Wintergreen
-
Posts
1,002 -
Joined
-
Last visited
Content Type
Profiles
Forums
Gallery
Events
Everything posted by Wintergreen
-
Steambox Carl? It is for sure on my short list of things to build. Need a heat source and am thinking of a single plate stove. Internet told me they come in the 20£ range which is affordable. Can be used for more things than just heat water to produce steam me think. Stay tuned.
-
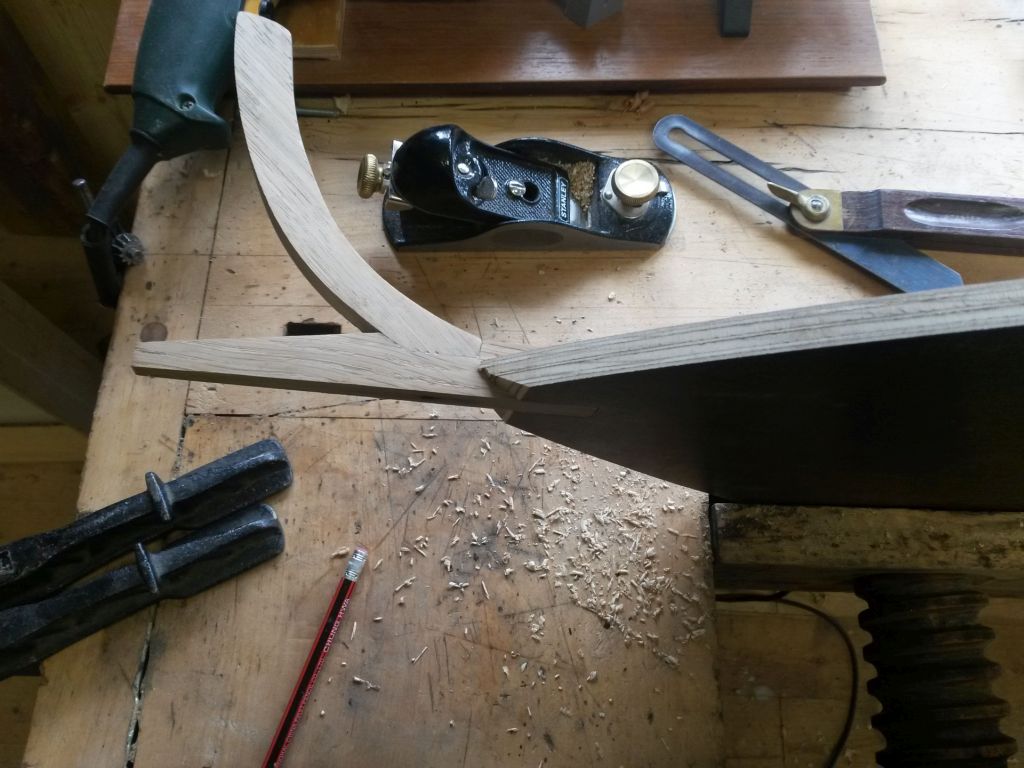
Question for the weekend: How do you plank a boat that lacks frames? And subsequent, do I really need to go down the spiling path? It took the entire Saturday to come up with the answer which is kind of: Nah, you dont really... Next question, how do you soak a plank that is nearly 1m long? The obvious answer to that is: In something that is just above 1m long and holds water... Went all over my place to find something useful. The closest I got was A. the bathtub on 2nd floor. B. Flower tray (unfortunately pierced to drain water...) Think again. Eventually I used some leftover gutters from my renovations. Wacked it to the shape of an ugly tray and voilá! There it was. Have only knocked it over once up to now. The shop floor needed some soaking anyway....not! Back to planking. First I ripped down the plank to some 8mm width. Then it went for a bath. Unsuccessful tries were performed yesterday so I gave up and left it in water for the time being. Went back to the shipyard this morning with a fresh set of mind (well, almost fresh). Having spent the last 12 hrs in water the oak was mildly negotiable both laterally and longitudinally. It will be a struggle nevertheless. Summary: I need more C-clamps.
-
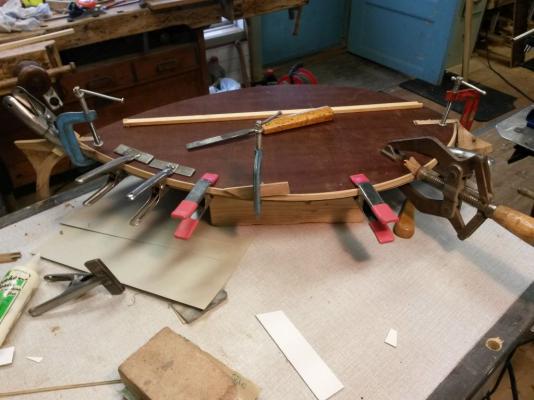
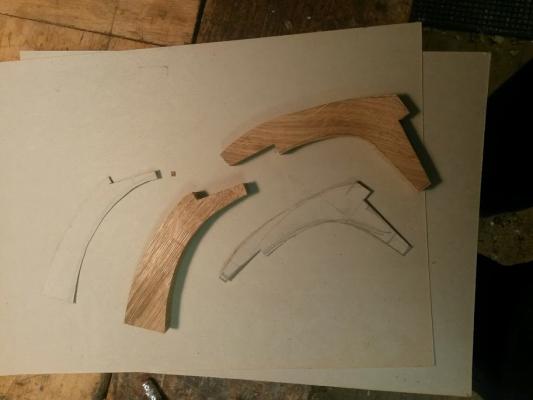
Was able to sneak some time in the shop tonight. All four rabbets are cut. Not to Remcos standard, but well, very few can reach his standard... I had previously cut and shaped the cutwater piece so I glued it in place now. The black rubber band is a scrapped bicycle tube cut at an angle. Very handy to have. For the bigger bands needed I snip from the 2" one, and for smaller I use a scrapped road tube, ca 1" in dia. When the glue has dried I will shape the entire stem to get rid of the bulky appearance that is has now.
-
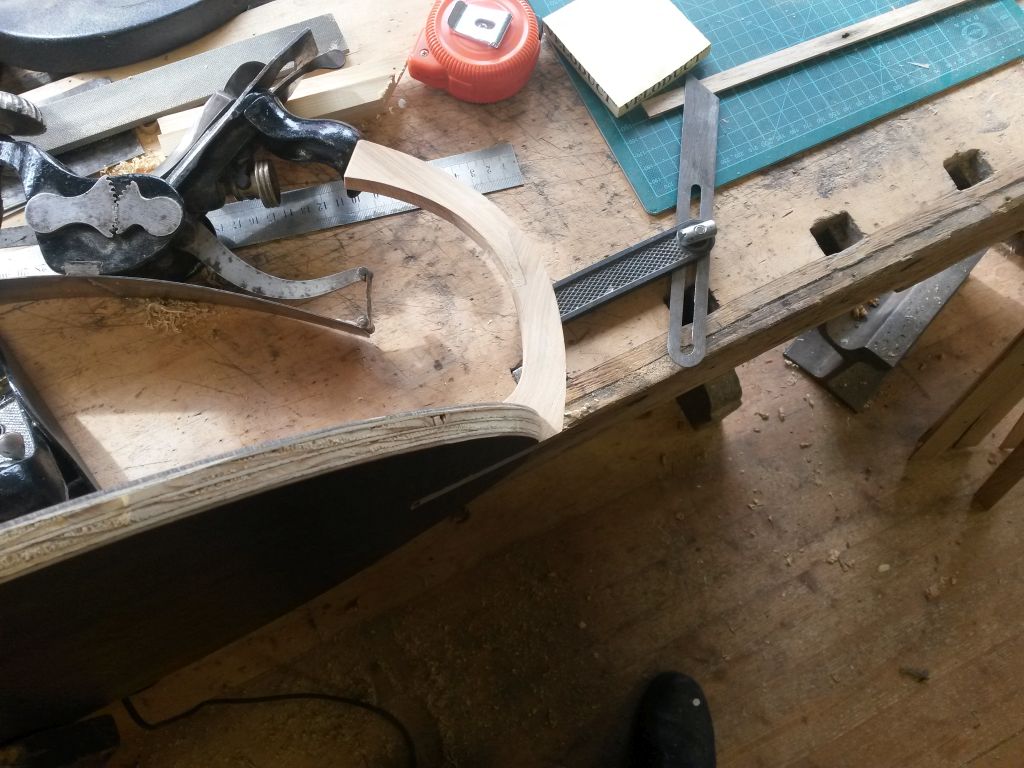
Hi Alan, welcome to my place. Any questions, just ask. Great building table you put to together. Todays update re the build. First out was to plane a bevel on the floor. Started by setting the for and aft bevels inline with the stem and stern lines. After that I continued the bevel from fore to amidships and from aft to amidships to minimize tear-out. Regarding using cutting handtools, it is an absolute joy to work with very sharp tools. How come you ask? Well, work had me on watch over the Xmas holidays which generated some extra to the budget so I ordered a long sought after addition to my shop, the Tormek sharpening system. I ordered the larger one and I have not regretted it. It IS pricey, yes, but then I do a lot more than just scratch wood for models. Also, in the pictures I try to let the tools I use linger around in the pictures so that viewers can see what has been used for each step. Stem bevel. And stern And here the entire line is cut. After the bevel was in place I started the rabbet. This was my first go at a rabbet, but I am fairly pleased with the outcome. Planks are 4 mm thick which I hope makes for a quite easy plank-rabbet mating process later.


-
No worries Mario, you are helping very much. Thanks for the link, I've been to that site a couple of times. My scale is somewhat floating, but nevertheless I want it to be reasonable when it comes to dimensions. As can be seen in the latest images the hull is way wider than the original. (So much for scale) But that has to do with this models purpose, being a candle holder of sort. Ben, you are welcome. There is plenty of space on the first row
-
Mario, I just found what I was looking for in this practicum from Dick Webber (google told me...): http://dickwebber.publishpath.com/Websites/dickwebber/files/Content/1101334/GalileeBoat.pdf Planks are in the range of 6"/120 mm wide. Which will give me a handy 10 mm wide plank.
-
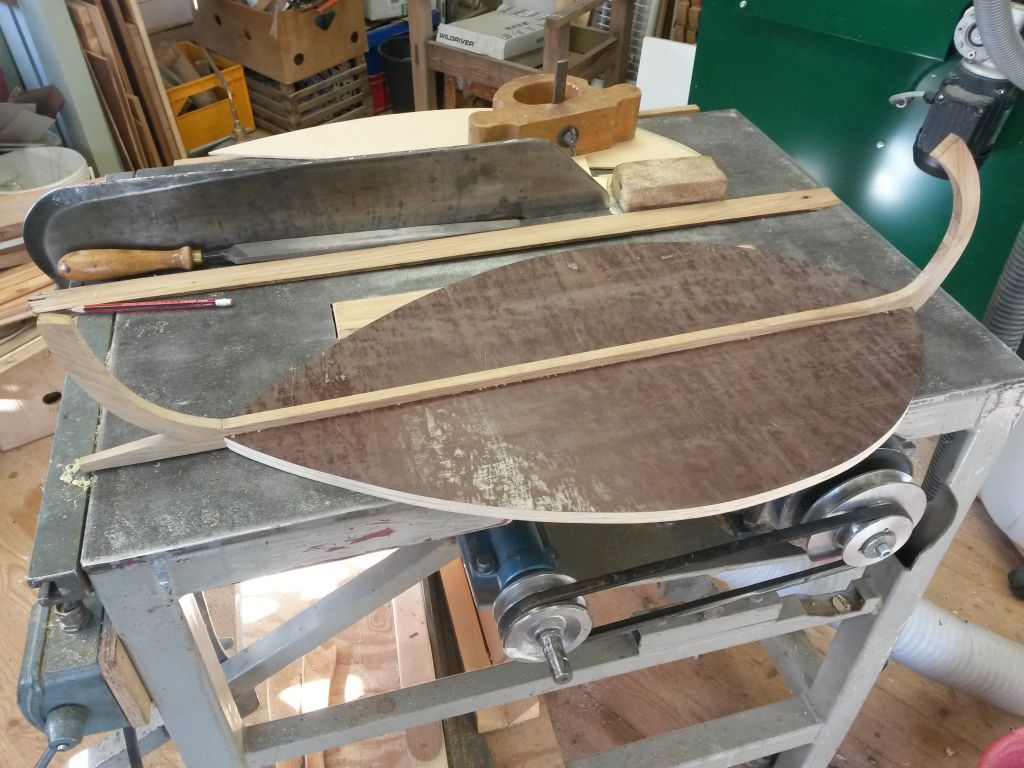
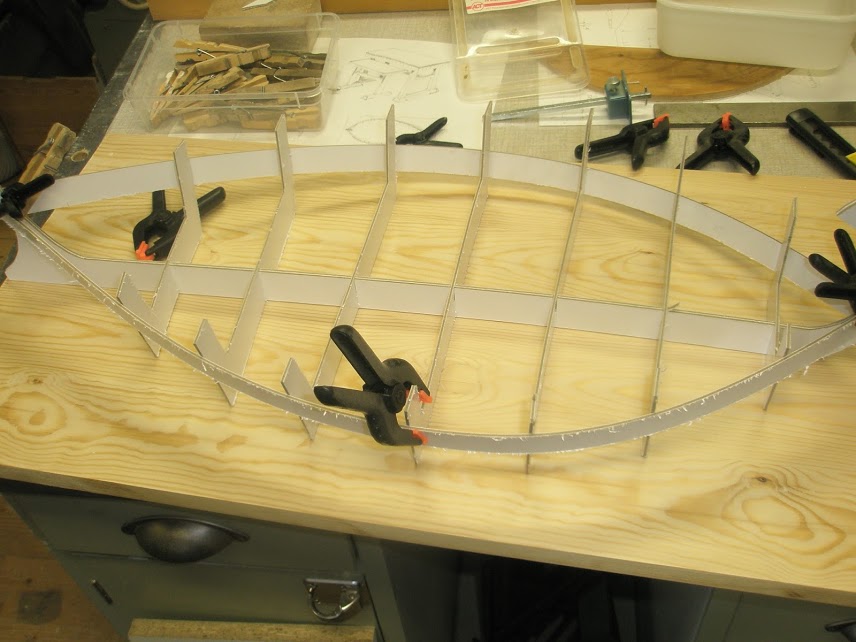
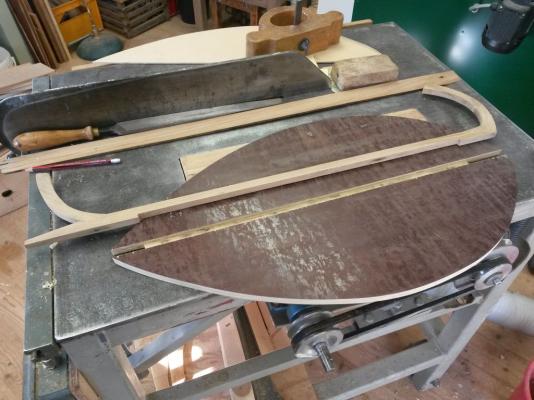
Back from abroad and able to spend some quality time in the shop ... yay. One thing that struck me today is that some day..any day ... in the future .. I will actually put together some accurate plans and then think through a step by step scheme to work by. However, this is not that day. I am more like Jack Sparrow (Captain Jack Sparrow) making it up as I go kind of type. Since the hull will be semi filled with sand I reckoned it needed a form stable flooring. In my stash I found an old piece of plywood of unknown origin (not really, I know exactly where it came from) some 12 mm thick. Next problem to solve was whether I should make two half sides and attach to the "keel" in some ingenious way. I opted out for that and instead made single piece floor. Problem with that was how to attach the backbone to it. Instead of more words, the pictures will tell the answer. First with the backbone in place And then to show the solution. Next up will be to bevel the plywood and also cut a rabbet in the stem and stern. Mario, a question to you if you read this, Do you have any information on the dimension of the planks for the hull? The thickness I have worked out, but how broad were they? Do you know? The scale I am building to is somewhere in the range of 1/12 - 1/15.

-
Thanks Mario, re "correct as possible" this time it will be a bit different I am planning to ease my pain a bit by not making it a replica or true scale model. Hope you dont get too disappointed friend. At this point I have no more progress to show, working on ripping planks for flooring and sides. Lots of uninteresting sawdust, but I will take some progress shots nevertheless. Tomorrow current projects at work has send me to London for the week...one of those weeks you know. My workshop will miss me and I it.
-
Hello Mario and John and thanks for the welcoming back! It's good to be here again. All likes equally appreciated. Yes Mario, I stumbled upon your log while I used Google's services. You are such a master of small boat dioramas. Lovely little pieces.
-
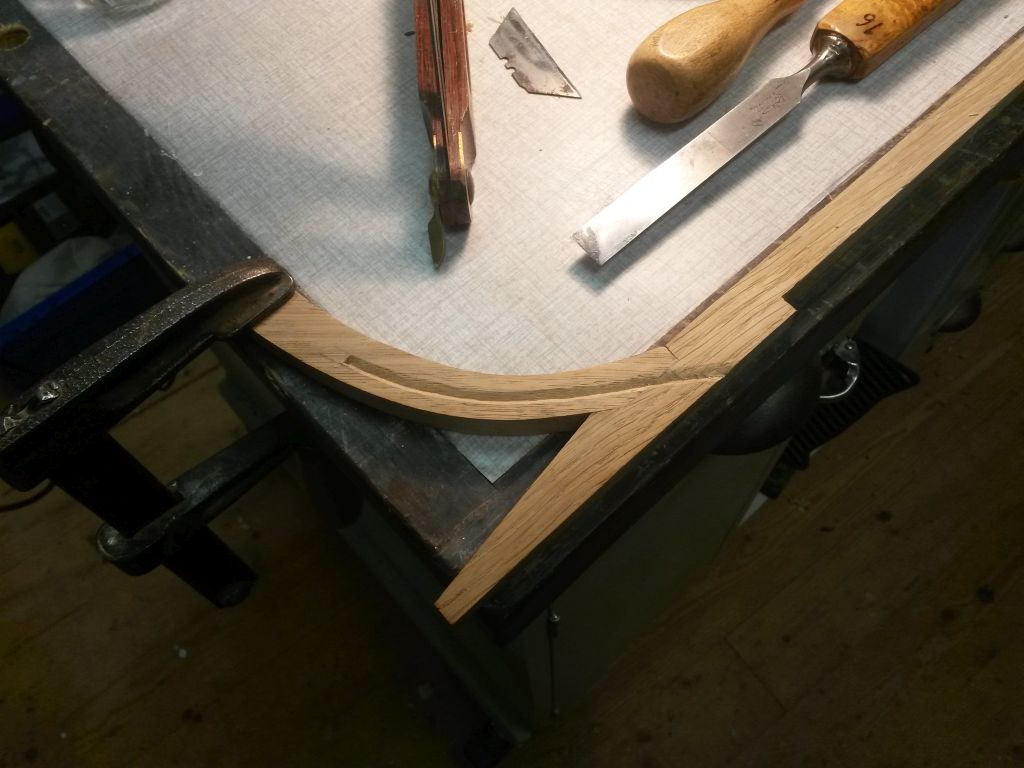
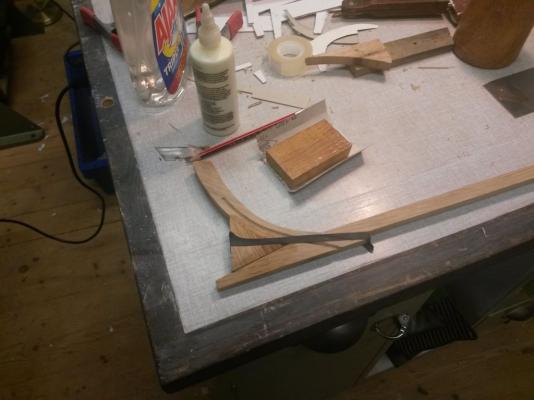
Next installment, some kind of a keel and stem. Since this boat will be generic I am using my artistic license to build as it suits me. For safety measures I glued the stem in place twice. Well, not really for safety, it was more of the so familiar: "I can do better than that" kind of joint... Happy enough with my second try. The stern came in place somewhat easier. You cant avoid being very humble when you look at other masters work here on MWS. Joints without gaps, straight and true pieces and all. Well well, I might get there some day when time permits. Here are a couple of images of the work so far. Stem and stern are glued and pinned even though I really dont think they would fall off without pins. I took a hot kettle of water to make the stem part with the keel. And it is not really the keel either since it will be a waterline model. Pictures, yes, here they are: Camera in question is the cell phone, hence the warped corners. Next up will be to form a floor/bottom for the boat. Since the boat will be half full with sand to position candles in I want to make it a confined structure.

-
Thank you for your interest. I dont mind chair squeeking, the row up front is almost always available (at least in church ...lol ) Today I practised sanding to true angles. Big pieces make for forgiving progress... Pinned and glued. The bamboo pin blends nicely into the oak. Next up will be the keel, I think. What I forgot to say is that it will be a waterline model. And for constructions, well, I will return to that topic further down the line.
-
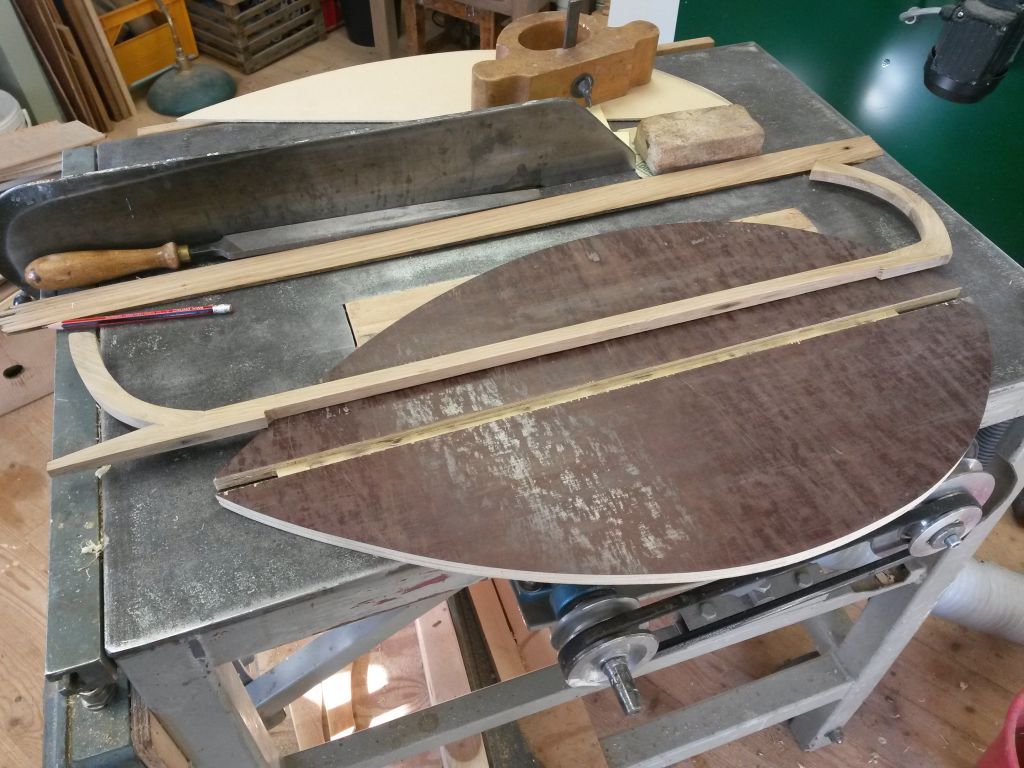
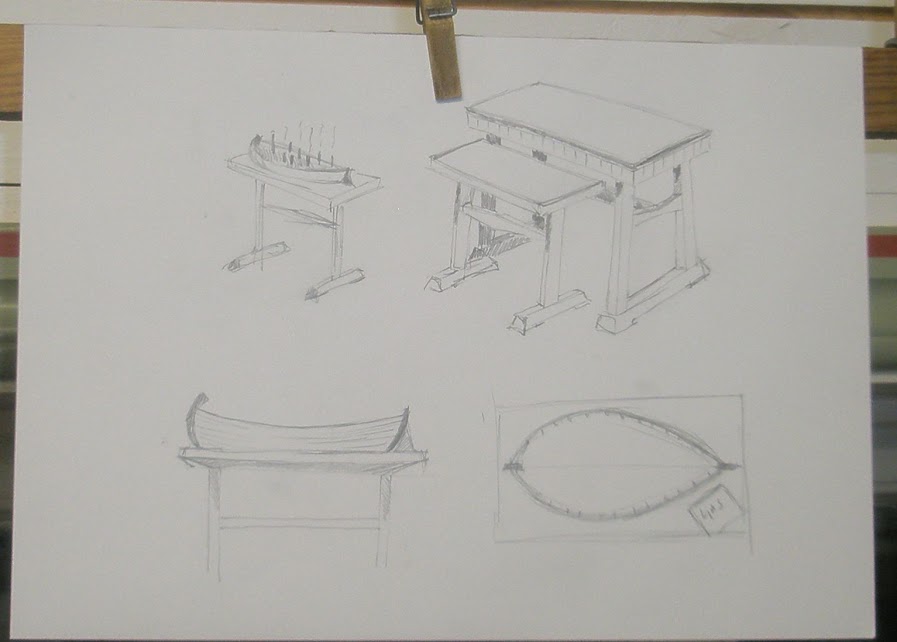
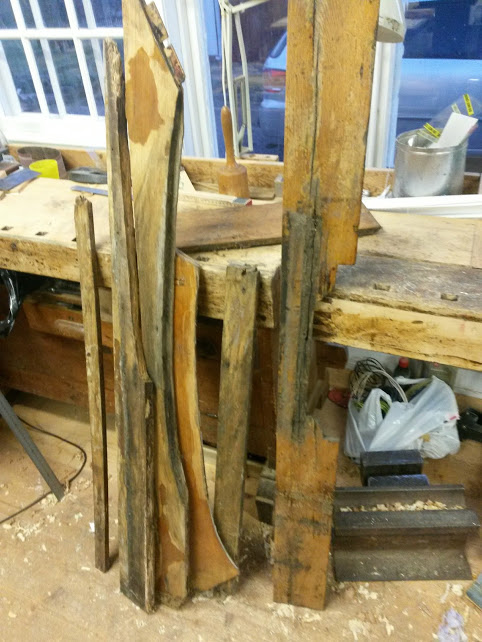
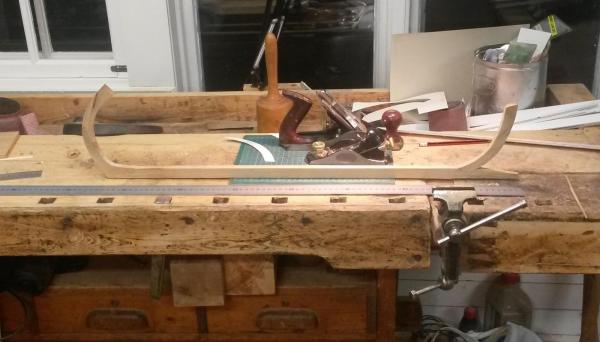
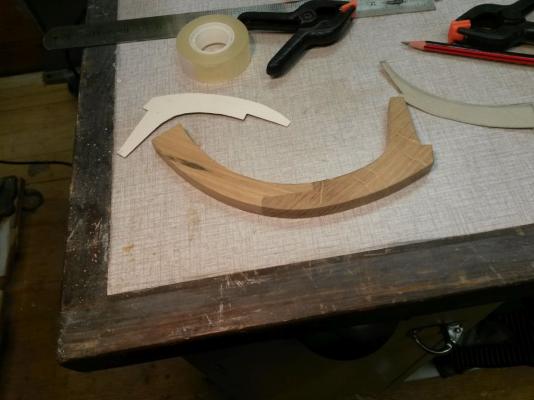
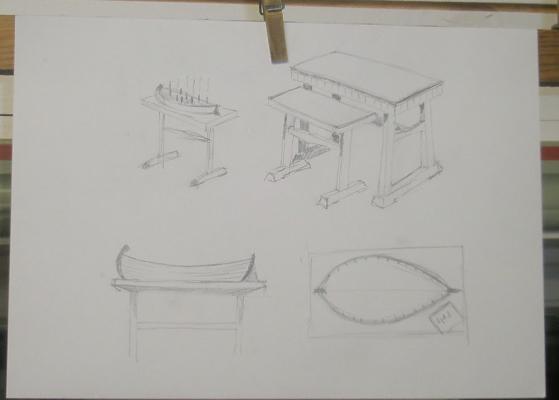
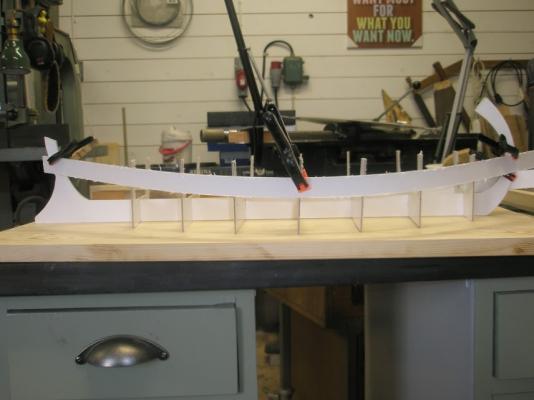
Hi fellow builders! So, first scratch build as well as first build in a fairly long time...what can be of this you say. Actually it is a build that I've been commissioned to do. That doesnt happen too often. For this particular commission I will not charge any payment, it is for pure fun. Quick background story (to keep with MSW rules of non-this and non-that content): Our pastor came up to me and asked about ideas for a candle holder to place in our church. A candle holder, usually found in Lutheran and Catholic churches, can have the form of a globe, a tree or just a box filled with sand to put small Christmas tree sized candles in. "A boat" was my immediate thought. I tested the idea and it was received well so I went home and took out my sketchbook. But what form should the boat be of? Anything open of course. Reverted to Google that told me about a excavation some 30 years ago at the shore of the Sea of Galilee. http://www.jesusboat.com/Story-of-the-Jesus-Boat How appropriate! A boat from the time around the start of our calendar. Not unlikely a type that Jesus, himself, rode in. Search "Galilee" in our forums and you will see both scratch builds as well as kit. Anyway, out from my pencil came the below sketch. Never mind the tables, they are a separate story. The sketch was presented to the board and accepted. Return question was: "When can it be ready?" Guess I have to start making sawdust. But first I made a card skeleton to grasp the needed size. As it turned out the finished boat needed to be some 20% bigger than the card model. Obviously the finished boat will be of wood, not card. But card is quick and easy to do a mock up in. Scale, might someone ask for. No such thing. My boat will some 75 cm long from stem to stern. I have blown up the mid section to care for more candles. There is some plan of the real thing on the site above which shows a flat bottom, rather upright sides and curved stem and stern and then the distinct feature of the cutwater. Like found on Roman ships of the time. Wood then? It will be oak. Rather uncommon on these pages because of it coarse grain. The real thing was build in Mediterranean species of which I have none...also the size of my model will cater for rather sturdy dimensions. Oak is known to bend well and it looks great when aged. Another feature of the oak I will use is that it is salvaged from an old motor boat from the 1940s...the trees that was used started to grow some 200-250 years ago... Here are some pieces that I picked out, arent they nice? Well, after some hand planing and a couple of runs through my thickness planer the blanks for the stern looks like this: That is how far I've come now. As always, daywork will interfere with time in the workshop, but I will make the most of it.


-
Dito everyone else Just so you know I'm still around...
- 745 replies
-
- 1
-

-
- francis pritt
- mission ship
- (and 1 more)
-
Nice looking pins Thomas! For the record, a lathe, (wood or steal) is not really needed. I did the same trick with my Dremel clamped to my bench and then, as you describe, using needle files and sand paper. Anything that can hold a pin of less then 2mm in diameter and spin it quick enough (at least some 1000rpm) will do. I also tried tooth picks but found them to be too soft so I switched to pear or if it was apple instead in my Regina build.
-
uhm...wow...this was a small treat to find! Love your work Thomas. Very clean and exact. Hat off for the figurehead also
-
What strikes me everytime I check your log Ed, is the cleanliness of your work. I can only imagine the time needed to accomplish this. Of course, the soft tone in the photographs might hide some, but still. Remarkable and something to strive for.
-
Hi Ed, your build log is such eye candy. One amazing 3D puzzle.
-
True that about the domestic support Dan! Great work also
-
So much eye-candy Ed, fantastic!
-
Hey BnB! The language on the plan seems French to me. However, from some other plans by Chapman (of English heritage but born and grew up in Sweden becoming an institution in ship building for the Swedish navy in the late 18th century) it is mostly small-talk on the plans. Not rubbish, but nothing you would miss if you understood it. His predecessor was also an Englishman so, it is fairly safe to assume that he had the Admiralty style in building. But then he also did some years in France, hence the language on your plan. Your start looks promising and I hope that you can keep the build going!
-
Hi Mark, I truly understand your decision. We learn as we go and I like the #9 point on your list "Its a hobby - have fun!" I've marked a seat in the back row since I'm not that active at the moment.
-
True that, will need to find my own source then... the hull looks splendid, to say the least
-
Nice work Ed. My guess about the in situ work was that you use (constantly) razor sharp chisels...and exercise great care. I appreciate your tutorial log, it is truly great.
-
Nice to see a variation of the wood used in that you use local species. Glad you found time also, for an update (pls hint we were you found it so I can source some time for myself also )
-
And add another 20 years worth of building? Regarding your build Mark, I can't find the words to comment. It is too darn stunning.