HOLIDAY DONATION DRIVE - SUPPORT MSW - DO YOUR PART TO KEEP THIS GREAT FORUM GOING! (Only 13 donations so far - C'mon guys!)
×


popeye the sailor
-
Posts
16,007 -
Joined
-
Last visited
Content Type
Profiles
Forums
Gallery
Events
Everything posted by popeye the sailor
-

Fokker Dr.I by hof00 - Hachette
popeye the sailor replied to hof00's topic in Non-ship/categorised builds
I get my CA from the local drug store..........the only other two I use are white glue and Testors. wish I could help -
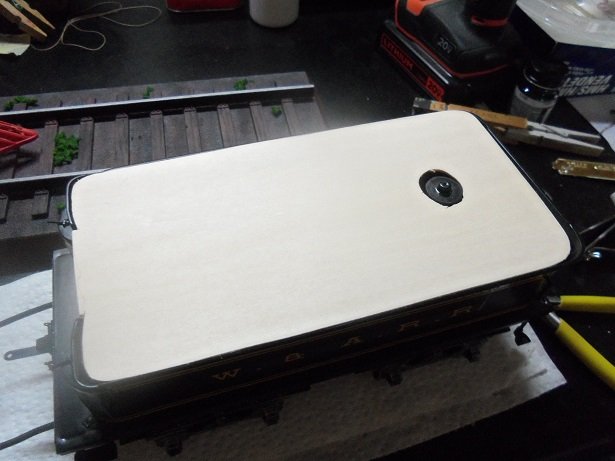
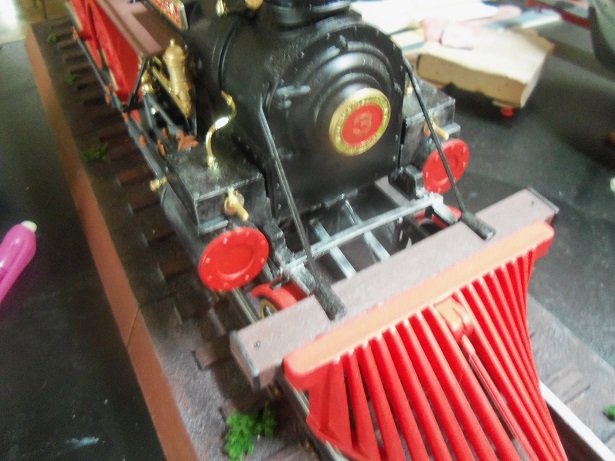
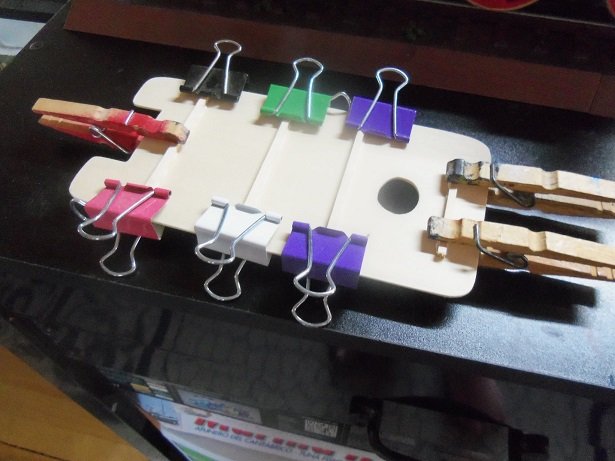
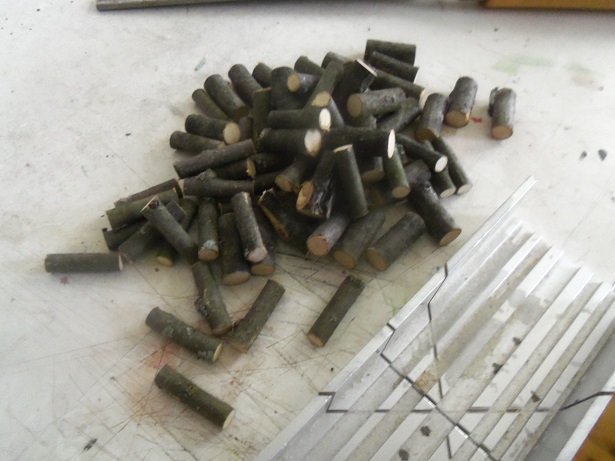
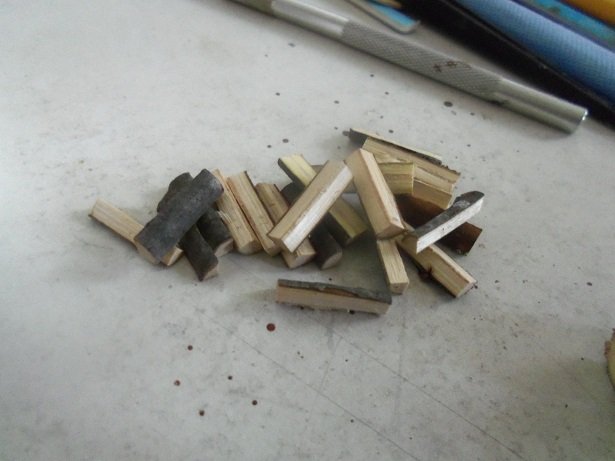
OK.....all that chopping has me puckered! .......and I'm only part way done of course, I'm not going to totally fill the tender, so I need to make a platform to base the load on. when the thought hit me.......I went in and traced the wood load on some 1/16 basswood sheet stock. I had to cut the hole for the water fill port.......that I'm going to try and leave visible. the grab handles were cemented on the valve chest boxes, as I mentioned earlier. I didn't break anything else off.......clumsy oaf that I am {ask the admiral, she'll tell ya} I was concerned about the weight of the wood on the platform, so I added some supports under it. you can see that I cut a section out of the front. there is another part that fits in the gap between the tender walls, in the front. this needs to be filled in as well.....I may have to cut in deeper {not sure yet}. once dry, I checked it to be sure I didn't have to adjust them at all. >film on that at Eleven< this brings us to the actual wood.......I started to cut it up today. I'm really not sure how much I'll need........of course I'll have to split some of it. the jig did move with all the vibration....I'll have to trim some of the wood back to the proper size supposedly, they are all to be the same length as the wood on the plastic part........I'll just have to periodically check the jig and reset it every now and again. splitting the larger pieces can be done with a razor blade...but I think I'll try a utility knife blade {no bar across the non blade side}. I did buy one of those 'choppers' from Micro Mark.......but I think what I'm about to do will void the warranty here's what some of it will look like/ did my bess ta keep the lichen on them there logs ........gotta love it........nature's detail
- 245 replies
-
- 15
-

-
Fokker Dr.I by hof00 - Hachette
popeye the sailor replied to hof00's topic in Non-ship/categorised builds
Esmerelda..........the three masted ship?!?!?! -
Airplanes and Tanks in plastic by Jörgen
popeye the sailor replied to Jörgen's topic in Non-ship/categorised builds
ya had me with the Focke Wulf............such a great job on her. one of my favorite single fixed wing you've done a superb job on these planes......I too hope you do a log here on one of your projects. now that you whet my appetite........where are the tanks?!?!?! truly nice work! -
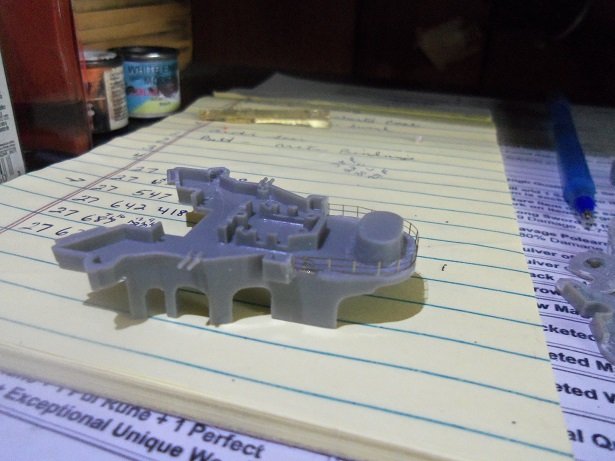
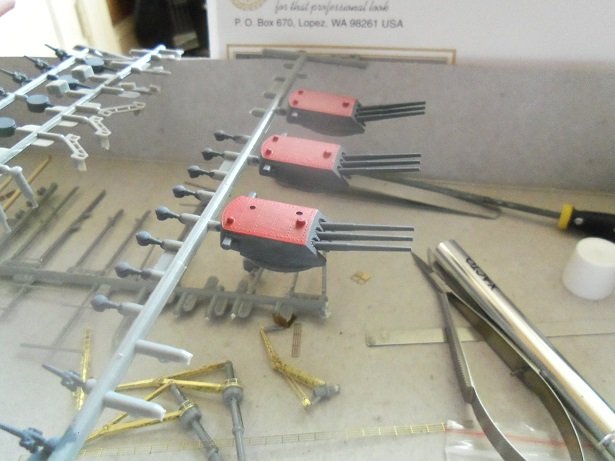
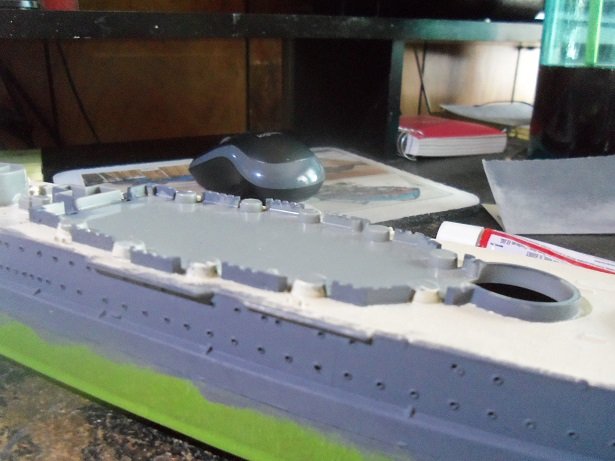
I did some mess'in 'round with the model today........started off, I just felt destructive so I removed the railings from a few parts. I began with the big part...guess you could call it the third level ........I only removed the front part of the casements. it's a weird shape......and they just had to mold those two guns on deck. ....could have upped the parts count by two! now......I have information that there was another building on the second level deck.......in between the two existing structures. I was going to add it, but then I changed my mind, since it would hardly be seen. I changed my mind yet again........ yup! ...........added PE doors on it too, I did. the third level was painted......and cemented in place. depending on the light........yea, it's hard to see. you can barely make out the door.........it can be seen a bit better in this shot..... as mentioned, I did paint the turrets I painted the other smaller guns and the search lights too. I'm going to check to see if I can use the part of the original catapult, that has the locator pins. it doesn't say so in the directions I got with the PE, but it makes sense I'll see if I can get more done
- 259 replies
-
- 11
-
-
look really good......not familiar with the two turrets mid ship......are they launchers of sorts?
-
in the last photo of plans, I see that they have the main and mizzen confused......should be the other way around before you go any further, make sure that the studding sail booms are toward the front of the yard, rather than on top. the studding sails when rigged will over lap the central sail. toward the front, angled slightly upward.........most ship that have these sails are positioned this way. I also notice that extra yard or gaff you referring to on the Bluejacket plans.........I believe it's wrong. there is no gaff that high up on the mizzen mast......if there is an upper sail from the spanker, it won't need one anyway. there are no yards on the mizzen either.......at least, not that I'm aware of. the problem with a yard that high on the Mizzen, would meant that there would also be a lower topsail yard, to secure the lower corners of the sail. I believe you can see this sail rigging on a sloop or a barque. I like your picture there.........good depiction of what she looked like
-
she looking super.......you've made a lot of progress since I last looked in.
- 446 replies
-
- 4
-
-
- zebulon b vance
- deans marine
- (and 3 more)
-
great way to display the ship's boats........else they wouldn't be seen. they'd be stowed away inside. she looks amazing!
- 345 replies
-
- 5
-
-
- graf zeppelin
- trumpeter
- (and 2 more)
-
you'd need a diagram of the shunts and leads to map out the series. yes....that would truly be insane awesome job!
-
Briar Pipe by Papa - FINISHED
popeye the sailor replied to Papa's topic in Non-ship/categorised builds
sterling finish! season 'er well. -
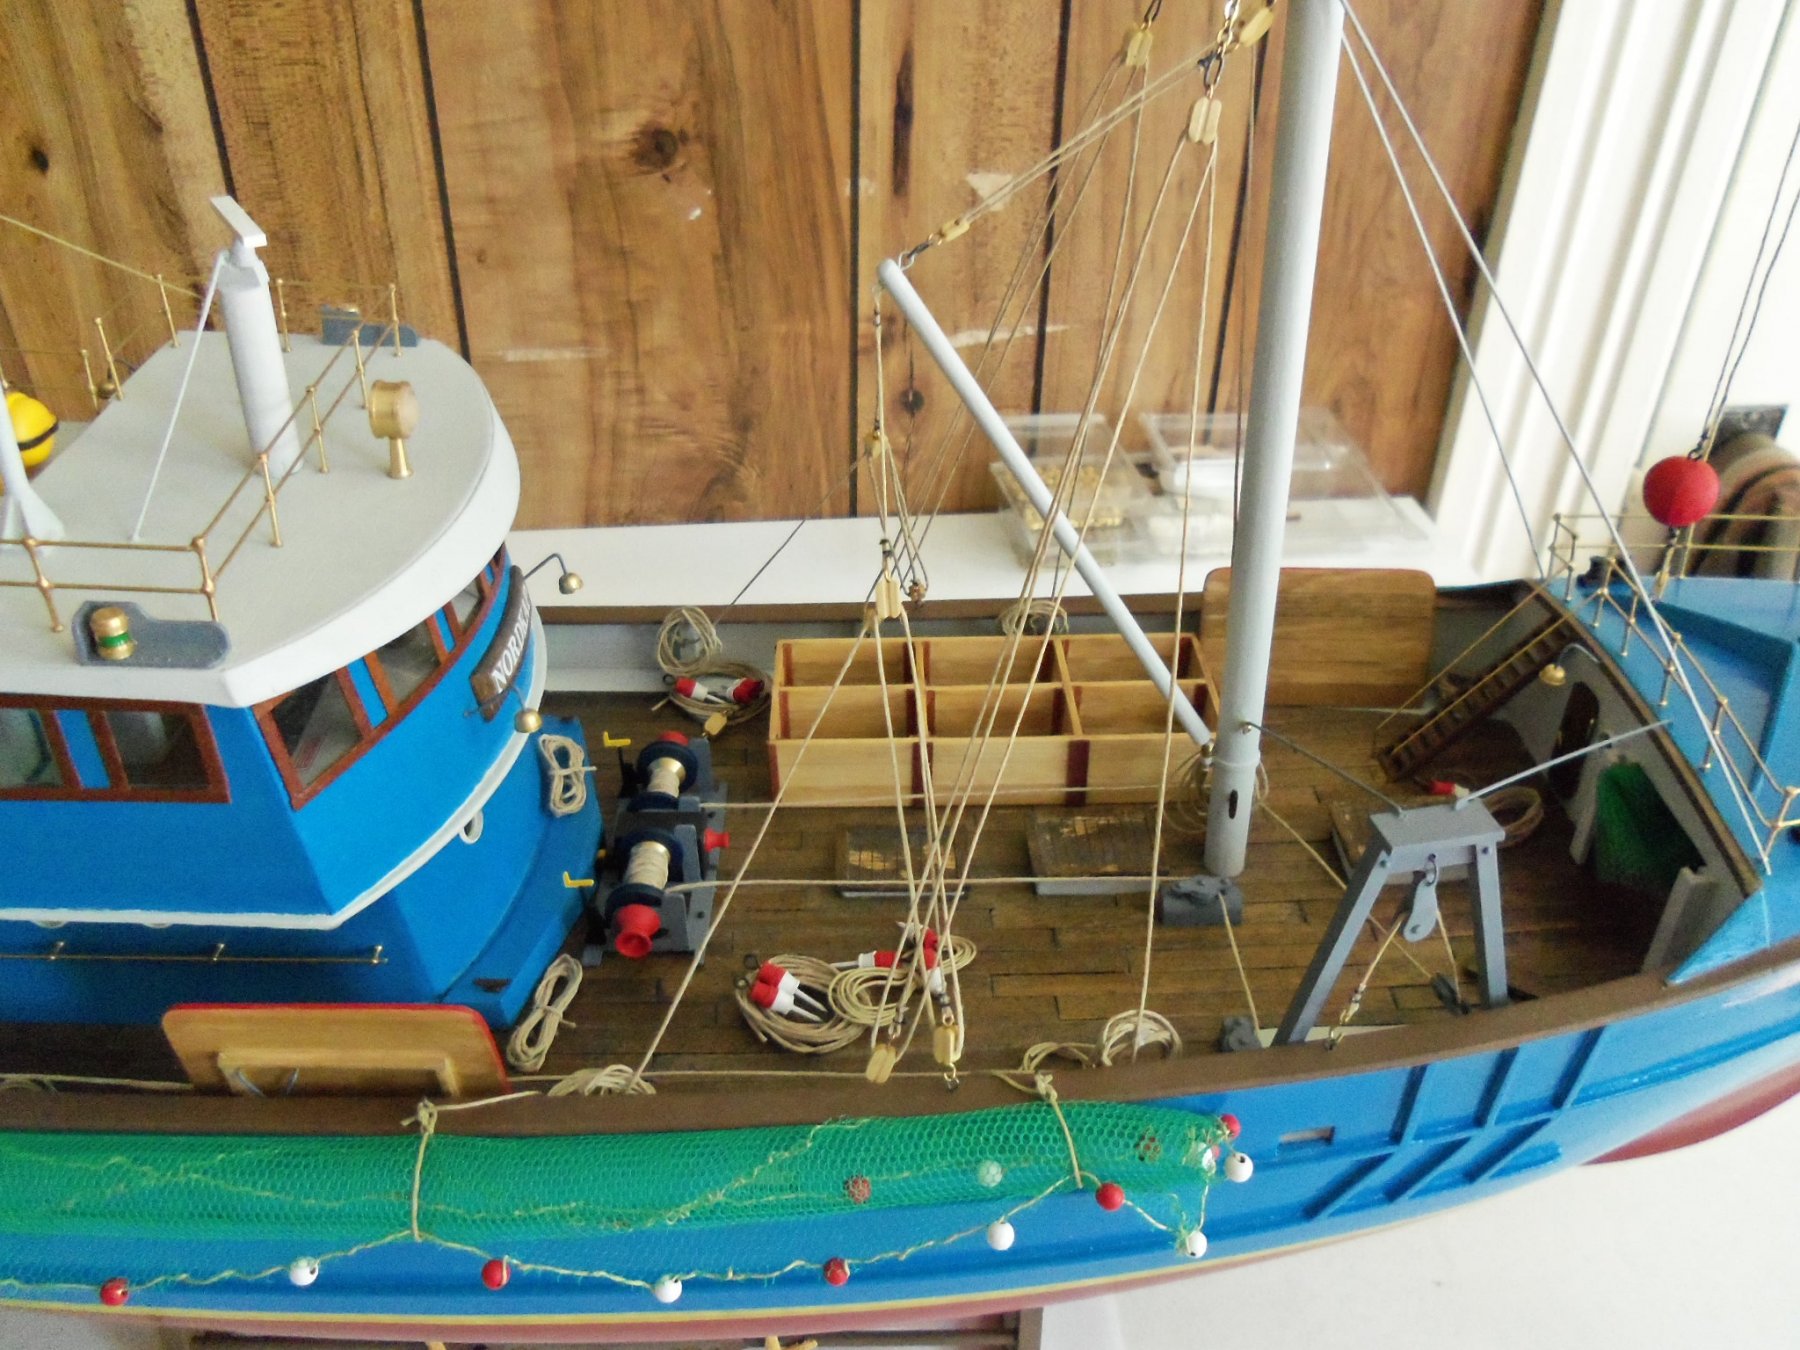
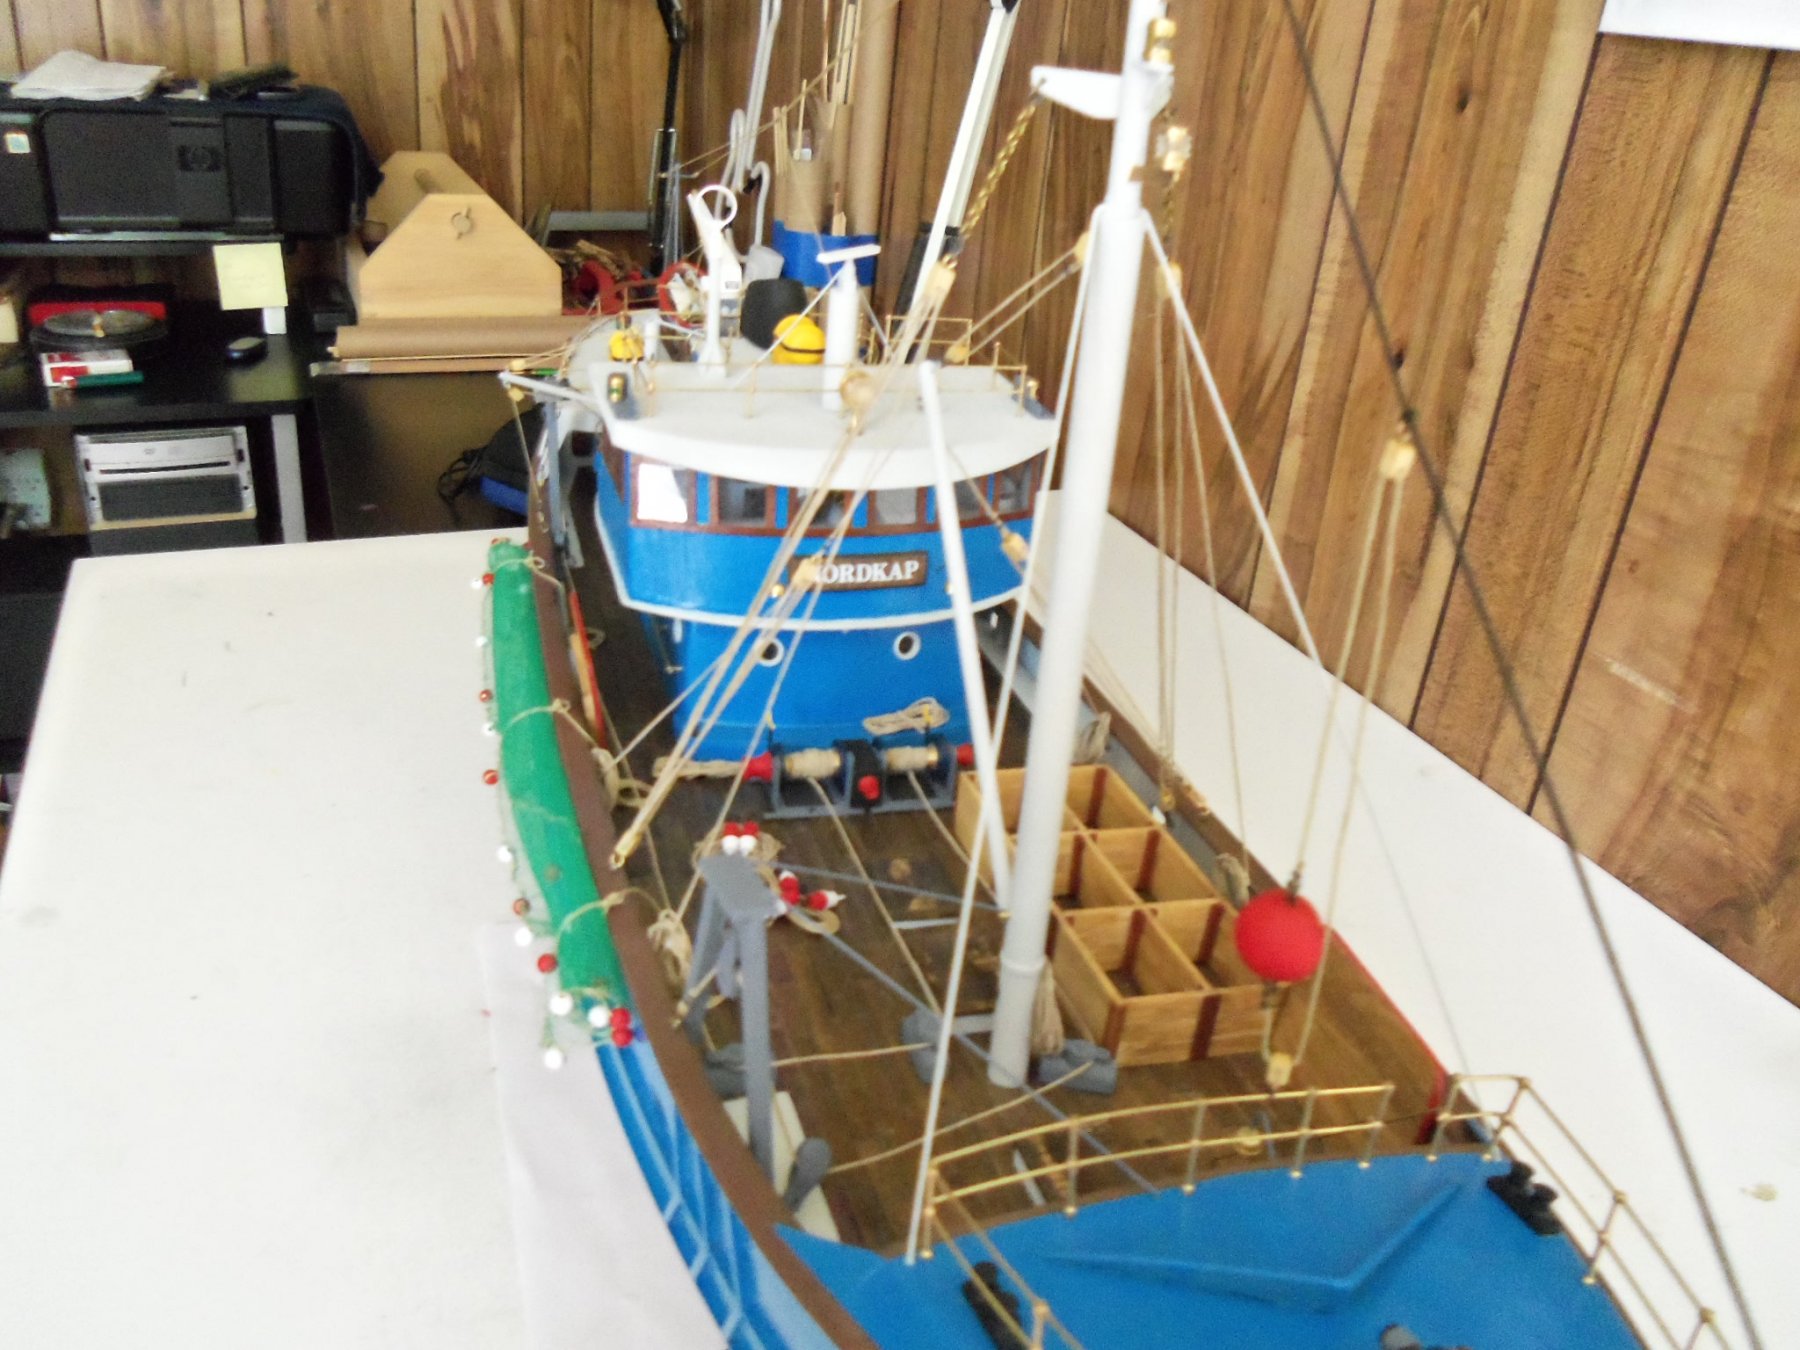
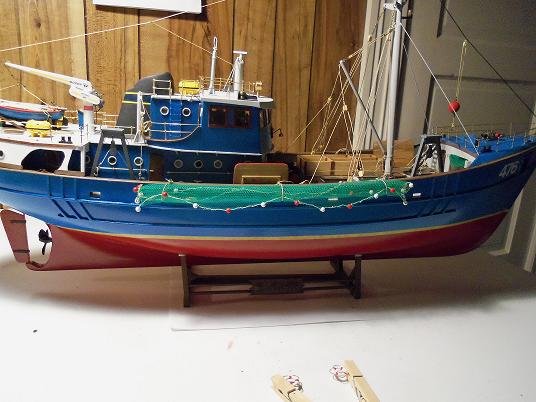
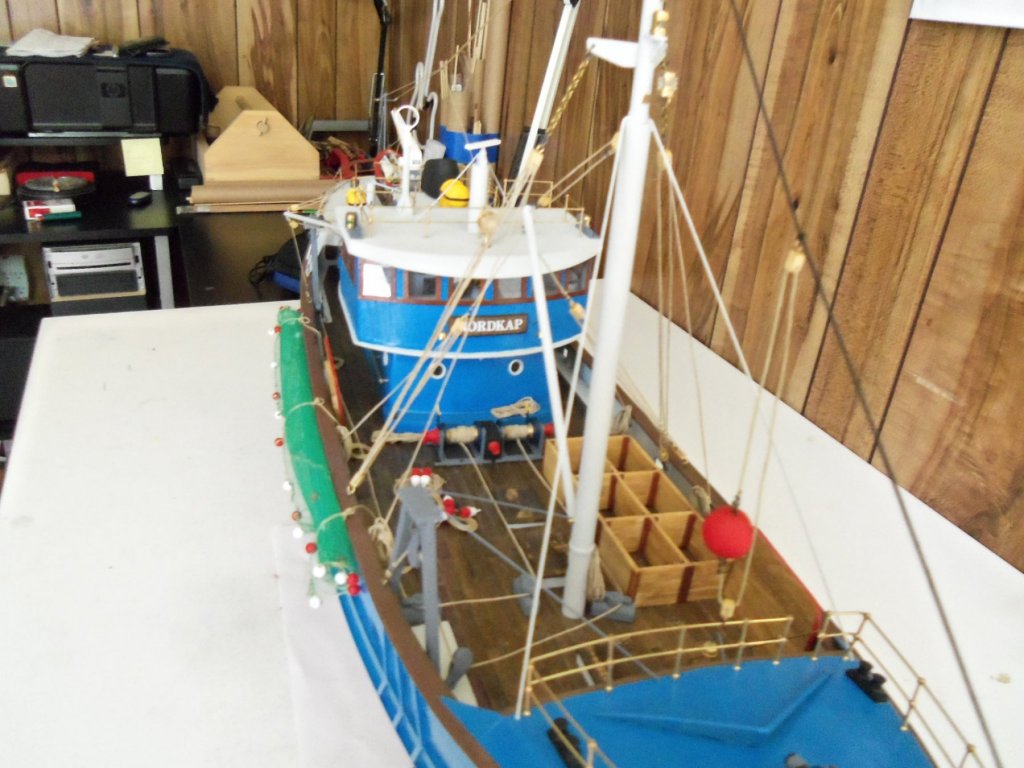
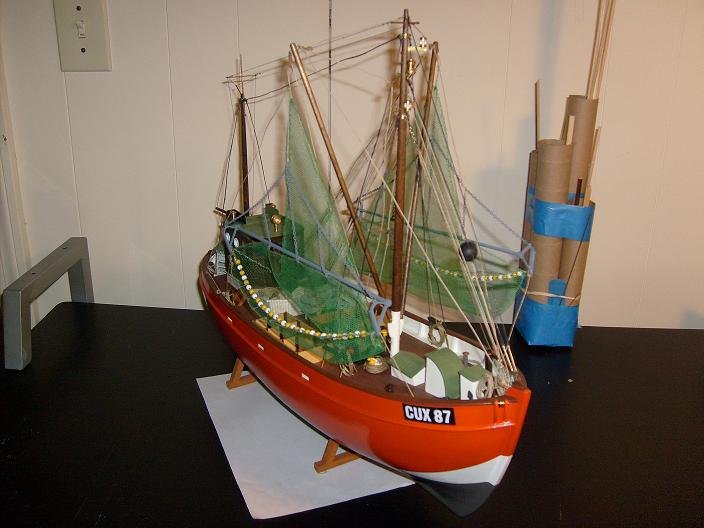
got any pictures of 'ole Nordie? that's what I nicknamed my build I built her back in 2010...she was my first wood ship, besides the Cux 87. the Nordkap was an older kit......not laser cut. I built the Cux for the owner of Billing USA. there are many Victory builds in progress......possibly the most popular project on the site. I don't think there are too many Pan Art projects though.....could prove to be interesting be sure to do a log......D'agostini?

- 1 reply
-
- 1
-
-
Fokker Dr.I by hof00 - Hachette
popeye the sailor replied to hof00's topic in Non-ship/categorised builds
a little at a time HOF..........no matter how you slice it, it's progress no Cabby.......no admiral you'd have to answer to.........you'd have a conductor instead get the darn kit.....will ya! -
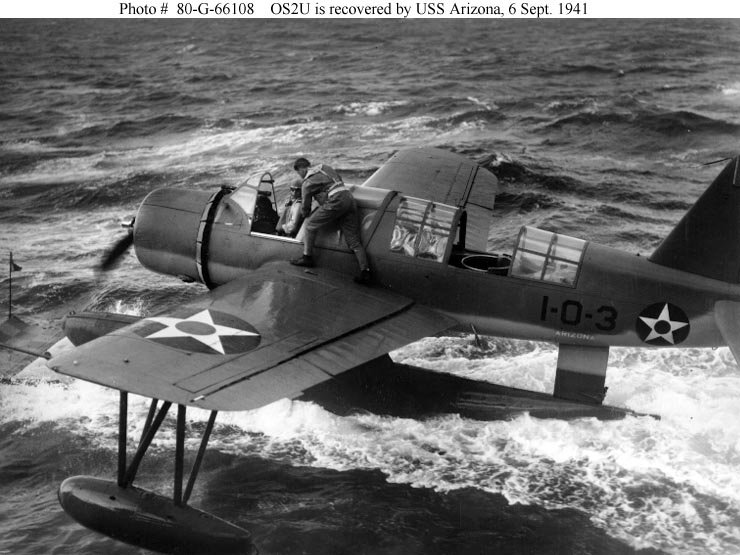
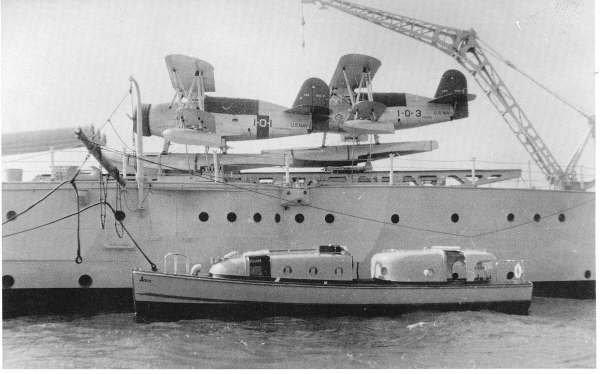
this photo was likely taken in 1938. kinda gives you an idea of their markings. another picture, shows that the insignias were on both wing undersides, as well as on the top wing......the instruction directs that a 'navy' decal goes on the wings. this was taken in 1941....... note the name on the fuselage that's why I ordered the decals.....the American insignia went through many changes through the years. I wanted to get the right one. I could have made them with the decal maker, but so many decal sets are coming with a bluish background to the paper they use. another thing to notice here is that there are no red markings.........I suspect this is when the Navy stopped identifying the battle ships with the turret markings {painted tops}.

-
look'in superb Greg! what type of planes are you going to have on deck?
- 345 replies
-
- 4
-
-
- graf zeppelin
- trumpeter
- (and 2 more)
-
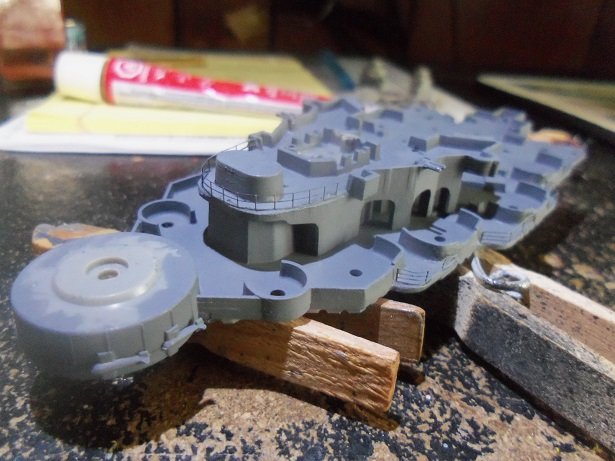
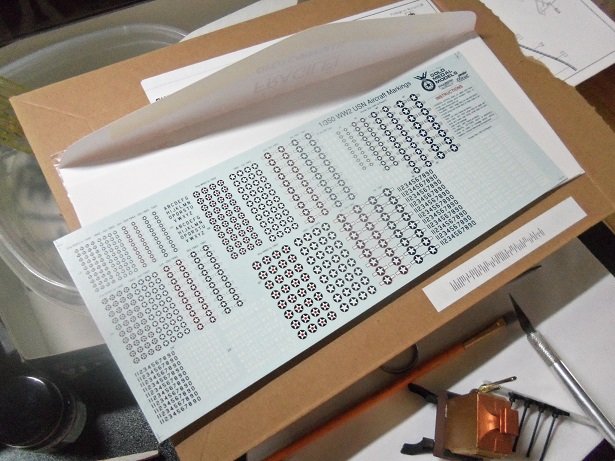
using the seagulls Lou, I have to stay before 41........the Kingfishers were used at that time. there are about four different scales on the sheet.....letters and numbers too........and they are dated which makes it a lot easier { you can hardly read it, but it is noticeable}. the gent who I got the idea from, did his planes with white tail {stabilizers and rudder} and black cowl. I believe the Arizona was red........the Pennsylvania was blue. full cowl with a line around the fuselage was SON 1........top half of the cowl was SON 2, and bottom half of the cowl was SON 3...these other two did not have the line around the fuselage. if I had gotten the other decal sheet {might have come with a resin plane too}, it would have had all these other decal bits.....but I'll settle for the insignias.......stress in moderation is good perhaps I can fudge something up for them. I did the repaint on that one turret.......it's good........I'm happy that was the last vestige of the paint I mixed. I've painted the tops red.......I said the heck with it and painted turret #3 too. haven't done much more with her.....I'll update again when I can get some quality time in on her. thanks for look'in in every one....I appreciate the interest
-
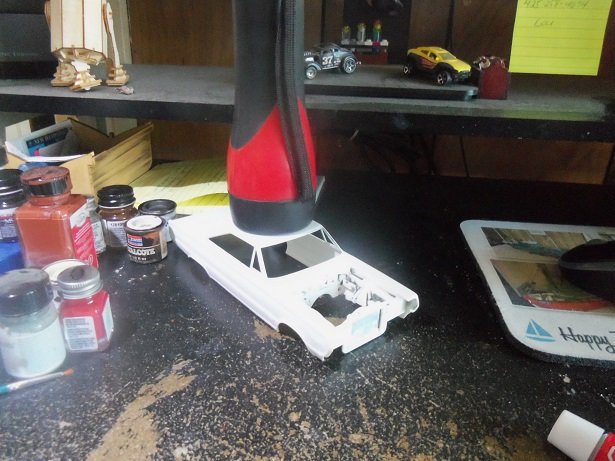
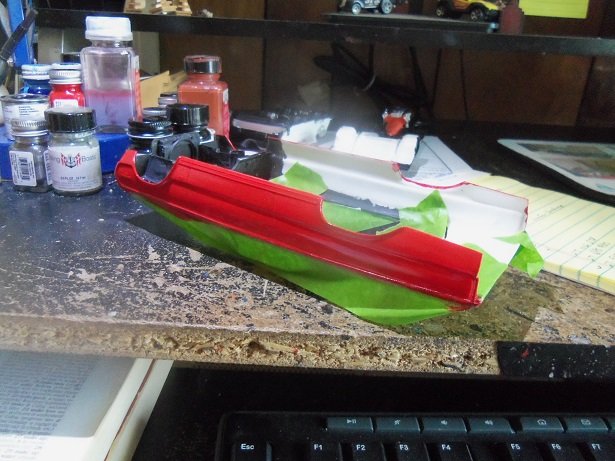
it has all the parts to be a street machine....I believe I posted a decal site that might have them, somewhere around here.......I may still have it book marked. yours will definitely look much better than mine.......hands down! the body has lost all of it's sheen........the paint shows all of the minute-est of marks. pulling off the masking tape, showed a disaster.........the red bled into the white. I even did the trick of prepainting the white before painting the red. I did it with a brush too........likely why it happened. I even pulled the paint down from the masking, and not welling it up against it......oh well. I did a fair job of fixing it freehand...it will have to do. finding out the properties of that paint I bought......I painted the scoop blue, and then went over it with the paint. I got the metalflake finish I was looking for anyway more on this one soon!
-
totally aware of Flubber.........I grew up with Disney used to have most of the major movies on VHS for the boys........now my grandson is interested in some of the ones I enjoyed as a kid. so far, I've been able to give him a preview of the Scarecrow {Dr. Syn}......this one was my favorite there are videos on you tube if your interested........and a fellow did some videos on the comic book character Magnus the robot fighter thanks for the good word all.........there's not a lot to do to finish the model.......the big focus now is the wood load. Ken has been very persistent with his suggestion of modeling actual wood for the load. now I can't get it out of my mind as a mater of fact, the spare room has become a veritable wood shed .....hosting branches of several different types of trees around here. the admiral is up in arms about it.......ticks and such, don'tcha know........no big concern all the wood was carefully screened before I brought them in.........no bugs will be harmed in the making of the load one thing I'm having trouble with......is I can't seem to find a wood splitter in this scale at the moment, I'm in the process of setting up a jig for the scroll saw to cut the cord wood....it will be faster.. more on this soon. thanks for look'in in Michael.......I never knew that. in the mini series 'The Terror'.....I do believe there is a reference about them, as a means to keep everyone warm. I don't recall if they were part of a propulsion unit......screw driven and such......I keep look'in for the DVD collection. your talking about the Cog railway........they just celebrated a birthday or sorts! Mount Washington Cog Railway, Bretton Woods, NH 03575 you'll have fun for sure!
-
Fokker Dr.I by hof00 - Hachette
popeye the sailor replied to hof00's topic in Non-ship/categorised builds
I've never built one of these.........only Guillow's / Comet flying planes. looks like you did a really good job with the wings. the broke stuff is immaterial..........you can fix it usually for me........I'll start tinkering with some aspect of the model, then next thing you know........I'm both elbows into it. surely there is one aspect in this kit that will be your spark.........keep digging! -
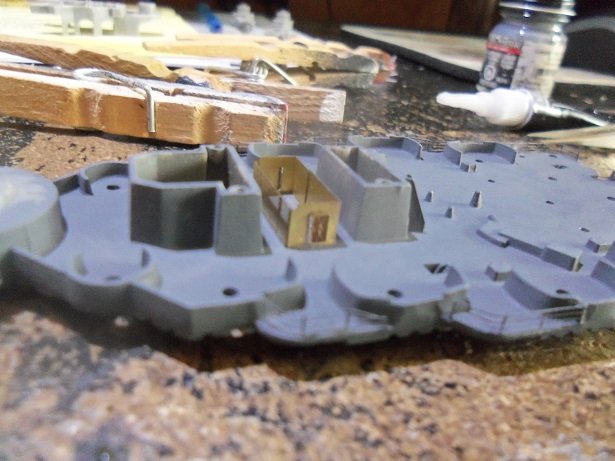
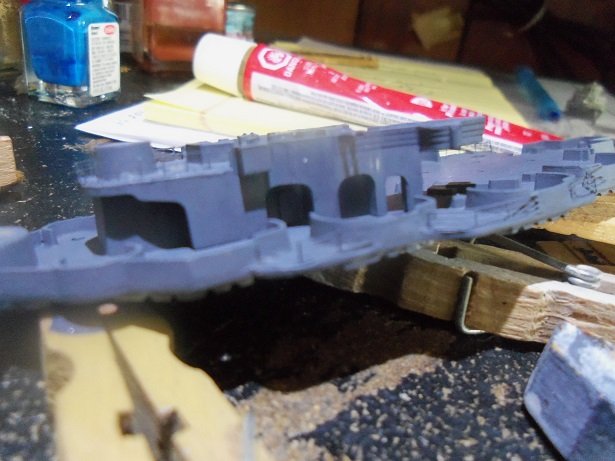
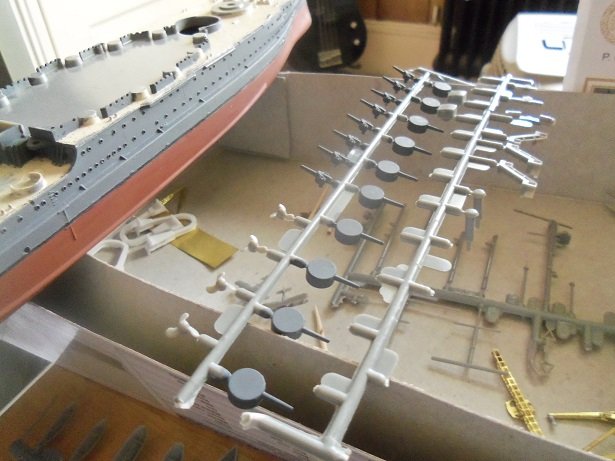
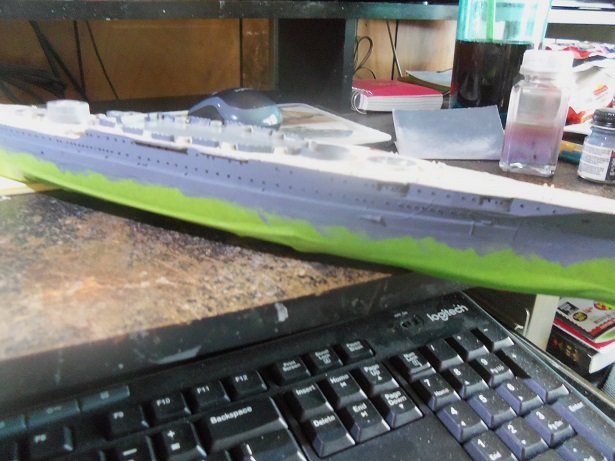
a little more progress..........the hull is completely painted now as mentioned, the paint I mixed was junk, so I just did her up in battleship gray........fitting, I think as can be seen, I also started to paint the details on deck. the casements were first for the super structure,,,the barbettes will be next. ..on a brighter note.........I received the decals for the planes today. they look really good!
- 259 replies
-
- 12
-
-
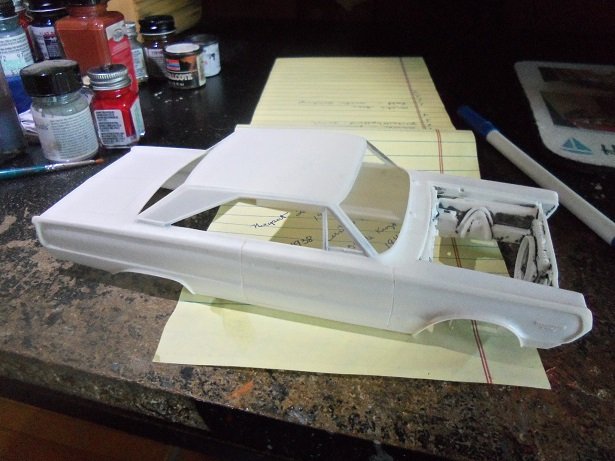
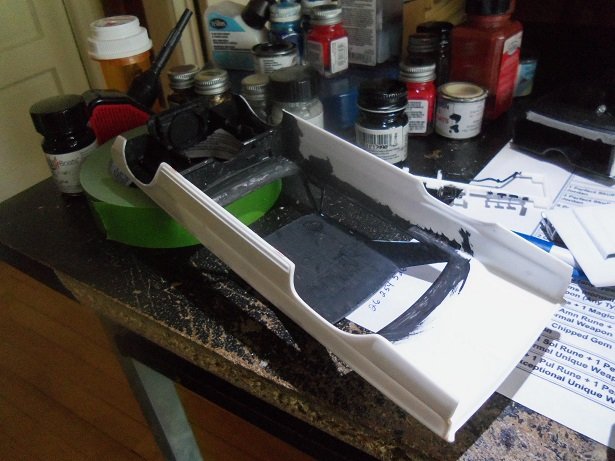
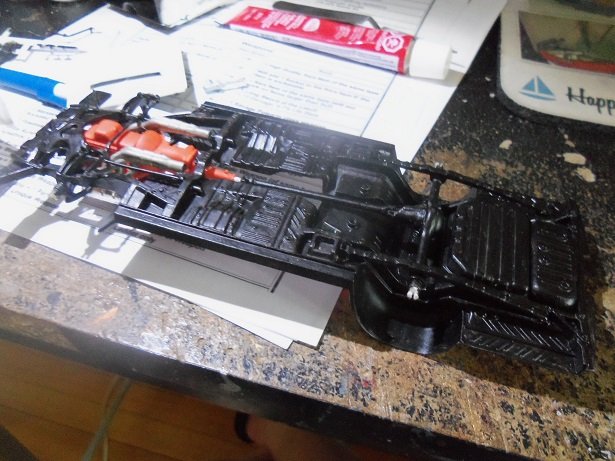
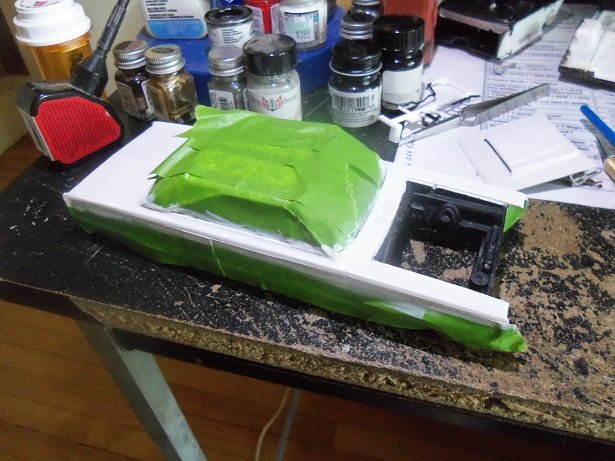
I'm beginning to think that this one should have been built by someone other than me...........just my thoughts I did some more sanding on the body to get it as smooth as possible. that's when I noticed that the engine box wasn't cemented in the corners, allowing the body to twist....not to mention the slight warp. so last week, I cemented the corners and put some weight on it until the glue dried. I was hoping that it might cure the warpage. it didn't cure it totally, but I think enough to make a difference. the engine box was painted flat black again, as well as around the interior compartment. I should have done along the rocker panels and rear wheel wells, but I can do that later. while this was drying, I added more to the chassis. it's out of sequence, but I really don't think it will matter much. the engine was cemented in place, as well as the drive shaft and the major part of the front suspension. the rear differential was cemented in place a while ago. knowing that I had taken the sheen off of the body, I masked and painted the white. the paint still reflected the sanding, so I went over it twice. the hood has been done too........I still need to paint the scoop blue..........................................and that's when things started to go down hill. the paint I had bought for the blue is nothing more than a reflective clear coat. it makes the paint look metal flake and changes the hue in different shades, depending how you look at it. now I'll have to use the blue I used before off I went to play with that........but after I remasked and painted the red. I corrected the line where the red meets the white. now to wait for it to dry. more soon.
- 86 replies
-
- 10
-