
HOLIDAY DONATION DRIVE - SUPPORT MSW - DO YOUR PART TO KEEP THIS GREAT FORUM GOING!
×


popeye the sailor
-
Posts
16,007 -
Joined
-
Last visited
Content Type
Profiles
Forums
Gallery
Events
Everything posted by popeye the sailor
-
 it will show up well on the aft deck.......I think the fore deck will be too busy
- 337 replies
-
- 3
-

-
- finished
- mountfleet models
- (and 1 more)
-
the warp was nothing Kevin.........but it will give you an idea of what to look for should you purchase one of these fitting kits. back when I did the Nordkap, all of it was metal......cut out all the confusion. even the center block was metal {brass}. as for the kit........a very small percentage of the kit had any issues with warp, considering how old the kit is. I'm still trying to use as much of the original wood as I can.........I hate to waste it. for any that I encounter.......that's what internal framing is for hello Yacht1255....a man of few words welcome to the log! I hope you enjoy.
-
your building a second ship this size?!?!?!?! I read through it EJ and man.........your doing a super job! very nice looking hull so far........I like the deviations in wood. so glad I found it...........really like to follow along
-
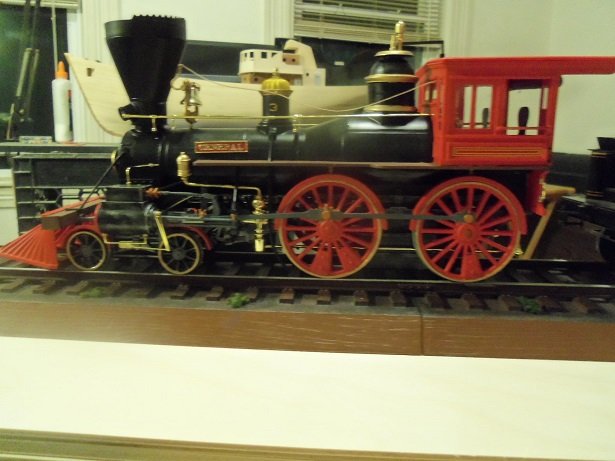
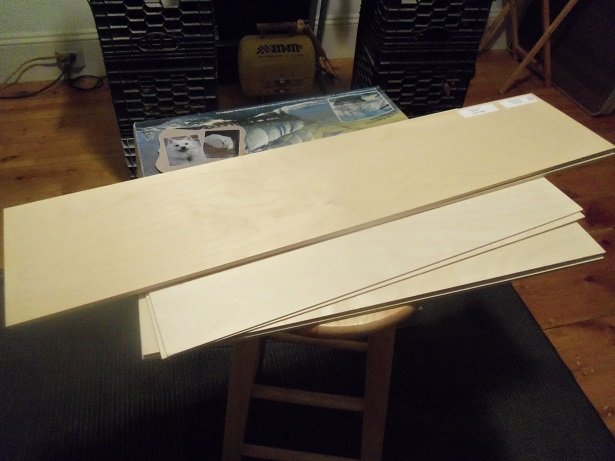
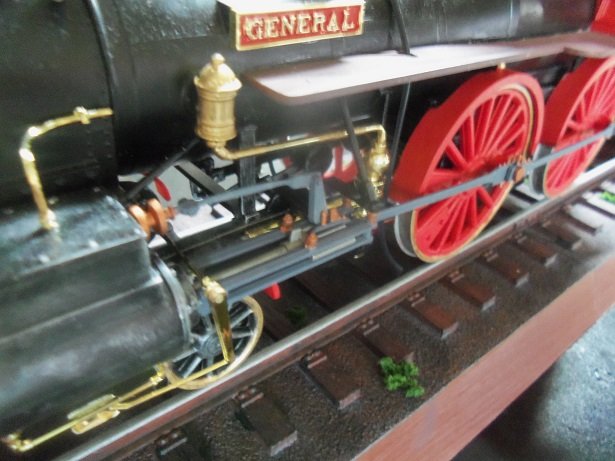
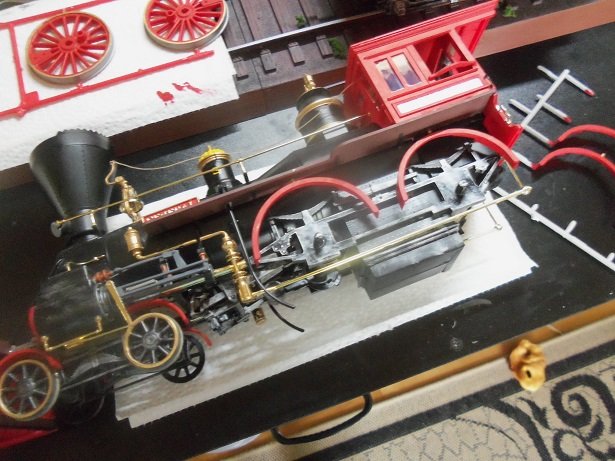
thanks Ken........good to see you pop in I read somewhere that you were having a tough go.......hope it's not serious. hope things get better. yes, there is a different positioning of the drive rods for each side. this is why the wheels and axles were keyed with tabs and slots. just like the compression engine....when one cylinder piston is down, another is at top dead center to produce power. I brought the General into the spare room where I would have sufficient light. the drive wheels do turn..........I re-positioned them so it would show better. I still have a few more parts to add to him.........the head lamp, two pairs of steps, the chains and water hoses for the tender, and the metal deck plate that covers everything up {joins the loco to the tender}. I have to do some mod for the hoses........for the life of me, I can't see where to install them. I stripped out some thin electrical wire to get the hose I will need....same diameter and all..........the chain.....I got that covered then there is the wood load I need to finish up on for the tender. still a bit more to come. unrelated to the General.........we went to Hobby Lobby today. you'd swear it was my birthday got some plywood....... 2- 1/4 x 8 x 36 Birch plywood 2- 1/8 x 12 x 24 hobby plywood 2- 1/4 x 12 x 24 hobby plywood ....picked up some flat black and gloss white for the Sox & Martin........get that back on the move, some thinner, and various small rattle cans of paint.......got some metal flake blue for the S&M roof while I was at it I also got a couple shades of brown for a future project. I should have picked up another Arizona kit.......there was one there, but I settled on a Revell B25J Mitchell bomber in 1:48 scale. what can I say........the budget director was standing right there....I didn't see her pull'in back the reins
-
you've sure made a lot of progress with her Kevin.......look'in very good B would be my choice too.......not to worry if it fades, a sealer will bring it back out again as well as the grain tree nailing is a hit or miss thing.......on some it stands out, while on others it tends to blend in...especially if you plan on weathering the deck. you probably should have done it though before you stained the deck, then the pattern could take on a look of it's own. I'm not say'in you can't do it now.......it's just that it won't have the base tint. usually, I do the simulated calking and go from there. your layout so far looks awesome!
- 337 replies
-
- 4
-
-
- finished
- mountfleet models
- (and 1 more)
-
thanks John..........it's been rainy here. of course, it has nothing to do with the warp I experienced, but it prevents me from taking it out to the garage to continue the sanding. hoping for next week........but for now, there are still bit I can do till then. very easy to overcome the problem in wood.....hate to see it in plastic! thanks for the good word
-
Revell Germany is also producing the U.S.S. United States.....very happy to see that the 1:96 series has always been my favorite.......the model is large enough to do almost anything to....and very builder friendly. I was looking at the Connie the other day.......both of the kits I have will need sails. I did find a place that make the sails from cloth, although they don't include the studding sails. they can be special ordered though. they have the sails for the Alabama too Canvas
-
they needs tas let me know hows they got us ta woik together.....A-K-k-k-k-k-K! that is so cool!.......love it! now if I had found some suitable figures when I was doing the Lobsie twins the model looks better than mine too ...looks like a Midwest kit {of course....hence the name of the contest}. thanks for showing me.......I have a plan to build the S.S. Olive Oyl one day, and I've bee having a fit trying to find the right scale figures for it. I wonder when that was, because a year or two ago, Midwest sold it's model ship line........I think to BlueJacket {hard to remembeer....pull'in at straws here}. thanks again......renews my thoughts about the plan I have. I'll keep look'in for the figures
-
rigging these ships isn't as bad as some....you can go with a simplified rigging plan, or with research, you can add the lines that the instructions don't show. did the kit include a rigging diagram?........it should have are you going to go with the triangular dead eyes? a lot of these earlier ship sported them.
-
welcome to the best place to be I took a ten year hiatus myself.........the bug never really dies........it just lies dormant until something triggers it what ever it was for you.......I hope you enjoy it!
-
awwww.......they really didn't hurt him........they didn't even know how to drive it! the only one who knew backed out on them, according to the article. then it sat for a while......so by not being in use, it helped to preserve him. now he's as safe as a babe in his mother's arms. heck ......I was more miffed about Paul McCarthy's bass! {interesting story about the Iconic Hoffner}
-
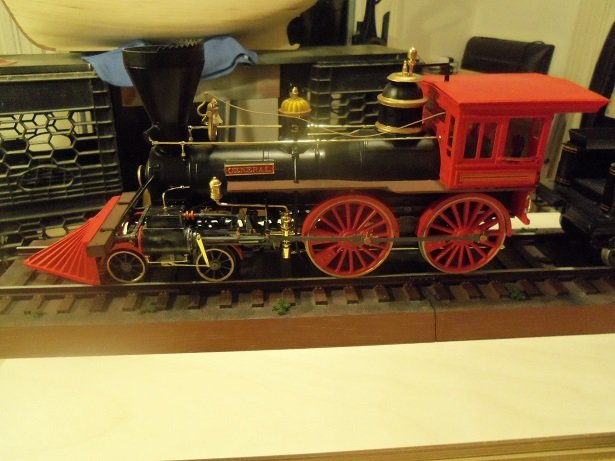
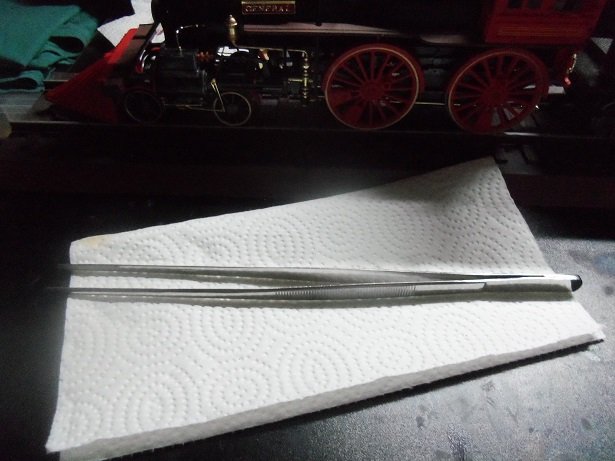
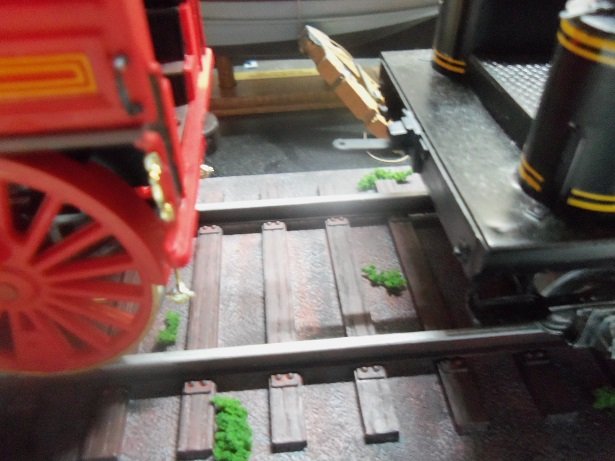
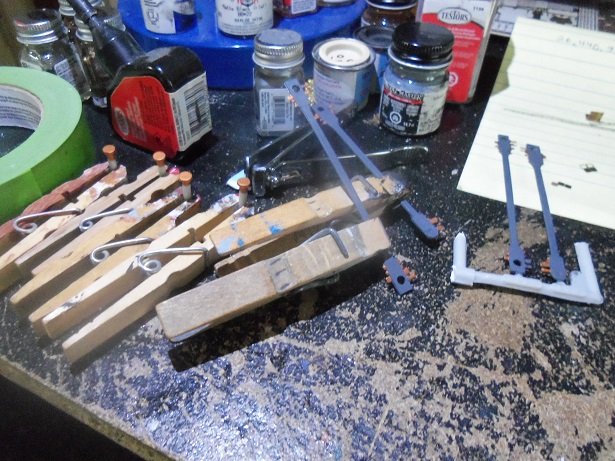
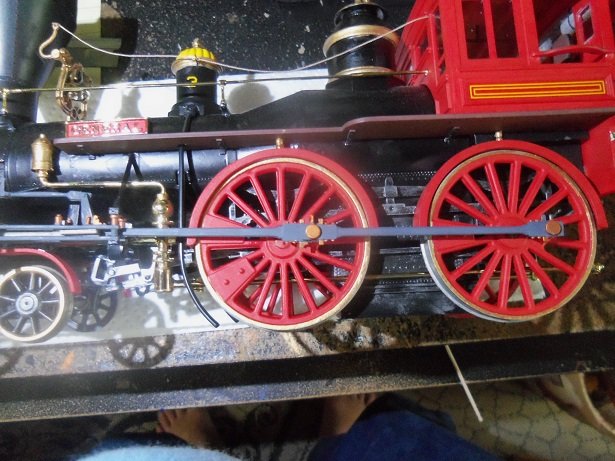
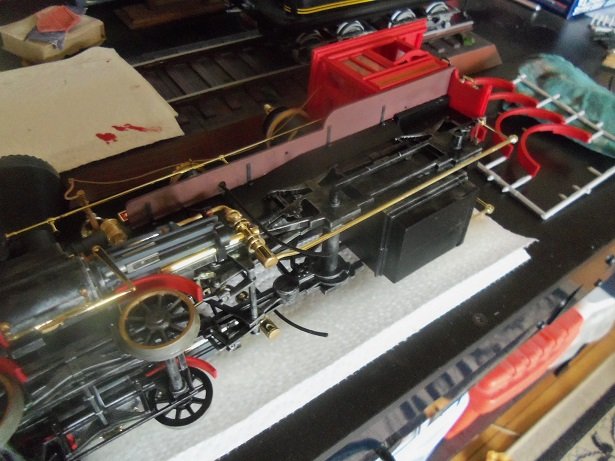
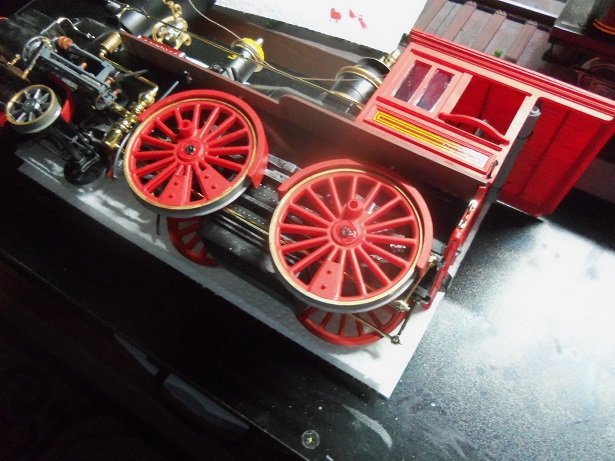
so yea........he has all his wheels on now! hey.....I'm psyched now....I had cemented the coupler on the front of the tender.........but the tab somehow got moved to the right......gotta fix that. it's gonna be a pain to hook them together......I bought a tool to help me with this. I'm sure you've seen the large Charleston Chew candy bar, for those who can't seem to get enough.........well, I bought a tweezers, since I don't have enough reach darn thing is 12 inches long!!! now I can put the pin in with ease profound thought: I think tweezers are actually chopsticks for the handicapped {sorry.......I think of the weirdest things I had to break the tab on the tender and re-cement it. thre are two safety chains that go along with the coupler.......I haven't made them yet......but I will be going with actual chain for them {not the plastic stuff}. the drive rods are touched up and drying. the one with the rounded head is the front rod........note the connection. the hole is actually slotted, so it will snap into place on the cross head. the left side is assembled now............from the cross head to the front drive wheel........to the rear drive wheel, connected by the pins painted bronze by the time I got the other side assembled, the General had had enough of this..............back on the track he went! so.......a couple of minor touch ups..........and I can move on to the next few parts to add thanks for look'in in! I hope I can get by Hobby Lobby in our travels.......I need some flat black for the S&M


- 245 replies
-
- 11
-
-
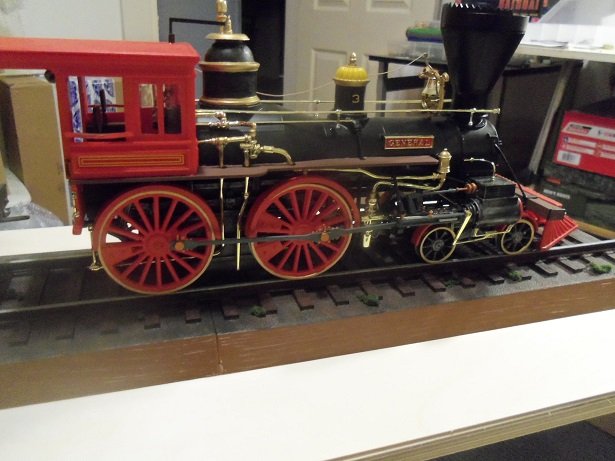
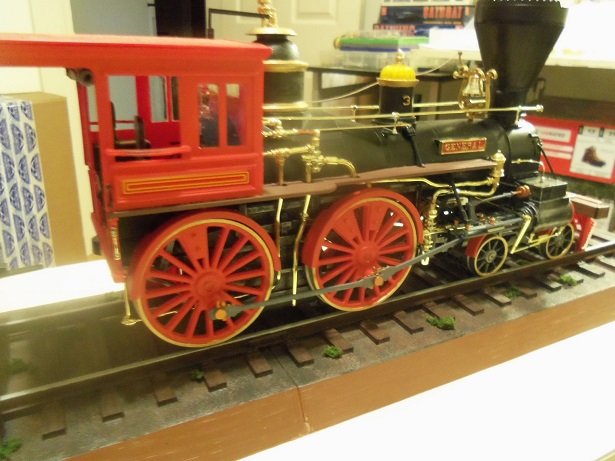
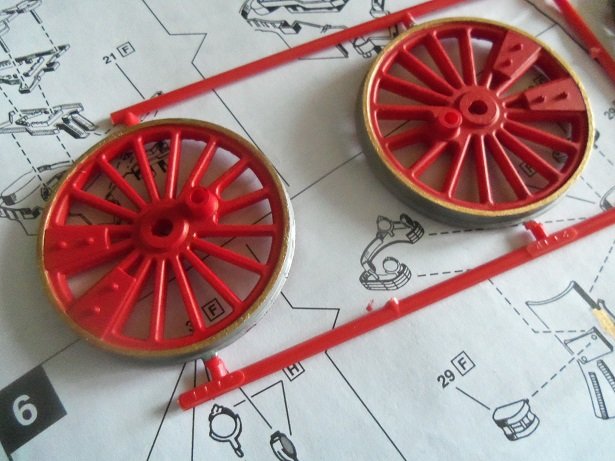
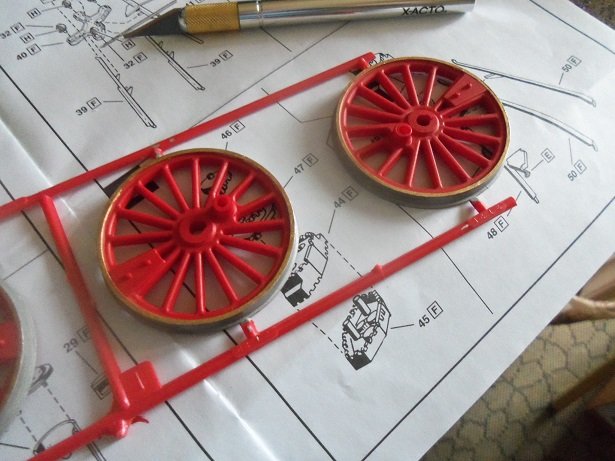
trying to get caught up with all the project I follow is a daunting affair.........I feel like Don Quixote well.......the admiral wants to do errands today, since it will be rainy tomorrow........so I'd better get the updates out of the way. that's right......two! the fenders are ready and the drive wheels are very close behind.......best to get the show on the road and get him on all eight first thing was to lay him on his side. next was to finish the paint on the wheels........the flat steel on the rail surface, and the gold ring around the circumference. the fenders and drive wheels are right and left.......so no mess ups allowed. the fenders first....... .....and then the drive wheels. there is a tab on the shafts, so both front drive wheels will be in sync with each other..........the rear axle is the same. I touched up the drive rods while things were drying here..........then on went the left side drive wheels. I had to take the picture on an angle so the glare would be less {stupid light}....doughhhhhh! the other side was done at this time.......but I was too shaky with the camera and it was blurry. as you can see here....they are in place as well. I had a picture of it on the rails........but it was blurry too. I'll get another one.
- 245 replies
-
- 12
-
-
sorry to hear your problem is still lingering.........hope it gets better for you and you can get back to this wonderful ship! really look'in super!
-
congratz on finishing her.........she such an awesome looking project you definitely have some really good weathering techniques! so interesting to watch her grow!
- 54 replies
-
- 2
-
-

-
- robert e lee
- amati
- (and 1 more)
-
very sorry to hear about your parent's passings..........profound condolences toy you and the misses also sorry to hear of your ills........I hope you have a speedy recovery and all goes well. understandable why you haven't been posting......been wondering. I'm glad your back though and hope to see more of your vic build. sometimes I wish I had a table like that.........work on it and then wheel it out of the way til next time wouldn't work for me though...........I'd need at least ten of 'em well.....anyway........what ever the pace.........this is the place
-
is that right about the kit box!?!?! I recall the box mine came in was a lot different I wonder if they are producing the kit again.........your box appears to be more updated. you have me very curious.......... I did some digging onto it and this is what I found.........in all the times I looked, I've never seen this. this is awesome! Confederate Warship C.S.S Alabama, Revell 05604 (2006) there may be hope after all 👍
-
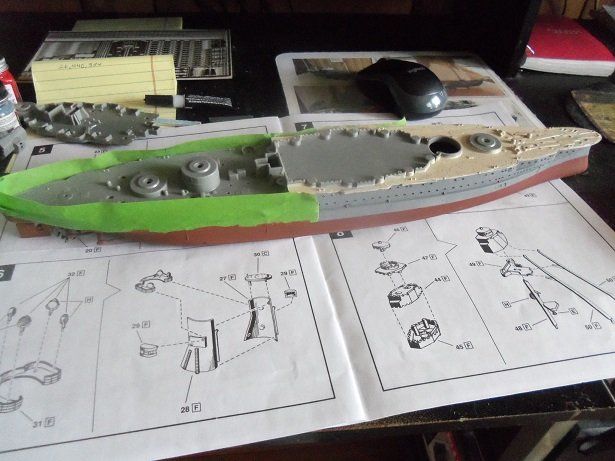
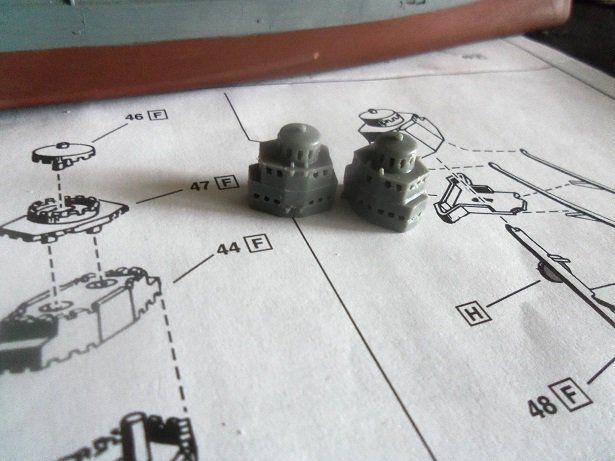
here are a couple of pictures of the progress on the hull. I did some fixing to the bottom hull paint and painted the fore deck in teal. I used the white ensign paint and I found it to be very watery. there is a little bit of ghosting since I used a brush, but another light coat should do the trick. as seen in the instructions laid out, I assembled the tops. there is a lot of cleaning to do.......all the windows look terrible I'll try to square them out a little better, but I don't think there is much I can do about it. I'm gonna check with the Hood PE to see if there is something I can use to make them look better. more soon
- 259 replies
-
- 13
-
-
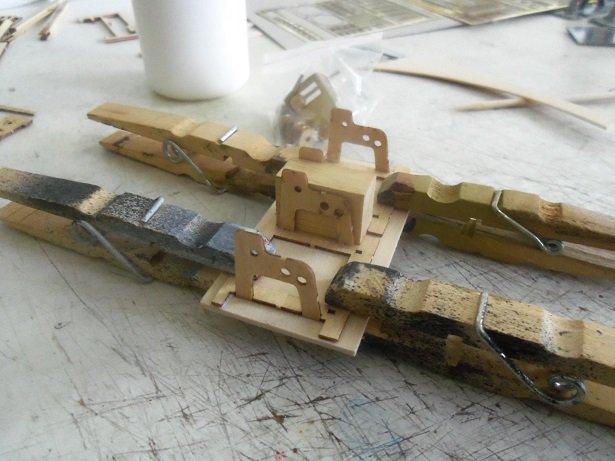
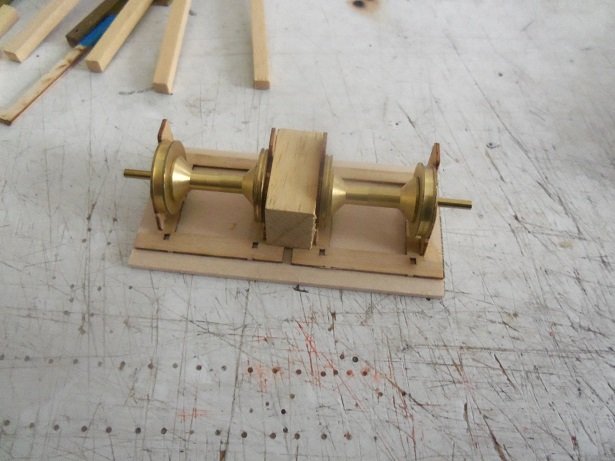
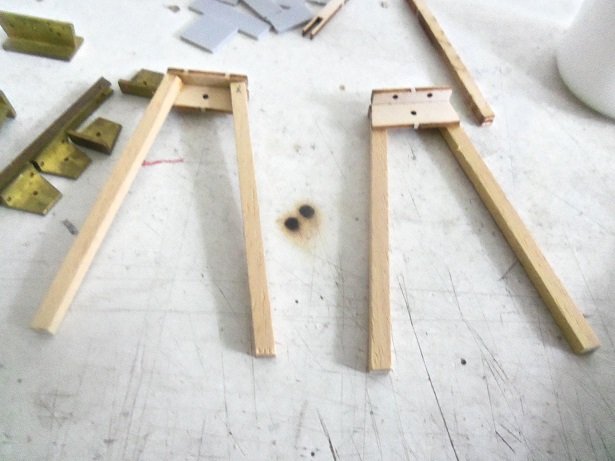
ahhhhh.......the powers of wood.......it has the ability to do many things on it's own. one of them is warp I assembled the frame, then left it to do something else. I thought it was flat....it wasn't. one side was a tiny bit warped and the outer part of that side of the frame was a tiny bit off. seeing what the gent did with his {in the pictures}, I gave it a base to help reinforce the frame and adjusted the offending frame part. I am now able to drill the shaft hole without fear of being off. I plan on adding extra detail to it. the hole was drilled and the spools were dry fitted. I did a little to the gallows too........I need to make parts for the other two more to be added to these as well
-
lots of nice detail added............really super Michael! love the way you made the pin rails........