


popeye the sailor
-
Posts
16,007 -
Joined
-
Last visited
Content Type
Profiles
Forums
Gallery
Events
Everything posted by popeye the sailor
-
 I'm still waiting.........hoping I would see it when I got home just as well though.......I have no idea if the PE kit is ordered either. I could badger the admiral, but that would just get 'er dander up
- 1,090 replies
-
- 6
-

-
- showcase models
- vendetta
- (and 2 more)
-
so good to see an update.........she sure shows her size on top of the bins! look'in real good........the bow is coming a long great!
-
really super looking structure Danny........so much detail. gonna look awesome when you start populating the deck
-
the admiral is going to order that PE for me...at least, I think she is.
- 1,090 replies
-
- 7
-
-
- showcase models
- vendetta
- (and 2 more)
-
I dunno.....this stuff was pretty thin. I'll be doing quite a bit of cutting when I start on the nordkap
- 171 replies
-
- 6
-
-
- krabbenkutter
- authentic models
- (and 1 more)
-
yea.......I have a few running projects. never at a loss for something to do welcome Bilghty.........I should be getting back to this project soon. gotta get through another fun filled work week.
-
there were enough people camped around the place. from what I saw of it.......it didn't look very 'royal' not too glitzy
- 1,090 replies
-
- 6
-
-
- showcase models
- vendetta
- (and 2 more)
-
hey there Jack.......coming along nicely quite a bit of rigging that goes into one of these!
-
rudder looks great OC........yepper! Damn the torpedoes! go for it!
- 455 replies
-
- 6
-
-
- slightly modified
- greyhound
- (and 1 more)
-
look'in very nice
-
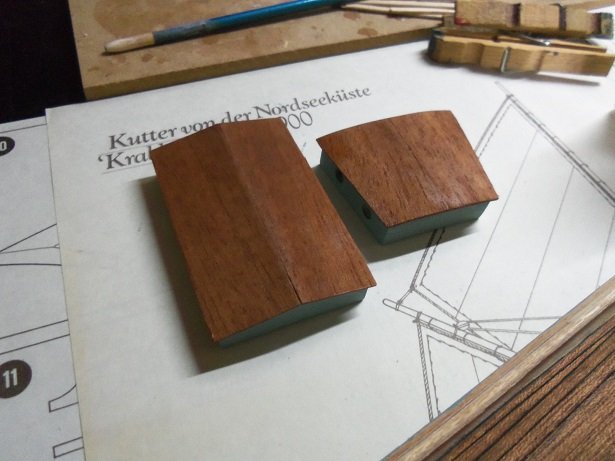
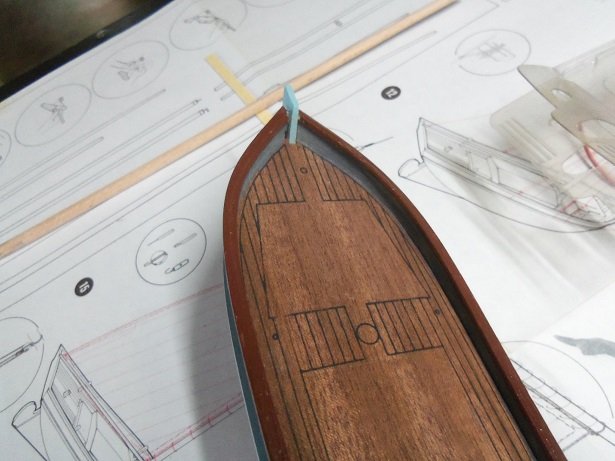
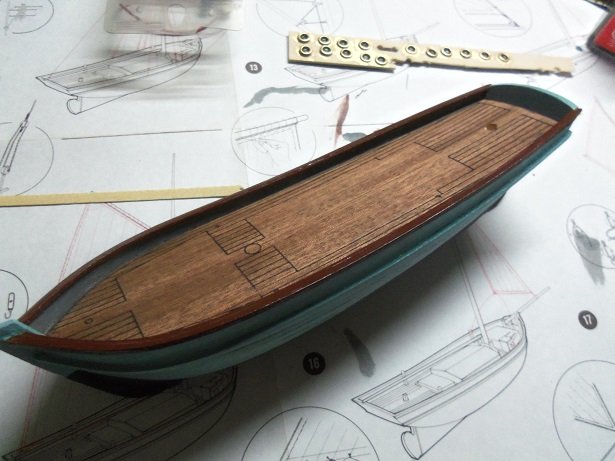
I traced them out on that stiff thin plywood they supplied.......I should have gone with my gut, and cut them from a piece of 1/32 basswood flat stock. that plywood was the toughest stuff to cut with a box cutter! by the time I got done sanding the two pieces to equal size, they were narrower at the stern. so what was a decisive thought, turned into absolute must. I really didn't gain much. when it came time to do the cap rails, unless I cut them out to a traced template {which would have taken some time to work up}, I decided to cement them along the upper edge. the curve towards the bow is very aggressive.....never be able to bend anything that much without breakage. running strips along the inner bulwarks was an after thought.......I wanted the cap rails to be wider. that's where the balsa came in. the strips are 1/16 x 1/32 X however long, and the thickness was perfect........and I even had to wet 'em to make that curve. the funny part is now......I gotta lay planking along the bulwarks, and I have to work around all this. there's still enough bulwark back there, so I guess that's a good thing the deck is about half planked.......drilled my hole for the tiller post and one for the mast, so I wouldn't lose my place where it was. I still need to drill holes for the horse, but it can wait till I'm done {I'm marking the spots}. I have a diagram to follow anyway
- 171 replies
-
- 6
-
-
- krabbenkutter
- authentic models
- (and 1 more)
-
good to see you back at the table.
-
found the perfect lead-in ........the admiral asked me what I wanted for Father's day. I went to the Eduard's site and looked up the PE set for the 1:350 HMS Hood. now I'll see if she'll go for it
- 1,090 replies
-
- 5
-
-
- showcase models
- vendetta
- (and 2 more)
-
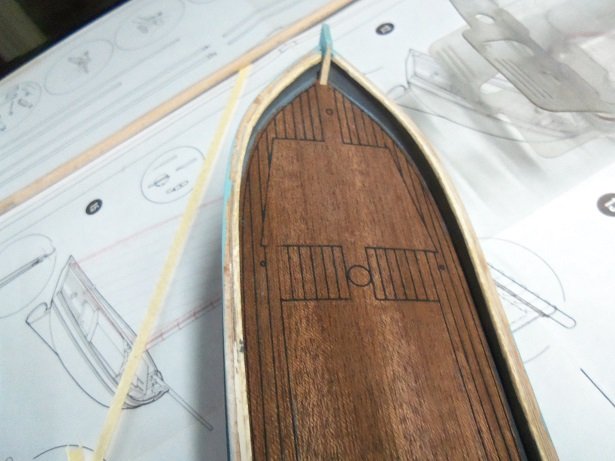
thanks Lou yea, I'm leaning toward the yellow.......but there are other colors that can be used. I figured I'd see what other folks preferred. I did the same port hole thing for my Gundalow.......the big difference is that the cabin on that model is hollow, so I didn't paint them. I do the same thing for my Nav lights {red and green}. I fill the lense opening, and when dry, paint the colors in on the inside of the light, seeing that they are hollow parts {Billing's kits}. comes out a much neater job. I'm planking the deck at the moment........I am regretting using that printed deck. this is cutting down on the height of the bulwarks, but I think it will look OK. should have an update soon.........that is, if I don't get roped into any more outside projects.
- 171 replies
-
- 6
-
-
- krabbenkutter
- authentic models
- (and 1 more)
-
lots of tiny parts J...............looks fragile very well done.......must have been trying to do all that tying. super job J!
- 258 replies
-
- 3
-
-
- harriet lane
- model shipways
- (and 1 more)
-
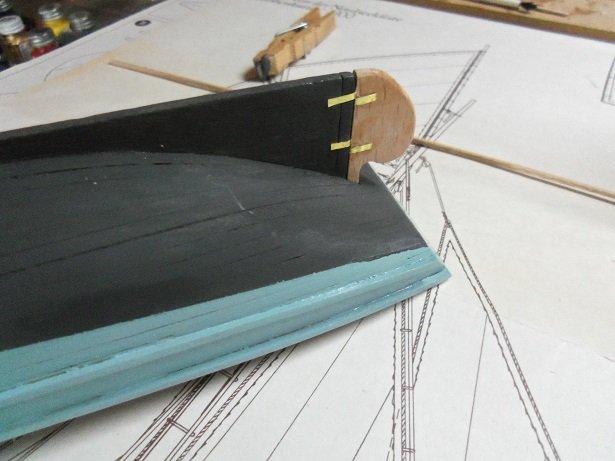
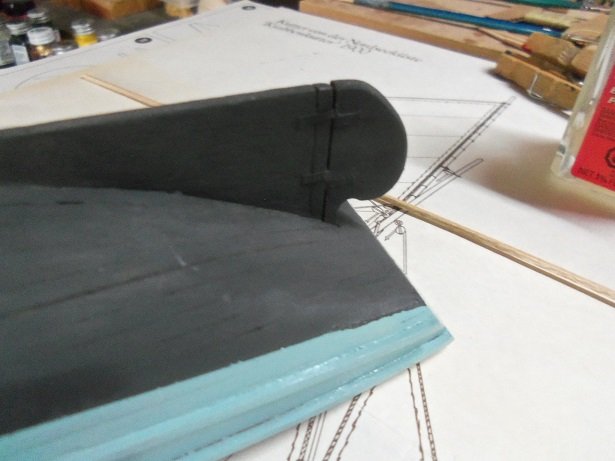
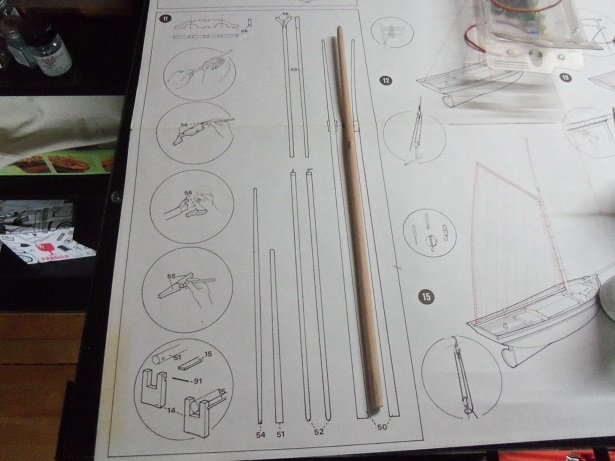
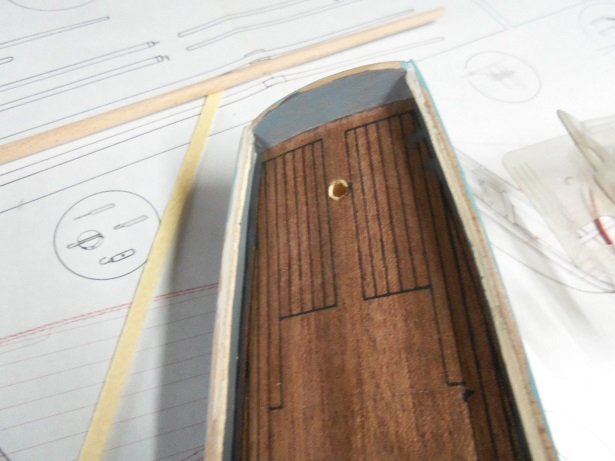
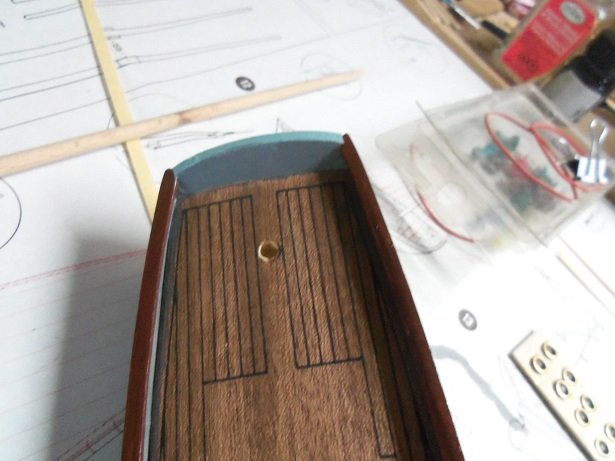
I began with the rudder to start this session off. the gungeons and pintles are simply narrow strips of brass bent in a 'U'. nothing fancy, since the scale of this model is small. great to look at........but just don't study it ....and I did decide to re roof the forward structure.....the thickness isn't that much of an issue really. trimmed........sanded to shape........and then given two coats of flat lacquer. the port holes weren't totally dry, so I gave them another day.........they look much better now the top sheet is now tacked to the wall......the section for the rigging is now on deck.......the instructions continue on this page. cutting the mast to length, I clamped it in my battery operated drill, and spent some time tapering the mast. while I was doing it...I was thinking.......what the heck about the deck? I was looking at the inner bulwarks........if I paint them, it will force my hand......I knew surely, I would get paint on the deck. I also noticed that the tiller post coming through the deck {I drilled it already}, isn't lined up with the rudder. I drilled the hole printed on the deck...........what gives? I hope I can be right on with re drilling.......cuz I will be planking the deck. so I painted the inner bulwarks....with a bit more care, I might have pulled it off, not getting any paint on the deck. then came the cap rails, and touch ups with the pale gray, and the sea blue makes I also found out what will fill that area behind the mid cabin........it appears to be a large hold. between planking the deck {the deck won't look like the printed one, so I'll have to get creative} and the rest of the fittings, I think I have a full day ahead of me the port hole glass color is making me think as well...I'm undecided on the color......... yellow: makes one think there is a light on inside......candle light white: makes one think there is a light on inside......incandescent lighting black: no light on at all......dark inside blue: most model manufacturers show this color on their proto type models....glass reflecting water perhaps? metallic: reflective nature.......re-fractional sunlight gray: reflection of the bulwarks.....silhouette light reflection I am leaning toward the yellow, but I thought of these other colors that could be used. what's your preference?
- 171 replies
-
- 10
-
-
- krabbenkutter
- authentic models
- (and 1 more)
-
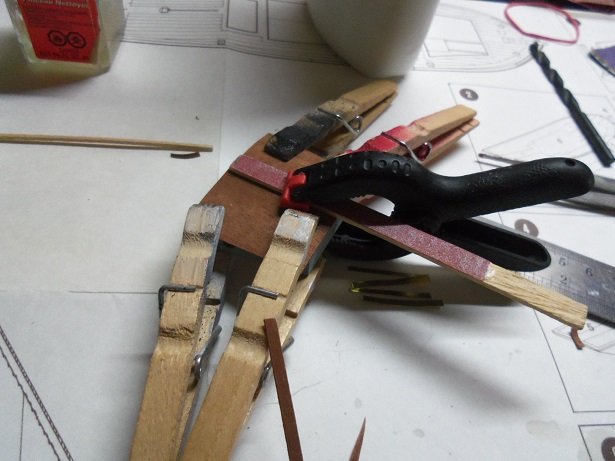
got to talk to you about your work area.........it's too neat! .........gett'in the hebbie gebbies nawww.....really, it's good to be organized........make me think that I could be a little neater look'in good so far. have fun on your hunting expedition I wonder if a steam iron would do well in getting rid of bowing.........get the wood wet......when damp rest the iron on top of it {put a piece of cloth between to keep from burning wood}. you'd have the option of giving it a shot of steam to help it along. I'll have to try it to see if this is viable.
- 37 replies
-
- 2
-
-
- eagle
- constructo
- (and 1 more)
-
we chimed in at the same time Carl.........are those clear plastic? after painting they won't be........no matter on what they are made of really nice progress as well! the admiral heard from the gent I bought the kit from...........no tracking number due to the postage terms {I took the cheap route apparently}. was there a particular problem with the guns, to make you replace them?
- 1,090 replies
-
- 4
-
-
- showcase models
- vendetta
- (and 2 more)
-
oh great Sam....that's all the balcony needs.....firewater!!! Pe looks real good Greg........I'll have a lot to live up to! I hope the PE stuff in there is good, cuz I have nothing here.......the admiral would kill me if I ask for anything else..especially for a plastic model! I'll see what I can finagle without making her eye brows aprt of her hair line.......gonna be tough.......she just got her hair cut
- 1,090 replies
-
- 6
-
-
- showcase models
- vendetta
- (and 2 more)
-
good plan......thinking ahead is always a good thing.....especially with the mods you want to do. with most sailing ships, the poop deck is planked in full strip, with no butts. this pertains to the shorter decks though. the fore deck can follow the same rule, if it too is short. where both the fore and aft decks are elongated, it is most probable to see plank butts, since in scale, planks are only so long {I'm not good with that}. I tend to mark off the bulkheads, and then mark off half way between each bulkhead, giving me more places to space the butt shifts. I'm not sure if these are firm rules, but this is what I've gleaned through my time building these vessels. I like to do something similar to what your planning.......creating other lesser known ships from others with similar hull construction. this should be easy to morph into a Whaler.....I look forward in watching your progress.
- 37 replies
-
- 2
-
-
- eagle
- constructo
- (and 1 more)
-
funny.......my wife tells me the same thing wonder if they talk on Face Book?
- 1,090 replies
-
- 5
-
-
- showcase models
- vendetta
- (and 2 more)
-
good think'in to get all that drill'in out of the way........looks great with the cap rails really nice!
- 359 replies
-
- 3
-
-
- prince de neufchatel
- model shipways
- (and 1 more)
-
thanks OC I fixed it Mike........laid another layer over it. it doesn't look too bad now I though it would, but one never know until one tries. I've been lax in thanking all who've hit the like button.....sorry
- 171 replies
-
- 10
-
-
- krabbenkutter
- authentic models
- (and 1 more)