
HOLIDAY DONATION DRIVE - SUPPORT MSW - DO YOUR PART TO KEEP THIS GREAT FORUM GOING! (Only 69 donations so far out of 49,000 members - Can we at least get 100? C'mon guys!)
×


popeye the sailor
-
Posts
16,007 -
Joined
-
Last visited
Content Type
Profiles
Forums
Gallery
Events
Everything posted by popeye the sailor
-
 nice ! the balance of the two M's........modeling and matrimony
- 1,090 replies
-
- 7
-

-
- showcase models
- vendetta
- (and 2 more)
-
see......cameras lie.........! in that picture, it looks just right I'll just go mix some spotted paint............. it's Ok Patrick, you commented on what wasn't there yet.........I commented on what was there already!
-
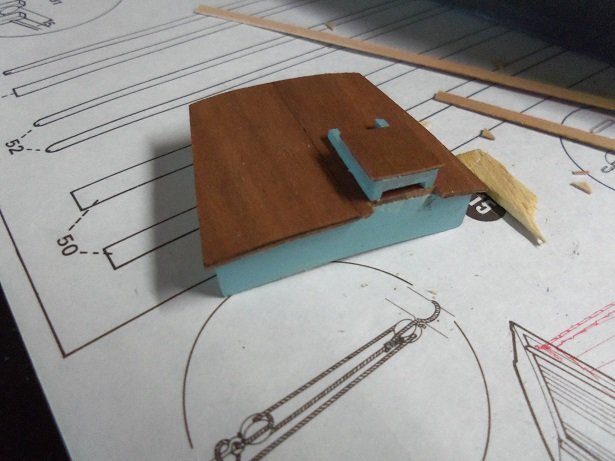
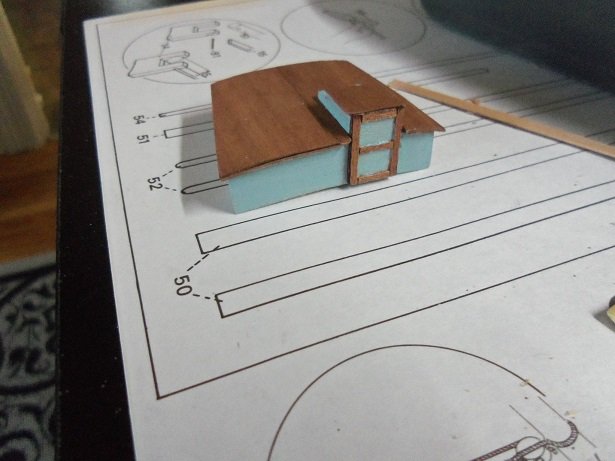
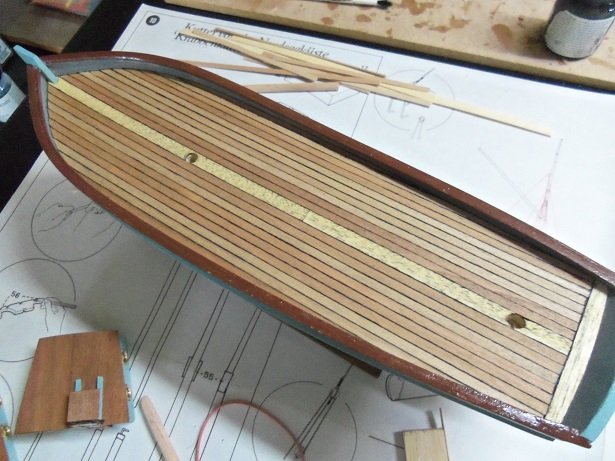
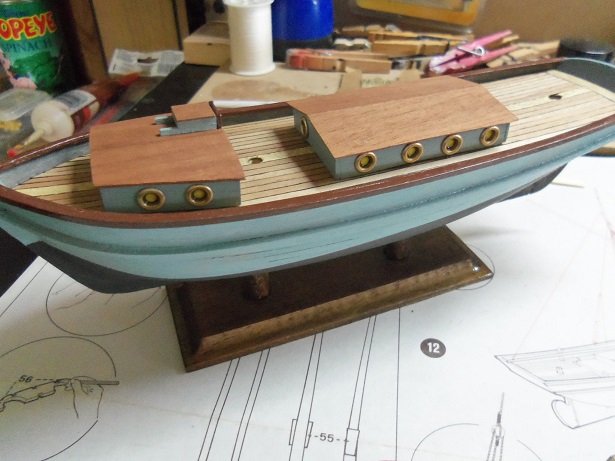
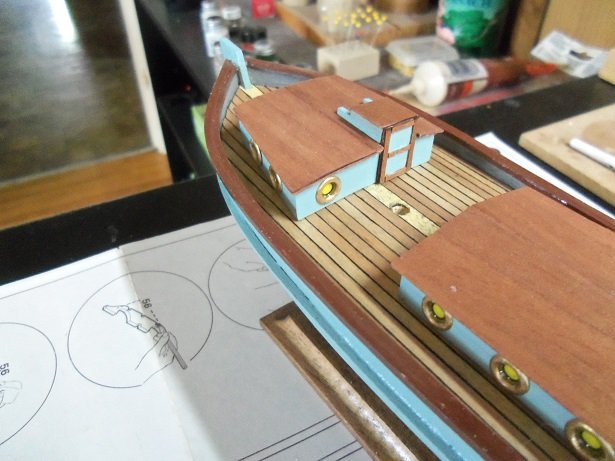
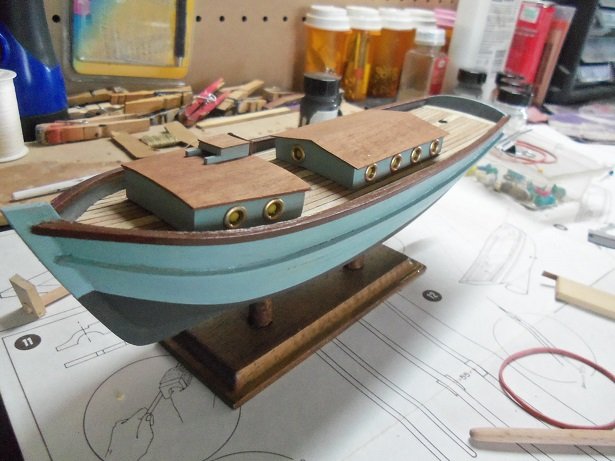
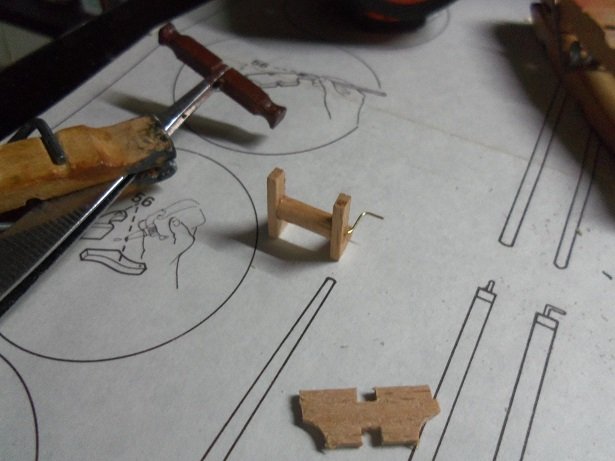
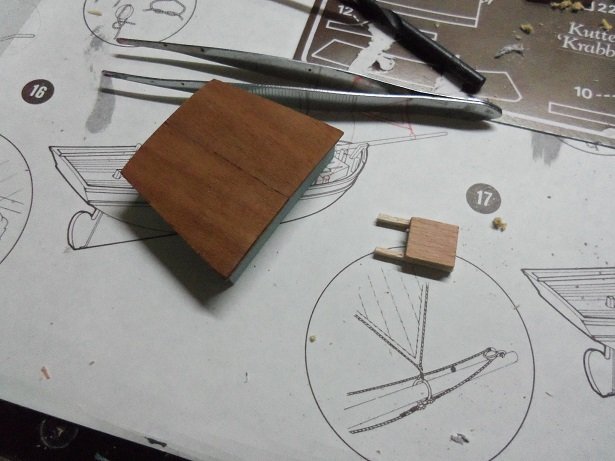
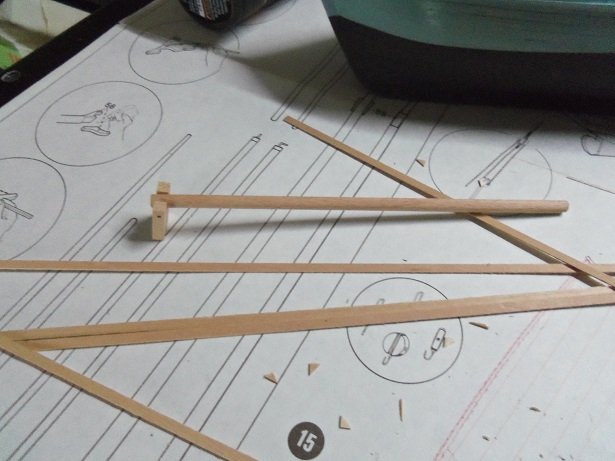
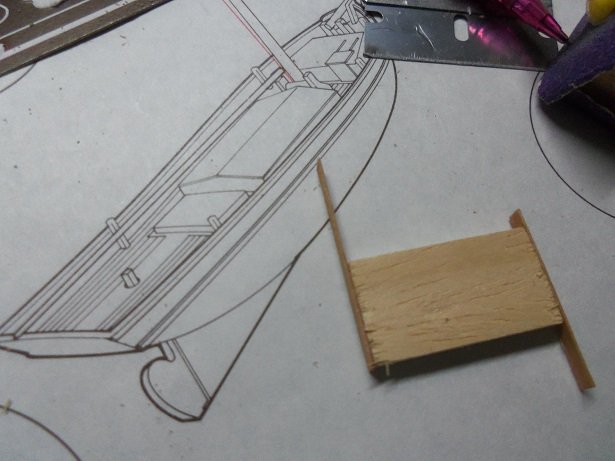
thanks for the likes gents I had a chance to do some more on her today..........and I am at odds with two parts that aren't mentioned in the instructions. I don't even see them in the diagrams. the fun started with the forward cabin......the space for the cabin door was notched out of the roof edge. the top hatchway was cemented in place after it was painted. it was topped with a small square of mahogany, which needs to be seal coated now. in between working on the cabin, the starboard side deck was filled in...it wasn't too bad.......went rather well. I cut that thin plywood with a pair of scissors....should have tried that with the bulwark panels it was outlined with 1 mm thin mahogany, and mahogany stain was used around the edges where the plywood still was showing. it was cemented in place on the cabin. deck planking continued with the port side.......getting within a plank or two from completion. it worked out fine........planked in without much trouble. after it was sanded, it was given two coats of dull coat, and then a single coat of flat lacquer. the grungy look remained....dirtied up the king plank the way I like it you may have seen the butt joint in the middle.......no worries, that will be covered by the mid cabin. the portholes were cemented into the forward cabin........I ended up with three left over. for a chuckle, I placed the cabins on the deck. I tried to use the extra portholes up......I place one on the forward side of the mid cabin........ ....and another on the forward cabin. I tossed the last one, seeing as there are no more free spaces. here's where the mystery begins......the bow spirit sits on the left side of the bow stem. I made up a chock for it to rest on, as it passes over the cap rail. on the starboard side...there is a fife rail. I haven't seen any belaying pins in the kit {I can just grab a few from the Thermopylae}. the yoke for the bow spirit has a slot on the starboard side fork, in the diagrams, but not on the part itself. I find it odd, because up to now, they've been pretty good in prepping the parts.......all I've had to do is some minor sanding. there's nothing in the kit that resembles a fife rail, so I will have to find something suitable in my stash. there is another post, that has a slot.......but is seen nowhere in the diagrams. my guess is that it's the receiving post for the fife rail, and it needs to be fitted against the bow stem. I have no idea about the other part........don't see it used anywhere {I'll use it somewhere}. so the crank handle was cemented on the sail winch.......I still need to make the horse. I need to paint the rest of the six posts that line the deck {both sides}....and I tapered and assembled the bow spirit and yoke.......painting it as well. I'll likely have more pictures, after I do the dishes........I'll post 'em as I get 'em thanks for look'in in


- 171 replies
-
- 11
-
-
- krabbenkutter
- authentic models
- (and 1 more)
-
WOW....Revell has really stepped up to the plate on their kits....then again, platinum edition kits must be rather new. I've not heard of them. ok then......I'll just sit back and watch
-
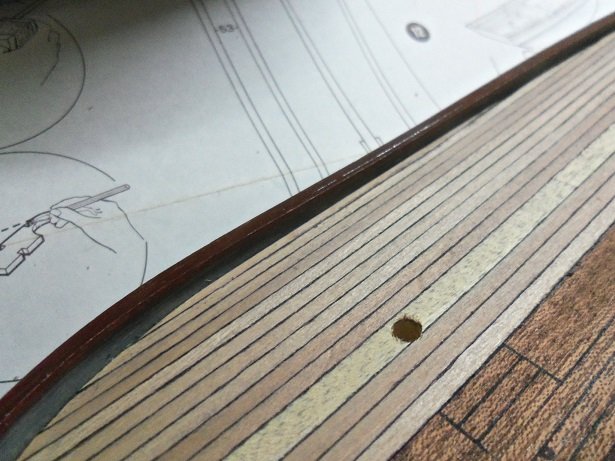
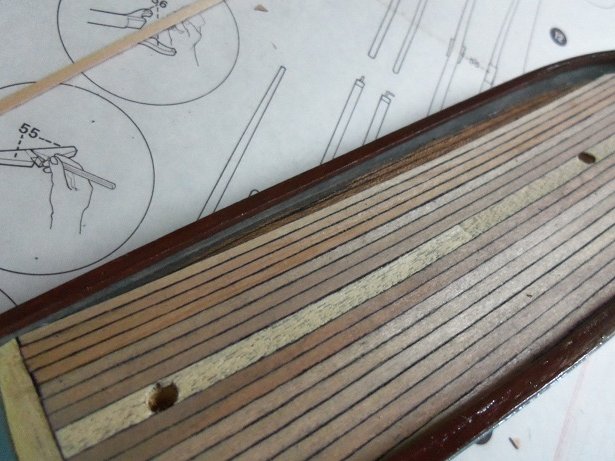
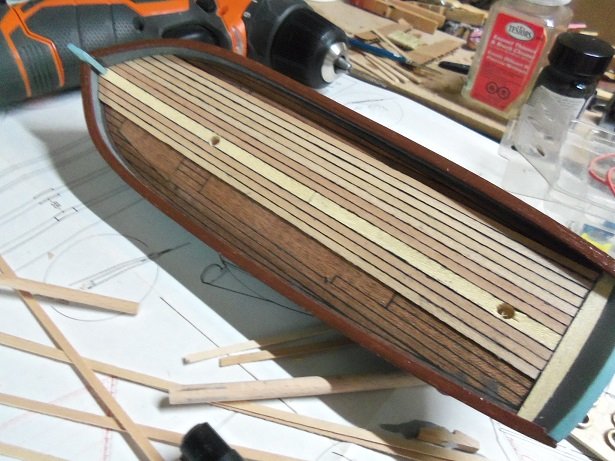
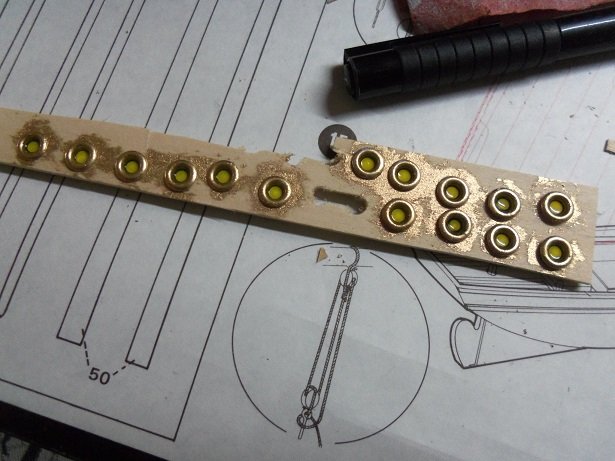
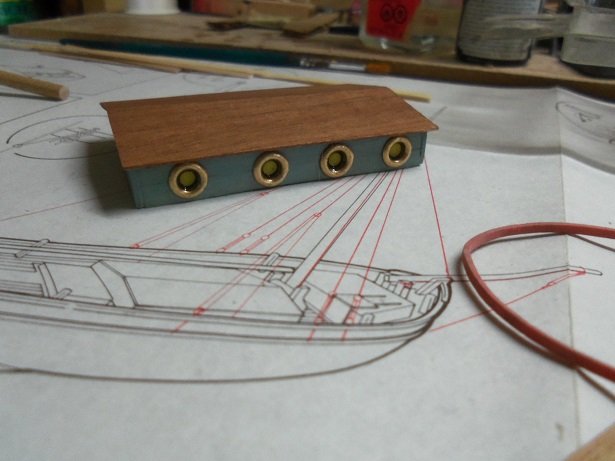
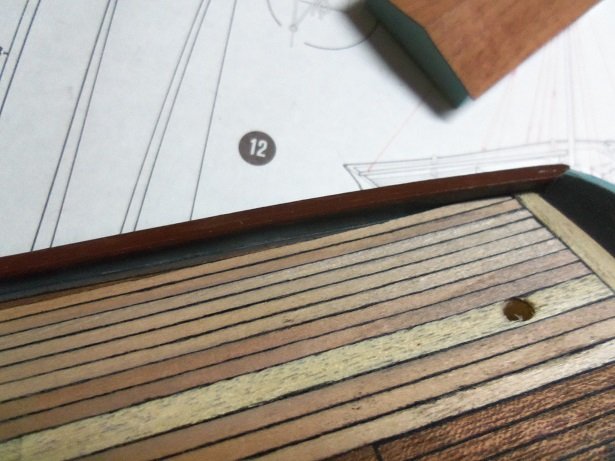
hi all.........good to be done with the work week I had done a few things last Friday......I hadn't taken any pictures though, so this will be sort of a catch up for you. looking at the cabins, the only hatch I see is located on the forward cabin. I made up the top portion of the hatch / companionway during my time Friday. I now need to make the cut in the roof overhang, so the door can be added, once the top portion is cemented in place. I had also drilled the hole for the bow spirit pin, that will assemble the two parts. then I can sand the bow spirit to shape. I mentioned that I planked part of the deck already........I stuck with the wide king plank and continued with the narrowest planking I had....2 mm. I didn't bother doing any butt staggering, figuring that if the deck gets too busy, it wouldn't be noticed anyway. I'm doing the simulated calking with the archive pen. I'm hoping that when sanded, it will grunge up the deck to some degree. as seen in the diagram, there is a hold aft of the mid ship cabin. I'm going to add a covering to the outside, so when it's painted, it won't suck up the paint. I've seen this already....this is some thirsty wood I've had to do two coats on everything so far. these 'plugs' are rough cut too.......good that I'm giving them a fascia. yellow is the color that I dabbed into the portholes....... here is what the front looks like....... ....and on the cabin, they look even better. I did a little bit of sanding to the deck.......I was correct in my assumption. the deck will retain some of the hue from sanding over the calking. if I do too much, I may lose it, so I just keep it to a light sanding......enough to take the roughness away. I added another plank towards the starboard side......this plank starts the trimming process at the stern bulwark. it will take two or three more planks to cover the rest in, involving more acute trimming as it closes. then I can do the port side. the stern is critical.........the overhang of the cap rail is gonna pose a problem. I'll show ya latter how it goes


- 171 replies
-
- 16
-
-
- krabbenkutter
- authentic models
- (and 1 more)
-
I think the stand looks fine........personally, I like the model better you did an outstanding job on this model Glenn,,,the stand compliments it just fine. whether you do some work to the snake or start the Scottish Maid, they are sure to benefit from what you learned on the Etoile.
- 101 replies
-
- 2
-
-
- L Toile
- Billing Boats
- (and 1 more)
-
your concept is beginning to come together Ben.......really looking nice
-
Mr. Bond would be pleased! once you get some paint on her.......you'll really be chuffed! she's look'in great Patrick!
-
super job on the davits and winches........ a very nice bit of metal work. looking at the picture of the winch, I can see why he had such a poor review of them note the rot hole in the bottom housing.......surly due from water getting in there actually.......looking at this particular winch......it looks more hydraulic, than electrical. you did a super job imitating them. the prop look very nice as well wonderful progress!
-
wonderful job on the Chebec Nils.....she looks superb! you'll never forget the day the Chebec thought it could fly.......it's part of her history, and part of the narration, to everyone that sees her {I have one that fell twice}........{I didn't learn the first time}. silly Chebec......everyone knows that lift outweighs ballast she's a beautiful model Nils and very well done....your skill really shows, as well as your resourcefulness. the sails and banners are superb! but yes......find out what irritating that chap at the stern........waving that scabbard around like that.....he might sever a line!
- 692 replies
-
- 4
-
-
- eagle of algier
- chebec
- (and 2 more)
-
sweet job on the anchor Pat.........at that size, is still a feat and a half! looks great!
- 1,013 replies
-
- 4
-
-
- gun dispatch vessel
- victoria
- (and 2 more)
-
a friend recently sent me the remnants of this model that he had bought off of E-bay.........your log will be a great reference when I get around to rebuilding it nice job on the paddles!
-
glad to hear everything is going according to plan I am envious good buddy!......love to be able to kick the job to the curb! seriously raising a glass to you !
- 1,350 replies
-
- 1
-
-
- constitution
- model shipways
- (and 1 more)
-
Carl beat me to it.......nice looking kit.........very nice detail on the deck. is there a wood deck upgrade out there for this model? https://scaledecks.com/ you can have a look here.......I do notice that they sell their products through Amazon and E-bay
-
the structure looks really good.........PE adds quite a bit ! super job!
- 122 replies
-
- 4
-
-
- tamiya
- King George V
- (and 2 more)
-
...a little putty will fix them.....no problem scratch building is not a science......it's an art. looking very good Kevin.
-
you jest Bob....the coppering looks super! very well done. at this small a scale, the nails might have been overkill. if I did one that looked half as good as yours......I'd be beaming your PDN looks awesome thus far!
- 359 replies
-
- 2
-
-
- prince de neufchatel
- model shipways
- (and 1 more)
-
I know.......I'm just gett'in all 'peckish' the admiral is an enabler......she's the one that got me the new table w/ built in electric outlets. I was always having to run extension cords if I wanted to do something with the Dremel or soldering gun. all I need to do now, is figure out a better lighting system....without buggering the table. I plan to do this at my desk anyway......seems like a small enough model. she still seems a bit chirped that it'a a plastic model though......I still would like to do something along the lines of the Arizona, or the Missouri......or even a carrier. I'm as curious as you are hopefully I'll see it today
- 1,090 replies
-
- 7
-
-
- showcase models
- vendetta
- (and 2 more)
-
things happen for a reason.........testing you to see if you can outwit the model I'd give anything to have my grand kids climb all over me......I just don't see them enough { I'm sure to get my fill when I do see them though } nice repair........there is no real rule that all dead eyes are equal in length. if they are off a tad, it's fine. I feel it makes the model look more life like. I hope all is better now......your dedication to this model is highly admired you've done a superb job on her !
- 1,306 replies
-
- 8
-
-
- syren
- model shipways
- (and 1 more)
-
looks very nice Michael looking at the picture though, you lost a little of the camber. I'm sure that after the deck is locked in and the center posts are installed, you'll get it back how much planking are you going to do on this deck?
-
looks much better you'll have to be careful not to put any scratch marks on the plastic areas. the method of planking still bugs me though......I would thing they would want you to lock them together with butt shifts and such. but, double planking alone will produce a good strong hull. gonna look nice when your done though I'd still be the one to buy more planking and continue the job.....guess I'm not built for these part works models
-
WOW Piet....... the diorama looks great! you did a great job with the water........even like the 'missed' shell splash near the ship I haven't done too much with the diorama thing either.....the only one I have {still in the project state} is for an old Ambroid train, the B&M snow plow. if I were to do one on a ship, I probably wouldn't go as far as you have, concerning the smoke and gun blast........they both are very hard to get right. you did an admirable job with it though, but for the gun blast, I think I would agree with Lou. cotton balls......really pulled apart {to make it wispy and thin} might be a better approach. then again, looking at pictures of these guns in action, the cloud produced does look rather dense. but it does fall on you my friend.......if you feel that it looks fine....then it is far off, I'm sure it does look good.....cameras have that nasty habit of blowing thing out of perspective. it's your vision and view that matters....I love what you did 'bout time I got to see this! luv that little touch of red in the blasts
- 378 replies
-
- 7
-
-
- java
- pacific crossroads
- (and 2 more)
-
look'in sweet Chris! the railings look great! shaping up nicely