
HOLIDAY DONATION DRIVE - SUPPORT MSW - DO YOUR PART TO KEEP THIS GREAT FORUM GOING! (Only 24 donations so far out of 49,000 members - C'mon guys!)
×


popeye the sailor
-
Posts
16,007 -
Joined
-
Last visited
Content Type
Profiles
Forums
Gallery
Events
Everything posted by popeye the sailor
-
 you know what I found out........you don't look into the camera and hit the stupid button, thinking your shutting it off! I know......I know........ go through all that trouble with the door, only to fall flat on my keister. I'll do better next time........I promise ! thanks for the good word pat and John the hinges will be the next experiment in the R&D dept. thanks for the kind word as well Bob....you wish is MY command!
- 378 replies
-
- 5
-

-
- t78 norden
- billing boats
- (and 1 more)
-
thanks semore......appreciate the good word thanks John.......the bin will sit on the deck, so in between the floats, the deck can be seen. I used tinted cello for the windows....the same stuff you would see in automobiles. it doesn't totally block out the vision, but the pilot house is so small, anything put in there would clutter it up. I'm actually surprised that they didn't supply dash parts and a ship's wheel. when I did the Mary Ann, I rebuilt the pilot house from scratch, giving it larger windows....the pilot house here is based the same way. I mounted the windows out side instead in inside.......a trade off for the siding thank you Samson....glad to have you look'in in thanks for the likes folks! I'll have more soon......I did go further
- 378 replies
-
- 5
-
-
- t78 norden
- billing boats
- (and 1 more)
-
Cutty Sark by NenadM
popeye the sailor replied to NenadM's topic in - Build logs for subjects built 1851 - 1900
when the boat is lifted out of the chocks, those pieces lay down, so they will be out of the way when they swing the boat around. I was going to mention that Nenad......but I didn't want to......I thought you knew how they were situated. the two life boats should also look the same......they are upright in the davits and they can be covered with a tarp at times. the ones up over the cabin are keel up......sad to say would dash the idea of detailing them. put them as you see fit....your the Captain.....it's your ship it would be sad to see good work, not be used.- 4,152 replies
-
- 4
-
-
- cutty sark
- tehnodidakta
- (and 1 more)
-
it does pivot though...Tim is correct in his assumption. fore lower top sail and main lower top sail should have one.
-
thanks gents......ya caught me! I cut the front windows out and I'm taking a break. I saw the pictures Kevin........looks a lot like the Jeanne D'Arc, except the D'arc has more Heli deck. wonderful stuff there bud!
- 378 replies
-
- 5
-
-
- t78 norden
- billing boats
- (and 1 more)
-
yep.......it reminds me more of the Jeanne D'Arc. I built t because of this vessel strange coincidence that I got that kit when I did....spooky!
-
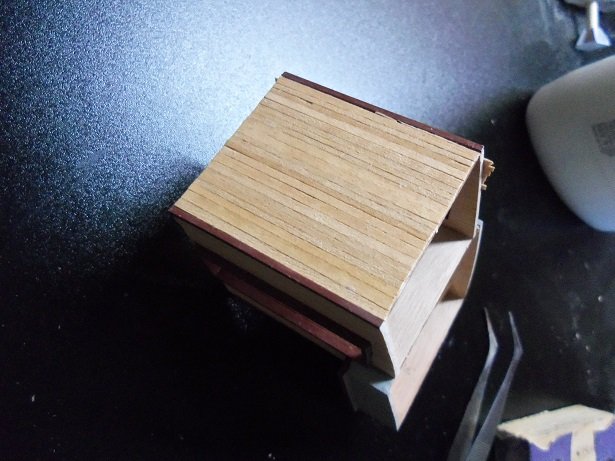
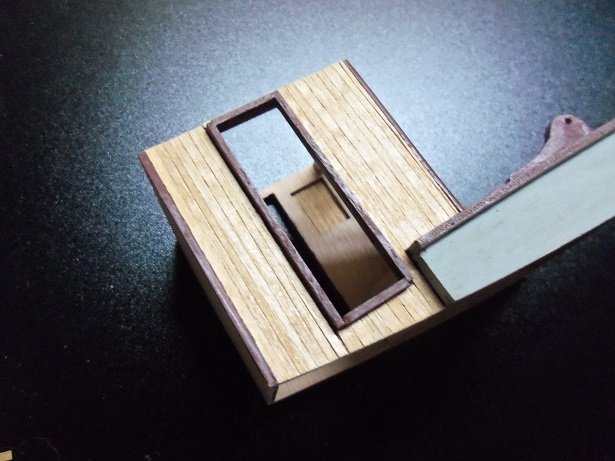
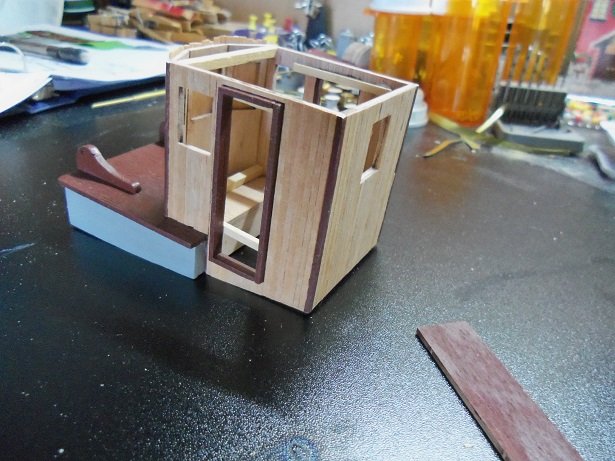
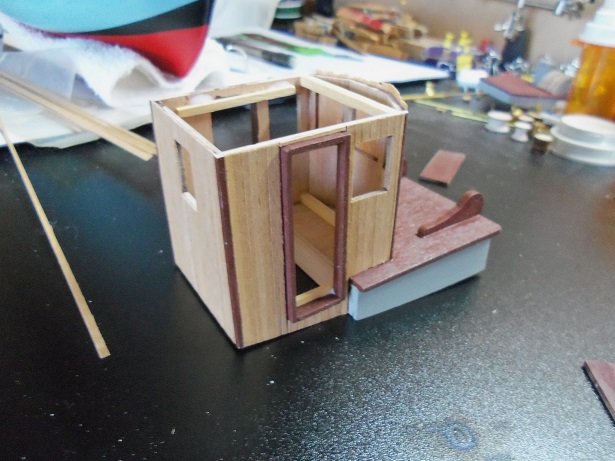
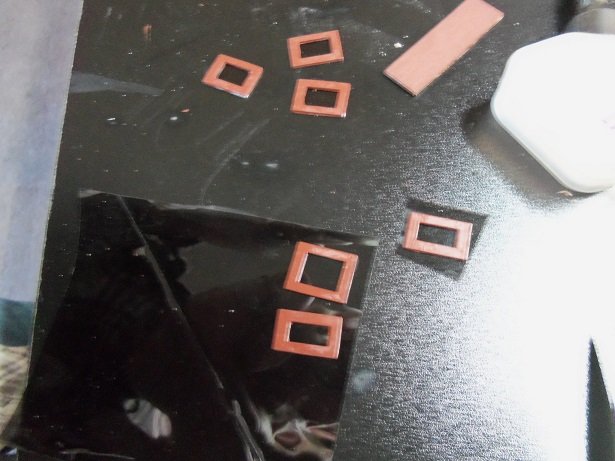
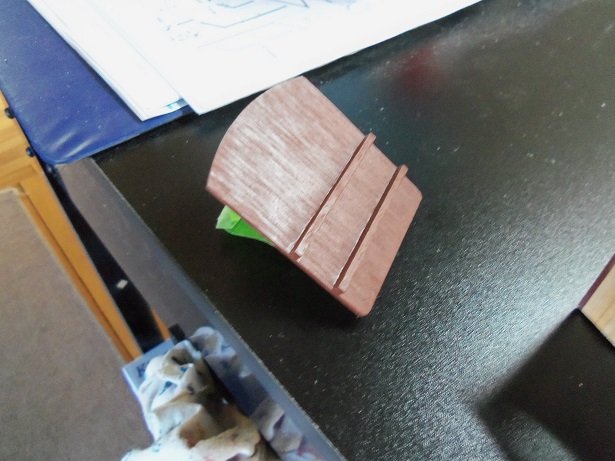
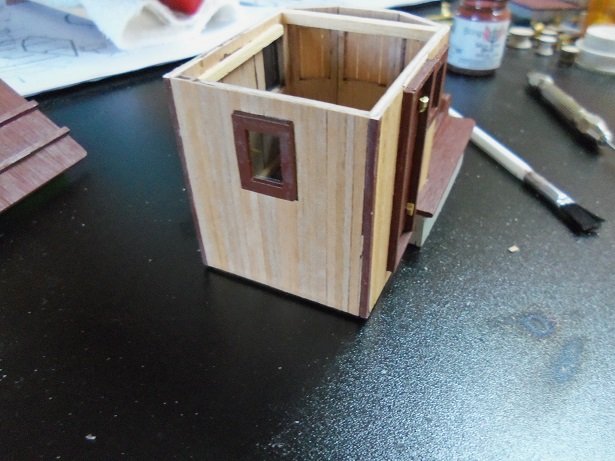
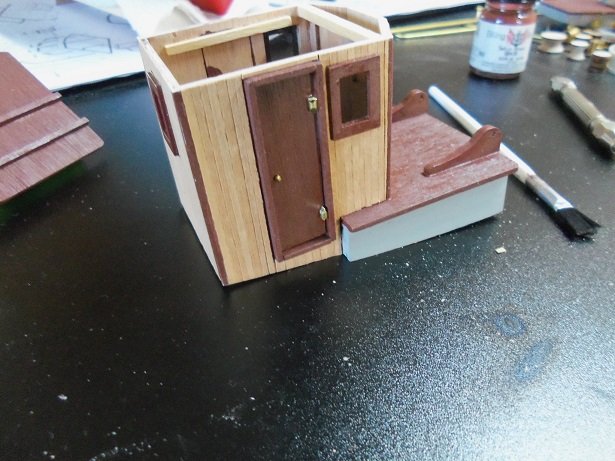
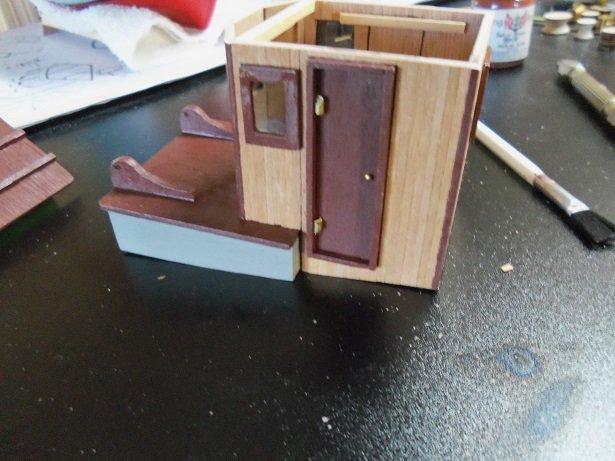
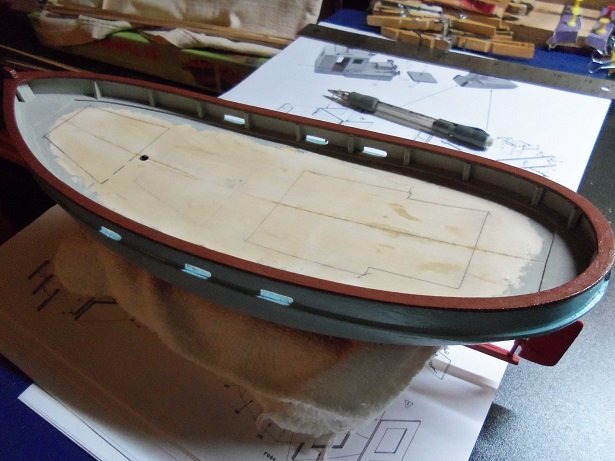
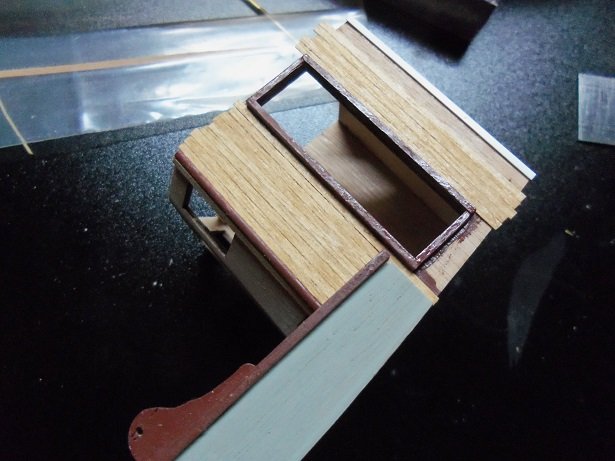
so.....the port side was trimmed and the edges sanded flush. the back wall got the siding treatment next. the starboard side was done next. the casing for the door was done and painted........then sided. in keeping with the satin brown for the trim, the doors and the window frames were painted. set aside to dry. the front wall was done last......after it was sided and dry, the seams that join the segments were sanded lightly to round off the edge look. since the three walls have had the most drying time, the windows were trimmed out. selecting a piece of the tinted cello that I thought would do the job, the window frames were cemented on it, and will be cut out when dry. I was a bit hesitant, but I used CA to cement the frames on.....I was so worried that the fumes would cloud the cello, but it didn't. while I had the brown out, I painted the roof. I'l be working with that pretty soon. I had cemented the cross strips on during an earlier session. cutting them out did remove bit of paint....I ended up having to touch them up a little. taking the side windows and the back window, they were cemented in place, using the Testor's window maker. I opened the new bottle...the old bottle is gone {horray!}. the doors were cemented in place as well. two 10 mm brads make up the door knobs, and buts of brass rod make up the simulated hinges. the tinted windows really aren't that dark, so there will be some visibility to the interior. not enough though to cause alarm. I'll get the front windows cased out and then it will be painted over with semi gloss lacquer....trying not to get any on the windows. I probably should retrace the structure outlines on the deck. in doing this, I likely changed the size of the areas.. I should be able to go further today.
- 378 replies
-
- 10
-
-
- t78 norden
- billing boats
- (and 1 more)
-
not a happy thing.......but it's good you caught it when you did the inevitable will come.......you'll finish 'er.......it may take one more day.
- 692 replies
-
- 3
-
-
- eagle of algier
- chebec
- (and 2 more)
-
the hull is so smooth, everything reflects off it! she's look'in better with every update Patrick love the topside paint !
-
super progress Nils........the ship really looks awesome!
- 692 replies
-
- 2
-
-
- eagle of algier
- chebec
- (and 2 more)
-
very nice yard work
-
no....it doesn't help with tapering. basically, just lay the plank down and see how it wants to lay.....tape to fit.
-
did they make a new structure, or did they install an elevator to move the helicopter below deck
-
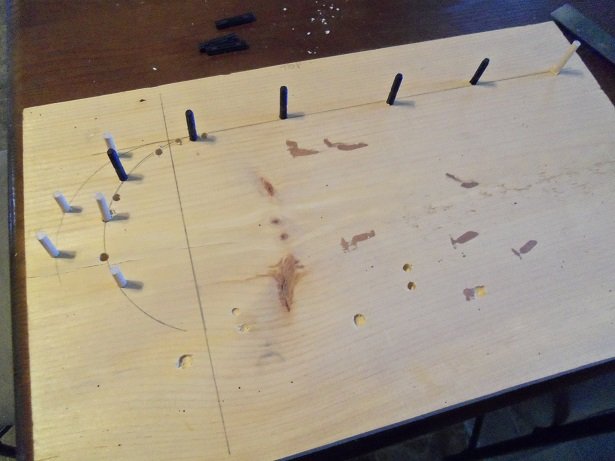
darn.......looked in the closet and I haven't the foggiest where the board got off to. I tried to quickly make another one, but you'll see where I drilled two holes, too close together, and the drill walked. it still will give you a good idea. you'll see where I drew two lines......from the bisect of the two lines, curved lines are drawn {I did two}. you can shape the curve as tight as you want to. the plastic pegs are 3/16.......I made others from wood dowel. don't use metal or rough pegs because the wood will get marred or stained. alternating holes allows the strip to be held in place. other holes can be drill to make adjustments, depending how much bend you need.
-
sure.....I'll put something together for you. I kinda figured that's what you were planning to do with the bulwarks. I know planking can be a trial......I'm no expert either.
-
look'in really nice OC..........your doing a great job! hands are still OK......no problems?
- 455 replies
-
- 3
-
-
- slightly modified
- greyhound
- (and 1 more)
-
who knows, she may like it more when your finished and the ship is in her case super progress!
-
thanks Don I'm continuing with the pilot house at the moment.......should have more a bit later. got up early this morning....Gibbs got me up for a morning outing @ 4 AM. I have the supplied deck planking for the ship, but I'm beginning to wonder if I should do the deck in this color Anegre, in keeping with the pilot house color. I might have enough. thanks again for all the likes
- 378 replies
-
- 3
-
-
- t78 norden
- billing boats
- (and 1 more)
-
planking her that way will insure your maintaining a straight line, but you'll need to remove the excess planking along the tops of the bulkheads, ending off at #6. the bulwarks should have a curvature that follows the main deck. it's not a bad idea, but you'll be doing a little extra work, defining the main deck bulwarks. I use pretty much the same method in bending plank strips. I have a pine board with systematically drilled holes to allow for changes in the bend. I have plastic dowels I stick in them......the kind you get from pre fab furniture. like your doing, I set up as many as I can
-
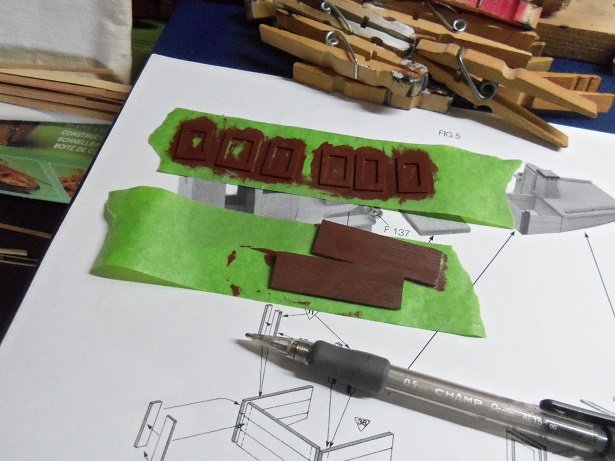
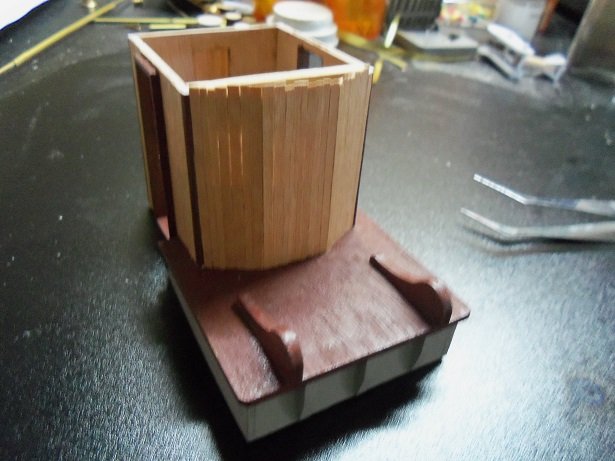
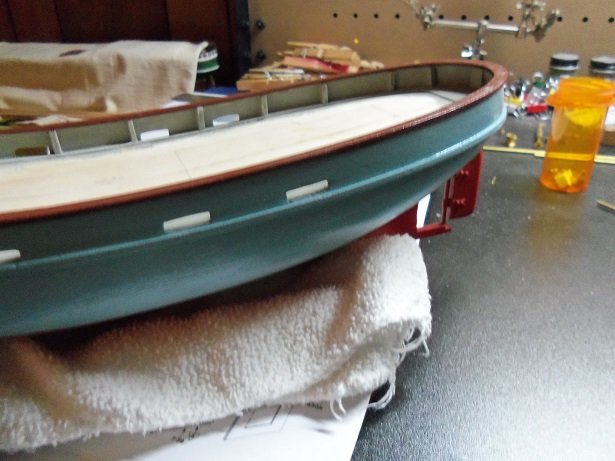
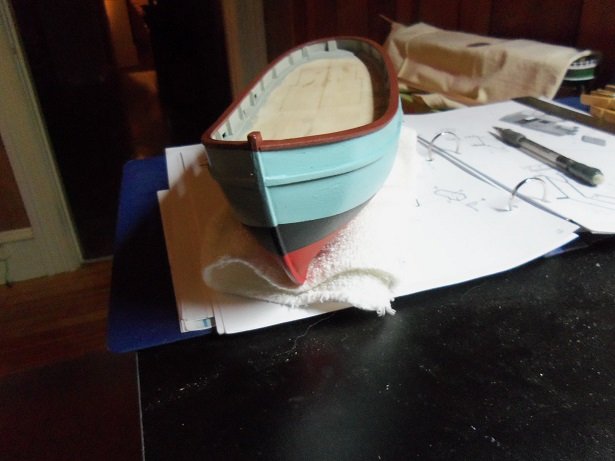
I've seen the Dumas kit......I was referring to the plastic version {seen that one too @ Hobby Lobby}. it's an airfix kit @ 1:72. one of these days, I'd like to try a Dumas kit.....like the looks of the PT boat they have. thanks for the good word my friend on the Nordkap front........I finally got a hit on the fitting kit! I've sent e-mails to Billing / Danmark and Age of Sails, but so far, no replies yet. last night I tried another search and came up with a place called Premier Ship Models, based in Canada. the reply mentioned referring me to someone else, so I'm waiting on that reply. I'll see where it takes me thanks Piet and OC! ....and thanks to all who hit the like button! I didn't get too much done yesterday......made the admiral happy by getting my hair trimmed. she said I was starting to look like a hippie we had a major ice storm the other day......everything is coated in ice. we did have a good amount of snow, but we had a January thaw and most of it is gone now. ........and then we get this.....it's quite slippery out there I was hoping to have this done when I posted the last set of pictures. I got to the table a bit late last night and painted the cap rails.....touched up the margins. when I did the scuppers, I did ding 'em up a little..........but that's alright, it's a work boat. when the model is finished, they'll never be noticed I was going to start planking the deck, but the cap rails were drying.....so I started to look at the pilot house. I wanted to do it a little bit different. I like the satin brown, so I decided to base it as the trim color, and base it off of that. I was thinking of a mahogany color, but it would be too dark. So, I went with a light color Anegre this strip, and will do siding on the exterior. going vertical, I went with 0.5 x 2 mm wide strip. I could have gone with 3 mm, but the 2 mm will fill the fields without having to patch in a smaller width. I'm not using the supplied doors........I'm going to add a casing and use the punch outs that I had removed. recall that I had used 1/4 quarter round plastruct for the front corner edges, since the assembly of the pilot house, left a gap there. I will also be using some plastruct 'L' angle for the back corners. this will box the side fields in and serve as corner moldings. I stopped here to paint the 'L' corners before I finished the port side. I will cut the windows out after this has dried. I plan on using the tinted cello that I've used on a previous project, since this kit doesn't much in the way of interior detail. I'd add some, but the pilot house is rather small and so are the windows. the port side is filled in now.......when dry, it can be trimmed and cleaned up.

- 378 replies
-
- 12
-
-
- t78 norden
- billing boats
- (and 1 more)
-
it's nice to hear that your misses is on board with the hobby. sadly, some are not......makes it tough to enjoy when there's friction, every time one wants to spend some leisure time. my admiral is totally on board.....I used to work with plastic, but when she saw my first wood ship....she decided that I would continue with wood and stop building in plastic! she gets involved with the color coordination {no plaid}, and she's a great sounding board. should I get stuck on something. she won't do sails though.......pity I dunno......there may be a call for a left handed door, you never know great to reason out the possibilities!