


popeye the sailor
-
Posts
16,007 -
Joined
-
Last visited
Content Type
Profiles
Forums
Gallery
Events
Everything posted by popeye the sailor
-
 thanks for the good word Rob....I've built the Mary Ann as well the shape and contour of this hull carries over in at least two {or three} other Billing kits. I've also cloned a couple of hulls from the parts panels {of the Mary Ann}, to build other models. I just got done sanding off the filler.......only three places that I want to refine before paint. glad to have you following along......I hope you enjoy Thanks Kees! so good to have you look'in in. hop'in it get nicer when I get paint on her thanks alos for all the likes
- 378 replies
-
- 4
-

-
- t78 norden
- billing boats
- (and 1 more)
-
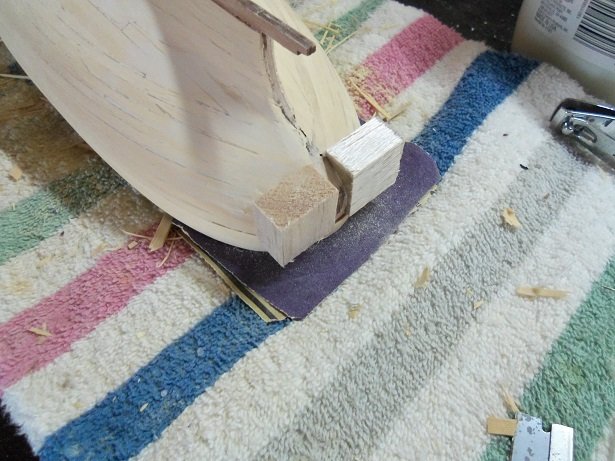
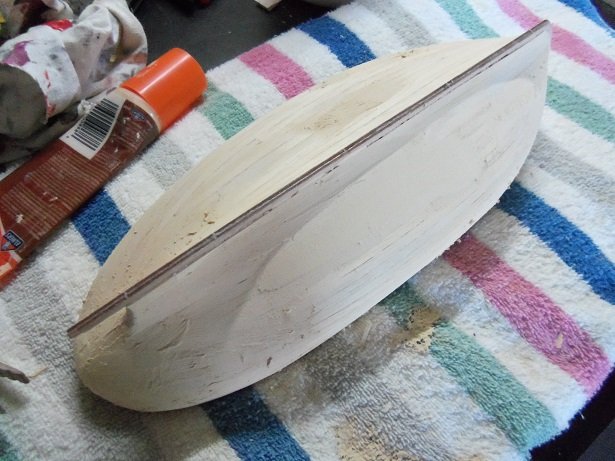
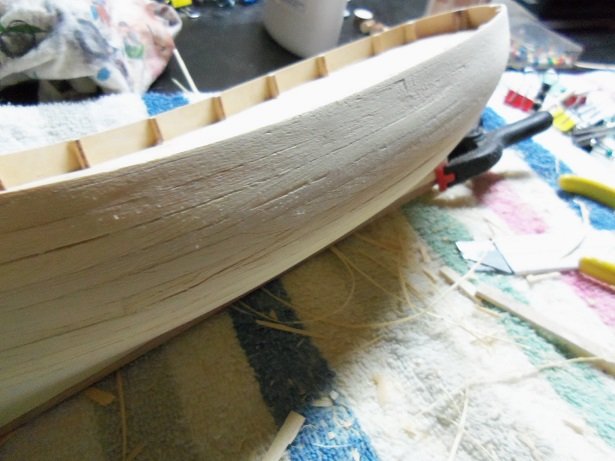
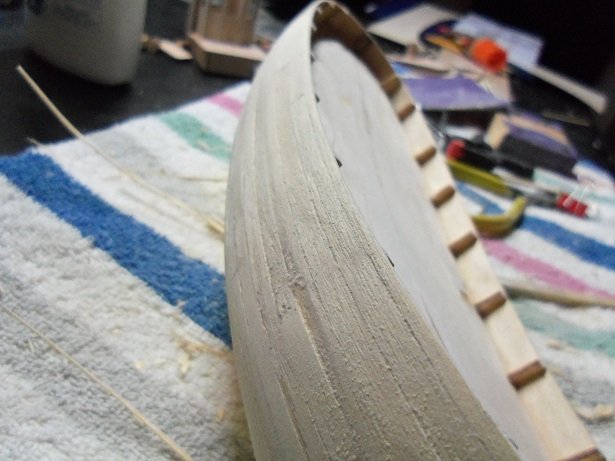
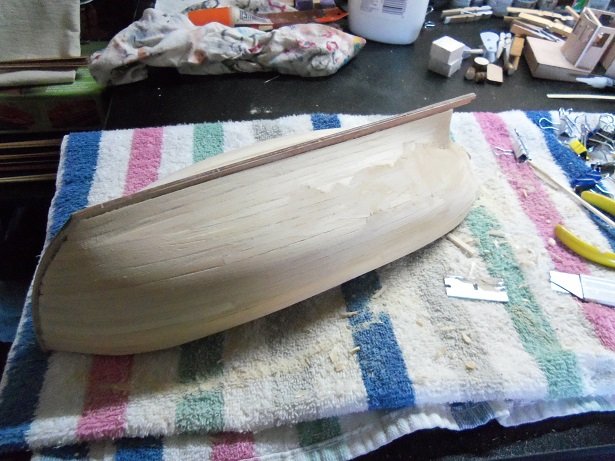
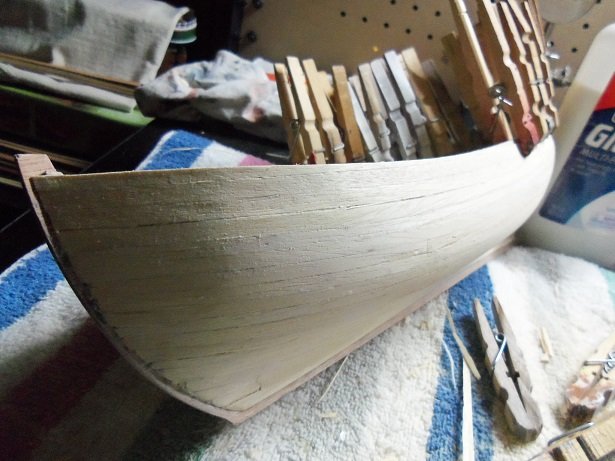
so......as I mentioned in an earlier post, the two stern blocks are in place. the adjustment made to the bulwarks came out well. I noticed the grain is running differently on the starboard side block......I changed that before it had time to dry. when the time comes to trim them down to the point where I can sand them to shape, this will be to my benefit. more sanding was done along the rest of the hull.......this got rid of more imperfections and cleaned up along the bulwarks some more. the port side has more fill work than the starboard side. the hull really isn't too bad....compared to some that I've done before. the blocks have been trimmed and sanded.....came out quite well . now it the time for filler........I went over the entire outer hull. it sands quick.......I'll be removing most of it, without taking any more of the wood. I'll let this set for the rest of the day, so it can fully dry elbow grease time tomorrow
- 378 replies
-
- 14
-
-
- t78 norden
- billing boats
- (and 1 more)
-
thanks Piet and Pat I hope your right about the rapid build.....it would be nice to call a few builds done this year. it's been a few years since I've had a finished one {outside of the Jeanne D'Arc}. I've got four in the stash now....one I can't touch because I have to find the fitting kit for it. my resolution this year is to stick to my active projects and get 'em done.....the Nordkap, the King of the mississippi, the Marina II, and the Marie Jeanne will just have to wait. keen to note though.... the latter three are all Artesania Latina kits......I seem to be turning a corner regarding Billing kits. thanks to all who hit the like button
- 378 replies
-
- 4
-
-
- t78 norden
- billing boats
- (and 1 more)
-
clew line are fastened to the outer corners of the sail......the bunt lines handle the inner edge of the sail. leech lines are fastened to the outer edge of the sail. when the bunt and clew lines gather the sail to a certain point, I believe they are manually fastened with the reef lines {lines that are pleated into the sail} there can be upwards of three lines of reefs ......I haven't seen more than this. this is gonna look super when you rig it up....I've never seen this detail before. nice work...the block looks really neat
- 101 replies
-
- 1
-
-
- L Toile
- Billing Boats
- (and 1 more)
-
gee....now I feel like a heel for not looking...spoke too soon you've made quite a bit of progress....she looks great with the copper bottom very nicely done!.......tree nails look good too!
-
thanks Bob......this is the part of the build that I tend to feel more critical about. I've always said that the time before the model sees paint, they always look terrible and a bit ugly. then it's getting rid of all the imperfections........I wonder if the hull will survive. I'm confident that I can turn 'er around I'm glad you found me Mobbsie......now I can truthfully say ALL my friends are look'in in talk about troubles.......jeeze, the planking splintered like it was brittle........and I just took another look at the other assorted strips {after knocking them on the floor with a wipe rag}, some of them aren't cut too good. not a problem though......I have plenty of wood in inventory. the main part of the boat is assembled now, so I'm past that stage. I had to run out to take the admiral to her doctor's appointment....but when we got back, I cemented the stern blocks in place. when they are dry I can trim them to shape. I hope to have another update soon.......I hope to have them done. happy to have you following along what's the hold up with your project? dying to see more
- 378 replies
-
- 6
-
-
- t78 norden
- billing boats
- (and 1 more)
-
I like the color........really nice shots of the hull. you did a great job.....nice and smooth
- 51 replies
-
- 1
-
-
- krabbenkutter
- billing boats
- (and 1 more)
-
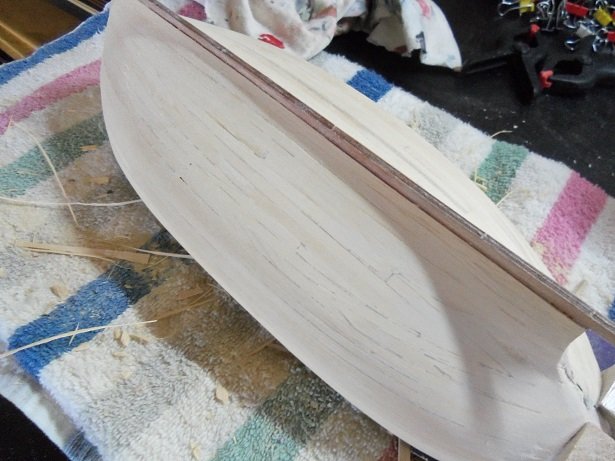
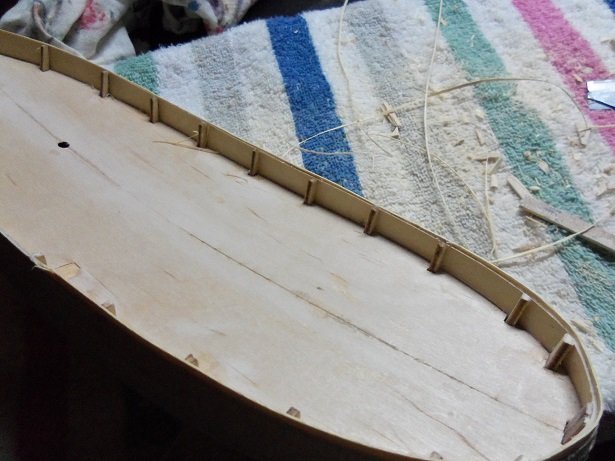
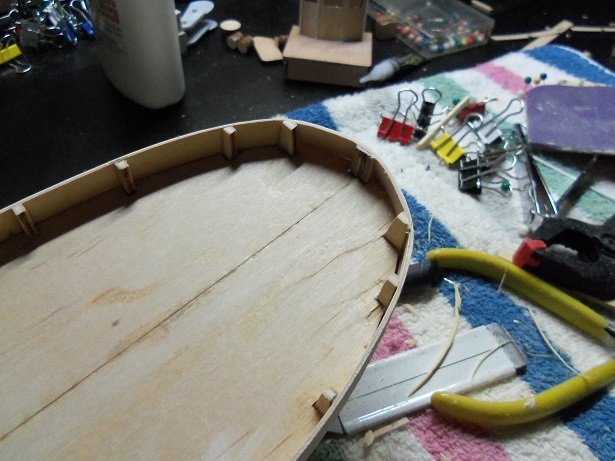
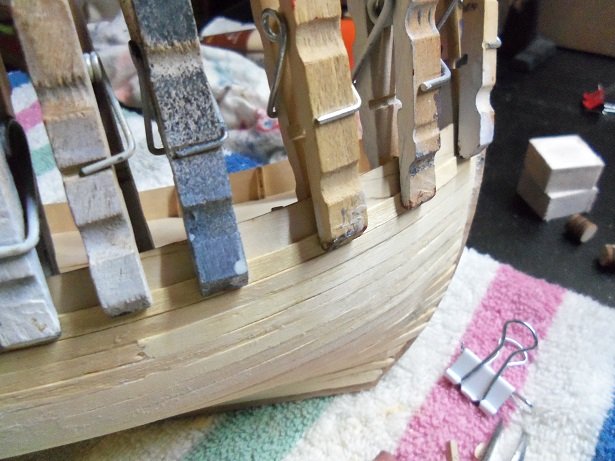
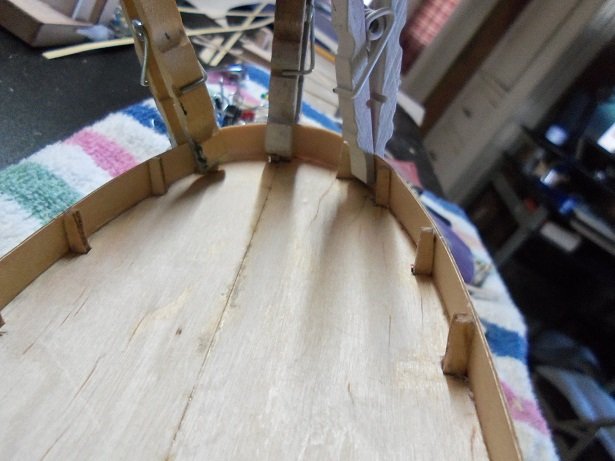
.......to further along what I did with the bulwarks.....yea, for a little while, the hull looked like a clamp holder. the top strip narrowed at mid ship, and I wanted to make sure I didn't have any areas that bowed outward. the 5 mm strips didn't take the curvature of the bulwarks very well. when I removed them all, the excess needed to be removed.....it was trimmed close and then sanded flush. this also trimmed off all of the posts, so that was a win / win. once completely trimmed down. it looked a lot better, although the stern still wanted to flatten. if there were a couple of extra posts, it might have taken the curvature better, but once the cap rails are on, I think it will pass muster. I haven't checked the cap rails for fit yet....I'll deal with it next. all around where the bulwarks met the hull was sanded to bring the 'fault line' flush......it came out very well. now to get the rest of the hull straightened out, to improve the overall looks of the hull. perhaps even get a coat of primer on her,,,we'll see
- 378 replies
-
- 14
-
-
- t78 norden
- billing boats
- (and 1 more)
-
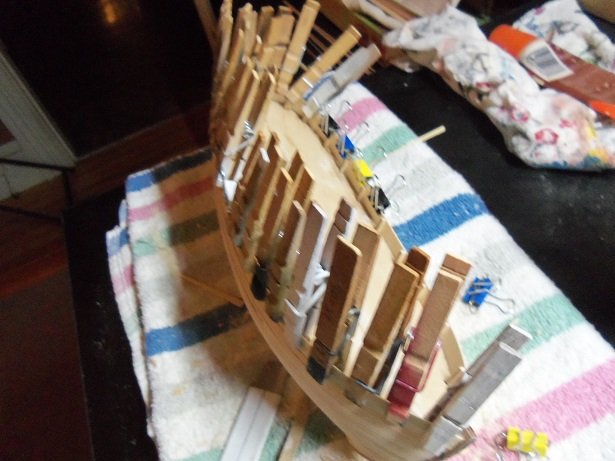
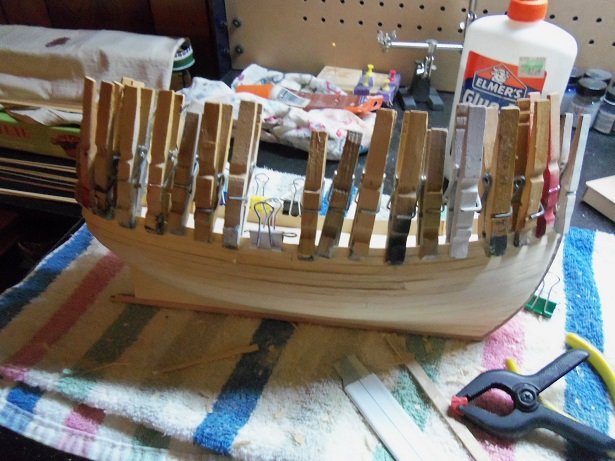
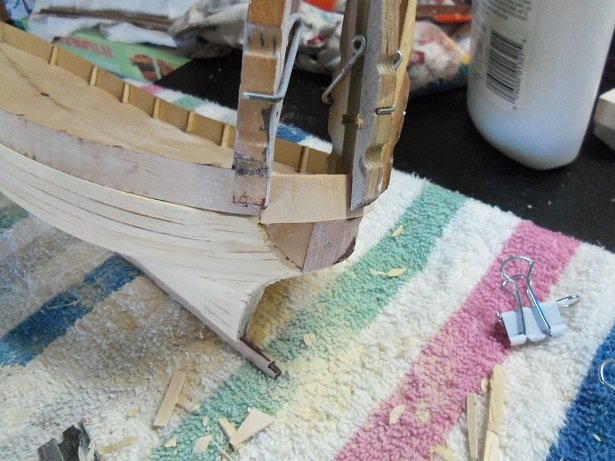
thanks for the kind comments.......even more the folks who came to look in......thanks as well I finished planking over the bulwark panels.........once sanded, will put that tiny problem to rest. I'm pleased the way it turned out. at the moment, it still looks like this: as soon s I remove the clothes pins, trim it and do a little sanding on the top, I'll know better. I'll save the rest of the hull sanding till I get the two stern plugs in place. thanks Pat.......yea, it will be paint. still in the raw stage at the moment. I've been itching to get the margins along the bulwarks on the deck...perhaps I can get that done too. it will make deck planking a lot easier thanks OC.......now I can get creative with the hull.......glad it done too thanks Lawrence......the Lasagna was great! the admiral wasn't too upset with my taste testing.....I'm her best barometer as to how good it is. I had a picture of the finished product......thought it best not to post it. nothing worse than food envy I'm halfway though with the worst part.....fleshing out the hull. I'll really be happy when I can get some paint on her thanks Mark.....the admiral is fine.........she gave me a hard time when I got home tonight......that's a good sign work wasn't too upset with me.....I got a write up {so what}. thanks for the good word. the Norden is a coaster of the 1930's. they mentioned seine netting, but that's not to say that it wasn't used for gill netting. the practice of gill netting goes back pretty far in history......and met with a lot of regulation through the years. gill netting was introduced in the US, as early as the twenties. a friend of mine, who is a driver for Wal Mart, is a relative of Albert Arnold, a fellow who gill netted all his life. he and his family came from Norway, bringing the art with them. they settled in the great lakes.......he and a group of others came to be known as the Michigan bears. later they migrated all the way to Gloucester Mass. Ken gave me a lot of information on the Plyllis A, Capt Arnold's boat {named after his daughter}. he wanted to see if I could make a model of her, but I needed more pictures to do a good replica. I haven't gotten the pictures yet the boat is supposed to be up in Kennybunkport, Maine, but I believe due to cost, it has since been moved to Gloucester Mass, as a sort of museum. one of these days perhaps I'll look into this some more.......perhaps I'll find something really appreciate your help...thanks!
- 378 replies
-
- 8
-
-
- t78 norden
- billing boats
- (and 1 more)
-
perhaps a more delicate approach.........scissors you can borrow my shoulder....I feel equally as saddened. do what I do.... I laugh at my own mistakes..clean it up, and start over again. it's all you can do my friend
-
stick up to far would be the better assumption........I think the way the first two are set in place looks better too. you've got the right idea as long as they don't spread the netting out of shape, they will look fine. that looks like the same sail cloth that I got with the Gothenborg kit. I may have to do the same thing when I get around to the United States and the Connie what your doing passes muster in my book
- 1,306 replies
-
- 3
-
-
- syren
- model shipways
- (and 1 more)
-
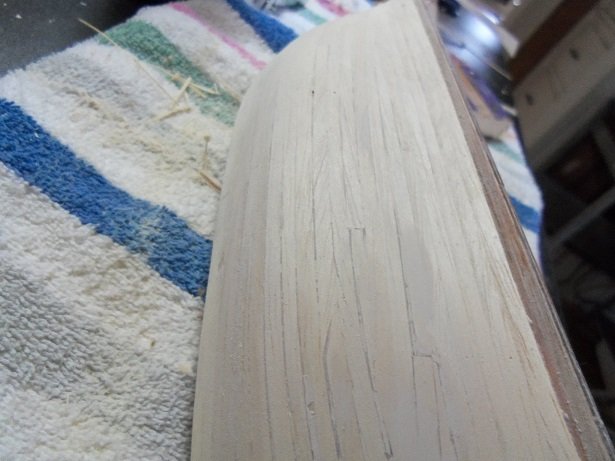
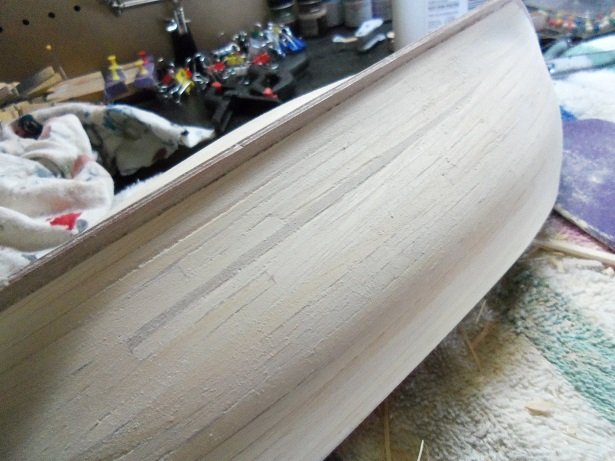
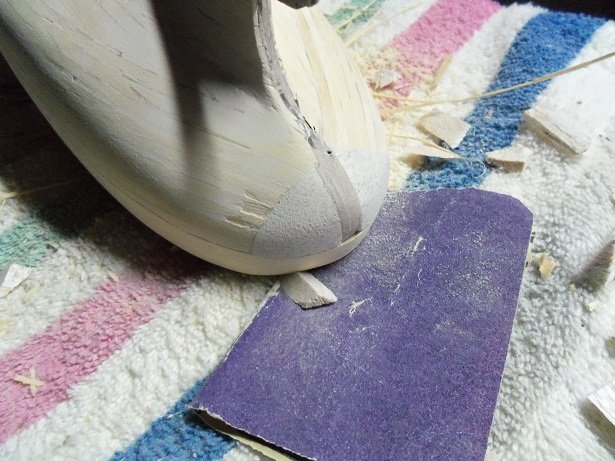
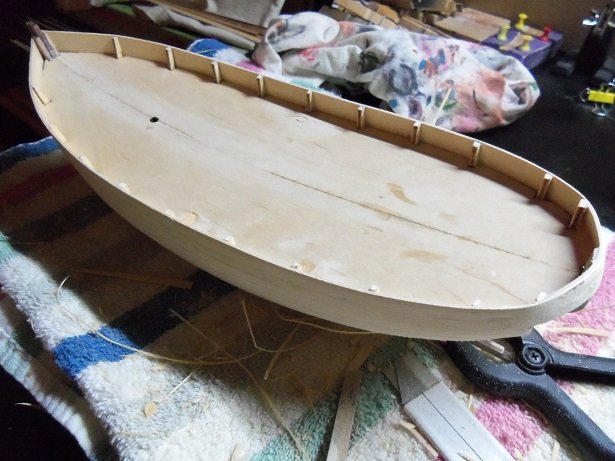
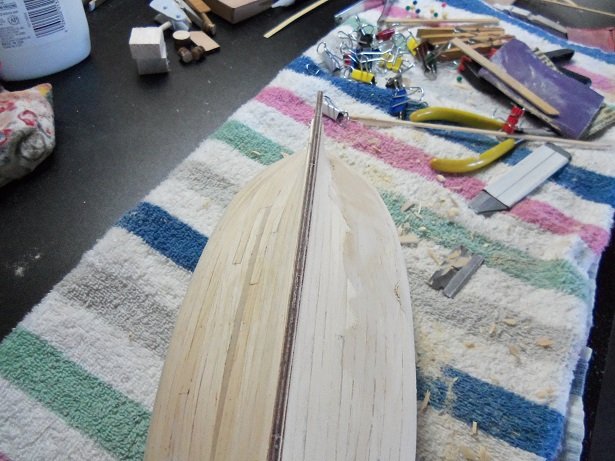
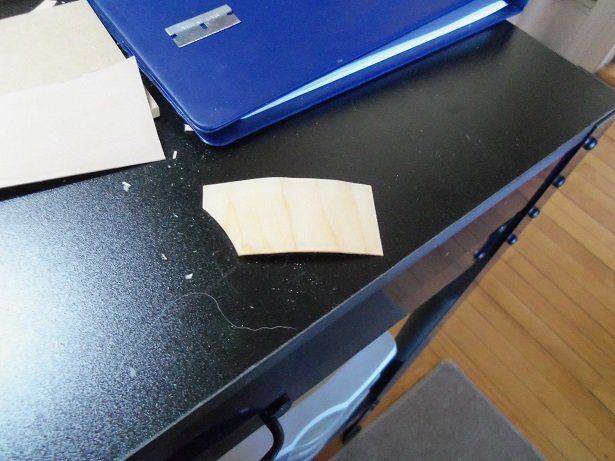
I was home today.........I was up most of the night taking care of a sick admiral. she's OK now........but not getting too much sleep, didn't do much for my morale, nor going to work.....so I didn't. just as well.......it's turned into such a hateful place. I figured that since I was home....I'd put the finish to the hull planking. it's almost closed now anyway, after making a little more progress from the last picture I showed of it. I did a little sanding after the hull was done......even began to add filler over some of the imperfections {I'll coat it completely later}. before I got too carried away with the sanding, I should take care of the outer bulwarks. as mentioned, these panels are not the same thickness, as the planking, leaving the two surfaces not flush with each other. I have some 0.5 mm thin strips that I will add to the bulwark panels, to make it so. looking like this may be the cure-all, I cut a piece of 1/32 flat stock, making sure the grain was going in the direction for flex, and soaked it for about 20 mins. cut down to a more applicable size, the open area at the stern was repaired later it was sanded to conform to the shape of the bulwark. once done, I was able to go all the way around with the thin strips, thickening the bulwarks. the top of the bulwark has to be trimmed, because it's 5 mm wide.......it took two and partial one to get to the top. I did the port bow area......after sanding it smooth, I see that it took care of the problem quite well
- 378 replies
-
- 19
-
-
- t78 norden
- billing boats
- (and 1 more)
-
decorations are looking splendid Nils.....really looks good !
- 692 replies
-
- 4
-
-
- eagle of algier
- chebec
- (and 2 more)
-
Cutty Sark by NenadM
popeye the sailor replied to NenadM's topic in - Build logs for subjects built 1851 - 1900
nice looking little boat Nenad- 4,152 replies
-
- 5
-
-
- cutty sark
- tehnodidakta
- (and 1 more)
-
did you use an airbrush? they'll give you a thin even coat......does take some getting used to. depending where you bought the kit, and how old the kit is, those dents can be popped back out without too much trouble. the Revell 1:96 series kits are really nice....they are the right size and they look good when built.....I built around four of them. back in the day, you could send a missing parts request to Revell USA, but I think they stopped honoring them.......Revell Germany still does though. I have extra sails for the Cutty......got two of thee three sheets by doing this. I noticed you used gray primer......good, but with today's paint selection, you could have bought flat black primer, which would have been a better choice. be careful with rattle can sprays too......some are automotive grade, and the harsher chemicals can eat or distort the plastic. try to stay with flats rather than gloss. the decks are the Achilles's heel of this series of kits......the section lines are the devil to get rid of.....even harder to line up. I've even tried adding a tab under one side, for the mating edge to sit on...to stitch them together.....any warpage, and they look out of sync I have a second kit of the U.S.S. United States...this one I made the decks out of wood and planked them {there is a log here...haven't touched it in a few years though}. the best way is to assemble the sections first, fill the mating line with plastic putty, removing the excess with your finger before it totally dries. when dry, rub it with a folded up cotton cloth....it will buff off the excess....paint to taste. I recently bought my second kit of the Constitution...not sure if I want to go through the trouble of making a wood deck for that one....they do make a wood veneer for this model {and for the cutty too}......I have a link somewhere in my bookmarks. I could swear that the picture of your sail sheets showed the jib sheet a lighter color that the other sail sheets. I had that problem too with the Cutty......the sheets I got to replace them were more of a beige color, than the ones supplied in the kit. I painted them in a flat light gray...and all sins were forgiven.......again....don't use an automotive primer or paint, or they will melt before your eyes. {actually they tend to shrivel up....been there } if you chose to go with the veneer decking ..whether you go with a decking kit: http://www.scaledecks.com/our-story.html {look in the shop} ....or one plank at a time {been there, done that}, you could use CA to glue it down. be careful how much you apply. check out contact cements too.
-
really nice fittings....details the yard very well chain instead of rope?
- 188 replies
-
- 2
-
-
- cutty sark
- billing boats
- (and 1 more)
-
look in some of the U.S.S. Constitution builds and even in Dafi's Victory project {look back in his log a bit for his take on them}. you could even cut some light cloth........rectangles 10 mm X 15 mm {seems like a good size}..........paint them with diluted white glue, roll them up and then fold them over {5 mm}....allow them to dry like that. my proportions may be off, so you might have to experiment a little. look at Usedtosail's Constitution log - page 30....
- 1,306 replies
-
- 6
-
-
- syren
- model shipways
- (and 1 more)
-
nice looking model you've built here I got this one for Christmas...haven't opened the box yet. thanks for the head's up on the fit problems, your log will come in handy when I tear into it
- 104 replies
-
- 1
-
-
- king of the mississippi
- artesania latina
- (and 1 more)
-
wale watching at it's best looks much better !
- 455 replies
-
- 2
-
-
- slightly modified
- greyhound
- (and 1 more)
-
looks very nice in blue......sea Blue? yep......that's the model I did of her. thanks for the compliment feel free to use anything in the log.....I added a few extras in there. I had a great time building her. I still have a good amount of international Orange really nice job with the painting....do you use an airbrush?
-
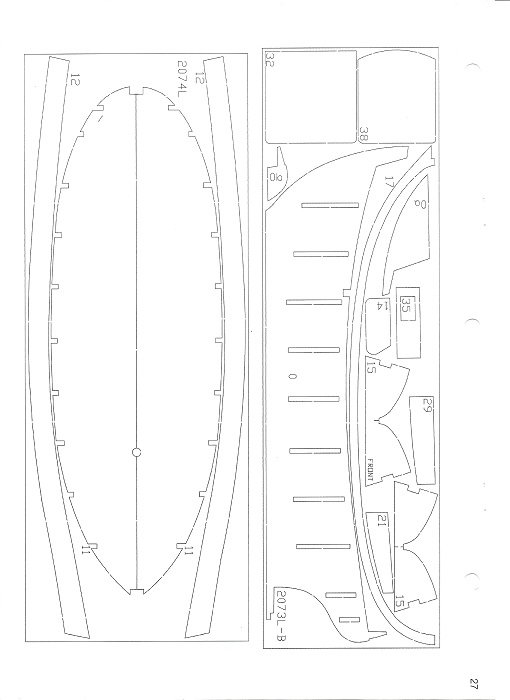
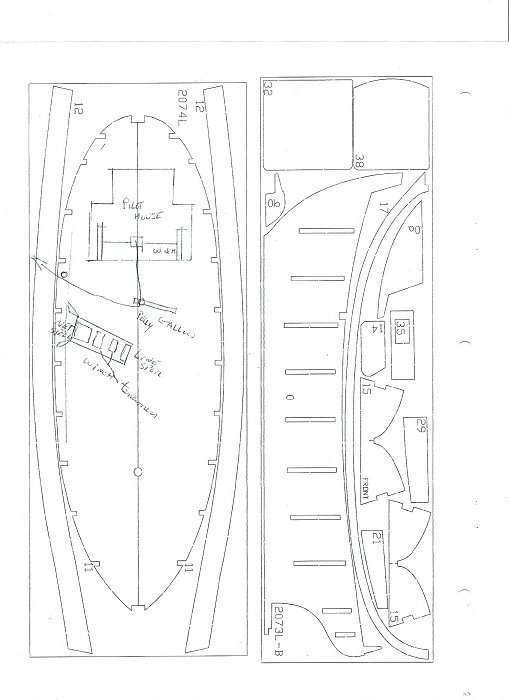
thanks for getting back to me Keith. I agree that there must have been a pulley affixed to the cap rail, acting as a form of sheave. but for a line to come from the winch pulley on the pilot house base, there must have been a pulley gallow set up yo redirect the line to the sheave pulley. I made a crude drawing using the parts diagram sheet. the deck ........from this I drew the pilot house, the proposed gallow with the pulley, and the sheave on the cap rail. I do admit, the winch pulley on the pilot house base is crude......all that is supplied is a drum with no guide plates on either side. I might try and do something with it, to make it look more like a spool. the round circle on the cap rail is the sheave. without a pulley to redirect the line, the line would not gather properly on the spool, having constant pull to the right......all of the line would gather to the right. now for the winch near the starboard bulwark....in front is a large spool......in the back is a small spool. I think the large spool is a net spool, ans the smaller one is a line spool. the two on the top act as tensioner spools, which aide in keeping the slack off of the line spool. at first I thought the winch on the pilot house base was the line that was used to drag the boat onto the beach.....but it seems unlikely, given where the line origination is starting from, then having to travel almost the full length of the deck...to a possible sheave at the bow. it would be super to see either one of these winches in action, so I could wrap my head around it better. I'm probably over thinking things, trying to give them some sort of functionality. I think it would add quite a bit to the model if i could.
- 378 replies
-
- 8
-
-
- t78 norden
- billing boats
- (and 1 more)