


popeye the sailor
-
Posts
16,007 -
Joined
-
Last visited
Content Type
Profiles
Forums
Gallery
Events
Everything posted by popeye the sailor
-
 besides.....you never know......they could have friends over
- 1,306 replies
-
- 6
-

-
- syren
- model shipways
- (and 1 more)
-
thanks for the info....I have Walther's bookmarked, as a matter of fact
-
hello Tom.......yea, it's coming back....more on the wet side though. the past cold snap was abnormal...made me hate my job even more thanks for the kind word on the model. once the other margin is in place, I can plot out the deck for planking and the real fun can begin. checked into your log this morning....love what your doing on the yards.....very fine work! thanks again to all who are following along
- 378 replies
-
- 5
-
-
- t78 norden
- billing boats
- (and 1 more)
-
hello JP.........recently received this kit. saw your log and went through it.......now you've got me dying to tear into this kit! you've done a superior job on her thus far.......the extra research you've done will come in handy when I do. looking forward in following along to see more. very nice work your doing!
- 131 replies
-
- 1
-
-
- finished
- artesania latina
- (and 1 more)
-
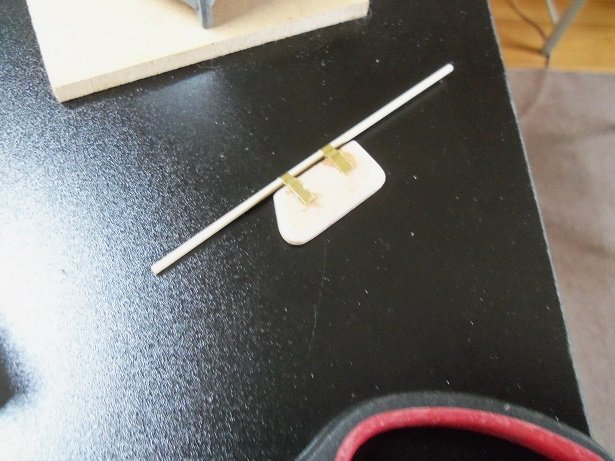
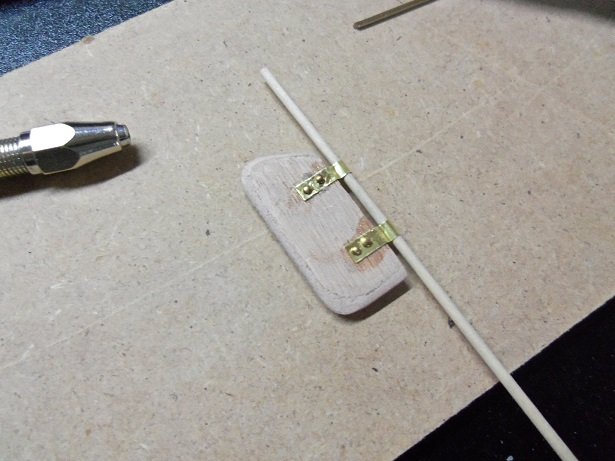
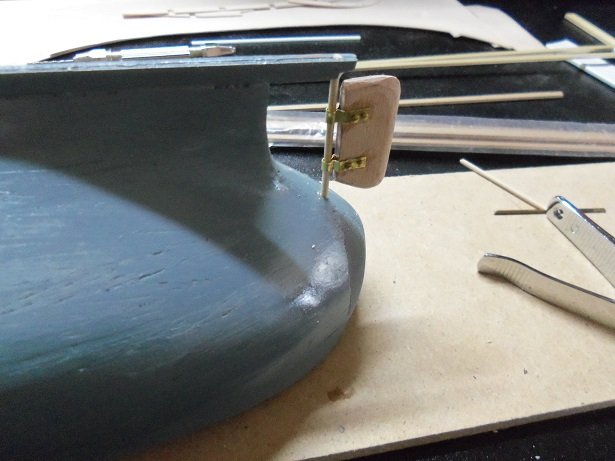
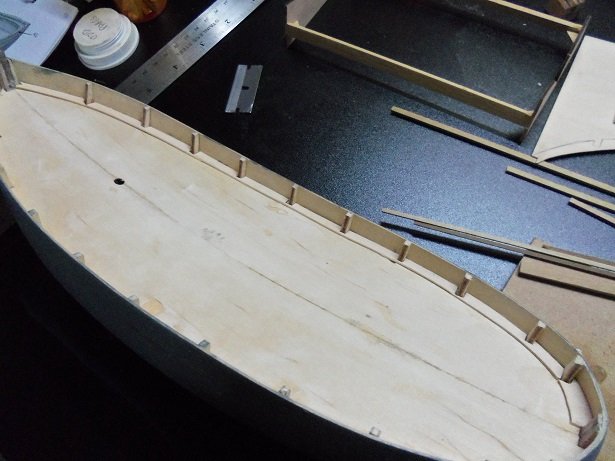
before I got pulled away to participate in the "great entertainment center switcheroo" I did manage to install the rudder and half of the deck margins. as with most Billing boats models, the gungeon parts are merely small pieces of mahogany glued to the sides of the rudder and shaft, to make it look good. I substituted this with thin brass strip. holes were drilled in the brass strip, to accept simulated bolts, which I used the cut off heads from 10 mm brads. the gungeons are not cemented to the shaft yet. the shaft was pushed through the shoe hole, through the gungeons, and then cemented into the hole drilled into the underside of the stern. this is when I realized that there was no prop in the kit........it looks like it needs something I was itch'in to see how the margins would work out.......I got one side in place. once I get the other side in place, I'll trim where needed, and add a bow and stern plate.....this will make planking even more easier I hope to get more done today. I've been in the 'plastic room' also, working on an ailing Batmobile.......the body won't fit correctly, due to an inaccuracy of the rear deck.....it won't fit into the cockpit opening. the instrument panel does {front}, but not the rear deck......sanding it down so it will fall into place lov'in the new arrangement!
- 378 replies
-
- 12
-
-
- t78 norden
- billing boats
- (and 1 more)
-
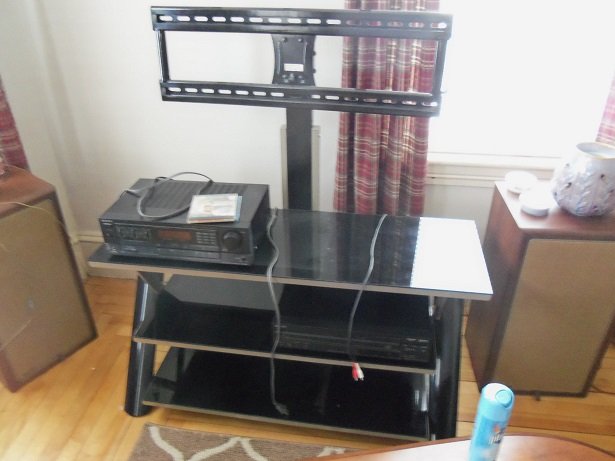
thanks Lawrence....the hull is always the worst part of the project {to me, anyway}. if it goes south, what have you to base the model on? happy to say that the hull came out well, and now I'm on to the "what can I do to this hull" part of the project. I've already come to the realization that this boat doesn't have an engine or prop......I though to add this in, but I don't have the parts. keen to note that the prop I do have comes from a 1:33 scale boat, and this one is 1:30.....there is a difference in the size of these two scales......too much for the interchange. I'm not going to stop and order parts. thanks for the kind word for the admiral......yes, she is back up to speed. in fact, she got her way yesterday.......she's been wanting to get a new entertainment center for the living room...the old one is open to dust collection and she's tired of cleaning it. I haven't liked many that she's shown me.......I hate pre fab furniture and their construction looks weak. we went to best buy yesterday to see if replacement legs could be purchased for our TV......I expressed my doubts, but she thought they could be purchased separately....*sure* we not only bough a suitable substitute for the legs....but a cabinet that fed her Frankenstein too! sorry if I digress.........if I didn't show pictures, the swing'in bachelors here might not understand........only those, who are veterans of matrimony would I'm happy, if she's happy thanks again Lawrence.........you asked! *****fade to music "mission Impossible"*******

- 378 replies
-
- 6
-
-
- t78 norden
- billing boats
- (and 1 more)
-
not to worry.......you've widened the field actually, it creeps up on you when you least expect it I wish I had a hull this large for my Thermopylae. just build until you run out of ideas.......or material {parts}.......whichever comes first!
- 79 replies
-
- 1
-
-
- marisstella
- barque
- (and 1 more)
-
the redo looks super, as well as the detail you added to the structure.......nice progress I see you've also been working up the forward armament - sweet!
-
there's always the touch ups at the end of the project.......results this good tell us you've got plans for those mere paint chips this structure is no different....such superb workmanship the PE additions really detail the structure and accents the molded detail you decided to leave. your log is a joy to watch
-
that little bit of wonky will never be seen.........nice work Was the deck planking supposed to be diagonal? I'd like to know about the figures as well......the admiral thought it would be a nice touch
-
never too late to start a log.......I think you covered it quite nicely your off to a very nice start. seeing that I received one of these kits too {the A.L. kit}, I might see if there is a site dedicated to these vessels. they are not uncommon on the site....seems quite a few folks have built one. I'll look forward in seeing what you do with this fine model
-
hull looks really good,,,nice job with the coppering
-
I find that the slips work for a short time.....once the frame starts being handled, it's hardly in it mine usually end up on a towel, especially during the faring phase. I haven't updated my signature......if I listed them all, I'd likely scare folks! waiting for paint or cement to dry is usually my biggest downfall
- 79 replies
-
- 1
-
-
- marisstella
- barque
- (and 1 more)
-
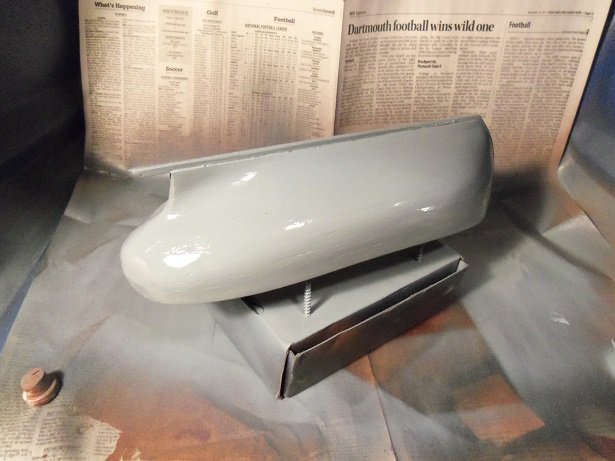
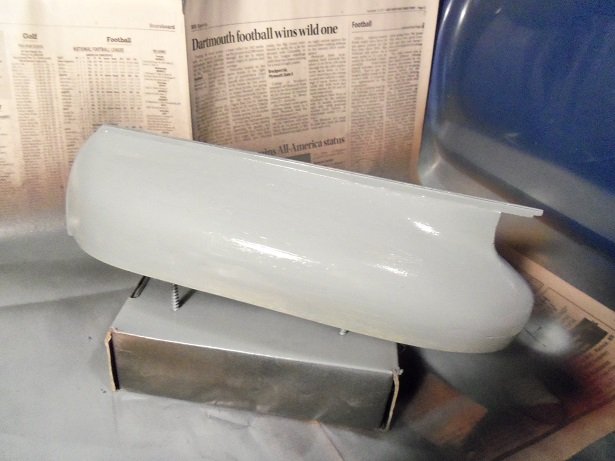
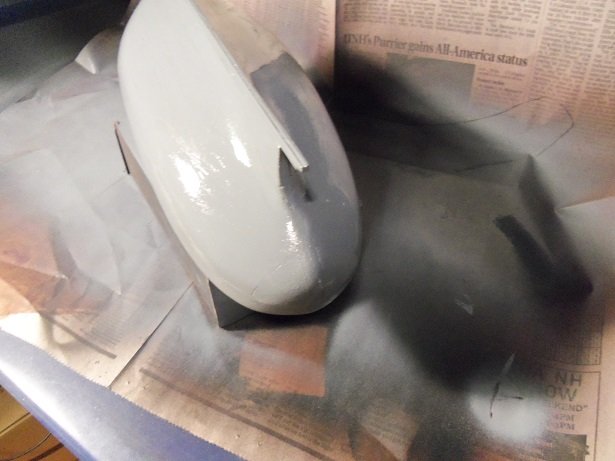
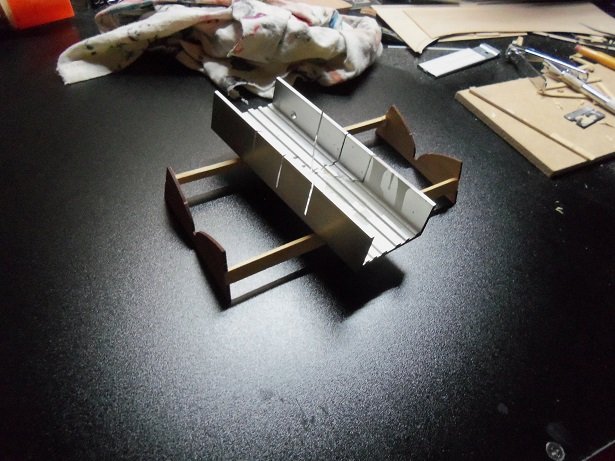
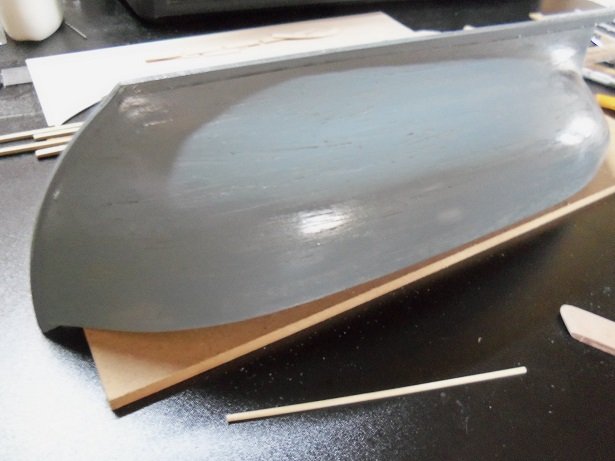
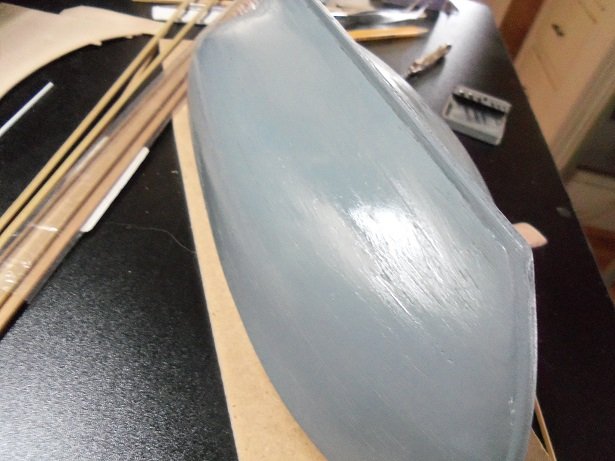
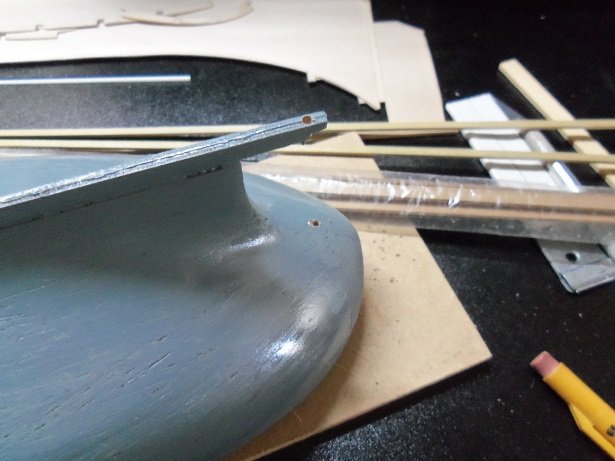
OK.........we have drum roll! 90% of the sanding is done.......there are a few tiny imperfections. I will take care of the tiny cracks and gaps at paint time, which won't be too much longer now. something I realized last night........there is no engine.....no prop! I was thinking of giving 'er one.....but all I have in my inventory, is a 34 mm two blade prop....too large for this model. I failed to get any pictures of the finished sanding......the hull went into the paint booth too fast the hull is still wet. the first passes, I had to wipe 'er down......too slow on the stroke and had runs. then I found out that this was a gloss paint.....no matter. by the time the hull goes for the color, I will sand 'er with a fine paper to hopefully get a glass finish. there's a few things I want to do before that happens....rudder, rub rails and the outer stuff. my usual next step at this time is to assemble the stand. not bad for having the glue bottle land on it .....don't ask how......even made the admiral jump! the use of gloss paint lengthened the drying time.....took all night to cure enough to handle. I did manage to drill the rudder holes though and start to assemble the rudder, but Gibbs wanted to go watch TV and wouldn't let it go until I complied. not that the admiral hasn't voiced her opinion, but I now have a cutting mat, so I don't hack up the table top. I still have the one from the AmericA build {I think}.....I'll bring that one to the table as well. the hull was a tad bit tacky when I brought 'er to the table. I also cut some wedges of wood to strengthen the corner joints on the stand. I still need to paint it and put some felt in the cradle. I'll make a plaque badge for it too.
- 378 replies
-
- 17
-
-
- t78 norden
- billing boats
- (and 1 more)
-
neat that you can flip it over and see the inner workings.......of course, it won't be seen when cemented in place {it will be totally shielded} amazing work Danny...fortunate that you at the point now where you can scratch make parts. wonderful job!...even with the movable aspect
-
did you catch my bug? awesome looking hull frame I have a Billing's slip.........like your better.....measurement lines and all! gonna be a large model, no doubt about it.......pleased to follow along {gotta catch up on your other projects first }
-
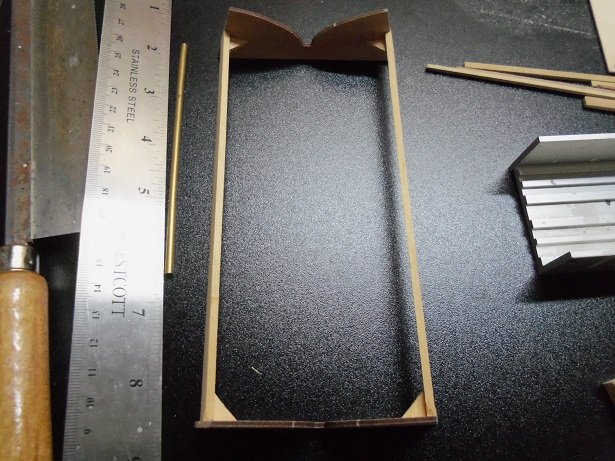
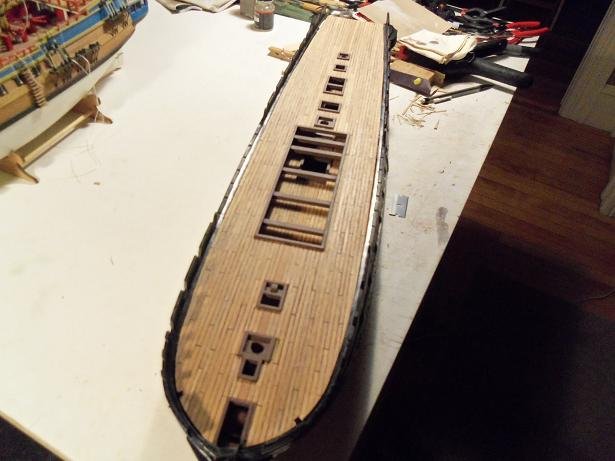
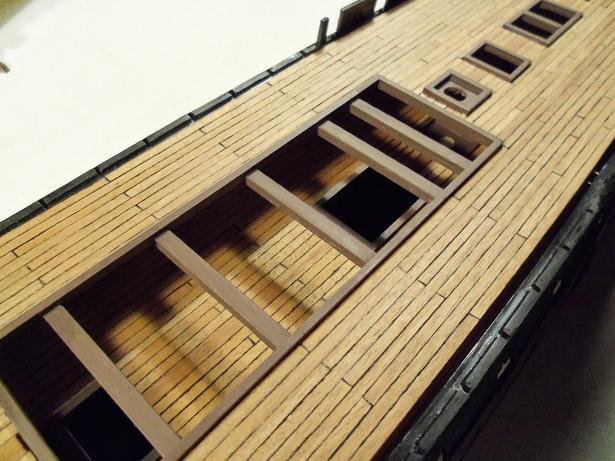
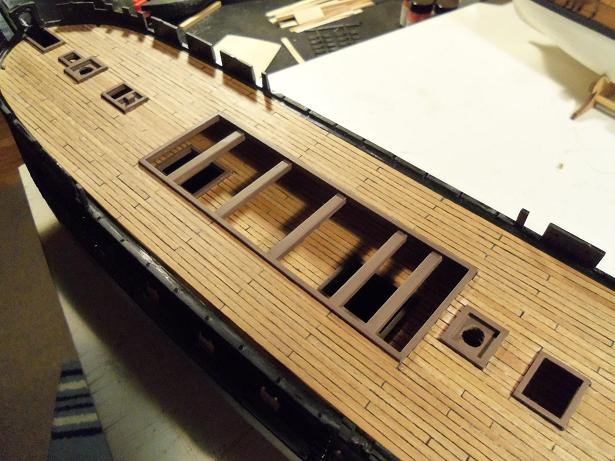
I wonder if they make a contact paper in wood grain........the scale of the wood pattern might be in question though. if you go with 0.5 mm thick wood strip, you'll be dealing with strips that are 2 mm wide......it will be a time consuming task. as mentioned.....go to your favorite hardware store and ask about contact cements. tell 'em what your using it on, and I'm sure they can help you looks nice cliff......be on the alert for it separating. I've used white glue on plastic before and it didn't hold. hope you have better luck. here are a couple of pictures of the decks I made for the United States. these are completely made of wood...wood decking planked with 0.5 X 2 mm annegre wood strip. I haven't been back to this project since 2014......the last decks I made warped on me and I had to redo them. these I have in the closet clamped to the plastic ones, so they don't lose their shape.
- 89 replies
-
- 4
-
-
- constitution
- revell
- (and 1 more)
-
I use the thin stuff......yea, you gotta be careful I've heard of the mechanics, but have not seen it......it will interesting to see. the Thermopylae I'm working on has a yard that is like this......not sure how I'm gonna do it yet {small scale}. really neat how your coming along on this vessel
-
one word OC.........no awesome paint work........now she looks seaworthy
- 455 replies
-
- 4
-
-
- slightly modified
- greyhound
- (and 1 more)
-
superior job on the aircraft.........they really dress up the deck can't say enough on how nice she looks! one of these days, it would be a real eye pleaser, if you took us on a guided tour of that wall of yours if you've done as fabulous a job on the miniatures, I can just imagine the gems you have on display.!
- 82 replies
-
- 2
-
-
- carl vinson
- trumpeter
- (and 2 more)
-
same scale but different size vessel......still in the ballpark
- 1,306 replies
-
- 4
-
-
- syren
- model shipways
- (and 1 more)
-
they look fine Jesse........they give the sailors some 'duck'in' room. mass produce at will! bow spirit and boom looks super. your mov'in right along...so good to see
- 1,306 replies
-
- 5
-
-
- syren
- model shipways
- (and 1 more)