-
Posts
16,007 -
Joined
-
Last visited
Content Type
Profiles
Forums
Gallery
Events
Everything posted by popeye the sailor
-
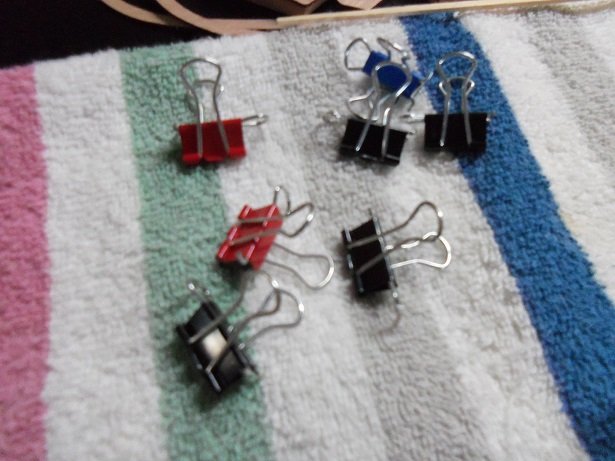
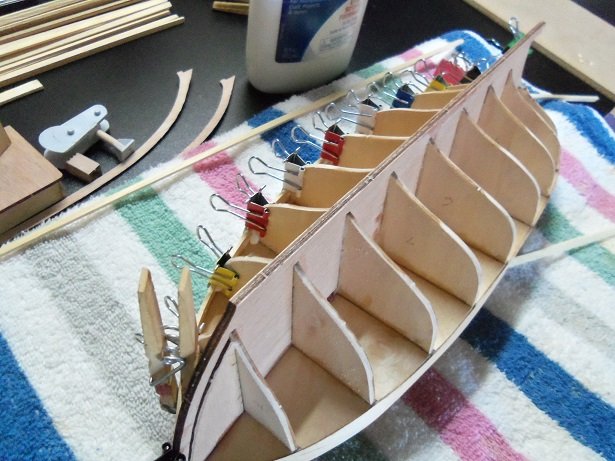
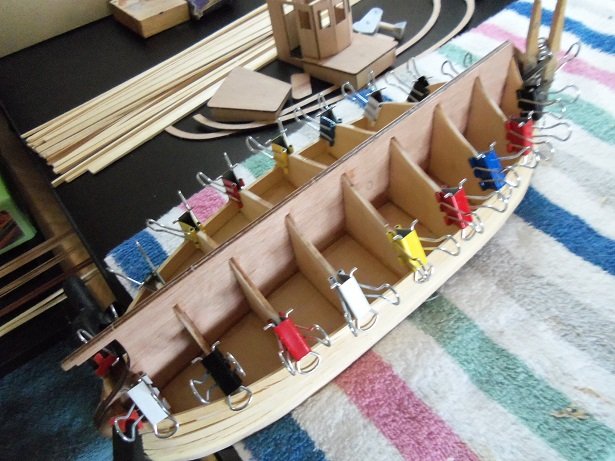
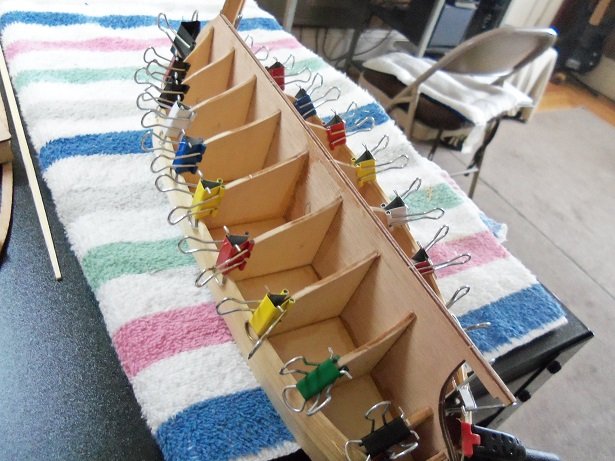
hi there.....HO! Happy New Years to all you fine folk! it's been frigid as all get-out up here in the Northeast.......we should see a break come Weds and Thurs though, just in time for some more snow the holidays are now past......the tables have been re-set up...and I can resume modeling. just after Christmas, I began the planking on the Norden. I had bought some of those paper holding thingies, and fashioned them the way I had seen another fellow do them....looked like a super idea. the planking went well.....in the beginning, but I'm finding that the strips are splintering here and there. I should probably soak the whole lot .....that may stop this from happening. then again, there will be paint, so a little filler isn't gonna hurt. the planking has been slow......short stints at the table..I keep gett'in pulled away. I got more done by the end of Christmas week. I'm hoping to get the hull planked this week.......but I've already made a few problems for myself. the stern bulwark got somewhat crushed by a rogue clamp....I will likely cut that part out and make a piece to fit in it's place. I've also been cutting out those margins, but they are proving to be a bit of a problem as well. I should have made them a little bit wider. we'll see what happens
- 378 replies
-
- t78 norden
- billing boats
-
(and 1 more)
Tagged with:
-
hello JP......good of you to pick up the gauntlet......my condolences about your friend's passing. I built this model as well.....had similar problems with the cap rails not fitting right at the stern. your off to a great start.....looking real good kinda curious about the openings for the companionway and hold....as well as the hole in the back where the pilot house will be......they were not cut out in the deck platform. I did field a few questions about the aft mast though......I had made a platform for the shrimp cooker, drilling a hole in it for the mast. I added a bracket for it near the pilot house roof, for a firm anchor. looking forward in seeing your progress
- 51 replies
-
- krabbenkutter
- billing boats
-
(and 1 more)
Tagged with:
-
I'm sure there are many.....some may even be building a different model, that will be more than willing to lend a hand. you'll find that folks here are really nice. by looking in on similar projects, you'll get ideas on how to proceed. there are even tutorials that can break things down step by step...you can even find cool things on you tube. anyhow.....welcome to MSW. I hope you enjoy
-
awesome job so far........very nice to see her at this point! hard to believe this is scratch built. done very well in the detail dept too
- 83 replies
-
- melvin
- blue devil
-
(and 2 more)
Tagged with:
-
she looks super Daniel.......glad to see were able to finish with n more trouble. congratz on the little one....2018 is going to be full of surprises already ! congratz on a job well done!
-
super progress Michael........glad to see your back at it. hope your over the bug......terrible to feel miserable during the holidays
- 749 replies
-
- albertic
- ocean liner
-
(and 2 more)
Tagged with:
-
the 'Envy' printer........we have that one linked between the admiral and I. I haven't looked into it's properties, nor have I done any real printing with it. I'll have to check it out. I also have two different photo shop programs.....the one I have in the computer at the moment is limited...I only use it to resize pictures. as for the HP F2480 printers, I've been using landscape and portrait.....I'll look into that. thanks for the head's up
- 82 replies
-
- carl vinson
- trumpeter
-
(and 2 more)
Tagged with:
-
I agree with everyone Jesse......the netting came out great! I'm sure you plan on adding the rolled up hammocks......wait till you do that to make a final decision. very well done my friend!
- 1,306 replies
-
- syren
- model shipways
-
(and 1 more)
Tagged with:
-
WOW Grant! the first video didn't work for me, but the second one did! she looks awesome on the water........puts up quite a spray! I think Barbie was a little scared though.....Ken.....you speed demon, you!
- 339 replies
-
- dumas
- Chris-Craft
-
(and 3 more)
Tagged with:
-
looking super Patrick.......once the hull refinishing is done, she'll look sweet! can't see much more you could add to her.....except the kitchen sink still need to install the engines.
-
swivel guns.......so it wouldn't do to simply drill openings through it. really great progress Nils.....the aft deck is very nice
- 692 replies
-
- eagle of algier
- chebec
-
(and 2 more)
Tagged with:
-
gill netting is a possibility Bill.......there is a reference to it later on in the career of these boats. I've yet to see one that is set up for use or rigged in any way.....love to see how it looks. the winch set up om the pilot house base is another aspect I'd like to see in some functional way. these boats are pulled up on the beach when not in use.....I wonder how that pertains to these two winches, if any. a lot of questions......haven't had a chance to resume research on them. seine netting was the main operation for these boat in the 30's glad to have you aboard Pat.......I know.......So many projects, so little time I got three more ship kits this year......one in particular is the Nordkap, the very first model I built. I'm faced with the same challenge......not laser cut, and looking for the fitting kit.....it's older than the first. I sent an e-mail to Billing / Danmark, looking into the possibility of getting the kit, but I also inquired about another ship that is similar to the Nordkap......the Progress. I vaguely recall, but I believe the article I read stated that it was a kit produced by Billing Boats.......if it was, it would be a very old kit {if ever found}. good to see you OC...glad to see you made it through the holiday well started to plank the hull.....hope to have an update soon. New years is coming up.......Wally decided that we have too much fun on the holidays, so they've deemed New years day...and Thanksgiving next year as working days. it's bad enough that they no longer offer paid holidays, but now the only one they observe will be Christmas day. pretty bad for a company that supposedly touts family, as most important. I've elected to take New years day off, and of course, pay myself for it......sad to think this is what the current trend is now.
- 378 replies
-
- t78 norden
- billing boats
-
(and 1 more)
Tagged with:
-
good to see your back good sir.........looking forward in seeing more
- 188 replies
-
- cutty sark
- billing boats
-
(and 1 more)
Tagged with:
-
great progress Glenn......the roll up sail is a nice touch. you did that very well
- 101 replies
-
- L Toile
- Billing Boats
-
(and 1 more)
Tagged with:
-
I have an HP deskjet F2480. I use the Testors clear and white decal film. the 'decal it' decal standard edition program is pretty good....it allows me to import images, but the transparency issue can be sort of a bugger. these printers not printing white is another, but with a bit of brainstorming, I've done well substituting the white decal paper. most ink jet printers max out at 600 dpi, which might be part of the issue, but I've found that using the white decal paper, gives the image a base backing, and looks much better. the down side is that the decal needs to be trimmed, to remove all of the unwanted white areas...especially if it is to be located on a surface other than white. you must use a photo shop program superb job!
- 82 replies
-
- carl vinson
- trumpeter
-
(and 2 more)
Tagged with:
-
how do you make your decals....do you use a program? I have the Testor's 'decal it' decal program, but it seems to have a transparency issue.
- 82 replies
-
- carl vinson
- trumpeter
-
(and 2 more)
Tagged with:
-
truly amazing model....how long is she? very well done with the lighting and aircraft......it's a diorama within the model really nice work!
- 82 replies
-
- carl vinson
- trumpeter
-
(and 2 more)
Tagged with:
About us
Modelshipworld - Advancing Ship Modeling through Research
SSL Secured
Your security is important for us so this Website is SSL-Secured
NRG Mailing Address
Nautical Research Guild
237 South Lincoln Street
Westmont IL, 60559-1917
Model Ship World ® and the MSW logo are Registered Trademarks, and belong to the Nautical Research Guild (United States Patent and Trademark Office: No. 6,929,264 & No. 6,929,274, registered Dec. 20, 2022)
Helpful Links
About the NRG
If you enjoy building ship models that are historically accurate as well as beautiful, then The Nautical Research Guild (NRG) is just right for you.
The Guild is a non-profit educational organization whose mission is to “Advance Ship Modeling Through Research”. We provide support to our members in their efforts to raise the quality of their model ships.
The Nautical Research Guild has published our world-renowned quarterly magazine, The Nautical Research Journal, since 1955. The pages of the Journal are full of articles by accomplished ship modelers who show you how they create those exquisite details on their models, and by maritime historians who show you the correct details to build. The Journal is available in both print and digital editions. Go to the NRG web site (www.thenrg.org) to download a complimentary digital copy of the Journal. The NRG also publishes plan sets, books and compilations of back issues of the Journal and the former Ships in Scale and Model Ship Builder magazines.


