HOLIDAY DONATION DRIVE - SUPPORT MSW - DO YOUR PART TO KEEP THIS GREAT FORUM GOING! (Only 36 donations so far out of 49,000 members - C'mon guys!)
×


popeye the sailor
-
Posts
16,007 -
Joined
-
Last visited
Content Type
Profiles
Forums
Gallery
Events
Everything posted by popeye the sailor
-
 most kits will produce a hull frame like this. I have hardly any experience in making frame using Cad or similar programs, so this is the best method for me. thanks for the good word
 -
cool dragon!
-
thanks Pat.......and all who hit the like button. I put the stairs like that to save on deck space........and it will make that bulkhead wall look busy appreciate the good word!
-
super shine........really makes the grain pop! I really like the design.........are you going to have sails as well?
-
sweet job on the winches Nils........they really do look quite functional.......super detail. sorry to hear about your disc problem......I can sympathize my admiral has been disabled for quite a few years due to a fall. {back and shoulder}. lately, I've been getting pains in my lower neck and left shoulder....I told the admiral about it........she says I'm a pain in the neck anyway hope you get better!
- 2,625 replies
-
- 5
-

-
- kaiser wilhelm der grosse
- passenger steamer
- (and 1 more)
-
Cutty Sark by NenadM
popeye the sailor replied to NenadM's topic in - Build logs for subjects built 1851 - 1900
your making some great progress Nenad.........glad to see your world is returning to some sort of normalcy cute new friend too........- 4,152 replies
-
- 5
-
-
- cutty sark
- tehnodidakta
- (and 1 more)
-
look in the sofa..........it always finds it's way between the cushions :D Majellan is really coming along! the furnishings look great....quite a bit of detail there a really super job so far!
-
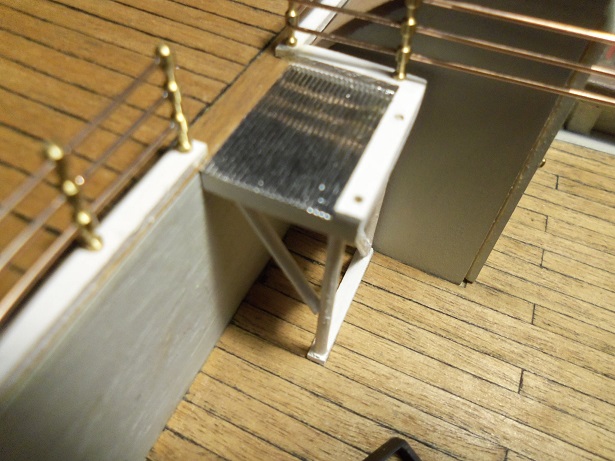
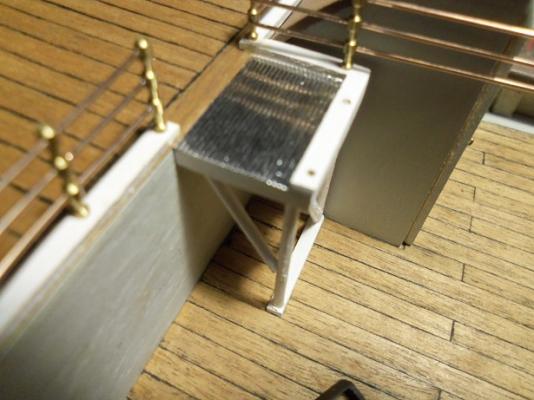
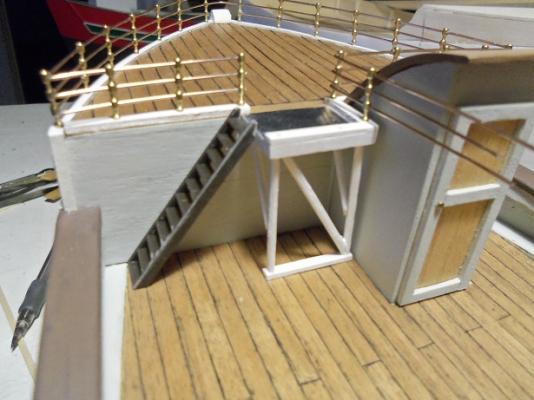
thanks Keith and Patrick......and all who hit the like button. it's working out well that I've been able to keep the railings as a 1 piece 'part'. I did go a little bit further, before I left to go to the airport........I forgot to snap a shot. there will be more to it, but here is the basis of my idea. I have some model railroad siding for structures. it's got rows of tiny ripples, like aluminum siding......I thought it would look good as a non slip surface........like grating or something like that. I plan to do the treads on the stairs with it, but make the pattern go across the tread. should I paint it to more of a deck color, or something? I will add something to the outside edge of the stairs.......some type of railing.
- 747 replies
-
- 14
-
-
interesting concept for hull construction I noticed that you didn't rib out the bow or stern. amazing that you were able to retain the shape, by simplt using the center spine so cool! gives it that 'Capt. Nemo' flare.
-
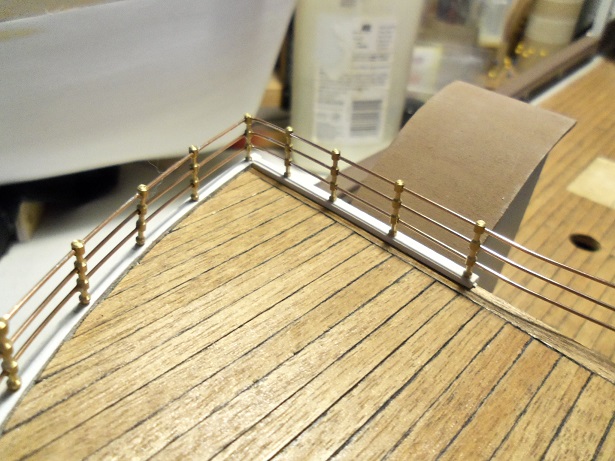
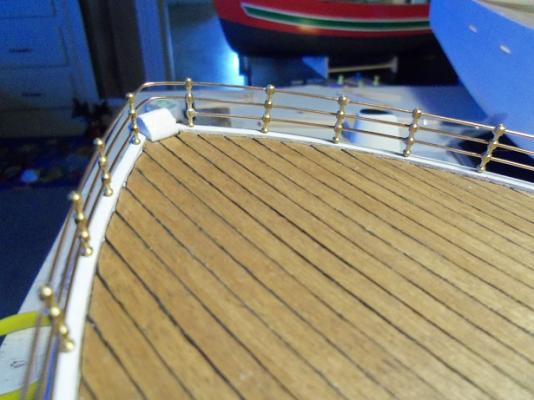
hello John........always good to see you thanks for the good word. in the last picture, you can see how I adjusted the port corner of the railings. it passes in my book thanks again
-
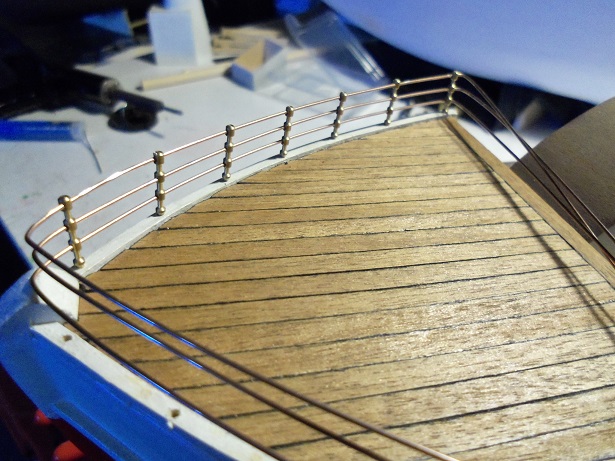
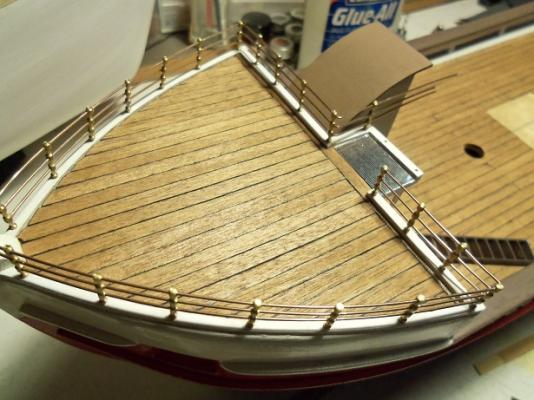
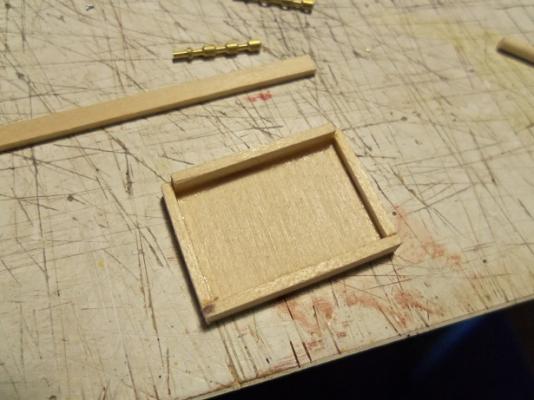
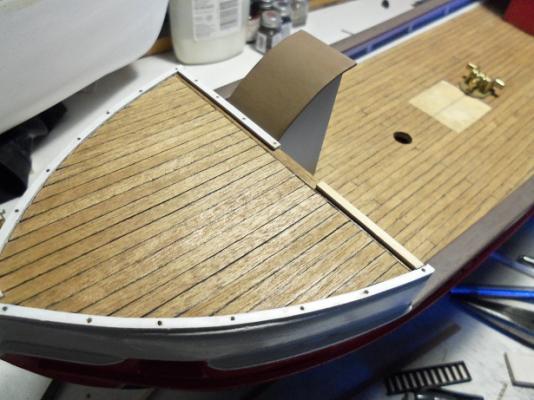
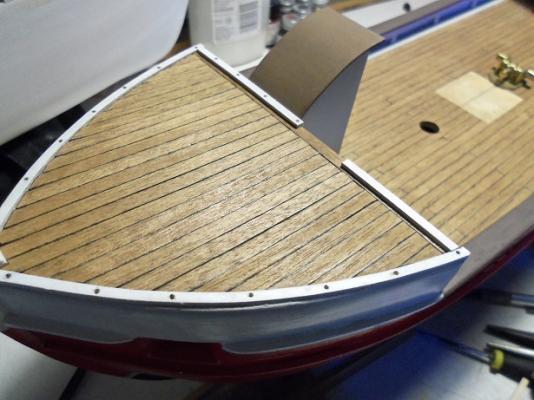
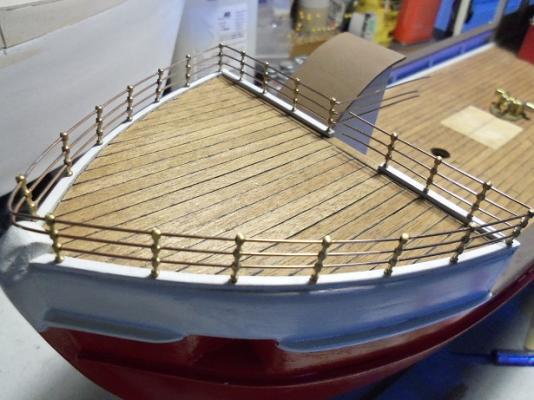
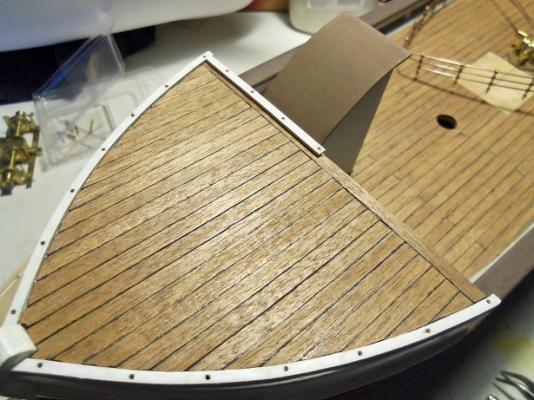
so now it's a toss up........do I want to plank the aft deck......or continue what I'm doing here? I have a neat idea going....so I'll just continue. I had finished assembling the top landing for the stairway. the underside of the landing was boxed in, so I can add some supports to it. now that I had the size of the landing figured out, I could add the other side of the fore deck border, on the deck. it's just fitted in place for now. I had bought that package of small diameter dowels......they will make the perfect supports for the landing. I even added in some bracing. after I added in the front support brace and the borders for the railings, it was sanded and dry fit. clean it up a bit more and it will get paint. the border on the fore deck was painted and cemented in place. holes were drilled.......the railings on the starboard side were bent to follow the companion way. these will continue on and around the landing. the post side will terminate at the end of the run. I sorta goofed a little on the port side.......I did manage to straighten it out a little, but the turn of the railing is not perfect. I think to fix it further might cause a bigger problem.......so I'll leave it the way it is for now {or until it bugs me enough to fix it}. the landing is painted and put back in place to check where to drill the rest of the holes for the railings. I'd have gone further, but >sigh< it was time to go to work. more tomorrow


- 747 replies
-
- 11
-
-
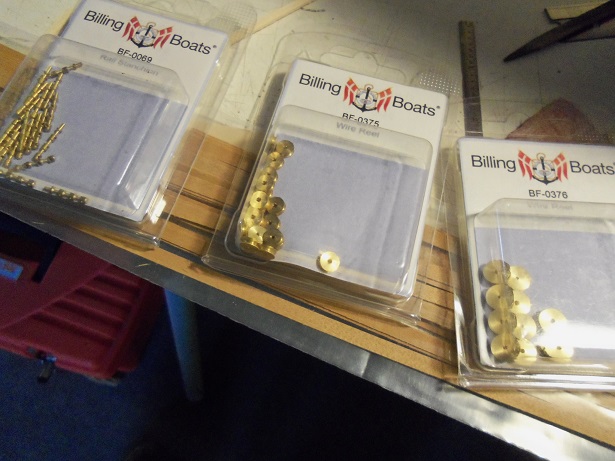
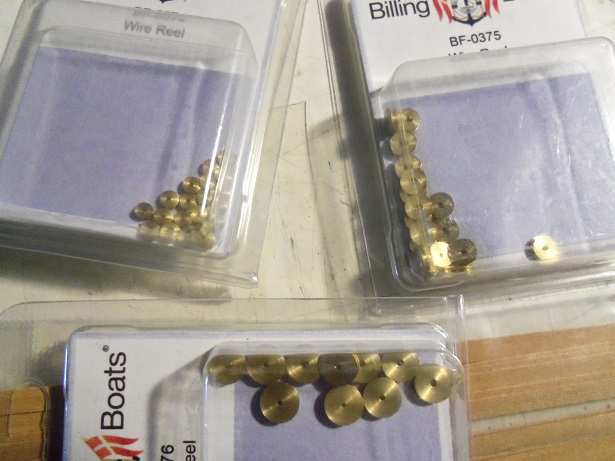
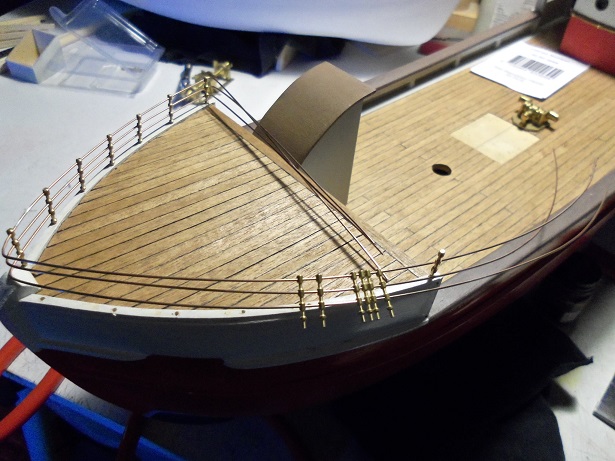
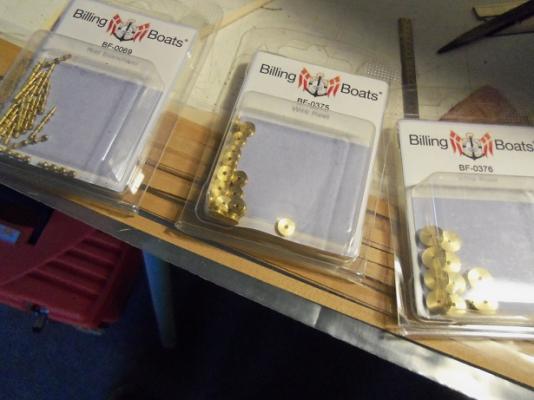
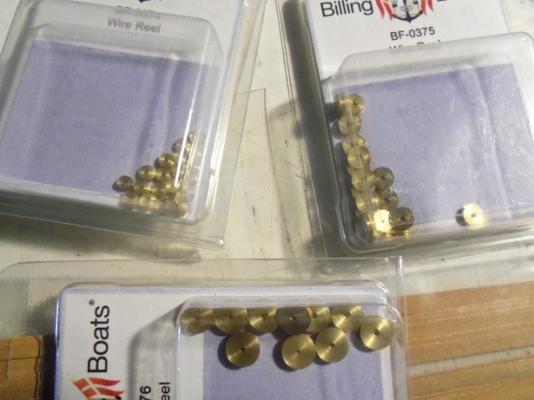
I made some more progress with the trawler.........I would have done more, but I got a call to cover the night shift at the airport. I had to stop.........mid thought here is what I've done so far............. I had gone a bit further with the railings, than what I had left off with. I had put the railing back in place, and then trimmed out the bottom rung at the bow tip. it sat much better once I did that. without taking a picture, I removed the railings again and laid the border along the bulkhead behind the companionway. with the railings back in place, you can see how I trimmed the bottom rung. and the new border is populated with the railings. I did get my order from Billing USA.......I got it on Saturday. I got some more 15 mm, three hole stanchions, two different sizes of pulley reels, and the aft deck planking so, now I have three different sizes of pulley reels.......4 mm, 6 mm, and 8 mm

-
when I do Patrick......I'll post it in the Holiday harbor build.....fitting, I suppose I had an interesting thought about the Tree Boat.......now I can't wait to get on with the deck work. I'll dig up the earlier comparison ..........you'll see.......gotta wait thanks for the good word my friend! *hint*..........soon.........and I hope it sooner than I think
-
that was the gist of the initial experiment. if by 'MM' you were referring to the M&M boat.......that was to be another shrimping boat. the trawler was {and is} the third. the second experiment kinda misses the goal.....although the Andrea Gail was a wonderful turn of events. I'll be doing a comparison soon with the four hulls, just to show how they've all progressed. this process is great for the person who don't have a lot of cash....replicating hulls is a good way to get your money's worth from a kit. the goal that I speak of, would be a multi build of all known ships. it's not hard to take hulls and outfit them the way you want. I have another project coming up......I made two other hulls from the original one. they will all be known ships........at 1:65 scale. they will all be of known ships......should be interesting when I get to it. thanks Pat for the kind word, I'm glad your enjoying the build
-
I can't see the pictures........but I remember them I wish I was better with the scroll saw........it was a new piece of equipment. thanks Keith!
-
thanks to everyone.....and those who hit the like button. the three rung rail looks good on this vessel.......I do kinda wish they were a bit higher. as you might know, Billing Boats has been sold to another company. so far, I don't know who....but the new website was due to be available March 1st....so far I haven't seen it. I get my parts from Billing USA, which is now a sub division of Ages of sail.......they are still running Tom's old site. Tom even posted a couple of condensed build logs, of a couple of my builds, on this site. I'm glad and proud that they are still available for folks to see. due to what going on at the moment, I'm sure Roger's supply of Billing's goods, is starting to wain. hopefully, the new revived company will be up and running soon. I got my order today, so the aft deck can be planked........I really pleased about that. unfortunately, it will have to wait for my work week to be over. thanks Jens this build is the other half of my initial experiment in replicating hulls. The Mary Ann is the same hull used in the Cux 87 kit...it's what gave me the idea. I saved the parts panels for the hull and made two hull frames from it. in the scratch build gallery, you can see the M&M Fun Ship....that was the first hull frame. with the Syborn, I duplicated bulkheads to make the ship longer........it's about 100 mm longer than the Mary Ann. I did the same with the Boulogne Etaples kit, to create the Holiday harbor boats. sad that one of them broke away to become the Andrea Gail........but I'm very happy with it, since I had thoughts about the A.G. when I built the Boulogne frame....the A.G. turned out just like I thought it would I have another experiment in the works, but my present roster keeps me from bringing them out. soon......very soon. it should be very interesting. I hope you follow along.......I love the work your doing. hello John......pleased to see you here. love the work your doing on the river tug...hope to see more soon
-
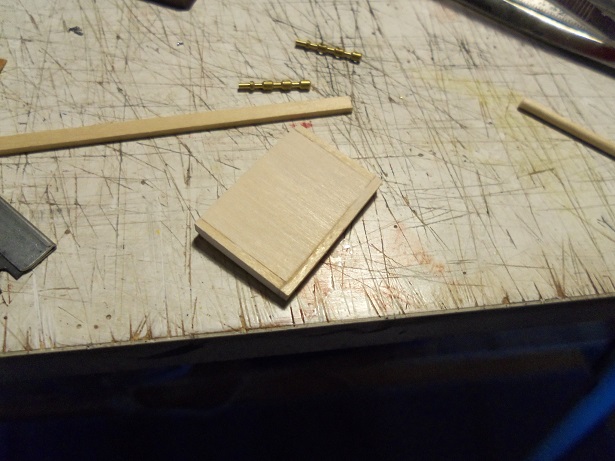
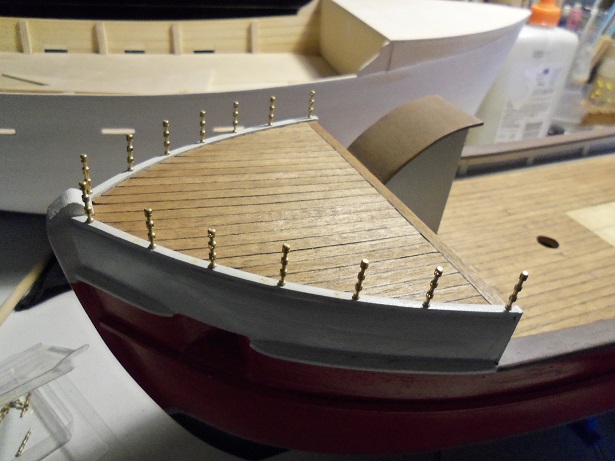
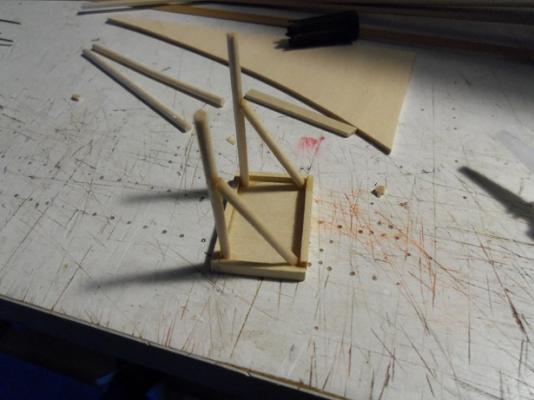
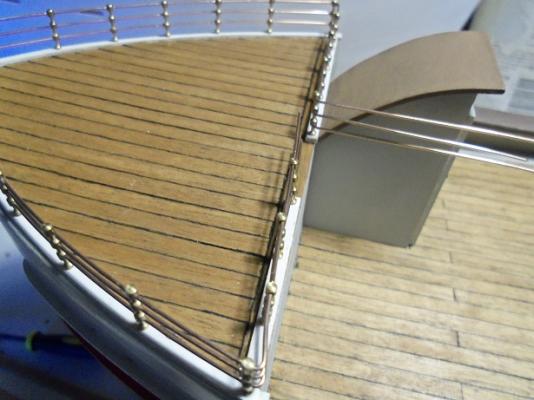
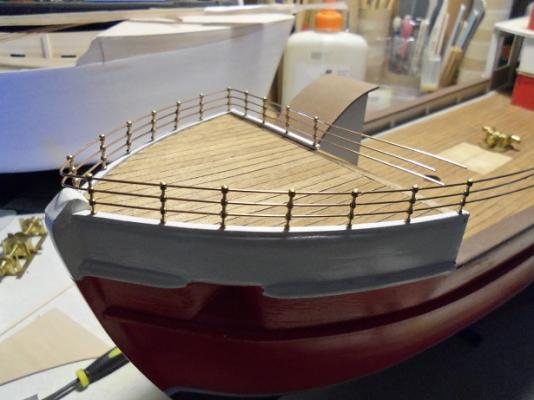
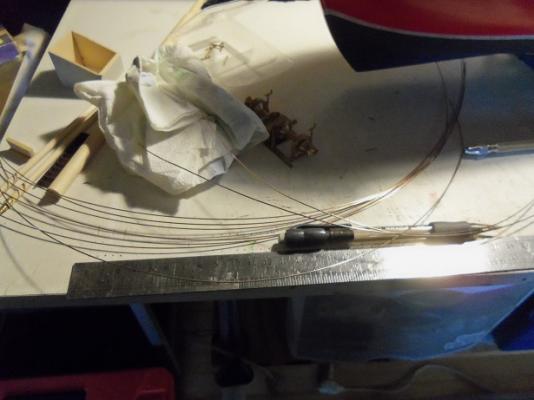
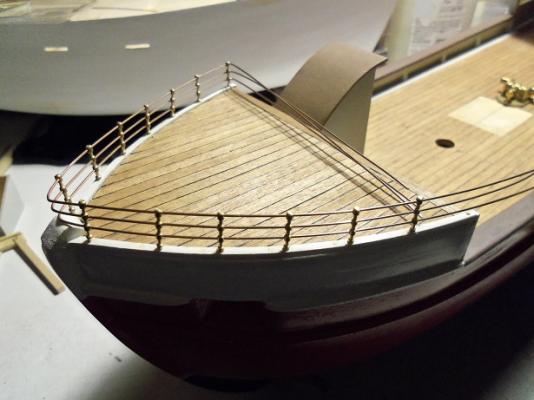
finally......back at the table. I had ordered some planking for the aft deck........it hasn't come in yet. so fine.........I'll start on the other end......the bow. I drilled a couple of holes for the anchors in the wells...I'll get 'em fitted soon enough. seeing that I have what I need for the railings, I'll start here. I have an idea for a stairway to the fore deck. to do it though, the railings need to be set up first. I want to make them all in one piece......so I began to drill holes and laying out the stanchions. these are 15 mm 3 hole stanchions. from that roll of MIG wire that I got, I cut eight pieces 18 inches long and two pieces 12 inches long......that equates to quite a bit.......I'll be able to do the entire ship and then some the bottom rail is going to have to be cut at the bow tip....it's in the way. the starboard side needs enough to go past the companionway.......I'll need to lay a border to raise it up to the hull borders. the port side will just be a short section from there. I can terminate this side once I do it. this wire is a bit tougher than I originally thought......but not enough to deter me from using it. I had to take it apart and flatten the wire out.......it got very unruly at times. once I reassembled it, it went much better, and I was able to get it to this point. since this last picture, the stanchions have been fastened and the piece at the bow has been cut out. the last stanchion has been added and fixed on the port side, so now I'm at the point of making the necessary bends. I need to think about making the stairway now


- 747 replies
-
- 11
-
-
they look like they do have a transom..........scrolling down just past the boilers, there is a picture of a lifeboat hoisted over the ship, up in the rafters. you can get a good idea of what the keel looks like. I think a simple ship's boat plug will produce you a couple of fine looking life boats. or you can order some plastic ones and plank them over {like I do with mine}
- 348 replies
-
- 5
-
-
- pequot
- cable ship
- (and 1 more)
-
rest up Jesse and take your time.........really stinks when you have to improve on kit parts. remember......a single picture doesn't mean that your going slow, it's progress
- 1,306 replies
-
- 7
-
-
- syren
- model shipways
- (and 1 more)
-
nice update Tom.......them guns look mighty fine when I'm not working on my ships, I usually drape a cloth {cut up tee shirts and stuff} over them and that keeps them protected to some degree. I use a bushy painter's brush {artist's.....not house}.....and spray a little furniture polish on it {wipe the excess}. start from the bow and work to the stern with strokes towards the center {with all the guns you have on deck} if it gets too cruddy.......stop, spray, wipe again...and continue.
- 1,350 replies
-
- 1
-
-
- constitution
- model shipways
- (and 1 more)
-
gee...thanks everyone......and who hit the like button! I have great wealth in friends I'm feeling even better today.......I've even made it over to the tables, so I hope to have some sort of update this evening. I'll make sure it gets posted thanks again.......
-
looking really sweet Stewart
-
great looking ship Jens........nice progress lots of folks here on the site have made their own dead eyes.......ans many more than that have made their own blocks. looked to me that you did a really nice job.......no need to hide or mask but, the metal coating made them look really cool. your doing a superb job!
- 188 replies
-
- 2
-
-
- cutty sark
- billing boats
- (and 1 more)