


popeye the sailor
-
Posts
16,007 -
Joined
-
Last visited
Content Type
Profiles
Forums
Gallery
Events
Everything posted by popeye the sailor
-
 looking really nice Patrick.........what else is going on the port side {I noticed the curved piece on the floor} some very nice progress indeed!
 -
nice work on the ship's parts Mark it's really going to make future projects much easier.
-
Thanks for the suggestions, but there is a further snag...........the part in question is broken don't know how.........I was just wiping the roof off with thinner on a rag. looks like I'll be doing some scratch building, perhaps
-
hull is looking nice Nils..........looks really smooth
- 2,625 replies
-
- 3
-

-
- kaiser wilhelm der grosse
- passenger steamer
- (and 1 more)
-
if nothing else Farbror........it will split very easily, for that cozy fire, when your sipping >your choice here< with the admiral very nice progress on your Batavia /Vasa...........Batavasa! cool name for such a cool little build glad to see your back!
-
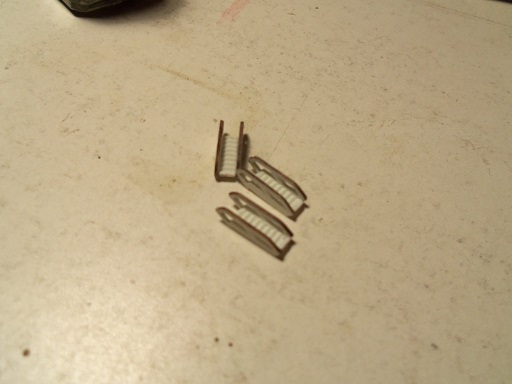
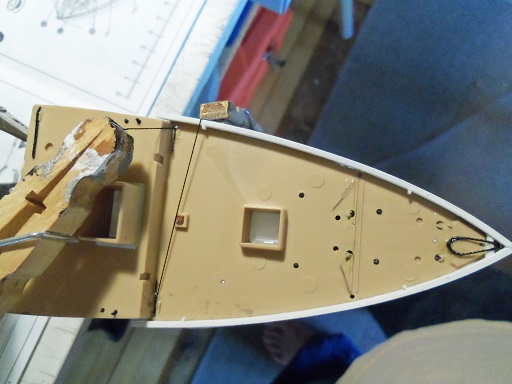
thanks John.......I was stuck for a word as to what they were called. apparently some manufacturers don't even know that. thank you for your kind comments and likes...you all are so kind with my clumsy attempt at a plastic model. if anyone hasn't clicked on the link to see Doris's build of the Academy Titanic, I strongly suggest that you do. there may be a language barrier, but the pictures speak completely for themselves. she has the kit with the photo etch and wooden deck and her process and work on this model is exquisite. it's very hard to see all the detail from the picture she posted of her. bravo Doris.........I was speechless with the level of modeling you put into this build..........absolutely stunning! I did a few bits on her yesterday .........not a whole lot. the two decks are cemented together now, and I attempted to do the window detail on the forward skylight / hold......it covers a domed skylight. I must say........I couldn't have botched it up, in any finer fashion. to make matters worse, I think I scratched the window aspect in the process of trying to remove the tape I had cut, in the effort to mask it. so it's off to removing the paint and starting over.......I just hope I didn't scratch the 'glass to badly. to me, aside from the chrome, this is probably the second bad point about this kit...molding parts in clear plastic. if they were to do it, I would have imagined that some, if not all of the windows, would have had clear glass inserts..........odd that the skylights would be the only place where clear 'glass' would be seen, considering how many windows are on this model. I hope to post some sort of an update, since this is the last day of my vacation. back to the grind, I suppose...............but, I'll be plotting my next vacation. I still have enough time accumulated for 1 more
-
she cleaned up quite nicely...........looking sweet!
- 745 replies
-
- 1
-
-
- francis pritt
- mission ship
- (and 1 more)
-
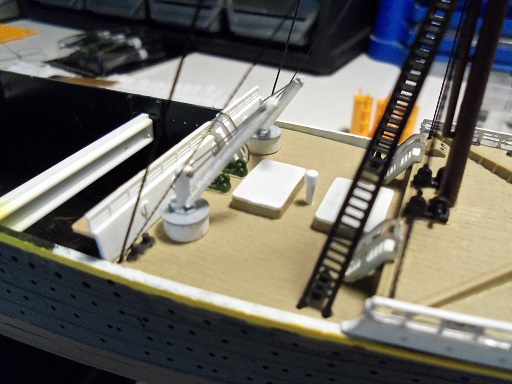
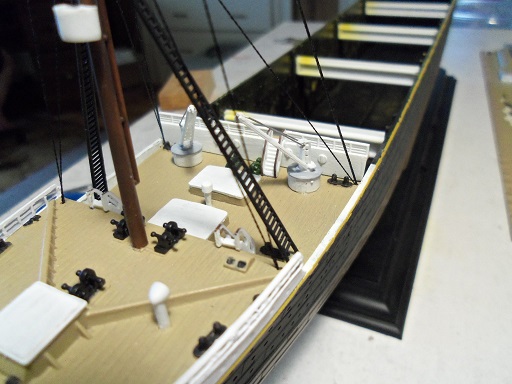
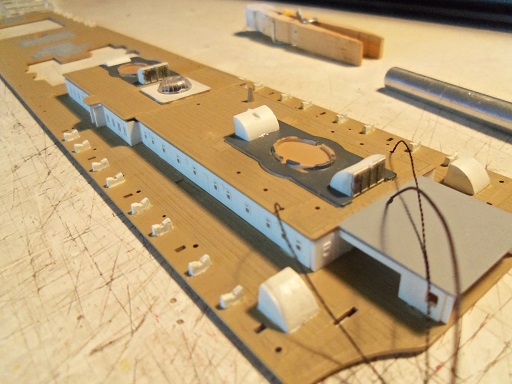
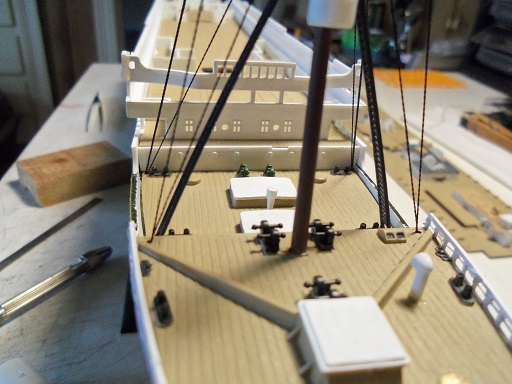
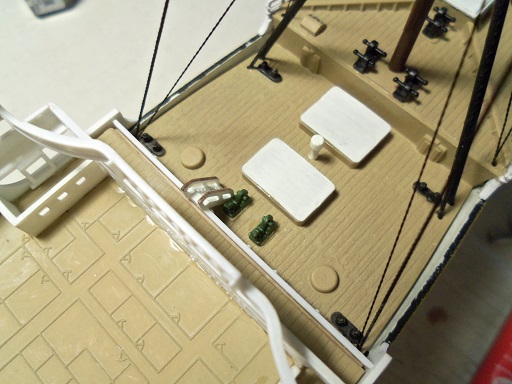
yea.......sorry Sam........I really don't want it to glow like a ghost ship...... but that would really send out an eerie message now, wouldn't it the fascia problem is solved.......I just hope those parts I used were truly extra pieces. I finally cemented the first pair of cranes in place.......glued in the fascia in place as well. then all of the life boat cradles were painted white, on the boat deck. later I'll go back and touch them up. the stern section got the mizzen mast rigging glued in ahead of time I started to work on the boat deck structures at this point. still need to cement in the rigging for the funnels, and then the A deck and boat deck can be cemented together. duct work was painted flat white..........the grating grids were then dry brushed with the paint I mixed for the hull........just to soot things up a bit. these four ducts are located at the first and second funnel finally I got back to the bow section, and cemented in the fore castle railing so now it's the boat deck....there's a lot to do here

- 573 replies
-
- 17
-
-
your back on the road again..........now you'll whittle away at the bow fillers until you can sand. I'm not familiar with this particular kit...was there a visible contour line towards the transom? what is to go in that cut away in the bow keel? you may want to put that in now and blend it in as well. looking very good though. do watch out for the "glue line" this occurs when panels are assembled like this. balsa will sand away faster than the glue will, so the glue line will tend to raise up causing a seam. I have the Chesapeake bay flattie kit in the closet.......the admiral saw it and thought it looked cute. in this kit, the bottoms and sides are already precut.......I can't wait to see how that goes. ------->planking here we come...........YEA! I might make two or three other hulls and do some different configurations of this hull design. the one thing about balsa......it will suck up any paint you put on there. being a very soft wood, it's really not good to use for ship building. there are many way to do this, but I would suggest that when the hull is sanded close to where you want it, the hull should be sealed. some folks will even use a resin compound to achieve a smooth hull. it's nice, but if your not going to put it on the water, just give it a couple light coats of an enamel......primer would be best. I laugh whenever I see a "sandable primer"............I think, sure......I'm going to sand it anyway...........I sand it, and it goes away you can even use lacquer, or a urethane.......just give it a light sand before you put on the color coat.
-
I'm currently building the Academy Titanic........got a big smile when I saw yours you have quite a collection..........such very nice work!
- 883 replies
-
- 3
-
-
- royal caroline
- ship of the line
- (and 1 more)
-
lighting looks great Sherry....lanterns look so cool
-
I did the Maine Lobster boat, and they supplied balsa panels for the sides and bottom. I made a mess of it LOL! I ended up planking the hull. at this point, you might want to trim the bottoms down close to the sides and sand them to the side contour. the same was for me....regarding the bow. I guess Midwest wants you to learn how to carve, before you learn how to plank
- 52 replies
-
- 1
-
-
- muscongus bay lobster smack
- Midwest Products
- (and 2 more)
-
there's a bit more left to go Augie the stern is beginning to look like a spaghetti factory.......the boat deck will be following suit thanks for the good word my friend.
-
it's the sad truth George.......I think it probably wouldn't have mattered what lighting I went with, light is light........plastic density would rule here. so I put all that stuff back in the Holiday Harbor box, and I'll continue my thoughts with that build. as I move back towards the stern, I remembered to drill out those holes as well, on the stern section. I'm sure those are off as well. I'm not liking the idea of cementing in individual rigging lines aft........but I believe I have a game plan for tying them.....might lessen the ganglia effect. the bow is almost complete
-
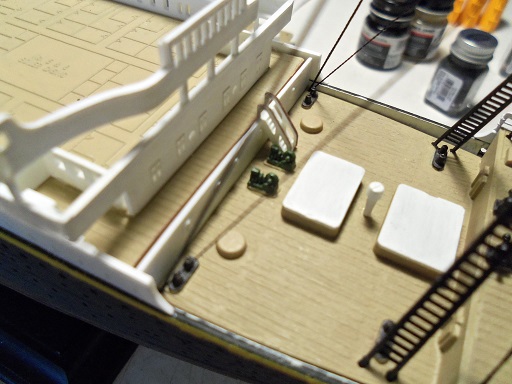
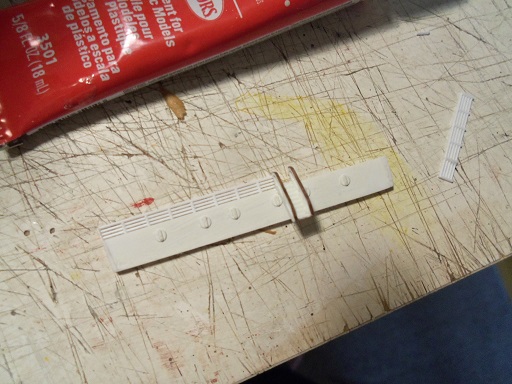
the bridge structure fascia.......what a starting point this actually turned out to be easier than I thought. the first thing I did.......I did this right after posting the last update.......was to add to the ends of the part. I will need three sets of stairs for this area.......the hand rails was done to look like wood. the part then got about 1/8 cut off of the top.......I dunno....some weird number the slot was trimmed out for the stairs. ...and then the stairs were cemented in place. the long section of railing was easy......I didn't need to trim much. but, for the small section for the port side. I had to add a piece to it. in place......not to bad I think now I need to do the same to the fore castle deck. it requires two sets of stairs.....all that needs to be added now is the railings I added some of the rigging to stern area.......I can't be as cleaver as I was with the bow. I'll figure something out though.

- 573 replies
-
- 12
-
-
thanks Lawrence. > goosebumps< ohhhh.......if I had the billing's kit........now there's a pipe dream the two big things would be the lighting and rigging. I've dumped the lighting idea........after seeing all the white walls lit up by the bulbs, it turned me off. density of material would be the cause here...that, and if it were black plastic......twould be a fool's errand to go off now and paint all the inner walls black......pretty much what I would need to do to cure that. I don't feel bad gents........I'm good with it given the diagrams and stuff that I've found, I'd be tempted to do one in wood. besides.......I have a bigger plan in mind
-
agreed! your doing a super job!
-
a very good point KP..........I can see I'll need to press the hull and sections together to eliminate any gaps. to do it now would give the results you describe. the bow was one thing..........the stern I can see, will be quite another. I will keep an eye on that....thanks for the head's up
-
thanks Mark and George........I'm half way there now. I have some really nice parts to work with I've heard of it Jack.......I use the Testor's in a tube {white putty}. used it for many years. I tend to rely on adding styrene to parts though......it can be fashioned off the model and fitted.
-
thanks Kees.........got her in the living room. looks good along with my other builds
- 956 replies
-
- 3
-
-
- andrea gail
- trawler
- (and 1 more)
-
thanks John........yea, they're small. the best thing is that they have a quick fix thanks for the like Augie
-
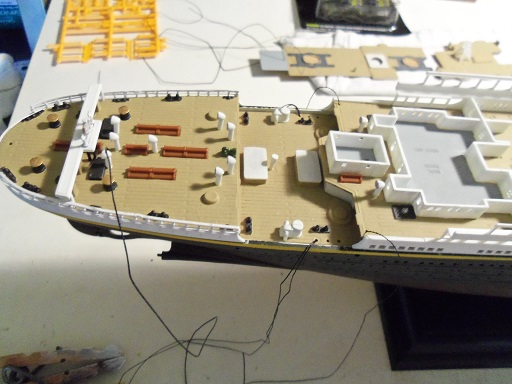
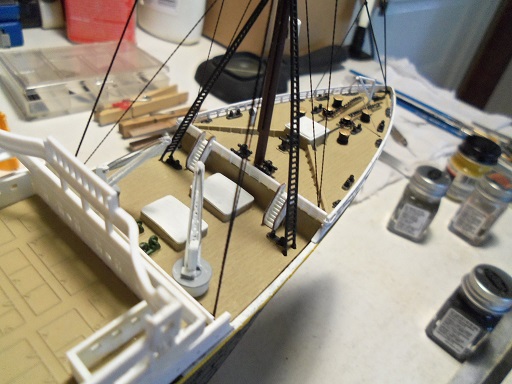
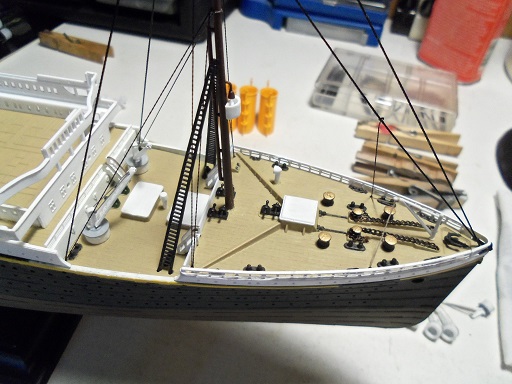
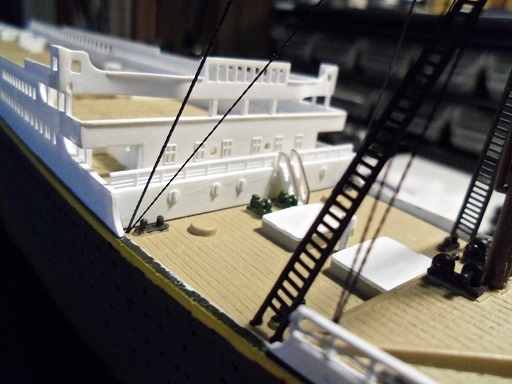
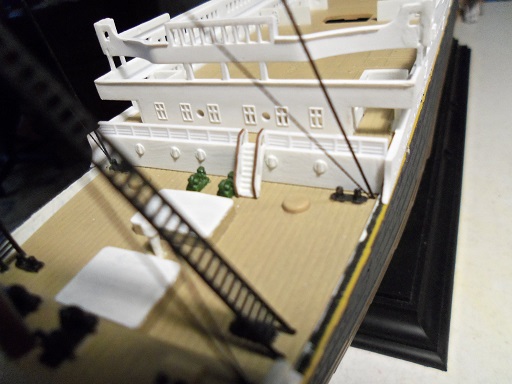
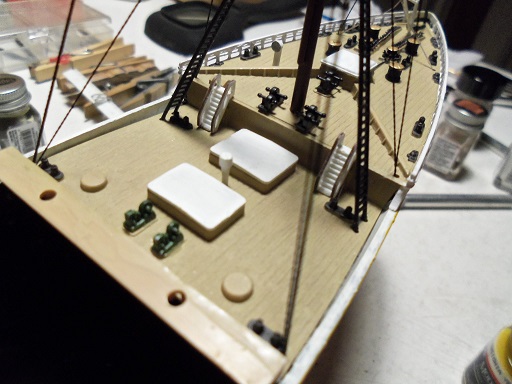
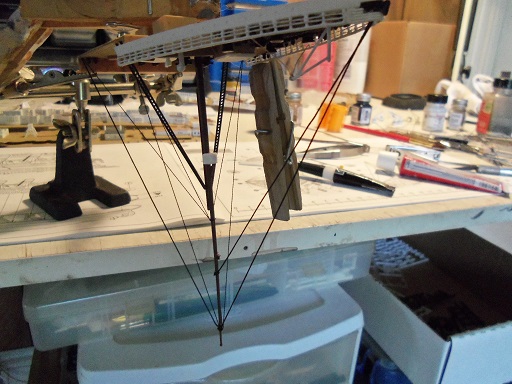
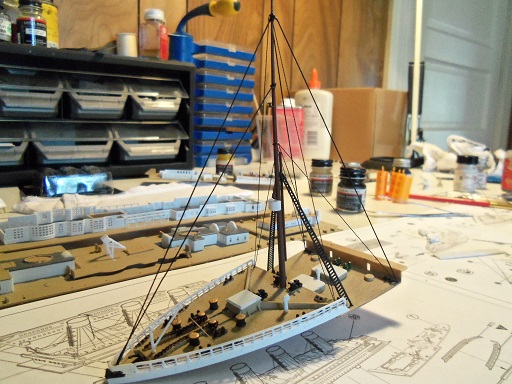
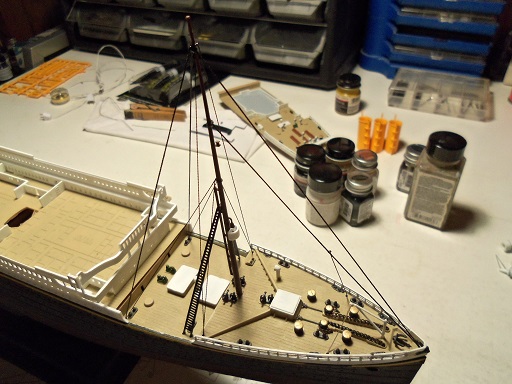
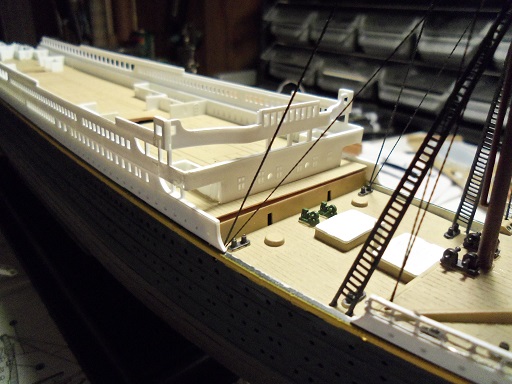
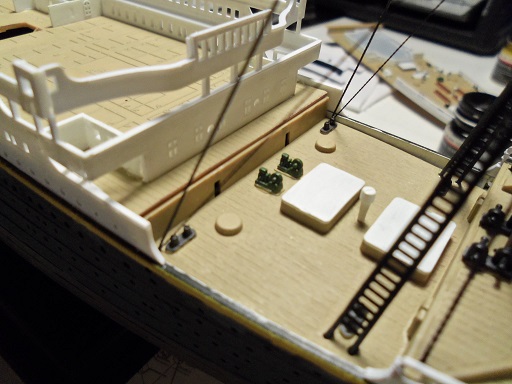
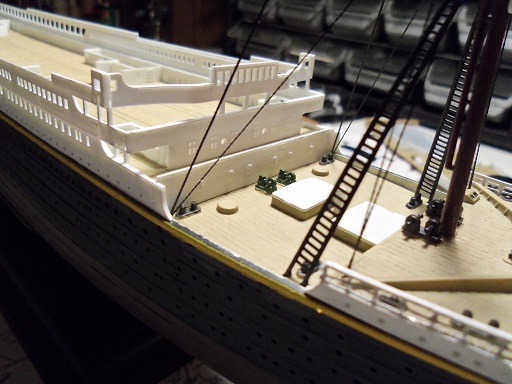
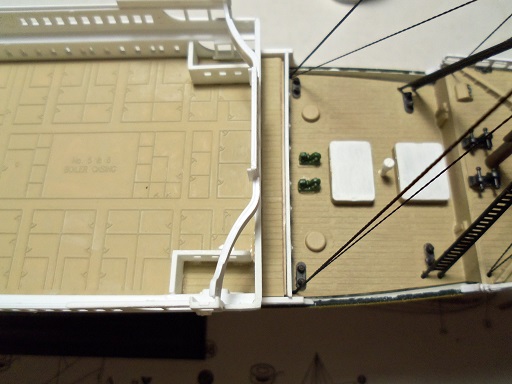
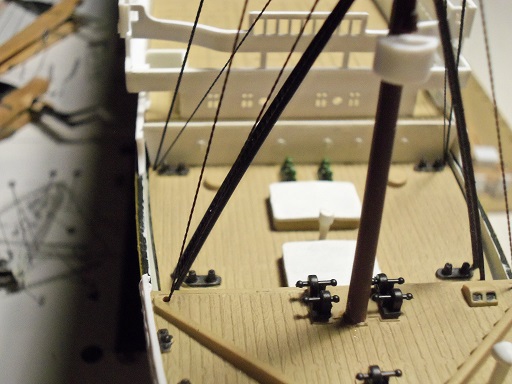
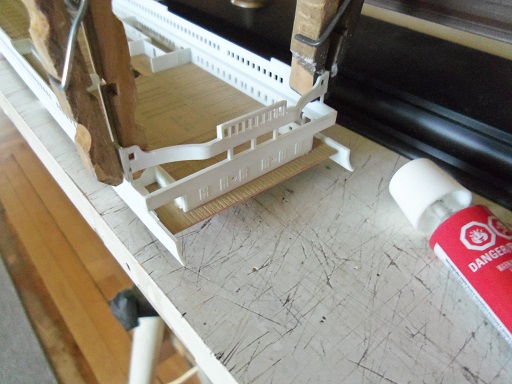
I also want to express my thanks and sympathies to all you folks who have furry friends that react to noise. Gibbs doesn't have a problem with thunder...I'm surprised....I've felt the noise percussion from some of the louder ones. let one firecracker go off though, and he's diving for the nearest hiding place. we hate it....there's nothing we can do. tried to play the TV a bit louder that usual, but someone just up the street, decided to touch off one of those mortar displays....and off he went.........under our bed. man.........was it loud too! I took a nap today......Gibbs got me up at 3AM to go out.......he won't go out after dusk. once the noise starts, all bets are off that he will go out. there was a little earlier this evening, but it's been quiet since......he is still unsure. it will get better when things quiet down Anyway........there were two other lines to add on {port and starboard}, and one to add to the lower fore stay {very slight tension on it}. these were tied on, weighted and cemented. hee.......hee.........thought I'd put that one in there there's nothing wrong with your computers.......do not adjust the horizontal...........do not adjust the vertical........I am in complete control of your screens.......I will do it. that's better. there is one more back stay that originates from the foremost boat deck roof, that will terminate at the upper mast. the decks sit pretty good.........but there is a problem. I had this all set up, but with the may-lay in gluing the mid section together, it fell short a tiny bit..you might see it here. there is a better view here. the locator pins do not sit in their holes correctly......too late to try and fix it now. I will have to deal with it.....but I'm seeing some form of a silver lining here. it lies in that part I showed earlier.......don't know what the thinking was with it. as for the alignment problem here......my first thought was to cut off the locator pins.......not a good idea. if there is a warpage issue, as with the aft section of the hull, this would make it worse. the correct thing here is to drill the holes a bit larger, which I did. this area of the bow section would be considered a well deck....this part would be the fascia for the bridge deck. here it is in place.........you can see how 'out of sorts' it looks. an over view shows how much aft, the bridge deck is. along the bulwarks there are gaps..........perhaps I can add a little material to fill them in. what I plan to do here, is trim down the part, even with the deck line. as I had mentioned, there are the two 'D' sprues, meaning that I will have quite a few extra railing parts. I will eliminate the over bite and replace it with railing. there is a stairway that is to go here as well......it should mate quite well. the instruction diagram shows the stairway cemented in a cut out in this fascia part........non existent on the part I see here. you can see it......it looks like a sort of grating in the wall. this needs to be cut out.......but since I'm trimming it, I 'll do it a bit differently. I still needed to cement the boat deck fascia to the upper deck sides {bulwarks}. I did it at this time. as mentioned, I may not be so lucky with the stern section.......I may have to cement these two sections together. I will have to see
- 573 replies
-
- 16
-
-
that would be funny Greg......the interior of the hull would look like a telephone switchboard I did the Star trek Enterprise when I was younger, with the lighting.......wasn't impressed either. *just heard a few booms.........Gibbs is under my desk now* wood is so much better with lighting.......light doesn't filter through the walls, as well as the windows. it's sad that a lot of the upper parts is done in white plastic........and painted flat white to boot...... I'm beginning to hear that discouraging word, I've heard tell about. I'll try and do a night time picture - dry fit. thanks for the good words my friends.......I'm still enjoying the holiday {and my vacation}, in spite of the small inconveniences. I'm convinced that they really goofed legalizing fireworks........there are so many folks out there that don't know how to properly use explosives case in point........the Darwin award goes to the young man in Maine.........whose drunk'in stupidity, made him believe it was a good idea to light a mortar shell on the top of his head. as Daffy duck said............"I can only do it once!" I can't take full credit for the section assembly.....I'm just doing it differently, than the kit says to. the main reason is the rigging.........if I did it the way the kit say to, there would be huge thread balls on the masts, where I've tied them all the bow was easy, once I figured that more than one group of lines could be added by tying a single knot. the best way to describe this.......2 for the port, 2 for the starboard.......run them {of equal proportions} through a fore mast thread loop, knot and cement in place, capturing the two sets of lines with one thread. if your using Ca though........get the tension on them before gluing them. lines that don't run true from an attachment point, just doesn't look good these masts are so thin........I wish I could have drilled holes to run the thread through.....wood has made this so much easier. the stern isn't going to be as easy........the mizzen mast is located at the aft section of the A deck........the mast runs through an aft roof and cements in the A deck floor. there are lines that initiate from the stern section, terminating at the mast. I fear that the stern section will need to be cemented to the mid section, prior to rigging. this could possibly set the stage for an alignment nightmare, since in the turmoil of cementing the mid section together, it ended up being about 1 mm off, aftwards....{could be just a 64ths.......I might be melodramatic here} I have another point of concern, that I will show you....I have to import the pictures to my computer.........a few moments and I will return I use Testor's , Model Master, and Billing's, Mr. Coleman .........gloss....but primarily flat enamels