
HOLIDAY DONATION DRIVE - SUPPORT MSW - DO YOUR PART TO KEEP THIS GREAT FORUM GOING! (Only 13 donations so far - C'mon guys!)
×


popeye the sailor
-
Posts
16,007 -
Joined
-
Last visited
Content Type
Profiles
Forums
Gallery
Events
Everything posted by popeye the sailor
-
 ....and a hello from the neighboring state of New Hampshire......glad to hear things are looking up!
- 2,250 replies
-
- 3
-

-
- model shipways
- Charles W Morgan
- (and 1 more)
-
now's the time there should be an armed guard against a 'kitty incursion'........if there ever was a time to strike, this would be it I've enjoyed watching your build Danny.........top notch wonderful work.....and spoken like a true modeler too. a very well done model indeed!
-
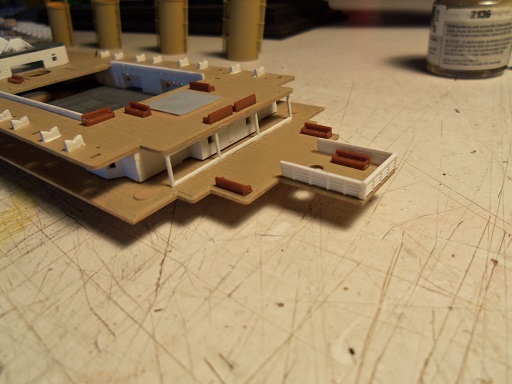
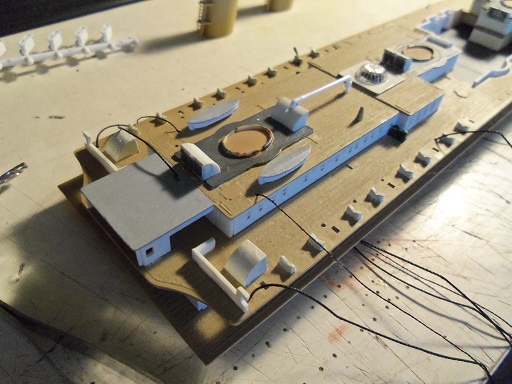
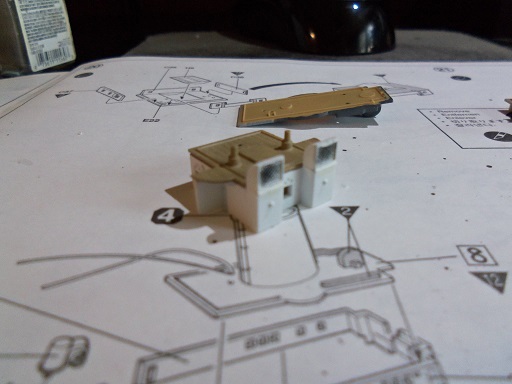
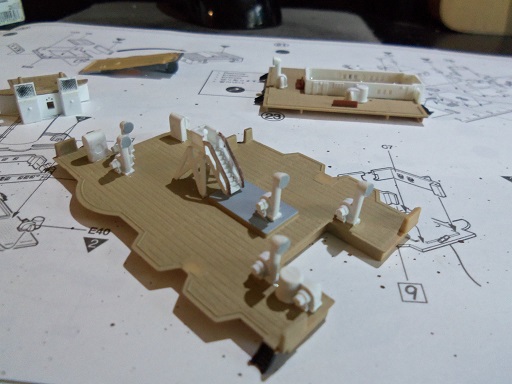
I had done this a week ago in one of my short visits to the table........I began to make the railing for the A deck / aft. I also cemented the bench that got knocked off.......and added a few more. some paint touch ups were done to the first section on the boat deck.......the life boats were cemented in place. these are the first two, to go on the model. from here, it was populated further.......... this is the cavity for the first raised section.......keen to note that there are no fore and aft walls. they put tabs on the deck parts, expecting that to suffice..........not even close vents are added. this is the second raised deck cavity.......did some paint work here. I painted where the dome glass will go......but I thought I'd shoot myself in the foot by cementing the mid structure in place. might be tough to get the cover part for the dome, on there. I still have to make that other cover structure for the first dome. I better get a move on. it's official.......the two funnels are permanent......cemented in place! other sections are simply dry fitted. the second dome has been cemented in place.......a few other parts as well. some of the structures are still dry fit due to easy removal of those raised decks. this has to be done in sequence. last but not least.........the overall view. the aft end is still a little bare. I'm finishing up with tying and cementing the last few bits of rigging cables.......and deciding which size thread to use. I will try to get this deck fully laid out by tomorrow's belle.......perhaps even the deck repairs........whoa baby!


- 573 replies
-
- 13
-
-
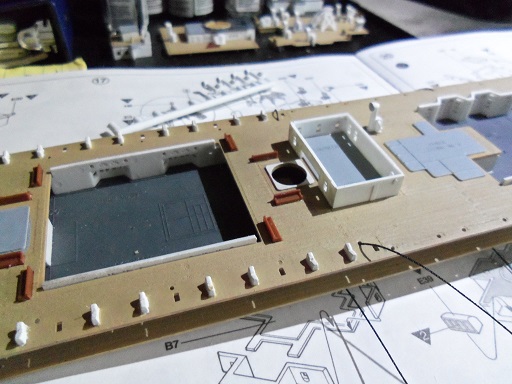
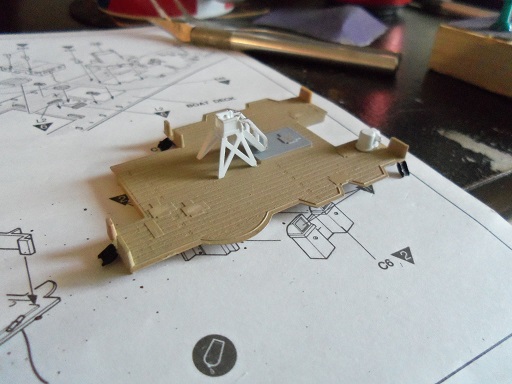
very happy to finally get back to the table! a bit unsettled outside at the moment.....and the admiral informed me that the lawns didn't grow an inch, since I last mowed them. I'll take that as gospel......amen brother! as I mentioned earlier.....I have another idea about the fore and aft ends of the raised decks......you might recall that they don't exactly match up to the boat deck. port and starboard sides are fine though.........so I need to make pieces to close the gaps up. I was going to use a section of deck from the U.S. build, but I may have something thinner........I'll get back to this later I did begin with these two sections of decking though.......populating them with parts and added detail, that only this kit can offer. followed the instructions too.........that was a big help I envy you Nils........when you do your funnels, you'll be able to add in the lower tether lines, shown in pictures Peter posted for you. I have already cemented some of the structure roofs in place...can't do it now it would have been very easy to do. so I added some parts to the first raised deck, and painted the ladders flat black. these ladders are black.....the other ones that the passengers use are white with teak handrails the second raised deck got the same.....added structure parts and vents......ladders painted flat black. the structure furthest aft on the boat deck requires this little hut.......walls flat white with light gulf gray roof. I'm going to use the Light gulf gray for the life boat canvas. these two go on top of the first structure. this the structure, furthest aft on the boat deck. I made a paint adjustment to it and shaded in the vents the first raised deck section got even more populated, with vents and such......a couple I even had to do some of that shading to the grids.


-
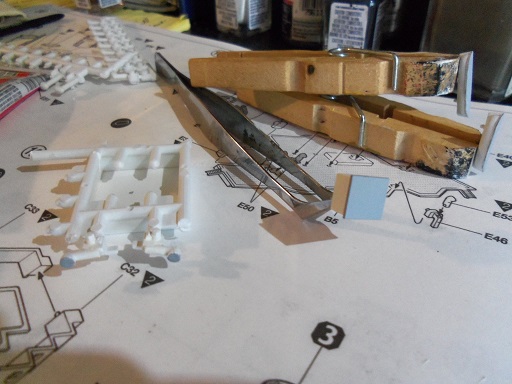
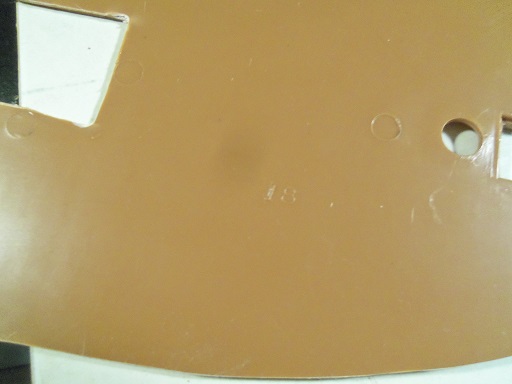
Hello everyone.......and thanks for the kind comments! I got past this work week........a few bumps along the way. I can tell ya that my knees aren't what they used to be. this morning the right knee was pretty stiff! in looking at the arrangement of the funnels, I favor the second one as well. I'm going with that one John: yes, the black parts go on the top. I really like the black I mixed for the hull.......I'm going to use it to imitate the soot David B: though I don't use it, Vallejo may be too thick to spray right out of the bottle. a friend of mine uses Windex to thin it.....gives it a faster dry time. I asked him why he doesn't simply use a little alcohol.......but he's a good 'ole boy....stuck in his ways. not a bad paint from what I hear. Nigel: thanks for the vote.....I marked them from the first time I tried to match the height. with wood builds I pop the parts out of the panels.....I have no problems with forgetting {or getting confused} where parts go. I forgot how important this is with plastic builds. I was going to show this picture....mainly because the part number is printed on the underside, but I was going to use this plastic to fix a manufacturer's oversight with this kit. this is the bow - gun deck from the United States build. now this plastic is about 1/8 thick.......I may have something a bit thinner. I tell ya more about this when I make the fix. if anyone who isn't used to working with plastic, decides to do so, please........do not remove anything from the sprues until your ready to use them ******OR******* if your left hand know what your right hand is doing Ben: yepper.......aware of the funnel height. my taking them off the sprues because "hey, I can cement two pieces of plastic together" is what started all the confusion in the first place I'm going with the second arrangement......the shortest one is first Lawrence: buddy.........you can't even "buy" that much fun! Sam: not sure about a false funnel......I'll have to look into that I did read something though.... I hope this update will be a big push forward.....I'm itching bad to get into a wood build.......>scratch<>scratch<.....I even resorted to playing around with that 'back burner project' just to smell a little sawdust! so, on with the update!
-
very nice progress Denis........I noticed that you've removed all of the bulwark posts. are you going to replace them all?
-
Cutty Sark by NenadM
popeye the sailor replied to NenadM's topic in - Build logs for subjects built 1851 - 1900
looks really cool Nenad!- 4,152 replies
-
- 4
-
-
- cutty sark
- tehnodidakta
- (and 1 more)
-
you've been busy Patrick.........very nice progress indeed!. the recent addition to the bow section as well as the furniture, really adds a lot of detail. she's continuing to shape into a very sweet looking build
-
Cutty Sark by NenadM
popeye the sailor replied to NenadM's topic in - Build logs for subjects built 1851 - 1900
very nice progress Nenad.........the bow is looking better with everything your adding to it- 4,152 replies
-
- 3
-
-
- cutty sark
- tehnodidakta
- (and 1 more)
-
no need to apologize Bob on time issues........same thing is happening to me I think your making great progress. minor adjustments aren't really a bad thing........they are what will give you a stunning build when your done
- 127 replies
-
- 5
-
-
- dragon class
- yacht
- (and 1 more)
-
very nice work Nils........been out of the loop for a spell, so I had quite a bit to catch up on. she's coming along really great though and I see you've already started with your fine metal work the stern is looking better and better with every bit of detail you add to her.
- 2,625 replies
-
- 3
-
-
- kaiser wilhelm der grosse
- passenger steamer
- (and 1 more)
-
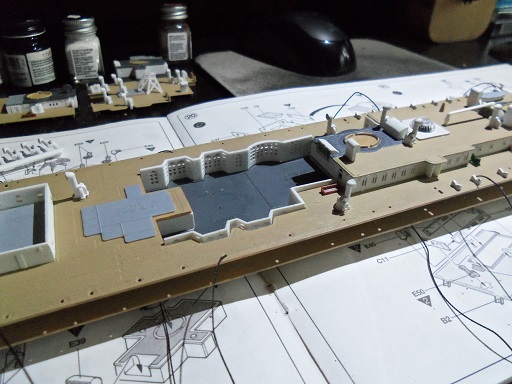
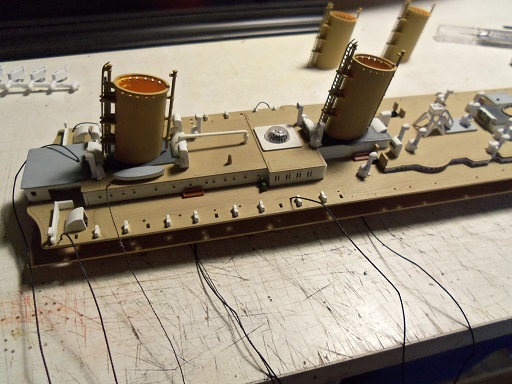
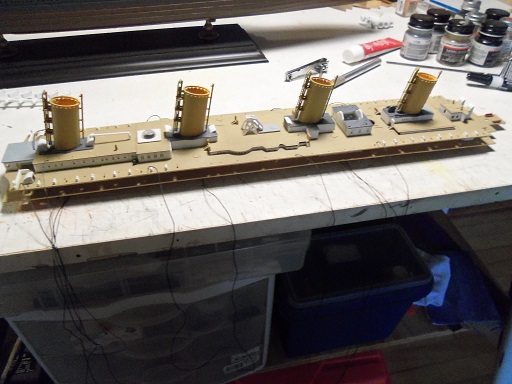
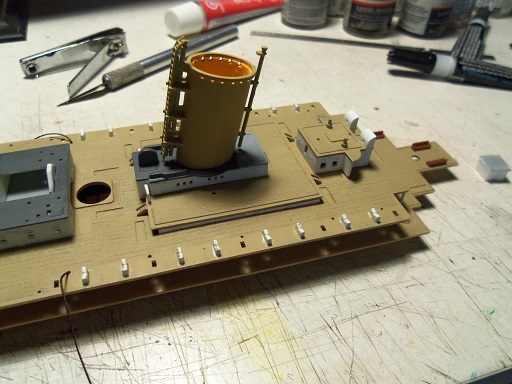
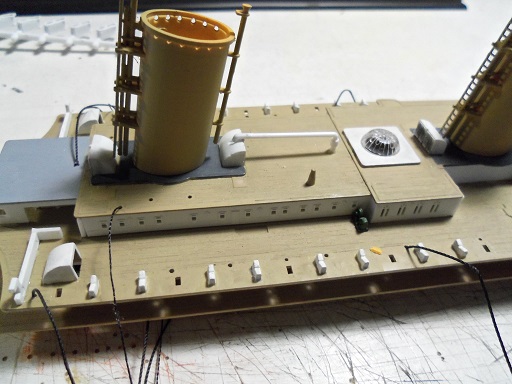
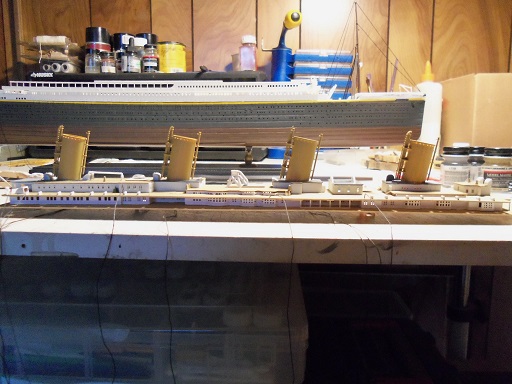
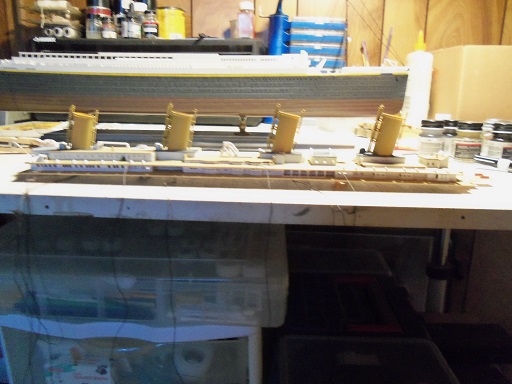
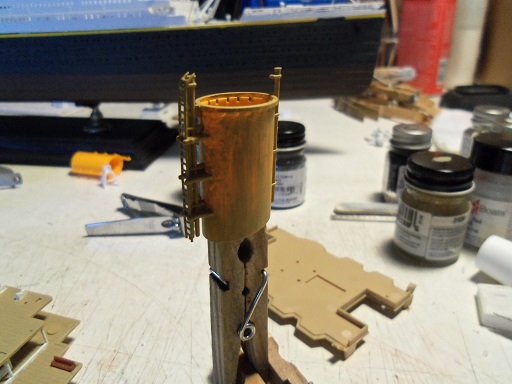
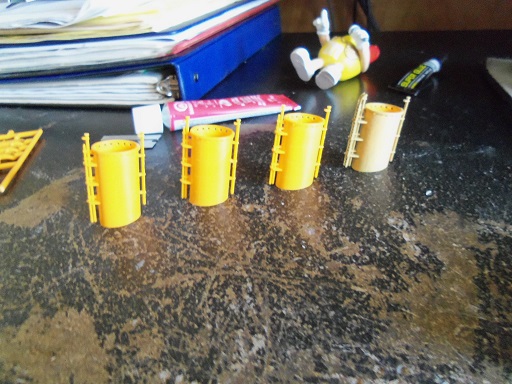
hi all...........just me got a bit off track, as you can see.........I was part auto mechanic, landscaper, and a bunch of other small sub titles for a little while. I had some pictures to post, but even that got side tracked. some pictures never even got taken......so all that I have done will have to be all bunched together. the funnels are now painted.......I had to cement the ladders on them, which are the only parts I'm sure are in the right location......the other parts I speak of have no locator tabs at all.....I will have to guess at their exact location. for the half raised decks, with the fore and aft ends having major {and ugly} gaps in them, I was going to use one of the deck pieces from the United States build. I noticed that there was a part number on the underside of the part. I may use something else though.......something a bit thinner......still in the planning stage on this. this is not a flattering picture........to look at it, you might think that not all the funnels are at the same slant.....but they are. still a bit more painting to go, but the roofs at the aft section are now painted. I started to do the railings for the lower deck, but they are a collection of tiny sections.......a real pain to assemble. more was added to the mid section........again, more paint work needs to be done same with the fore section....... I saw the layout shot tonight.......I was in a hurry when I imported them to my computer.......yea, I wasn't pleased with it, due to the slant issue. I took another one tonight........but now I'm thinking that this might not be the correct lineup for the funnels. here's a better picture. there..........four little indians, all in a row. but something still seems off. here is a different arrangement of the funnels. I took the last one and made it first........the third one is now the second one........the first one is now the third one.......and the second one is now the fourth one. I like this better.........your thoughts?

- 573 replies
-
- 19
-
-
fore castle railings look great!....I'm glad your injury didn't stop you from doing more with your 'summer project' ending it's chapter for the year, it would be neat to see another of your projects, to fill in the gap. I'll look forward in seeing the start the imagination your putting into this build is very enjoyable to watch. it's nice to meet you Sam Denis
-
paint work looks super David
-
nice work on the fore deck Augie.......very nice progress
- 2,191 replies
-
- 2
-
-
- confederacy
- Model Shipways
- (and 1 more)
-
doing some catch up Marc......I must say you've done well with her progress! the deadeyes and the structure work is really super....very well done!
- 525 replies
-
- 3
-
-
- cutty sark
- mantua
- (and 2 more)
-
she's looking super KP............nice improvement on the oars
-
thank you everyone for the good word! I've had these spray outfits for quite a while now.......strange that I never thought of trying out the spraycraft compressor sooner. I got a conformation e-mail from the Rustoleum people.......just waiting now for an actual answer. I never knew that testors was affiliated with rustoleum....learn something new every day. gave the funnels another coat....and sprayed the pipe work parts while I was at it. the funnel color is suggested by the TRMA........can't believe that I had some on hand you are right Mark....I forgot that one
-
your moving ahead though John......and that's what counts with two groups of onlookers watching you {physical and online}, I'd say you doing quite well. looking really nice John!
- 745 replies
-
- 5
-
-
- francis pritt
- mission ship
- (and 1 more)
-
this is not good........sorry to hear about your injury even more sadder to think the build will be put on hold again. do you have a project in the works at home? love to see it hope it heals soon.......your imagination is fun to watch
-
Cutty Sark by NenadM
popeye the sailor replied to NenadM's topic in - Build logs for subjects built 1851 - 1900
have a great time Nenad.......so right about the young ones. I lived in a small town {country setting} when I was a lad........told them one time about going down to the swimming hole to take a dip. needless to say they were stunned........I saw it as a sign of the times, when they asked me if it was polluted?!?!- 4,152 replies
-
- 5
-
-
- cutty sark
- tehnodidakta
- (and 1 more)
-
that's one sweet looking railing Augie........very well done!
- 2,191 replies
-
- 2
-
-
- confederacy
- Model Shipways
- (and 1 more)
-
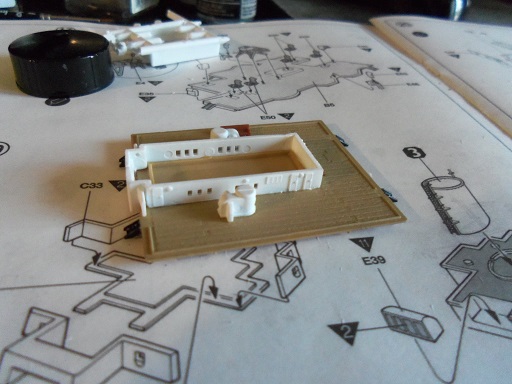
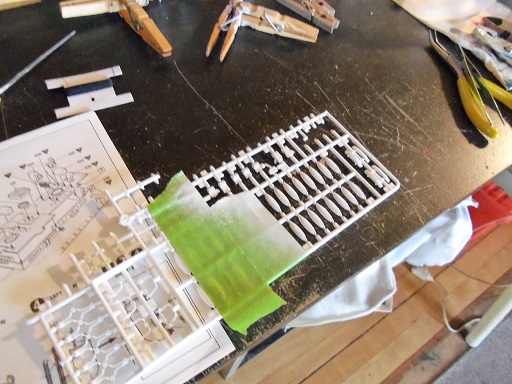
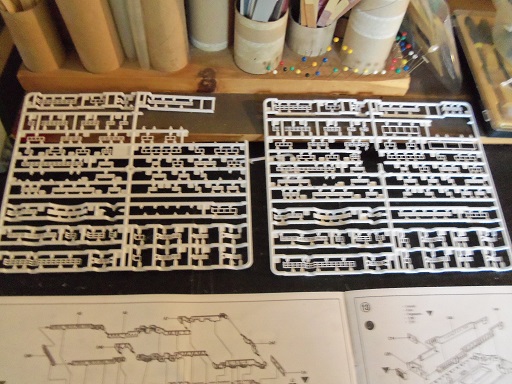
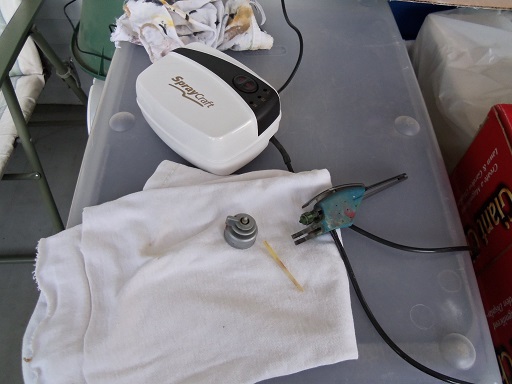
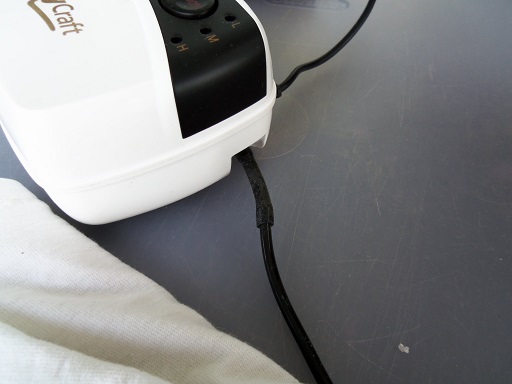
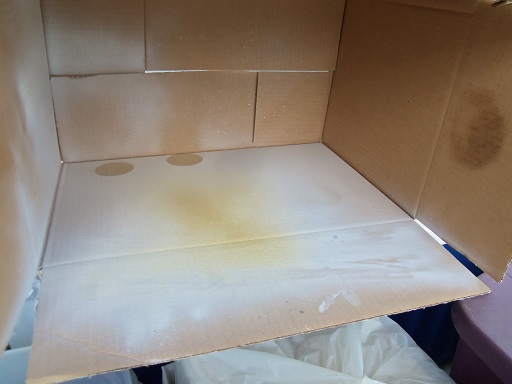
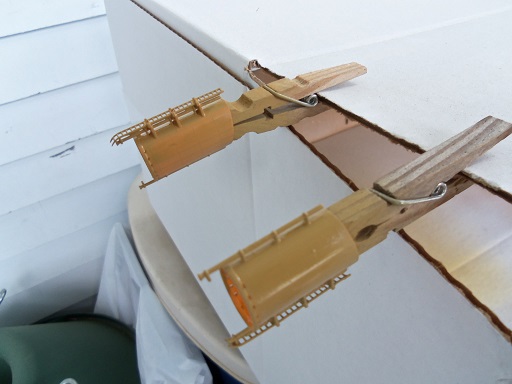
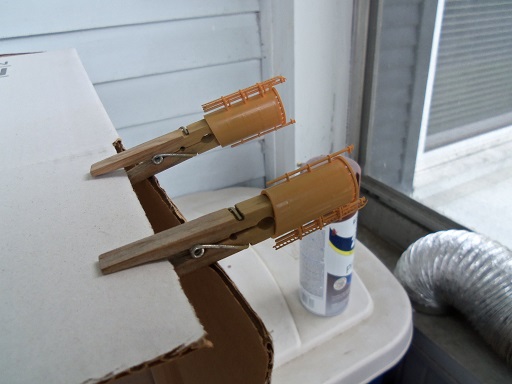
I've managed to put something together......wonders never cease! I actually had the day for myself today......the only thing I needed to do, was repair a Christmas ornament that had broken over the holidays....and of course, I offered to fix it {I found it stuffed in a drawer......I had no more room under the carpet } there were a couple of pictures from a week ago.......like this one, where I had glued on the two little wall pieces and the forward roof......after adding the back stay for the fore mast. during another opportunity to play at the table, I painted one of the funnels. this is the British Gulf LT Stone......I think it was more the color of the parts than anything else......the paint didn't cover very well. I also managed to paint the railing sprues, and the vent parts with flat white. there are a lot of parts here. still a bit befuddled concerning the funnel order, I set'em up again.........now the one I thought was first, is last I had painted that one, because the ladder was cemented in place. there are other parts that need to go onto them, but there are no locator tabs, and a couple of the parts are associated with other parts, that are cemented to the structures. three words best describe this hobby......goesinta, goesonta, and goesova..........just thought I'd share that with you, just in case I ever use these words. don't wantcha ta think I went hip-hop or something today.......I got to think'in........those funnels are such a small job. it t'would be a chore to crank the Craftsman compressor up.........what can I do..Hmmmmmmmm. I remembered that I had the Spray craft outfit......this is comprised of the airbrush, which is a gravity feed, a holder, hose, and a three speed compressor. I didn't want to change over the Testors airbrush I had set up for the Craftsman, so I got the old one that I had set aside a while ago. to hook up the hose, I cut a small piece of the hose from the gravity feed, and used it as a connector, seeing that the Testors hose is smaller in size. after checking the airbrush out, I found that it wasn't the airbrush itself that was bad.....it was the cap. the cap and siphon tube screws onto the testors 1/4 oz bottles.......naturally, these caps are prone to wearing out. I used another cap.....and it worked just fine. I sent testors an e-mail today, asking where I can get new caps and siphon tubes. I hope to get an answer soon........I have two caps left. so far I've bought two of these kits TES4030 & TES4034....here are the numbers in case you want to do a search on the testors website. Testors » Airbrushes » Airbrushes I have been spraying out on the porch.........here is my spray booth here are the funnels with a coat of paint on them some ghosting did occur, but I think it has a little to do with the color of the plastic........orange is such a transparent color to work with....it's as bad as white. I gave the first pair the second coat.......they look much better I also have an Aztek A320 spray outfit too........that is a siphon feed. I have never used it.......these testors airbrushes have worked so well, I haven't had to resort to it


- 573 replies
-
- 13
-