popeye the sailor
-
Posts
16,007 -
Joined
-
Last visited
Content Type
Profiles
Forums
Gallery
Events
Everything posted by popeye the sailor
-
 nicely done Augie.......glad to see you found some shop time
- 2,191 replies
-
- 4
-

-
- confederacy
- Model Shipways
- (and 1 more)
-
I just use a block of wood, with a groove on the top end for the pencil. make sure the hull is level and won't wobble. cut a piece of wood {I used pine} the height you want the waterline, then make the groove for the pencil. it can be taped in place. the hull looks good....super job priming her wood breakage happens to the best of us. since it got covered over........no harm, no fowl......you learned something through the process...that's what matters. judging from what I see in your stash, your going to learn a whole lot more your doing great so far.......don't kick yourself
-
Roger is a really good person. I usually download the instruction sheets from either site
-
very nice progress Marc.......I really like those sails. I had no idea that there were aftermarket sails........I'll keep that in mind
- 525 replies
-
- 2
-
-
- cutty sark
- mantua
- (and 2 more)
-
thanks Lawrence....this has been a big leap forward for the build. the painting and the tiny parts are pretty tedious......the life boats should be a walk in the park there is some more railing work to be done on the stern section......so I'm not out of the woods yet. I wish I could say more about that..........trying to practice what I should have done in the first place besides, there's still more to do
-
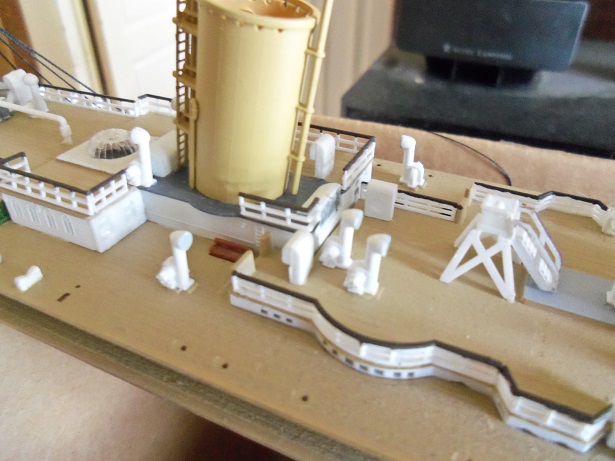
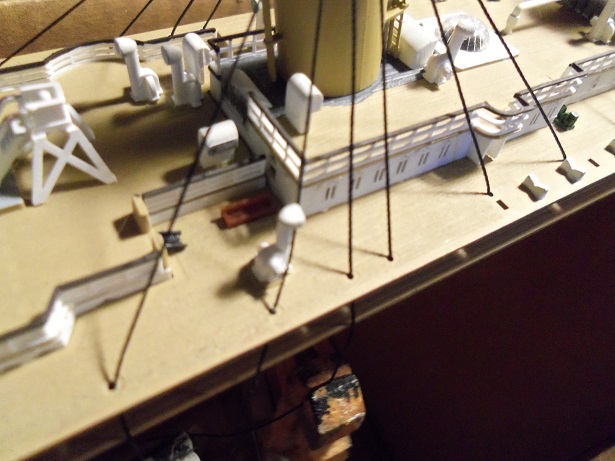
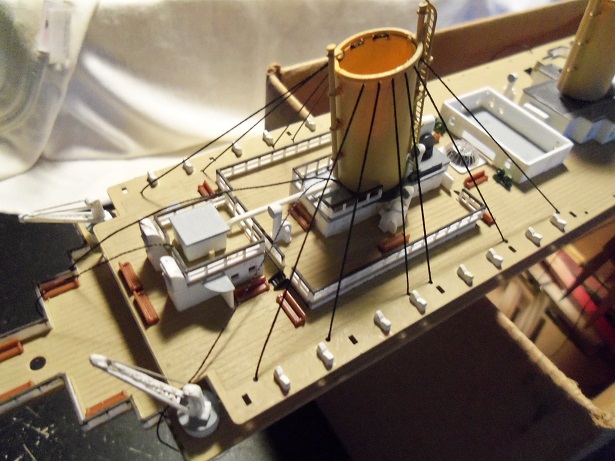
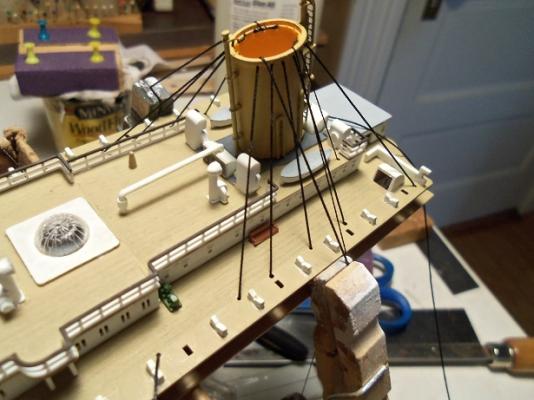
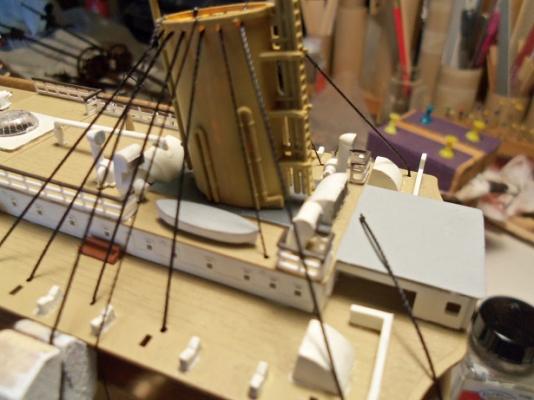
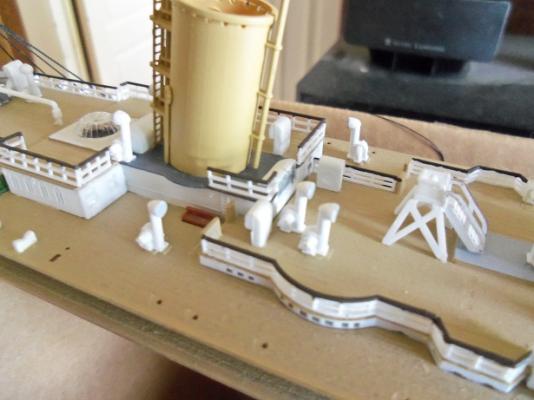
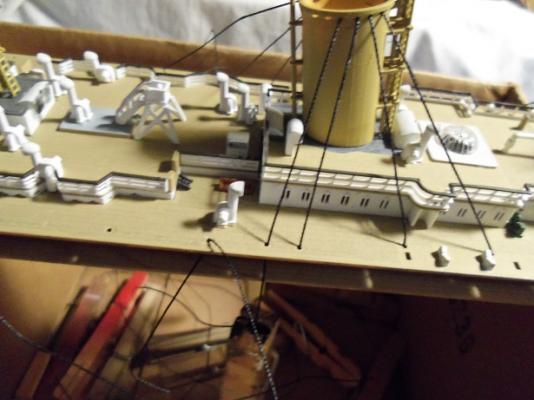
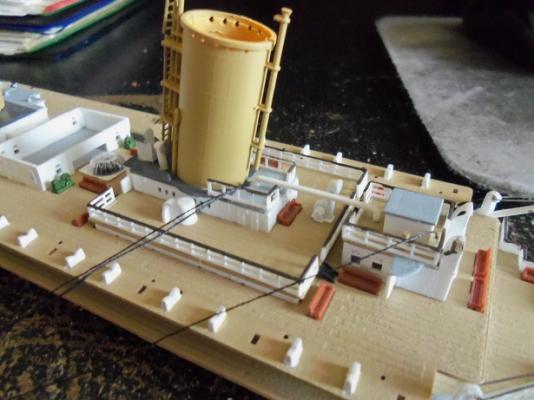
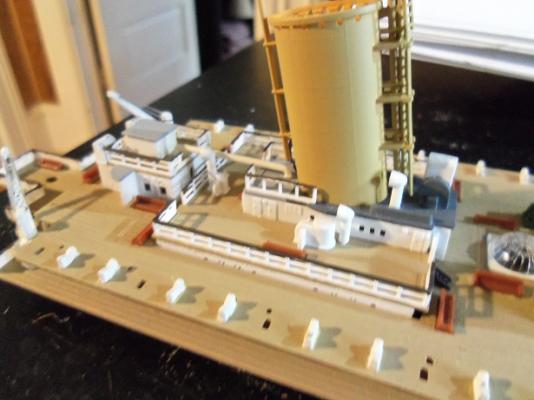
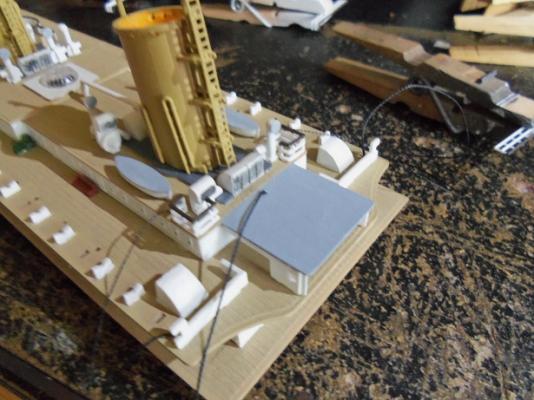
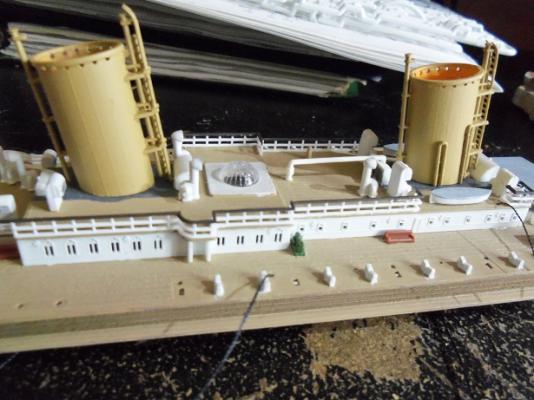
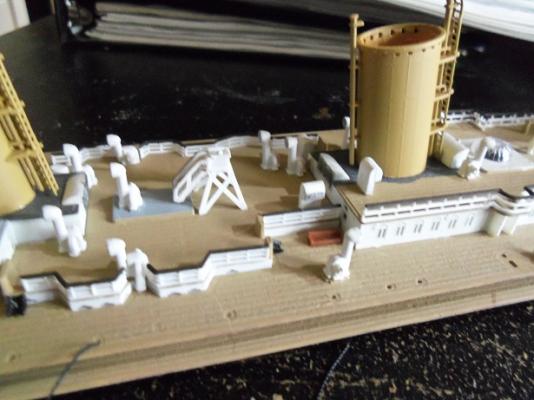
the forward section was done.......so I rigged the funnel. the way that the first funnel is rigged, is interesting. there is one cable that comes from the roof of the structures. earlier we had talked about there being a lower set of cables, that attach half way up the funnels. if I knew of this...or even thought of doing them, I could have drilled the other holes needed {enough for four cables would have been good}....taken this one and changed it.....and ran another upper cable to replace it. all speculation now.........but this one does give me the thought that it should have originated from the deck........the thought about the second set of cables was in the designer's mind when they did this. this kit is large enough for the added detail all to the other funnels are done differently, but identical to one another. the third funnel has some piping to be added, along with assembling the roof for the small structure in between the third and fourth funnel. I still have to finish painting the window area, and add the rest of the parts. a couple more railing pieces were added ......as well as more touch ups the second funnel was rigged. I see some interference here......I will make adjustment the fourth funnel was rigged again........this time permanently. still some more railings to go, along with the piping......and then the third funnel can be rigged. at that point, I may even be able to cement the assembly on the model


- 573 replies
-
- 18
-
-
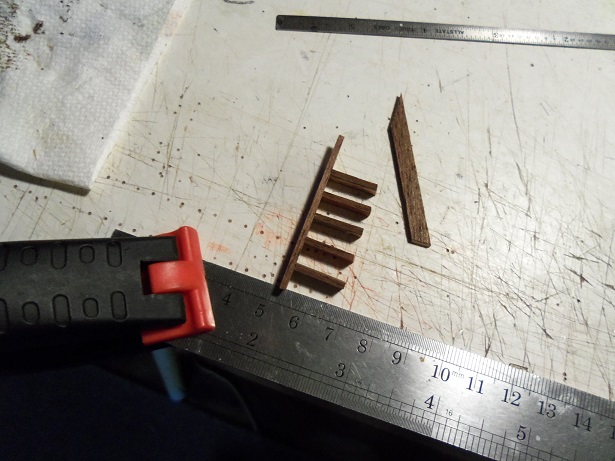
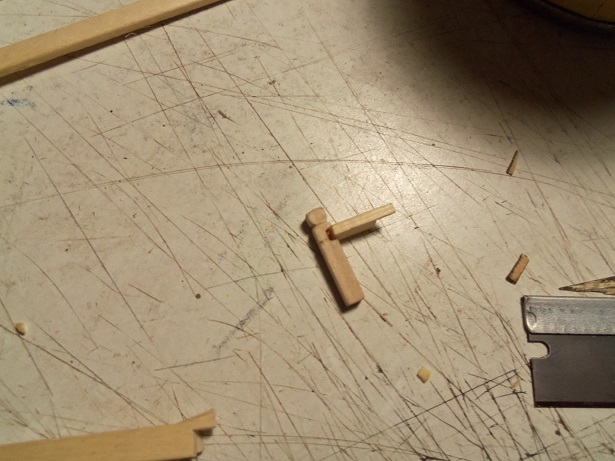
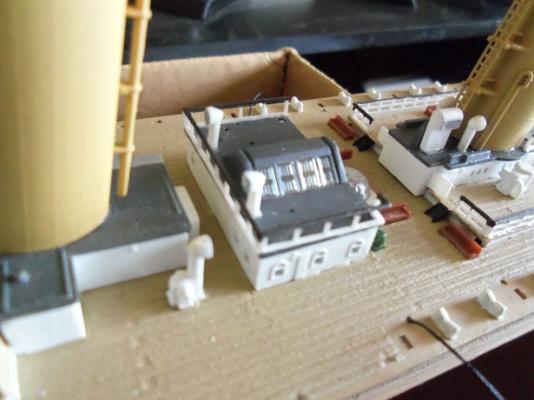
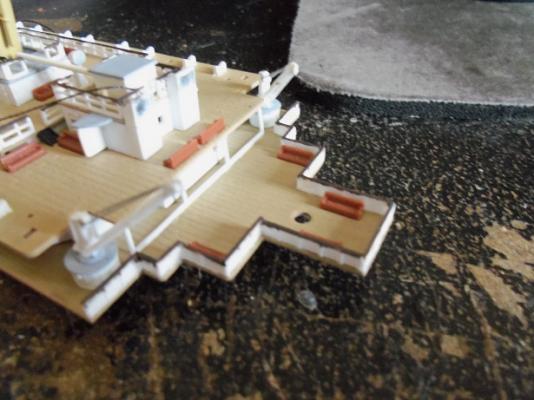
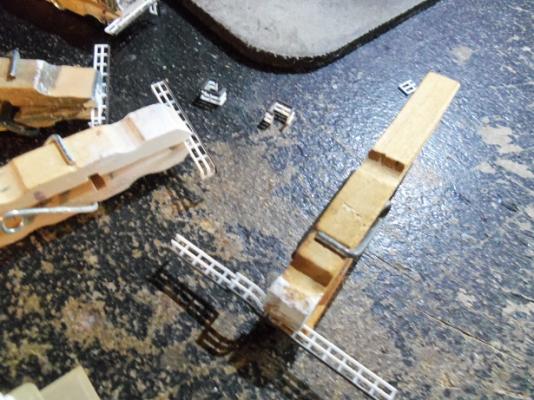
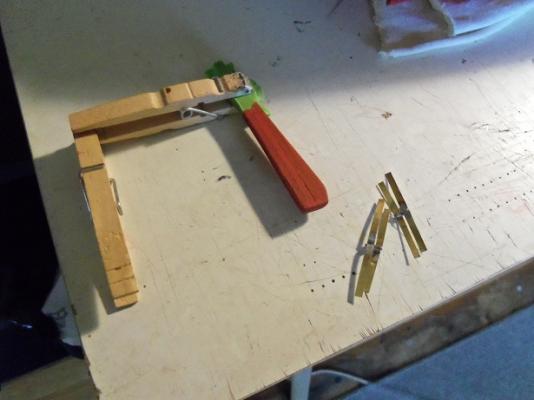
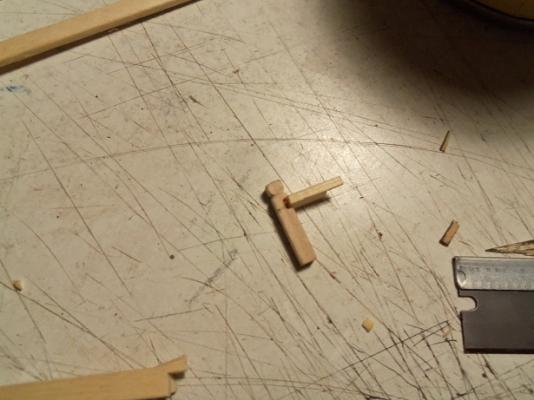
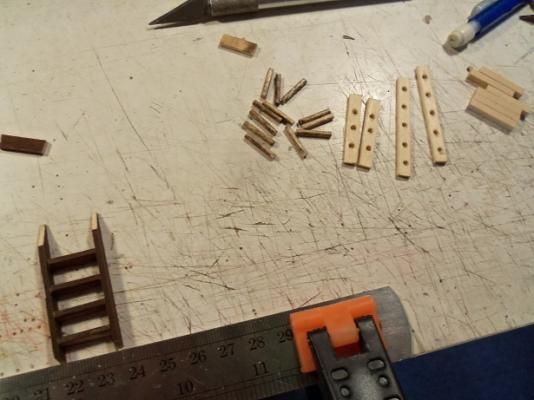
let the tedium begin! painting the railings that are cemented in place....is not fun. I've had to touch up a few places that I had nicked with the brush.......still more refinement to do. what makes this worse, is that it's white over brown........I'm having to deal with a lot of ghosting and secondary touch ups. waiting for these railings to dry, I singled out the next group to go on......and painted the railing. this made it a lot easier, but still tough on the eyes.......my auto focus isn't what it used to be the square sections you see are made from two parts, assembled and allowed to dry. the small section you see by the end of the clothes pin was my first real M.I.A. it flew from between the tweezers...to I don't know where...............I combed the entire room looking for it. I had to take Gibbs out, so I got the duplicate from the other sprue and used it instead. when I got back in from our walk, I took another look around. I found it lying right beside my garbage basket.......I swore that I had looked there!.. I moved everything over to my computer desk......I needed to sit. when those parts had dried, they were cemented in place. minor touch ups followed......

- 573 replies
-
- 15
-
-
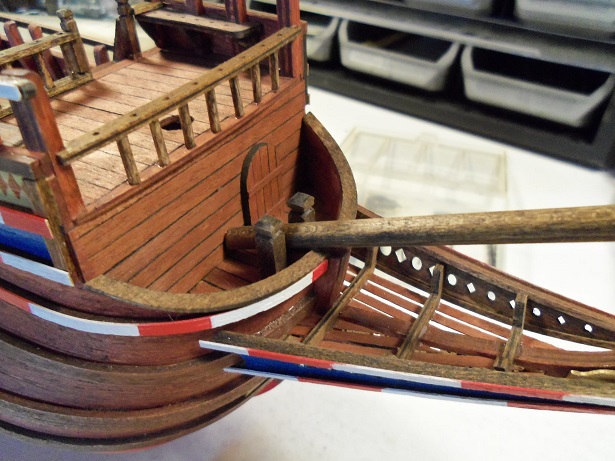
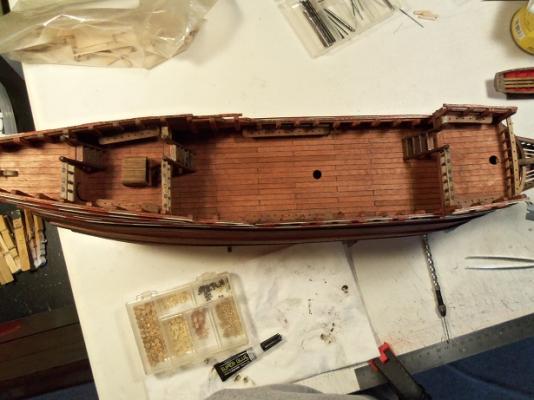
I wanted to further along with this build, than I thought I had.........if that makes any sense. these past couple of days, I have been moving from one table to the other.......surprised that I only got a few pictures of mu time with the Half Moon. I did some measuring and spacing with the gun port lids masked and painted the rudder.........went into my inventory and got the Gungeons and pintle hinges I had made for an earlier build. I need to look at the actual ship to see if I can get away with just the two.......if not I can make another. the gun ports are cemented in place. the only chain board that I'm going to need to make any adjustments on, will be the main mast boards.


-
hello everyone .......thanks for the kind comments and the likes. when I got back to her, it was kinda short lived......I only got to stain the chain boards and do the rest of the assembly for the gun port lids. first day back at work........surprisingly, it wasn't too bad. at least they didn't move everything around on me work this week....then the week after I have Monday off. I only need to wait till the 20th of September, and I get all my vacation time back I just hope this week goes quick welcome back Augie
-
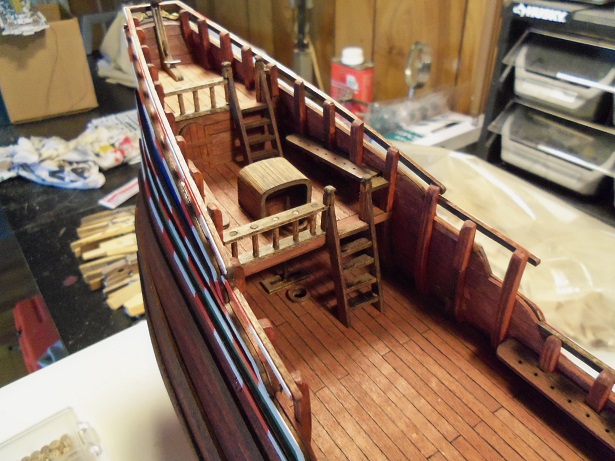
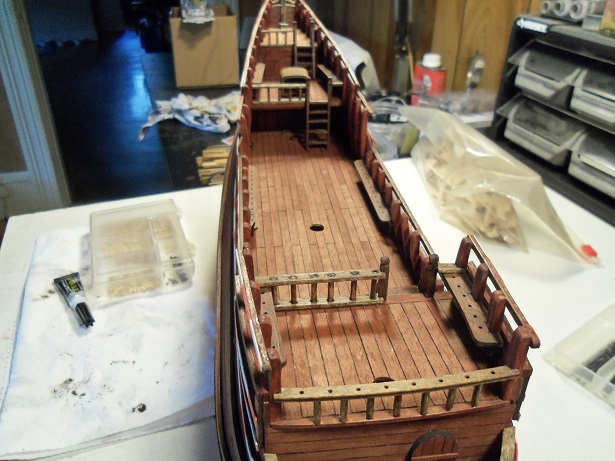
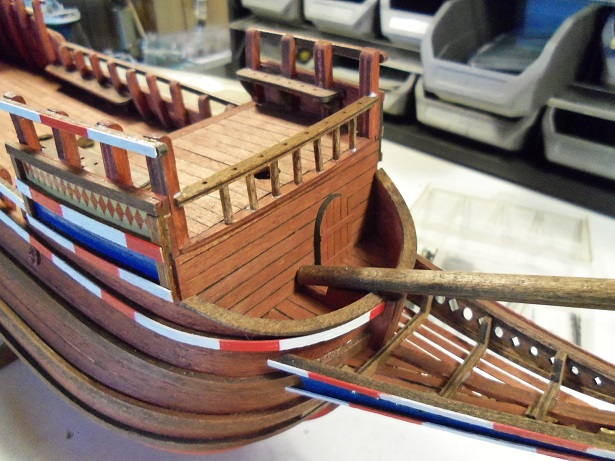
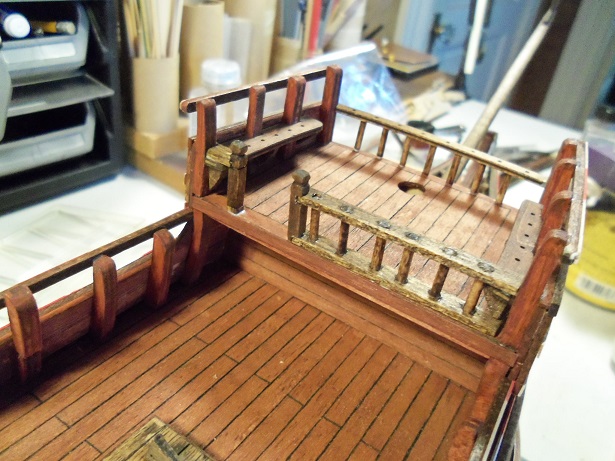
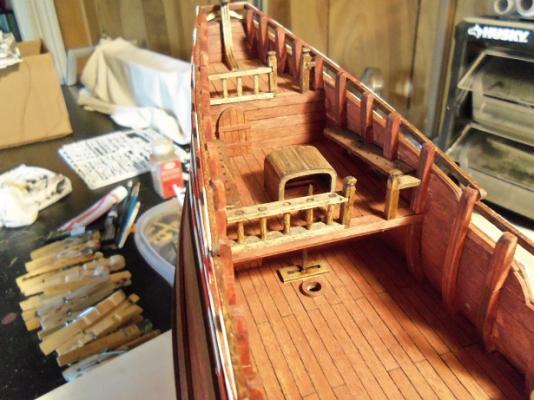
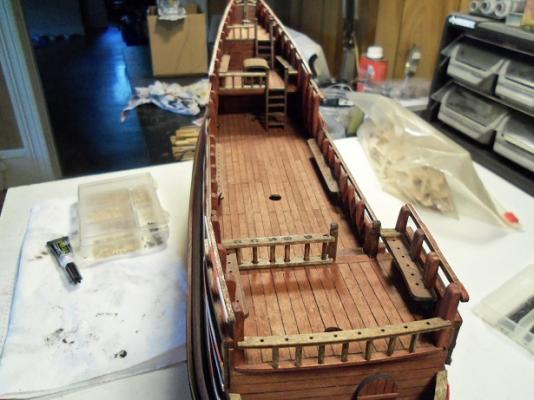
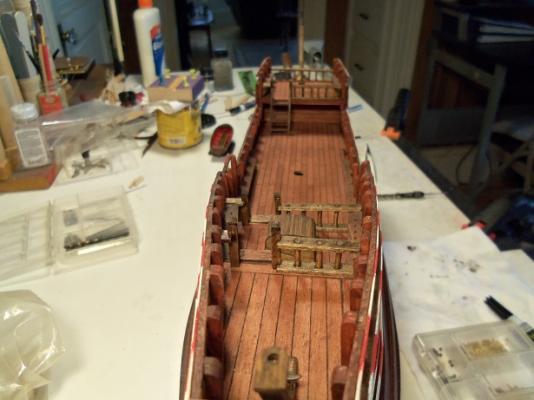
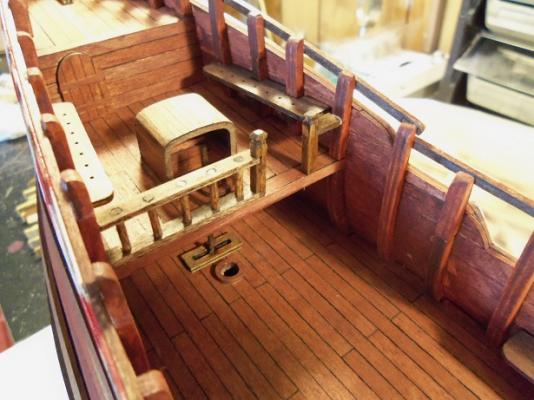
thanks Nenad.......but I can't do that. but at least now I can juggle as mentioned, I did do more this morning........should I get back to it, I'll be sure to post it. the poop deck railings are done. doing a little more at the bow, the pin rail was added and the stops for the gammoning. the ladders.........the one for the lower aft deck.... ...and the one for the poop deck. both are now cemented in place the progress of the deck layout....... even an overview......thought this was cool the cleats for the tack lines were added as well.........a real pain trying to drill holes for them. since that was a bust, I cut off the locator tabs and super glued them in place. I hope that doesn't turn round to bite me later. this ship sports a lanteen sail.......block and eye bolts installed, along with a couple cleats. now it's time I think to figure out the chain boards and the gun port lids. where I've made the modifications to the bulwark railings, it may have an effect on the boards. who knows, I may have to make a set that are a tad bit wider.


-
thanks for the kind comments and likes well......the vacation is drawing to a close at least this vacation, I got to do a lot more on the boats. thanks John good thing I'm not from a cow Frank then I'd be nicknamed 'patty" the Goth is still alive......wasn't happy with the ratlines. if I keep up, it'll be the oldest build in history one of these days ....... thanks Patrick and George..........that's the good clean smell of wood! It wuz all I could stands, cuz I couldn't stands n'more! I'd say I broke some ground on the Half Moon........I do have an update coming. last one before going back to the grind. thanks Ed.......just getting up to speed on the H.M. before returning to paint all those railings. I'll be glad when I get caught up with the ones on the deck...that includes the touch ups besides..........Urmilla can have some variety Titanic will resume as normal.
-
quite the mass production Daniel.........did you manage to maintain some sanity? very nicely done
-
been there.....done that Greg ......now I have to take the big jobs to the garage. looking good!
-
I've had a couple of kit like that........after wrestling with the first one......all of the others that have the problem got what I call a mast pot. it's just a simple box for the mast root to sit in........it can be shallow, built under the deck platform, or it can be installed at the keel board.....deep well. I didn't do this with the Half Moon......if you look back in the log, I did a dry fit of the masts and have them set in place with jigs {nothing fancy either}. perhaps that can help you. some folks don't cement their masts in place.......but with a problem like that, I'd imagine it would be very hard to get the right rake or maintain a perpendicular masting. I'll look forward to see how you remedy it
-
you can say that again Jerry .......I think Anja has the same kit as well {Corel}. more or less, it's just manufacturer's copyright......they cannot be the same. when manufacturers attain the rights to make the kit of whatever ship they choose, they are under agreement to only include so much detail. this was explained to me some time ago........I had asked why the Gothenborg kit did not include cannons. chances are, other manufacturers are given a different set of guidelines, should they want to market the same ship. I found some big differences.......the bulwark railings......the paint and art work {which instead of following the Billing scheme, I chose to follow pictures of the more recent boat}. I don't have too many pictures that show the complete deck...... ....the railings seem logical. After all.......we don't want some poor schmuck, whose off on a mead buzz, falling from an upper deck thanks for the dimensions J.......they will give me something to compare to by the time I'm done......I'll be sick of doing newel posts
-
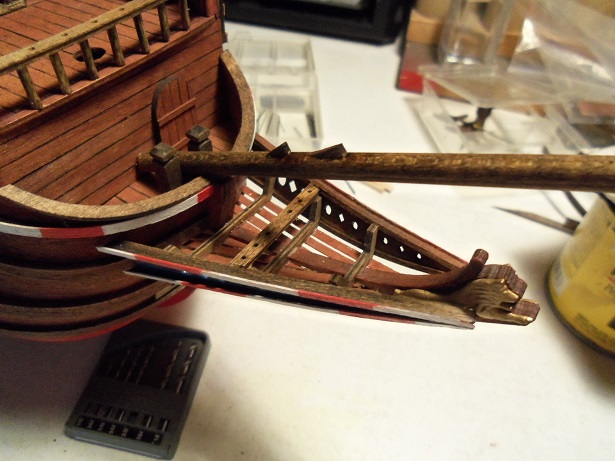
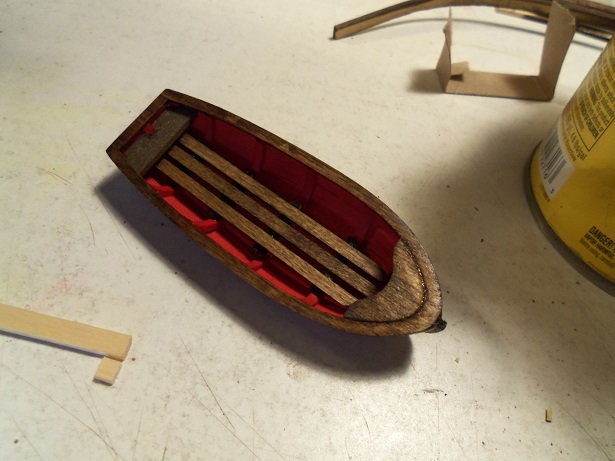
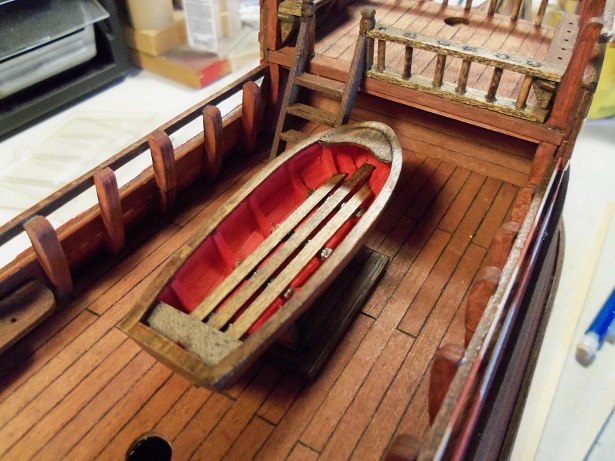
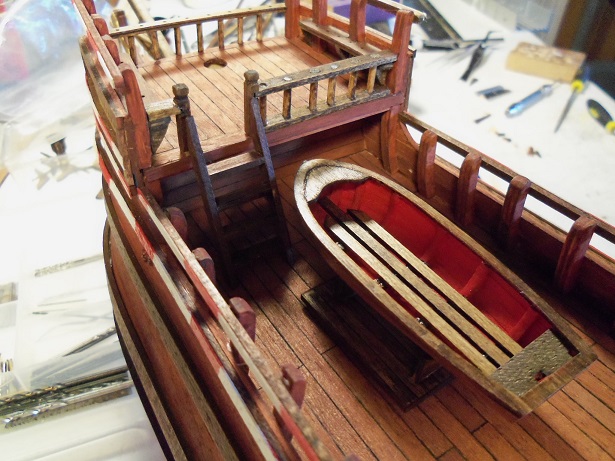
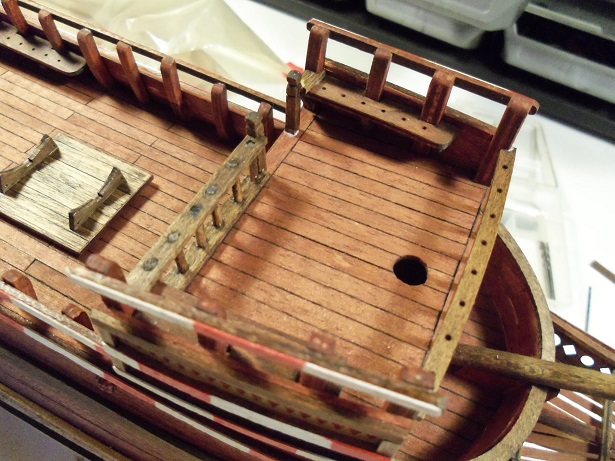
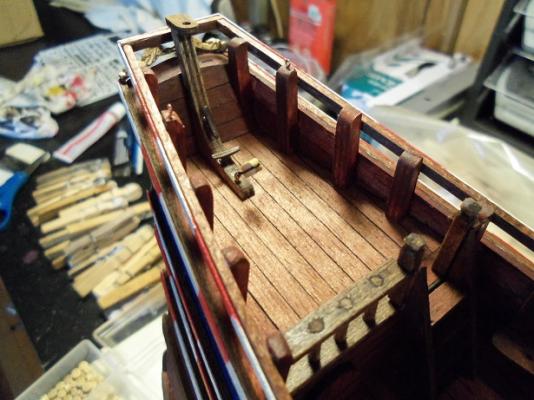
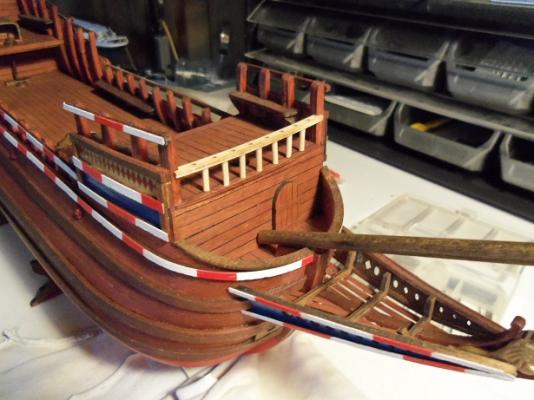
I also am trying to pick up where I left off with the ship's boat. there really isn't too much to it. if you recall, I had the parts to make one with a frame and planked it with some wood I had ripped up. I combined it with two others that I have lying around...I'll most likely use them for the trawler......still need a little more work. there are two Sampson posts that locate in the lower bow deck. there is more to be done at the bow. they were cemented in place, since they won't be in the way.......I have other aspects that I made ahead of time. with the ladder done and in place....I was concerned about interference with the ship's boat. a dry fit shows me I have plenty of room. I'm still working on the railings and ladders for the aft section........I got the railings done for the lower aft section.


-
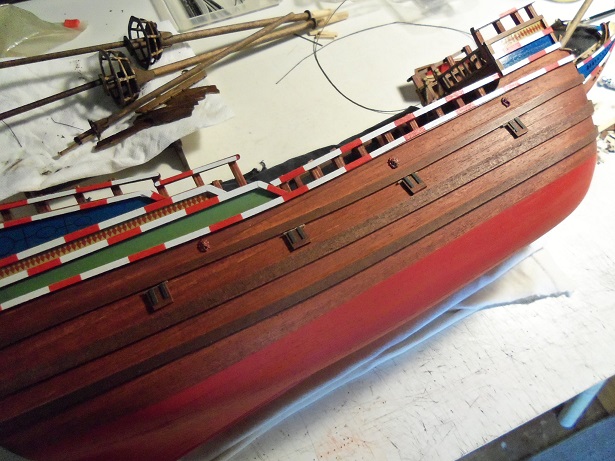
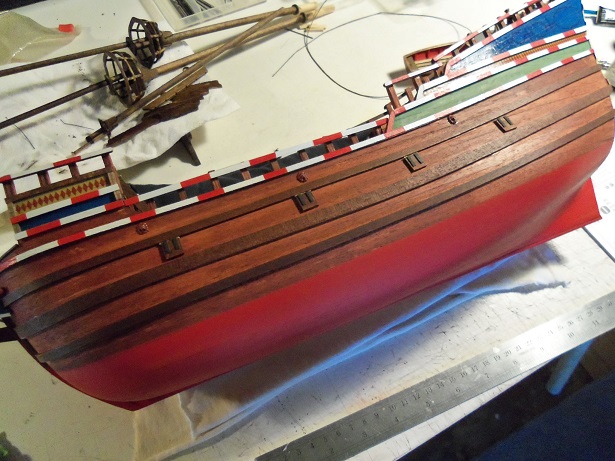
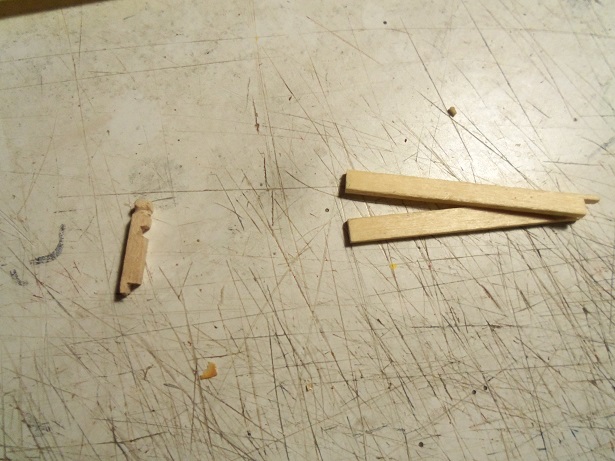
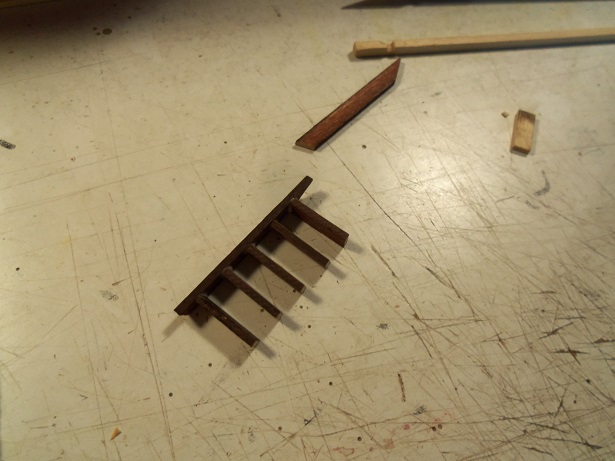
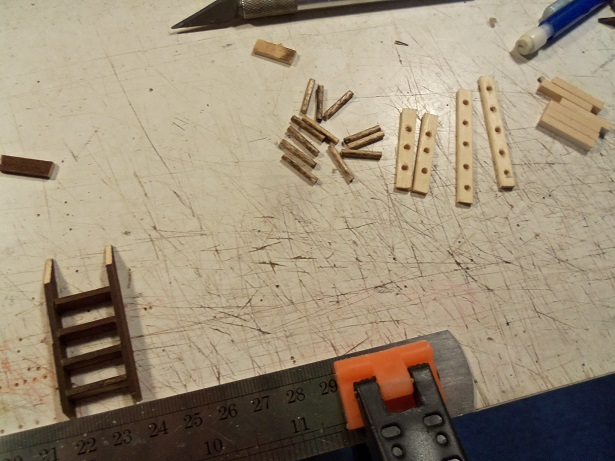
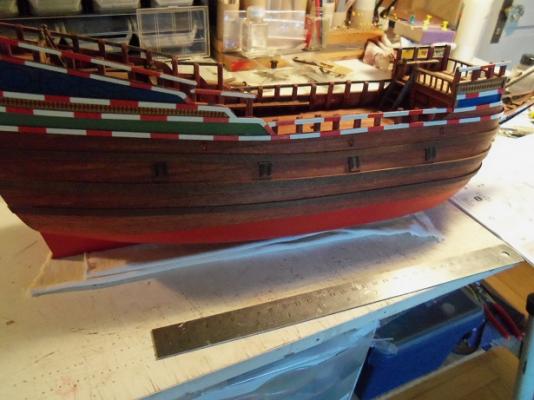
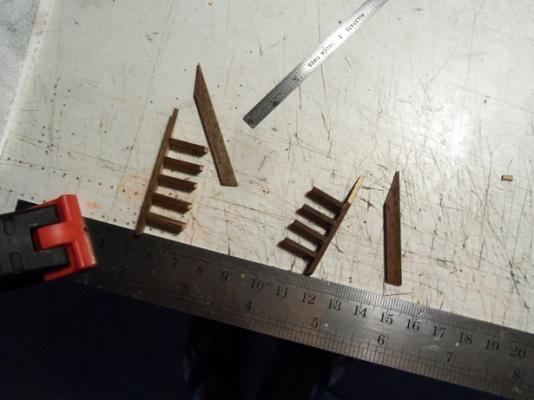
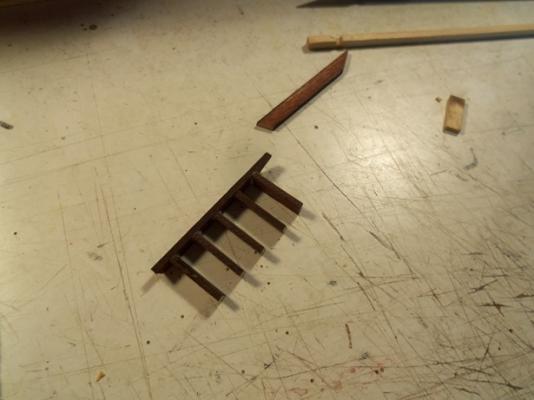
thanks for the good word and the likes folks.......glad to have put the 'bad paint day' behind me......couldn't wait to fix it. I bought the flat red a while ago, in anticipation of this day. this next update is a combination of the last couple of days.......first off though, is my little freeloader......the bow fore deck railing. I had fitted it and left it in place.......and of course, forgot about it through the masking and painting process. I think the round stock looks better than the 1/16 x 1/16 square stock Billing says to use. for the aft fore deck railing, I wanted to do something different. in the assembly instructions, it appears as a full length railing across the span, but, on the full size rigging sheet {shows you as well, where everything locates}, it stops to allow for a ladder. the ladder sits up along the bulwark......since there is a tack line coming through the bulwark in that area, I gave the ladder some space. this will require a two piece railing........this is the port side part. this will be the starboard side part. raw as they appear......they would soon arrive at what I was shoot'in for. the port side fell a bit short........rather than make a new part, I added to it. stained a bit better, it won't be as noticeable. the bow fore deck railing was stained and cemented in place.........no more runn'in 'round for you.....kid! work on the aft fore deck railing was done........it too was cemented in place. the opening does look a bit too wide..........I was going to put a ladder on both sides. I opted to just do the one ladder, since if I did it for one deck......I would have to do it to all three. the aft deck and the poop deck will have a set of railings and ladders as well. these will have narrower ladders......since this is such a large deck, I made it a little wider. I have quite a bit of strip stock, I had stained when I did the hull rails.......this looks like a good place to use some of it up. while making the fore deck ladder, I got the other parts together for the other railings


-
are those sails, ones you made, or the ones that came with the kit? if so, that's a neat way of using them very nice progress Frank
-
up.......down......personally, I'm not that familiar with it. it does look better instead of the mock up.........the way you've done it looks really nice, covering the sun deck
-
can't rush perfection John........gorgeous contours and defined plank lines.......very nice!
- 745 replies
-
- 3
-
-
- francis pritt
- mission ship
- (and 1 more)
-
Cutty Sark by NenadM
popeye the sailor replied to NenadM's topic in - Build logs for subjects built 1851 - 1900
your suppose to make it so no one can see under there! my rule of thumb.......anyway. once the deck is fully populated, you'll never see under there......I've tried on my builds....it's an eye strain to be sure. a whisk of fresh paint usually hides it well. nice progress!- 4,152 replies
-
- 4
-
-
- cutty sark
- tehnodidakta
- (and 1 more)