


popeye the sailor
-
Posts
16,007 -
Joined
-
Last visited
Content Type
Profiles
Forums
Gallery
Events
Everything posted by popeye the sailor
-
 a big thanks to everyone for the kind comments. some of you even want to see me go over the deep end........when I was doing the railings, the admiral said I was crazy........when she saw me drilling these holes, the admiral said I was crazy. I can imagine what she would say if she saw me doing rivets and porthole rings.........I'd be in a tie-back jacket before you could blink! suggest it to me when I have the Billing's Titanic I do have something for glass mark........or I could just go mental with the window maker. not sure if I'll do it though......I'll look into it. thanks also for for you folks who hit the like button!
 -
almost hated to bring it up........instructions can be a bear to decipher. you could try cloth sails......with the work you've done on this vessel......it would be well worth doing the steps look great......beautifully done!
-
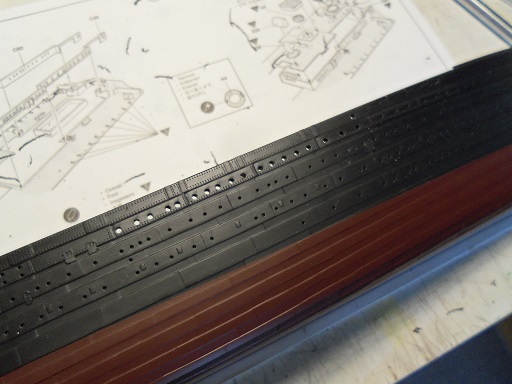
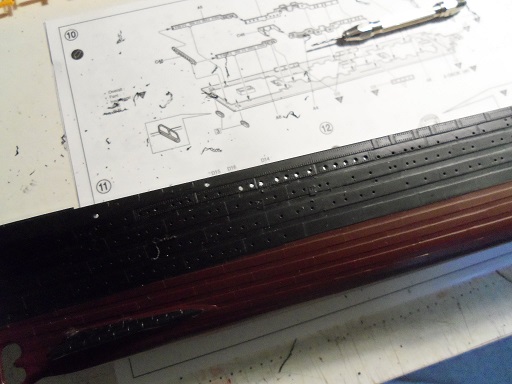
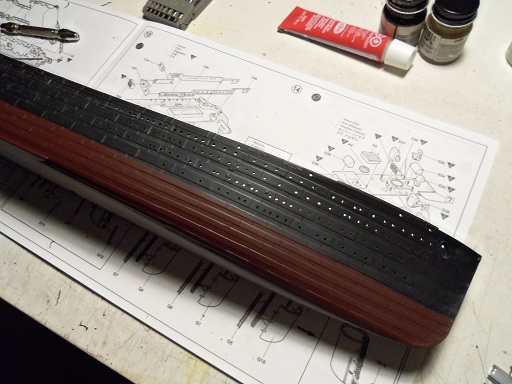
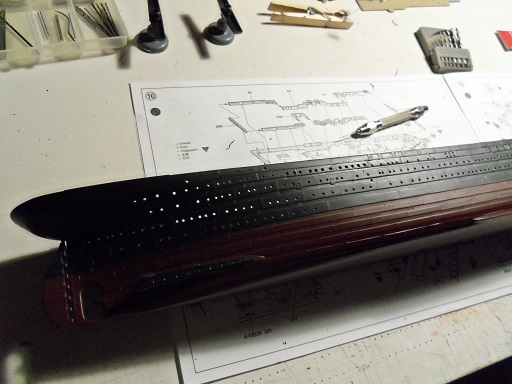
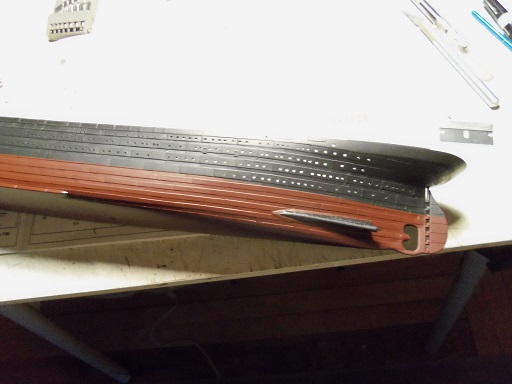
I was going to hold on to this, until I had a little more meat with the potatoes, but awwww what the heck.......I may as well post it now.....it's Friday's progress. it's the beginning phase for the paint work of the hull. if I'm going to attempt lighting this model, I thought it would be cool to drill out all the portholes. the admiral had to go to a doctor's appointment......I began at the table, but soon retreated to the front porch. when she came home......I guess she was unnerved with not finding me in the house.......I dunno.....she seemed relieved when she finally tracked me down. it took a while..........I used three different size drills to do this.....but they are all done now I guess I'll try and touch up those screw tunnels

- 573 replies
-
- 16
-

-
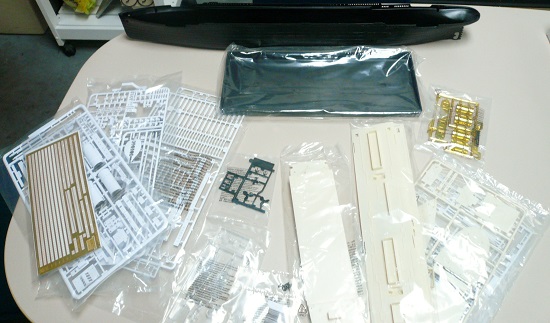
sorry for my late reply Tim.....work pulled me away... thanks for the good words.....and yea, I can agree with that. unless a person has some skill in scratch building and modification, plastic kits can be quite daunting. some detail missing.......incorrect detail and {or} location of said part, are just a few of the problems one can come across. I do like the Academy kit......I've resided myself to the fact that all kits have their quirks.....so now I just throw it on the table, and away I go The TRMA site....most of these folks {in the forum......a very odd forum, by the way} utilize the Minicraft kit of the Titanic. I'm not a huge fan of Minicraft, but after seeing what the contents of the kit looks like, I'm tempted to pick it up the next time I see it. this is the minicraft kit contents......there are some really major differences. I think this is 1:350.....slightly larger than the Academy kit. thank Greg........yea....that's the flag staff. I showed the hole in question a few pictures ago. it's really not a big deal....I merely posted the info about it, just in case someone out there buys the kit and stumbles on it.....they won't get all weirded out by it if I don't find the {missing} part soon, I'll simply fill it in and paint over it. glad to know I haven't lost one of my pet peeves.........the hole that goes nowhere

-
Cutty Sark by NenadM
popeye the sailor replied to NenadM's topic in - Build logs for subjects built 1851 - 1900
sorry to hear about your loss Nenad........my condolences to you thoughts and prayers- 4,152 replies
-
- 3
-
-
- cutty sark
- tehnodidakta
- (and 1 more)
-
sad to hear my friend, but glad that all is well. I'll look forward in seeing your updates again
- 2,250 replies
-
- 3
-
-
- model shipways
- Charles W Morgan
- (and 1 more)
-
do both sails 'billow' in the same direction? the main sail billows to the starboard side, but it appears that the fore sail billows to the port side. I hope I'm wrong.
-
I worked with plastic before I got bit by the wood bug........I do have a couple plastic kits in the closet, but I found new fun with wood.....hard to say if it's magic or not......do what you enjoy, and enjoy what you do thank you Nenad yea.....the hole is odd to me too.....I'll dwindle down the parts and see what I have left. we can only deal with parts that the kit contains.......that is, unless the enhancement you want to do, is doable in the first place. but it is good to talk about the ship and what is covered in it's assembly......after all, it is a build log I was browsing through ' old model kits .com ' ....saw the Olympia and the Lusitania.....they would be cool, but the scale is too small! I want something bigger! ........like the one Nils is doing thank you my friend~!
-
I use window maker to fill in the lense and paint them for the inside.......I'm good with that I've even made my own. as for your F451, it is the ball for the floatation buoys {I added an extra one in my build of the Mary Ann. I also built the Cux 87, which is pretty much the same model, with a slight variation in fittings. I haven't looked at the Cux instructions to see whether they show a fittings list {picture}......the Mary Ann instructions don't but I looked at the instructions that Billing Boats show on their site, and they show that part. why it looks like that......I couldn't say.
- 79 replies
-
- 1
-
-
- cutty sark
- airfix
- (and 1 more)
-
a very interesting design.......I like the idea of the stringers. I also like the size super progress at this point Nils
- 2,625 replies
-
- 3
-
-
- kaiser wilhelm der grosse
- passenger steamer
- (and 1 more)
-
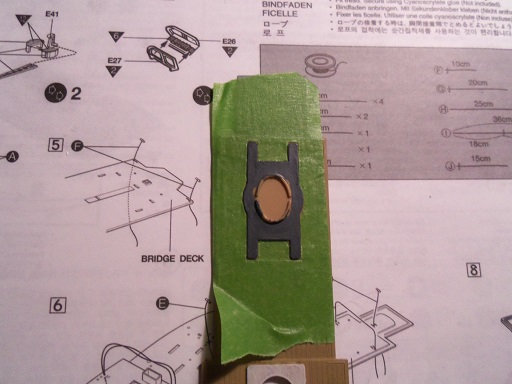
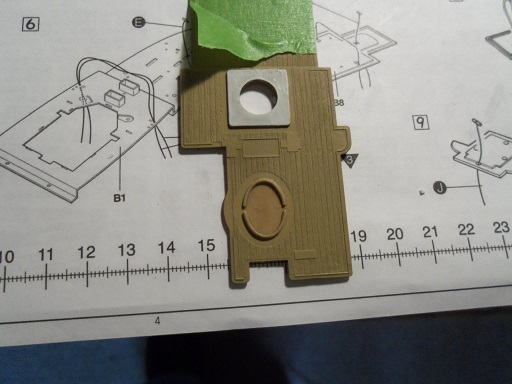
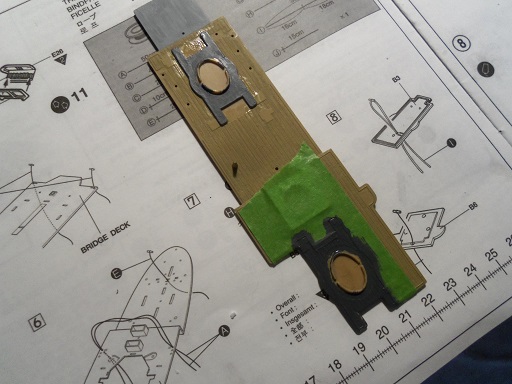
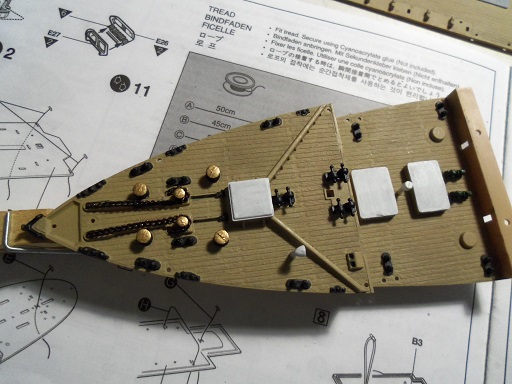
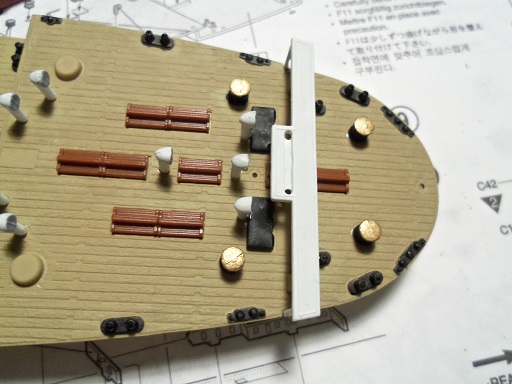
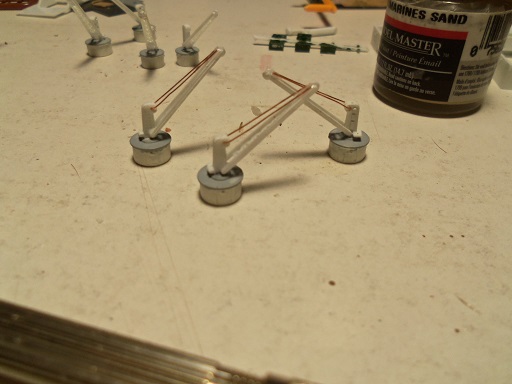
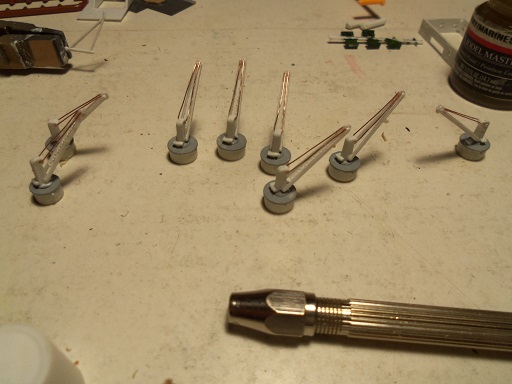
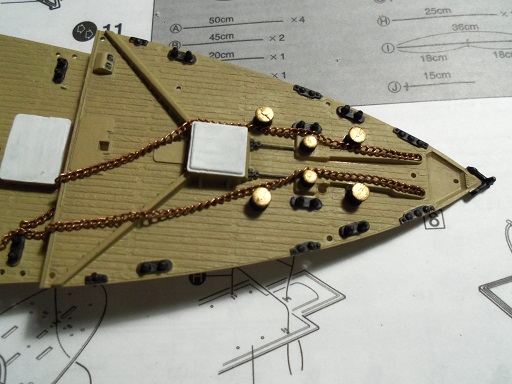
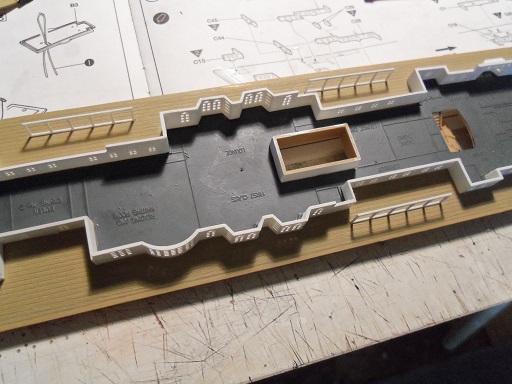
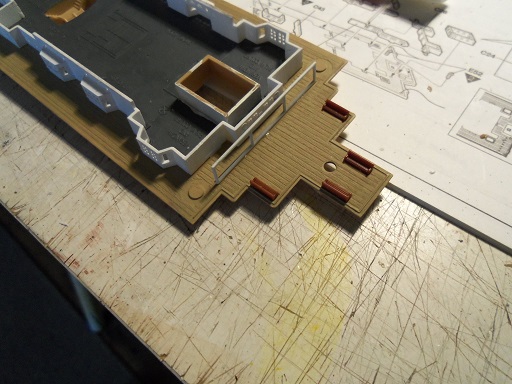
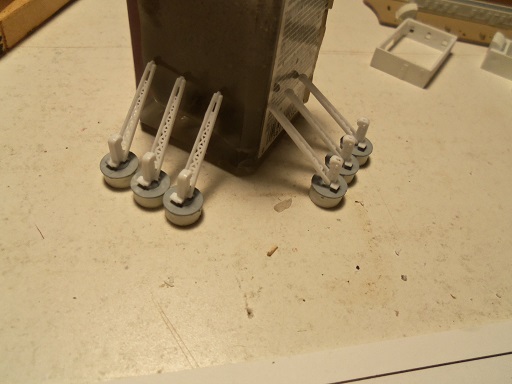
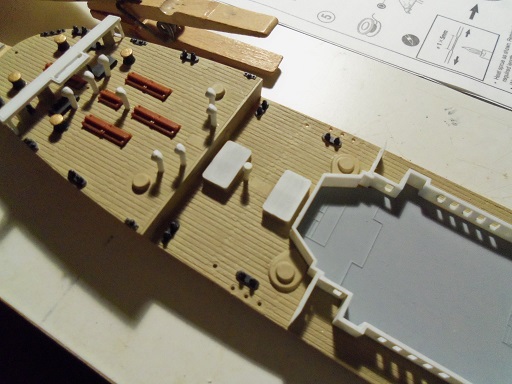
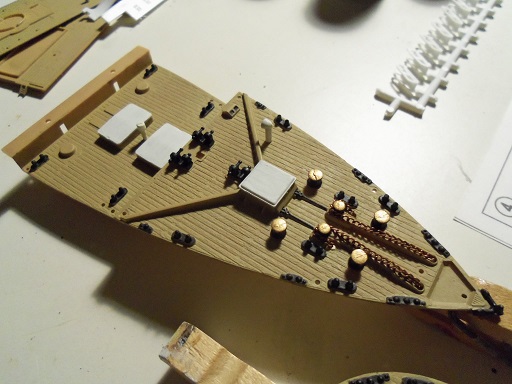
this week has been busy......I've been bouncing from the table to mowing the lawns......to raking up a particularly nasty area by the garage......wiring up outlets and motion detector lights on the garage. I think this week has been very productive so far ahhhhh, but this is the last day of it........I had taken Monday off and it will be back to work for me on Saturday. I think I'm going to book another vacation........soon...............I want it! the roofs on the structures that populate the boat deck, have a pretty distinct bit of paint work. the funnel platforms need to be painted......but one does not have a distinct platform.......but still has the pattern design to be laid out for it. I was thinking about it, while working on another aspect......and then it hit me........make a masking template grabbed the masking tape and laid a strip over one of the funnel platforms......cutting out the center where the funnel is to be cemented. then I cut around the shape of the platform. the area in question is here........ removing the newly formed template and laying it down on the area, I found that I didn't need the entire template. so, I cut off the extra and folded it over. painting went well. then, I took care of the anchor chain, painting it black. I was going to simply replace the chain......but this will be good practice for me..... I also added the winches on the lower level of the part. here is the hole that I mentioned Ben. yes, the hole to the very aft is for a flag staff........but I went through the entire set of instructions, and could not find a part that goes here. I will probably end up blanking it out later. I almost had an oopsie moment.....adding enhancement #3 to the cranes. I wanted to drill a couple holes near the tip of the booms, to add cables. they look silly without them. the drill slipped off it's mark......not just once.......but twice! it was looking pretty bleak for this to work, but after patching up the damaged crane with some plastic putty, I got an idea. I would simply lay the ends aside the pulley at the tip and call it good. I can touch them up afterwards. I soon had them all rigged....... I was painting up the ship's wheel and helm.....such a tiny part.........and finally cemented it in place. I added a couple more parts, and that finishes the stern / poop deck assembly. I can put it aside now. for the bow. the last two parts to be added are the extra anchor, and the stanchion.......I believe it would be used as an aide with hauling up the anchors......not completely sure. I'm beginning to miss wood

- 573 replies
-
- 16
-
-
you've done very well.........some real super progress!
-
Cutty Sark by NenadM
popeye the sailor replied to NenadM's topic in - Build logs for subjects built 1851 - 1900
hoping recovery picks up speed for you two Nenad.......catheads look sweet!- 4,152 replies
-
- 3
-
-
- cutty sark
- tehnodidakta
- (and 1 more)
-
the only helm I have seen to do anything with is on the poop deck. the others are superficial and hidden. it's good info though........I haven't assembled it yet to the docking bridge {guess this would be what that particular strip of deck is called}. thanks for the info and it's use
-
thanks Patrick........that will still take some time. does make me wish I had the one with the P.E. upgrade......but as long as it looks good, I'm not kick'in! thanks for the good word!
-
I wonder if they have things like this in the states? I do agree....very clever! uniformity would be the key here...the number of teeth may vary, but spacing and straightness is crucial. do you have a sort of guide built into it? looks great Daniel!
-
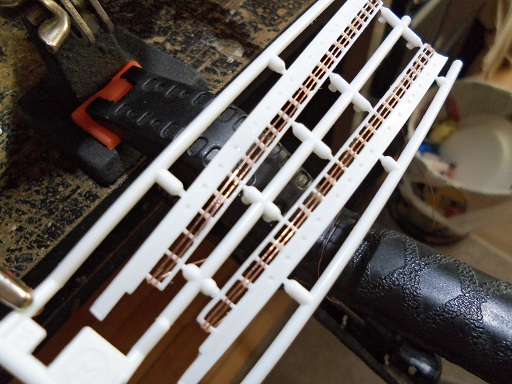
oh, that's right Gary.........looking at so many, starting the get them mixed up! Hee....Hee! got to admit though....it's a heck of a deal. I showed the e-mail to the admiral......she looked at me kinda strange whae I asked if I could have another unless one purchases a kit, you hardly ever get to see other brands of the model. in the minicraft kit, for instance......the only parts that come chrome, are the stand parts. you can see that they don't use the multi color plastic.......and the tooling {in my opinion} is a lot better. the bow and stern aren't these large sections, as with the Academy kit. oh....well......I guess I can keep on wishing that the admiral will turn as crazy, as I am thanks John and Frank hello Greg.......it wasn't easy hence the reason why getting more that these two rungs on there would have been a bust. so close together......and using Ca.....it would have closed up so many spaces. I have a couple that I need to clean out, so I called this good, and am satisfied with it. thanks for the good word! thanks also to all who hit the like button
-
gotcha Pete........so, now she will have them. your progress has been very good. she looks great! at least they got the design work on the cabins right
-
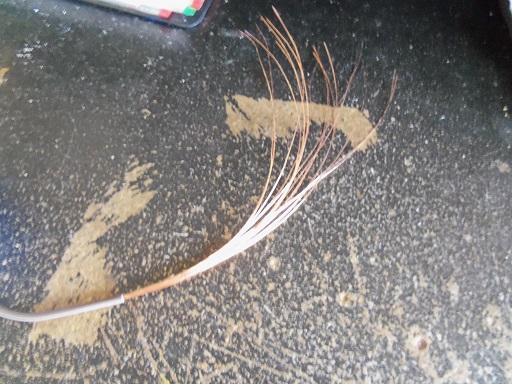
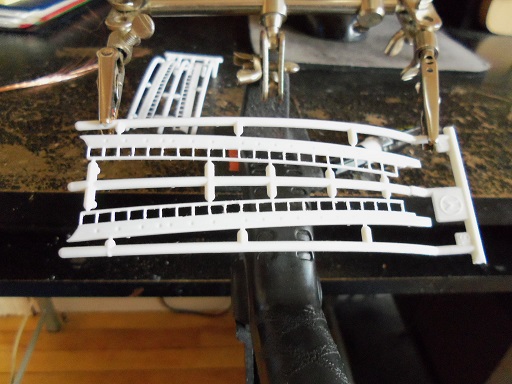
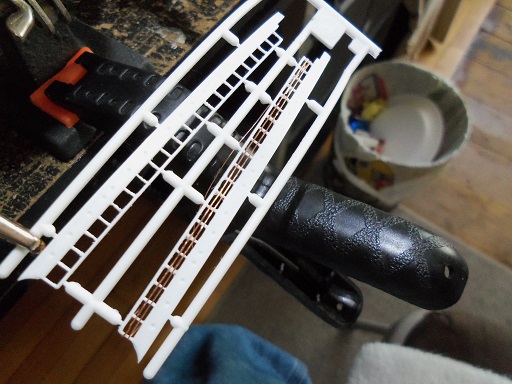
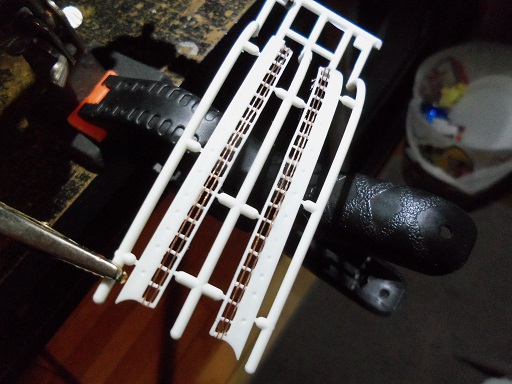
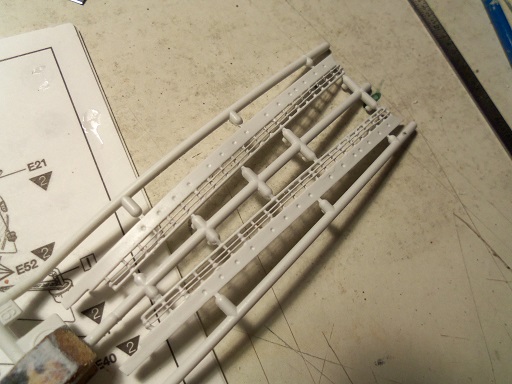
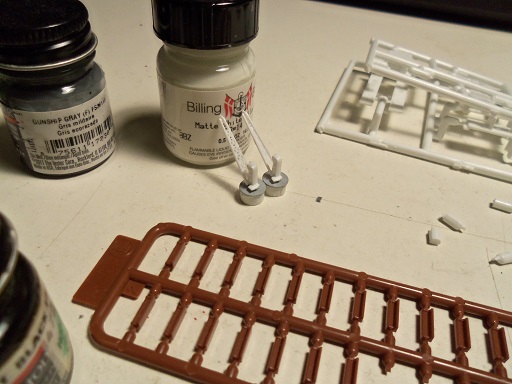
I'll post the change made to the anchor chain......shouldn't be too tough to touch up.....thanks again John before I begin with this update...wanna get in on the fun too well I got an e-mail from Model Expo today...they are offering the Minicraft Titanic for almost half price! reg price: $119.99......down to $65.95......and it even has the P.E. upgrade! I forgot to look at the scale........but it has to be 1:144...it's a little over 30" long! so, don't be the LAST kid on the block , to own one of these buggers.......promo code JU2! >commercial's over< anyway......I can make amends to the second enhancement I planned for this kit. But, I can't do anything about what I did here........on the first enhancement I started with. the railings are supposed to have four rungs to them. I began with that in mind......but in the interest of keeping the integrity of the parts that I'm trying to save, I settled for a bit less. I did some electrical work in the garage today. when I finished, I managed to out aside a short piece of 16 gauge wire. Stripping it down, it revealed the many strands it has. setting up the helping hands on my desk, the sprue with the bulwark part on them, was clamped in place. I began with the bow parts. the wire was cemented on using CA.......for some reason, it wouldn't stick too good. I'd put a dot of CA on and then wipe the excess away. finally, both sides were done.........the best I could do was two rungs. any more than that, and I'd be looking at the same thing I cut out in the first place. the stern part {the ones that gave me the most trouble} actually came out looking better than the bow parts. the bow parts were painted white...there is a little bit of clean up that needs to be done. even though they are not quite right, I'm happy with the results. I did a bit of mess'in around, doing some testing on 'White Star Buff'. the TRMA site gave a couple of suggestions for paint......one of them was a color called British Gulf LT Stone #2137. I happen to have a bottle of it. I did a swath on a piece of sprue...there is some ghosting, but the paint isn't mixed well enough yet. the separation of the paint was pretty extensive...it's an older bottle. I think the orange of the funnels will tint it well enough. the stern parts were painted as well......a couple touch ups need to be done, I think this is a better way to go.....rather than the alternatives


- 573 replies
-
- 15
-
-
thanks Nigel.......I'm still doing my share of dropping thing.......mostly tools though this next bit of progress I made was very perplexing.....of all thing to drop to the floor...the tube of CA. .......and every time, it would end up under the lower level shelf on my desk. thanks for the good word OK john........you caught me the anchor chain is supposed to be black........that's what the fake looking chain was molded in. I kinda liked the antique copper look, so I left it.......but in the back of my mind, I wanted to go over it with black. I figured that if I missed any spots, I could call it rust I will paint it your word is sage to me {two thumbs up}.
-
thanks Augie and Nils. my attempt to get this build over to the smaller table, so far has been a failure. I don't see it happening as fast as I would like it to. I guess I'll just stay on course, and finish this one outright! perhaps when I get to the point of finishing it out.......there's still hope I'm glad I changed my mind about the deck. reading John's comment, confirmed my thoughts {thanks John } I still have a ways to go....but if I were, I have the Jolly Rogers......as well as everything on my roster. no worries Augie.....I'm sure I can imagine something up! the hole I'm referring to is just in front of the center vent, in front of the bridge. the one at the very aft.......I haven't seen the part that goes there yet. it must be later in the build sequence. I can't believe the ship's wheel is out in the open like that.......you'll see what I mean in a bit. if I don't see a part that goes in the hole I mentioned, I'll just fill it with glue and paint it over. it's not a big deal......just I don't like to see stuff like that.
-
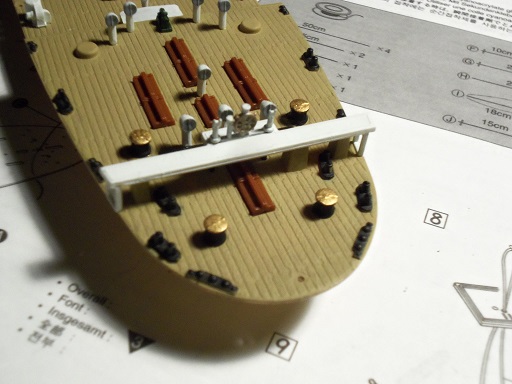
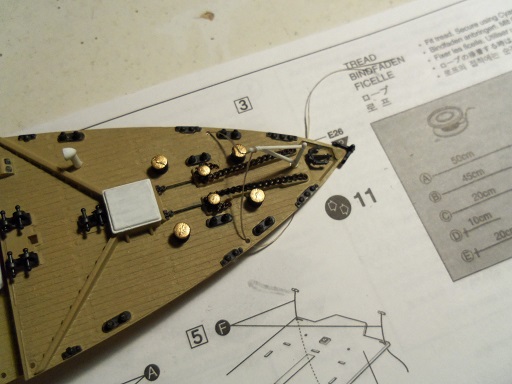
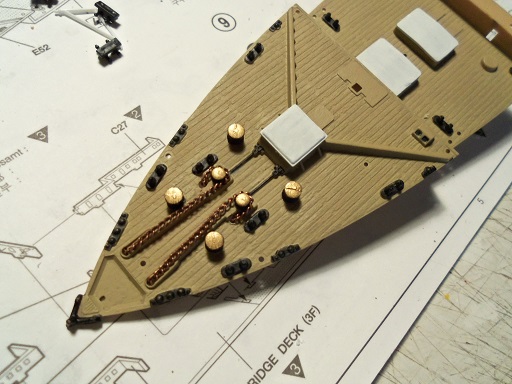
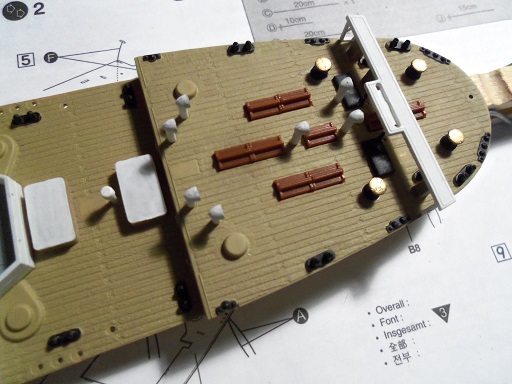
I had cemented one chain on the hull already........the other side is now cemented in as well more parts were added to the A deck........support racking for the upper deck and benches that line the aft section of the deck. the anchor chains were wrapped around the capstans, and terminated through the added holes. the stern section got a few new parts as well.....the vents and the bridge, where the ship's wheel is located. there is one hole that I have no idea what goes there........the exploded assembly view is very crowded. the cranes were assembled.......I cemented the booms in place. six large ones and two smaller ones a few more parts were added to the bow and stern sections. they are almost complete. today, the sun is finally out........the bout of rain we've been having is over. it's still on the cool side, but I think the temps will rebound until we get back to where we were. I should get my butt back out to the garage and finish setting up the electrical outlets and lights. shouldn't take me too long though. it will be busy today......but it won't stop me from making some progress. one finished build for 2015........I'm shoot'in for more

- 573 replies
-
- 11
-