HOLIDAY DONATION DRIVE - SUPPORT MSW - DO YOUR PART TO KEEP THIS GREAT FORUM GOING! (89 donations so far out of 49,000 members - C'mon guys!)
×


popeye the sailor
-
Posts
16,007 -
Joined
-
Last visited
Content Type
Profiles
Forums
Gallery
Events
Everything posted by popeye the sailor
-
 awwww........just say it Larry........you did it for a reason..... most folks will be so taken by the overall appearance, that they will forget that they left their microscope at home. but.......if there are some to be vacant and you plan to show it, perhaps a little tweaking might be in order.
 -
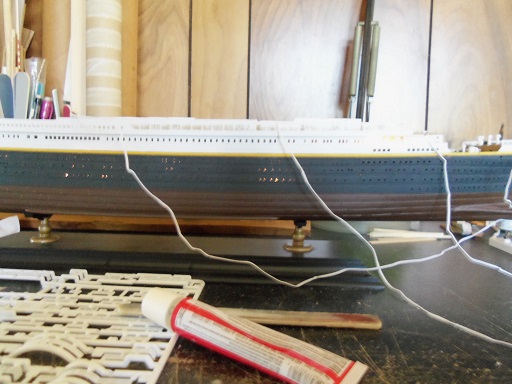
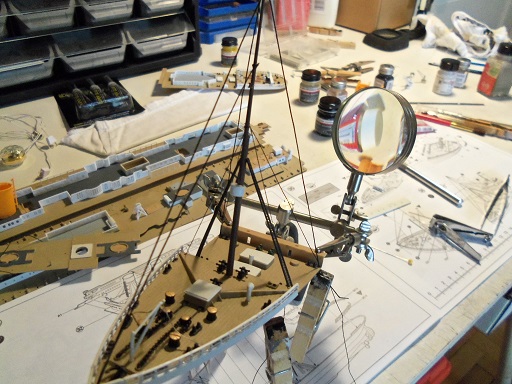
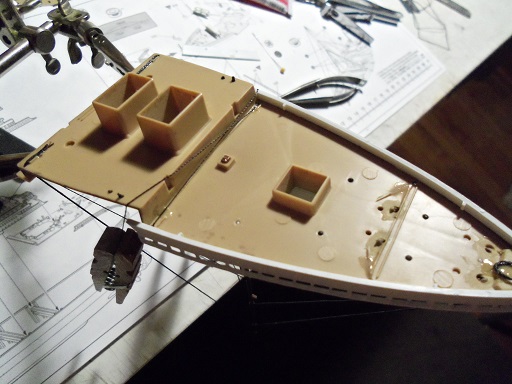
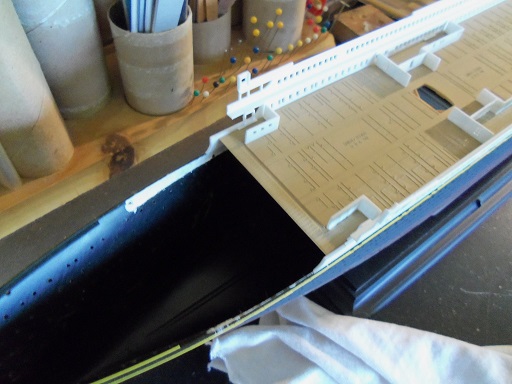
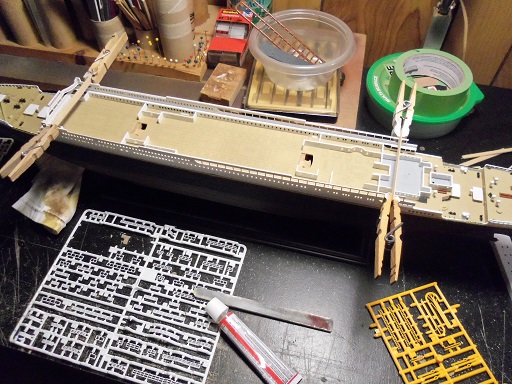
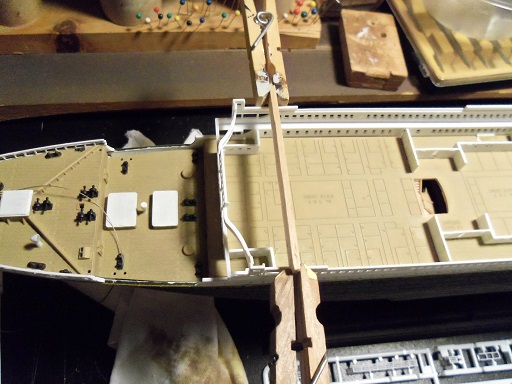
the place is hopping here........although I'm not spending it where I would like to. compound that with a dog that is deathly afraid of loud booms, and you get a very short attention span. I've kept him close these last couple of days.....last night I was up well after 2 AM. anyway.......to recap what I've been up to I put a few lights in the hull to see how it would look. too bad it was daytime......it might have looked better. I only have two lights in the hull..........as many as five may be needed. touch ups were done to the mid ship section. the fore stays and the three main back stays will be the larger size thread. I opted to use the kit supplied ratlines. they cleaned up well and I refined the contours, getting rid of any mold marks that might be on them. this part is the front fascia for the bridge deck.......it is sooooooo incorrect. the slant of the outer edges are wrong, it appears to be too tall, and there is no slot cut out for the stairs. I may have to cement the bow section to the mid section, in order to straighten it out. more stays were added to the bow section......all the lower ones will be the smaller thread. there are quite a few of these lines, but it will need them all for support, when the communication lines are installed. they will span from the fore mast, all the way back to the mizzen mast. using clothes pins for weights, they will be hung off the sides and cemented on the underside of the deck. almost all of the lines are done on the bow section..........one more pair and the back stay terminating on the boat deck, from the forward structure roof, are all that's left to do. there are still a few more parts that need to be added to the bow section. more to come.......

- 573 replies
-
- 19
-

-
the stern ratlines Sam........the starboard side looks like it's too long and bulging out from the model. actually, the kit supplied ratlines don't look too bad..I've only done the bow section at this time. I haven't really looked at it yet, but cementing the stern section to the mid section, may be a tool I can use to cure the slight warpage in the hull.......jury's still out on that one. sorry for the lack of pictures........I've had to babysit a very scared dog these last couple of days. I'll get right on it!
-
you are among a cavalcade of first timers Larry.........I raise my hand as well playing so long with plastic and fishing boats, really hasn't given me too many opportunities to try them either. mass assembly isn't fun either looks like your well on your way. nice tools BTW............wish I had that chopper when I was planking those three hulls.......
-
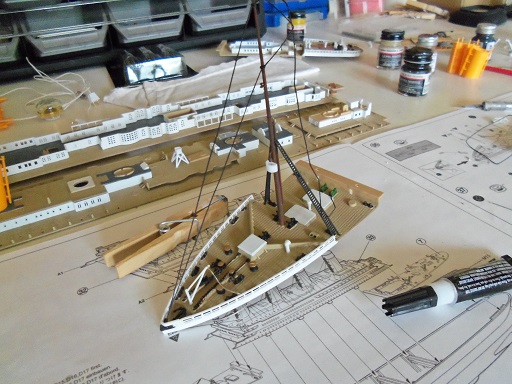
thanks all for the kind words and likes. I got a chance to do a little on her yesterday. I wish it were Nigel.......the TRMA has some wonderful rigging diagrams. I'd love to use them, but it just wouldn't look right. I haven't seen that one Larry......kind of reminds me of that Bugs Bunny cartoon where Daffy Duck does his "exploding duck trick". bugs is clapping saying "wow Daffy, that was some neat trick!" ....and there's Daffy, floating to heaven, saying "yea.........but I can only do it once!" done some rigging to the bow section.......mast is up. I'm using two sizes of thread......the difference in size looks pretty good to me. however, I did settle on the kit supplied ratlines......close compatibility on the preformed, but no cigar.
-
thanks all for the kind comments and the likes. it wasn't that bad Greg......but enough to warrant an apology. usually I'm the one whose bummed and she's the one giving me the pep talk we're good took the clamps off it after I mowed the lawns..........I can pull it off now without any more horseplay......I glued the underside and touched up the glue marks on the surface. I need to be careful with it now.......cripes, I'm knock'in off the vents and stuff. this is the reason why I made the change in assembly. I didn't want to have too many small parts on there that can get knocked off. I can't wait to see how the other two decks {assembled} go on there. I did do a dry fit with the A deck.......it fits pretty snug. hope to have an update soon
-
some really nice progress Den.........I agree on the planking.....contrast makes the eyes grow fonder
-
looks great Bob..........I like basswood as well. I've seen hulls done in mahogany, and they look nice as well. I used to order my wood from the Billing's outlet / warehouse in Wisconsin {Tom} , but I haven't ordered any since they closed. what I was using was a wood called Obechi. I've been getting stuff from Hobby Lobby
- 127 replies
-
- 3
-
-
- dragon class
- yacht
- (and 1 more)
-
come on!!! you mean to say that you don't compear your model to a banana???? it has appeal {find the hidden fruit}
-
mine's a hand held one.........I lock the button and set it upside down in a milk crate. one of these days, I might get an orbital sander...a bit smaller and more compact again.......your hull looks awesome!
- 2,625 replies
-
- 5
-
-
- kaiser wilhelm der grosse
- passenger steamer
- (and 1 more)
-
she looks super Sherry........love the way you made the lanterns really dresses her up!
-
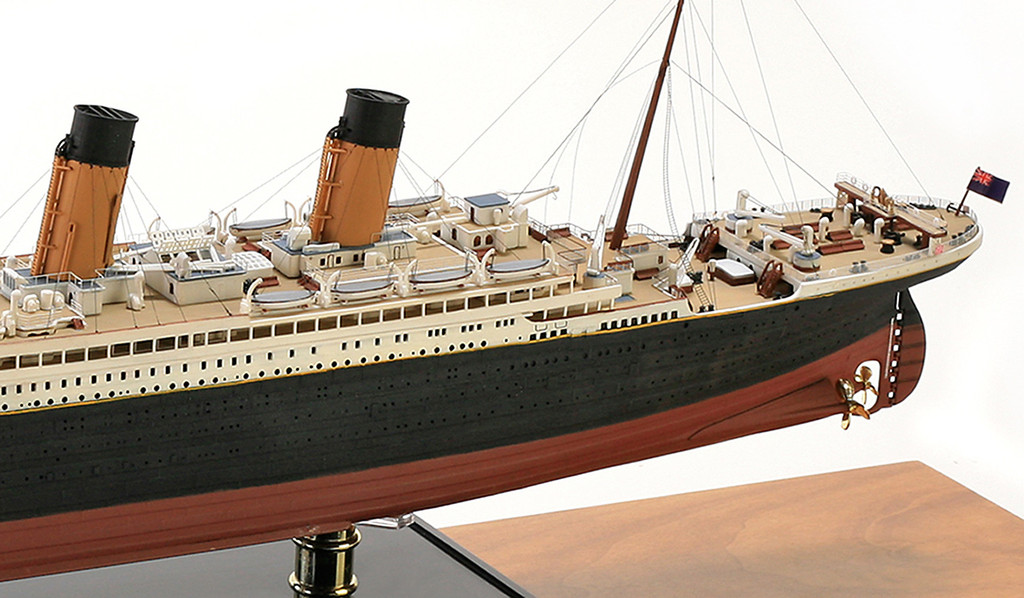
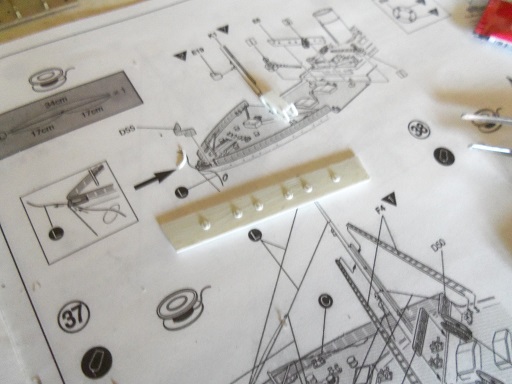
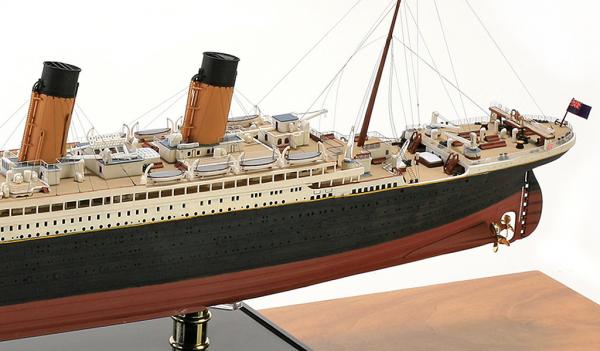
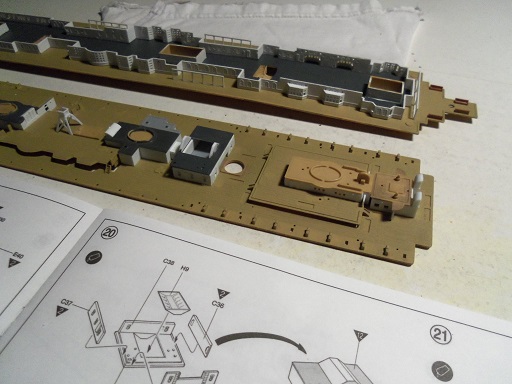
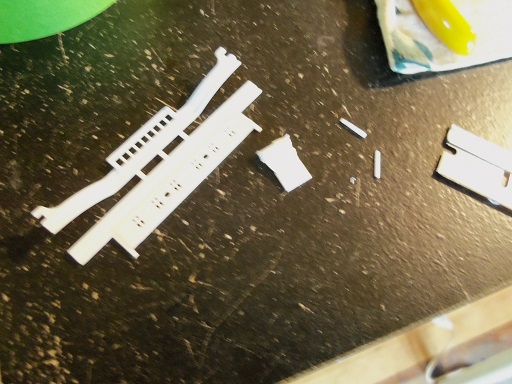
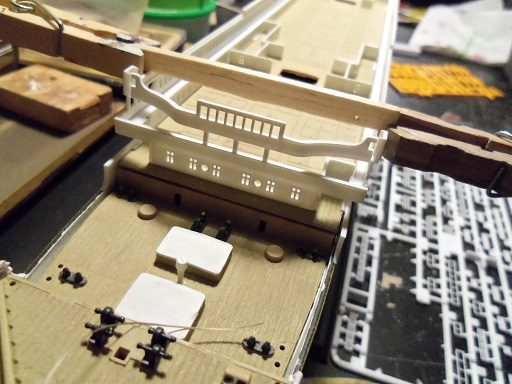
it's been a week or so since my last update. along with the chores I've had to do around the house, the admiral and I have been battling this nasty summer cold. 'ole Suzanna was right! we've been miserable! it's now settled in my chest, to make life even more so. but I have been too lax with the Titanic....as well as skeptical with the instructions. I decided to go my own way.......if the need arises to modify......so be it I'm still in a quandary over the ratlines........using the preformed ones instead of the plastic ones. while I was in my thoughtful spot, I looked at the photo of the Mini Craft proto type model....and it made me stare........ not too keen on having this on my build........note the rigging as well. this is where I tend to think that there should be different size rigging thread. it would be hard to come up with blocks for the rigging diagrams I have though......too bad this isn't at 1:96 scale........I do have some from the C.S.S. Alabama, the Cutty Sark, and the first U.S.S. United States build. I've always loved this Revell series........in spite of the conjectures ans conceptions that surround them. anyway.....I still need to check this out. last week or so, I showed where I was, with the boat deck.......the aft structures need to be painted, the life boat cradles need to be done.......various touch ups.... the fascia wall that houses the fronts of all three decks, need to be widened at the base of the wall. one of the name flags was cut out of the parts sprue and slivered into tiny slices, which were cemented on both sides of the bridge deck portion of the wall front. when dry, it was trimmed and fitted to mate the adjoining wall structures better. here, the slot impression in the deck, shows where it is to be located. once fitted, it stands in place much better. now comes the part I've been dreading.........cementing all this together. the deck itself is so long and flimsy, it was really a feat to get everything lined up. imagine trying to do this with three decks cemented together. I even snapped at the admiral.......she saw my frustration and offered to help. I apologized profusely after the ordeal......it's never been my way to get that agitated. I was very glad to hear she didn't take it to heart. during the procedure, one of the walls came off. before the fascia was cemented in place, the wall was reinstalled. I made those simple clamps to keep the walls perpendicular while the assembly was drying. I did the same for the aft section, cementing on the top areas of the mating at the aft........it won't be so flimsy, when I do the underside {where I wanted the glue marks to be in the first place}. I have some damage control to do later. there was a slight adjustment of the clamp, but the front fascia was cemented in place at this time. I will also finish this up, when the glue has had time to set. yea..........like all night!!! this morning.......I took a look, but haven't touched it yet. when I do, it will be to pull it back off and cement the underside. the fore and aft sections of this part of the assembly, will need to be masted and rigged, before all three sections can be cemented permanently in place.

- 573 replies
-
- 20
-
-
thanks Mobbsie.....yes, I am a lucky guy. it's been a fun ride, even though the Zodiac deems us not compatible for one another {if anyone believes that nonsense anymore}. really appreciate the well wish, my friend! I do have some progress to report on Titanic........but first I must take Gibbs out for his morning jaunt........be right back
-
I agree Mark.......especially the first row! wonderful work Daniel! you are definitely the king of the diorama! so very well detailed!
-
I do the same thing with my belt sander......stay safe my friend
- 2,625 replies
-
- 1
-
-
- kaiser wilhelm der grosse
- passenger steamer
- (and 1 more)
-
congratz on the new arrival Ben!
-
the way your accenting the interior is really nice. the wood finish really brings out the inner beauty
-
Cutty Sark by NenadM
popeye the sailor replied to NenadM's topic in - Build logs for subjects built 1851 - 1900
catheads and whisker booms look great Nenad........just a slight paint adjustment- 4,152 replies
-
- 1
-
-
- cutty sark
- tehnodidakta
- (and 1 more)
-
have you given though to get mahogany in thicker strips? I've known some kits to use it as the supplied planking. not that I would use it.......I've always thought of it as a finish wood. I've done the method you've described, doing the double planking.......I've liked the way it comes out I don't think you really need be concerned with the thickness issue though........I think faring the hull frame will help you with that
- 127 replies
-
- 3
-
-
- dragon class
- yacht
- (and 1 more)
-
I'm sorry to say that my plans for George Clooney.......is a bust. apparently, the 'ole boy is too busy for the likes of me. Sorry Frank......I tried on another note...........not that I go there a lot, but I posted some of my past builds on my Face Book. I had a few of them on there already, so I figured that I would add them in. I also posted the Andrea Gail pictures, which got some nice reviews...........pleased and proud I was my friend Tom sent me an e-mail, letting me know that he had posted the pictures on his Face Book as well. I was surprised to see that one of the likes was Kent Billing.......I guess I should be glad that he didn't raise a saber citing copyright issues........after all, she does look quite similar to the billing's finished model. my only answer to the charge would have pointed out whose practicum I followed.......what did anyone expect the outcome would be? if anything at all, it shows how well I can read the instruction sheet.........to discern the big picture from a vague description. I'm still very pleased to have fed my inner monster
- 956 replies
-
- 9
-
-
- andrea gail
- trawler
- (and 1 more)
-
thank you Nigel.....same here we're still making future plans that include each other.........so I guess she's not planning to stick me in a box or have me committed thanks for the kind word on the Titanic.....I've started my vacation, but haven't touched it these past couple of days. this is a very nice kit, in spite of my changing a couple things. I'm getting to the point where the model is going to make me do the rigging for the funnels and masting. they show this at the beginning of the build......I thought that was a bit early, not wanting to wrestle with hanging string while building the main parts of the assemblies. in looking at this, I looked at the ratlines for the masts, in relation to the supplied rigging thread. somehow, it doesn't make sense to supply only one size thread, when the ratlines are thicker........I would imagine that the fore stays and what back stays need to be done, would be the same size rigging as the ratlines {the main parts of them}. I'm not a big fan of plastic ratlines either......not sure if I want to go through the trouble of making them. I do have a though running through my mind at the moment, to look into the preformed ratlines that are in the United States kit, that I have. I'm planning to do the ratlines on that build, so the supplied ones will not be used.......I could cut them down to get the pieces I need. this revelation, coupled with the change in the order of assembly, is proving to be quite a conundrum {there is also the slight warpage in the aft section of the hull to deal with as well}. I have a chore or two to do today........but I promise some sort of progress........by this evening...I hope
-
well......at least you had a contingency plan......... oh well......all's fair in love and modeling say........how are those coffee stirrers coming along?
- 119 replies
-
- 2
-
-
- la reale de france
- heller
- (and 1 more)
-
looking really sweet Rod! very nice progress indeed!
-
SJORS!!! where have you been!?! missed you good buddy! yepper.....already told the admiral that another shelf will be needed it's the one thing this crazy mixed up world can't take away from us! thanks Patrick glad to see your back Augie........I can go klompen in the car :D would it be a better smell than the last freshener the admiral bought? perhaps.....Carl I still have to put the mat back in the car.......we had a few days of rain. it must be all washed off by now thanks Greg for the well wish..........and who commented or liked.......nice to have friends like you folks