HOLIDAY DONATION DRIVE - SUPPORT MSW - DO YOUR PART TO KEEP THIS GREAT FORUM GOING! (Only 51 donations so far out of 49,000 members - C'mon guys!)
×


popeye the sailor
-
Posts
16,007 -
Joined
-
Last visited
Content Type
Profiles
Forums
Gallery
Events
Everything posted by popeye the sailor
-
 WHOA>>>>baby!! looking good there Sjors! your off and running!
- 1,616 replies
-
- 1
-

-
- caldercraft
- agamemnon
- (and 1 more)
-
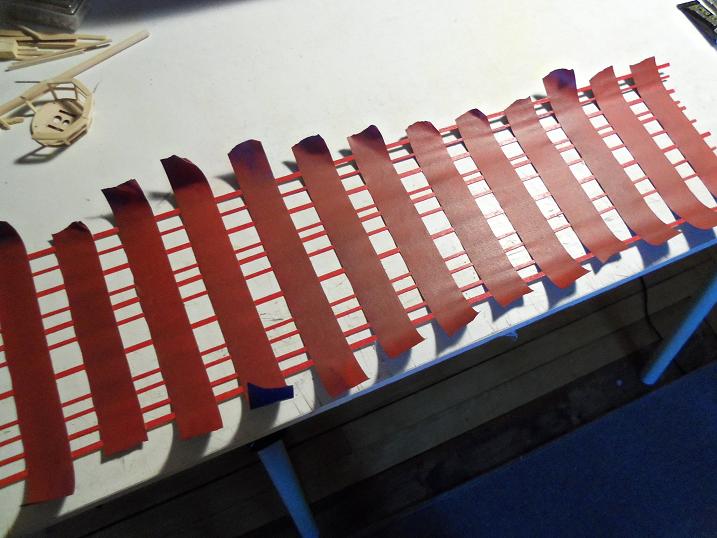
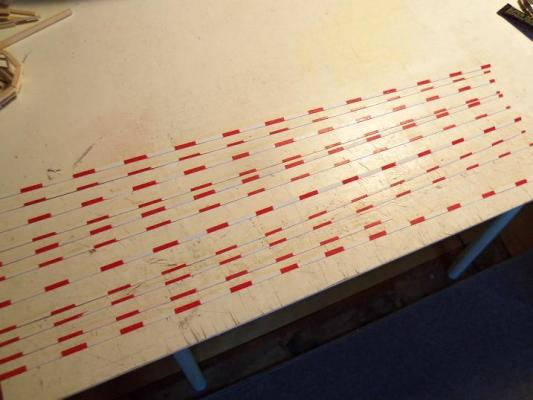
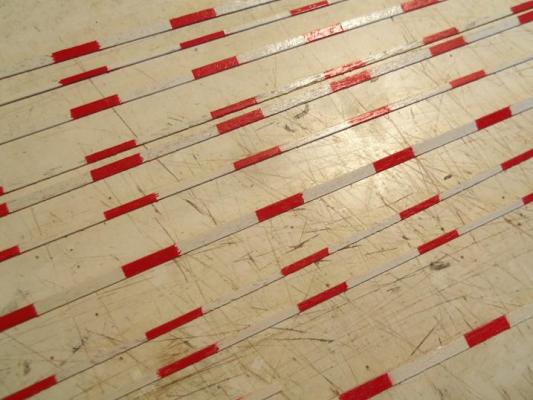
I also need to get a move-on with the exterior hull work. I'm just going to go with the best looking scheme and be done with it the way I did the railings, will make it hard to follow the flow of the lines, but I will try to make it work. the first aspect was with the railings themselves.....the red and white striping. I took a bunch of thin mahogany......in different widths, and painted them white. I sorta goofed here when I masked off for the red........I should have cut the tape down and cut down on the length of the dashes. yea........I used that crappy blue stuff! it didn't come out as good as I wanted it to......but it is salvageable, so I guess it's not a total loss. just as well.......I don't have much extra stripping left. I tried a piece of it on the model.......touched up, it will look better


-
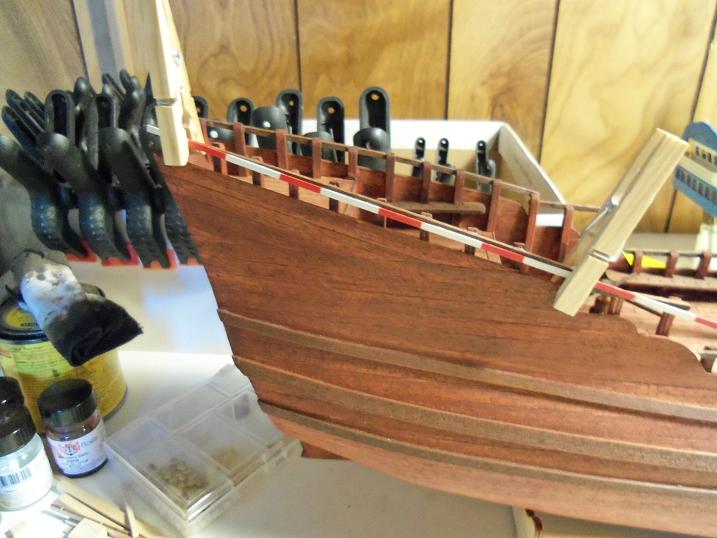
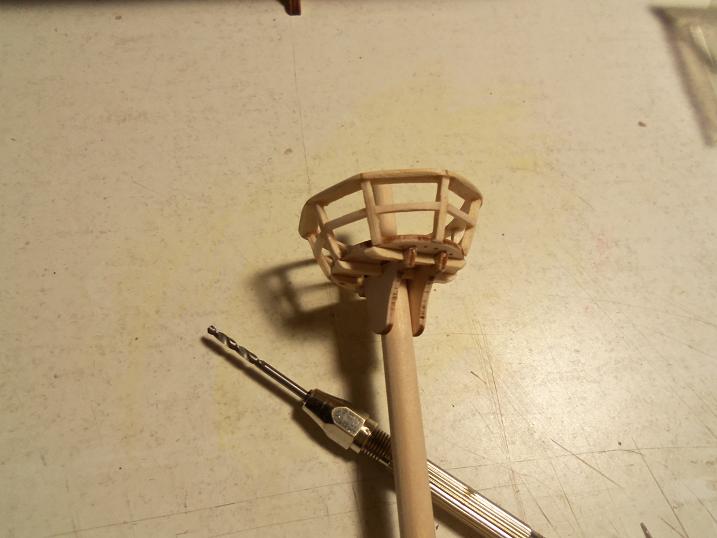
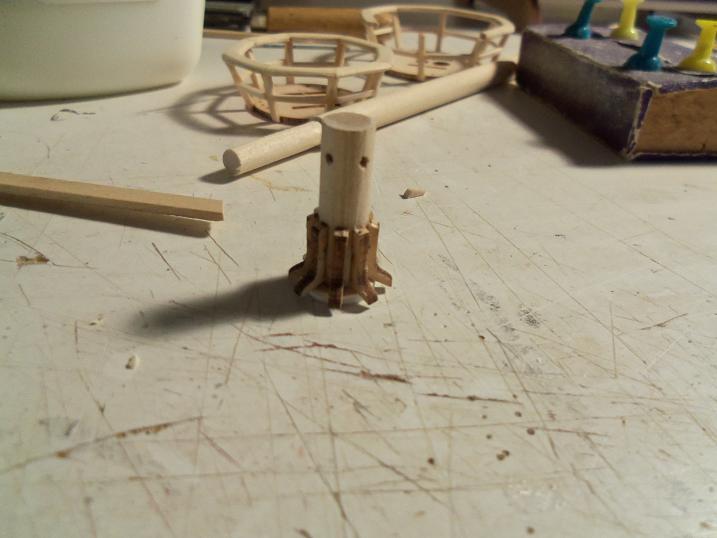
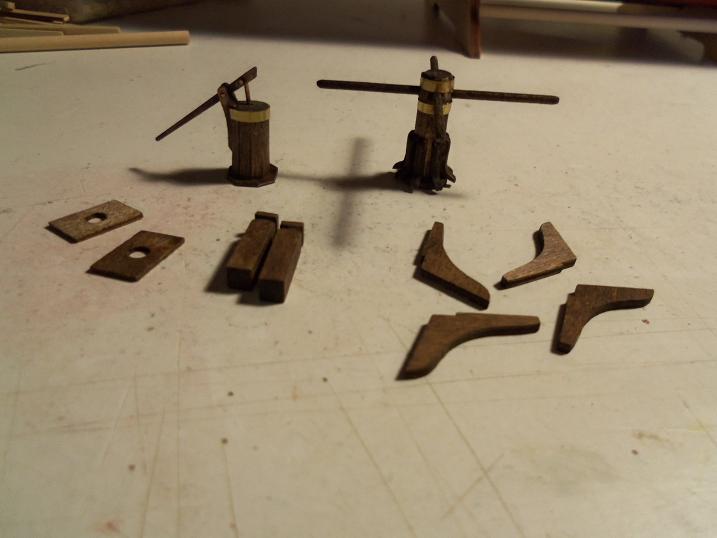
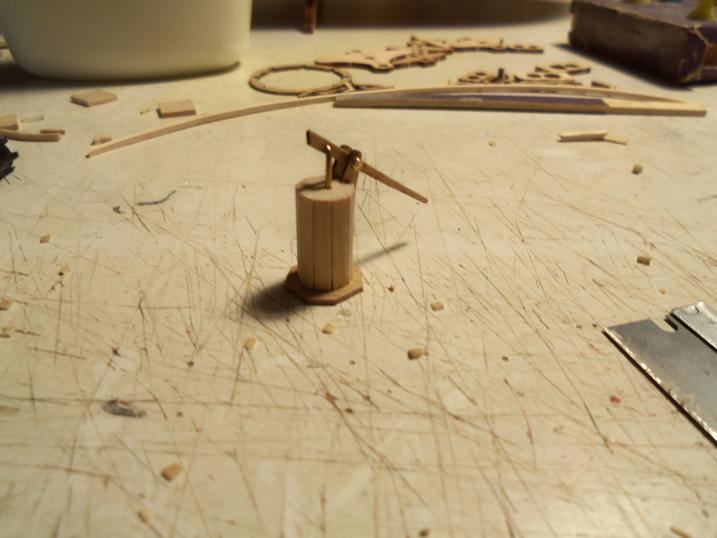
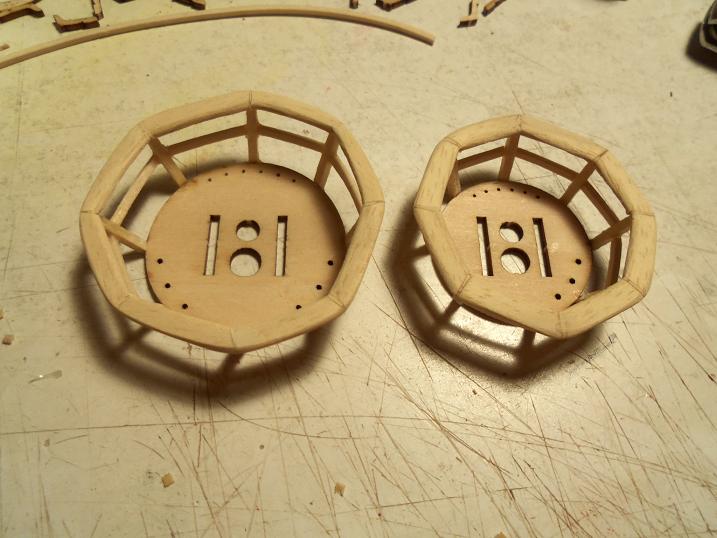
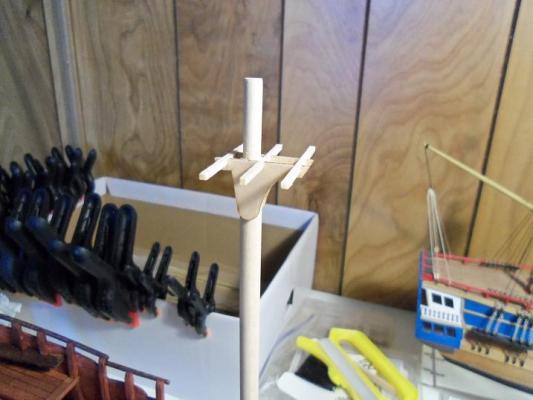
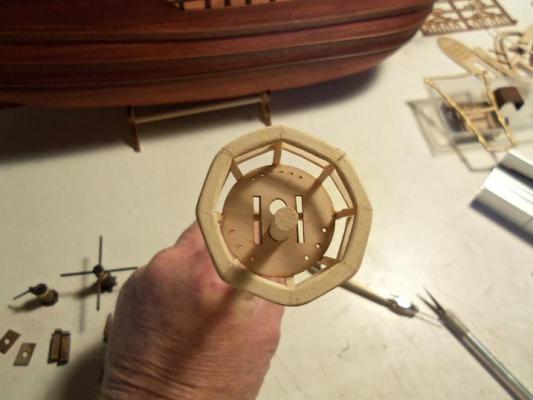
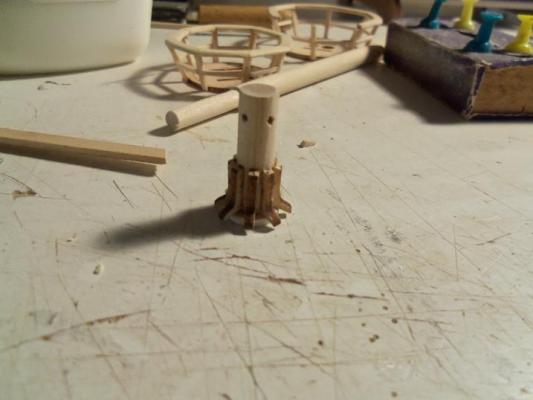
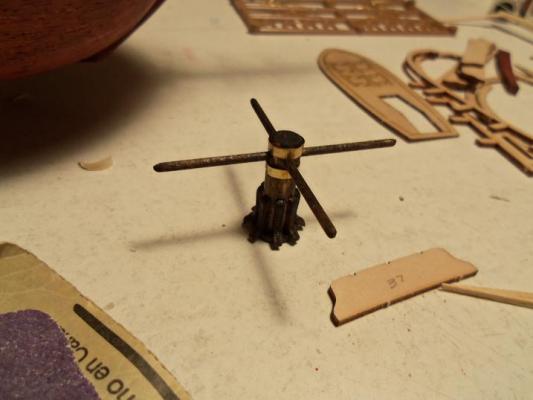
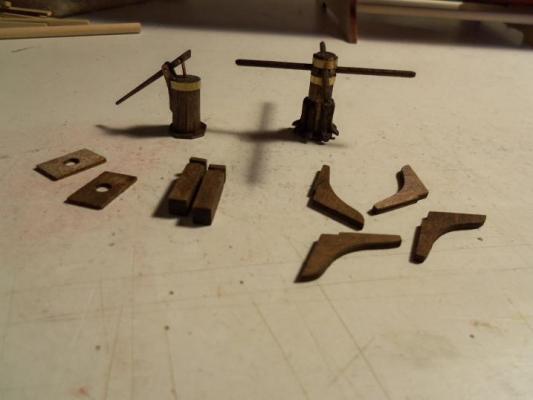
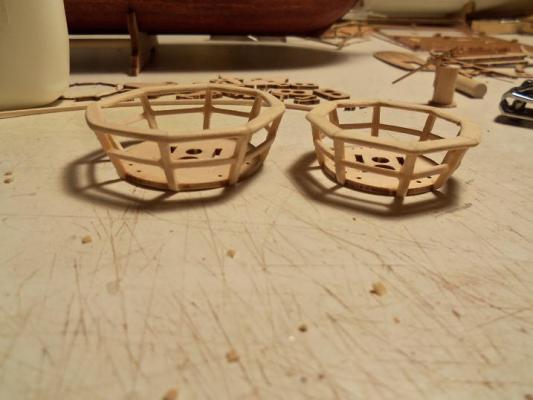
I'm kinda wondering, if this is also to denote port and starboard......something I've never seen before. anyway......................................I mentioned the whittling I was doing on the masts. I needed to get the top capping down to the size that will fit into the nests. so, I cut into the mast with my miter box and saw, and cut away the excess....later sanded smooth. now, I had mentioned perhaps making a new main mast nest, but I chose to repair the original one, only because it has the pre drilled holes. later, I chose to rip off all of the upper railing and start over, adjusting the post in the area I started from, and the redo. I assembled the framework that the nests will be located on. the fore mast nest was assembled to the mast......since that one turned out OK. after the railing was finished on the main mast nest.....there was still an area on it that wasn't right. I am making the change yet again. while I was working on that, I continued on other aspects, between drying times. the capstan is an assembly, consisting of a bunch of little pieces....most of them are missing. so I opted to use the parts that the nests would have been made up with. after making up a scratch base ring for the supplied capstan post, the railing parts were cemented around the base. then, the bow spirit was assembled. it is not trimmed to size yet. I had some smaller dowel to use, instead of the supplied dowel for the capstan bars. I added some brass banding to spruce it up a bit more. I did the same for the pump, and stained other parts that can be readily assembled onto the ship. I'll lightly stain them with the mahogany stain to match them up with the rest of the ship.


-
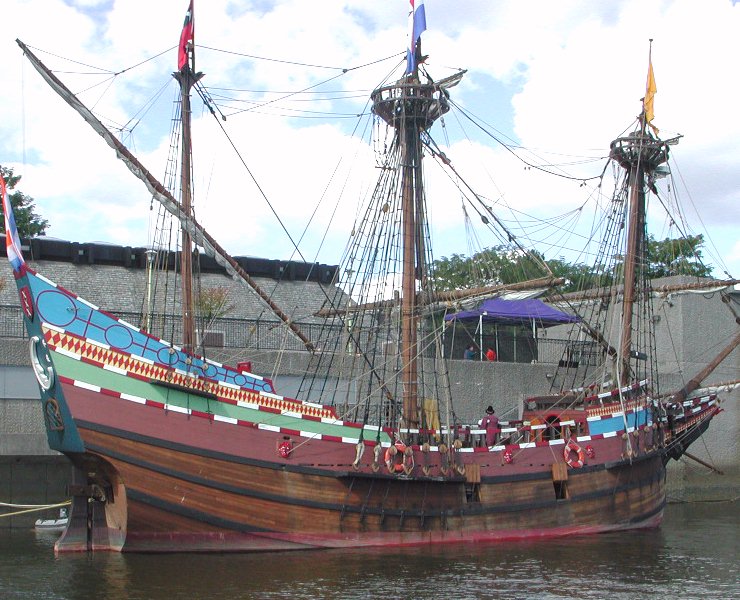
thanks Pawel and Nils......welcome to the log.....I hope you enjoy it. OK Sjors........here's that progress I promised you I got wrapped up with a couple of aspects.........and my picture search. I did come up with something strange. here are a couple of pictures......I guess there must be more than one copy floating around.... notice the aft artwork: I hope they didn't do this, just to mess with my head.......don't know how I'm going to do all this, but if they're not careful.......I'll do it my way, and really mess'em up! :D

-
sweet!! .........on with the rigging!
-
man!!! your a lucky guy! my admiral won't do it for me .........but I can agree with her, it's my thing I don't mind playing 'Sally Seamstress" for a while......it's kinda fun :D . nice bit of progress you've made........the ship looks absolutely marvelous! the traveler {horse} came out great! superb!
-
nice job on the inner bulwarks Sjors........love the deck, looks very rustic
-
I'm a bit late to the party........bit just wanted to drop a line to say how great the planking looks! totally agree that a staining to match the upper hull would be a great idea.......why cover that wonderful work with paint. super job Augie.......congratz!
- 2,191 replies
-
- 1
-
-
- confederacy
- Model Shipways
- (and 1 more)
-
soon Sjors........very soon
-
looks great Den..........and the templates are reusable too!
-
you could make a new sail if you wish......it's good practice. as a rule anyway........most sails are out of scale in some way or another, so we try to portray them as best we can. as long as you used threads {ropes} that are comparable to the sails, it should be alright.
-
nice how you made the stirrups from rope....... really cool!
-
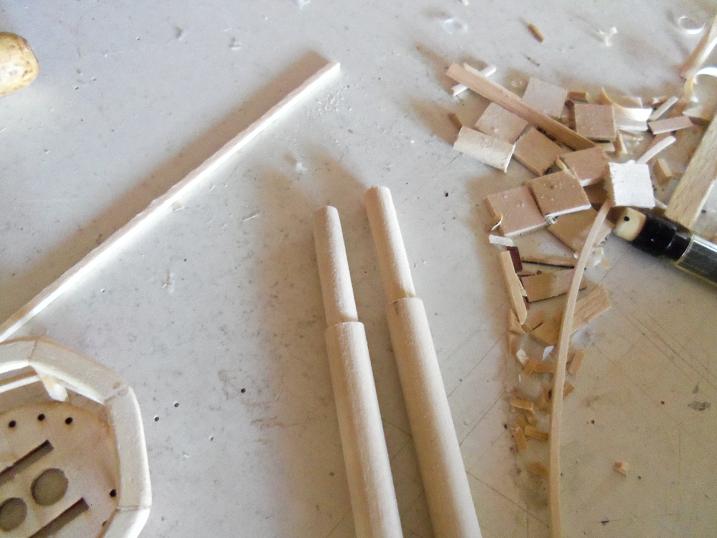
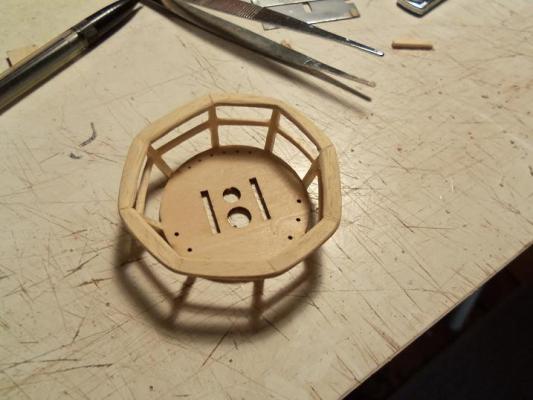
yea....I know Bob {hangs head........then shakes it}......I should listen to myself sometimes. currently, I'm in the process of trying to make some adjustments to the original one. hopefully, I can make it a bit better, like the fore mast nest. I was in the process of looking for more pictures today........and I stumbled across a site by National geographic. this is used by schools as a teaching tool for kids.....so, gather up the young'uns and watch these videos......it's kinda cool. Life on the Half Moon - National Geographic Education I am also in the process of assembling the first sections of the masts......had a near death experience with one of them......snapped the upper part of it, in which I was whittling it down to fit the nest. luckily, I'm still able to use the dowel.....I haven't cut it down to length yet. hopefully, I will have an update for you soon
-
Cutty Sark by NenadM
popeye the sailor replied to NenadM's topic in - Build logs for subjects built 1851 - 1900
I use the small staples for ladder rungs and grab handles.....I keep a small box around. as for paper clips, that's a different story. the admiral bought a big box of them, for what reason, I don't know. I find them lying around......I toss'em out. I have quite a bit of the brass and steel wire, but you have plenty of ideas there. one thing to consider, is depending on the type of metal, it will dictate on the type of bonding you can use. it is easier to solder to softer metals, than to harder ones, so harder metals requires more aggressive bonding. softer metals are OK.....especially if there is no stress that will be put on it, on the model. solder will bond much better as well. I have been fooled many time with brass coated steel wire, so you have to shop around to be sure your getting the good stuff. silver would be an expensive metal to use....in my country anyway, but copper is readily available, and very easy to straighten out after it's been manipulated. I have a container of paper clips....I may have an use for them now.......thanks!- 4,152 replies
-
- 1
-
-
- cutty sark
- tehnodidakta
- (and 1 more)
-
awesome work Daniel.........I see that they've chosen a good spokesperson to shed light on your hobby. very nice work!
-
too fantastic and awesome for words Nils.........there's just so much detail.......the eye will never see it all! I'm trying very hard though.....see me in about a week or so........OK beautiful!
-
it's good to know that I'm not the only one who has to have their color schemes approved watch out if she says something like : "that one would look good in the blue room" {and you don't have a blue room}.........there's a subliminal message there can't wait to see what color you choose.
-
she looks great Piet! you have created one heck of a model it's nice to see the person behind it all......good to meet you, and you really need to get a frame for that last picture! simply superb!
-
your off on what looks to be a very long road.........your going to give your tools a good work out. very nice!
-
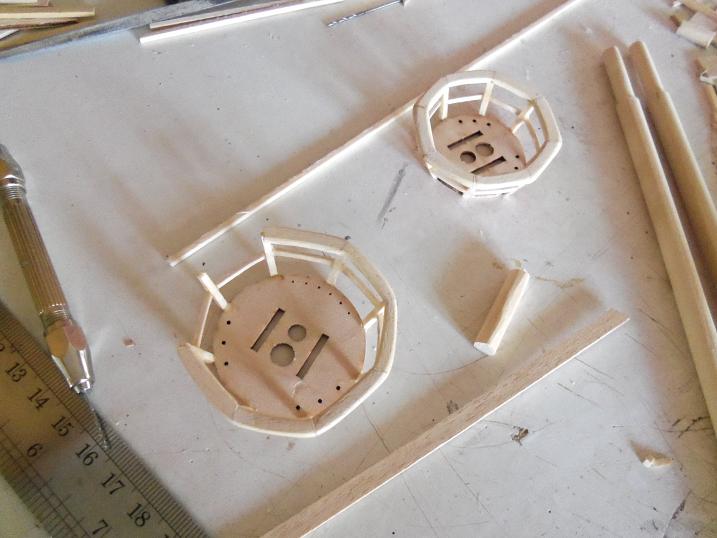
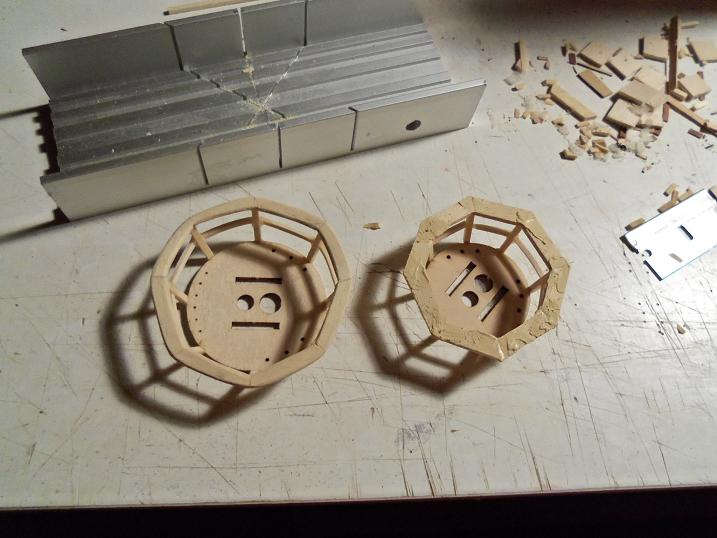
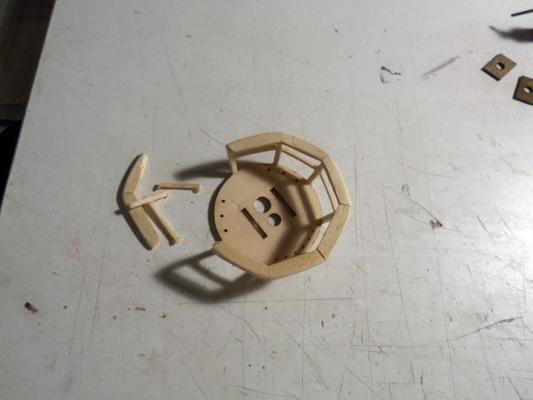
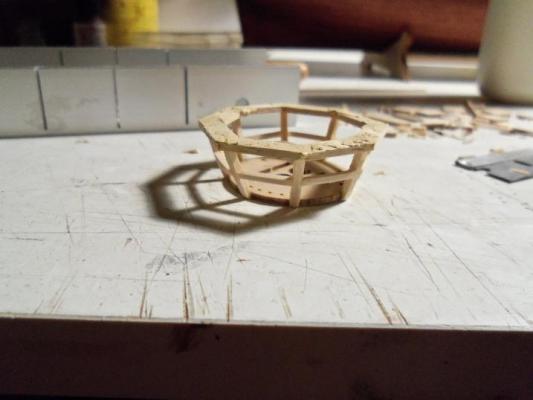
thanks Daniel........I look at the top rail for the main nest, as opposed to the fore nest, and yea......I need to do something with it. I'm having a problem finding a piece of plywood the same thickness, so I'll probably be making adjustments to the original one. I'm still on the look out though......with the amount of cast-off wood I have......I'm shocked! thanks for the good word thanks Patrick........I thought about using a compass to trace out the rail rings, but I never have good luck with that. splitting is a big problem.....I don't have the cool tools. I'll just have to see what I come up with thanks for the good word and the suggestion, I really appreciate it
-
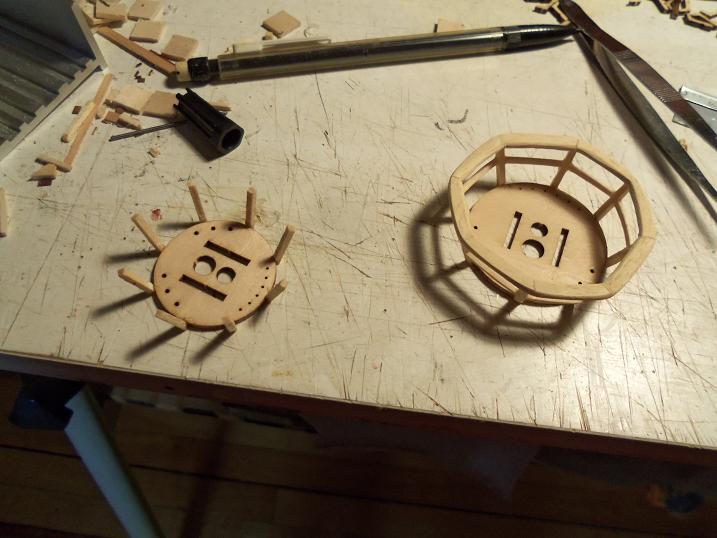
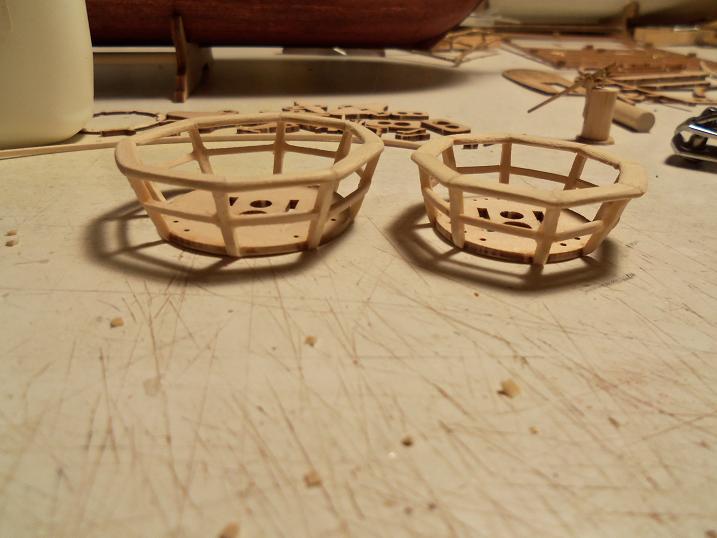
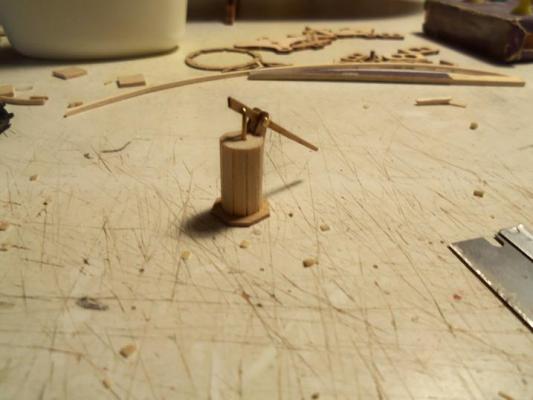
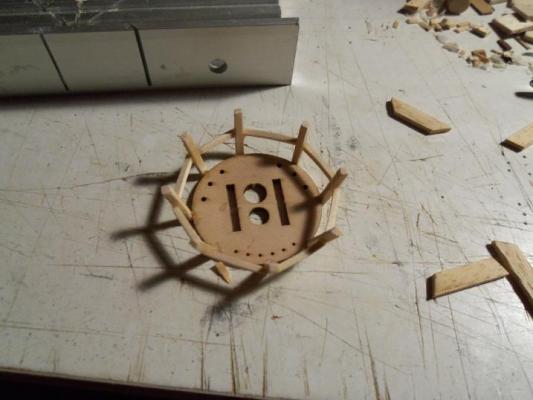
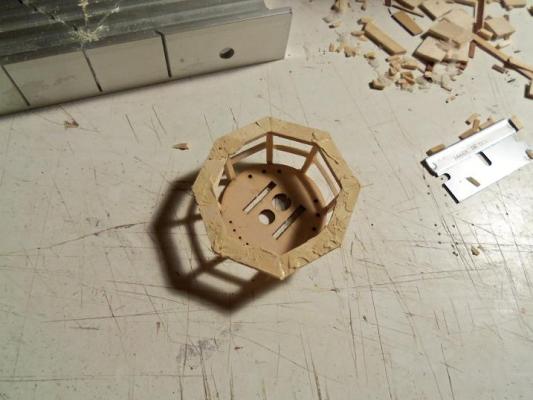
that's a possibility John.......I used the kit base for the nests, because they have the pre drilled holes. let me see if I can make another base.
-
hello Andy! glad to see your back yea......too much time on the planking makes for a very bored boy! I was looking at the 'last paid any attention to' dates, and figured I'd start with this one. at this point of the build, there was plenty of itch'in........and the scratch'in feels good not to worry, my friend.........glad to see you.......thanks for stopp'in by and the good word
-
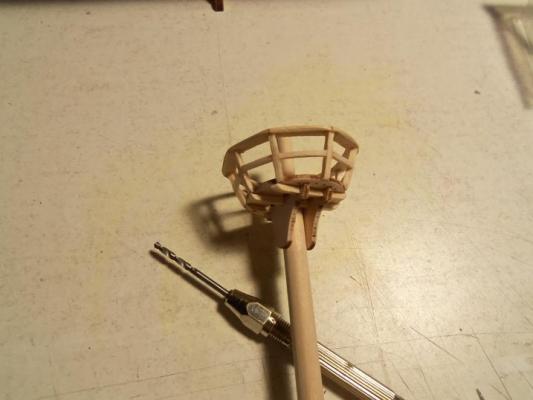
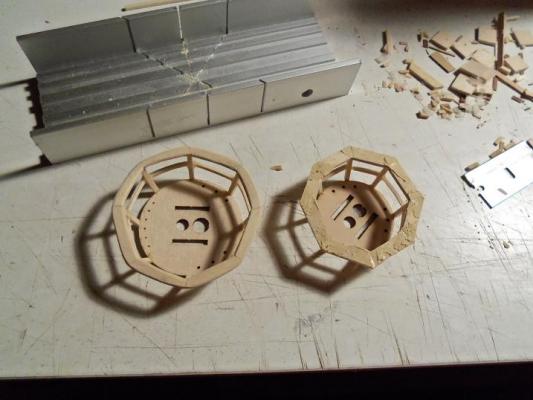
you gotta use a screw driver to keep the tab in............ I see you don't drive the dish washer too much....huh? I told the admiral, she better look around for a newer model......this one is getting old! I did some sanding on the main mast crow's nest...it looks OK.......but it still looks a bit off. I figured that I would make the fore mast nest......if it comes out any better, I try to do something with the other one. while this was drying, I dolled up the pump a little. the first set of railings are on then the top railings went on. of course I used the same method as the other one, so I added a little putty on the joints. the fore mast nest looks a bit off too.........it's going to be close now that the fore mast nest has been sanded........yea, it's a little off too. it looks better than the main mast nest though. not sure if i want to mess with the main mast nest and risk botching it up.......I'll have to think about it.


-
good to hear you've found a solution! got pictures?