HOLIDAY DONATION DRIVE - SUPPORT MSW - DO YOUR PART TO KEEP THIS GREAT FORUM GOING! (Only 51 donations so far out of 49,000 members - C'mon guys!)
×


popeye the sailor
-
Posts
16,007 -
Joined
-
Last visited
Content Type
Profiles
Forums
Gallery
Events
Everything posted by popeye the sailor
-
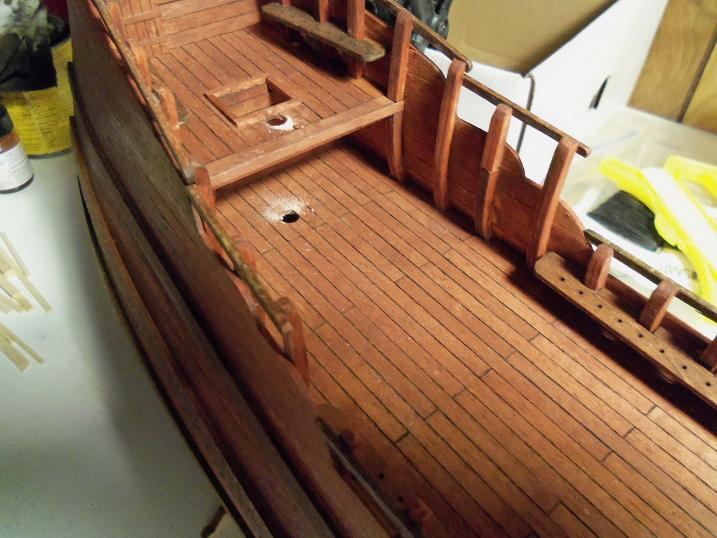
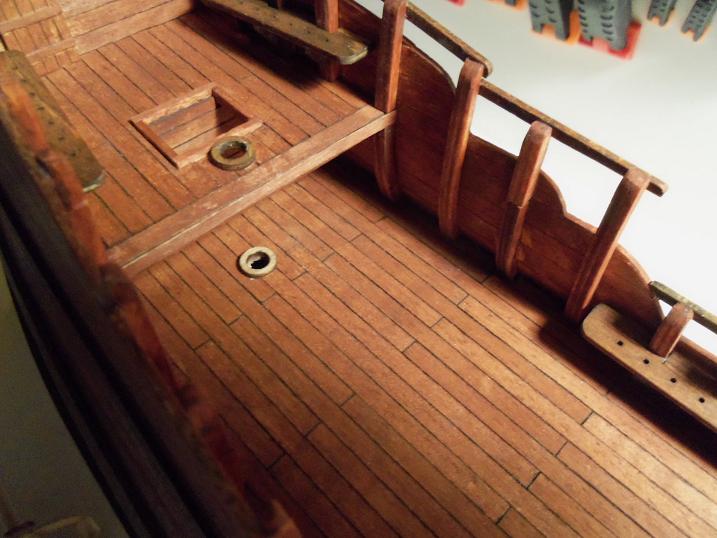
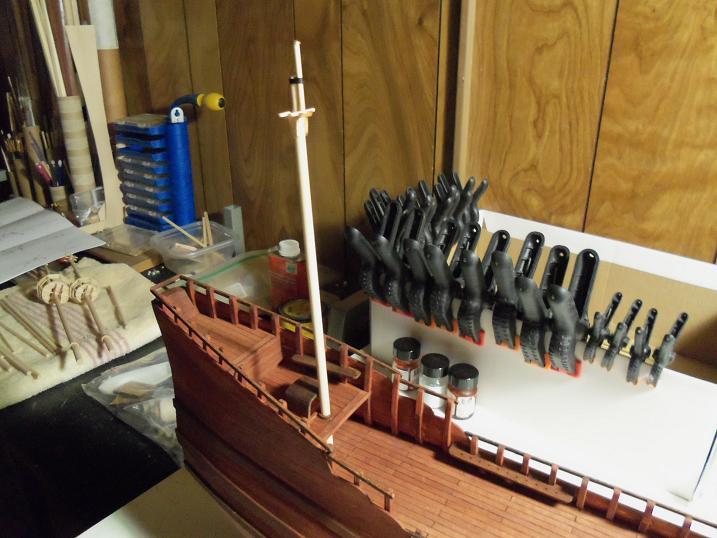
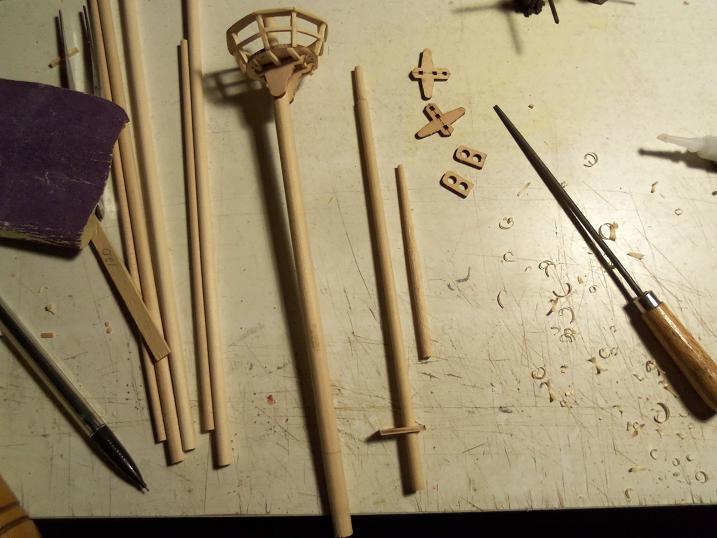
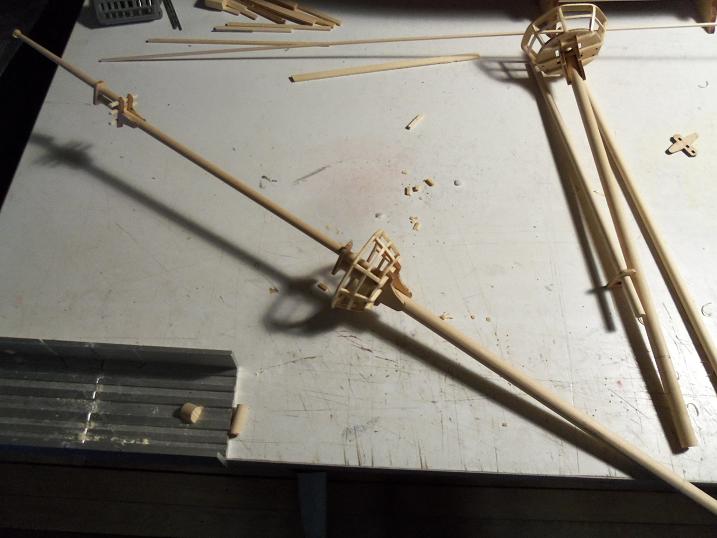
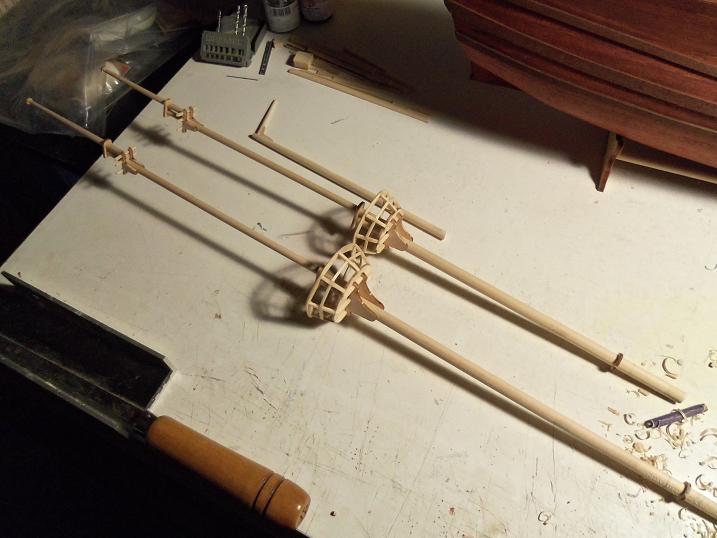
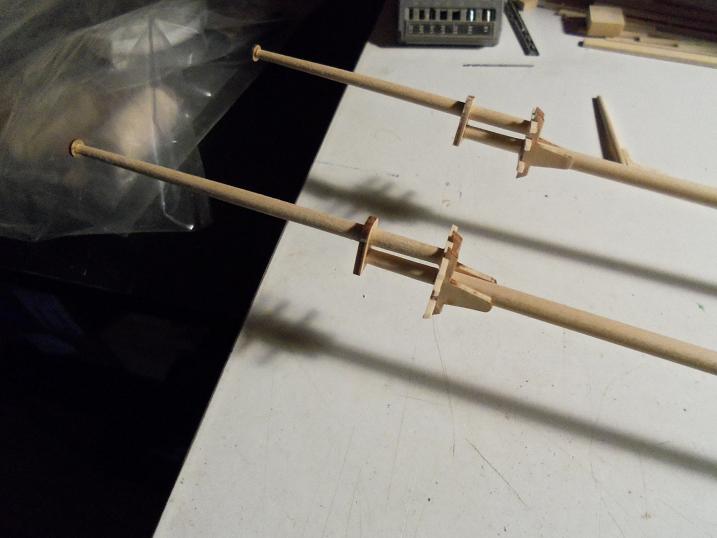
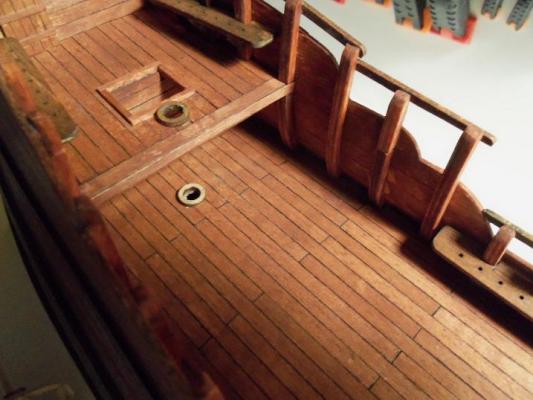
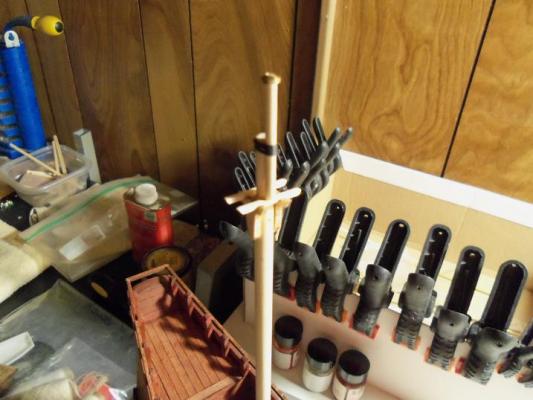
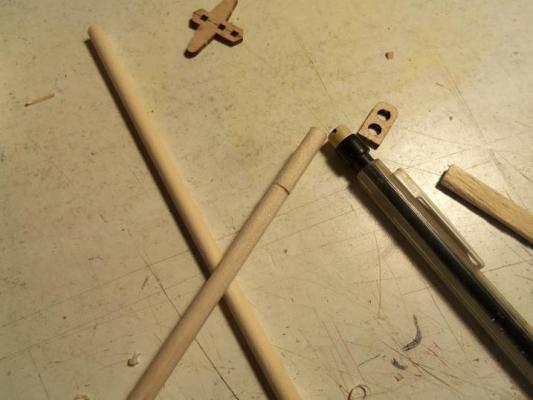
 with the fore and main masts somewhat completed, I looked at getting the mizzen mast squared away. once the correct dowel was chosen for it, the adjustment of the rake, was the next step. using the bottom hole as the pivot, sanding at the front of the upper deck hole took place. there is a mast collar for the main and upper deck holes.....they were stained at this time. I noticed that the main deck collar was a little lighter than the upper one.......I just ran a Q-tip with some mahogany stain over it, to darken it up. after the collars were cemented in place, a little more sanding needed to take place, for the mast to fit through. a little more sanding was done......still needed a bit more. I got it to about 1mm, and will leave it as is.....as mentioned, if I go any more, it will be out of alignment with the main mast. to sand out the mast hole, sand paper was cemented to smaller diameter dowels the rest of the mast was assembled......the cross tree and upper section of the masting.


-
thank you Nils.........making them was fun. they're not perfect......I may do a little side project and experiment a little with this......I'm sure the methods I used could be improved but not right now though.........I think it might get me into more trouble :D quite a compliment coming from an experienced modeler like yourself....thank you I'm still humbled from Doris's kind comments
-
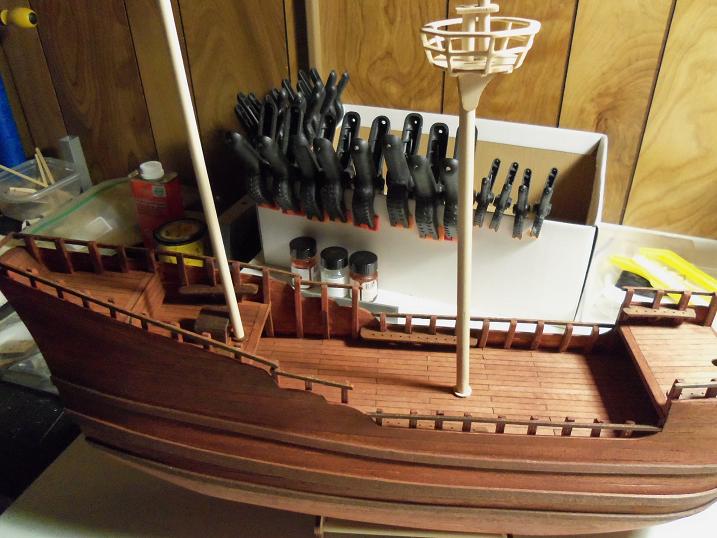
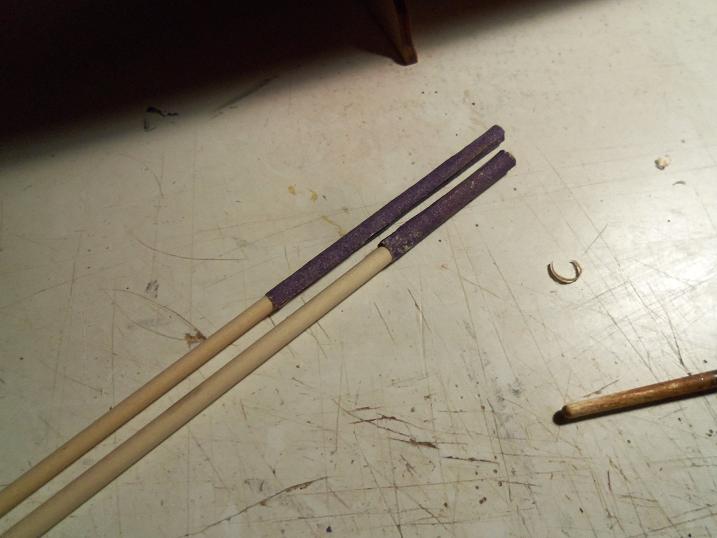
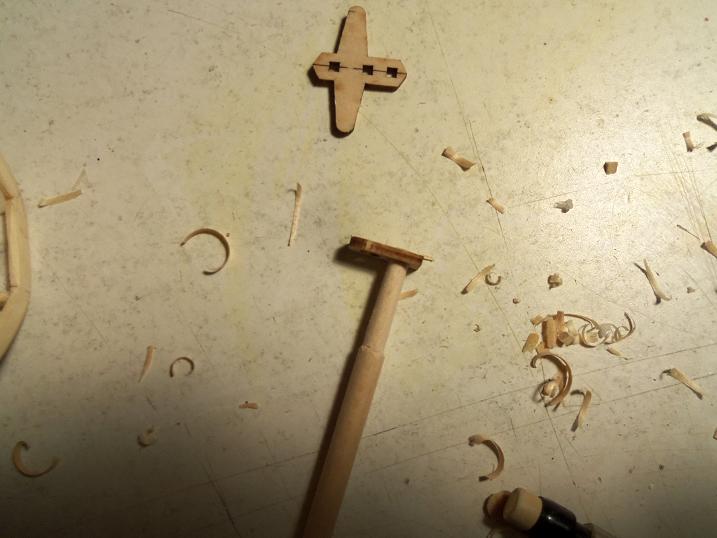
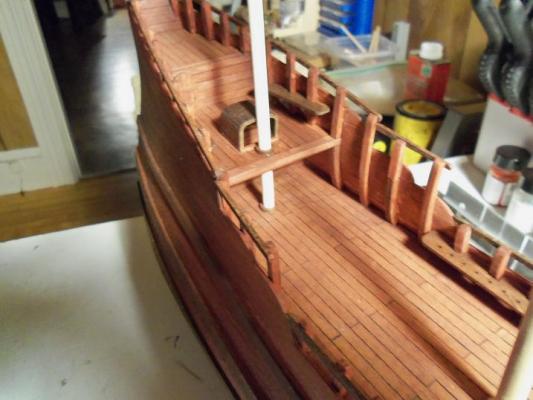
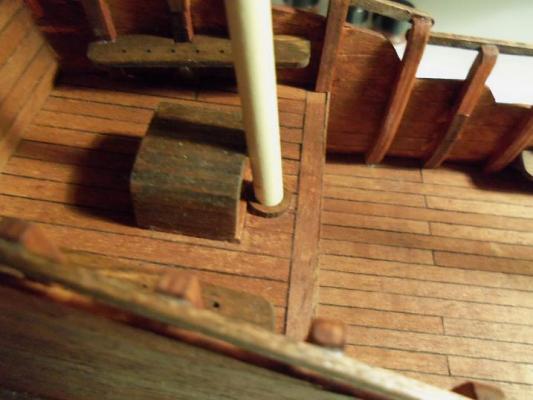
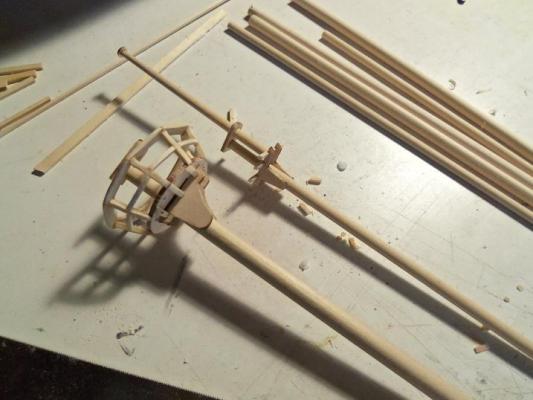
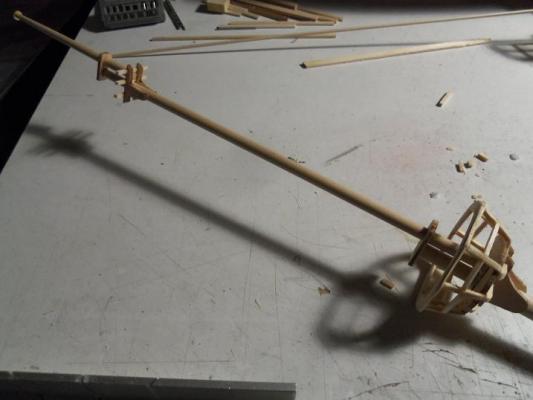
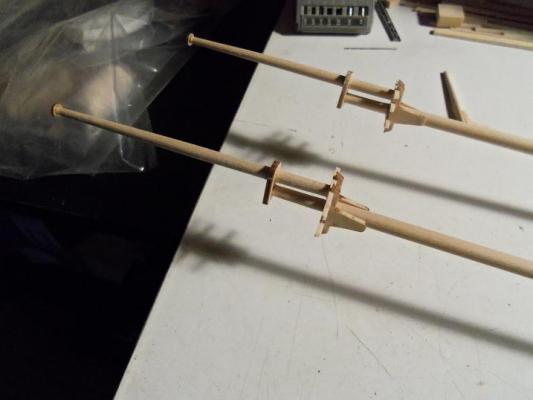
oh......it was so nice to work only in my smock again {actually it's a button - down shirt, but I have a habit of wiping my hands, and the mouth of the paint bottles on it}. I'm not a sloppy person.......I just look 'lived in' :D ! I made some good progress......the mast steps have been assembled. they still need to be sanded and cleaned up.......stained and {or} painted. I also took care of the Mizzen mast......it's not perfect, but if I went any further, the darn thing would be perpendicular to the deck.......and that just would NOT do I started to assemble the fore mast......I have already whittled down the top part of the second section for the cross tree and cap for the final section. how I whittled the top part down, was to score around the dowel with miter box and saw, and then shave it using an x-actor knife. I took those photos, while I was assembling the main mast.


-
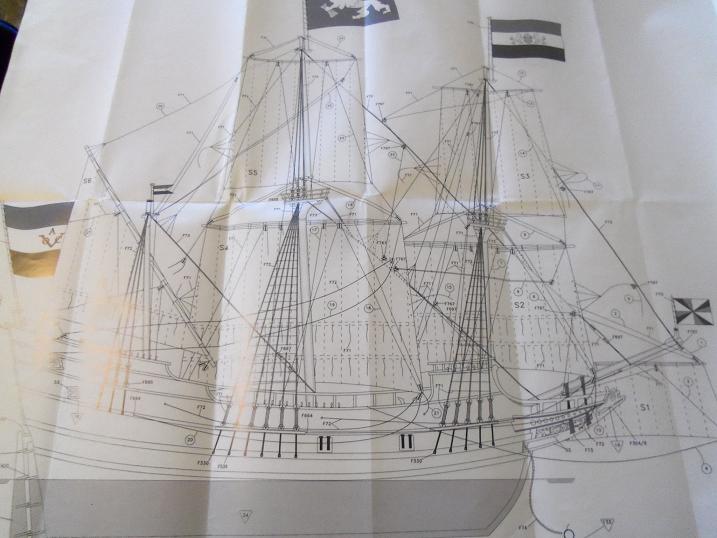
thanks Max.......this is an interesting observation. I know of another fellow who is building the corel kit, along with Anja and yourself. he made the same observation. I'm sure a lot of it has to do with copyright, but I also think it has to do with the amount of R&D they do concerning the kits they make. just between these two kits alone, there are differences with the crow's nests, the cap rails, as well as the assembly of the bow and decorations. heck.......with the Billing's kit, I've found differences with the kit itself, and the actual ship. the most prominent feature......is the stern. I'm sure that the Billing's drawing is of the 1565 - 1611 ship.......the picture is of the more modern rebuild, used as a floating museum. Anja was very kind and showed me the corel plans......I see some very nice pros with the corel kit. I've come to the conclusion that most kits are generic in nature..........why do I continue to build kits?...... .........because they are the perfect 'backbone' to build the actual ship. many people do research on the ship they are modeling, because they know that there are inaccuracies in the kit. it's a corel kit, but you are the one building it.........and I must say......you have done one spectacular job with that kit! you have put your best effort into her.....I'm very much looking forward in seeing future projects from you so in my view........the day you bring the box into your house, it stops being a corel kit......it becomes YOUR kit......YOUR build.....and you build 'er as you see fit thanks for the good word I really appreciate your kind comment!

-
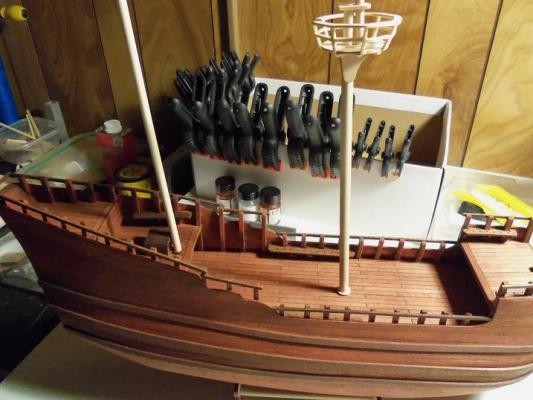
I'm not that familiar with this type of hull Sjors.......filler blocks would definitely help you out here. I wonder if it might be a benefit if you continued this planking from the keel up? I see lots of plank bending in your future.....you'll master it, I'm sure of that! the cannons look really good....they're going to be some mean looking 'barkers' when you get them finished.
- 1,616 replies
-
- 1
-

-
- caldercraft
- agamemnon
- (and 1 more)
-
it is unique, because it has two purposes.......to try out new ideas and techniques, and as a diorama when the ideas and techniques are successful! wonderful work Daniel..........it's obvious to see all of the thought that went into them nice!
-
...good way to utilize a piece of wood
-
congratz Steve! it's nice to see she went well with the trial..........good to see your best laid plan, came together!
-
Cutty Sark by NenadM
popeye the sailor replied to NenadM's topic in - Build logs for subjects built 1851 - 1900
weathering is a hard thing to do......one of the reasons why I don't do too much. do one aspect, then you have to do it all........I always end up thinking I did something wrong..........then I end up fixing it I need to let loose my 'inner child' .........back in the day when I loved getting dirty! :D you could do your planking.........the difference in the color will do half the work for you. then make up a batch of gray wash.......make it very......very thin....all you want is pigment. brush it on and wipe quick.......do small areas at a time. this should give you the gray tint, and still let the wood color be the dominant color. I would probably use an acrylic for this.......don't try enamels....the suspensions in it might seal the wood. if you can find this in a stain.......might be your best bet.- 4,152 replies
-
- 2
-
-
- cutty sark
- tehnodidakta
- (and 1 more)
-
looking good Popjack! the chain plates are coming along great!
-
now.......that's awesome! very nice work on the furniture your moving right along and doing a very nice job!
-
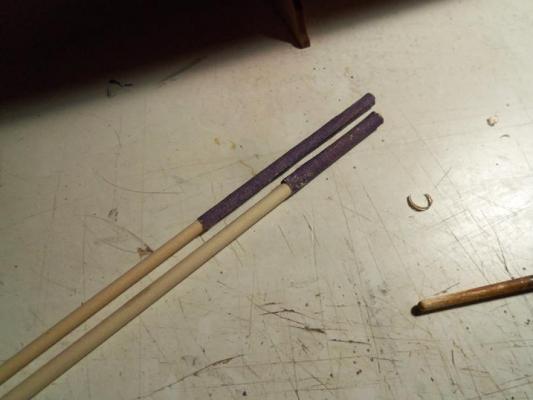
thanks Robbyn.......actually, I just held the camera up there and took those.........couldn't see what I was snapp'in see......there is a place for these little 'point and shoots'........only took one take thanks for the good word! thanks Piet! my first time making crow's nests.......not sure how I'm going to do them. I do know that there might be quite a few glue blotches if I stain......if that happens, I may need to go with a similar color brown....or even black. if that happens, I will do the rest of the masting to blend it in. the mizzen though, I do have a problem.......there is a bit too much rake and it interferes with the canopy. once adjusted, it will cure the problem. there will be rake.......but not as much thanks for the good word! well folks........I'm back at the table! it's great to get up in the morning and feel a normal temp in the apartment! this thing runs as well, as a clock can tick! we never got the snow that they were forecasting.......in fact, quite the opposite! it's 35 degrees and the melt continues......but I won't hold my breath. we will get one of those storms, we always do........but it won't stay long. the season is changing my friends..........and I for one, is ready for it!
-
big strapping guy like yourself......with no lady friend under you arm......poor Andy! are you using the right lure? don't use bait.....girls don't like bait.......like the phrase.....' with baited breath ' who ever thought that one up was ill! you'll find that lucky one, one day..........all in good time
- 382 replies
-
- 1
-
-
- stadacona
- sylvan scale models
- (and 1 more)
-
no, I don't think you'll have any trouble with the men in the white coats........they'd see that your a modeler, and think it all.....quite normal wonderful work on the shackles..........your metal work is truly amazing!
-
looking great Piet! you've turned this build into one amazing odyssey! the doors came out great........most afterthoughts, turn out to be the best detail nice job!
-
such an awesome ship Doris! it's amazing.....the medium in which you work with, to produce a ship like this. simply beautiful
- 883 replies
-
- 1
-
-
- royal caroline
- ship of the line
- (and 1 more)
-
Cutty Sark by NenadM
popeye the sailor replied to NenadM's topic in - Build logs for subjects built 1851 - 1900
nice to see you've finished the bulwarks......very nicely done I agree ......number three! -
too cool Nils! a real nifty way to create them as well! very well done!
- 222 replies
-
- 1
-
-
- gorch fock
- barque
- (and 2 more)
-
you plank by day and rig by night........your doing some fine work Sjors
- 1,616 replies
-
- 2
-
-
- caldercraft
- agamemnon
- (and 1 more)
-
I don't open any more threads.......I revolve them now :D
- 1,873 replies
-
- 3
-
-
- occre
- san ildefonso
- (and 1 more)
-
thanks Mobbsie.......yes.....we have that saying over 'ere, but I don't think a cold blooded primate, would have much of a problem with that it's us warm blooded sapiens, that seem to scream the loudest {sorry.......been caught watching Monty Python on you tube} we'll still need it for a while yet........I could stand for a few more days like today thanks for the nice comment......a bit more, and then it's off on some other tangent
-
aye Augie.......I hear ye!.......they tried to put the Pop {sycle} in Popeye! buts me landlord caim through.....jes' in the nick'o time! alls much better now! we got crap coming in tomorrow! should have an update soon....thank you.......my good man!
-
yepper Sjors.......I'm keeping it awww-wite!.....you wascally wabbit........... it is a good question......where I made so many changes, it's going to be hard to stain the nests. I think I'm going to need to get a little creative. thanks for the good word thank you Doris for your kind comment....actually I'm kind of humbled..... I'm many levels away from the fantastic work you do...with the materials you work with.......I'd be a life-time, in attempts to equal......but it's fun trying thank you very much! thanks Patrick! I think the nests are the biggest hurdle I had to get over. now that they are complete, there are only a few other aspects that I'll need to address. thanks for the good word thank you as well Bindy.......I thank my lucky stars, I know Bashman! here is the only known picture I've found of him........ . I have to rely on an emoticon, since there are no real pictures of him thanks for the good word thanks Bob........ttttthhhhanks fffffffor nnnnotic'in it was so cold in the house the other day, I couldn't even type on the computer. we have the new natural gas furnace now.......it was 32 degrees this morning, and I didn't even turn it up......felt good {we turn it down for sleeping}. yesterday, they must have hit the cable connection downstairs........internet was knocked out for a while. by the afternoon, we were up and running again......but behind on just about everything. today......it's almost 50 degrees..... tomorrow.....6+ inches or more of gooey wet snow {I think they have rocks in their heads} :D as soon as the dust settles, I can get back to the table. thanks for the good word
-
I can only surmise.........I wish you well. I hope to see your hands on that lovely build of yours again