


glbarlow
-
Posts
4,127 -
Joined
-
Last visited
Content Type
Profiles
Forums
Gallery
Events
Everything posted by glbarlow
-

Wipe On Poly Techniques
glbarlow replied to Freebird's topic in Painting, finishing and weathering products and techniques
To actually answer your question...Only use Satin. Give the first coat at least 24 hours to dry, maybe longer, until it’s not tacky or gummy. Lightly sand with 400 grit or steel wool and add at least a second coat. My Cheerful hull probably has 4-5, I’ve lost track. You can paint over it and or put it on over paint (at least with acrylics). It’s inexpensive, easy to use, and creates a great finish. I’ve never used a whole can, it may dry out before I get to the third or fourth model in which case I go to Home Depot and shell out $13 for a new can, then I have just the one can...ready to use... no other cans of other stuff laying around I have no use for. -
Wipe On Poly Techniques
glbarlow replied to Freebird's topic in Painting, finishing and weathering products and techniques
It’s $13 a can. 😞 -
I think maybe 2 or 3 of my Sphinx’s boats will have been lost in a storm 🤪😂🤣
-
I spent an entire day making two ladders, the things we do. You’ll be really good at it my the ninth one 😂
- 642 replies
-
- 3
-

-
- winchelsea
- Syren Ship Model Company
- (and 1 more)
-
Very clean crisp work. Nice job on the rigging, the seized blocks look great.
- 436 replies
-
- 3
-
-
- vanguard models
- alert
- (and 1 more)
-
Hull Planking Question
glbarlow replied to tomsimon's topic in Building, Framing, Planking and plating a ships hull and deck
Quite the dissertation. It is my opinion that your ‘facts’ are just another opinion and like all opinions, including mine, worth about as much as that toilet paper roll - though everyone knows it should hang down from the front. Anyway, I use CA and I’m happy doing it. This post has gone off the rails. I’m out. 😇 -
Hull Planking Question
glbarlow replied to tomsimon's topic in Building, Framing, Planking and plating a ships hull and deck
Just so someone says it, a few of you need to add “in your opinion” to some of your bold unbending statements. So in my opinion: 1.CA is the best choice for planking a hull using Chuck’s method linked above, PVA is just so unnecessary. 2. I have models over 25 years old done with CA that are just fine and look great. 3. I don’t think any well built ship model survives dropping to the floor, it’s best not to do that. 3. Edge gluing is not only totally unnecessary it’s also detrimental to the look of the hull. 4. I doubt the humidity variance in most first world homes creates an issue. 5. I’ll put up my nine models as examples of using CA for hulls any time. I don’t understand why people don’t just acknowledge design and build preferences as just that, a preference. There are many ways that are right and many that work just fine. There are very few that are wrong, using CA for hull planking is not one of those. Why denigrate a method different than your preference, why not instead offer your method as one of many options. In my opinion... -
Merry Christmas everyone. Hoping you have a happy holiday and exciting things to look forward to in the coming year.
- 778 replies
-
- 10
-
-
- cheerful
- Syren Ship Model Company
- (and 1 more)
-
My kingdom for an ample supply of boxwood. It’s going to look great!
- 201 replies
-
- 3
-
-
- Duchess of Kingston
- Vanguard Models
- (and 1 more)
-
Nice looking hull, very smooth. 120 grit, go big or go home🤪
- 201 replies
-
- 1
-
-
- Duchess of Kingston
- Vanguard Models
- (and 1 more)
-
Thank you Bob and Matt and to all for the additional likes. I appreciate you all stopping by.
- 778 replies
-
- 2
-
-
- cheerful
- Syren Ship Model Company
- (and 1 more)
-
Well done. The ship’s boats are a bigger challenge building than the ship, you’ve done a really nice job with it.
- 950 replies
-
- 1
-
-
- syren
- model shipways
- (and 1 more)
-
Thanks guys, I appreciate the comments and new likes😀!
- 778 replies
-
- 1
-
-
- cheerful
- Syren Ship Model Company
- (and 1 more)
-
Thanks Chuck, just a tribute to your design. PS: Can you send me a couple of pre-made boom crutches 🙂 LOL
- 778 replies
-
- 1
-
-
- cheerful
- Syren Ship Model Company
- (and 1 more)
-
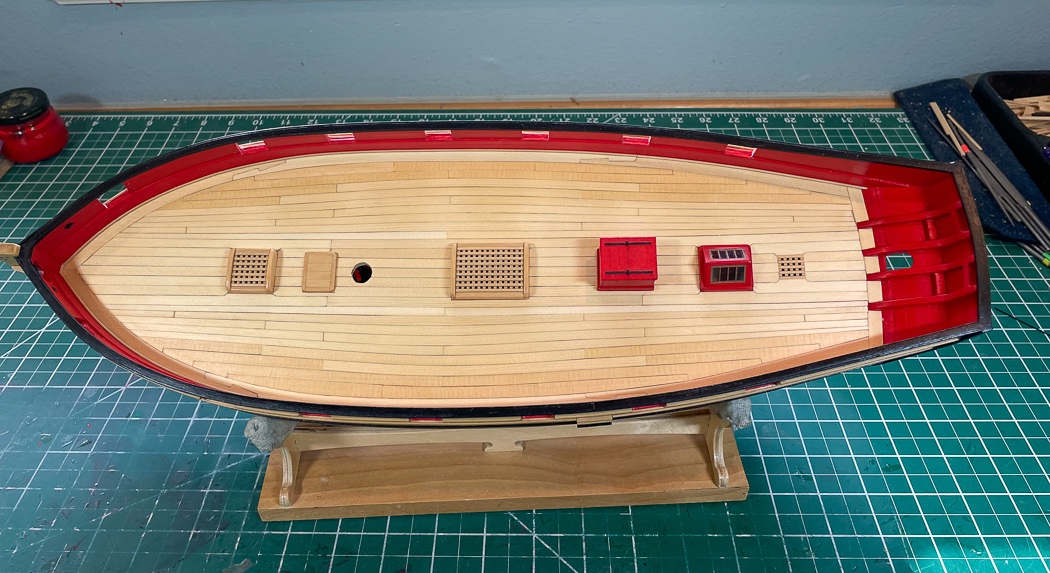
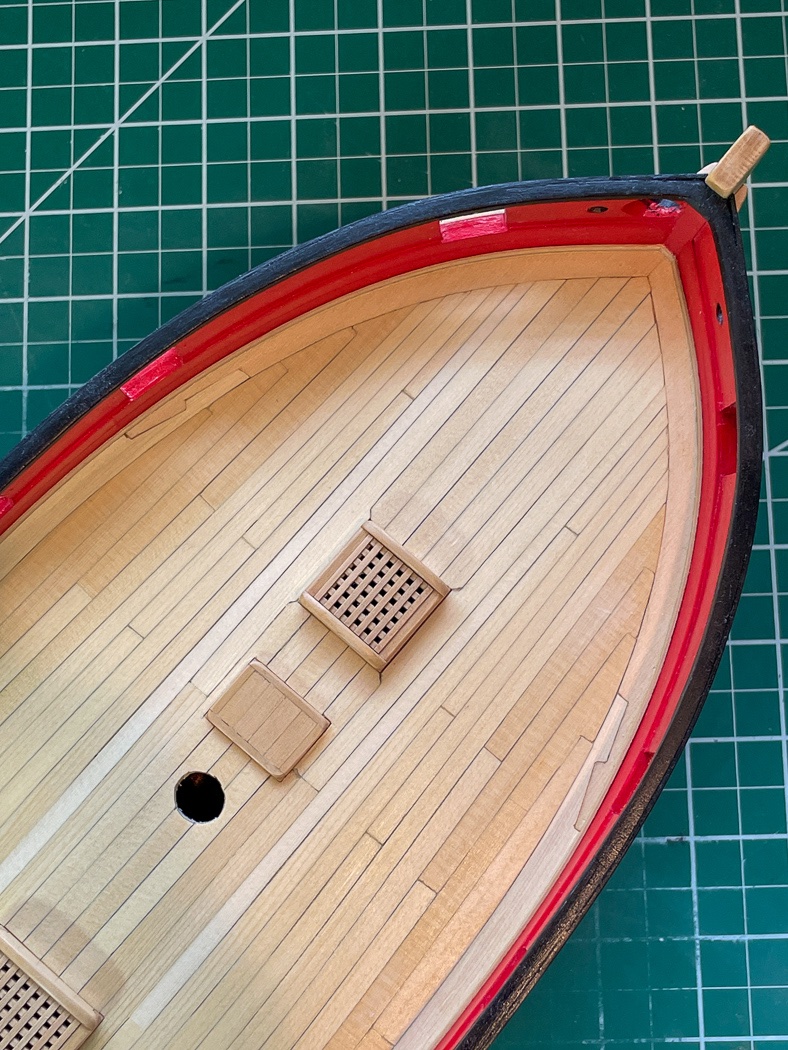
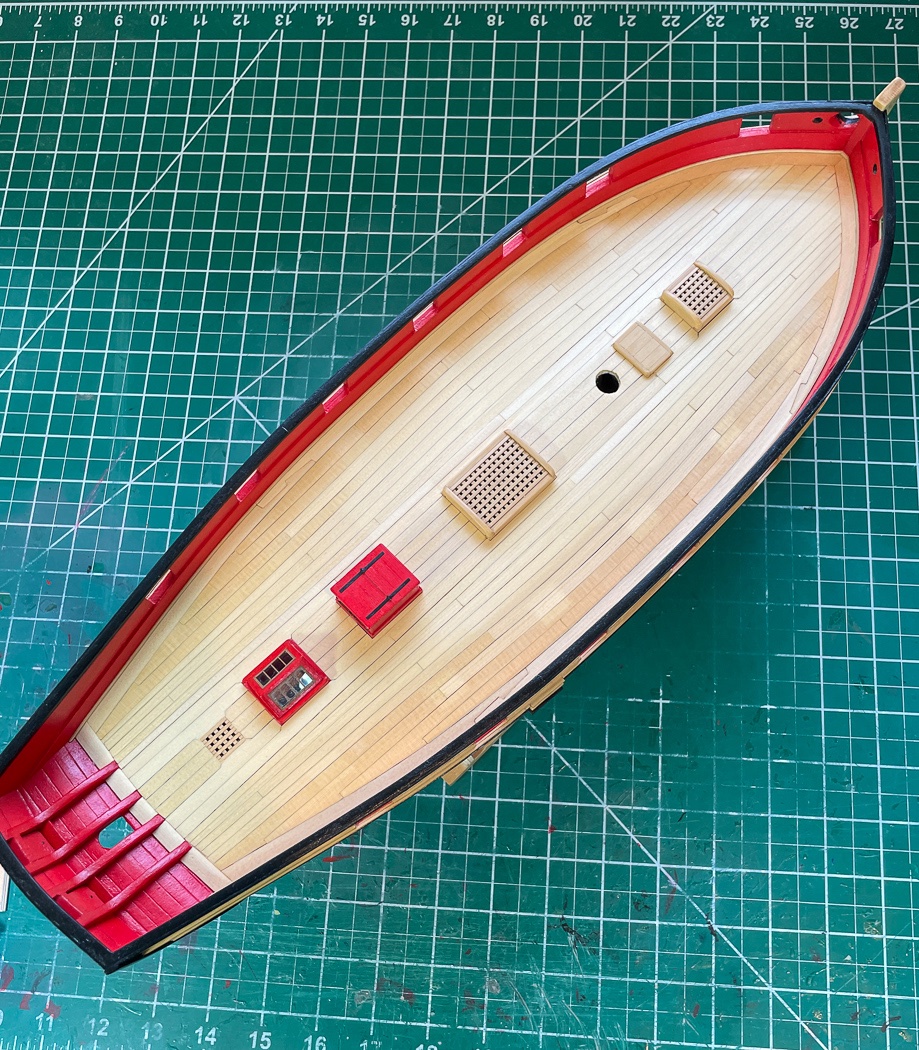
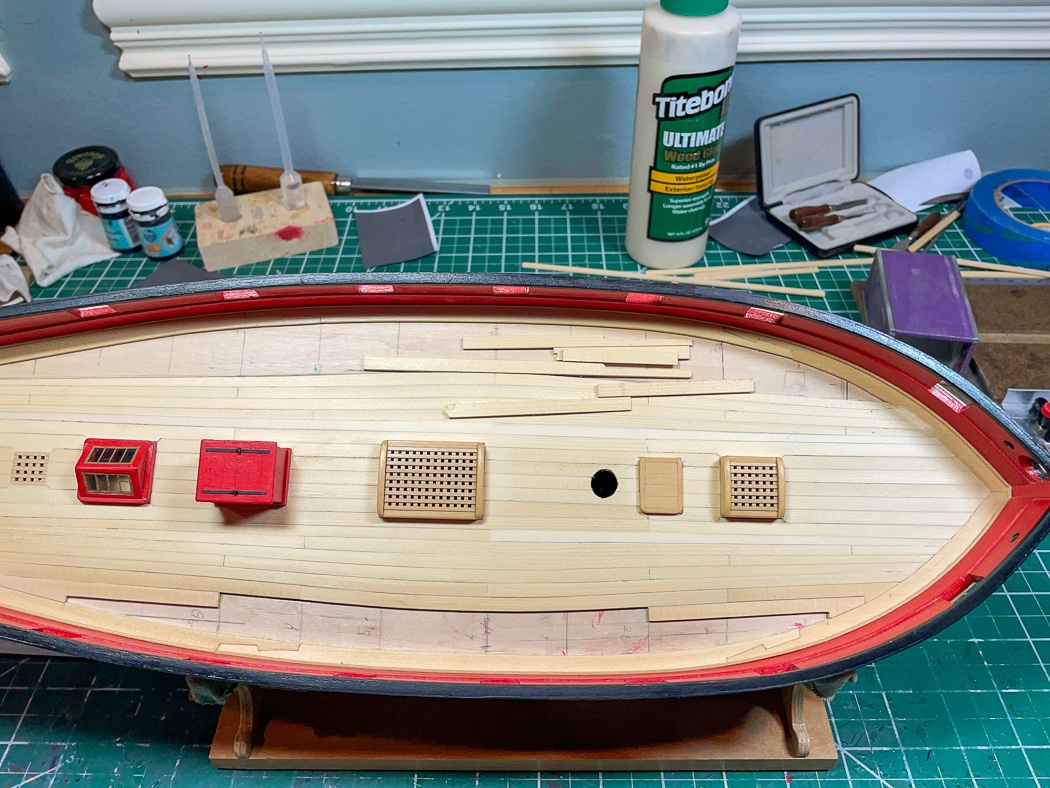
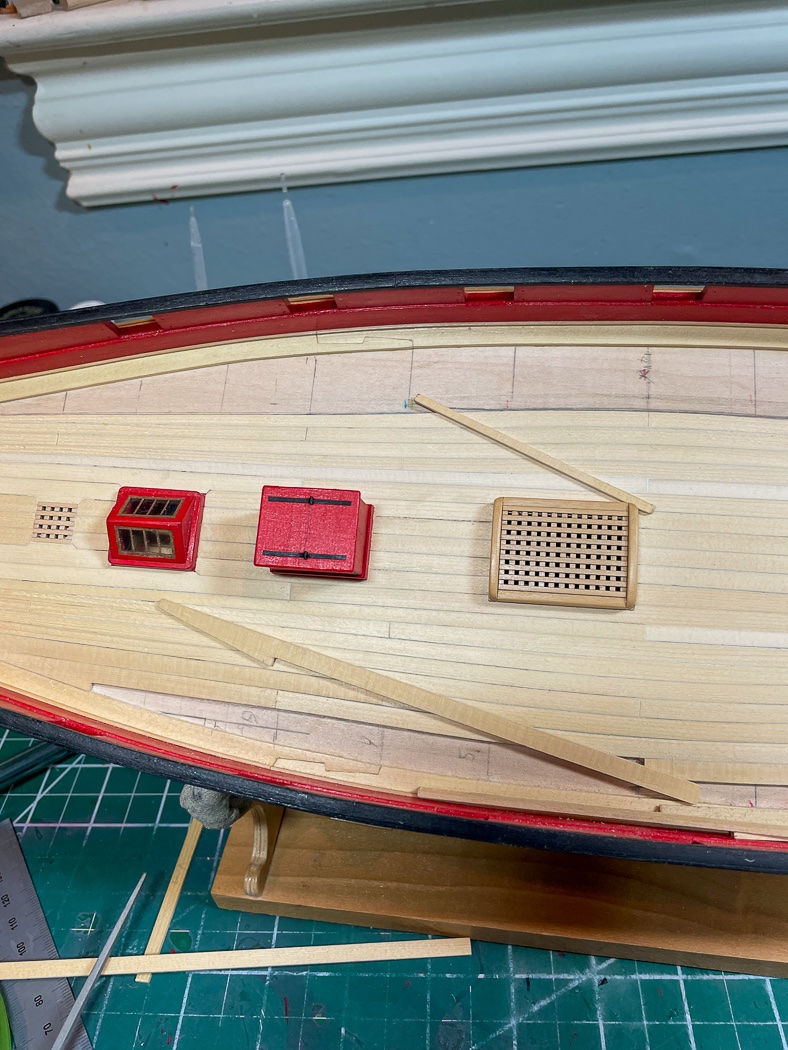
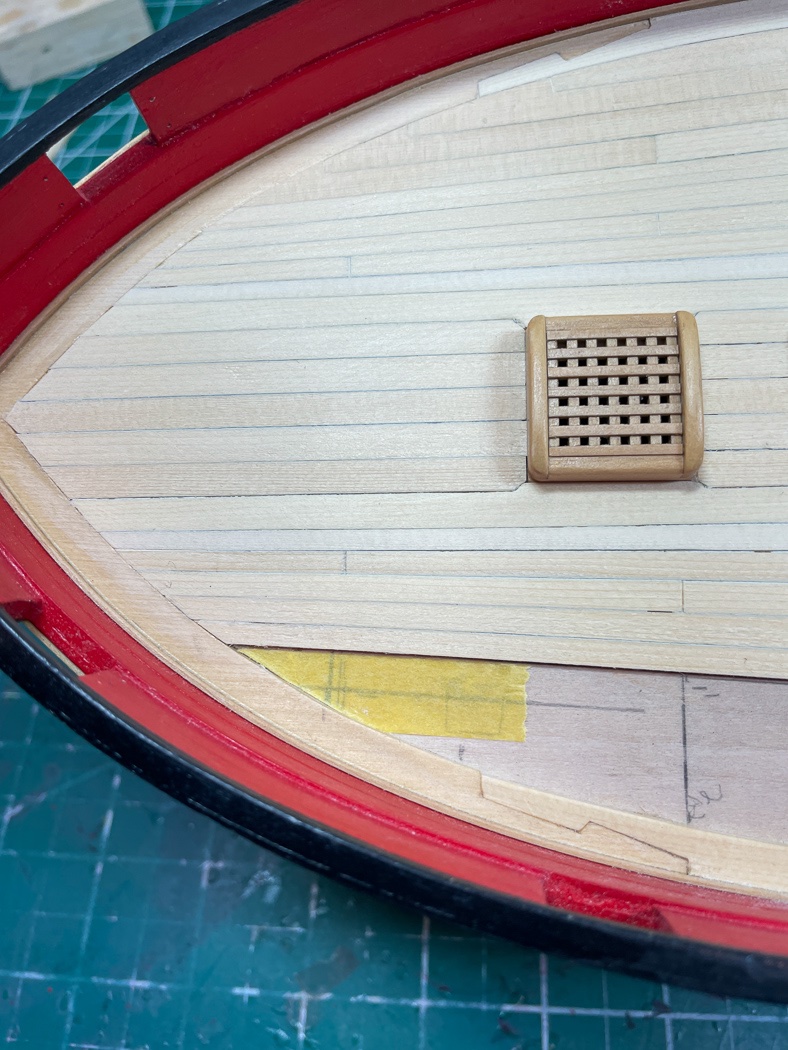
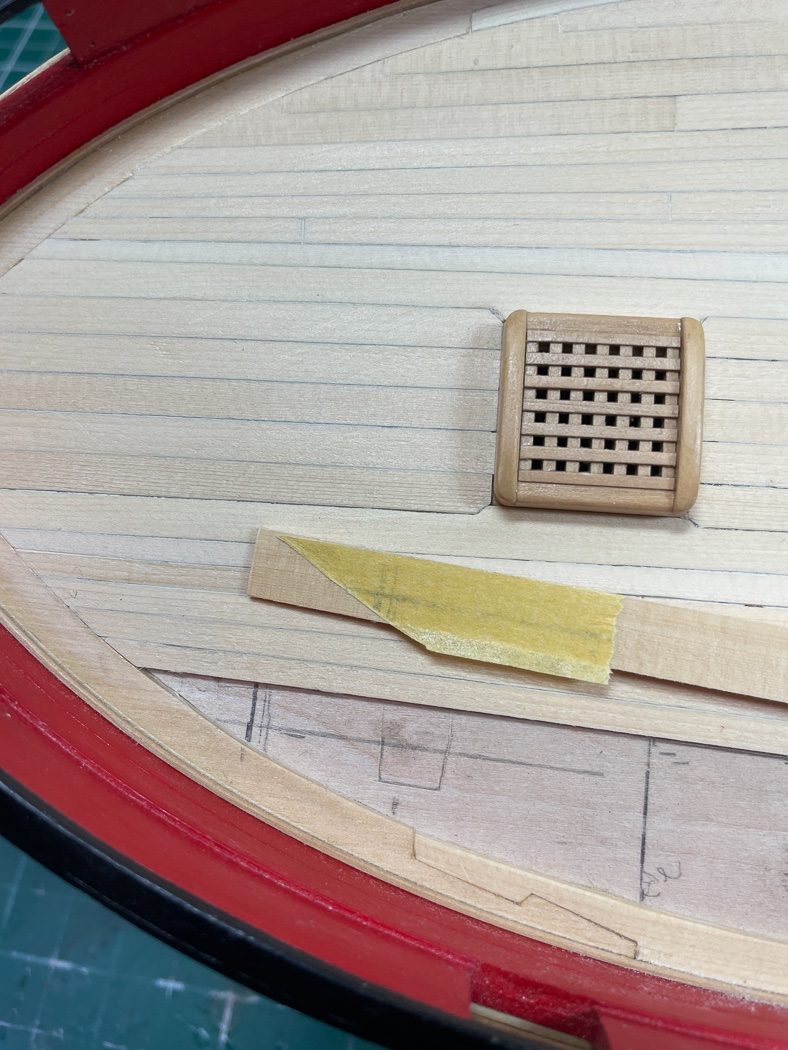
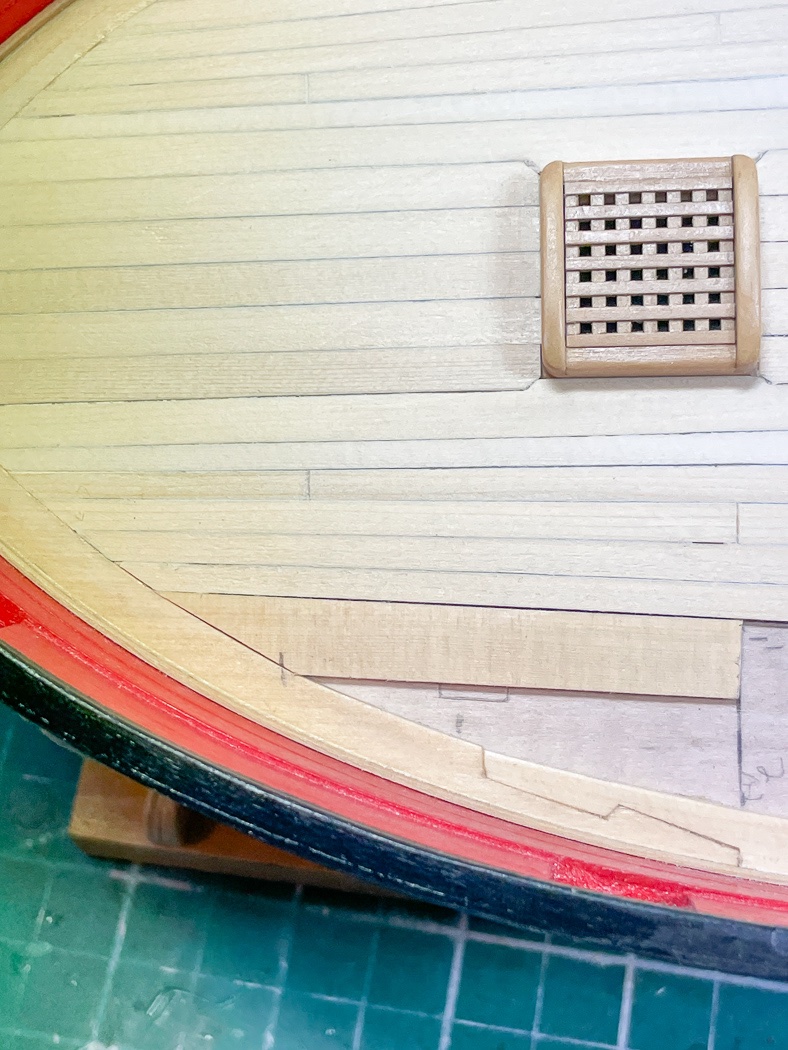
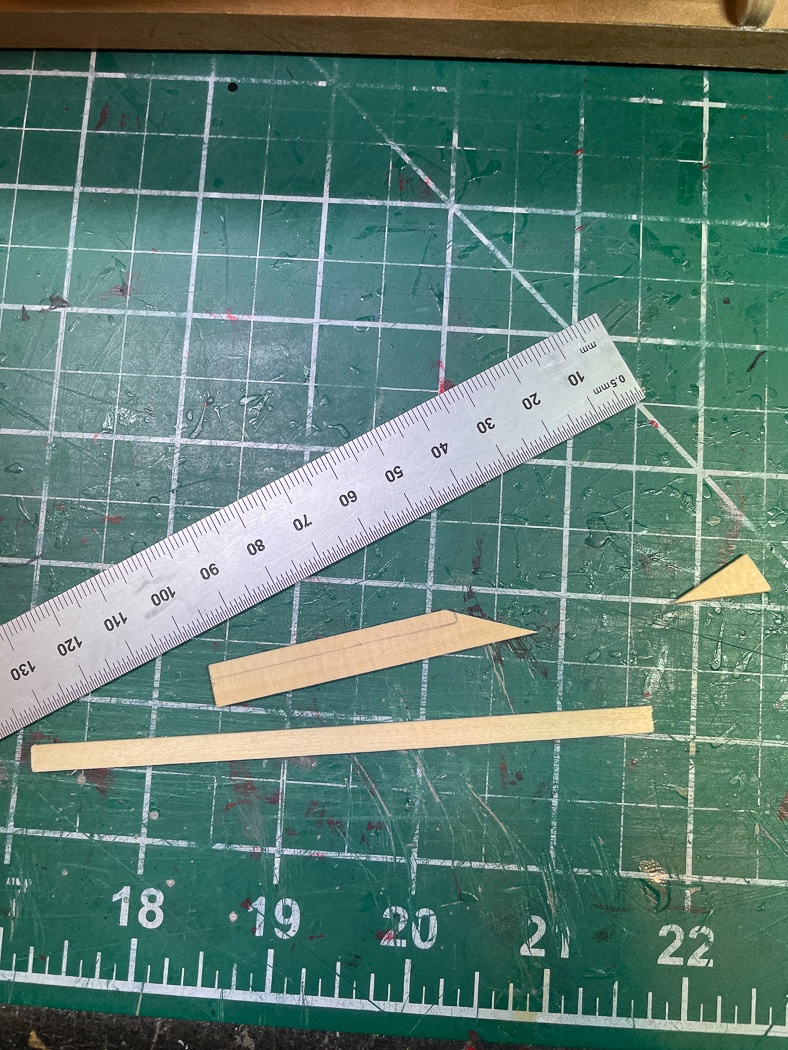
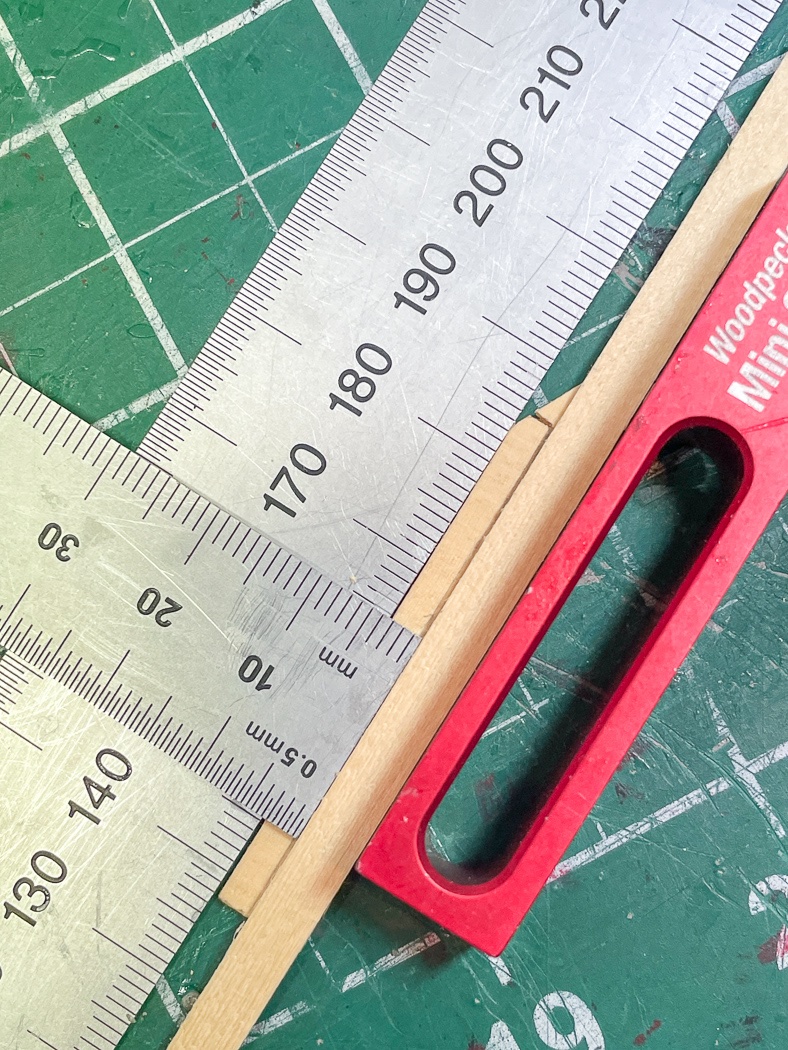
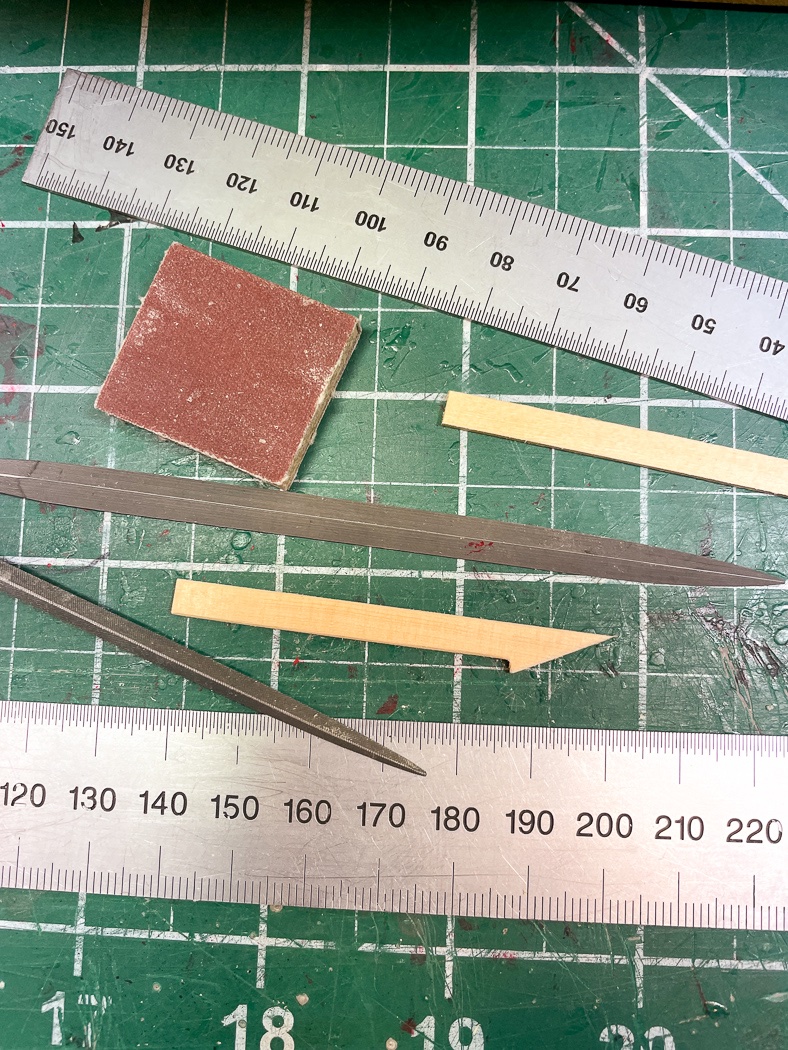
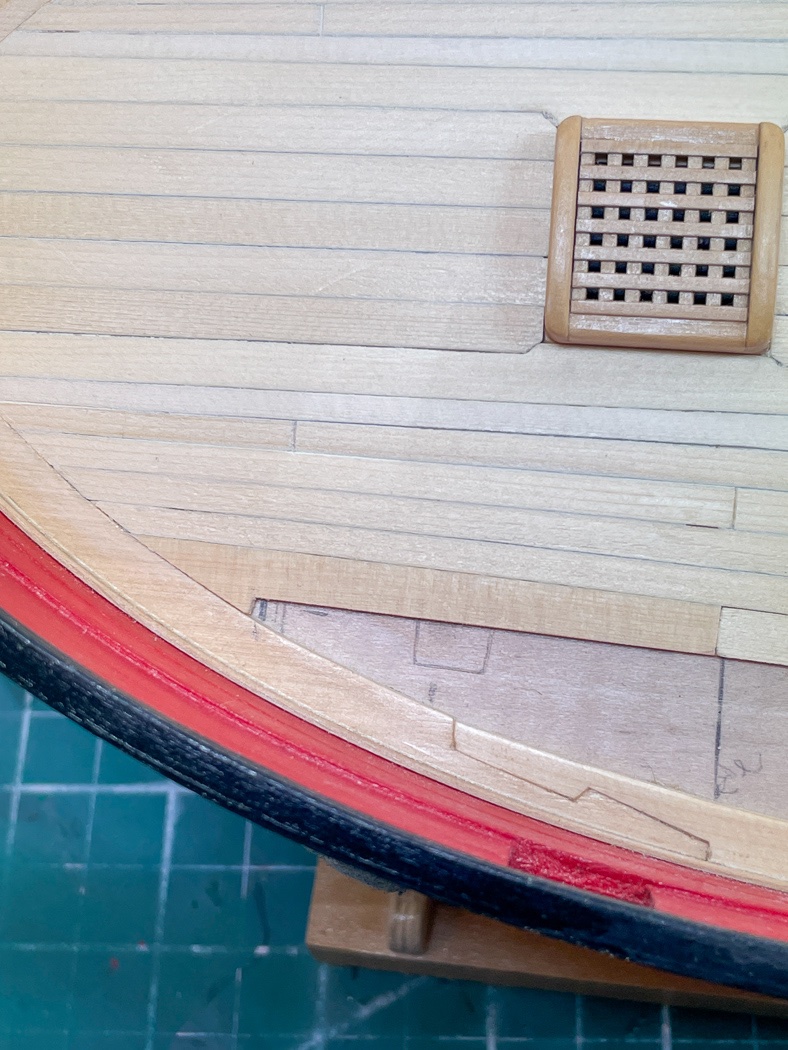
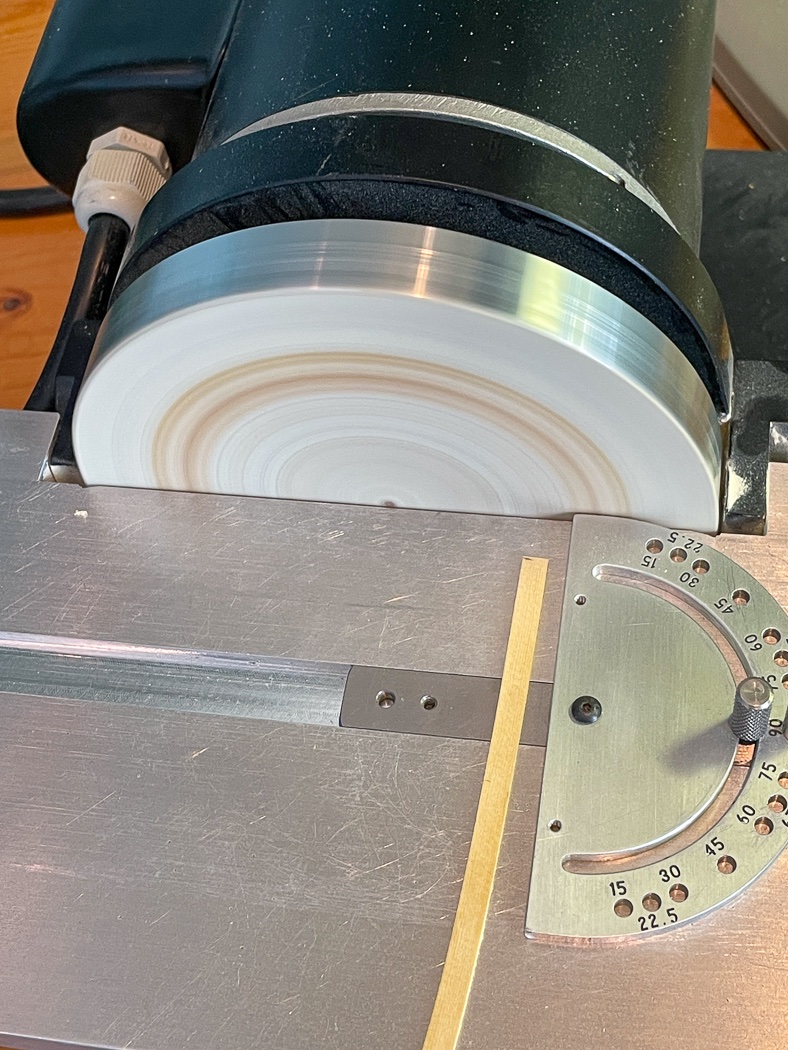
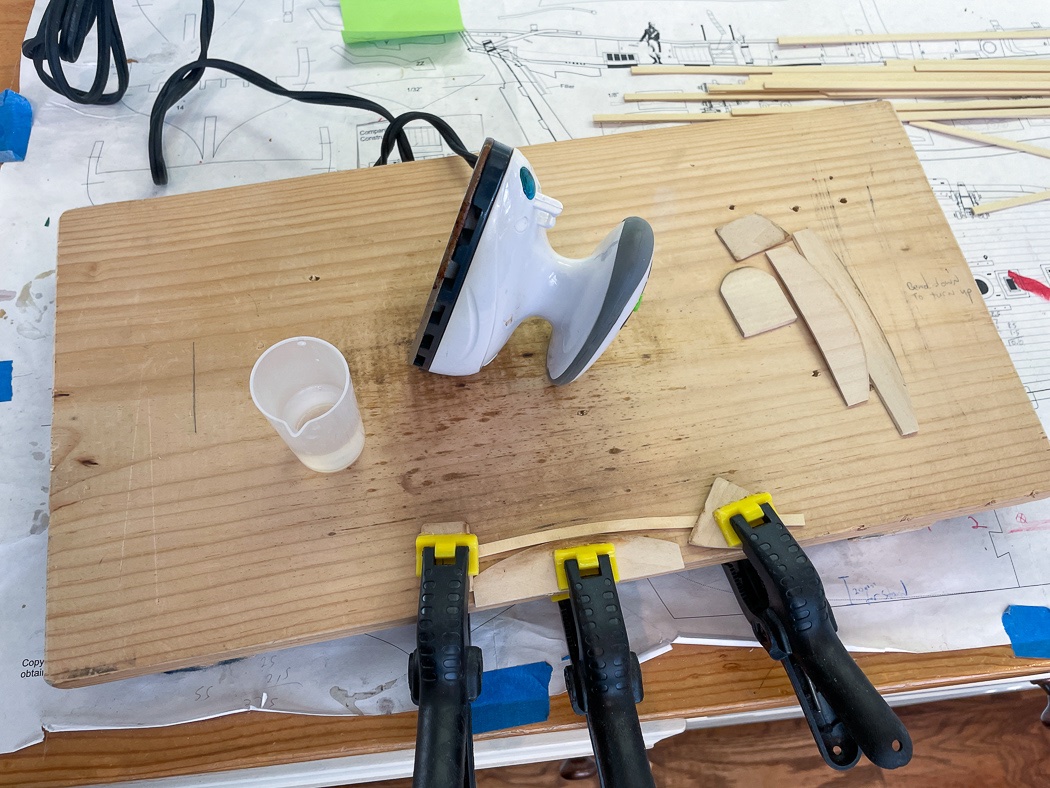
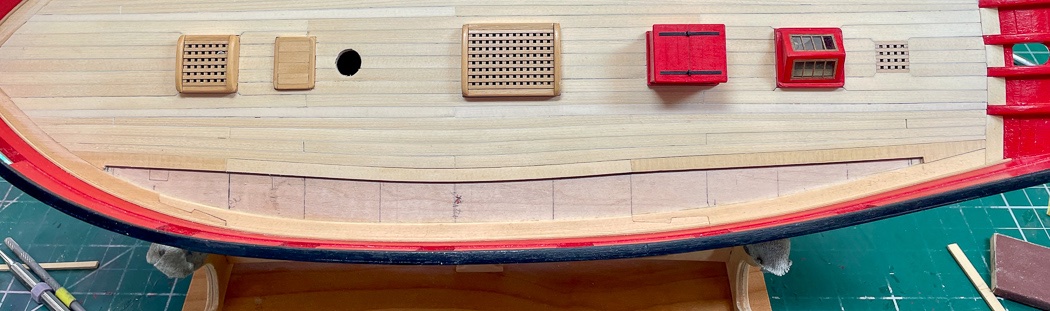
Completing the Deck Decking Cheerful seems like three different projects, planking the center around the deck furniture, the first belt of six curved planks, and the final belt of hooked scarphs. It took me a while to sort out how to do this third step and interesting design features of Cheerful’s deck, at least for me it wasn’t readily obvious how to create them, or at least create ones that fit. So I thought for those interested, and with my never ending quest to provide way too much detail, I thought I’d share how I did it. I again acknowledge there are likely better and more than one way (write your own log:-) this is just how did them. I did some measurements and determined that starting with 5/16 planks (the widest of my selection of cedar) would be wide enough to include the scarphs. I could have also used 3 inch wide sheet wood, and maybe I should have, but the 5/16 was my choice so I ripped some planks and off I went. Back from the “hook” itself the plank obviously has to be 3/16 to match the rest of the deck so I slide a 3/16 plank until it met the margin plank and marked that line. I decided after some experimentation I wanted a 3mm fit “into the hook” on the bow and 2mm on the stern. I selected the smaller size on the stern because the hook portion would be too large for my taste due the more narrow overall angle, so the fit was largely dictated by my choice of size of the resulting hook (or hood as I’ve seen some call it). So I made a little jigs, one 3mm and one 2mm. I slide that under the 3/16 plank and drew a line the would become the size and shape of the hook to check the look and also put a light mark at that spot on the margin plank as shown in the photo. Next to get the required angle on the front edge I fit and cut some Tamiya tape. You can see my earlier marks below the tape. Then I transferred the tape to my 5/16 plank and made the cut. I slid the full plank into its future home and transferred the pencil mark I’d made on the margin plank to the 5/16 plank, and the first step is done. That mark defines the hook forward and the 3/16 plank behind. The cut of the angle has to be larger than the mark, otherwise it won't be a hook, this can be adjusted by the width of the fit into the hook, part of the measurement process that led me to the 3mm and 2mm jigs. Next I used a 3/16 plank to mark its width onto the 5/16 plank, holding it firm with my heavy ruler and handy square, but double checked it with another ruler. As it turns out I needed to remove 3mm (so fun jumping back and forth from imperial to metric). My scarph is marked and ready to cut. The total length of each scarph is determined by the butt joint plan I noted in my last post, the total length of course varied for each of the twelve (6 per side) I made. Since I can’t take a photo and wield a #11 blade at the same time here is the result. I used my little 220 and 320 grit sanding blocks and files to finish it up. I also slightly beveled the back side on all four sides. This is an important step I believe. I want the top edge dictating the fit not any minor differences on the sides or bottom edge. And what do you know, it fits. It's ok if its short of the mark a bit (resulted from squaring it up and matching it to the starboard size in this case) it just can't be longer than the mark on the margin plank. I also had to remember not to forget the pencil mark on the edge closes to the side to simulate caulking. To complete the row I do the same process on the stern then determine the length of a 3/16 plank to fit between them. I cut that plank a little long then use my Byrnes Sander extremely gently and slowly form the edge until I have the right length (it’s actually spinning in this photo, close as I’ll get to live action shots). Then it’s back to the bending station to get the required curve for a tight fit. I’ve said it multiple times and will say it once more (for the last time in this log as I don’t think there is anything left to bend): Chuck's technique of using dry heat in the form of a travel iron (so much quieter and quicker than a hair dryer) is the way to bend wood in my humble opinion. The only water I use is dipping my finger into the little pitcher shown in the photo and lightly wetting the wood. I can (and have) unbend the same plank if I bend it too much. I have a couple of templates depending on what curve I need and always put a scrap piece between the plank and clamp to keep it from marking or crimping the plank. This process just works for me. Here’s the completed row, the three pieces now glued to the deck. I don’t think I got the curve exactly right on the first belt. Oh well, it’s the curve I have. I hope this step by step detail helps someone someday, it was a certainly process of discovery for me. Yet again a thing I’d never done before, thank you @Chuck and Cheerful. Here’s the nearly completed deck. I’m not done, I’ll lightly sand the first coat of WOP and apply a second plus there are a few blemishes I’ll attend to before moving on. I personally think Chuck’s design and instructions make for a pretty interesting deck. There’s a lot more going on than my usual straight bow to stern planking. So many joints and angles here at the stern. I think it’s pretty cool how it all fits together, making each plank was a process in and of itself. A look at the bow and it’s interlocking pieces. The planks aren’t discolored in front of the hatches, that’s the shadow they’re casting from the poor orientation of my workshop light above and behind. Finally another above look. My only minor disappointment is the amount of variation in the cedar color. The WOP did even it out a lot but there is more variation than on the hull. The 5/16 is darker and as it was used only on the outside stands out, plus there is a much paler plank running either side of center. I like that it’s not all the same, it makes it come alive, I just kinda wish there was just a little less variation. I’m sure that will all fade together as the rest of the deck and cannon are added. Again there are shadows from lighting, I first thought what are those squares, then realized its window light coming through the gun ports on the far side plus the work light coming from behind. My grumbling aside, I’m happy with the finally completed hull. As Chuck noted in the monograph, with the deck complete all the big messy stuff is done. Now I begin to add the details, sub-assemblies and mini-kits to make it a ship. I started April 30th, so it’s been eight months to reach this point. What a fun ride its been.


- 778 replies
-
- 22
-
-
- cheerful
- Syren Ship Model Company
- (and 1 more)
-
I'd never trust myself with spray paint at this point on the model, I'd inevitably get some over spray. Best of luck!
- 382 replies
-
- 1
-

-
- Vanguard Models
- Duchess of Kingston
- (and 1 more)
-
Where's the fun in that, sometimes I think I wind up doing the most painful rebuild possible 😄 Being willing to step back and improve something is the sign of a good modeler, its only the impossibly great ones that never have do-overs.
-
Fine work Rusty, your skill is showing thru as usual with the quality of the planking not to mention how quickly you reached this point.
- 201 replies
-
- 1
-
-
- Duchess of Kingston
- Vanguard Models
- (and 1 more)
-
This is really good work Tim. Rigging is fun for me, it means you’re close to the end. I thin your mouse and stay collar look fine, as BE points out you won’t notice it once you step back other than seeing it as a unit. The rigging and deck looks great, you’re going to finish with a fine model.
- 436 replies
-
- 2
-
-
- vanguard models
- alert
- (and 1 more)
-
I don’t know the answer either, Chuck points out it’s historically accurate though.
- 778 replies
-
- 1
-
-
- cheerful
- Syren Ship Model Company
- (and 1 more)
-
Probably still plenty of thickness to fill, sand, and repaint the hull. Nice job on the Wales, remove and replace is a way of life for me...
-
As others mentioned clove hitches are the way to go, but the lazy way is half hitches on the inner shrouds but these may slip. I hate rat lines, but do find once I get in a rhythm it becomes almost meditative. An option is a touch of your choice of glue on each knot to keep them there. One key suggestion is to create a grid on paper the height of the shrouds (I use Excel, but there are better ways) with horizontal lines spaced per the plans but also vertical lines to make sure the shrouds keep their line and don’t get pulled in. Place this paper behind the shrouds. It’s both a guide and keeps you from going cross-eyed trying to see the ropes.
