-
Posts
4,127 -
Joined
-
Last visited
Content Type
Profiles
Forums
Gallery
Events
Everything posted by glbarlow
-
Such neat and crisp work, great job.
- 201 replies
-
- Duchess of Kingston
- Vanguard Models
-
(and 1 more)
Tagged with:
-
Yes there is a guide. You have them the on the plans for Nelson, if you want to replace the kit rope just get equivalent size, or closest to it, from Syren. That’s what I did, I also replaced the blocks, a more important step. The Nelson blocks are junk. Note that other than ropes and blocks most stuff on Syren is 1:48 scale and Nelson is 1:64.
- 139 replies
-
- Lady Nelson
- Amati
-
(and 2 more)
Tagged with:
-
The decks of Cheerful and Nelson are pretty much the same. The bigger effort is getting some of the Nelson stuff to scale, meaning scratch building. There really isn't anything to add to the deck, just stuff to make better.
- 139 replies
-
- Lady Nelson
- Amati
-
(and 2 more)
Tagged with:
-
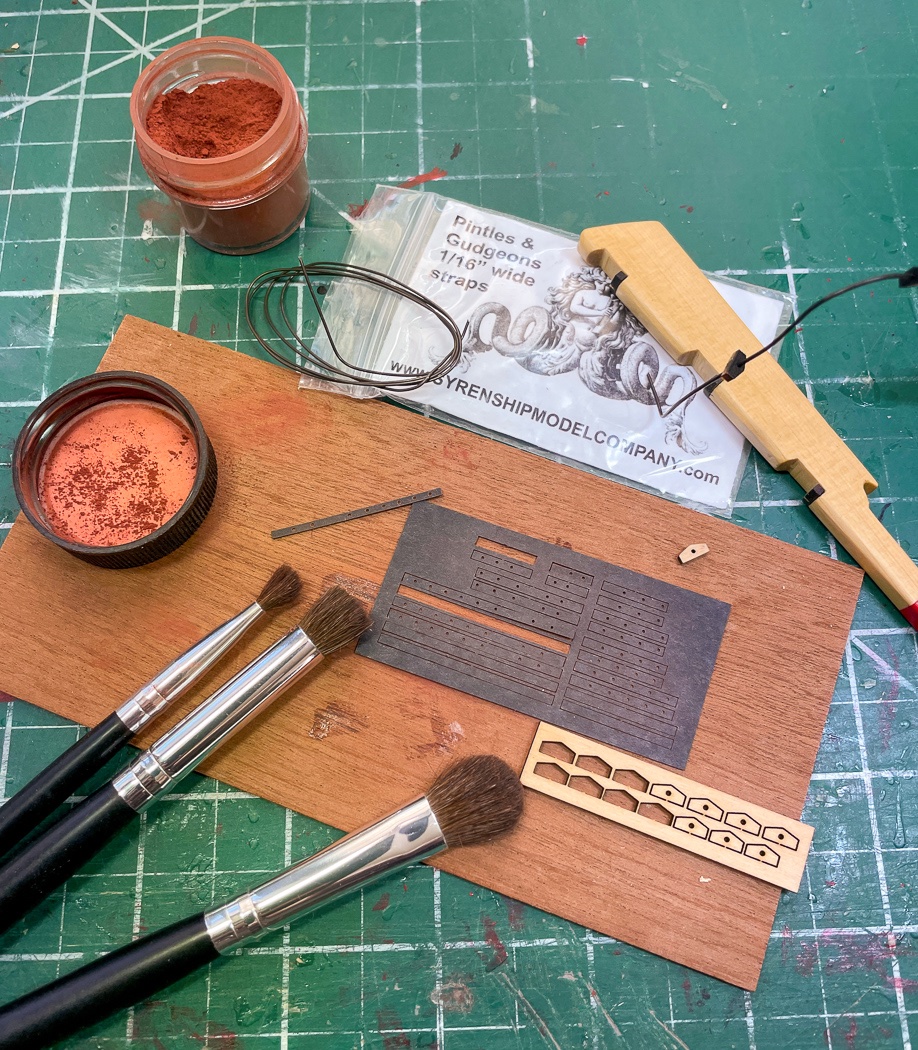
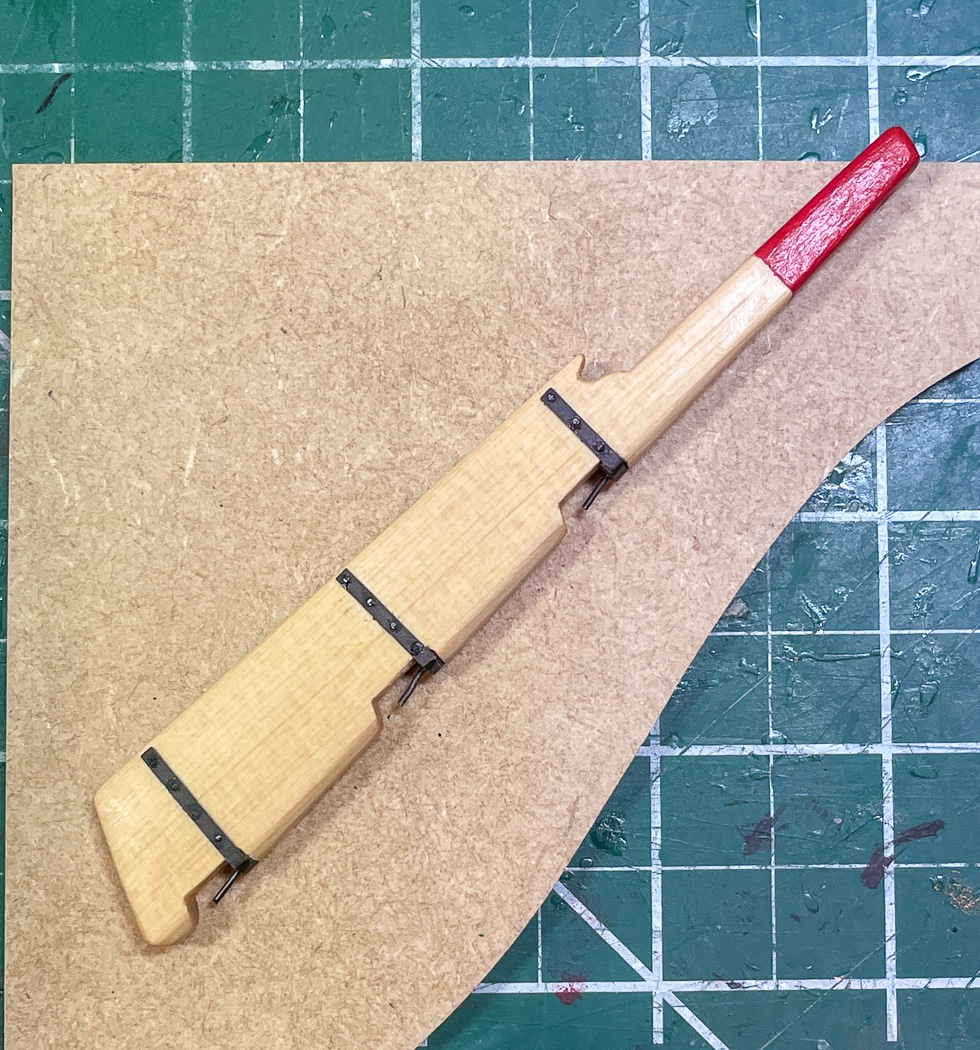
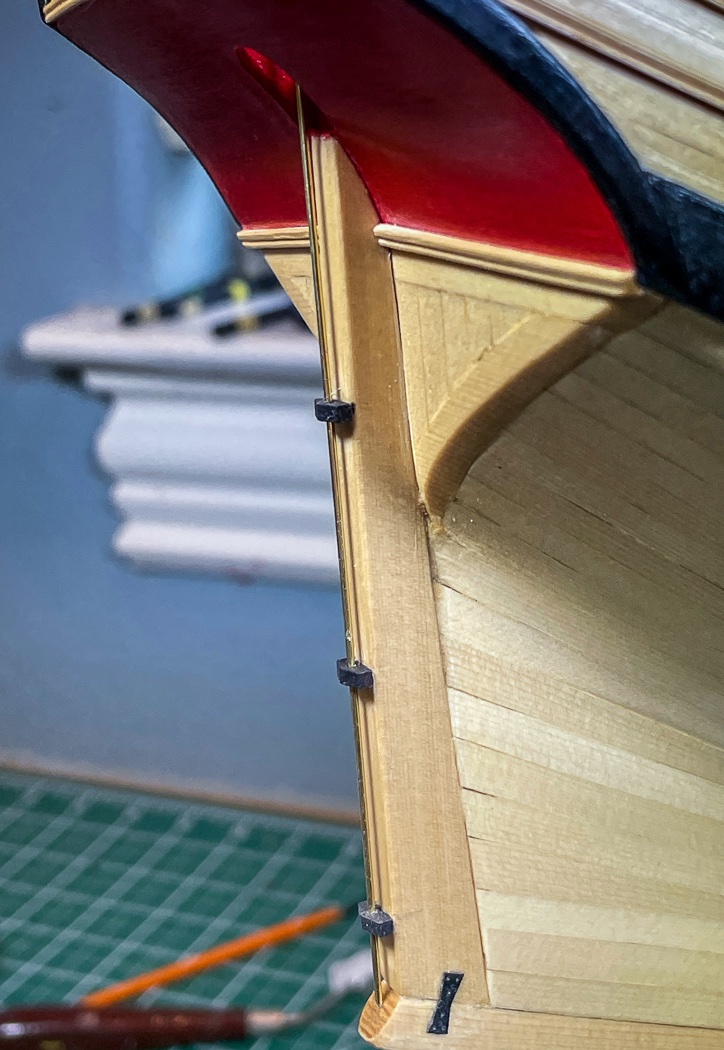
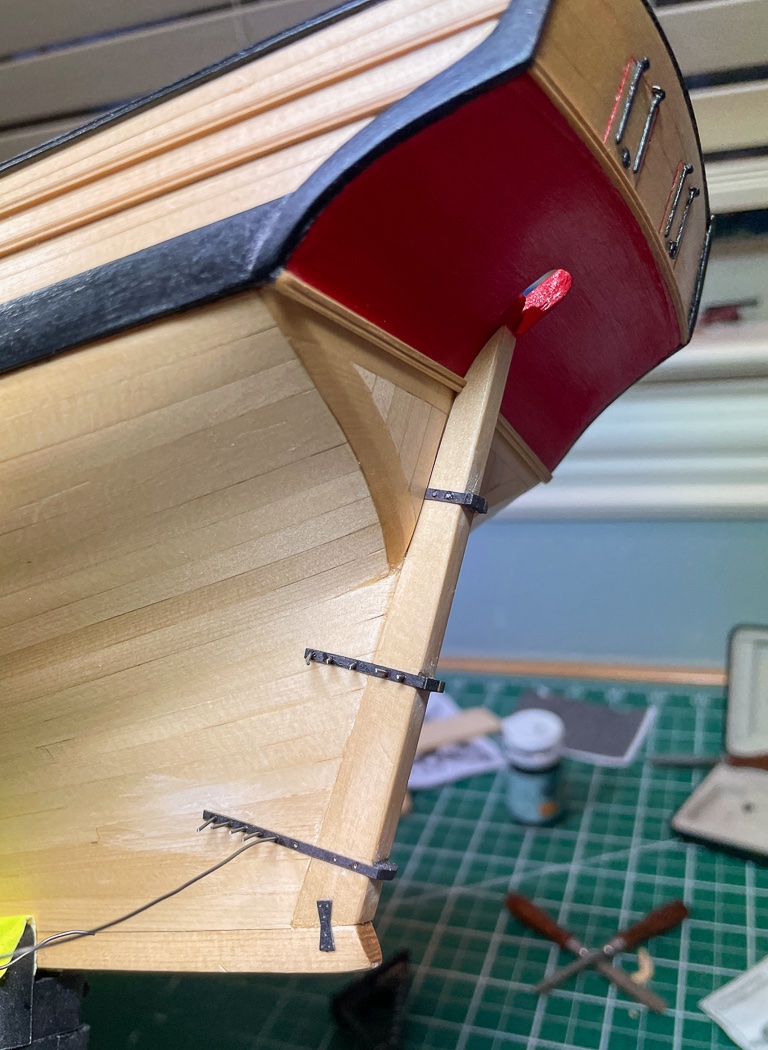
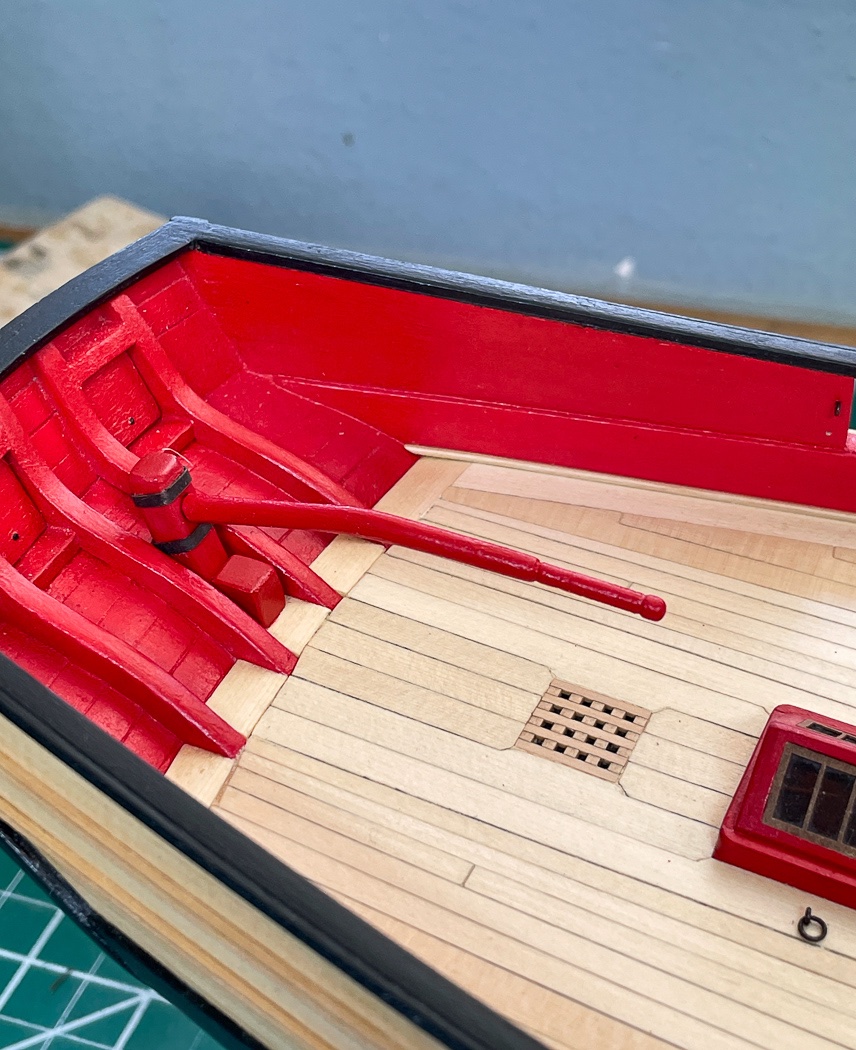
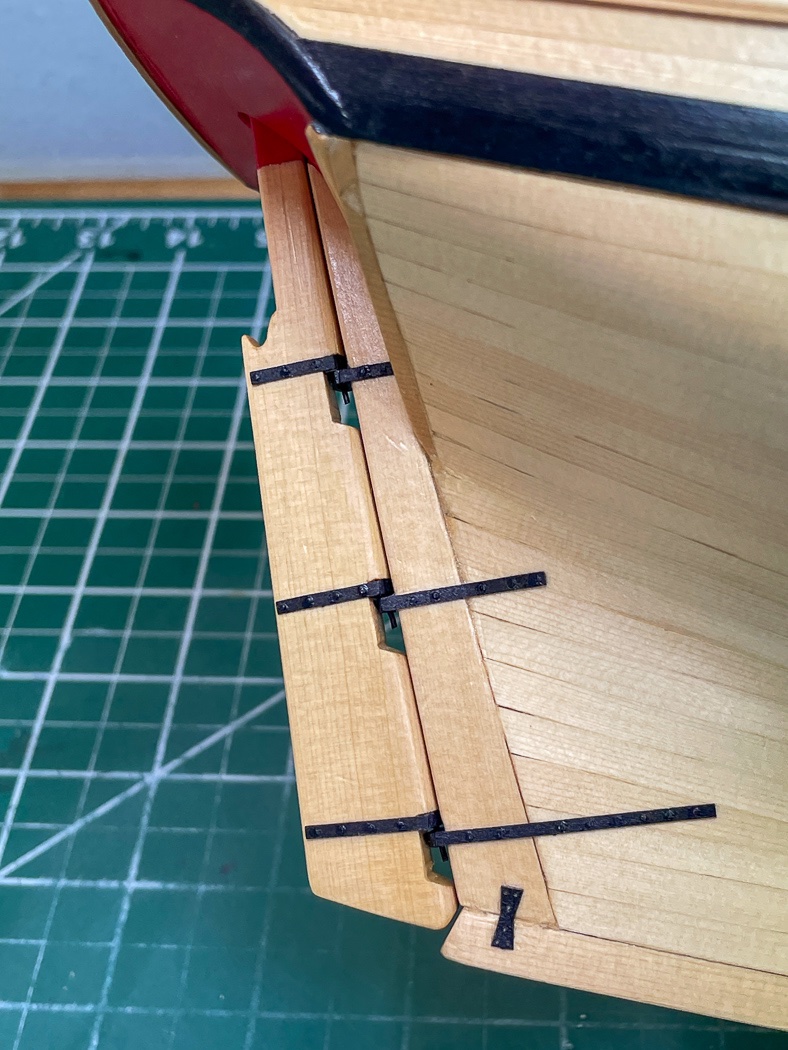
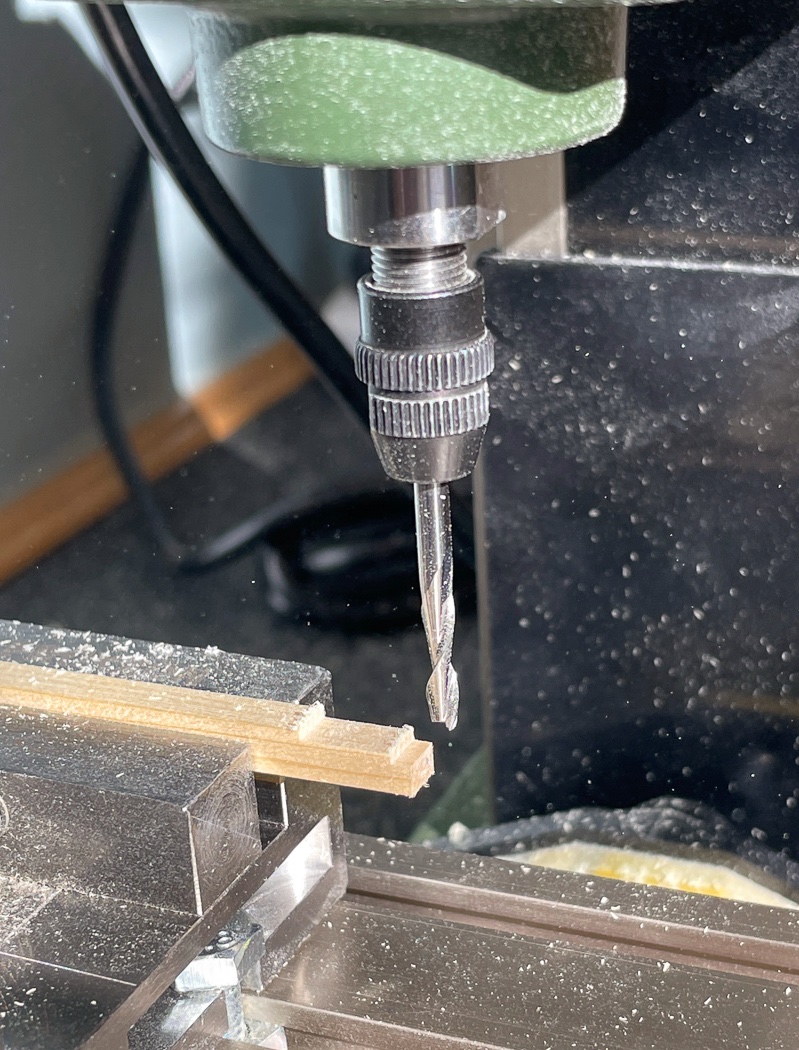
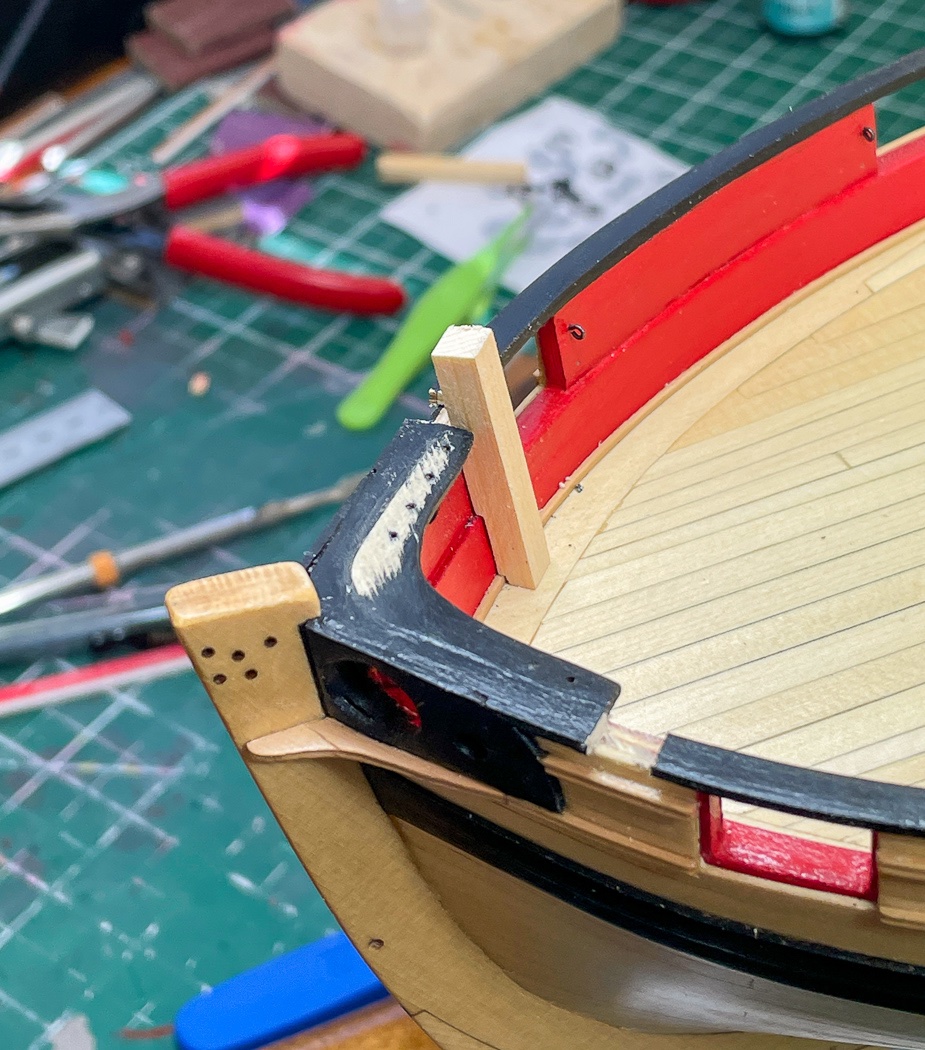
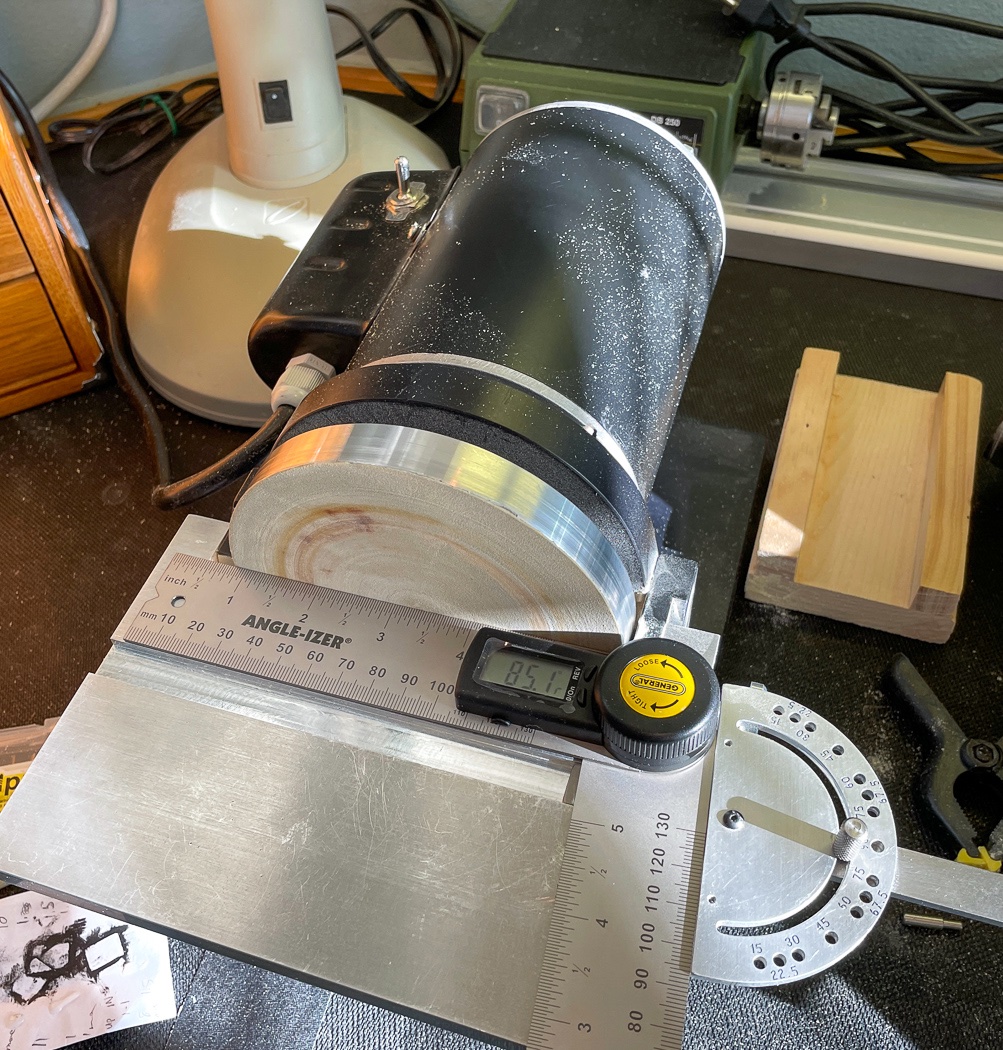
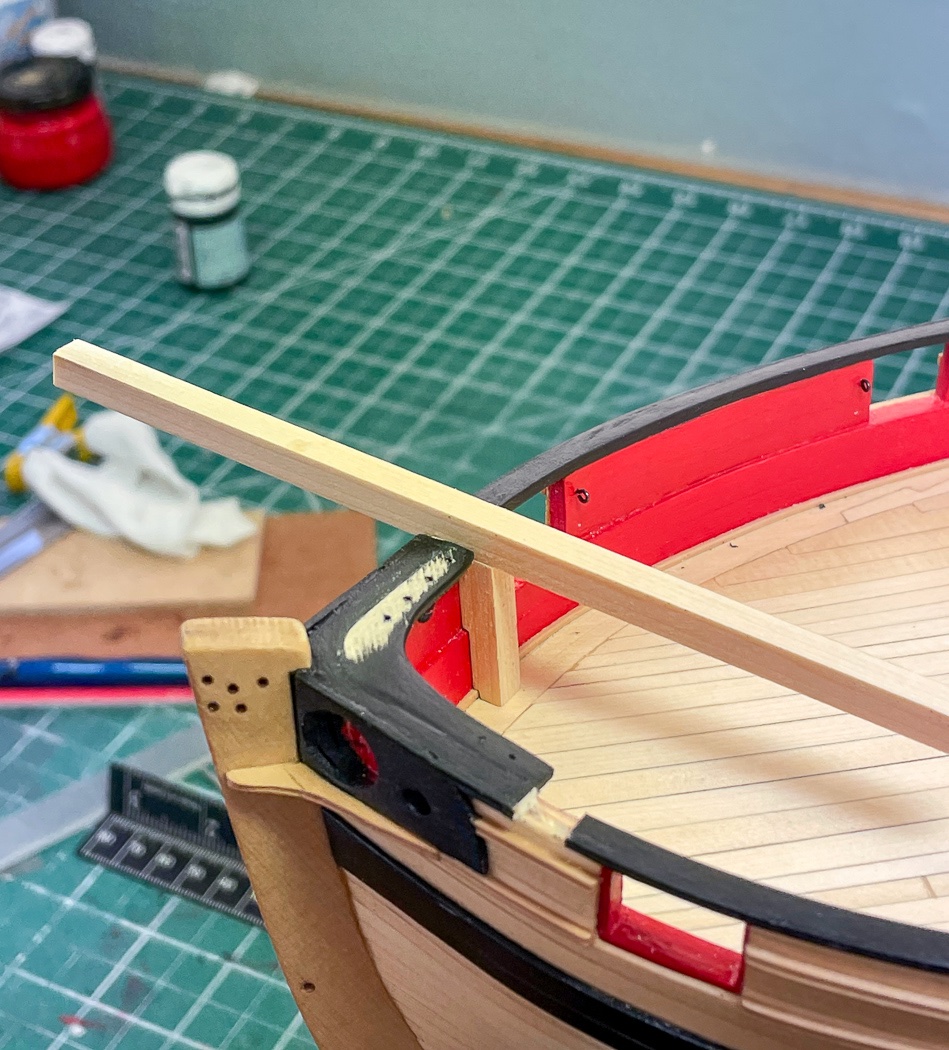
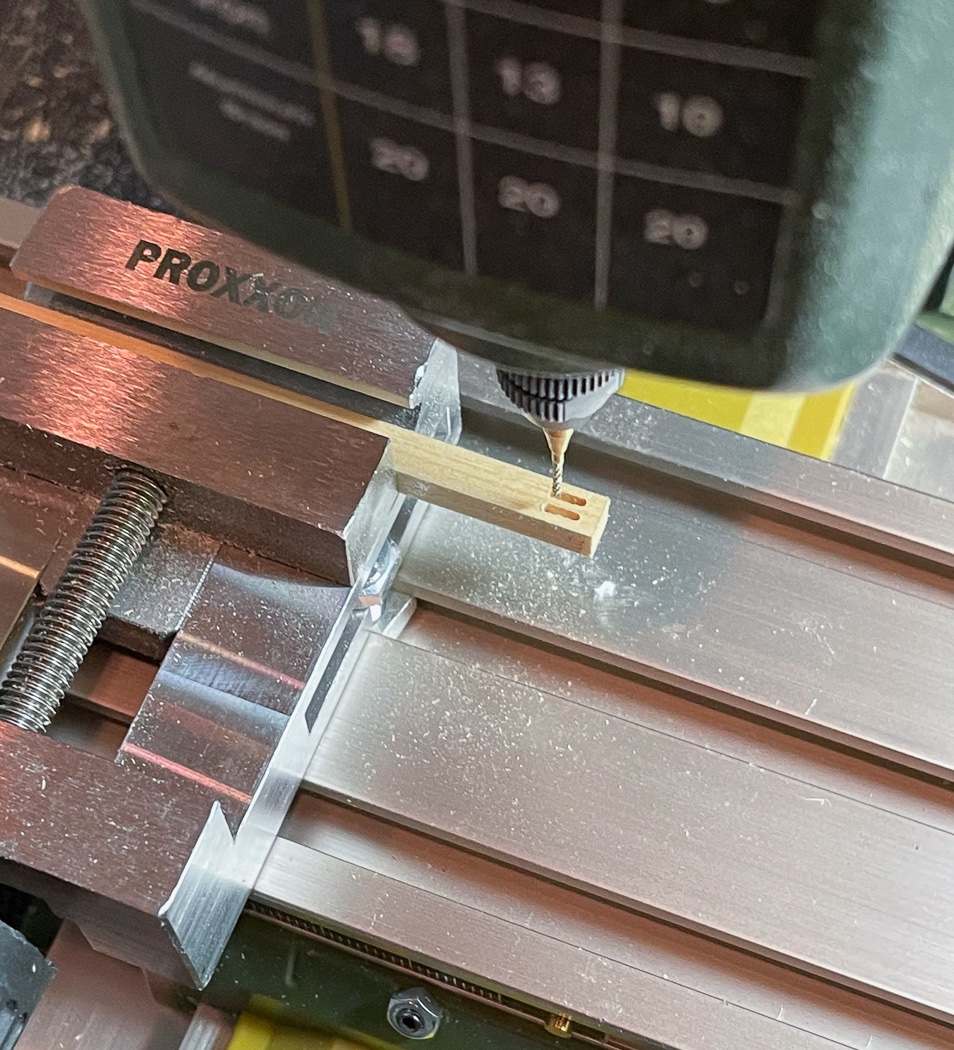
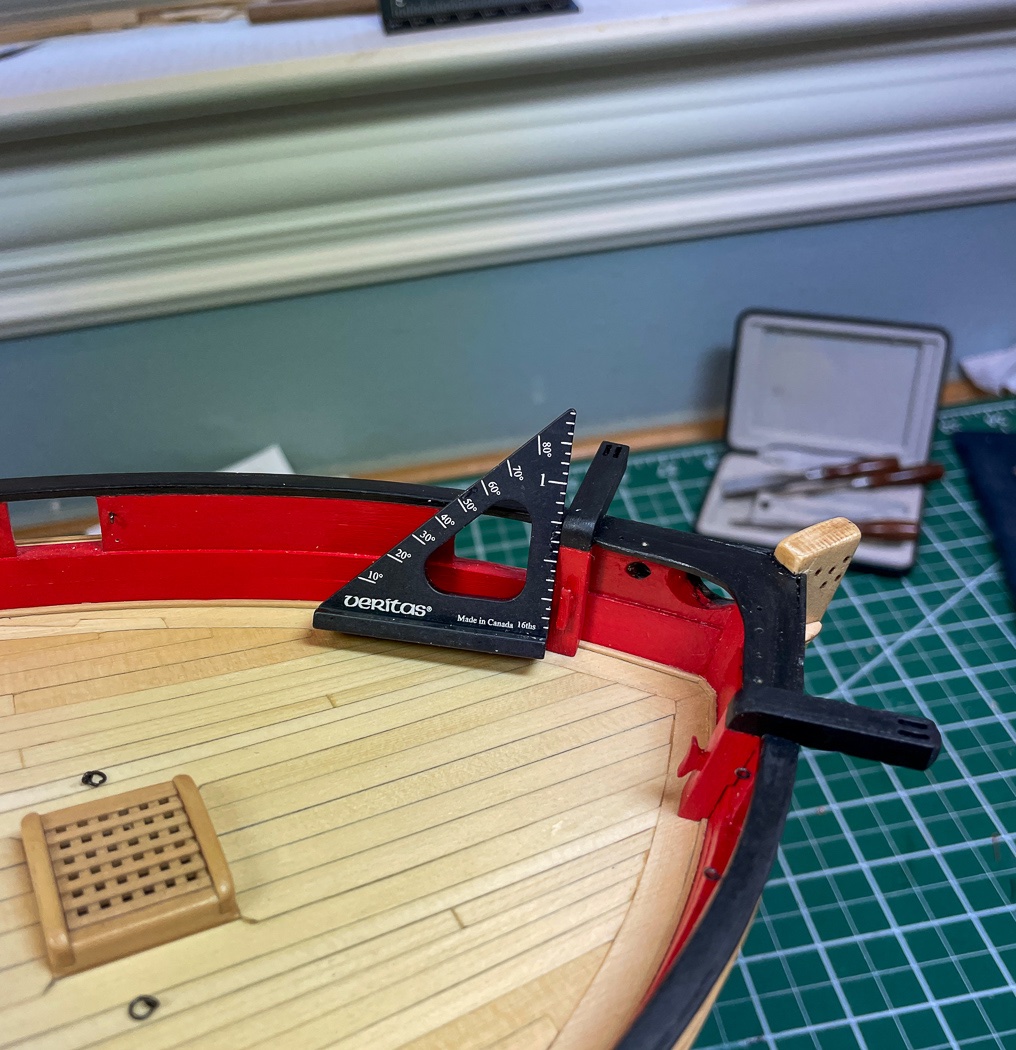
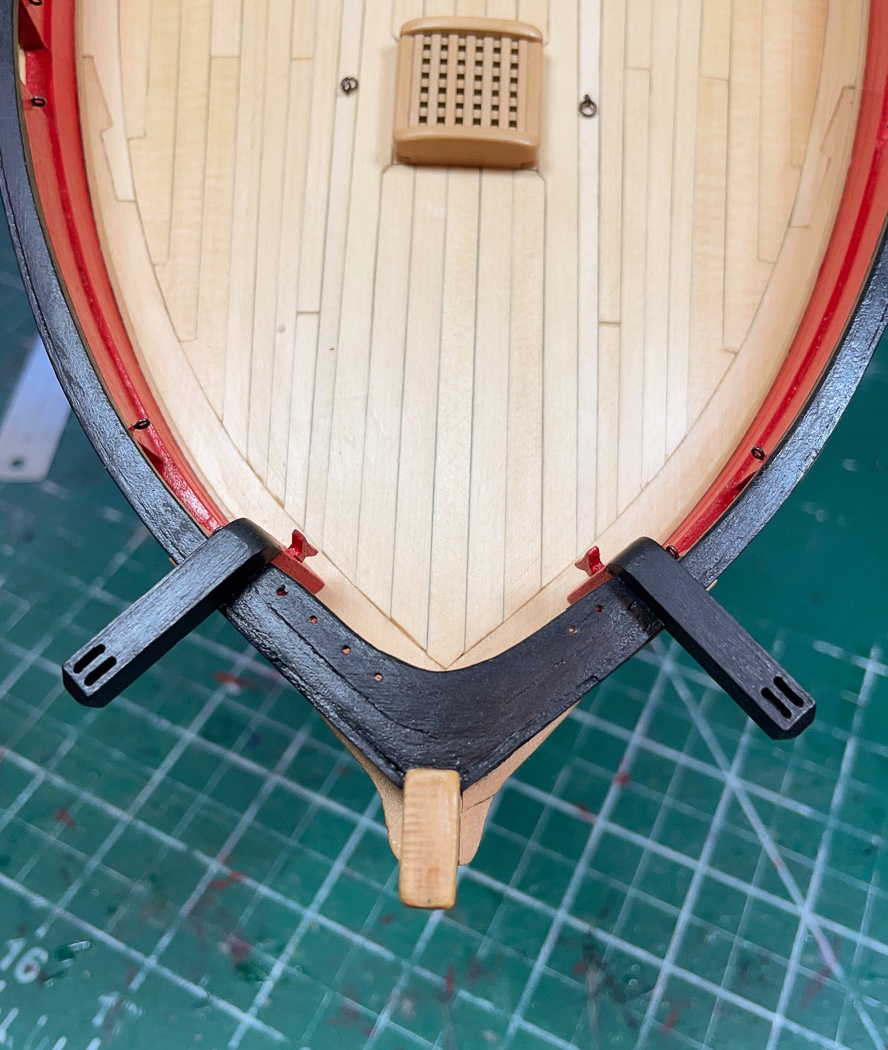
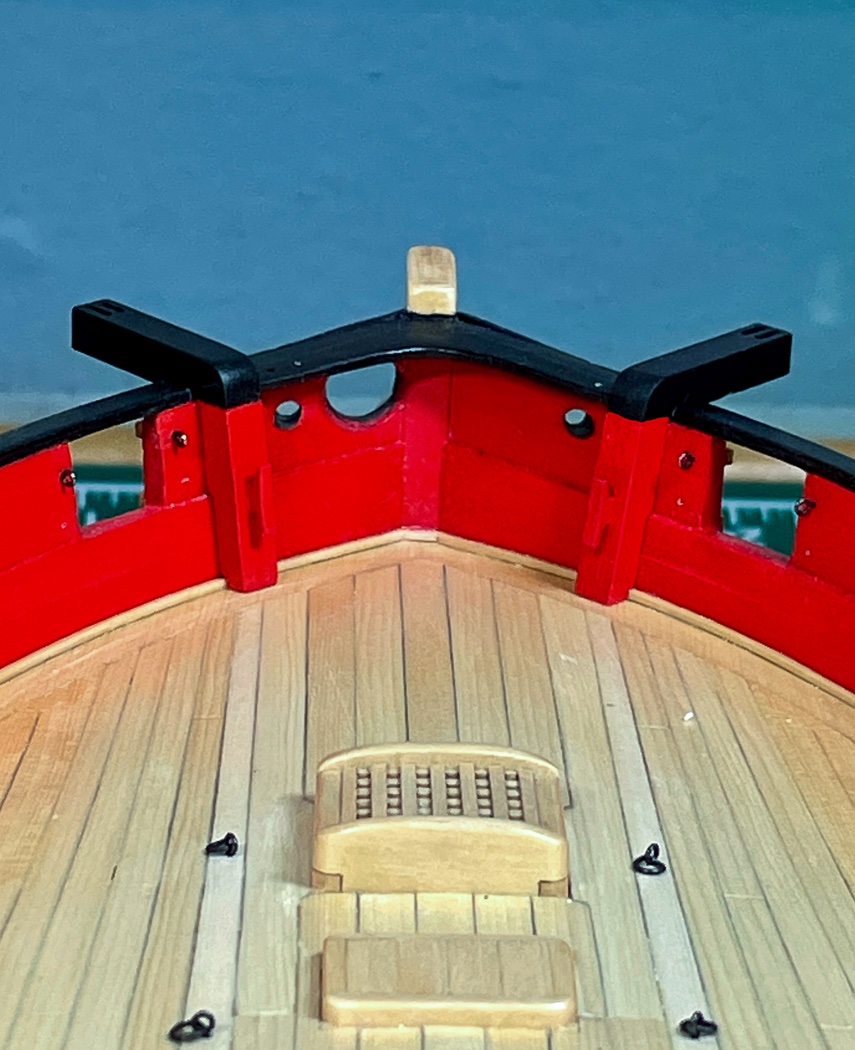
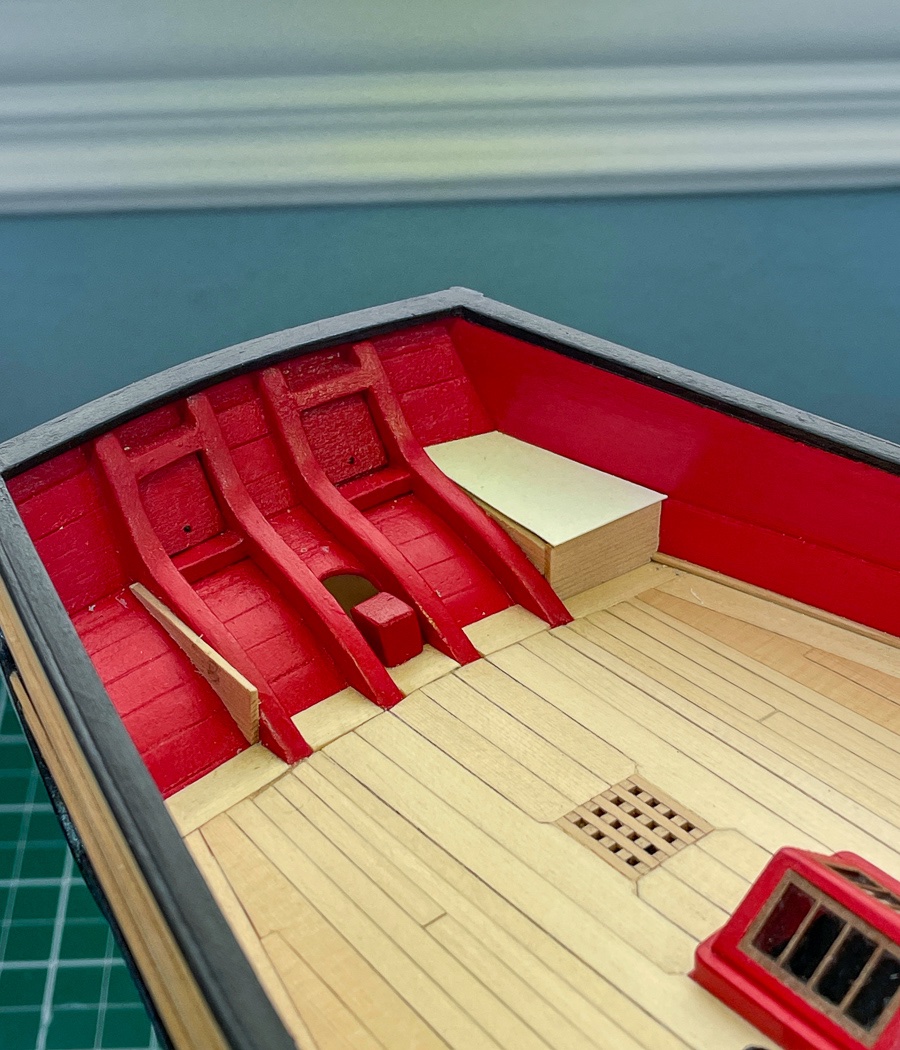
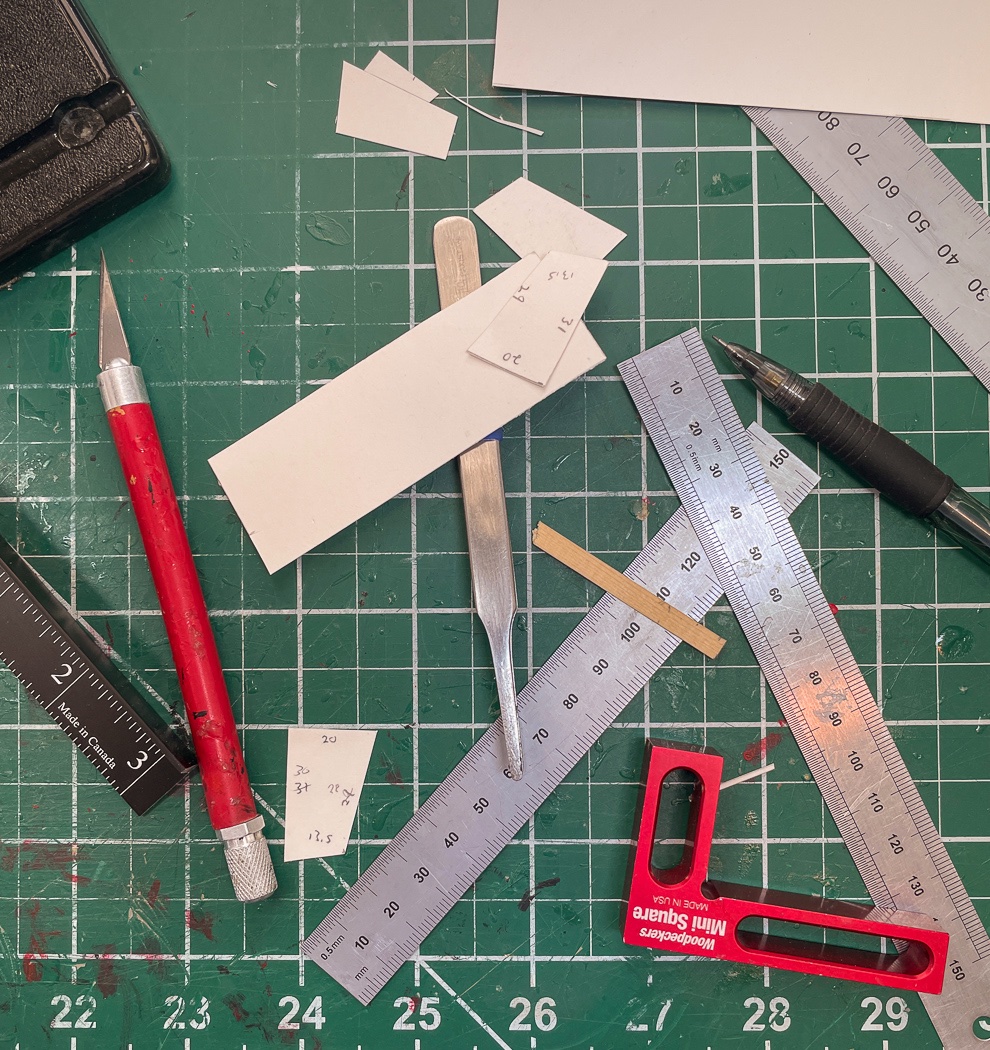
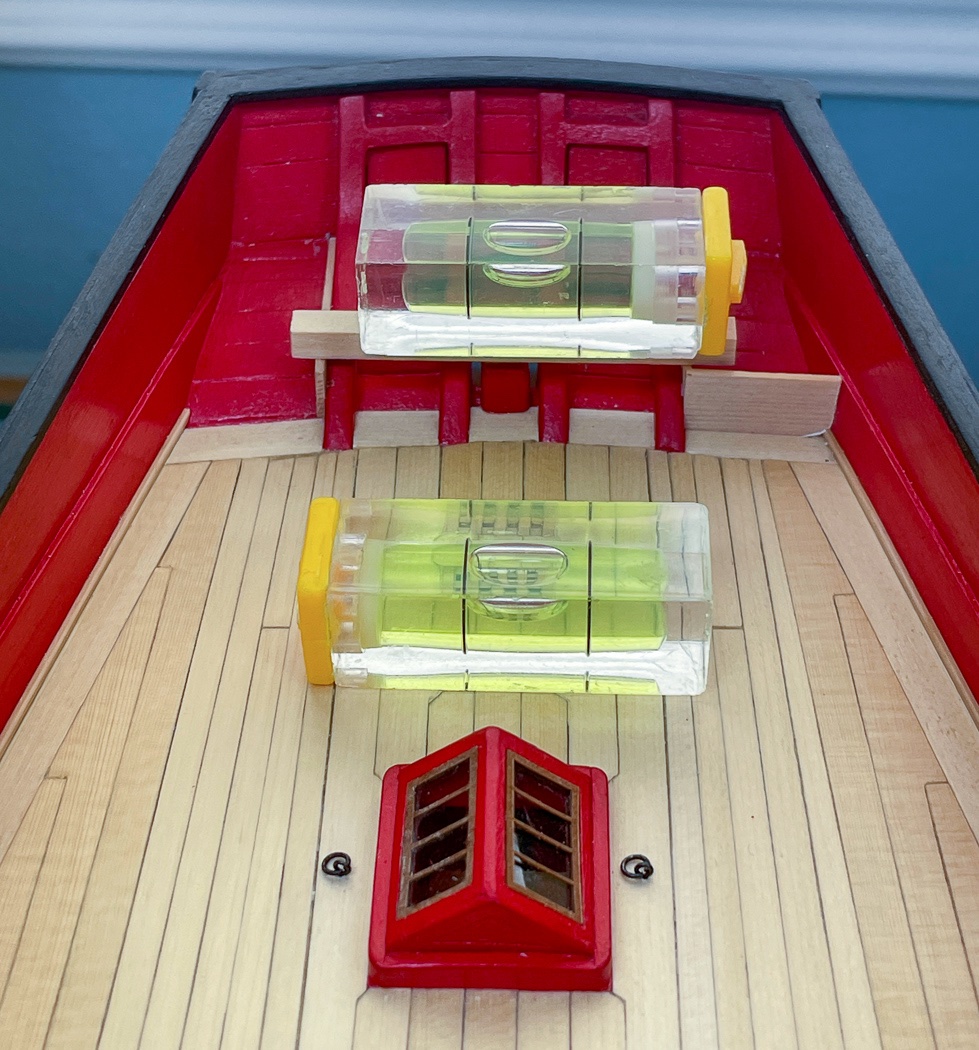
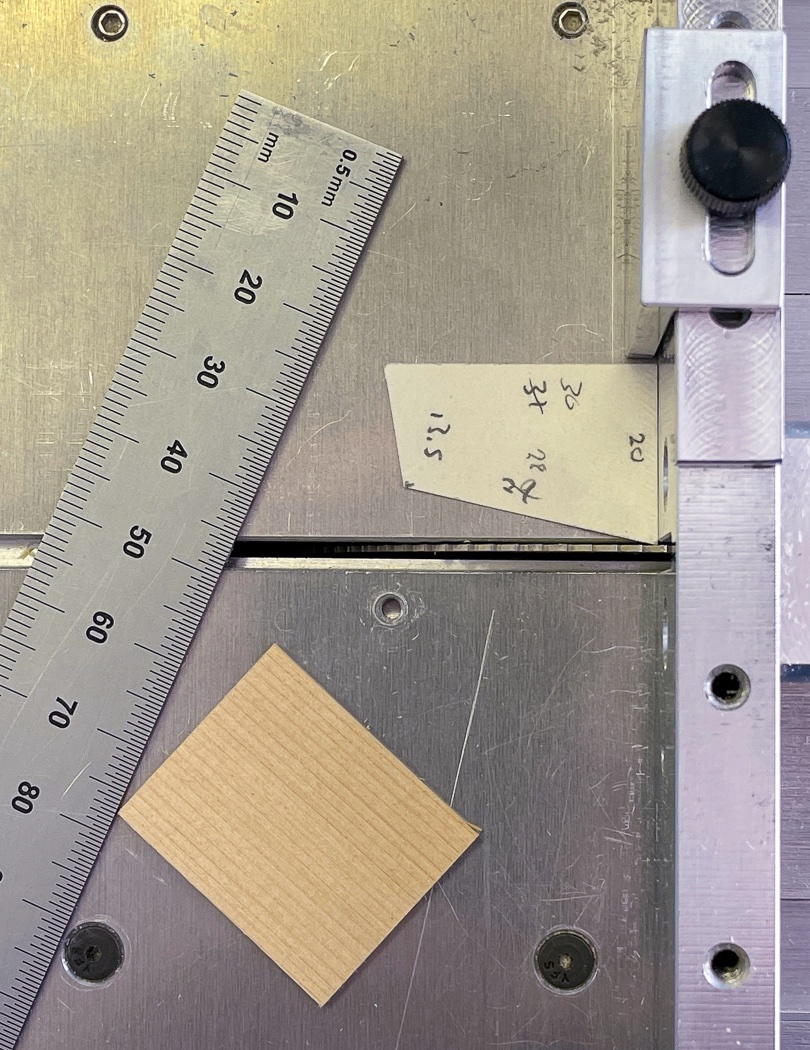
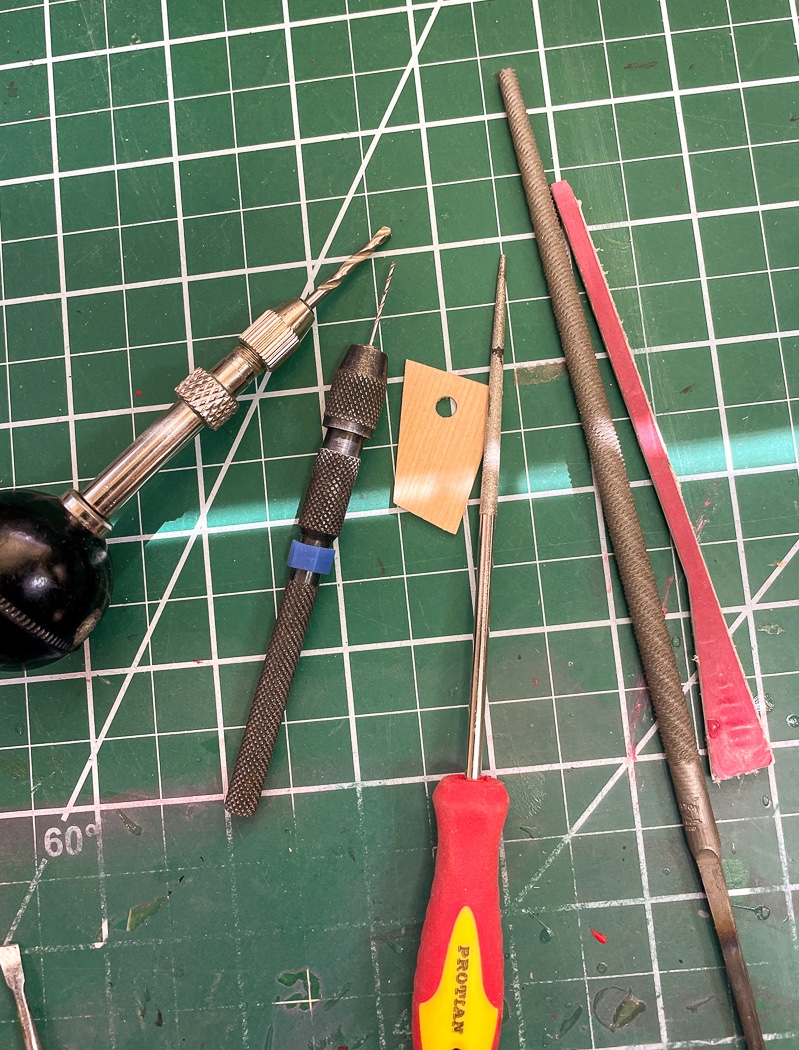
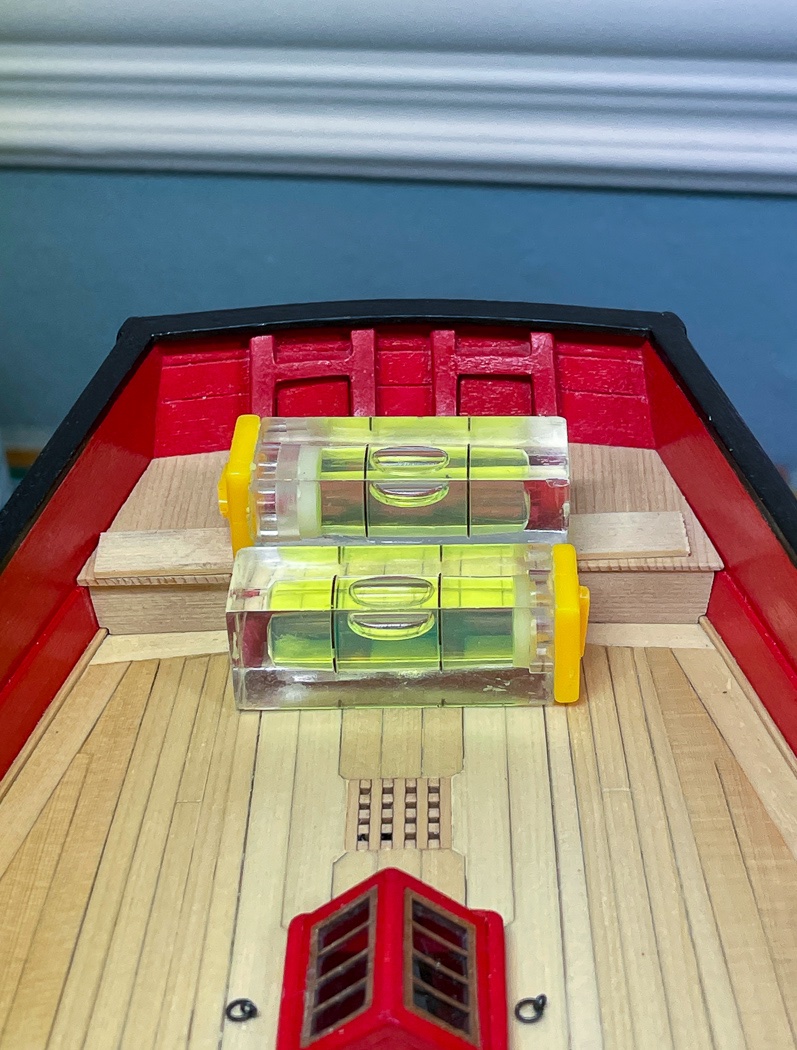
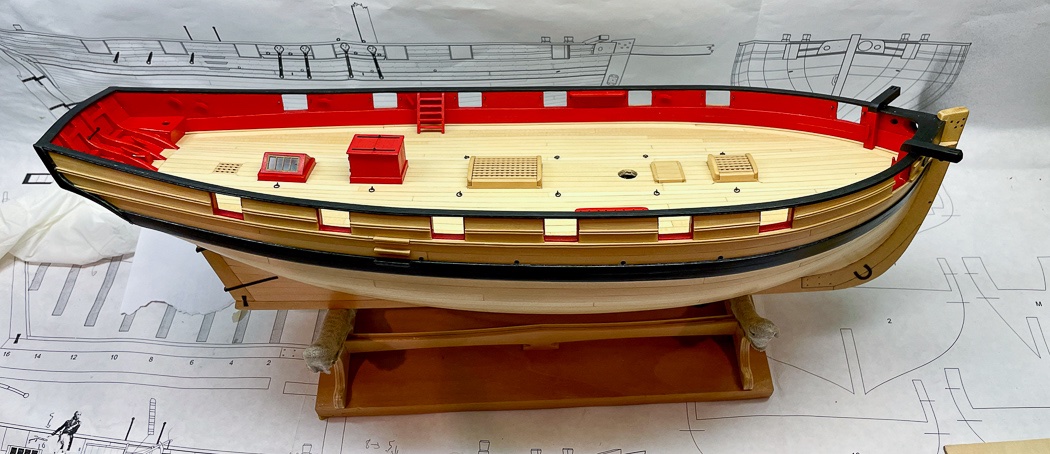
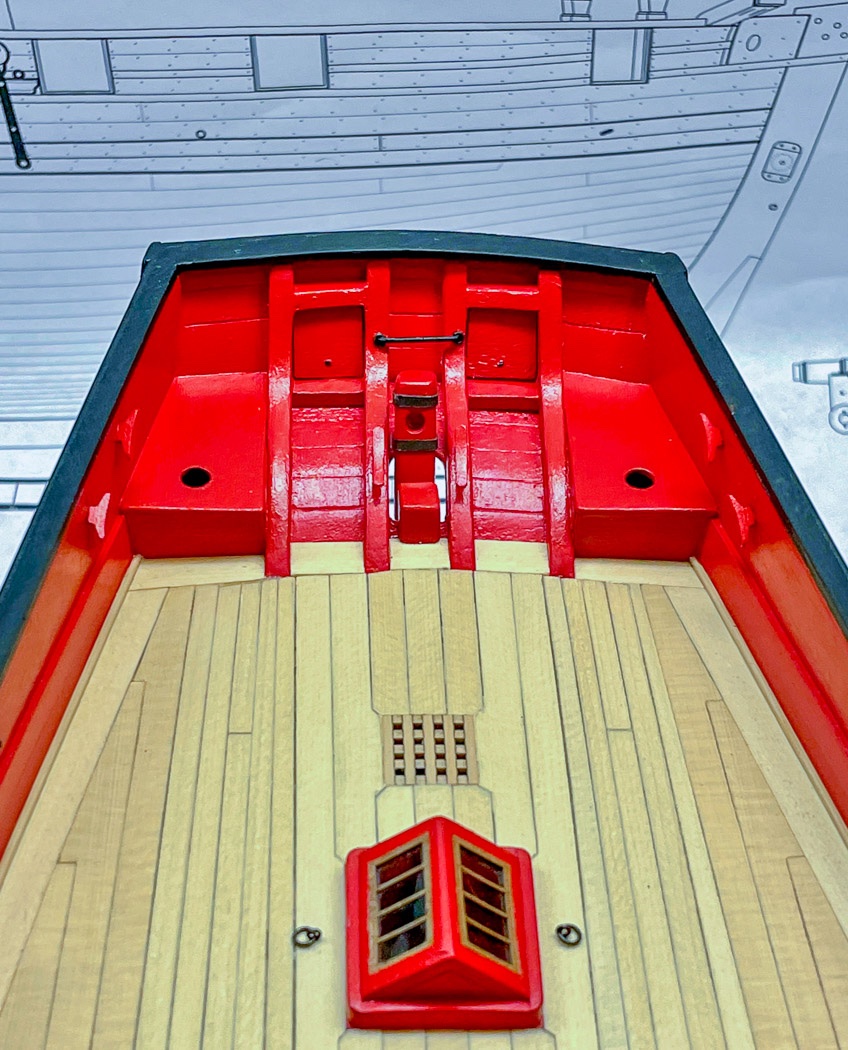
I’m continuing to do mini-projects in no particular order - following the ‘why don’t I do that next’ plan. So: Mounting the rudder When I first looked at the Pintles and Gudgeons mini-kit I wondered what do you do with those. Turns out it’s another brilliant design and a simple way for attaching the rudder. Simple in concept anyway. The first step was to paint the gudgeons Ironwood Black then dust them and the straps with weathering powder, because you know you can never do enough weather powdering. Attaching to the rudder itself was straight forward, I left the pintles long initially then trimmed it back after some test fitting. Then came the more challenging part, attaching the gudgeons to the hull in the right place to fit the rudder and in line. After some careful measuring and marking I used a piece of brass wire to make sure they were aligned. There isn’t any forgiveness here, everything has to be in the right place. I encountered a problem, I couldn’t get the glue to adhere to the hull, after several frustrating attempts I determined that glue sticking to wood with too many coats of WOP doesn’t work - I simply had let it get it too thick on the stern post. I roughed up the wood with some 220 grit, and after that no problem. I of course knew this, but sometimes in the thick of it you just want the wood to shut up and do what you tell it to do - the wood laughs. I also shouldn’t do these things at night, or maybe not at night after drinking scotch, or maybe just not after drinking scotch. Anyway. The straps and bolts are added. I liked how drilling holes as marked on the strap, inserting wire a little long to glue it in and then cutting it near flush made for nice bolts after touching with Ironwood Black (a little touch up there to do on the hull too, oops). And there you have it, my ship can now be steered should it find itself adrift in the ocean somewhere. I still think I’m going to remake the tiller, we’ll see, it’s just hanging there loose for the photo. So with that done the rudder is removed and put on the shelf to be permanently installed later, bye rudder. The Catheads Then, since it can be steered I figured I better be able to anchor it, so do the catheads next. That meant it was time to play with the mill again and pretend I know what I’m doing. Following the monograph I constructed the catheads in two parts. First the upright, which to fit tight against the bulwark had to be notched for the spirketting and again for the waterway. I cut both notches with the mill. While it takes the unskilled like me a bit of work and trial effort to get the measurements right, the mill cut nice and clean once I had it correct (actually it cut nice and clean when I had it wrong too). I bought a car engine feeler gauge, took it apart and used the thinest one to set a good zero for between the bit and the wood for the X,Y,Z axis. This proved pretty handy in getting a consistent starting point for the cuts. It was fortunate I read the monograph first (not that fortunate as I always do). Before starting on the catheads, the forward pin rail has to be made and installed. That has to be sized carefully so that the cathead doesn’t impede the flow of the anchor rope through the hawse hole or restrict the gun tackle for the forward chase port, there isn’t that much room between the two. I had to do a little fine tuning on the pin rail not related to the cathead as shown here. Next up is getting the correct angle on the upper piece of the cathead, hint, it’s not 90 degrees. There needs to be some upward angle to it, while also accounting for the bit of lean of the upright on the bulwarks. After some experimenting I determined 85 degrees was best (or 95 degrees depending on how you look at it). Since the Byrnes gauges don’t do notch anything less than 15 I set the angle on the sander for a smooth edge using a digital protractor. Then to get a good feel for it I set the top piece on for a look. I decided this made a great ship's crane and installed it just like shown here. Well, it did cross my mind for a second. When I know I’m going to need multiple equal sized pieces, plus several more for testing I cut a properly sized long length and cut everything from it, hence the long piece shown. Then its back to the mill to cut the sheaves into the top piece. This is so incredibly easier and better than doing it by hand with a blade as I’ve always had to do in the past. Just cut the slots a 1.5 mm deep and drill all the way through on both ends. I added flush-cut 24 gauge wire to either side later but it doesn’t go all the way through and is just for simulation. This little Veritas triangle, a new tool, has been coming in handy a lot for deck work, here to make sure the cathead is perpendicular to the deck. Some filing at the leading edge, paint, a couple of cleats, and I have catheads. No anchors yet so the ship is still drifting, but at least they have someplace to attach one, or maybe attach Fred, their fellow crewman who drank all the grog, and just let him hang there a while. BTW, they are straight, the photo is a warped perspective due to the angle. The Seats of Ease I struggled with the concept of this a bit. These seats are such a prominent feature of the deck. I have this vision of two crew members availing themselves of the seats, just a few feet from the helmsman. There is no cover on them (I almost added one) so I wonder, given the prevailing wind on a sailing ship is generally from either rear quarter, if the helmsman - often the captain on a ship this size - was constantly bombarded by the smell. So I almost turned them into lockers and let the crew poop over the rail. In the end I decided to stay true to Chuck’s design and accepted they’d be a topic for conversation once the ship was finished. So I began to build my two onboard outhouses with apologies to the helmsman…courtesy flush dude (which would be a bucket of water I suppose). It seems simple, just glue together three pieces of wood, the top, one side, and the front. The thing is, again, there are a lot of angles and curves involved - plus you are making two and the two have to be both identical, level and even in height with the spirketting since that forms the outboard side, and the width of the inboard stern frames. Here’s hoping I installed all of those equal on both sides so long ago. I started by cutting card templates (as Chuck suggests) - its kinda essential here to get the right fit. I’m sure there is a geometric name for the shape of the top, let’s just say it doesn’t remotely resemble a rectangle. I also cut a long strip 9mm wide from 1\32 sheet so that the front and sides for both seats came from the same piece of wood. This photo is from later in the instruction. I first did the sides since everything else is based on them. The challenge is cutting the curve of the counter on the bottom, having both end up the same height and level, be the same length coming forward, and the leading edge perpendicular to the deck…no problem…who doesn’t love geometry. And what do you know on the first try both sides are level…or maybe not on the first try… After cutting the fronts - with the outboard side beveled to fit snug to the bulwarks, it was on to the top. There is no substitute for card templates here. I marked the measurements, tested it and remarked until I had the varied lengths on the four sides required for it to fit, the angle of the hypotenuse or something like that. I used the cross cutting table on my Byrnes saw to get precise cuts on two of the sides, there is likely some way to do it with the saw, but I opted to cut the remaining two sides with my heavy steel rule and #11 blade. It’s possible I didn’t get all this right on the first try, card stock or not. With the pieces cut and only the sides glued in I test fitted everything, and found it’s all level and equal sized, how’d that happen. The last step before mounting and painting is the ease part of the seat, cutting the hole, which after all the work to get two fitted tops I didn’t want to screw up. So I went slow with a small pilot hole, then a bigger one, then a round needle file, then a larger file marked with a sharpie to finish at a 4mm hole, and finally an ultra fine sanding stick to smooth it out. I added two large cleats and 4 smaller ones then painted it by brush with thin coats of my favorite RED (again some iPhone camera distortion on the angles). The cleats come from Syren, available in multiple sizes. I had to remove the laser char (it would show through the red paint) and shape them a bit. I used the stem of a standard eyelet to pin them to the bulwark so they can take rope tension later. I also added the horse, created from 24 gauge wire. I used the eyelet portion, cutting off the stem flush to the circle, to accent the horse either side, painted it Ironwood Black and weathered it to finish off the stern - except the knees and boom crutches which are up next…maybe… Pin rails and cleats I finished up this phase by adding the bulwark pin rails along with the rest of the cleats noted on the plans. Turned out to be a pretty tight fit for the cleat nearest the ladder. I’m glad I checked that, I had to give it a little extra turn to allow the ladder and gun tackle to fit with room for the future lines shown on the rigging plan. It’s generally a good idea to take a look around at what might happen or be added later to make sure nothing gets in the way of something else. That was evident here and especially evident with the catheads. As I noted I’ve been turning pages in the monograph and doing what I felt like doing next - at this phase, at least so far nothing has to be sequential, though that will change soon. Thanks everyone for the likes and for stopping by. I better go check to make sure the crew didn’t actually drown Fred.
- 778 replies
-
- cheerful
- Syren Ship Model Company
-
(and 1 more)
Tagged with:
-

Bulging 2nd Planks
glbarlow replied to drjeckl's topic in Building, Framing, Planking and plating a ships hull and deck
Hard to say, haven’t encountered that. I put little dabs of CA, don’t need much, along the whole plank. I leave only a small space between each dab, no big gaps along the way. It’s also important to have the right bends in the plank both in and down using Chuck’s method. You’re right, no edge gluing is needed. So the only thing I can guess is your gaps between CA are too large or the bend isn’t right or a combination of both. Your first planking needs to be very smooth and faired. You can’t get a different hull with the second planking, it conforms to the first. -
First, sorry for the typos, me and my iPad are not friends when it comes to typing.... That is your best advice. It’s understandable to want to get to a result, but harder to remember your not on a schedule. If I had remembered that Cheerful would have both sides planked once instead of 2-3 times, my having ripped off work I wasn’t happy with. Which bring me to my other advice - don’t settle. If it’s just “ok for me” then rip it off and do it again. That’s the nice thing about wood, there is almost nothing you can’t fix. I often say if things had three sides my third side would look great because if the practice from the first two. And of course enjoy it, it’s a hobby not a chore.
- 139 replies
-
- Lady Nelson
- Amati
-
(and 2 more)
Tagged with:
-
Yep, that’s why I described using the lans to cut the hull shape out of a board for bending the pattern, not to pile n...
- 139 replies
-
- Lady Nelson
- Amati
-
(and 2 more)
Tagged with:
-
So many nautical terms, I don’t know what you’re saying in most of this post 🤣😂 Nonetheless very expert and detailed on the rigging work, things I’d never think of doing.
- 725 replies
-
- vanguard models
- speedy
-
(and 1 more)
Tagged with:
-
After Vanguard I really learned to hate coppering and vowed never to do it again. However you’ve done a really nice job of it. I’m very impressed with your painting, it’s something I pride myself on doing. Sadly I don’t have your patience to paint so many coats though I do thin mine a lot. The sanding sealer, or I should say your use of it, really turned out a great result.
-
Expert work all around, and using all that cool nautical terminology. I had to buy a nautical dictionary to follow Derek’s build. I’ll have to pull it out to follow yours now too😂🤣 You should build Cheerful for your next cutter.
- 436 replies
-
- vanguard models
- alert
-
(and 1 more)
Tagged with:
-
I admire the expert painting, the gold really pops! It is so weird that the Revive It works, but clearly it does.
- 201 replies
-
- Duchess of Kingston
- Vanguard Models
-
(and 1 more)
Tagged with:
-

Why do some manufacturers make single plank kits?
glbarlow replied to Meriadoc Brandybuck's topic in Wood ship model kits
Depends on perspective. I know in my opinion it’s not one of expense. Cheerful, a quality single planked model, is no less expensive than Flirt, a double planked one. A single planked hull is more of a challenge than a double planked one, no room to recover if you do it wrong. I don’t think in general you can single plank a POB kit designed to be double planked because of the lessor number of bulkheads, essential to shaping the hull. For that reason it’s not comparable to a real ship which had many more frames than a kit, even a single planked one. My Fair American, a 1:48 POF, has only about 1/4-½ inch between frames, Cheerful, a single planked semi-scratch build has a third more bulkheads than a typical double planked kit. Bottom line, just different things. I know Fair American and Cheerful are much more complex challenges and benefit a more experience modeler than regular double planked models. -

Sand & Sealer
glbarlow replied to DaveBaxt's topic in Building, Framing, Planking and plating a ships hull and deck
Most kits just use another layer of planking to simulate the wale, applied on top of the second planking. -
I use CA for planking and have for 20 years and 10 models. There are grades of CA, I use Smith Industries. I also use White PVA and Titebond wood glue depending on the task. You should use what works for you and not what others insist is best. Plenty of the best builders use CA for planking. BTW CA is an abbreviation for Cyanoacrylate not contact adhesive.
-
As I recall the plans I clued a belaying diagram by using letters/numbers on a line matched to the same letter number on the deck. I added a number of lines mostly because I thought the plans were skimpy. I used prior knowledge from other models to belay those.
- 55 replies
-
- lady nelson
- victory models
-
(and 2 more)
Tagged with:
-
Thank you Dana, that’s my goal😁!
- 778 replies
-
- cheerful
- Syren Ship Model Company
-
(and 1 more)
Tagged with:
-
Thank you, I try to make it useful to others.
- 778 replies
-
- cheerful
- Syren Ship Model Company
-
(and 1 more)
Tagged with:
-
No problem with the question. I didn’t go back no read it all, I thought I had explained it, but you kind of answered your question anyway. It’s a result of very careful fairing of the hull to have a smooth run of planking, as judged by the test battens, flowing and correctly contacting each frame bow to stern. It’s critical to spend the time getting the fairing right given Cheerful is single planked. Getting that smooth run resulted in the brown being removed, a result, not an objective. In fact I kept the trailing lasered edge right up to the last to make sure I didn’t overdo it an alter the shape of the hull. Hope that helps.
- 778 replies
-
- cheerful
- Syren Ship Model Company
-
(and 1 more)
Tagged with:
About us
Modelshipworld - Advancing Ship Modeling through Research
SSL Secured
Your security is important for us so this Website is SSL-Secured
NRG Mailing Address
Nautical Research Guild
237 South Lincoln Street
Westmont IL, 60559-1917
Model Ship World ® and the MSW logo are Registered Trademarks, and belong to the Nautical Research Guild (United States Patent and Trademark Office: No. 6,929,264 & No. 6,929,274, registered Dec. 20, 2022)
Helpful Links
About the NRG
If you enjoy building ship models that are historically accurate as well as beautiful, then The Nautical Research Guild (NRG) is just right for you.
The Guild is a non-profit educational organization whose mission is to “Advance Ship Modeling Through Research”. We provide support to our members in their efforts to raise the quality of their model ships.
The Nautical Research Guild has published our world-renowned quarterly magazine, The Nautical Research Journal, since 1955. The pages of the Journal are full of articles by accomplished ship modelers who show you how they create those exquisite details on their models, and by maritime historians who show you the correct details to build. The Journal is available in both print and digital editions. Go to the NRG web site (www.thenrg.org) to download a complimentary digital copy of the Journal. The NRG also publishes plan sets, books and compilations of back issues of the Journal and the former Ships in Scale and Model Ship Builder magazines.


