


glbarlow
-
Posts
4,134 -
Joined
-
Last visited
Content Type
Profiles
Forums
Gallery
Events
Everything posted by glbarlow
-
 This is a step you want to get right or you’ll be chasing it all the way through planking. They don’t follow the waterline but the sheer of the deck, they aren’t square as a result. I would have been lost without the reference lines, but depending on the bulkhead could be a little off. You’ll figure it out, and later as you’re planking, will be glad you did. Have fun.
 -
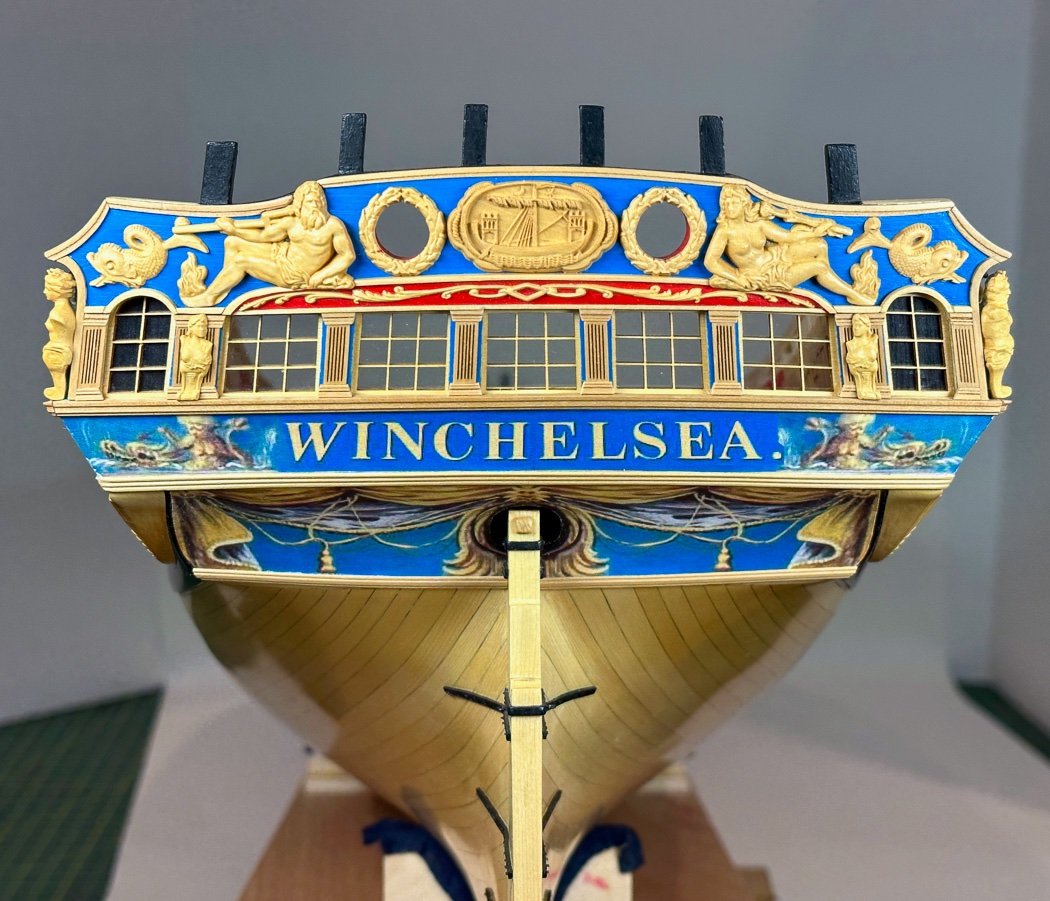
Transom & Stern Near Complete A short update. The windows (or lights) have been sitting on my padded shelf for a long time, waiting for this moment. There is nothing special about installing them, all the readiness work in creating, measuring, and fitting their frames was done long ago with the installation of the stern frames and later with the transom and its associated work. The challenge of this task was to install the very nicely scaled, but as a consequence very fragile, boxwood windows without breaking them using the very minimum of PVA glue. Much of the frame shows of course, so only a very small amount of glue in the very edge of the corners works. Following a lot of hold my breath moments, well more specifically five such moments, and without breaking anything next up was the acetate used as window glass. For this I used Liquitex Acyrilic Matt Medium. It takes little to hold the acetate and the medium dries clear, still I applied it only to the corners of the window. Finally I added the sills below the windows to complete the transom interior. Using a ¼ by 1/32 strip of Yellow Cedar these require some work matching up the angles and lengths required. I did all the cutting and fitting before the windows were added to have more working room and less stress working around installed windows. Only minor adjustments, with WOP added before installing, were needed for the final fitting. And with that my transom and stern are complete for now. There is a railing to add to top off the stern frames later in the build (I’ve already used the template to cut these to the proper height), below that rail the work is done. Thanks for stopping by, your likes and comments always appreciated. I’m off to continue Chapter 5.
- 840 replies
-
- 27
-

-

-

-
- winchelsea
- Syren Ship Model Company
- (and 1 more)
-
The first photo of strings weighted with nuts I thought what is that, then I saw how it became a woven mouse that would be the envy of a full size ship. The simple but perfect jig for aligning deadeyes that never occurred to me. The precision of the seizings and splices, the quality of the blocks. Wow, the creative mind and master skill displayed with this model. Incredible. Which museum gets the completed work?
- 589 replies
-
- 7
-
-
- le gros ventre
- cargo
- (and 1 more)
-
I have that same mouse but no way would I have trusted myself to use it to fair Winchelsea, good for you making it work. I did mine all by hand, it took a week. Your Indy is well on its way, nice!
- 648 replies
-
- 5
-
-
- Indefatigable
- Vanguard Models
- (and 1 more)
-
Interesting that CMB lists them as “temporarily unavailable”. 😩
- 840 replies
-
- 3
-

-
-
- winchelsea
- Syren Ship Model Company
- (and 1 more)
-
Source for 1/16th x1/64 brass strip?
glbarlow replied to glbarlow's topic in Metal Work, Soldering and Metal Fittings
I appreciate the input and suggestions, thank you. I’ll go with @Chuck design and research on the thickness at 1/64. Very odd to me that what I simply ordered on Amazon just a couple of years ago appears to be no longer commercially available. I was hoping someone knew of an obscure hobby shop that might have a supply. -
I’m not sure I want to cut metal with my blade…
- 840 replies
-
- 2
-
-
- winchelsea
- Syren Ship Model Company
- (and 1 more)
-
Source for 1/16th x1/64 brass strip?
glbarlow replied to glbarlow's topic in Metal Work, Soldering and Metal Fittings
Yes, but I’m not going to cut metal with the blade. 1/64 would just curl. -
1/16th wide brass strip.... Google, Amazon, even the K&S Metals website have failed me. I cannot locate the 1/16th wide brass strip I need for Winchelsea's port hinges! Does anyone know of a source for getting this??
- 840 replies
-
- 1
-
-
- winchelsea
- Syren Ship Model Company
- (and 1 more)
-
Google, Amazon, even the K&S Metals website have failed me. I cannot locate the 1/16th wide brass strip I need for Winchelsea's port hinges! Does anyone know of a source for getting this?? Help!
-
Your photography is always such excellent commercial quality. Can you give is a little “behind the scenes” look at your set up? My other hobby is nature and wildlife photography, which I do ok with. I’m always disappointed in my log posts, but not enough that I get out the full on photo setup. Your log photos are as consistently well done as your model work. I’m interested in how you do it?
-
Sigh…I don’t want to like this model with my head still down on Winchelsea, yet I’m sure it too is in my future. It just keeps getting more enticing with every post. So creatively mastered.
-
Patience…my never ending life challenge😊
- 840 replies
-
- 3
-
-
- winchelsea
- Syren Ship Model Company
- (and 1 more)
-
Thank you, I hope the log does prove helpful.
- 840 replies
-
- 2
-
-
- winchelsea
- Syren Ship Model Company
- (and 1 more)
-
Thank you. It is by far the most detailed rudder I’ve ever made for sure.
- 840 replies
-
- 1
-
-
- winchelsea
- Syren Ship Model Company
- (and 1 more)
-
Thank you Rusty and excellent advice. I was able to have working pintles and can easily remove the rudder. It is now off the ship and sitting on padded shelf. I am quite confident of my ability to knock things off and dent the nice cedar, so I made sure I could park the rudder in a safe place. I’m glad to know I’m not the only counter of things. 😊
- 840 replies
-
- 3
-
-
- winchelsea
- Syren Ship Model Company
- (and 1 more)
-
I have no interest in watching videos of a model, why? As a photographer, and how I manage my photography website, it is an essential truth that the result of posting a large number of photos to a gallery is a sure fire way for none of those photos to be seen. Less is more, every time. I see this happen with Facebook posts, if I see +72 photos I don’t look at the first one. I see it in some build logs with a large number of photos showing pretty much the same thing, I skim right on by, especially if it’s photos not supported with text (the reverse is also true, text not supported by photos). My experience for a gallery is 12 images enough to generate interests an over 20 loses the audience. This doesn’t apply to a build log where there is a running narrative and progress photos, the difference between a gallery and a log.
- 65 replies
-
- 11
-
-
-
Thank you Chuck. I appreciate the replacement parts, they were put to good use.
- 840 replies
-
- 2
-
-
- winchelsea
- Syren Ship Model Company
- (and 1 more)
-
Thank you, I never regret the attempts after I'm done, I know I'd regret it if I didn't.
- 840 replies
-
- 3
-
-
- winchelsea
- Syren Ship Model Company
- (and 1 more)
-
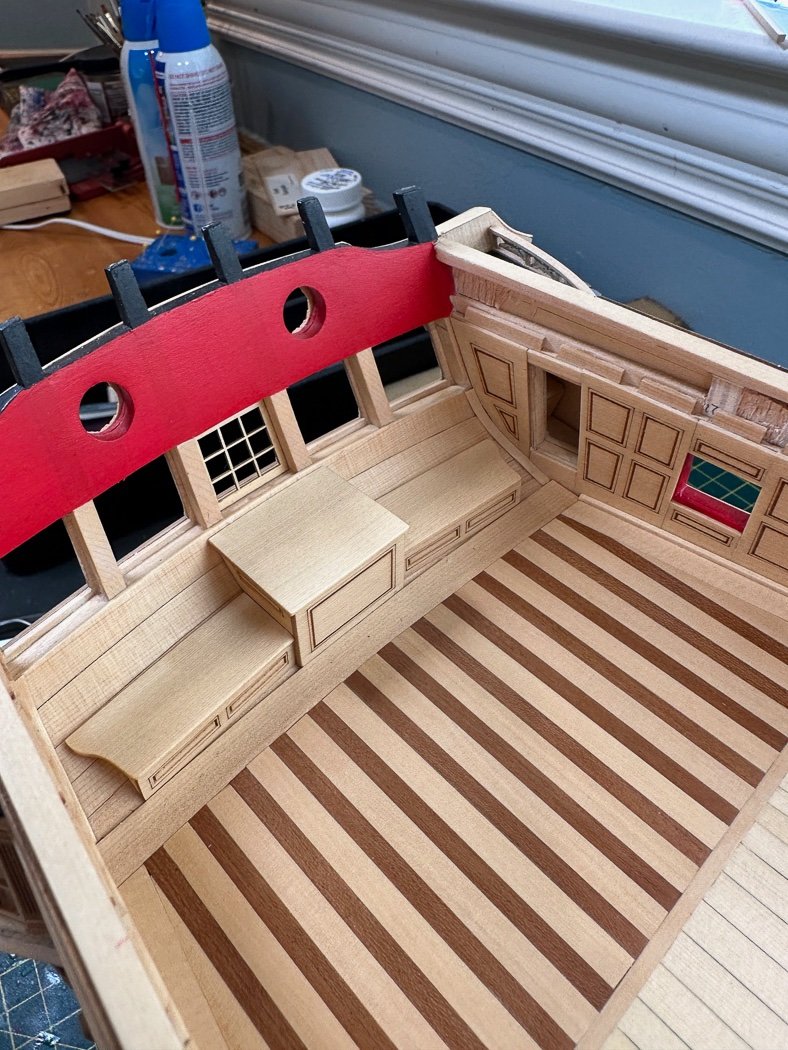
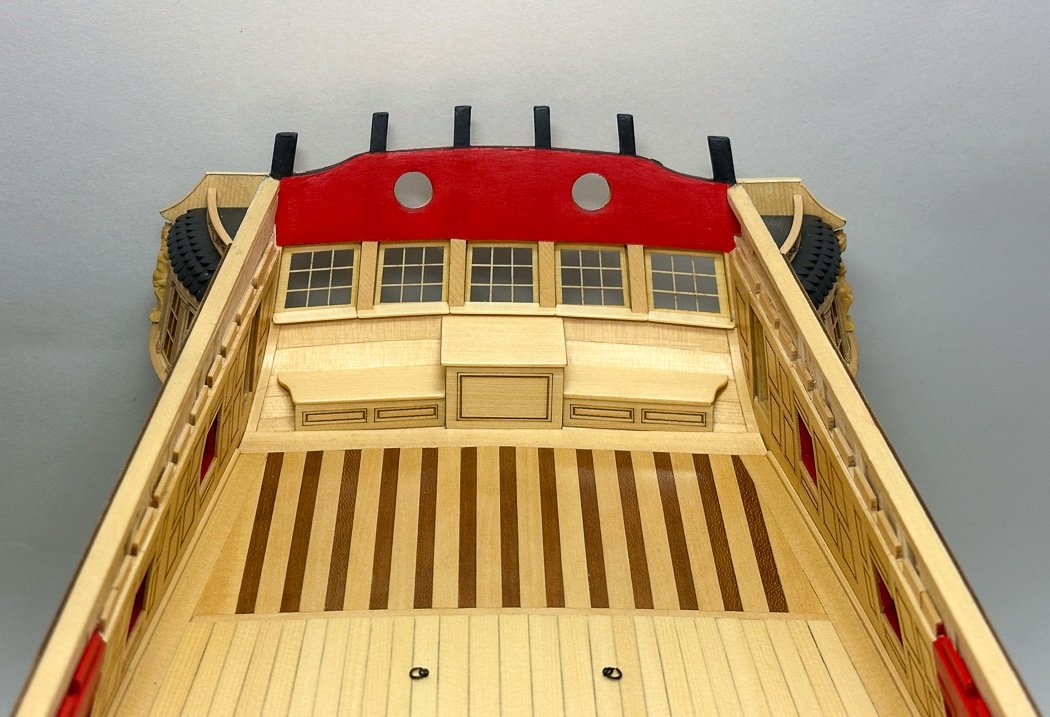
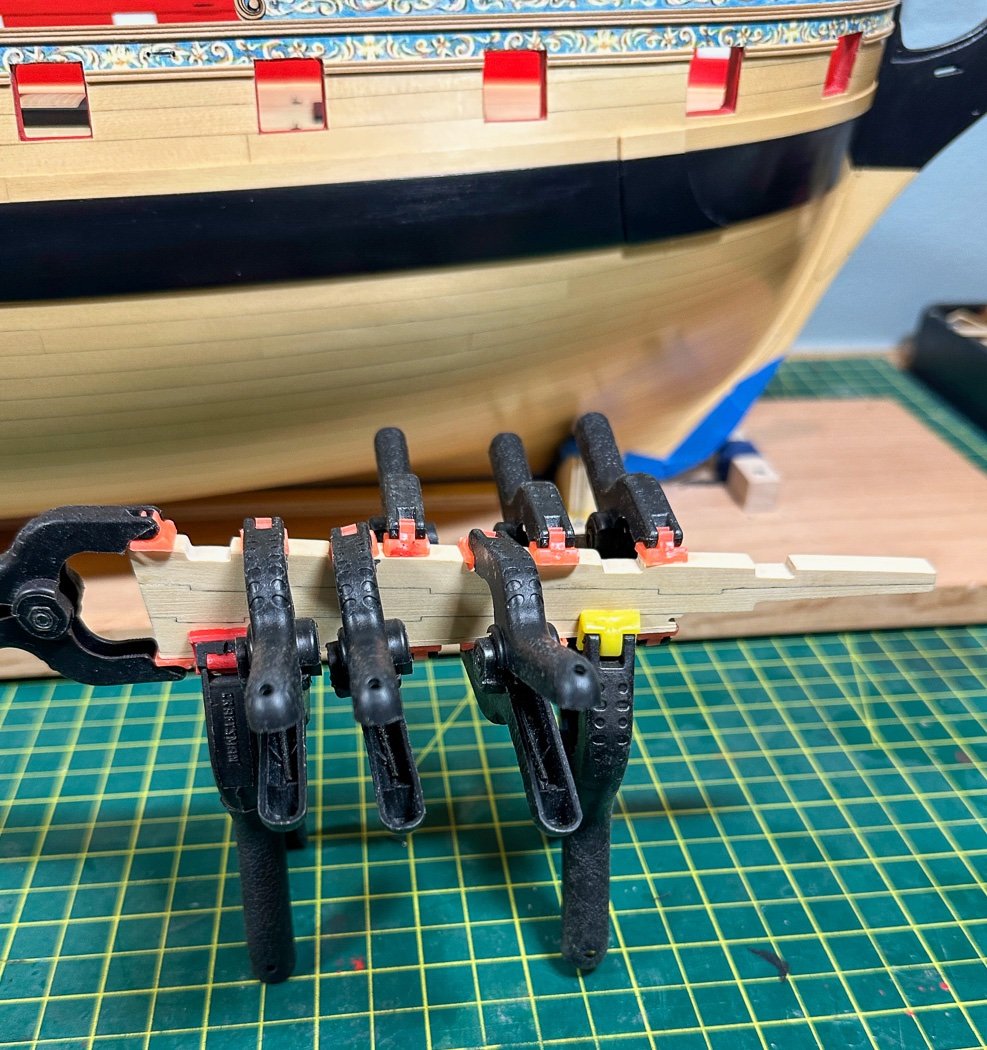
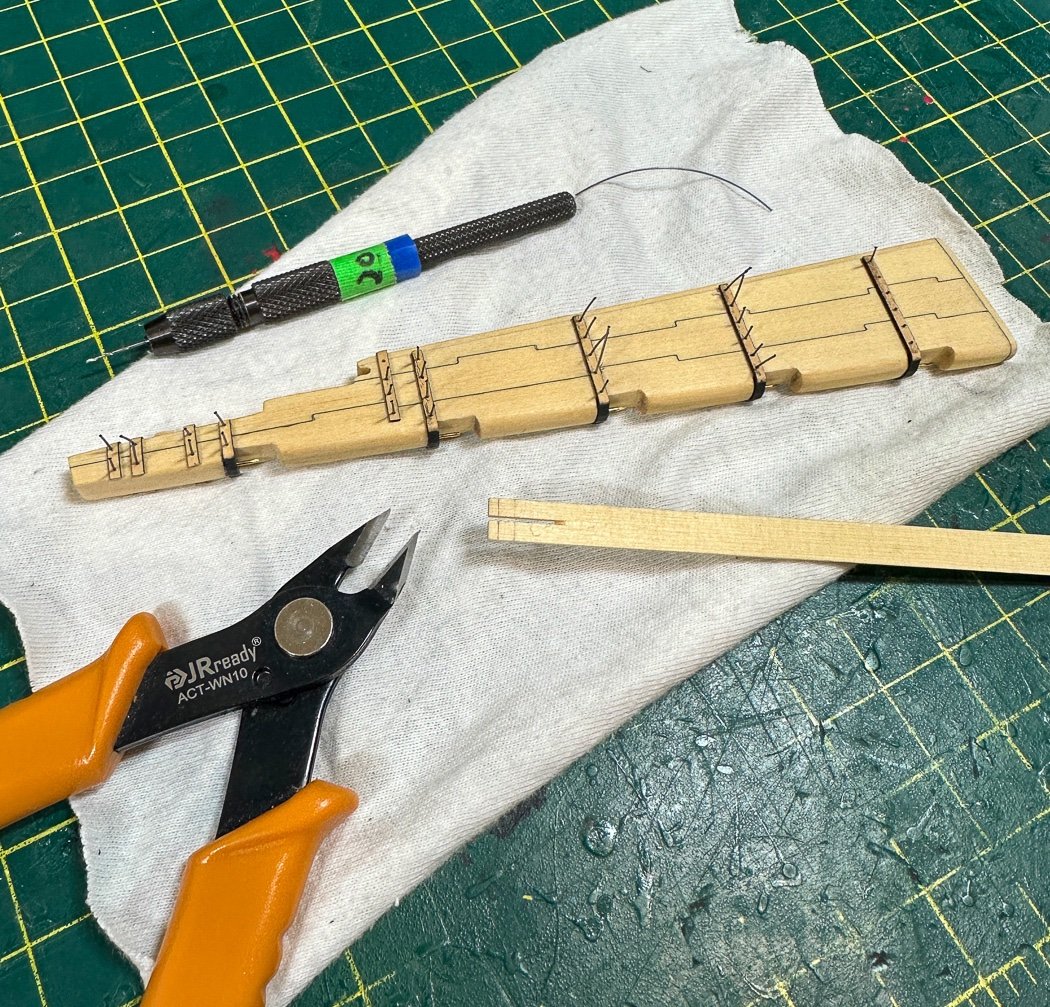
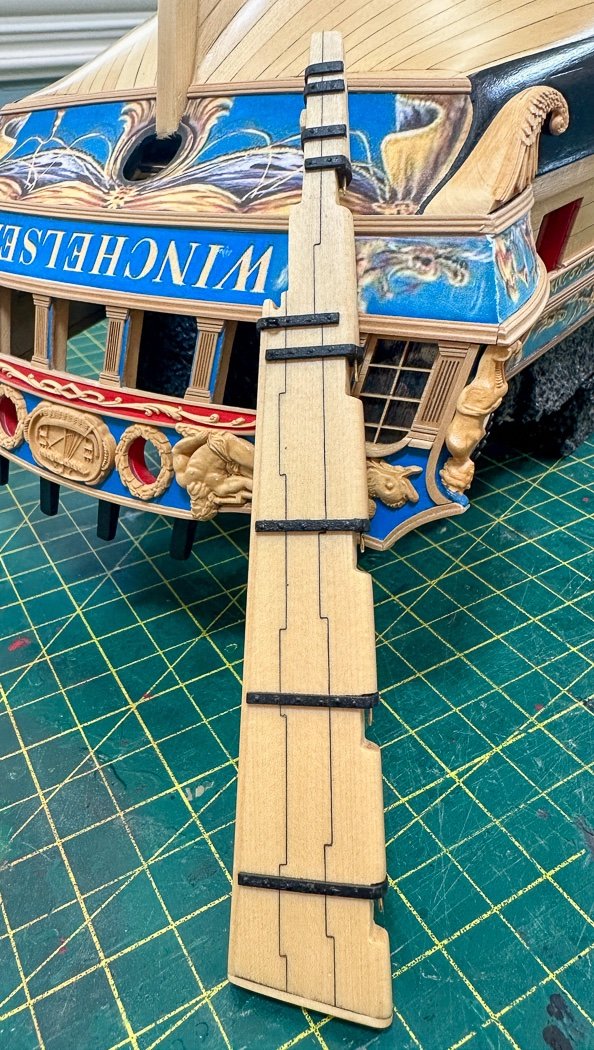
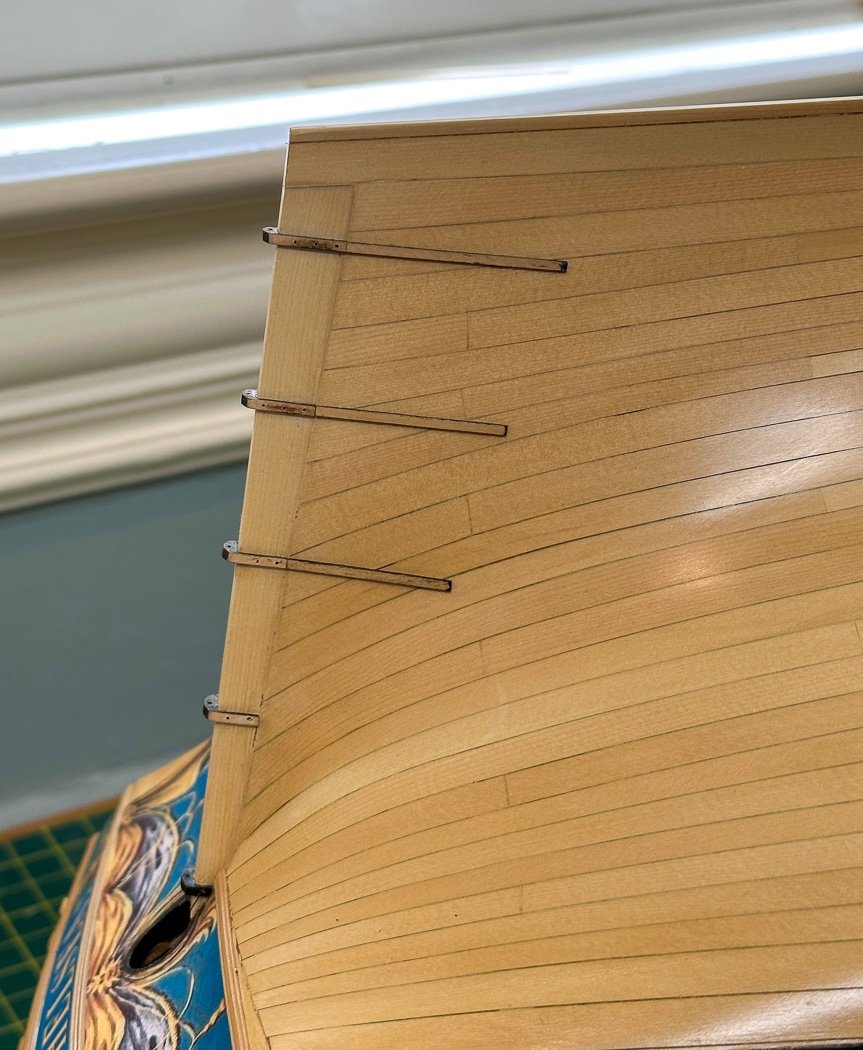
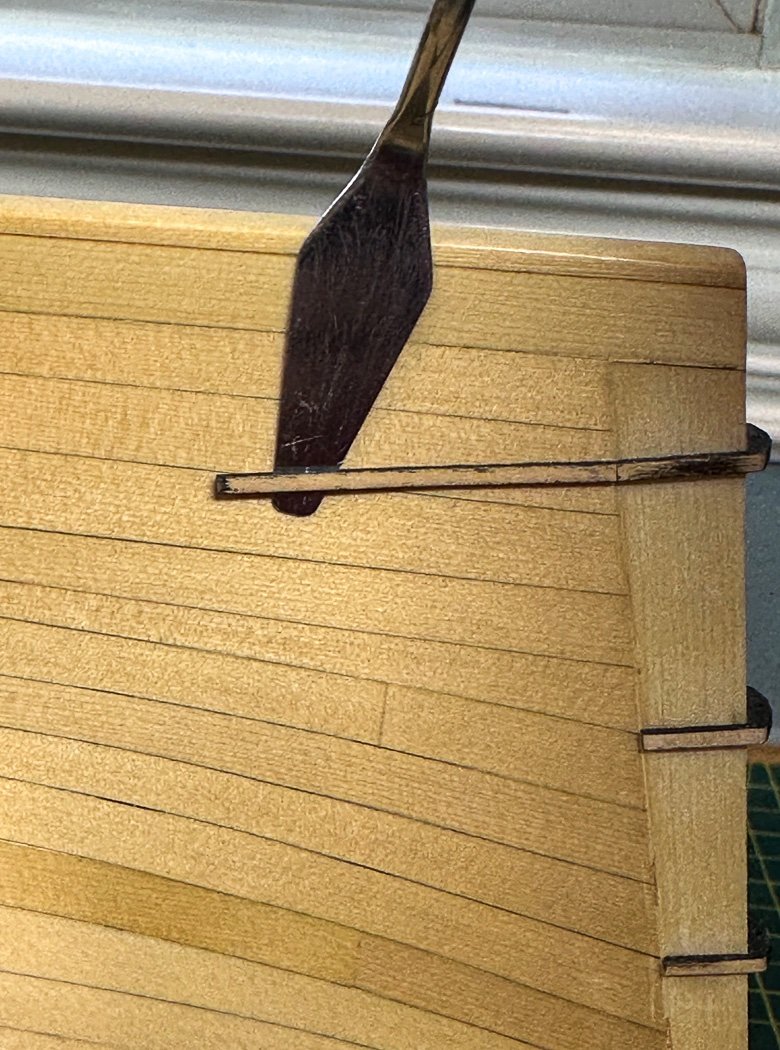
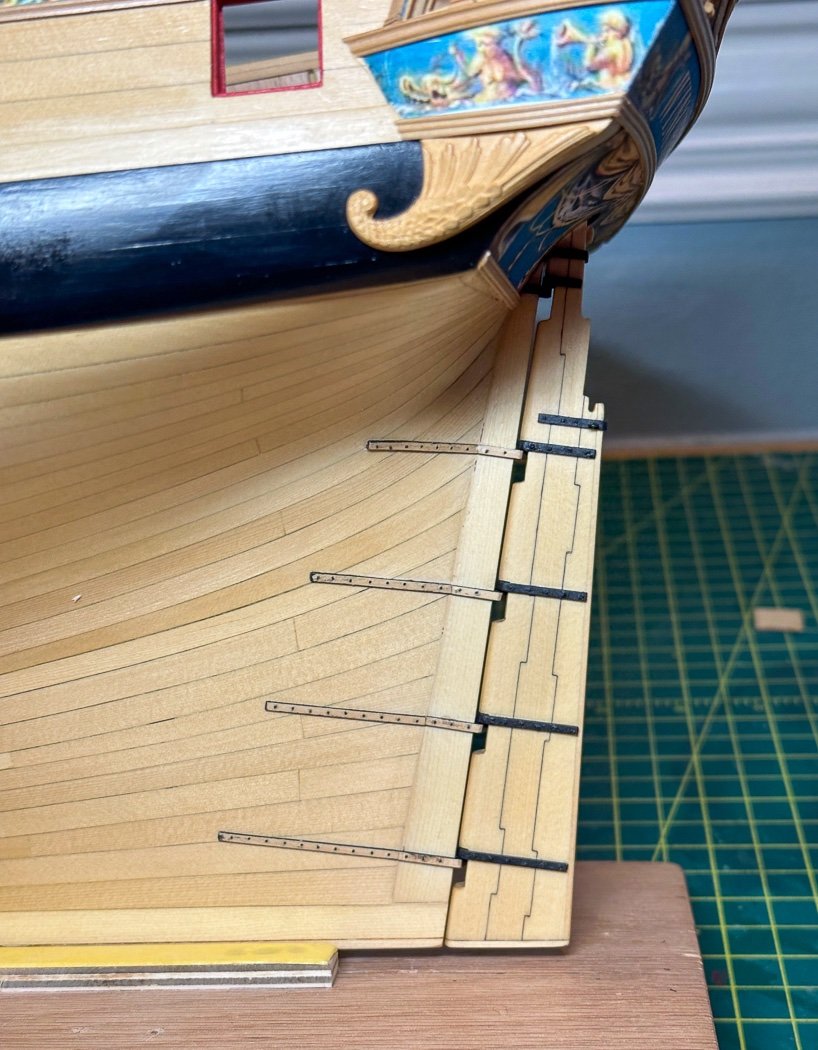
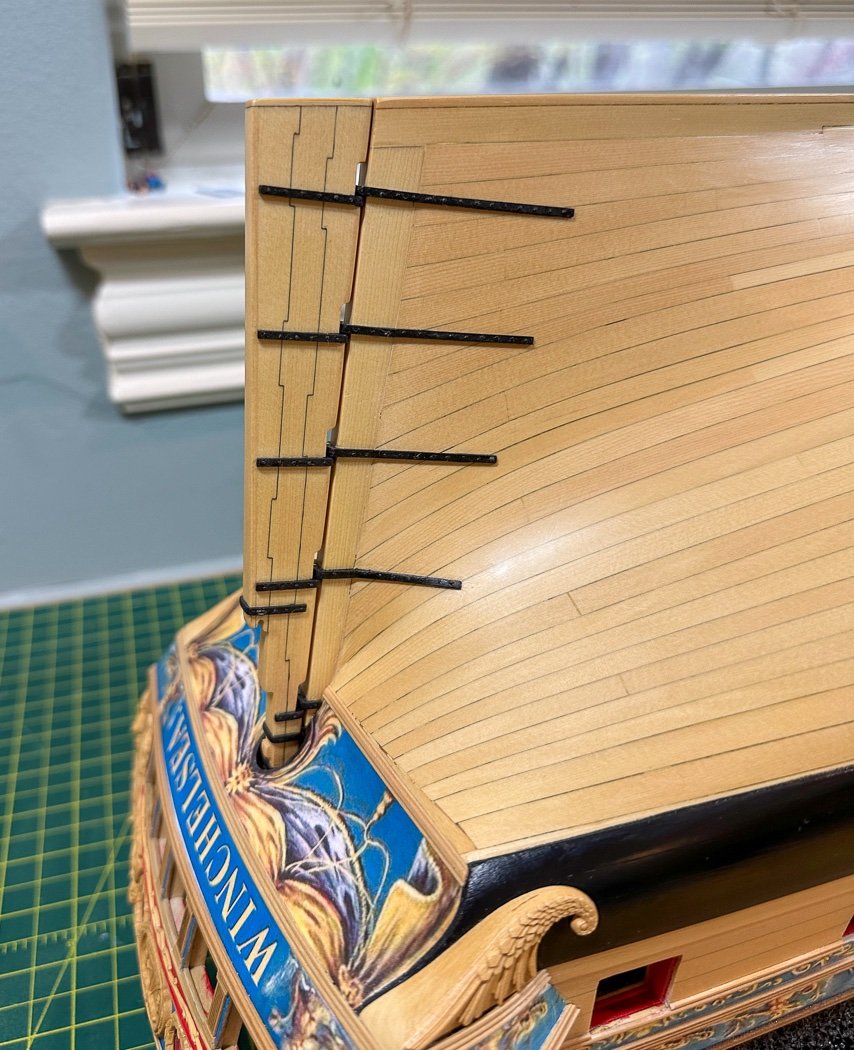
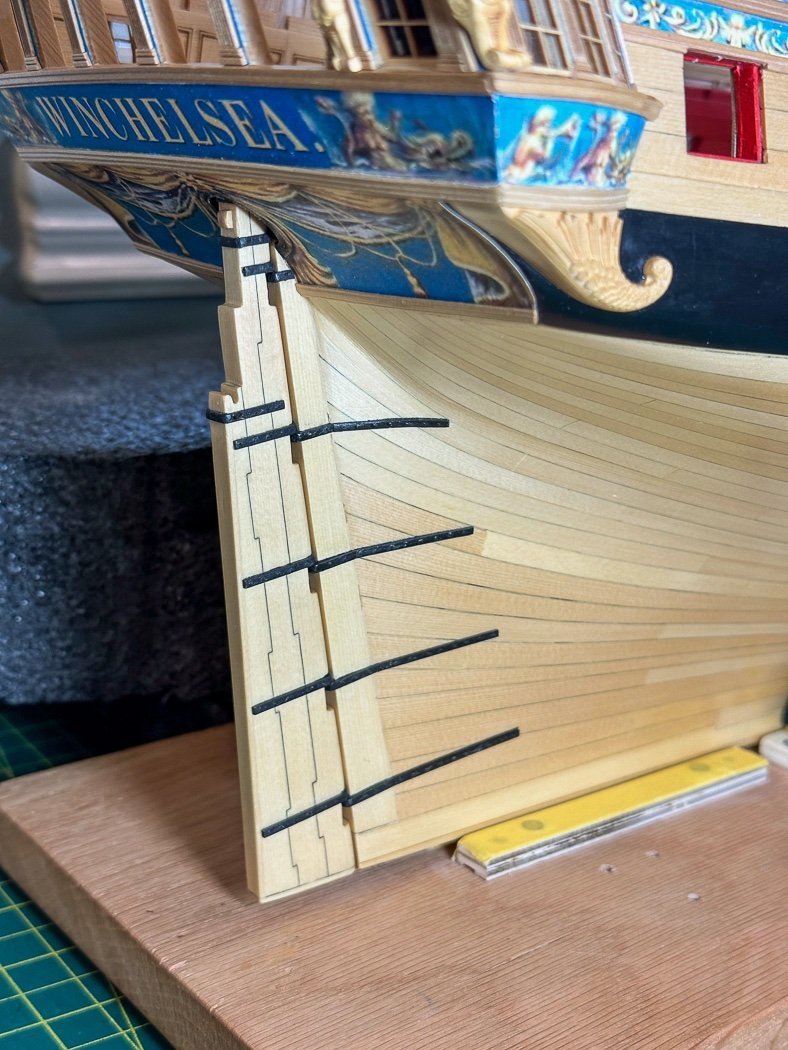
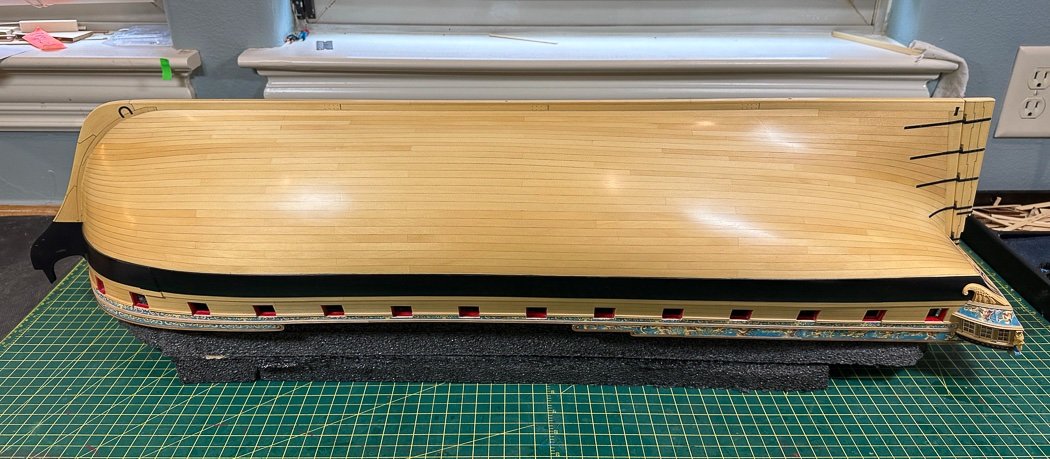
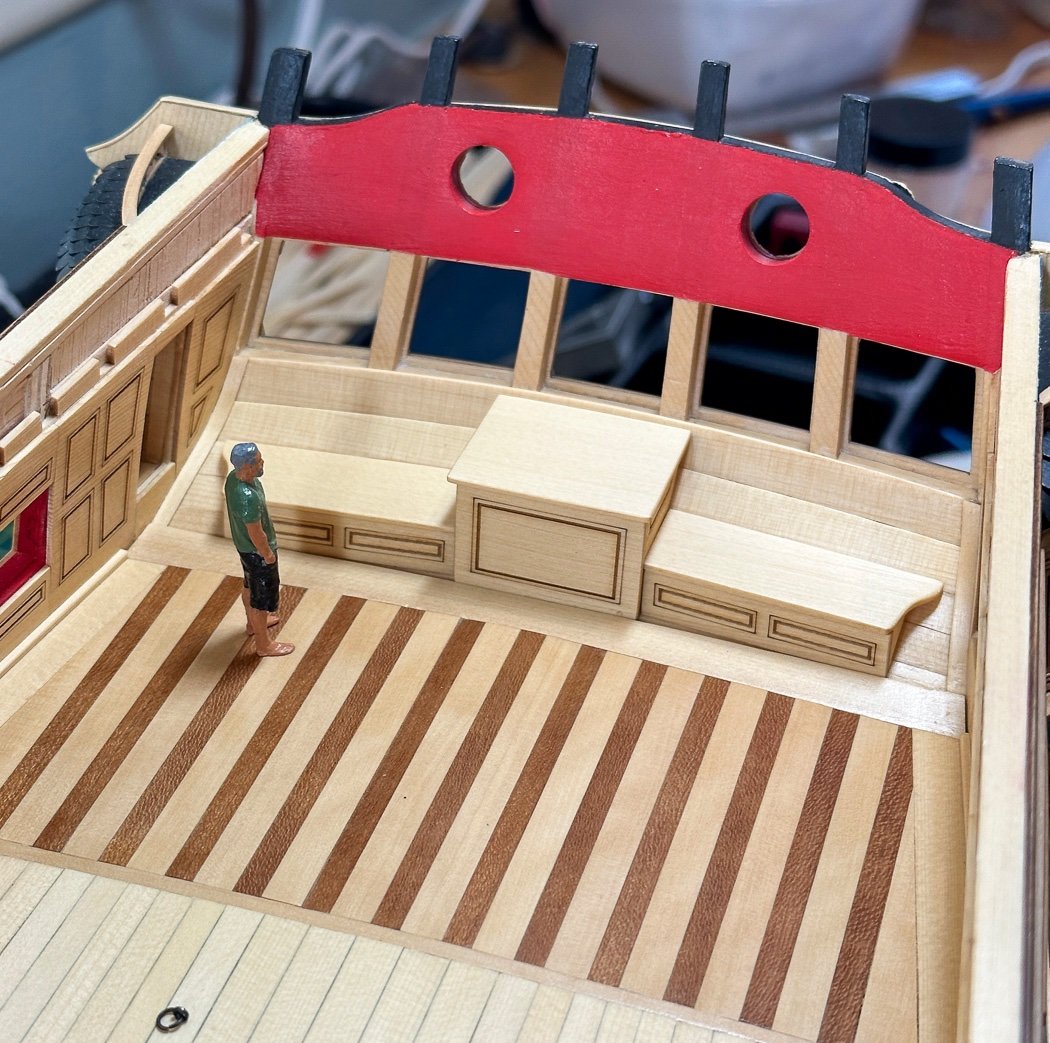
The Rudder By my count I’ve made and installed 12 rudders up to this point, unsurprisingly Winchelesea’s rudder is next level. Couple this fact with my inevitable way of making what might seem easy into something much more challenging given the annoying fact I can’t let go if I don't like what I've done no matter how many times I have to do it over. Anyway… The rudder starts off nice right from the start, not simply a piece of wood but three laser cut pieces, the caulk being an opportunity not to remove char where they connect - of course there's plenty of char to remove on the outside edges. Then the addition of two thin strips on the aft on keel edges. I kind of enjoy the next step of shaping the rudder with the the aft side thinner growing more so towards the keel then rounding the fore edge. Who doesn't like to sand stuff. Next up the pintles, fragile laser cut “U’s with the addition of straps from 1/32 wood. These are thinned further, bolt holes drilled, and the bolts, 20lb black mono-filament fishing line, inserted, glued and trimmed. My simple jig allowed me to evenly space the bolts based on the plans. I used blackened little brass nails for the pins, the point of which allowed me to more easily steer the rudder home to the gudgeons later. I remove most of the point and place them to just be visible below the gudgeon. Add a few more straps and a small slice of 1/8 wood to stimulate the tiller, all detailed by the monograph and the plans. This was all fun and straightforward. The description of which having bored all the Winchelsea builders that have gone before and wondering how Glenn can turn the rudder into a ten photo post. The next part, not so fun. As I slide the first U gudgeon on the stern post, they having slide on the rudder so easily, it immediately broke. I sorted out that my sternpost was, this is true, 17/64th. Not sure how or why, but the ¼ gudgeon wasn’t going on even that small difference. After experimenting with options, none of which I liked, I was faced with reducing the very nicely finished stern post by 1/64th for the gudgeon to fit. I really didn’t want to do that. The thing I said about sanding, not so much here, there are no photos recording this ugly process. Suffice it to say it takes a lot more than you might think to evenly reduce a piece of wood on both sides by total of 1/64th especially when that piece of wood connects to a bunch of planks I didn't want to reduce or damage their finish. With the gudgeons finally fitted (so easy now to say that in five words) I added the straps using CA along with clamped on guides. My thin putty blade tool again came in handy to apply the CA as it did with the planking so long ago. Then followed more drilling for more bolts, more gluing, more trimming. After painting I applied more coats of WOP with more sanding between, a slow careful process to not damage anything and to get it all back even in color as I could. The word 'more' in this case meaning tedious amounts of time taken on repetitive tasks. In the end, after taking about as long as all 12 of those previous rudders put together, it all turned out ok. I don’t know why I do these things but I counted it all. The rudder, including all the small parts to make up the various straps is 26 pieces, plus 17 more on the stern. I hand-drilled 156 holes for the black filament bolts, each of those glued, inserted, and trimmed. All together, it is a well designed rudder consistent with the detail of Winchelsea and certainly worth the time spent. No matter how I might sound above, it's all good...now. The final touch is the rudder trunk and benches in the Captain’s cabin. All straight forward laser cut pieces. A little work to get the angles to fit and match my particular counter but not overly so. Mini-me stopped by to check it all out. Finally, before I installed the trunk and benches I took a long look at my Winchelsea upside down for the last time. The deck gets more crowded from here on in, upside down it will be no more. Thank you for stopping by and for your likes and comments. After a pause for non-modeling work I’ll move on the the remainder of Chapter 5. Then after that I get to make lots of cannon, lots of eyelets, lots of split rings, So much fun awaits.
- 840 replies
-
- 26
-
-
-
- winchelsea
- Syren Ship Model Company
- (and 1 more)
-
That’s a really fine looking model. Excellent tricks for mounting and making things fit correctly, and for taking the time for small details. Thanks for sharing them. Your forecastle planking will be my reference if I ever get there. Well done!
-
One of my favorite and most often used tools.
-
Excellent work, well done!