


glbarlow
-
Posts
4,134 -
Joined
-
Last visited
Content Type
Profiles
Forums
Gallery
Events
Everything posted by glbarlow
-
 Such nice work. Amazing detail and more amazing is the consistency from one to the other. Well done!
 -
The thickness sander is great and makes a huge difference. As Chuck notes, wood sorting is a pain but well worth the effort in the end.
-
Nice planking. As Allan notes for more complicated hulls pre-bending will be necessary. I’m a devoted fan and practitioner of Chuck’s heat bending method described in the referenced video. Welcome to wood modeling.
-
I’ve mentioned my other hobby is photography. I recently returned from a two week trip to Patagonia and since my return processing images. I’ve completed a gallery of my favorites. If interested they can be seen on my website by clicking on Patagonia 2023 (it was my second trip). Now back to ship building.

- 840 replies
-
- 20
-

-

-

-
- winchelsea
- Syren Ship Model Company
- (and 1 more)
-
The legacy continues… No. doubt a reference model for Indy builders on the making.
- 648 replies
-
- 6
-
-
- Indefatigable
- Vanguard Models
- (and 1 more)
-
Glad to see you’re off and running. I’ll enjoy watching another Cheerful come to life. It’s such a great build.
-
I like the gray wash on the mounting plate - I've been deciding what I want to do there. The weathering powder doesn't stand out very much. Lovely stove too.
- 399 replies
-
- 1
-
-
- winchelsea
- Syren Ship Model Company
- (and 1 more)
-
Planking becomes a way of life for a while, enjoy the journey. Looking nice!
-
I completely get it.
-
Looks crisp and nice. Good idea to check colors of billets. There can be a wide variance, I spent a lot of time matching colors. But yikes I’m out of matching ones.
-
Because it's fun, interesting, and a pleasant way to while away a few hours. PS: I too was president of our HOA, worst job ever. Work your *** off for nothing but complaints from the same 10-15% of noisy neighbors. They asked me back to fill a departed director, NOPE.
-
Fiddling or not, the result is so sharp, detailed, and crisp. That bow shot show such depth of detail. Mightily fine work. The pear gets me every time.
- 642 replies
-
- 2
-
-
- winchelsea
- Syren Ship Model Company
- (and 1 more)
-
Very nice looking deck. The result is definitely worth the effort to replace those planks. Well done!
-
Thank you for your comments. Yesterday was spent drilling holes for the many ring bolts, I have to say it hurt a little bit to do so 😂
- 840 replies
-
- 6
-
-
- winchelsea
- Syren Ship Model Company
- (and 1 more)
-
You really should. In a lot of ways she’s more challenging than Winnie, certainly she beautiful to build.
- 113 replies
-
- 3
-
-
- Cheerful
- Syren Ship Model Company
- (and 1 more)
-
Your correct. It’s just a bit of the same flat brass used for the chain plates, rounded off on the end and a hole drilled for the block and the other end cut/ filed to a wire like end and inserted into the mast. Even now you could do it should you so desire. I think you’re a bit hard on yourself, I know the feeling, your Cheerful is absolutely wonderful. You’re doing a great job. I knew where every small flaw on mine was, but darned if I can find them now as she sits on an office shelf.
- 113 replies
-
- 1
-
-
- Cheerful
- Syren Ship Model Company
- (and 1 more)
-
Thank you all for the kind comments and likes. I appreciate your time stopping by.
- 840 replies
-
- 6
-
-
- winchelsea
- Syren Ship Model Company
- (and 1 more)
-
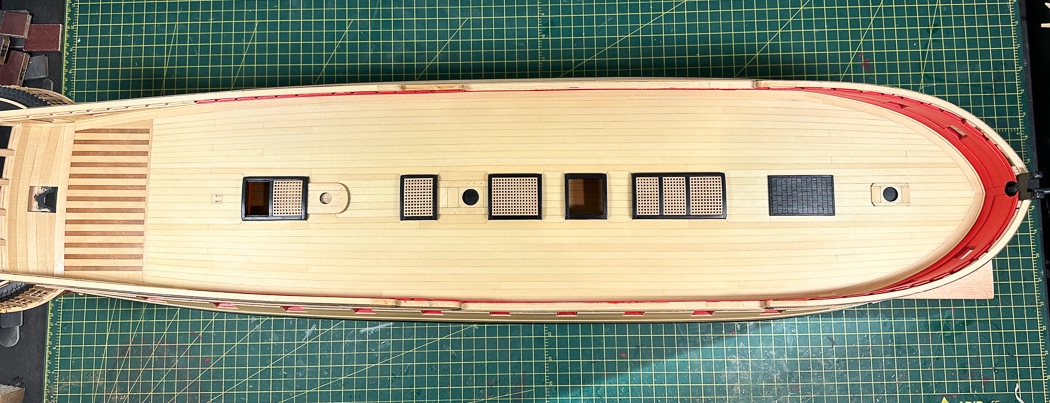
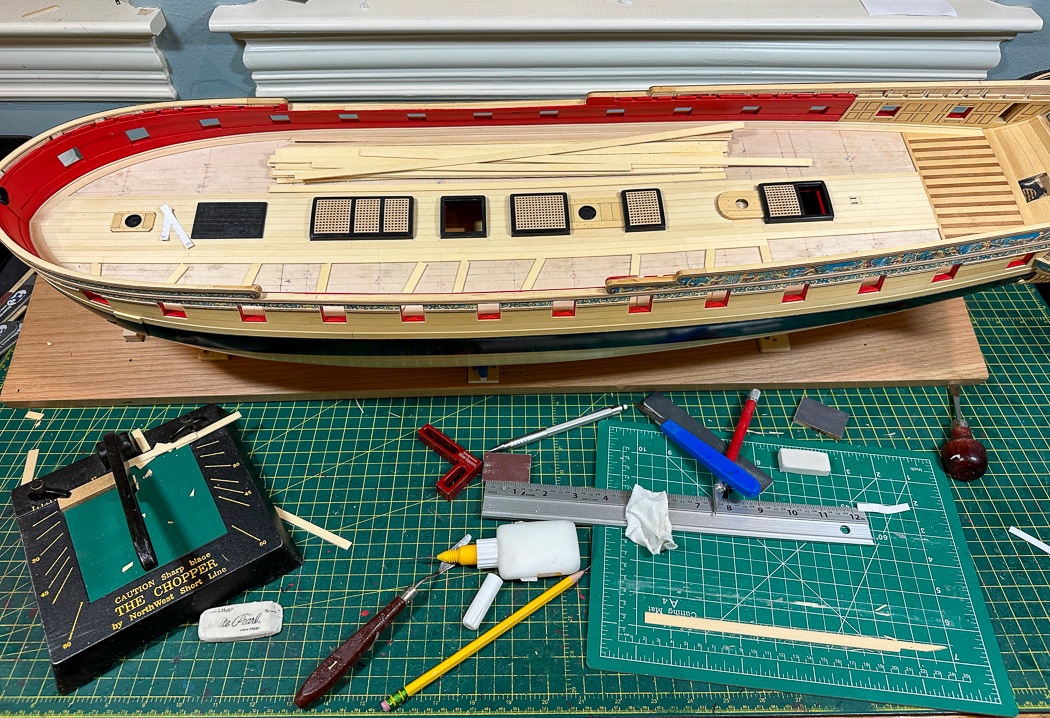
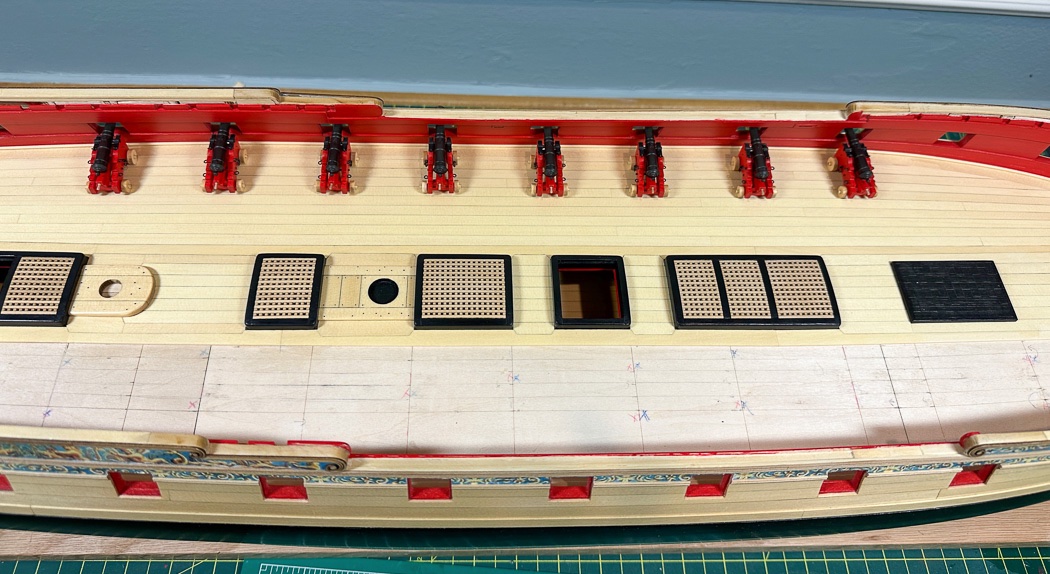
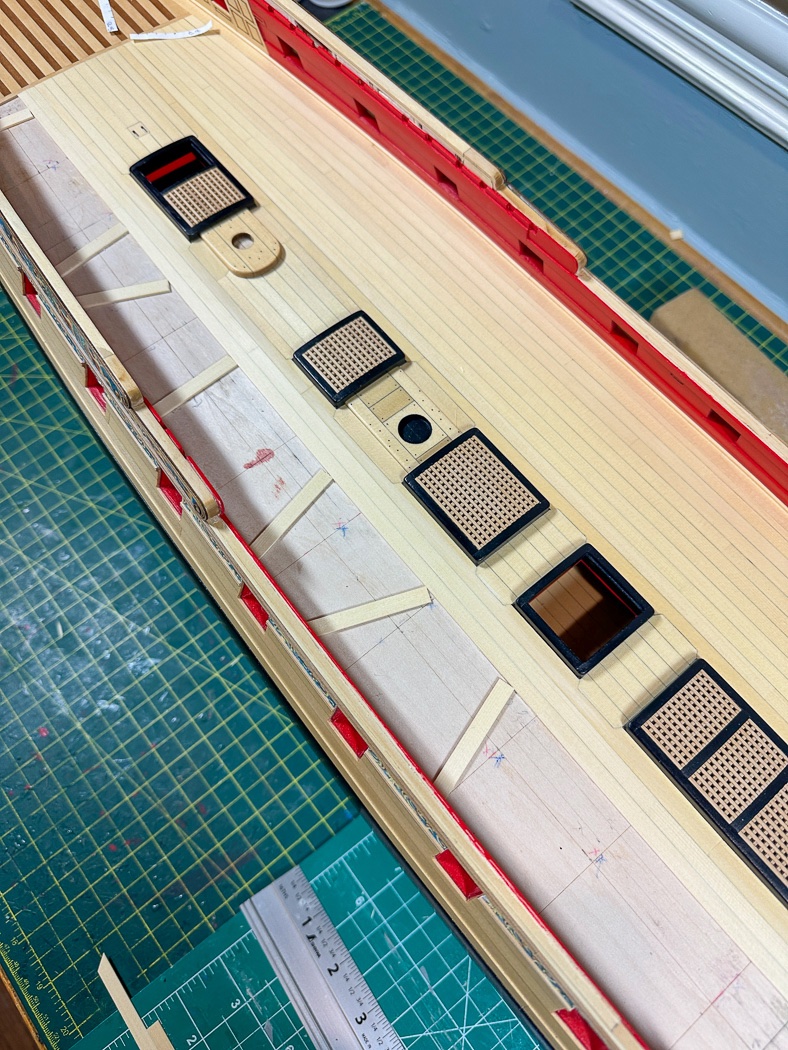
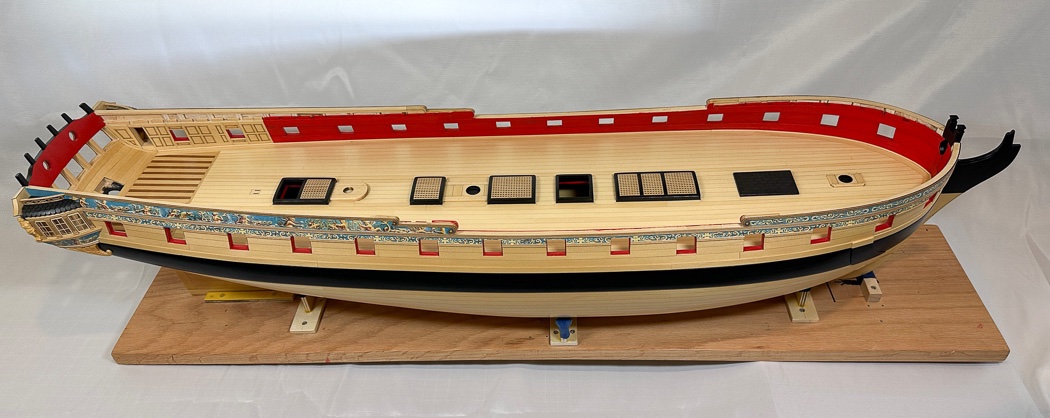
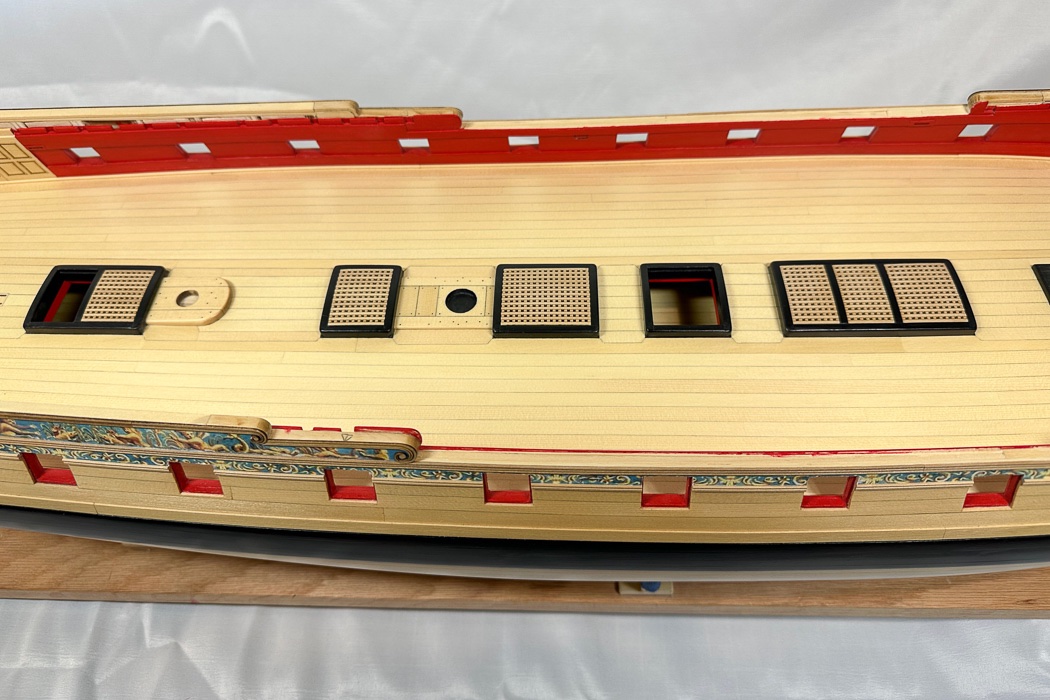
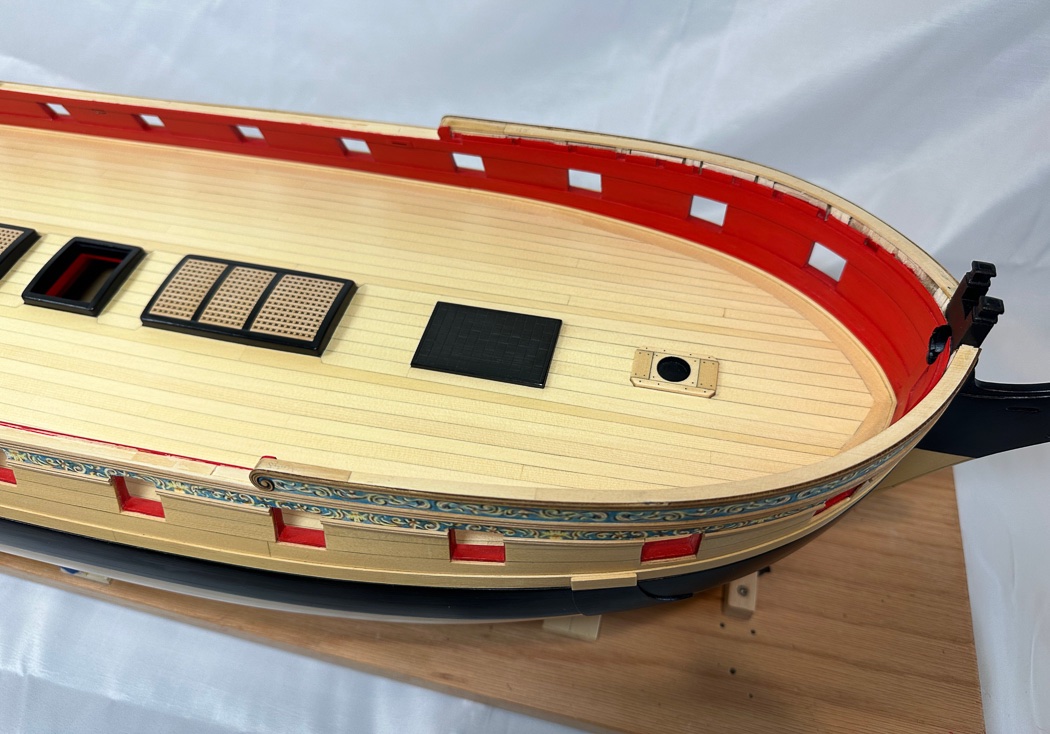
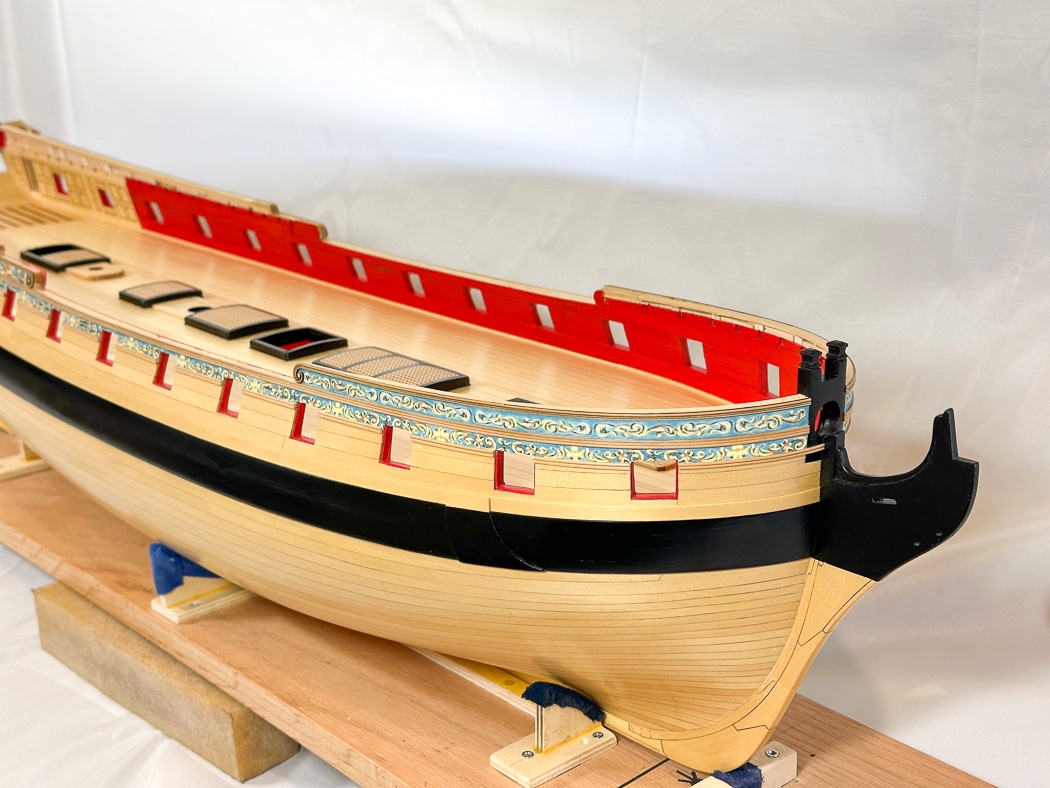
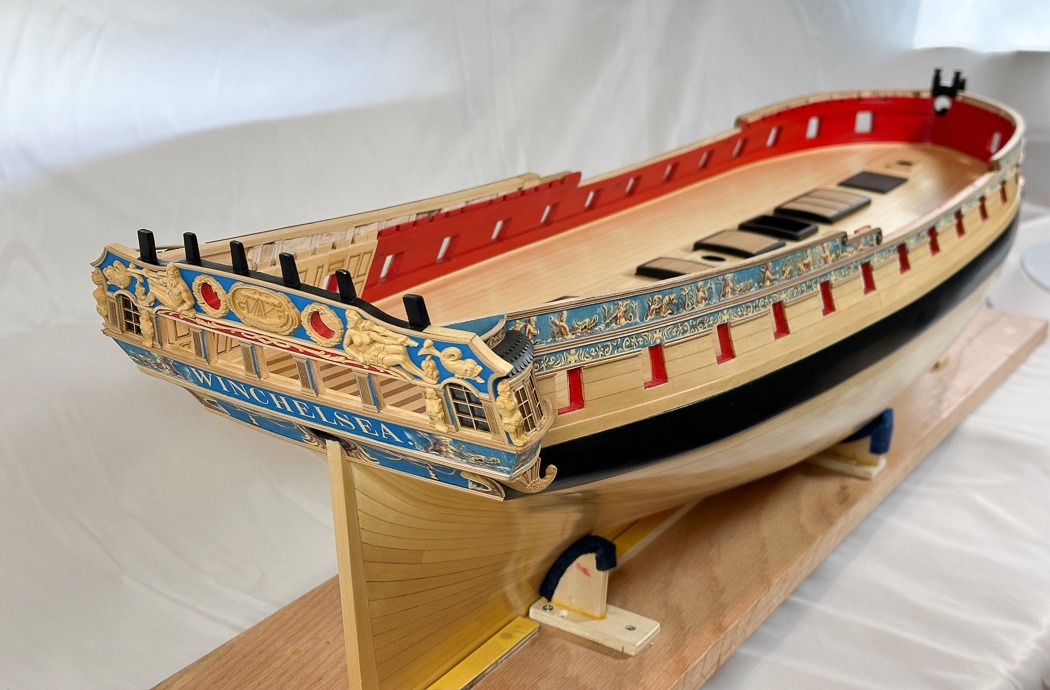
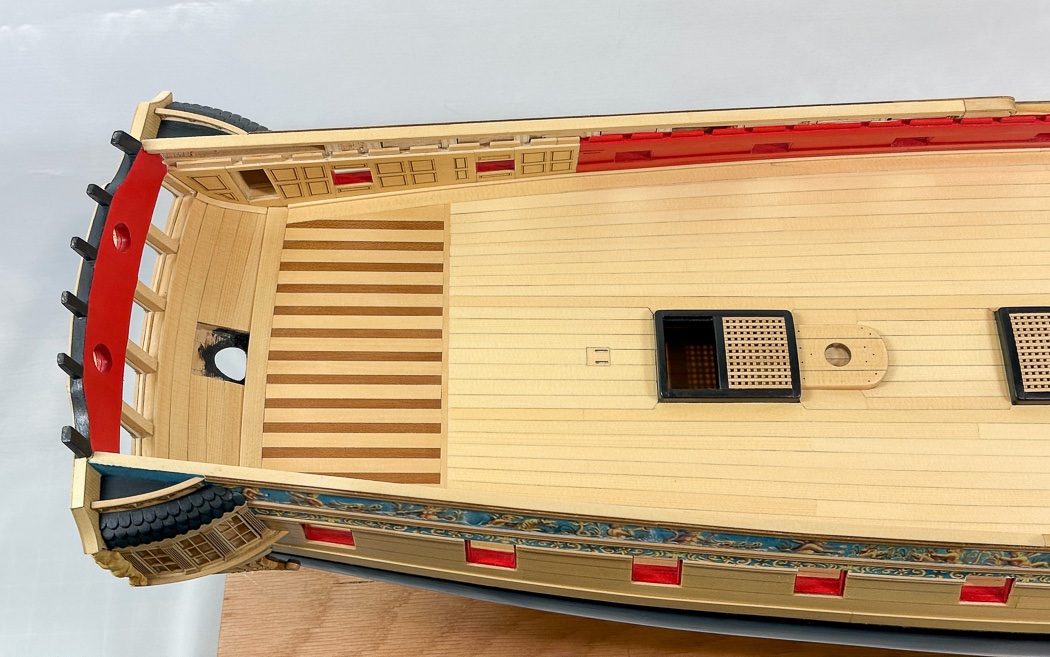
Main Deck Complete I’ve returned from my two week journey to Argentina and Chile pursuing my other hobby of photography, it was incredible. Before I left I completed the deck but didn’t have time for a post, so I’m now catching up. With the challenging center belt completed the belts either side are straightforward enough. I’ve had some issues with my Byrnes saw and ended up sending it back to Byrnes Model Machines for some repairs and a tune up. I’ve had it since 2008 so it was probably time. The Thickness Sander was a joy to use in providing consistent thickness planks for the deck. The deck became a construction zone as I followed my marked out butt shift plan on the lined deck. The lining out showed me where the tapered planks began to achieved the desired subtle but curved planking. I used the same double-sided tape, metal ruler, and #11 blade method I described earlier in this log for the hull planking. My goal was to keep the tapered planks to near the same width for each plank for a consistent look. The lining off of the deck was the guiding force in doing this, though I doubled down with tick strips to confirm and mark the planks. The actual builders probably didn’t use little strips of woods to ensure tight seams between planks, but it works well for the model as I opted to use white PVA for the deck and drying time was necessary. I spent a lot of time sorting planks to keep the colors as even as possible. As we know there is generally some color variation in AYC. Even with that sorting the 5/16th billet I had was darker than the ¼ planks, but it’s consistent so it’s ok. The master gunner stopped by for a trial fit of the waist battery, he was satisfied with the look. With the planking complete, I did some aggressive sanding with 220, 320, and 400 grit sandpaper in turn. That resulted in a nick here and there on the coamings, easily corrected with Tamiya tape and the Admiralty Ironwork Black paint, 10/0, 3/0, and 20//0 paint brushes as needed. The tape job was excessive, there were just small paint dings to touch up. I applied three coats of WOP with light sanding after the second (the first is absorbed deeply into the sanded wood), buffed it up and the deck is done. You can see here the difference in the 5/16 wood either side of the center belt. This will hardly be noticeable at all once the deck furnishings and especially after forecastle and quarterdeck are later installed. It’s really not all that noticeable now. With that the deck, and Chapter 4, are complete. Here are iPhone photos sharing the state of my Winchelsea. I really ought to get the good gear out at some point for photos. Thank you for stopping by. Your likes and comments are always deeply appreciated. Chapter 5 will have to wait until after I’ve selected, processed, edited, and published from the over 1,000 images taken during my Patagonia trip.

- 840 replies
-
- 28
-
-
-
- winchelsea
- Syren Ship Model Company
- (and 1 more)
-
That takes care of the outer edge as long as the ratio of the blue field to the total width of the flag is accurate.
-
A fine looking model, well done! Excellent display stand work as well.
- 102 replies
-
- 1
-
-
- Flirt
- Vanguard Models
- (and 1 more)
-
Bob, I reall hope you undertake the planking of Flirt at some point if for nothing more than the practice, even if you don’t keep up the log. There is a sense of accomplishment from planking a hull, I’m sure with trial and error and the help of many relevant logs you could get it done.
-
Our flag wouldn’t have the red sea down the sides, so hopefully the actual installation will provide for removing those. With each new state came a new star, so if the time period is before the 16th state in 1796 the number of stares is correct. The flag had 15 stripes only between 1794 and 1818 then went back to 13, making it unique in our history.
-
So important to get this stage right, looks like you’re doing well on getting it done. Nice work.
-
Nice work, well done. It’s such an accomplishment to complete the last of the planking, your patience and determination for a good result has paid off!
