


glbarlow
-
Posts
4,134 -
Joined
-
Last visited
Content Type
Profiles
Forums
Gallery
Events
Everything posted by glbarlow
-
 I agree. Having a build log gives you both the chance to share and ask the inevitable questions that will come up and to get encouragement for others. There is every level of experience and expertise, there is no judgement, only help and and camaraderie. Join the fun and enjoy your build.
- 1,784 replies
-
- 6
-

-
- winchelsea
- Syren Ship Model Company
- (and 1 more)
-
These were war ships, lots of blood flying about during a battle, white would be demoralizing splattered with blood. Hence red being the standard. I used Admiralty Paints Red Ochre on all my earlier models. Now, like Chuck P, I like RED. It makes the model pop, and highlights the details. Nothing at all wrong with the red you have, some modelers seem to think darker is better, not so in my view.
- 347 replies
-
- 3
-
-
- Sophie
- Vanguard Models
- (and 1 more)
-
Looking great, overcoming challenges is half the fun.
-
It's the same scale ship, so ropes and rings would all be the same. I build cannons between stages, there are just so many of them, they're a good change up from time to time. I do have to note your trucks seem to be pretty small in relation to the carriage and gun. The Syren trucks are more to scale. Hang in there, just go to the shop and work, it will all get going again. We all get stuck from time to time.
-
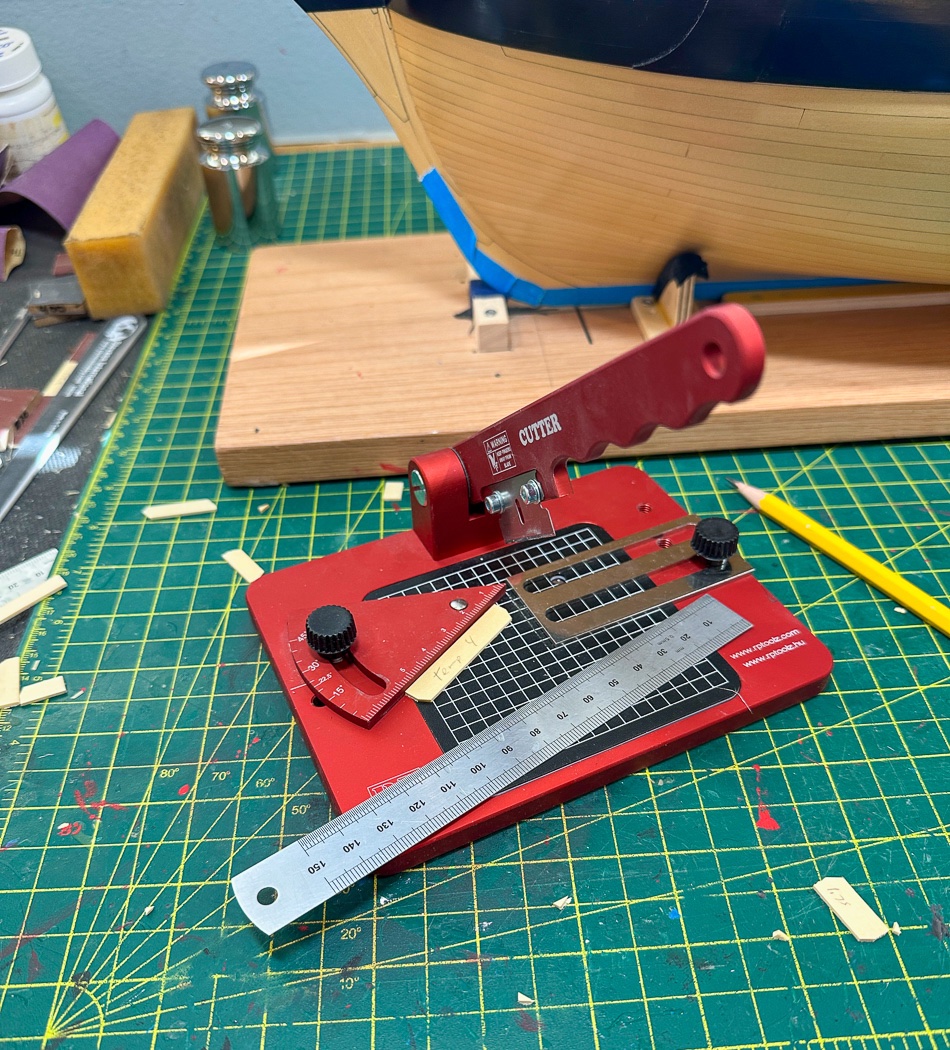
Thank you! I'm ready for a piece of cake and making broad progress for the next step. Every day in the shop is a fun day with Winchelsea. Thank you! It takes time and multiple efforts to get them but time well spent in the end. My assistants just drop by after the work is done and stare, I wouldn't trust them with a sharp blade 😄 Thanks, I hope it helps as so many others have helped me. Yours is coming along great as well. Thanks Rusty. I really do need to remember that. My wife is always amazed by my model work, since I apparently have little patience about anything else. Thank you very much for saying so. I really do commit to the best possible result, no matter how many tear-offs I need to get it. Thanks! I didn't think I needed another cutter, but this was a excellent buy. Quick, repeatable angle cuts made easy. I also used one of its blades in my old The Cutter and am getting better straight cut results with it. We'll have to check the score to see who's made who buy more. www.rptoolz.com - it's waiting for you there. Glad you're on the path to build your version and glad I can help. It's a great model, challenging, but great. My main advice is take the time to get the framing and infrastructure as an exact mirror to the plans, everything that comes later is so much easier and better if you do. I sent you a PM back, my mail box was only 19% full. I asked James H to check on it, he says your box may be full? Thanks Joe. While I'm also a photographer all my recent build log photos are taken with an iPhone 14 Pro and iPhone 12 Pro before that. Truthfully I think I got better photos with the 12. I import them to Adobe Lightroom for some very basic editing, export them to a folder then upload to MSW. I move my intense workshop lights around for the best lighting depending on the photo. I have professional lights and cameras, just don't get them all out for log photos. **Thank you for all the likes and comments, I appreciate them very much!**
- 840 replies
-
- 7
-
-
- winchelsea
- Syren Ship Model Company
- (and 1 more)
-
Definitely a light coat of a fixative spray, I did two light coats of Winsor & Newton Fixative. I got it on Amazon Here It is neither matte or satin, still looks like the paper when it’s dry.
-
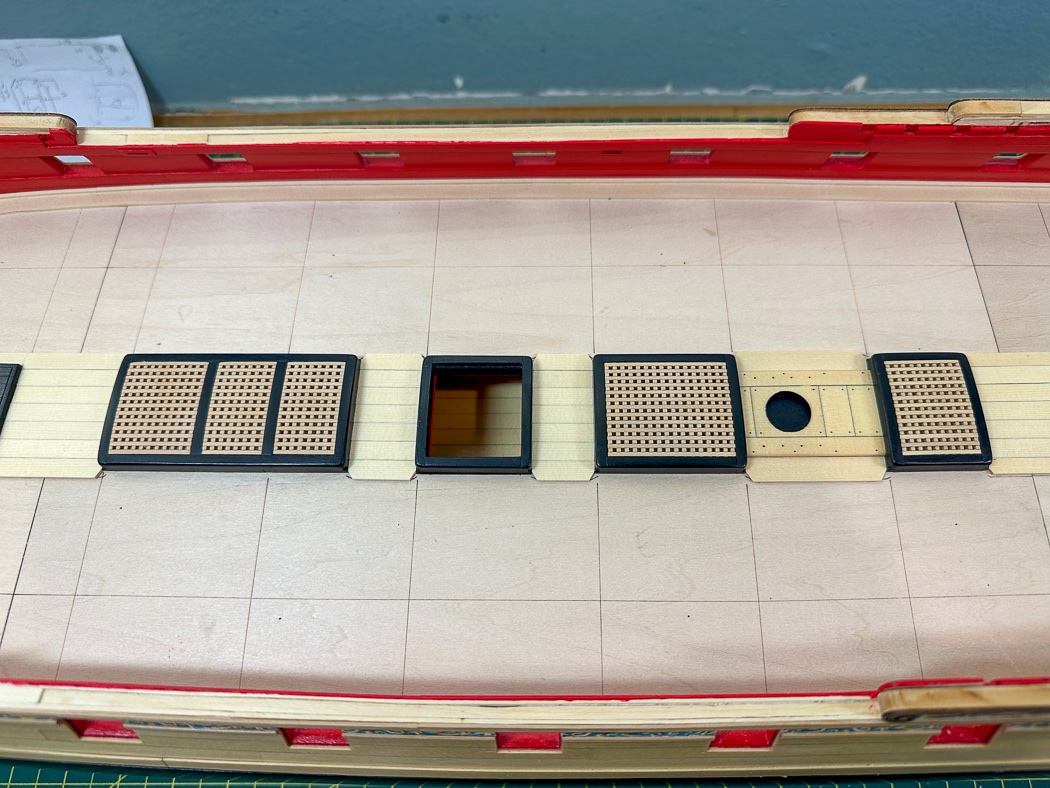
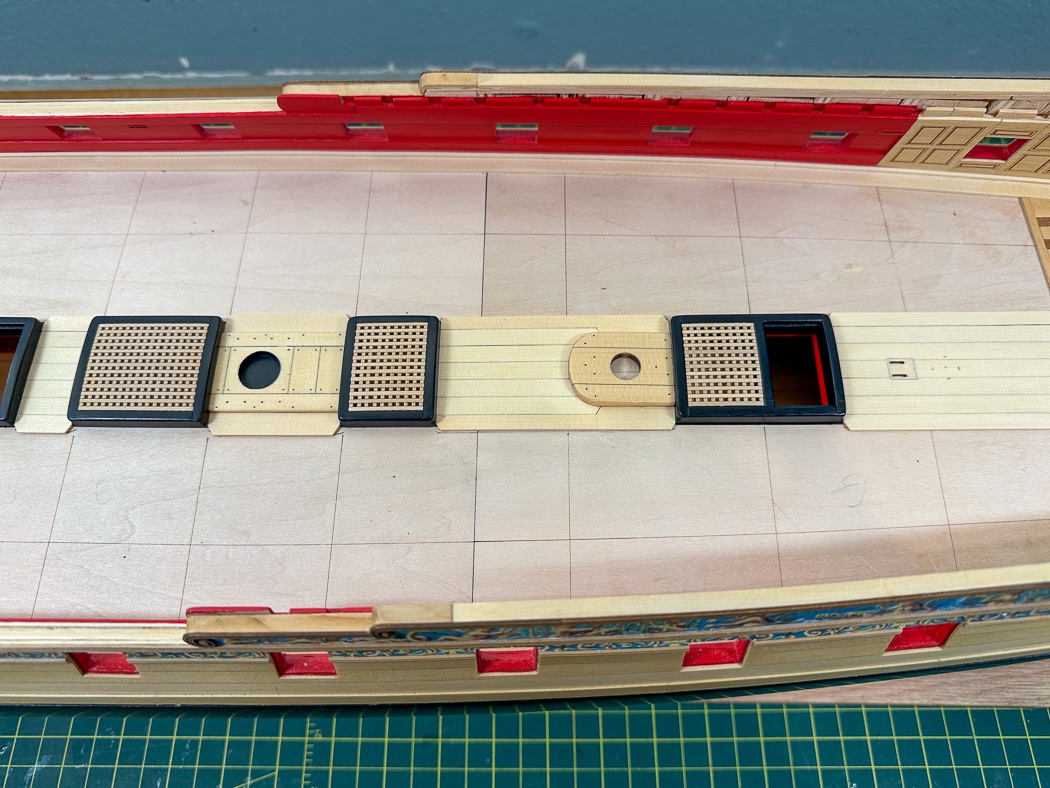
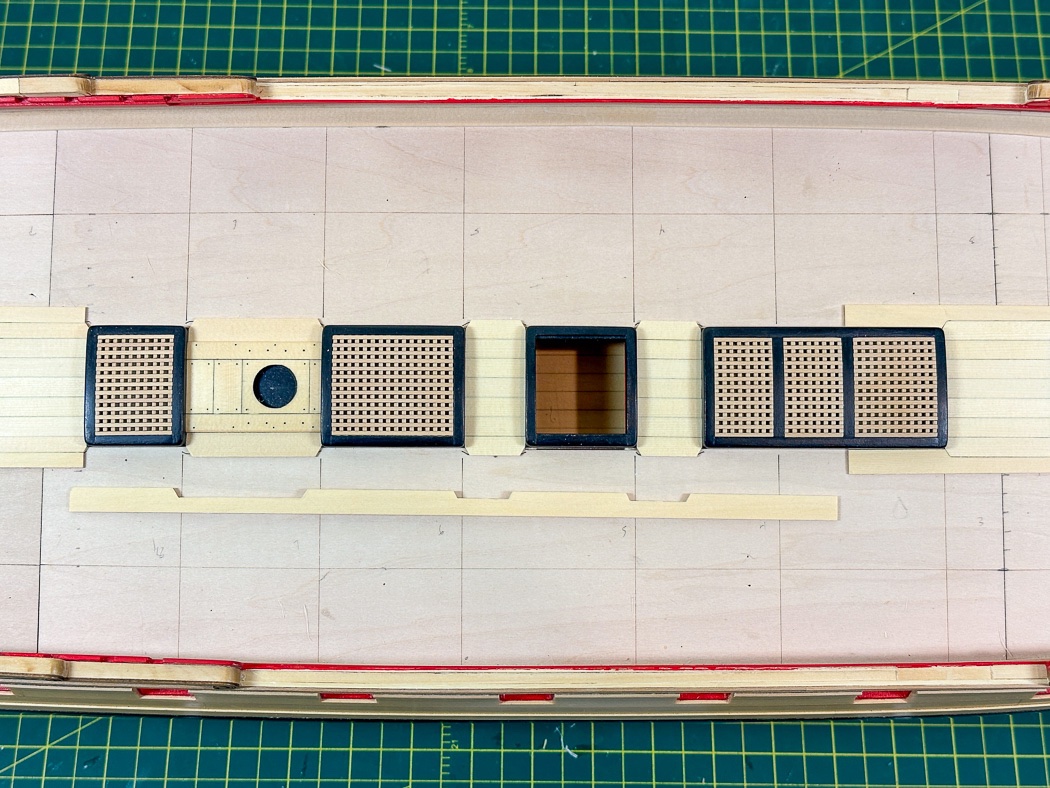
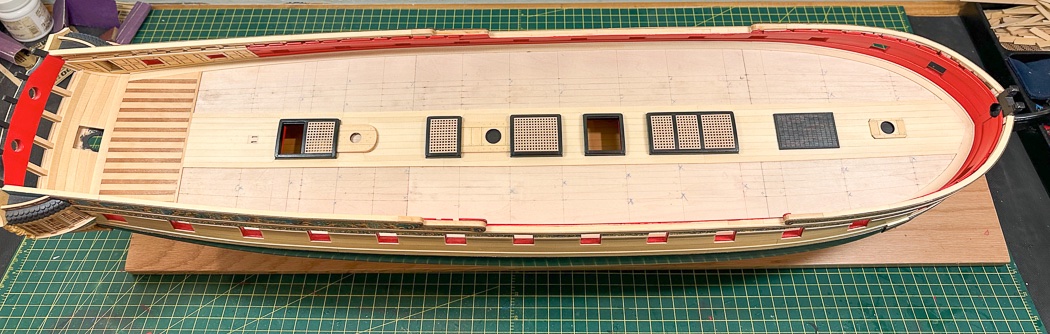
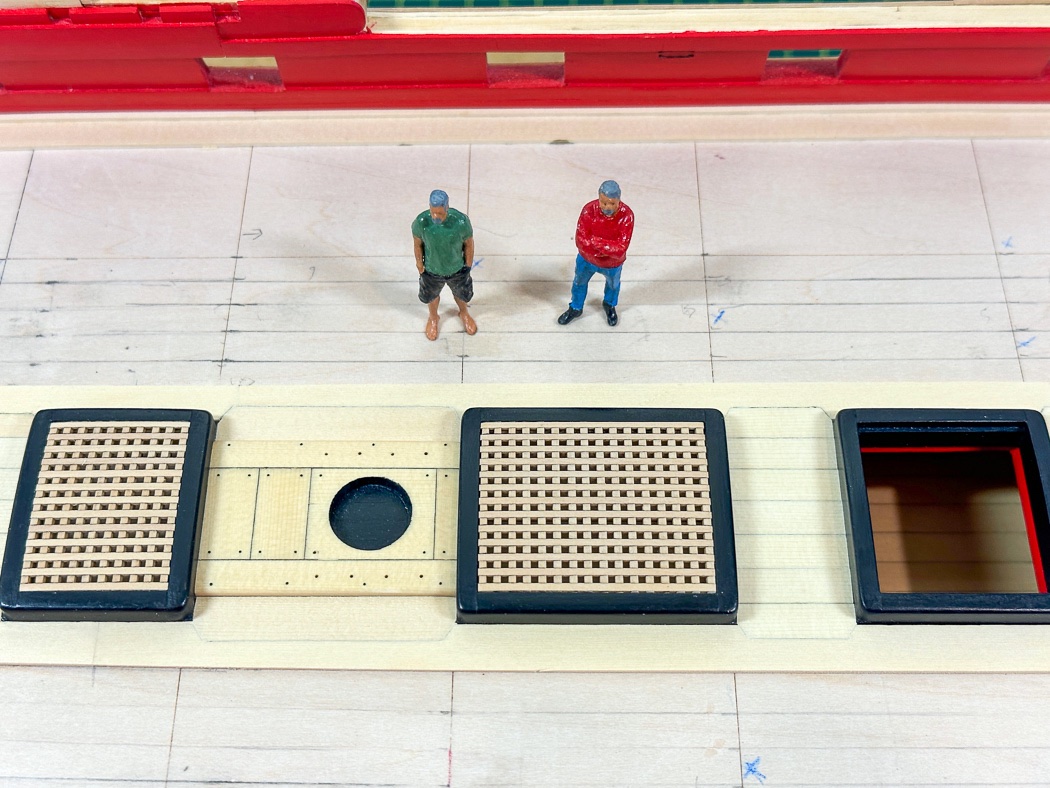
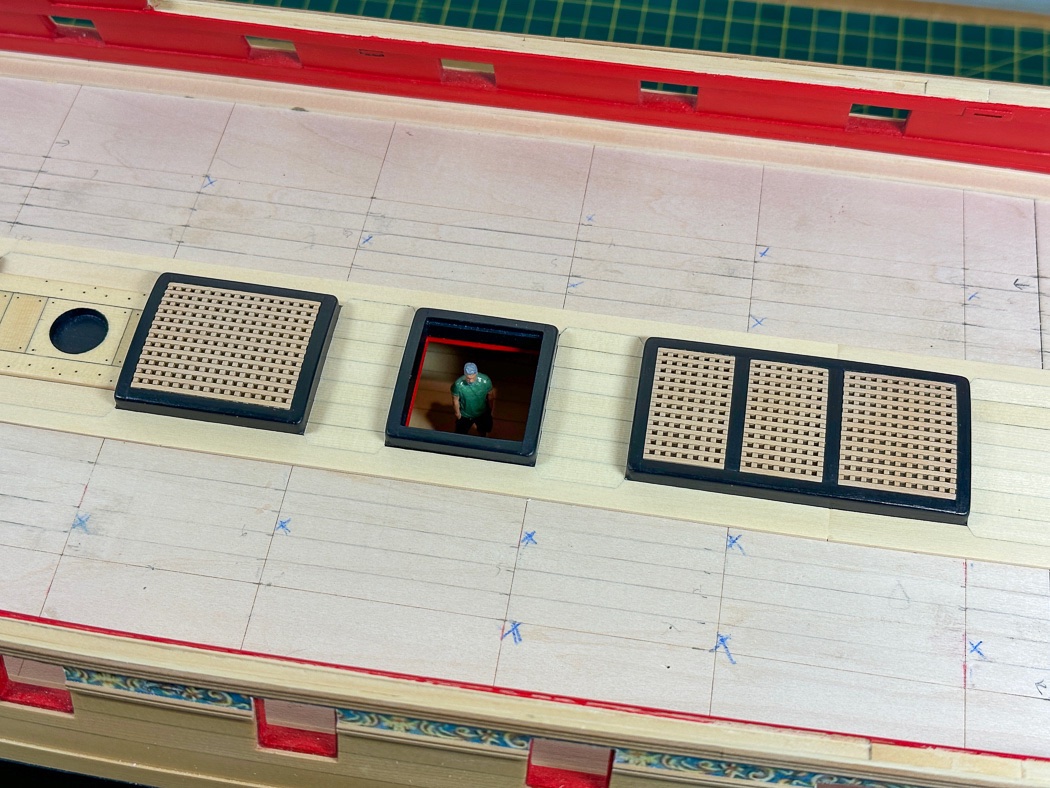
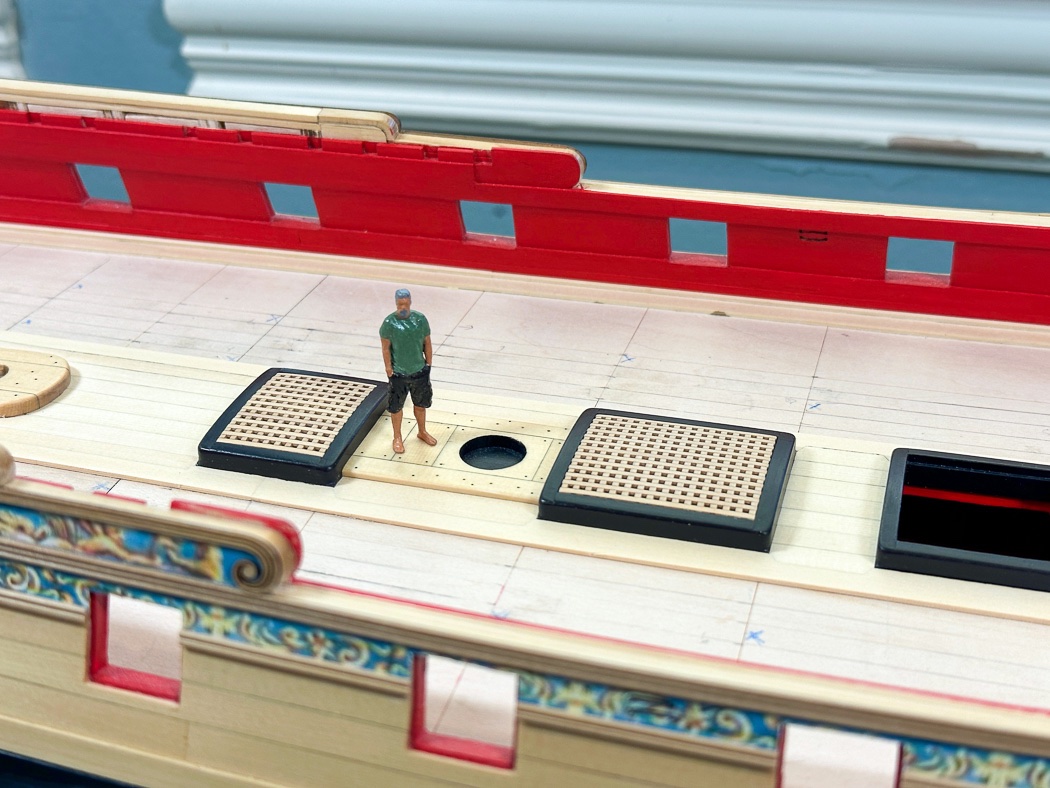
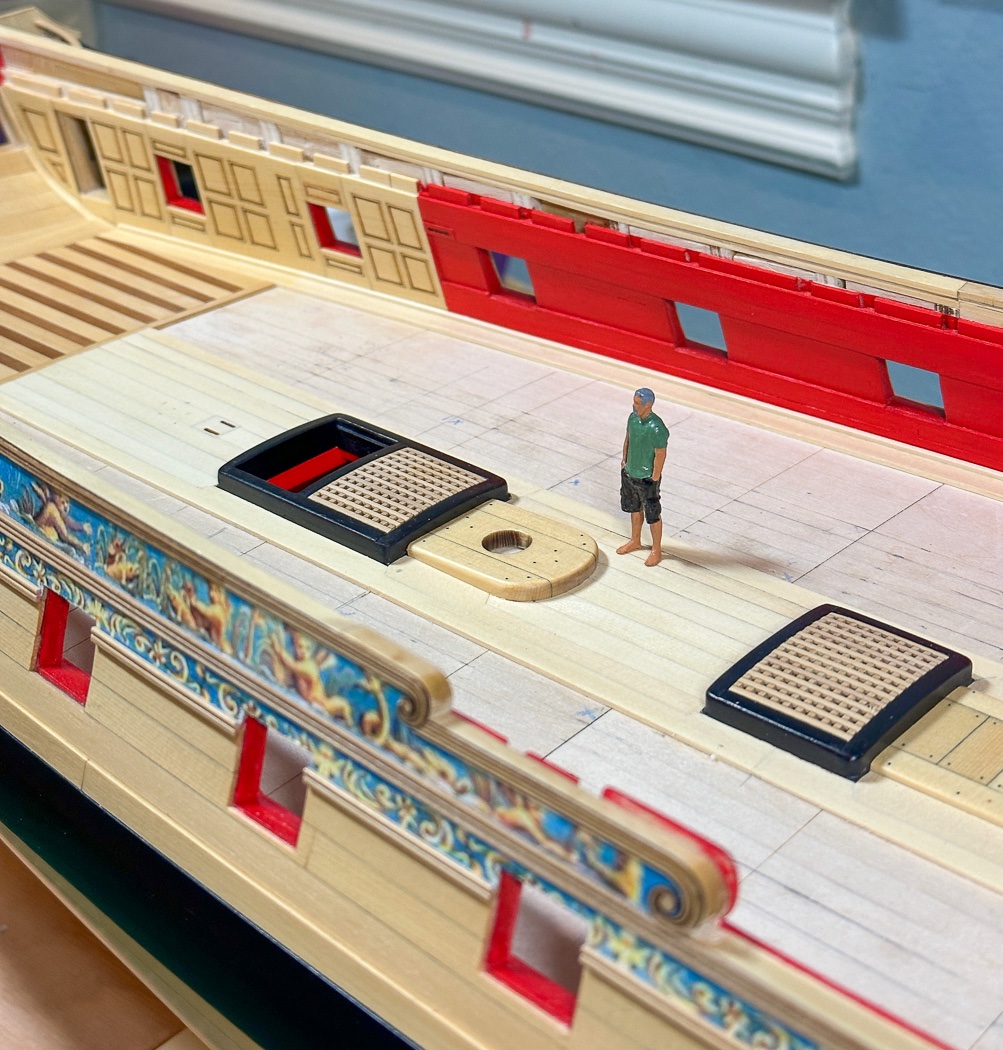
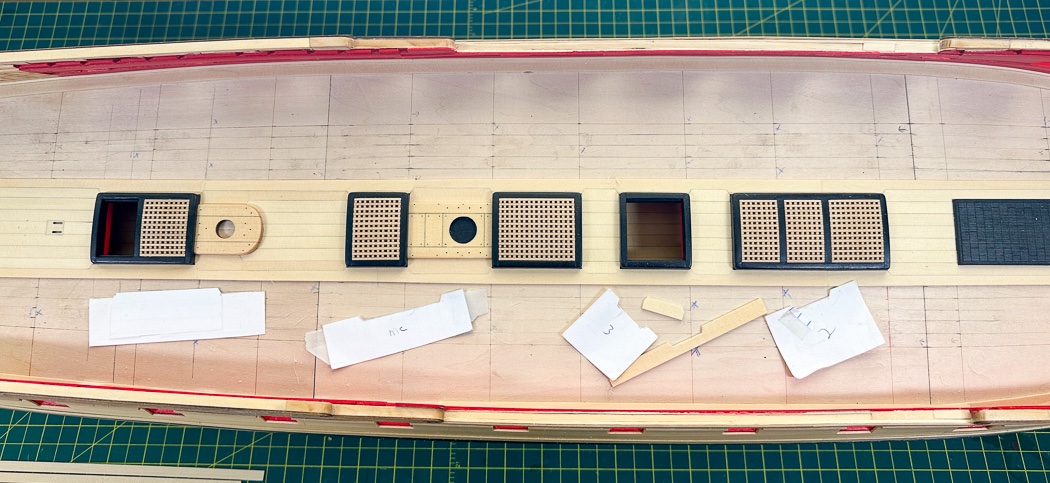
Main Deck The center belt of main deck planking is a process requiring precision and patience. Making those first cuts around the coamings is very enjoyable, its when I’m making the same ones over again for the third, or more, times it gets a bit less so. Did I mention patience. The first step was spending a good deal of time making sure of the center plank alignment. Filling the remaining six rows between the coamings and partners was straightforward enough, a process made easier by my new cutter. With its sharp thin blade and with its ability to make precise angled and length cuts I was able to quickly make consistent angles (one arbitrarily chosen to visually match plans….sorta). With the old cutter making set lengths and the new cutter set for the angles filling between deck furnishings all went smoothly completing the first seven rows. I made three of the angled planks for each space, two for the deck and one for the next step. After a good deal of fumbling about to match up the the tabs between the seventh and eighth rows I kind of tripled down on a process. I started with a card template cut to match, made adjustments to it after making a practice cut on a scrap plank, used those two plus the third piece I’d made earlier to check and make the final cuts on the plank, one tab at a time, slowly. Did I mention patience. I got there, obtaining three good matches on a single plank, both sides, a triumph in the end. It’s not just the cuts, there is a taper to account for at both the stern and bow that proved equally fun. This gave me ample opportunity to cut and carve planks, long after I didn’t want to cut and carve planks. In the end I have a result I like and made ready for the next belt by lining the deck and marking the butt shift pattern with blue X’s. I’ll wait to line the outer belt once I’m near complete with the inner, as I’ve frequently discovered I am not perfect in all things, planking included. My 1:48 scaled mini-me gives a nice perspective to the size of the actual Winchelsea (though why he went into the hold in one photo I don’t know). He also invited his Winchelsea color coordinated friend to also stop by for a look. Thanks for looking in, your likes and comments are always appreciated. On to more planking.


- 840 replies
-
- 22
-
-

-
- winchelsea
- Syren Ship Model Company
- (and 1 more)
-
Nice to see you back in action. I’ve always admired this kit, I’ll enjoy watching your build. I’m sure there are no others in your home matching the designed color scheme and subsequently no reason to change it for our entertainment.
- 131 replies
-
- 2
-
-
- Medway Longboat
- Syren Ship Model Company
- (and 1 more)
-
We’ll done, very nice looking work!
-
Great looking work on the guns. Those hooks were a nice find.
- 113 replies
-
- 2
-
-
- Cheerful
- Syren Ship Model Company
- (and 1 more)
-
I had the same reaction to my cabin walls…wow, they fit…cool… Nice work!
-
As Chris notes, these posts already exist in the form of James' build logs for each model.
-
Enjoy the Antarctic. I’ll be close by in Patagonia in a couple of weeks on my paid for in 2020 photo trip. The rigging and the model look fantastic. I’d venture to say you are a master of rigging. I had to get out my nautical dictionary to understand what you said🤣😂
- 345 replies
-
- 4
-
-

-
- Duchess Of Kingston
- Vanguard Models
- (and 1 more)
-
Such nice looking work as always. So much detail, I’m sure it is enjoyable to be at this point of the project.
- 642 replies
-
- 1
-
-
- winchelsea
- Syren Ship Model Company
- (and 1 more)
-
My go to reference for rigging ship models is Derek😊
- 345 replies
-
- 4
-
-
-
- Duchess Of Kingston
- Vanguard Models
- (and 1 more)
-
There is another moulding at the bottom of the counter where the frieze meets the planking you could add.
- 389 replies
-
- 2
-
-
- winchelsea
- Syren Ship Model Company
- (and 1 more)
-
So much fine detail, those curves…. Well done.
- 607 replies
-
- 1
-
-
- winchelsea
- Syren Ship Model Company
- (and 1 more)
-
Too late now but cutouts of profile drawings of the stern and quarter gallery framing on the plans were helpful for many of us to get the proper alignment and structures in place. Something not in the instructions is likely made clear on the plans. My biggest struggle was making an acceptable transition of planking from the counter to the sternpost. The filler piece Chuck mentioned is essential to make that curve. I’m sure many will appreciate the level of detail you’ve provided, thanks for taking the time to share it. Chuck is great in answering questions and all of us in the project learn from each other. Be sure to take advantage of those that have gone before. I think as I described the quarter gallery framing would have been helpful for example. I studied other logs in addition to Chuck’s monograph regarding the stern fillers as another.
-
I may make some more cannon to avoid the tabbed plank on the center deck planking belt for a while 🤣
-
Welcome to the project, I’m only on chapter 4, you may be late but there is still a party. I agree with others the plywood may be a challenge. The design includes plenty of bulkheads for strength whatever the material on one hand and on the other careful and thorough fairing is crucial to your success later in the build. At any rate I look forward to following your progress, as noted and as I frequently do myself there are excellent build logs to help you along in addition to the monograph.
-
The gratings look nice, do your coatings account for the height of the deck planks? They are well made for sure.
-
Thanks. It’s all fun, one way or another 😊
- 840 replies
-
- 2
-
-
- winchelsea
- Syren Ship Model Company
- (and 1 more)
