


glbarlow
-
Posts
4,126 -
Joined
-
Last visited
Content Type
Profiles
Forums
Gallery
Events
Everything posted by glbarlow
-
 Excellent work Frank, it looks nice and tight.
 -
Thank you. I appreciate the comment. Thank you for saying so.
- 840 replies
-
- 1
-

-
- winchelsea
- Syren Ship Model Company
- (and 1 more)
-
So there’s an open tab for me at a bar somewhere 😂. I’m glad my log is helpful. Yours too will be an excellent reference for future Cheerful builders. I wish I’d thought of drilling the holes for the stirrups, they were a bear to line up.
- 112 replies
-
- 2
-

-
-
- Cheerful
- Syren Ship Model Company
- (and 1 more)
-
Nice work, clean and sharp, both the model and the photography.
- 102 replies
-
- 2
-

-
-
- Flirt
- Vanguard Models
- (and 1 more)
-
That’s the absolute rule of modeling. You aren’t on a schedule, enjoy the process.
- 83 replies
-
- 3
-
-
- Lady Nelson
- Amati
- (and 2 more)
-
Thank you Don. A lot of it is how good Alaskan Yellow Cedar turns out with the WOP.
- 840 replies
-
- 3
-
-
- winchelsea
- Syren Ship Model Company
- (and 1 more)
-
Thanks Bob. I appreciate the comment.
- 840 replies
-
- 2
-
-
- winchelsea
- Syren Ship Model Company
- (and 1 more)
-
Odd approach for bulkheads and deck planks
-
Thank you Chuck, I’m a poster boy for dry heat plank bending. I appreciate all your guidance and help.
- 840 replies
-
- 4
-
-
- winchelsea
- Syren Ship Model Company
- (and 1 more)
-
Thank you, we are definitely challenged by this wonderful model. It took me a minute to sort out the stern and then 3-4 times longer to get a fit than any other plank…fun stuff.
- 840 replies
-
- 3
-
-
- winchelsea
- Syren Ship Model Company
- (and 1 more)
-
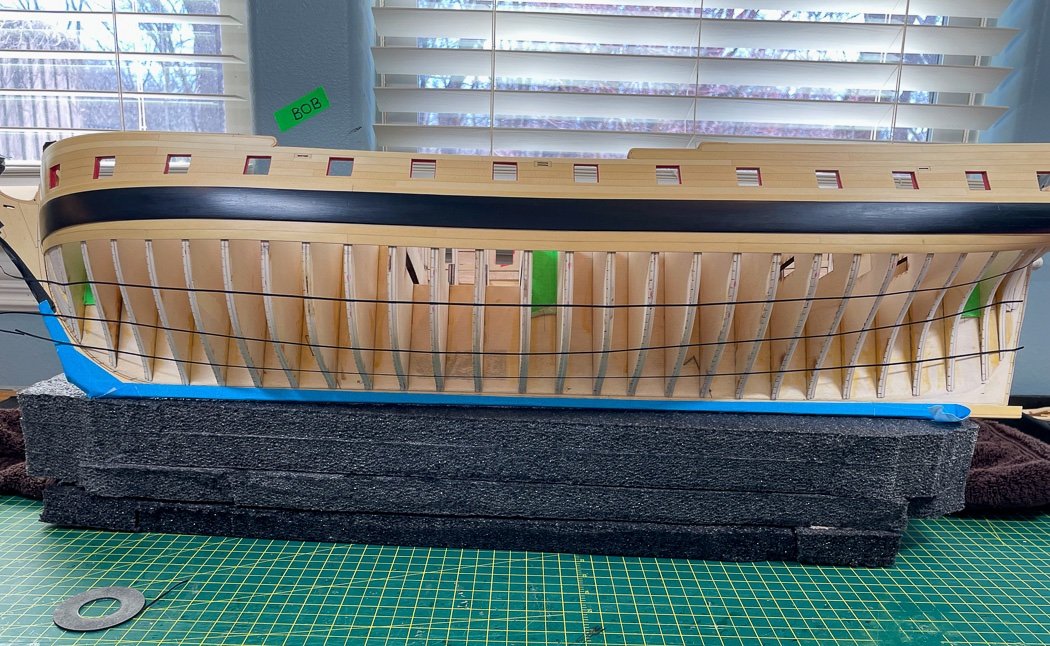
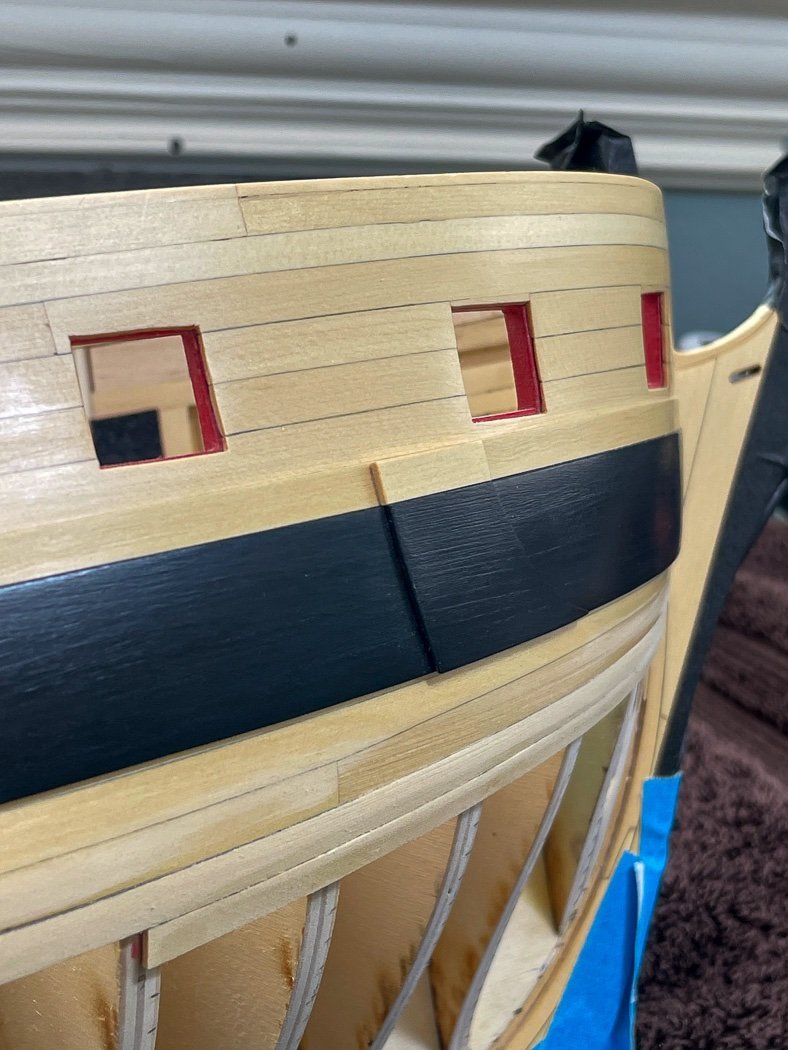
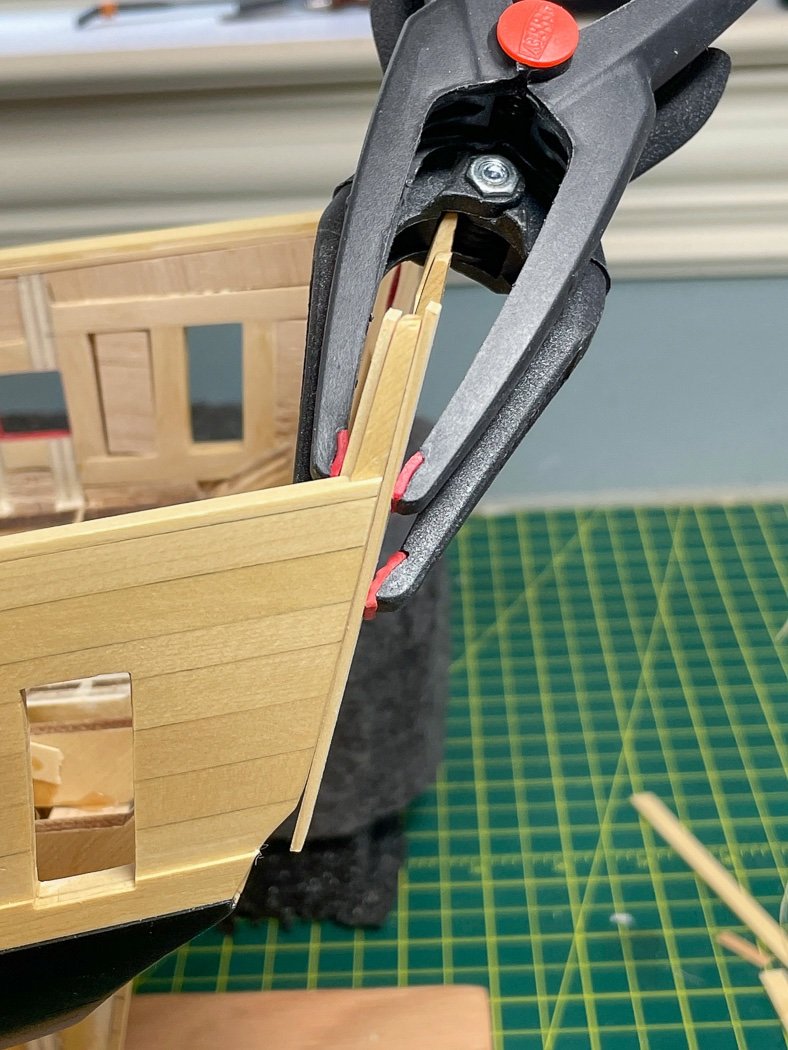
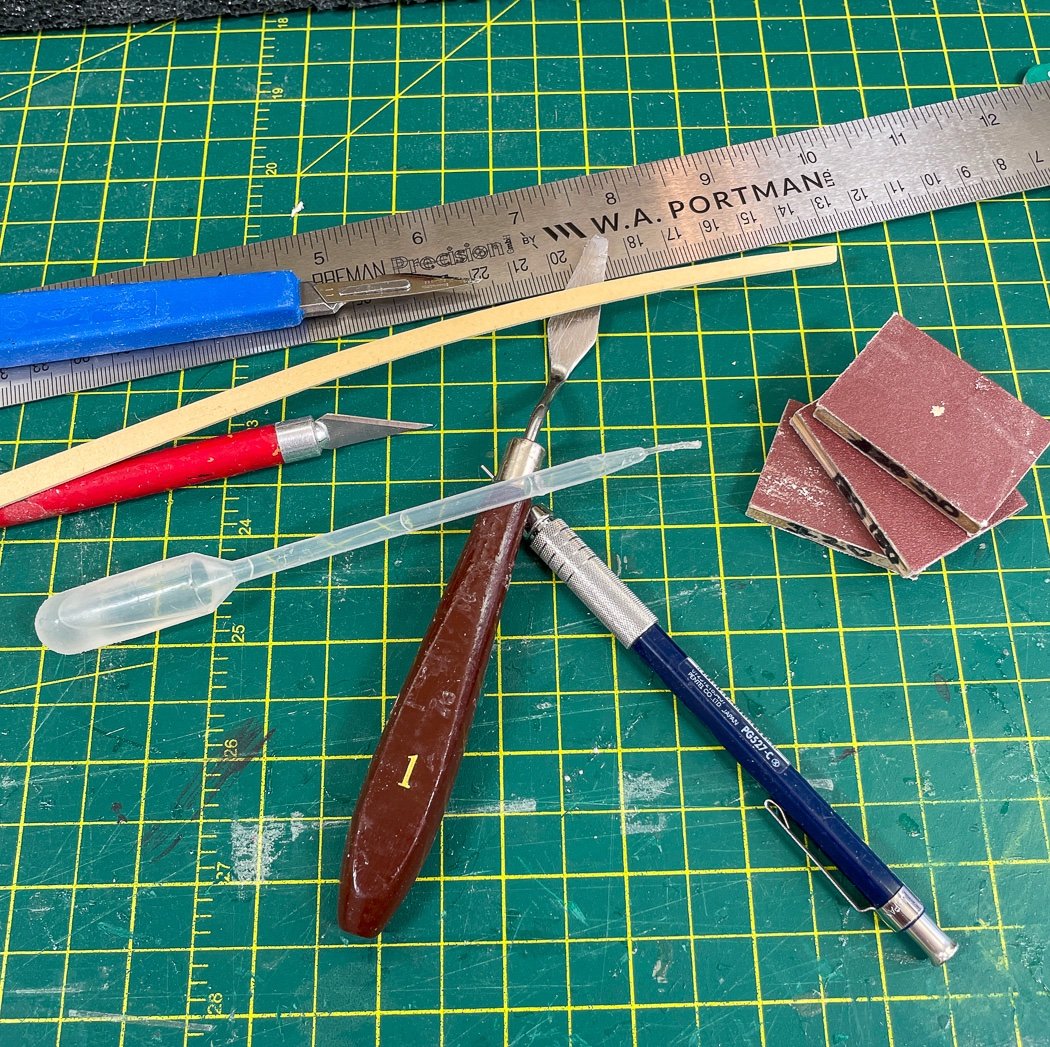
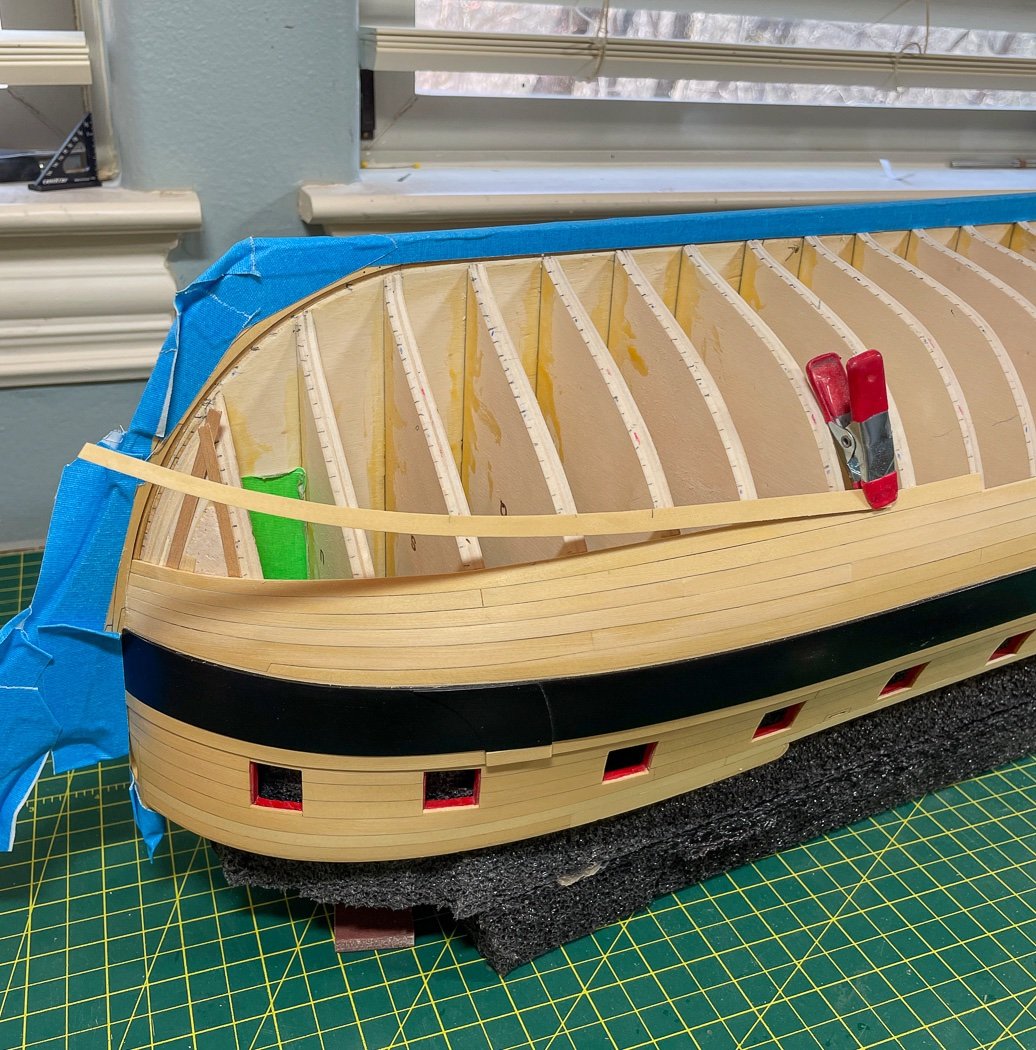
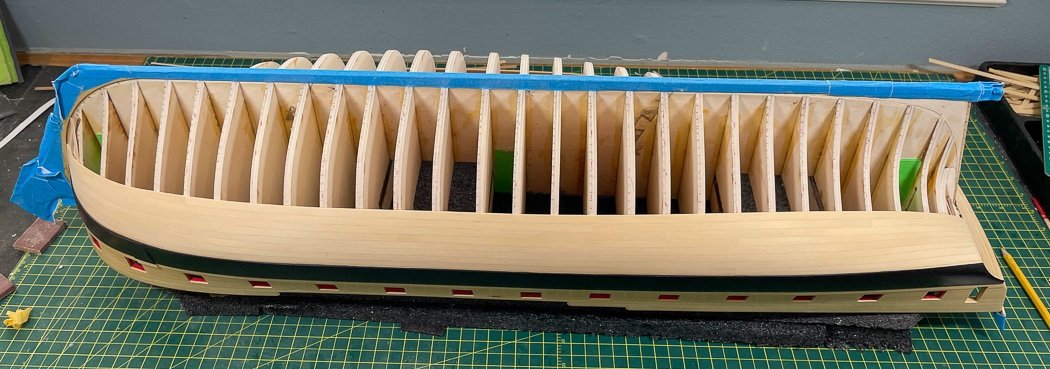
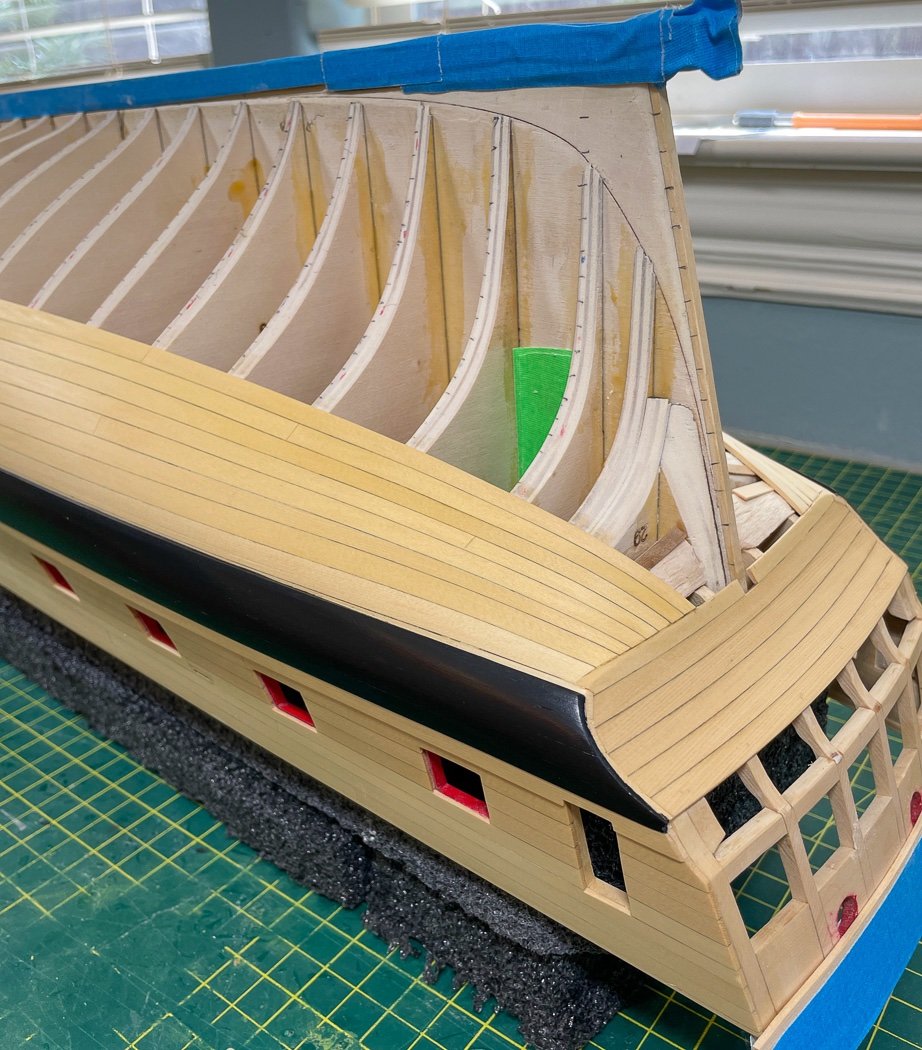
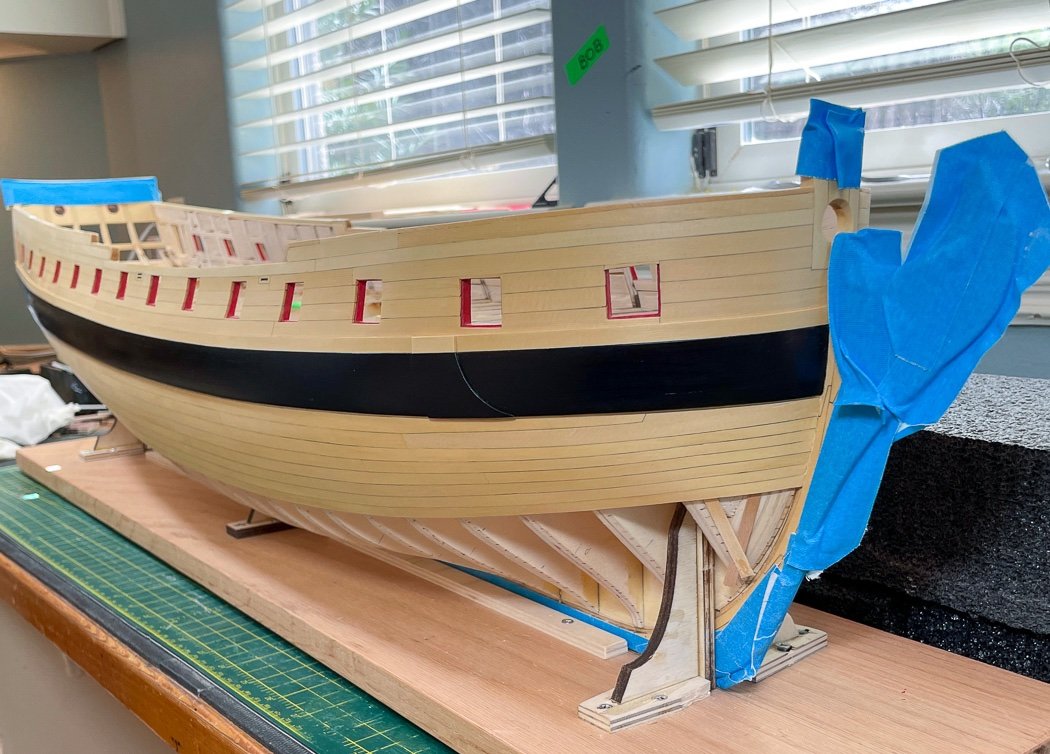
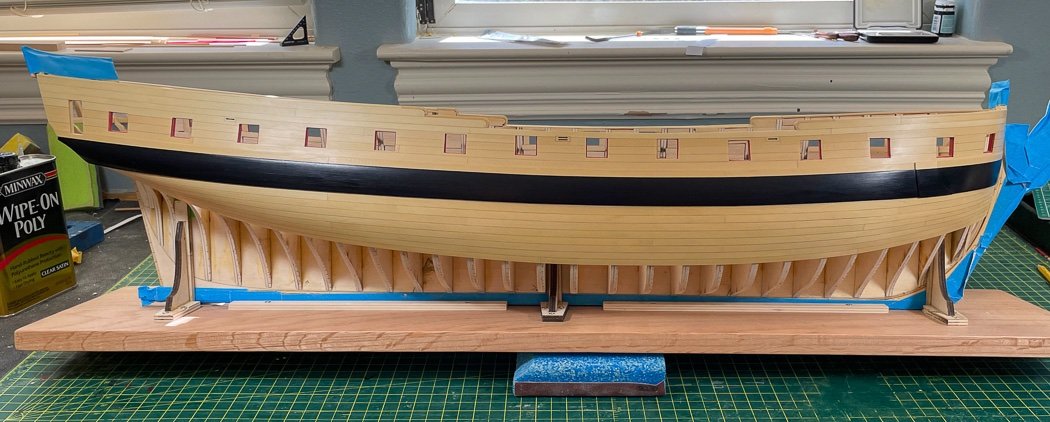
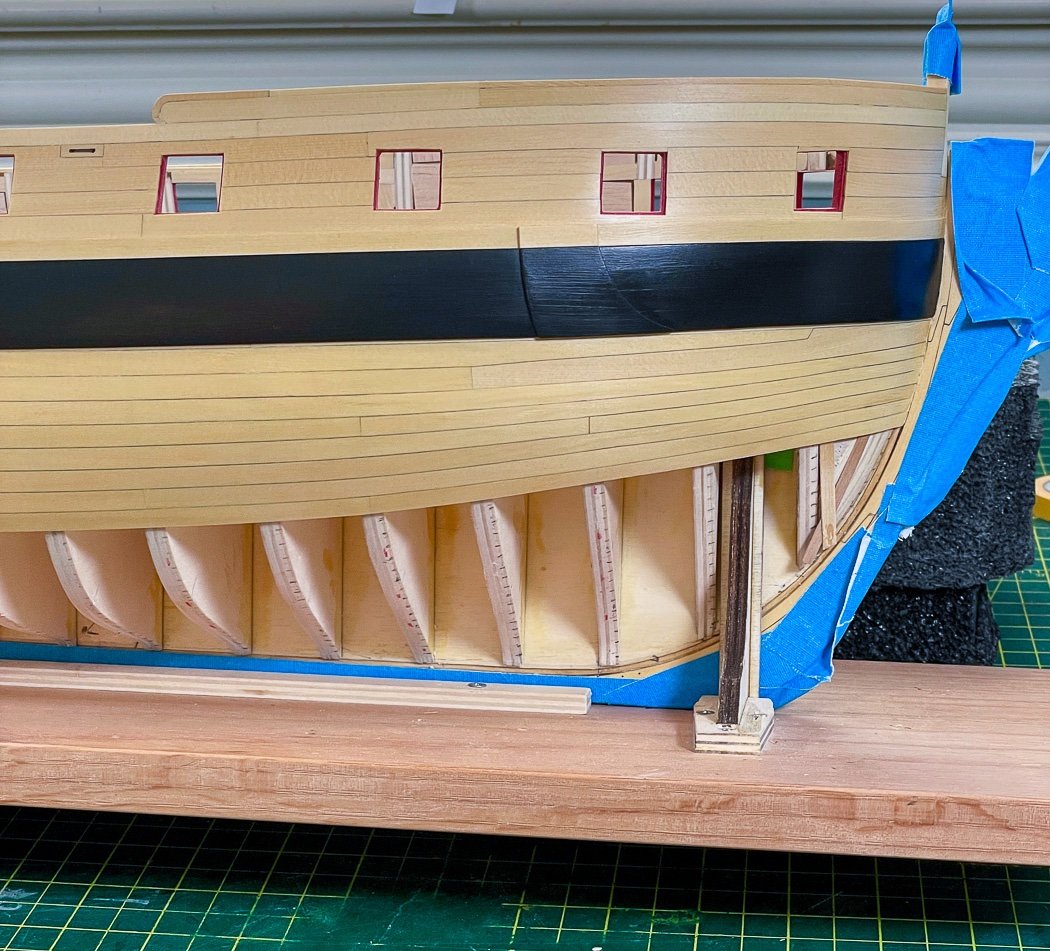
First Band of Planking It took two weeks, I’ve completed the first band of 6 planks on one side (and two on the other) for the main hull planking. Chuck providing us the tick strips is such a great gift. While having lined the much smaller Cheerful using a planking fan was a good learning exercise, without the tick strips provided for Winchelsea it would have taken me forever to do. As it was it was a full days work marking, making sure I had it right, then adding red ticks for my plank shift pattern and then blue marks to signify the bands. The chart tape helped me check the line. I made a few adjustments after this and will note the tape no longer stuck at the bow, so it looks ajar because it is. I started by doing two rows on each side, I wanted to be sure I was past the drop plank without the challenges I had with Cheerful. This time it went so much better. From here on I am alternating sides after completing a band. I’ve shown my plank bending station before (a raised board, clamps, travel iron and the recent addition of a craft hot air tool), here’s basically all the tools I need for planking. The dispenser for my Smith Industries medium CA, an Excel #11 blade along with a Swann-Morton #11 scalpel blade (for no rhyme or reason I’ll cut planks with either or both), the home-made sanding blocks I use to soften the inside edge of each plank where it meets the adjoining plank, pencil for marking and metal ruler for cutting. Missing is the the #2 wood pencil I use to “tar” one edge of each plank. I've recently added a new tool, double sided tape. I can hold the plank down for longer cuts required for Winchelsea without concern of it slipping beneath the metal rule as I cut. I use this spatula to apply the glue to the back side of the plank over each bulkhead. Basically I lightly “butter” the back side as I go, gluing either one, two, but never more than three bulkheads at a time depending on the place in the run. This allows me to keep the plank close, limit to the small amount of glue needed, and firmly hold the plank both to the bulkhead and up tight up against its neighbor a little at a time. My forearms are generally sore from the resulting isometric exercise at the end of the day. It’s a slow process to attach each plank this way, but it works for me and I’m sure it’s much faster than not using CA. I don’t start that process until I’ve tapered the plank per the tick marks and shaped it at the bending station strictly with heat, no water needed. As has been said, each plank is its own project. It can take me a few minutes or an hour or more to get the plank to the to lay where its supposed to be with no force added by me other than gluing it. Chuck’s method was a game changer for me, I really don’t know how I ever planked a ship before. It’s amazing how wood can be shaped with no more than a little heat. The bow is a challenge, the stern even more so. The planks there both curve (with the iron) and bend (using the hot air blower). One of many nice things is if I bend a plank too far I can just as easily unbend it. I do split or crack one now and again, but that’s my lack of patience, not the process. PS: I'm sure I've said all this in other posts, it's just so fun to share. The nice thing about wood is generally when you screw up you can fix it. The upside down Winnie slipped (not on its own, so I guess I should say I pushed it) over its foam stand and broke one of the transom posts. Fortunately it was a clean break and a little splint surgery had it back where it belonged. Note to self, don’t do that. So with that and two weeks later the first band is complete. Here it is after a light sanding. I made need a bit of an adjustment at the bow, easily done with the next couple of planks And here’s a few after more sanding and a light coat of WOP. I don’t want to sand it too much until its’ finished, but I like to get the rough spots out of the way. The first coat of WOP is soaked in like a paper towel soaks up water. I like to give the wood a little protection (from me mostly) and of course the fun of seeing how it looks. Smart money would be not to sand it at all until it’s complete but where’s the fun in that. One band complete. That sounds great until I remember there are six total bands. Back to work, more lumber to saw first. As always thank you for the likes and comments.
- 840 replies
-
- 33
-
-

-
-
- winchelsea
- Syren Ship Model Company
- (and 1 more)
-
Just ordered a copy. For the record, ordering from you including international shipping is less than the list price in Amazon books, plus there it’s only available as a a pre-release. Having yours and Chuck’s models makes it for me.
-
Balsa at the bow and stern is a good idea, especially for a kit with more widely spaced bulkheads. I just saw, cut, file until it’s close then sand from there. Chisels, much as I like my Veritas mini-chisels, aren’t much help on balsa. Mechanics squares are what I use, but any solid true square object is fine. Either way you need to clamp the square tight between the bulkhead and framer, just sitting it there isn’t enough. Rule one in modeling, when you think you have enough clamps, buy more clamps.
- 83 replies
-
- 1
-
-
- Lady Nelson
- Amati
- (and 2 more)
-
Lines are probably attached to hooks, then the eyebolts. The deck looks great! Now having done it, I also appreciate the difference serving lines makes, well done.
- 91 replies
-
- 1
-
-
- Speedy
- Vanguard Models
- (and 1 more)
-
In addition to using two squares on each bulkhead as I glue them, I do them 1-2 at a time, not all at once. A shim in the groove might help getting them flush with the framer. Flush and square are essential, do what it takes to get it there.
- 83 replies
-
- 1
-
-
- Lady Nelson
- Amati
- (and 2 more)
-
Isopropyl alcohol will loosen the glue so you can reset the bulkhead. You want to do everything you can to have a squared up frame.
- 83 replies
-
- 2
-
-
- Lady Nelson
- Amati
- (and 2 more)
-
Looking for a good "starter" pin vise set
glbarlow replied to Capella's topic in Modeling tools and Workshop Equipment
There are a full range of prices on Amazon. Frankly I'm not sure what justifies a high priced one. They are a basic tool, the ones I've had for years are still fine. They just have to tightly hold a bit. It is worth it to get multiple sized ones to accommodate multiple sized bits - I have four sizes, they're all I need. The larger ones, no matter how small a bit they hold, get in the way of small tight areas. I have these, or a version of them Amazon Pin Vise Set they have yet to fail me. I've never had nor understand the need to put a hand drilling device into a mechanical one. It's worth noting I've never seen an expensive tool I didn't like and in quite often buy (like Veritas mini-chisels for example), but in this case... -
Just be sure the bulkheads are squared up completely before, during and after the glue is added. Fair them so you have a smooth run of a plank bow to stern. One way to make sure you don't over-do or under-do that task is to remove all the char others than a line of it on the the stern-facing edge forward of midships and the bow-facing for the bulkheads aft of midships. Take your time with fairing and take your time with your first planking. Study the other logs for a technique and don't be mislead by well-intentioned advice. There are many ways to plank, but mixing them is the worst way to go - choose one and stay with it. I've seen a lot of entry level modelers think there in a race to get past these first steps, but just like the concrete in a house the foundation is critical to future success, rush it and everything after is a mind-numbing challenge to correct. Planking is a skill, its fun when you do it right, it's misery when you try and force the planks to fit. It is not natural for a flat rectangle to fit opposing curves. Plank bending is an easily learned skill. My advice is to find and read Chuck Pasarro's tutorials, you can look at my LN, Cheerful, and now Winchelsea logs to see how I apply his techniques.. On the plans for LN, as you will see noted in other logs, two of the bulkheads are labeled incorrectly. It's fairly obvious they don't fit that way. The biggest flaw, though it will be a long while before you get there, is the forward bits are out of scale and incorrectly sized so badly the bowsprit won't fit. Some have just cut them down, I chose to scratch build a new set. You'll see this in other LN logs including mine. It's great you started a log - between that and using others that have gone before you can get plenty of advice to make up for the lack of quality instructions with the kit. Be sure to use the plans, even though they aren't crucial for this build, learning to follow along with the plans and use them when possible is excellent instruction and learning for more complicated models as you grow with the hobby. Welcome to modeling, we're glad you've joined us. I'll follow along with your build
- 83 replies
-
- 4
-
-
- Lady Nelson
- Amati
- (and 2 more)
-
Very creative cleat installer tools, that’s a very tight area.
- 112 replies
-
- 3
-
-
- Cheerful
- Syren Ship Model Company
- (and 1 more)
-
I understand I’m about one millionth done with planking
-
Building this model as we know requires patience and perseverance. Rigging all the cannon doubles that requirement, well done. Not to set you back, but it’s not 22 more it’s 30 including the eight on the QD 😊
-
That’s a nice job on some tricky planks. Doing them will make a big difference on the final deck. When I made these for Cheerful I made sure the joints were between ports so a cannon didn’t cover them up.
- 562 replies
-
- 4
-
-
- vanguard models
- alert
- (and 2 more)