glbarlow
-
Posts
4,126 -
Joined
-
Last visited
Content Type
Profiles
Forums
Gallery
Events
Everything posted by glbarlow
-
I recommend you look at Vanguard Models in the UK. Chris has great kits from beginner to advanced, with excellent plans and detailed, including photos, instructions. In fact you can download those before buying a model and Chris, like Chuck, is an active member of MSW. Even better there are lots of build logs on this forum to help you along. Better to get a good start with a good kit than struggle with pirated stuff with poor instructions and no help from others here on the forum.
-
 Trying to avoid the insane part, but definitely some truth there. Thank you. Thank you, as we say, each plank a project, sometimes two or three projects. Thanks Bob, I enjoy following your build and thinking someday mine will look like that. Thank you for that, though I’ve got plenty of room to improve. Yours looks great, enjoy following your progress Thanks Rusty, I appreciate your saying so.
- 840 replies
-
- 2
-

-
- winchelsea
- Syren Ship Model Company
- (and 1 more)
-
Thank you Chuck, something I have to keep telling myself.
- 840 replies
-
- 1
-
-
- winchelsea
- Syren Ship Model Company
- (and 1 more)
-
Very meticulous and impressive. How did you close the loop (the photo of just a loop of served rope)? Very clever modification of the servo-matic.
-
I have never understood that and consequently have never done it. Why risk black ink stains on the ship, hands, work bench, etc. when you can just use black rope.
- 91 replies
-
- 2
-
-
- Speedy
- Vanguard Models
- (and 1 more)
-
By not putting those eyelets in until the blocks are attached. I drill the holes per the plan but don't add those particular eyelets until the rigging phase, same with any on the outer hull. So at this point pull them out, attach the blocks, re-drill the hole and add them back. blocks attached. Seizing the blocks to the eyelets is well explained above by Keith and David.
- 362 replies
-
- 1
-

-
- Amati
- Lady Nelson
- (and 2 more)
-
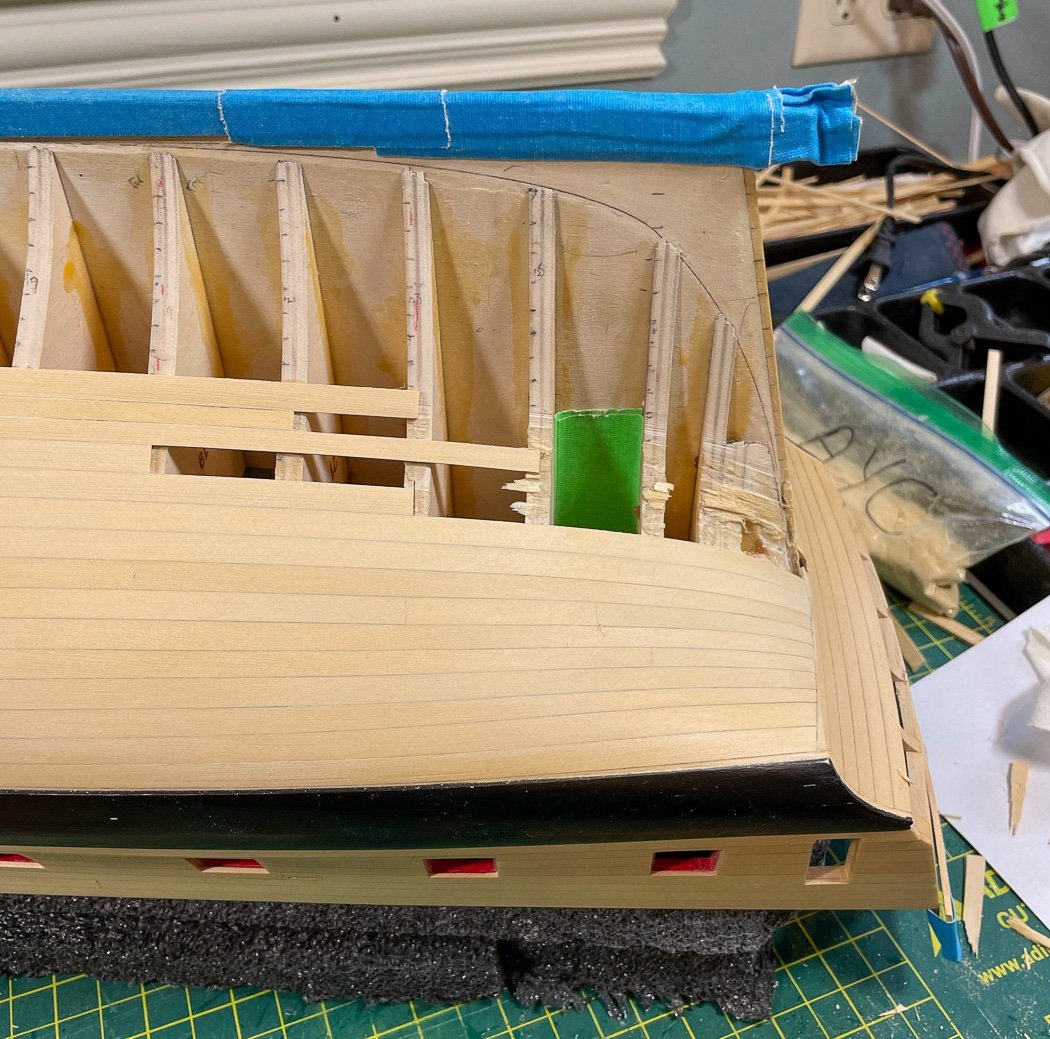
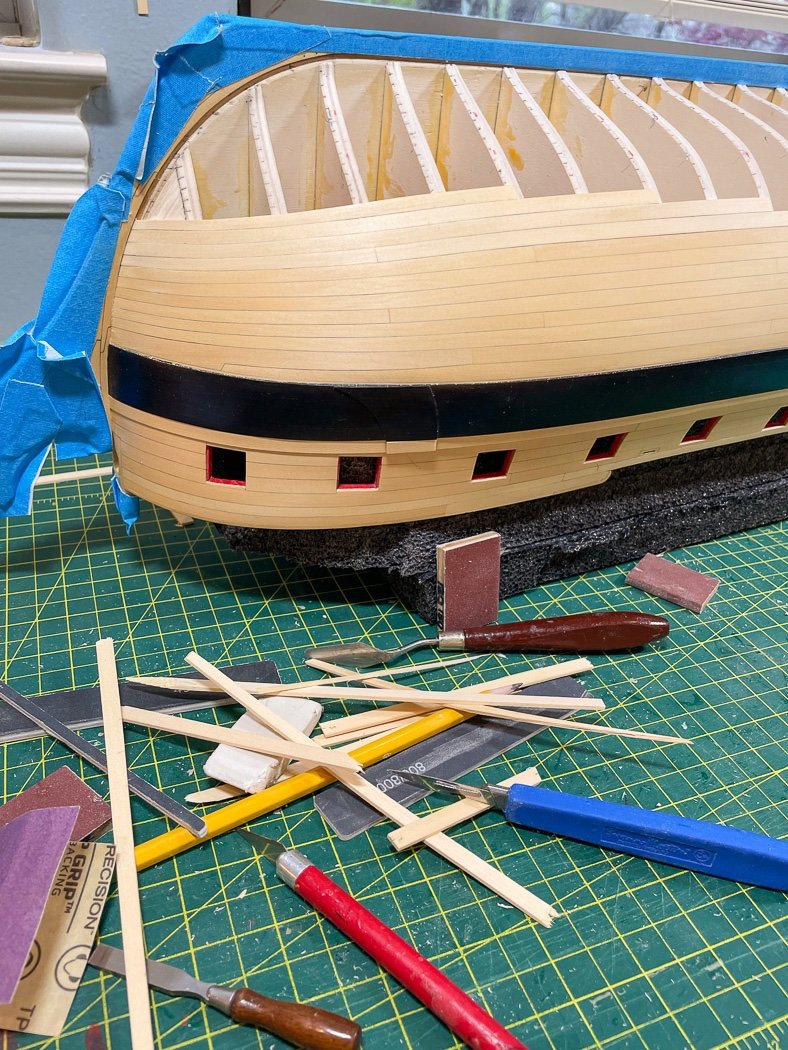
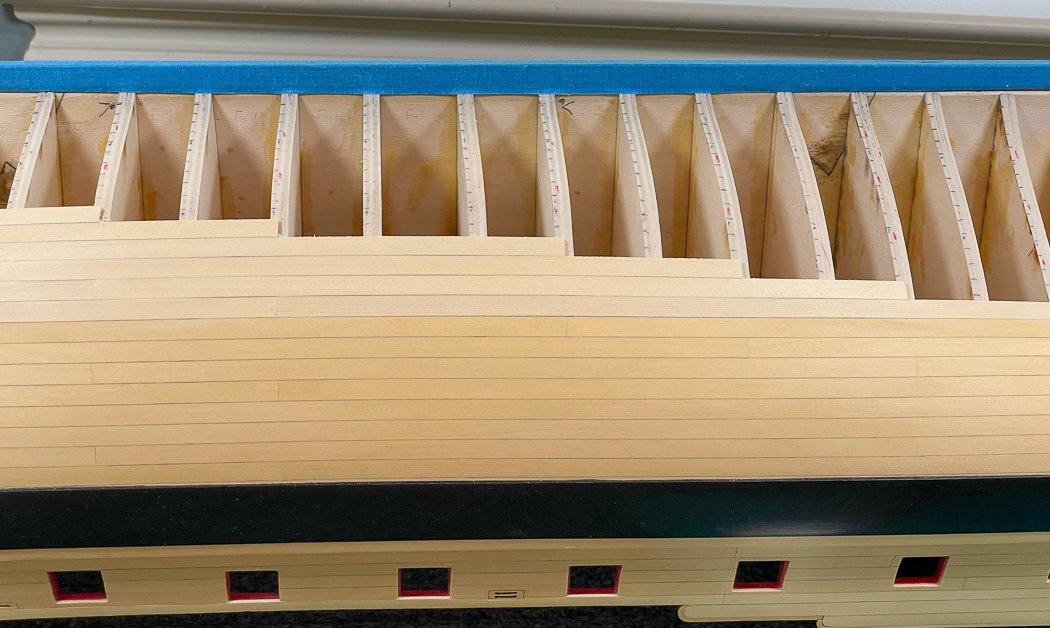
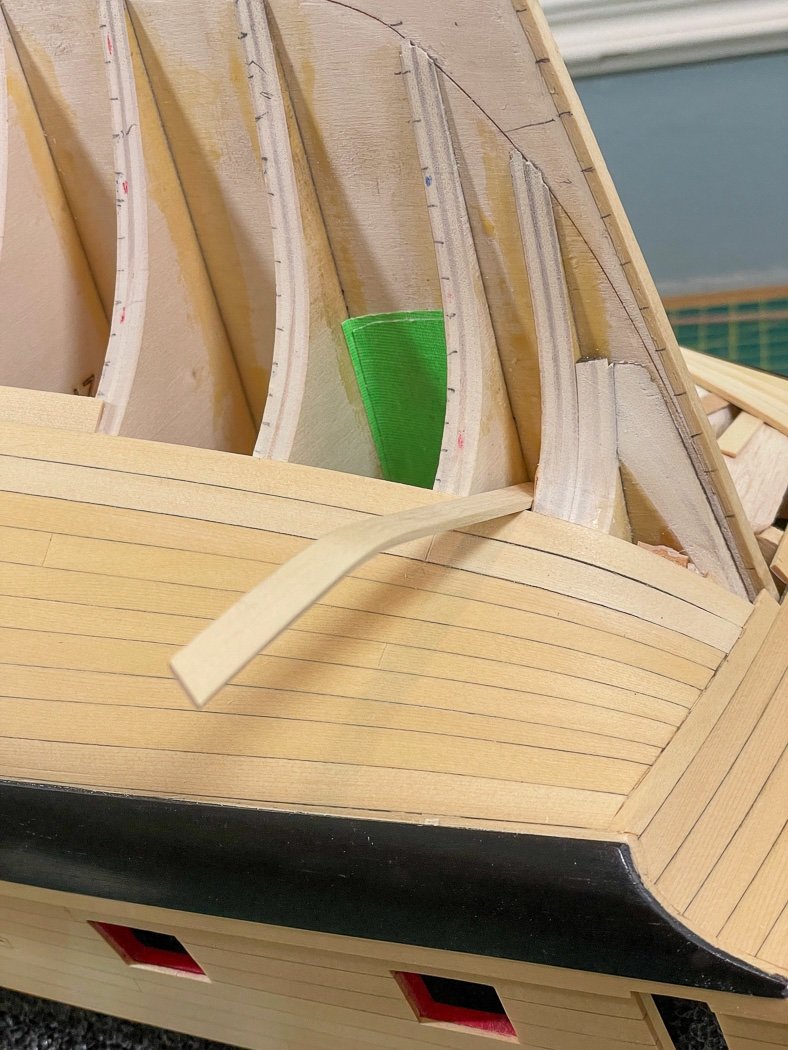
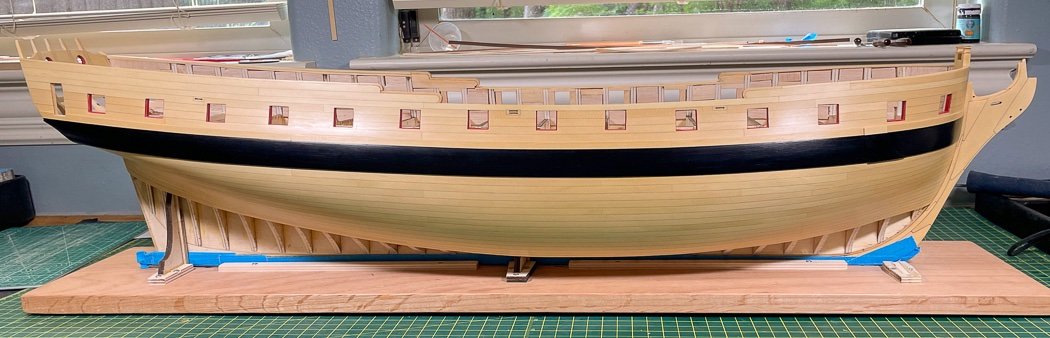
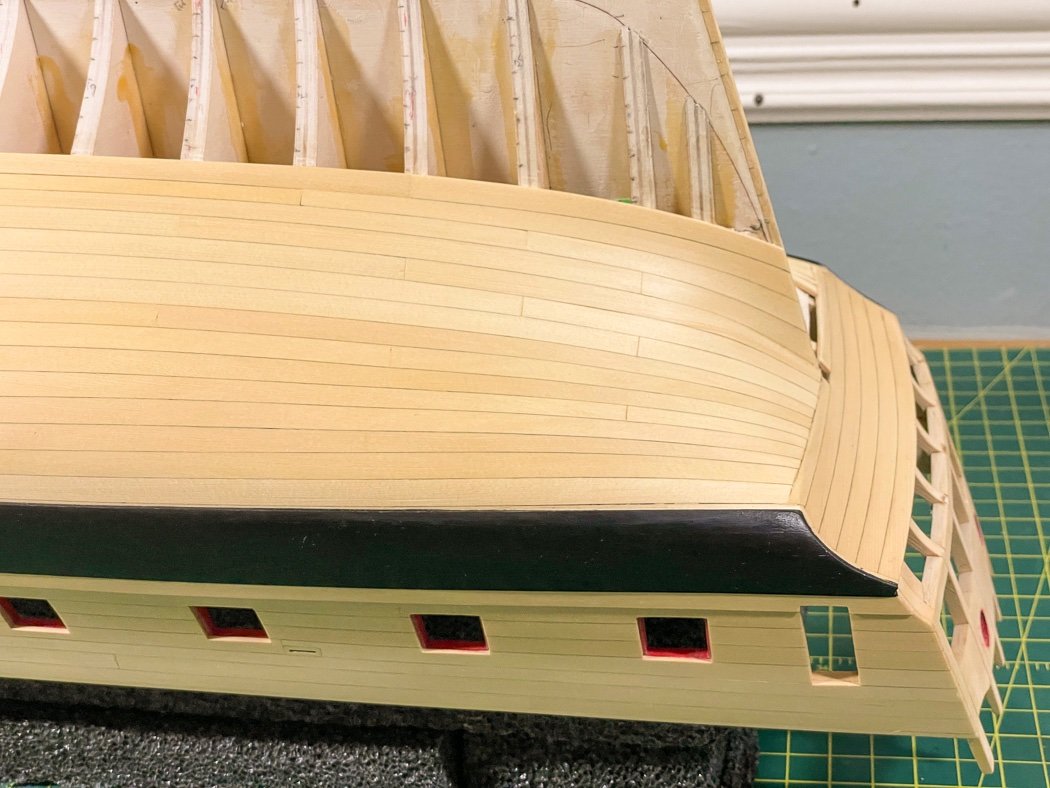
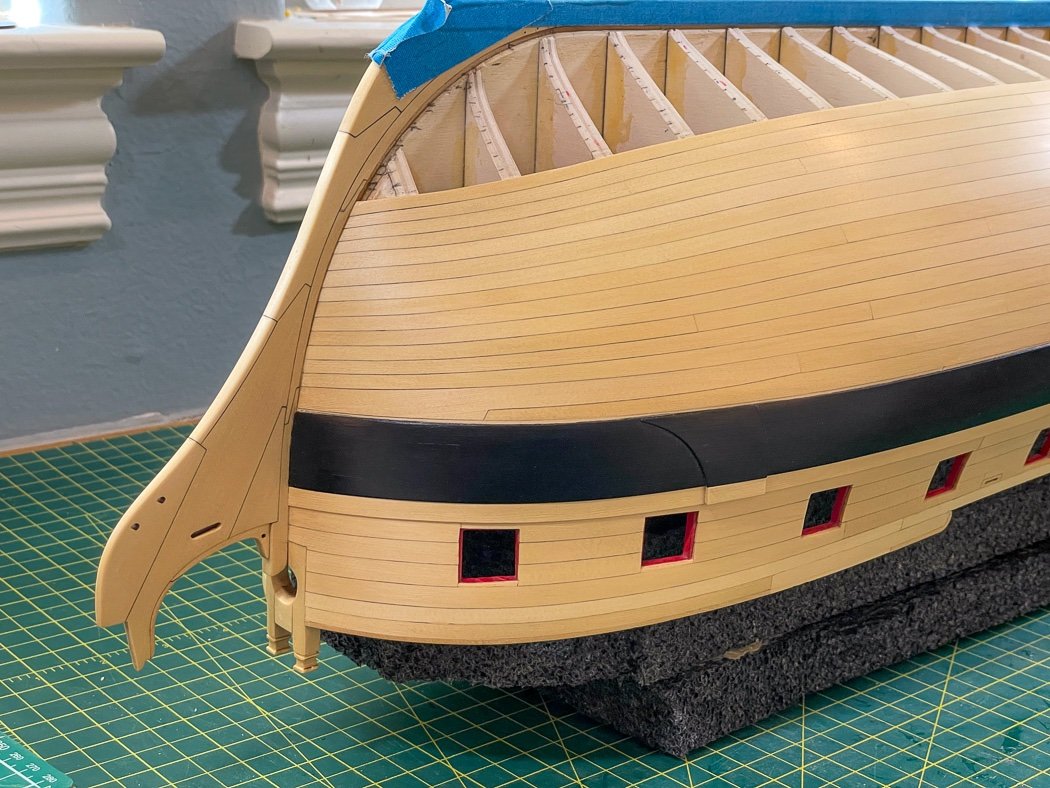
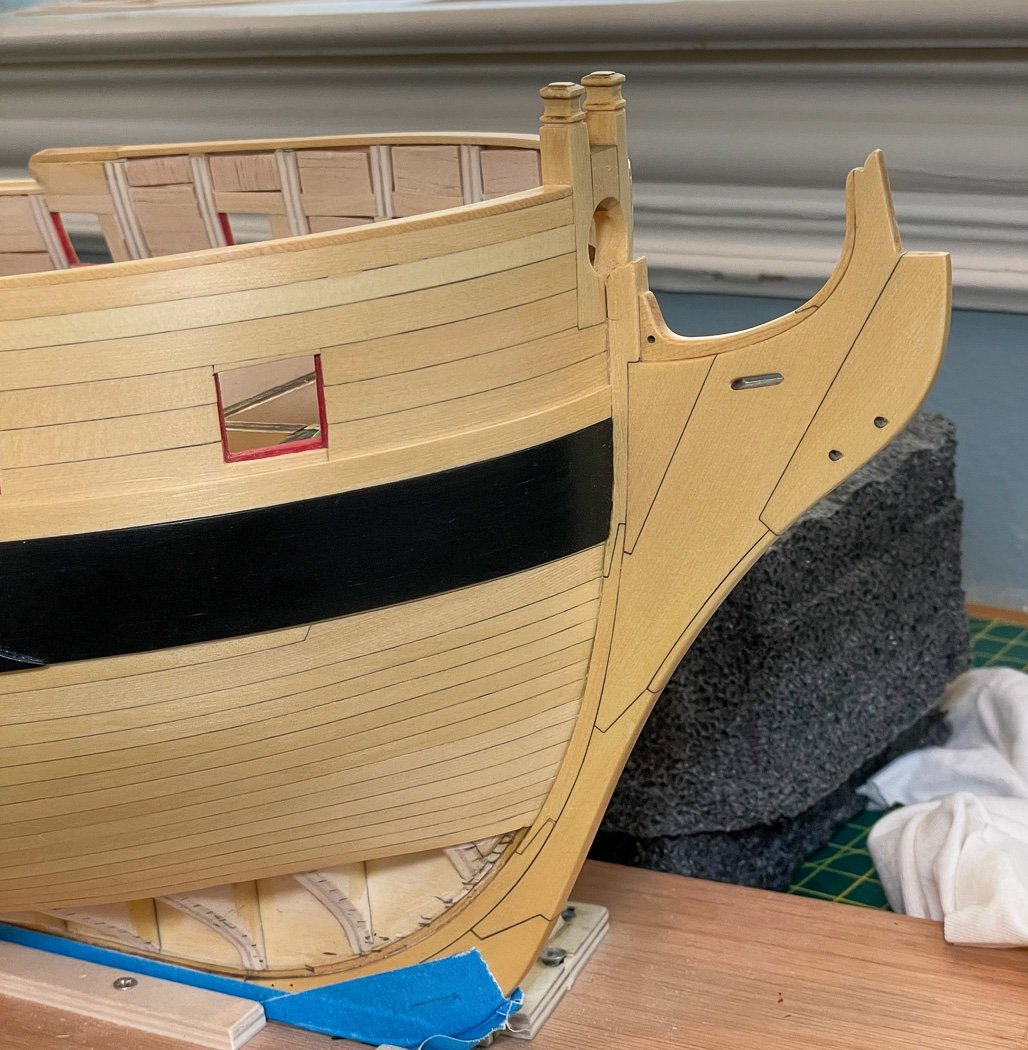
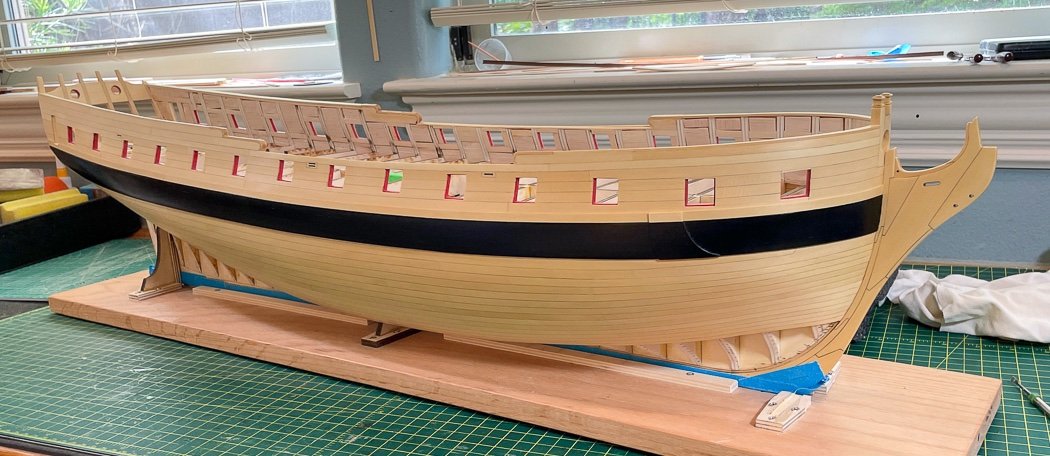
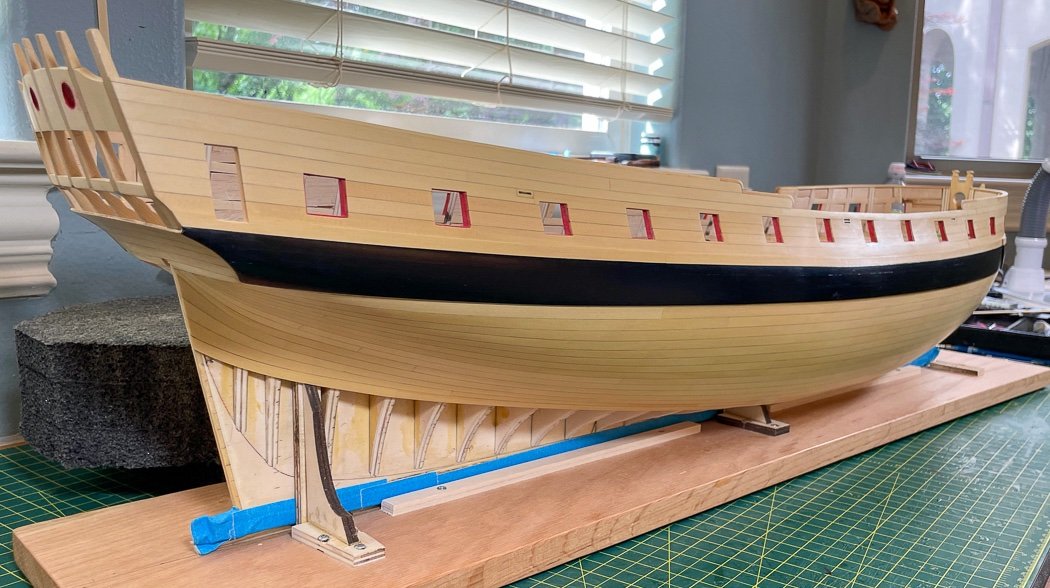
With the exasperation of my previous post behind me... Planking Continues It’s been a while since my last post, but it’s not been due to a lack of effort. I have struggled a bit with the transition from the counter to the stern post on the starboard side as you’ll see below - and I get to do it again on the port side, anyway… I elected to continue starboard with the 2nd belt. There was a slight bend I wanted to correct, plus the counter to stern post was on my mind and I wanted to get past it. There is a lot of remakes and broken wood involved (by me when It doesn’t fit properly, stupid wood). Things started well enough as I climbed up towards the keel (working upside down). The bend to the transom was challenging but manageable. As always I used my travel iron and dry heat to achieve the necessary bend and as I moved to the stern post also a twist. The craft hot air tool I mentioned in an earlier post is helpful in achieving the twist although if I’m not careful I can scorch the wood, something I have never done with the iron. After I’d finished the second belt I decided I didn’t like the look and so I ripped it off…it would be three more attempts before I got past this point. I still don’t know if I’m happy with it, I’ll wait until I get the the port side transition. The objective obviously is to have them match up, though practically once the ship is upright it and the fact generally we see our models from one side, and not zoomed to macro scale it becomes one of those obsessions I could do away with (he said knowing he wouldn’t). The bow is looking ok. Lessons learned (or re-learned) for the port side on how to avoid getting off track. While I single planked Cheerful there is just so much more to Winnie as all of it’s builders know. The top belt has two coats of WOP the bottom only one, it will even out when I do the final sanding and apply additional coats. Right now it’s more protective than finishing. That white plank at the top and the top of the port will be covered by the frieze later. The quarter shots continue to show the long graceful lines of this wonderfully designed model. With the first two belts on the starboard side complete I now turn my attention to the many planks it requires to get to this same point on the port side. Maybe by the end of May I’ll get there. Once again I say how much I like the golden glow of the Alaskan Yellow Cedar. Thank you all for your likes and especially the comments, they are inspiration and motivation.

- 840 replies
-
- 26
-

-
-
- winchelsea
- Syren Ship Model Company
- (and 1 more)
-
You have a nice touch with the paint mixes. It’s all really coming together, we’ll done.
- 857 replies
-
- 4
-
-
-
- Sphinx
- Vanguard Models
- (and 1 more)
-
Nice work on the boat, these little things frustrate me far more than any ship model ever has.
-
Having built Cheerful and now working on Winnie, a couple of observations: First, there is no way it can be double planked, it would throw off everything, like the square tuck. Cutting down the bulkheads would just make it worse. Second, while it’s true it’s a lot smaller than Winnie, it is not easier and some cases it’s harder with things like the square tuck, boom crutches, etc. With Winnie we are fortunate to have a lot of mini-kits and lasered parts, more of Cheerful is scratch. Don’t get me wrong, it’s a really great model just no more a first kit than Winnie. My suggestion is to look at Vanguard Models (he’s in the UK but shipping to the US isn’t bad). for a true kit kit, and double planked, like Flirt or Sphinx to gain experience then come back to Cheerful and Winnie. Btw, the Byrnes line up of tools is second to none. Best of luck whatever direction you take.
-
See post #626 in my Cheerful log, substitute the block for the thimble. Personally I’d never use wire for any rigging.
- 362 replies
-
- 4
-
-
- Amati
- Lady Nelson
- (and 2 more)
-
Very well done Paul! Congratulations on completing this great model, I know it was much more challenging than it might seem having built my own. Excellent photography as well. I recommend you use those to set up a gallery here on the forum. Beautifully done!
- 112 replies
-
- 1
-
-
- Cheerful
- Syren Ship Model Company
- (and 1 more)
-
Rat lines 😊 Hopefully the lines aren’t fixed yet so you can loose them in order to get inside for the boom and gaff as well as those missing cleats. Remember I mentioned bottom up, middle out. Bees wax can help with furry lines. Interesting comment about MS rope, I haven’t seen ROS’s product but there is no comparison to what Chuck provides, it’s worth its cost. You’re doing fine for a first model, hang in there. It will all pay off on your next one.
- 362 replies
-
- 2
-
-
-
- Amati
- Lady Nelson
- (and 2 more)
-
At this point I’ve planked at least two Cheerful’s yet only about a third done with Winnie. Planks and planks and … planks. At some point I should clean up my ship room.
- 840 replies
-
- 14
-
-
- winchelsea
- Syren Ship Model Company
- (and 1 more)
-
Are you following the rigging plan for blocks and rope sizes or a different one?
- 542 replies
-
- 1
-
-
- Sphinx
- Vanguard Models
- (and 3 more)
-
Good explanation Chuck, thanks. I don’t buy from any company over charging for shipping, $16.95 is clearly a rip off. There is a small hobby store in Florida that has a minimum $15.95 shipping, I can get the same item from another small company in California for $5.95, it pays to shop around. I have found in many cases, though probably not for proprietary mini-nails, I can find the same or similar product on Amazon. Aside from the bulk power of Amazon, companies offering “free shipping” have it built into the price, nothing is ever free. The best I can do is buy multiple items from companies charging a reasonable shipping fee to get the most from my shipping dollar.
-
After setting the mast usually the shrouds first, then the bowsprit, then standing (black), finally running (tan). Work bottom up and middle out following the rigging plan for rope and block sizes and where things run. Other than the shrouds don’t permanently fix lines until you have them all run then go back and adjust as needed. Lines should be taunt not tight. The LN model has very simple rigging, I used Peterson’s Rigging Period Fore and Aft Craft book and even my similar Cheerful’s plans to add more to mine. Many of the frequently cited references don’t apply to cutters, this particular book does. It has lots of nice easy to follow diagrams. Just be logical about what you can get to now and or won’t be able to fit fingers or tools later. There’s no magic, just a line at a time. Of course the many LN build logs are there as ready reference.
- 362 replies
-
- 5
-
-
-
- Amati
- Lady Nelson
- (and 2 more)
-
Actually you should mount it before starting rigging. Those out of scale fat belaying pins will make it harder to rig. Check out Crafty Sailor for a much better option.
- 362 replies
-
- 3
-
-
- Amati
- Lady Nelson
- (and 2 more)
-
Is there a place or more definition of how to print, and match the pattern, (not to mention gluing wrinkle free) of the frieze on tissue paper? I don’t get how to run that through my printer. Will the properly sized boxwood strip for the ladders be supplied in the parts package? And maybe a nice photo of your scrapper pattern? I figured I should ask my questions now even though I’m still planking the hull. By the time I get to this point most of you will be on Chuck’s next project.
-
Because we’re building a model and the aesthetics of a rigged gun look nice. Plus rigging guns is something we all need to endure to improve our perseverance and tenacity. That said, and having rigged the guns on all of my previous models and my tenacity fully tested I won’t be using a single strand of rope on my Winchelsea. I figure a model with 32 guns is a good time to go ‘contemporary.’
-
That’s a really nice job of rigging so many guns, well done! The natural cherry is a nice touch.
-
Nice! Since we're sharing - here's one from the Quiver Forest in Namibia - MSW downgrades image quality - this photo is much sharper than what's shown as I'm sure your's are. No more off topic I promise...maybe...

- 345 replies
-
- 8
-
-
-
- Duchess Of Kingston
- Vanguard Models
- (and 1 more)
-
Having cut the moulding on Cheerful for steps I’d just as soon not to do it again if it’s an option. Since no one is climbing them I’d rather go for aesthetics. Also can’t imagine a neat way to have the frieze applied to a step other than I guess a little hand painting.
- 1,784 replies
-
- 2
-
-
- winchelsea
- Syren Ship Model Company
- (and 1 more)
-
Your build is looking great! I might suggest you consider a matte or even satin finish, the high gloss of the liquid wax might be a bit much on a model as large as Winchelsea. Just a thought.