


glbarlow
-
Posts
4,126 -
Joined
-
Last visited
Content Type
Profiles
Forums
Gallery
Events
Everything posted by glbarlow
-

Gun Port Yellow?
glbarlow replied to Dave_E's topic in Painting, finishing and weathering products and techniques
Can you add in your signature line links to your completed models, I’m sure many of us would like to see them. -
Gun Port Yellow?
glbarlow replied to Dave_E's topic in Painting, finishing and weathering products and techniques
I am a fan of Admiralty paints. The yellow and red ochre along with Dull and Ironworks Black look great in combination on my Vanguard and Pickle. The Ironworks Black actually looks great on wood, it covers the boom and yards on my Cheerful and Pegasus as it will on Flirt when I go back to its rigging. I like not only the color but how easily it goes on and covers. -
The guns look great, what’s your process for removing char from the trucks?
-
That all looks great, the pear/cherry really stands out.
- 642 replies
-
- 2
-

-
- winchelsea
- Syren Ship Model Company
- (and 1 more)
-
Your clever solutions never cease to amaze. I’m pretty sure if I try the lathe axel rounding method I’d end up with a bunch of axelless cannon.
- 345 replies
-
- 2
-
-

-
- Duchess Of Kingston
- Vanguard Models
- (and 1 more)
-
Don’t plank all of one side first, danger of keel twist as VTH says, may not happen but why risk it. Alternate by belt.
-
Thank you. Yes the Byrnes sander is proving far more helpful than I would have guessed, another great Byrnes tool. Or at least more of my usual work😂Thanks Rusty. Thank you.
- 840 replies
-
- 1
-
-
- winchelsea
- Syren Ship Model Company
- (and 1 more)
-
I agree, that a gel stain, or just sealer on bare wood. I’m not a fan of gold paint on models, it looks a bit much and unrealistic to me. Without all the analysis, for me it’s just a matter of personal taste. No gilding for me. I like how these posts can go so far afield from the original question.
-
That's a good looking planking job, well done. The flow of the wales and counter also looks nice. I believe Chris will send extra planking if you come up short, I recall I didn't have much to spare either.
- 102 replies
-
- 3
-
-
-
- Flirt
- Vanguard Models
- (and 1 more)
-
I’m glad you’re back at it, hopefully enjoying the process. Even if you go admiralty style with it I’d encourage you to include the deadeyes and guns as your eyes permit. The ship will look much more complete that way.
- 505 replies
-
- 8
-
-
- vanguard models
- Sphinx
- (and 1 more)
-
The holly deck looks great, I’ve used it on some past models. If I can find a source I may use it on my Winnie. Nice work
-
I know what you mean, I’d never see a lot of stuff if I hadn’t taken a photo.
-
Nice work and nice photos, I like the angles.
-
Thank you, I’m working from the slower is better mantra, or else I’m just slow. Thank you, I appreciate your saying so. Thank you, I appreciate that. There is lots of great planking work,especially among the Winchelsea builders. With only single layer careful is key. Thank you. I enjoy watching yours and the other Winchelsea builders as well. Such a formidable challenge and a great model design
- 840 replies
-
- 7
-
-
-
- winchelsea
- Syren Ship Model Company
- (and 1 more)
-
Thank you Bob, all done with CA btw. It works great as long as I’m careful.
- 840 replies
-
- 4
-
-
- winchelsea
- Syren Ship Model Company
- (and 1 more)
-
Thank you for the comment. All the planking is milled from sheets of Alaskan Yellow Cedar, which has a fair amount of color variation, sometimes on the same plank. I know from my Cheerful WOP evens out the color as does time still leaving enough variation to keep it interesting. It’s a great wood for ship building. The top 2-3 rows and the bottom 5 will be covered later in the build.
- 840 replies
-
- 4
-
-
- winchelsea
- Syren Ship Model Company
- (and 1 more)
-
I solve that problem by not including tree nails 🙂
-
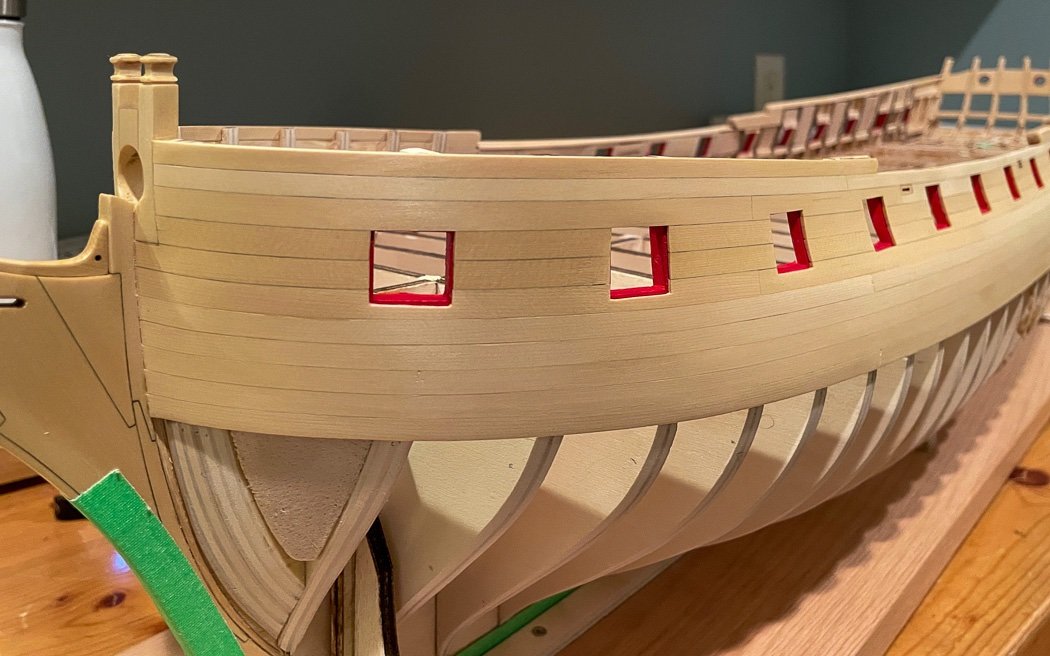
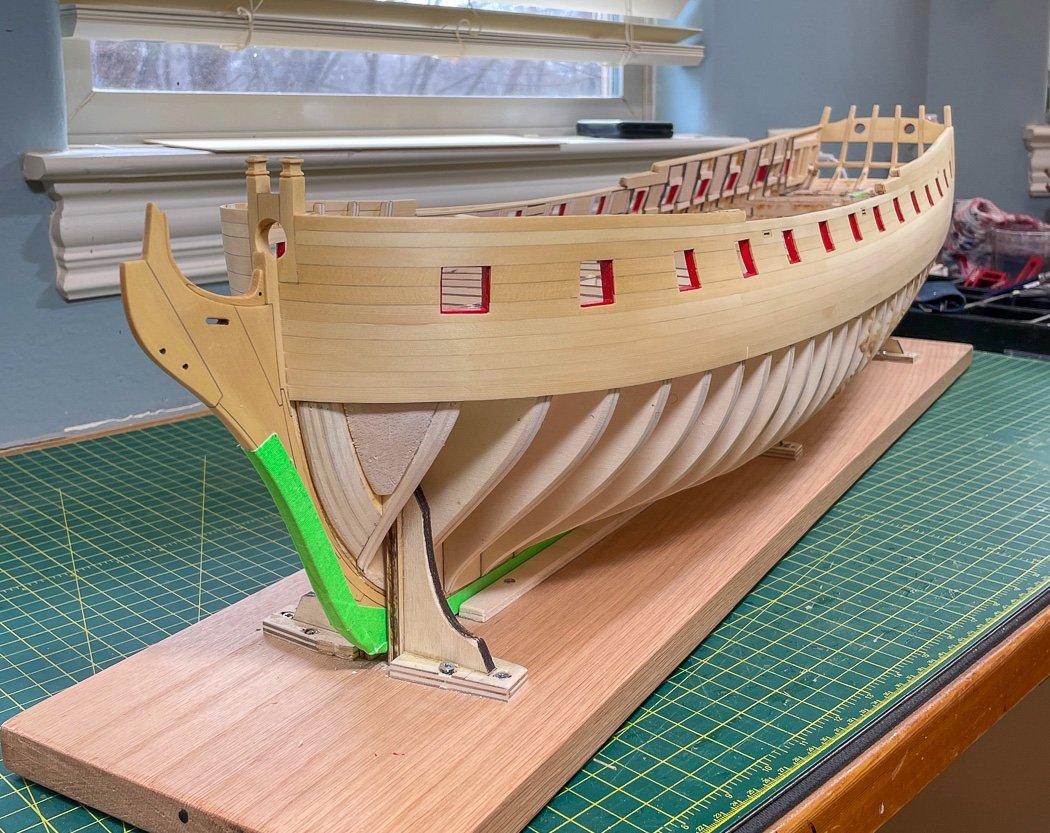
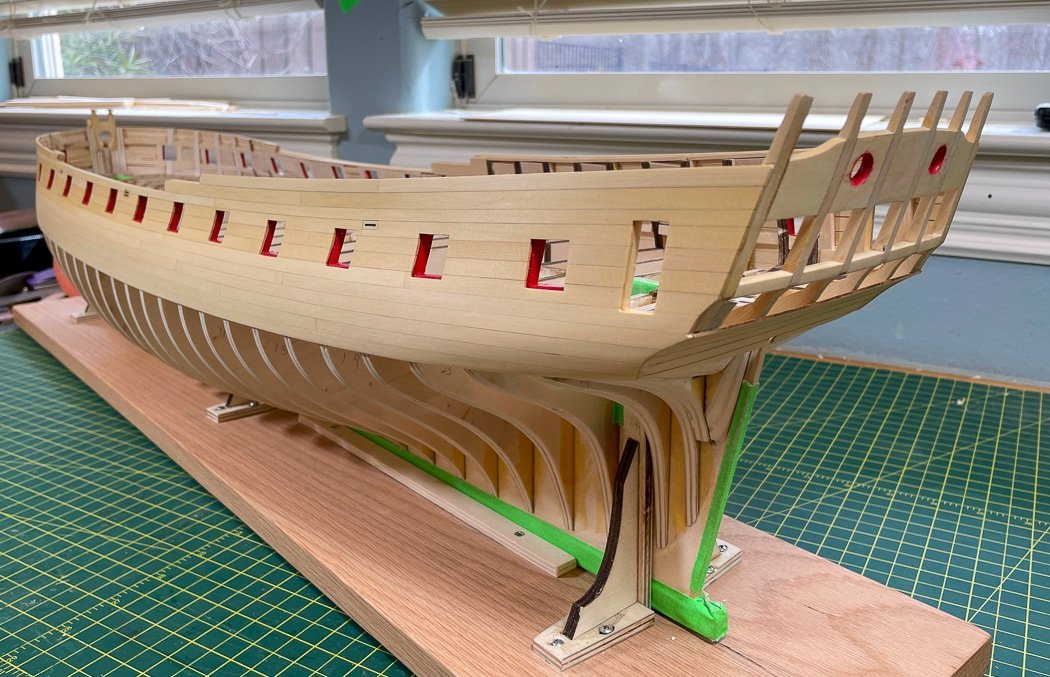
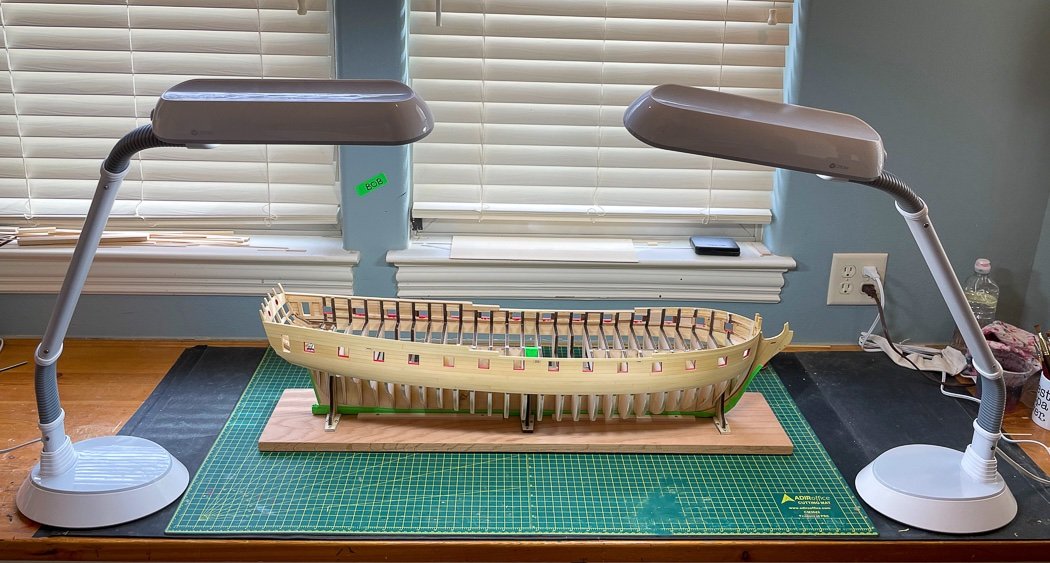
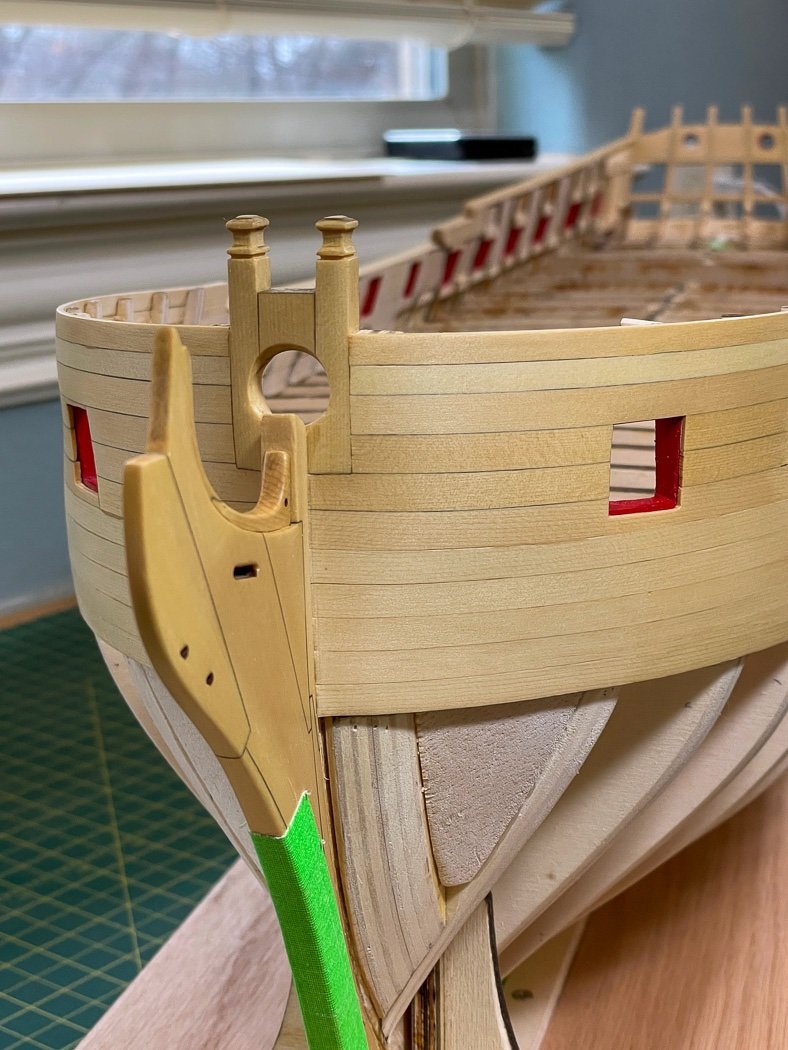
Above the Wales Complete After another two weeks work I’ve completed the port side above the wales, so yay. The good news is it looks a whole lot like the starboard side so that’s good. The bollard timbers turned out fine, folding into the curve of the bow nicely I think. They'll look good I think when I later paint them black. As an aside I’ve upgraded my most important tool, my light source. I’ve had the same Ott lights for ten years or more, they were kinda broken and hard to adjust, and were often in my hair as I bent forward. I got a newer version of Ott light, amazing for their daylight brilliance using only 18w bulbs, that are both higher and much more adjustable. They make seeing things so much easier. I got them from Amazon and highly recommend them as my workshop primary light (in addition to the room’s under cabinet and overhead lights). I mentioned in an earlier post that my 7/32 wale planks turned out to be 15/64 increasing my plank height almost 1/16 above the tops of the bulkheads, I also lost some of the S-curve as I planked higher which I didn’t notice until after a consult with Chuck. So I ripped off the 7/32 top plank called for by the plans and replaced it with a 3/16, it is now near even with the bulkhead tops. Later additions to the forecastle should go much better, or at least problems won’t be due to plank height anyway. It wasn’t an easy surgery, there are a few flaws along the new seam between planks, but it will all be covered by the friezes and moulding. Sometimes you just have to suck it up and rip it off to get it right, or at least get it better. Here’s quarter shot photos of the port side. I’m going to do the internal fairing before adding the wales and the first two plank rows below. I just want to be past that step. So I’ll add the fairing caps next and ever so lightly, I hope, reduce the bulwarks to 3/16 and, I hope, without splitting the ship in half. So if you never see another post you'll know it didn't go well. Thanks for stopping by with your likes and comments. You have many choices in Winchelsea logs, I appreciate your taking a look at mine.

- 840 replies
-
- 19
-
-

-
- winchelsea
- Syren Ship Model Company
- (and 1 more)
-
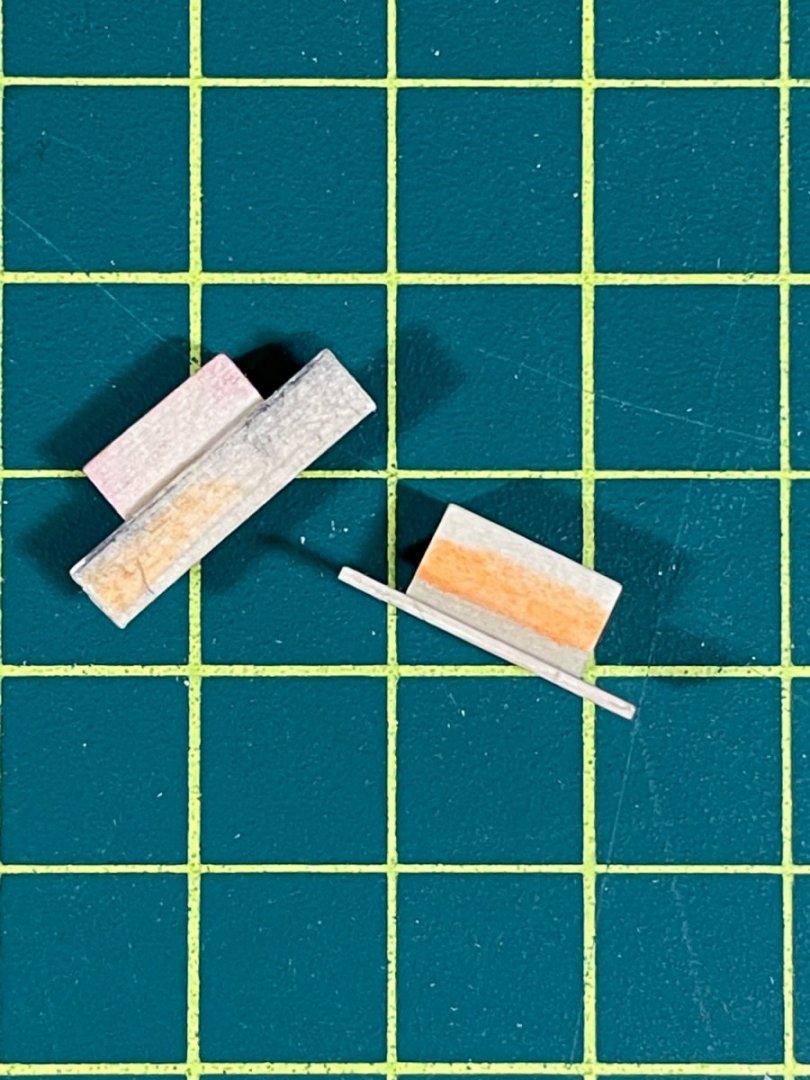
I’m sure there are better ways. They are just a short strip of 1/32 half of it glued to a scrap of wood I used for the ports. (I colored them with a highlighter only so I could find them in the mess, I have two to improve my odds of finding one😂.) The larger piece placed up against the inside of the port with the 1/32 strip defining the rabbet which I marked with pencil then aligned planks to, then used to confirm I had the right width rabbet. Like I said, I’m sure there are better ways. It isn’t perfect but it definitely helped me, especially with all the angles involved. For those the Byrnes sander and mitre gauge were indispensable.
- 840 replies
-
- 8
-
-
- winchelsea
- Syren Ship Model Company
- (and 1 more)
-
Nice looking cannon. I’m sure you plan to fully rig each one right😂😁
-
Excellent work in the cabins. It’s all looking quite sharp and we’ll fit.
- 857 replies
-
- 3
-
-
-
- Sphinx
- Vanguard Models
- (and 1 more)
-
Thank you for your comments. The red pencil marks the shift pattern butt joints for the second row of wales per the plan. I’ll carry those down the hull once I get that far.
- 840 replies
-
- 3
-
-
- winchelsea
- Syren Ship Model Company
- (and 1 more)
-
There is no need for a drop plank. Determining the flow is, as Chuck points out, more art than measurement. I think you’re making that harder by trying it with three belts on this small hull, two is enough. You just look for a smooth flow and sweep of the lines consistent with the sheer. The top line doesn’t have enough sweep at midships and runs too far up the bow to maintain a consistent width of planks top to bottom. I struggled with this too, you must become one with the ship.
-
The jig for cutting the ladder angle is a great idea, wish I’d thought of that. Very nice work.

