glbarlow
-
Posts
4,015 -
Joined
-
Last visited
Content Type
Profiles
Forums
Gallery
Events
Everything posted by glbarlow
-
The Nelson and Alert are essentially the same ship, a cutter ( though not near the same quality kit). Might want to consider that in your choices.
-
I build my first model, the AVS using the practicum by Bob Hunt of Lauck Street, I highly recommend his practicums. He’s a cantankerous old dude but I learned a great deal from his guided instructions, much of which I still use today. It is a great way to learn by the numbers. I’d definitely go that route as a first timer. Seems some have an issue with some of his business practices, I wouldn’t let that influence you, the practicums are great. Just don’t buy the one he did for a Chinese kit. The Alert is a much better kit than Lady Nelson, but LN is a good starter model. Cutters are cool ships, mast and rigging but in a much simpler form that a brig or frigate. You’d be crazy to start off with Victory or Vanguard, way too much the first, or third, time out. I thought Chris had stopped producing Alert, if that’s the case consider Flirt, more complicated but any Vanguard model is better than most others
-

Photographing your models
glbarlow replied to Patrick Matthews's topic in Photographing your work. How to do this.
There’s a whole long post on this topic, you should add this to the other methods listed there. -
I have HMS Speedy from Vanguard Models for sale. The kit is intact and in like new condition, barely touched and includes pear wood planking and fittings, copper plating, and resin cannons among many other nice features. It also includes upgraded Pear Block set and an upgraded Maple laser engraved deck, both purchased separately when I bought the model. The ship's boat is not included (I built it one day with my grandson), but a replacement is available on the Vanguard website. I'm asking $250 plus shipping, 40% off list price. This is a new design by Chris Watton. My reason for selling it is I later purchased and am now building HMS Flirt, a near identical kit and have HMS Sphinx waiting in the wings. I just won't get back to building this great kit. I have Chris' permission to sell my HMS Speedy. Please PM me with any questions.
-
The Modeler's Sawmill at http://www.modelerssawmill.com/ will have what you need and is a great resource for modelers.
-
Yellow cedara and pear are great woods for overall modeling, however boxwood, more expensive, is better for smaller details like deck furniture.
-
I was a little concerned with the first photo🤣 Glad you’re back at it.
- 642 replies
-
- 1
-

-
- winchelsea
- Syren Ship Model Company
- (and 1 more)
-
Nice to see you’re on this journey, one I’ll start soon myself.
-
The square tuck is an adventure to make but a signature of this build. I certainly cut more than a few pieces for it. Nicely done using tape to measure the pieces, it looks great. Are you bringing the top of it flush to the bottom of the counter?
-
A thin line applicator like I’ve shown in my log helps manage the flow and amount of CA used and keeps it off your fingers. Plus it takes very little CA to hold the plank. I run the applicator behind the plank as I press down and wind up with very little on my fingers or on on the plank. I’d be careful with acetone on the wood, you might first try gentle scraping first (one of the many uses for my dental scrapers). The Chuck method of edge bending is a big help since the plank is already formed to fit. As you said though, ultimately it comes with practice. Congratulations on finishing the planking, I hope you don’t mind a little more input but I suspect you’ll have paint runs with your taping as it is. Tamiya tape will stretch and conform to curves. I use a 6mm size to run as a single strip as much as I can, overlaying only where there is a straight line. Then a put 10mm tape above that less concerned with the line just to prevent paint going where I don’t want it, the 6mm tape curves more easily. Every overlay, especially short pieces, is an opportunity for a paint leak, paint build up, or a less than smooth line. Just a thought having recently painted Flirt’s hull.
-
Very clever idea and execution. Well done.
-
There are not likely any video instructions but there are plenty of build logs including mine to search and review. They’ll give you lots of help. Take your time and read the logs as well as keep up your own, it’s the best way to ask questions and get answers here on the forum.
- 19 replies
-
- 1
-
-
- Lady Nelson
- Amati
- (and 2 more)
-
No worries. There is more texture than shows in the photo. It’s why I use a brush for hull painting.
-
It is my hope to get it right myself some day. I agree on the painting. I had the same conclusion on Flirt. It needs the bottom and top to balance out. Besides, who doesn’t love painting waterlines. 🤣
- 345 replies
-
- 1
-
-
- Duchess Of Kingston
- Vanguard Models
- (and 1 more)
-
Clever jig. The planking looks great. Almost home on the hull.
-
Nice work on the shrouds, they can be tricky little things.
-
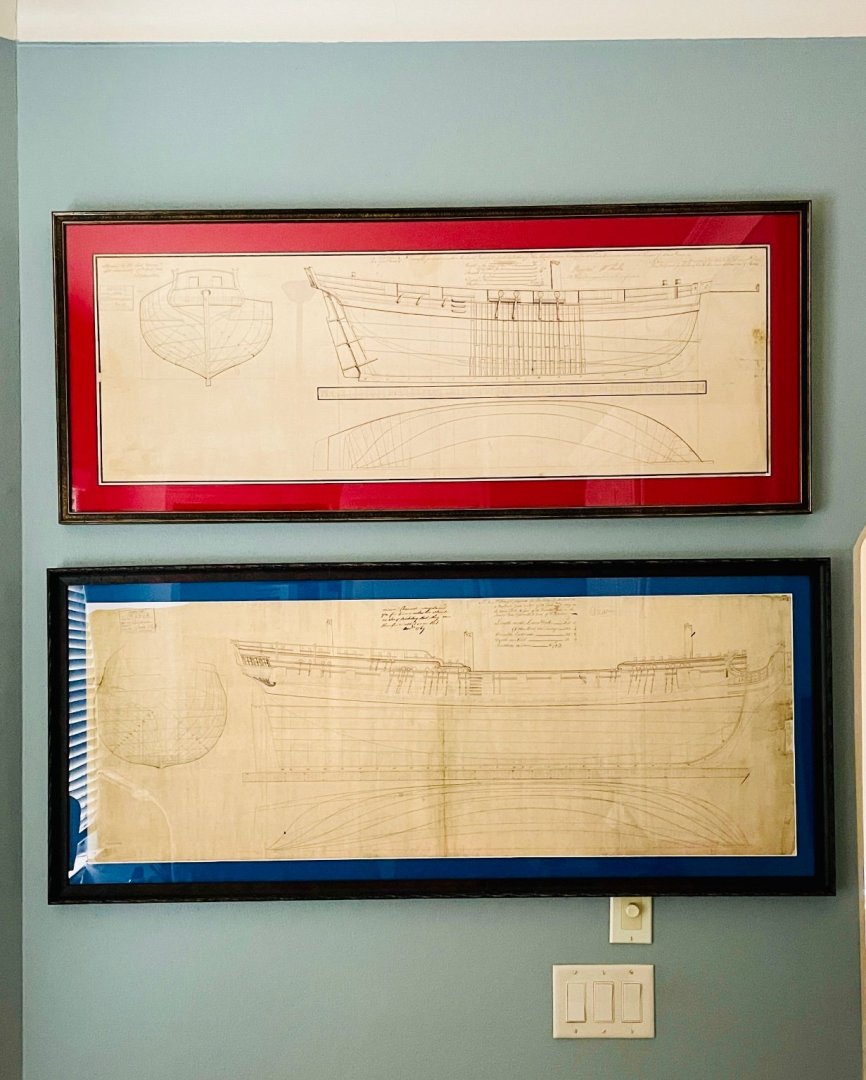
Further established my motivation (not that I need any) Now hanging in my workshop; On top is my completed Cheerful, below the draft for the Winnie class. I love the beauty of these prints.
- 840 replies
-
- 16
-
-

-
- winchelsea
- Syren Ship Model Company
- (and 1 more)
-
It’s not obvious in the photo but for the hull I like seeing the subtlety of the brush strokes.
-
Of course it’s Derek like in its amazing quality, well done as always. if I may offer a lesson I learned from Chuck: In lining your belts you went to far up the bow with the curve from midship, meaning the width of the planks at the stem should have been wider starting at the first one. That would have eliminated the drop planks. As you said it won’t matter once you paint it, it will look beautifully smooth and crisp as it already now does. Superb craftsmanship as is your hallmark.
- 345 replies
-
- 2
-
-
- Duchess Of Kingston
- Vanguard Models
- (and 1 more)
-
Thank you. The white was brush painted, not airbrushed. It takes a lot of taping, scraping, retaping, touching up, and sanding to get here. This represents about 12-14 hours just for the white and waterline.
-
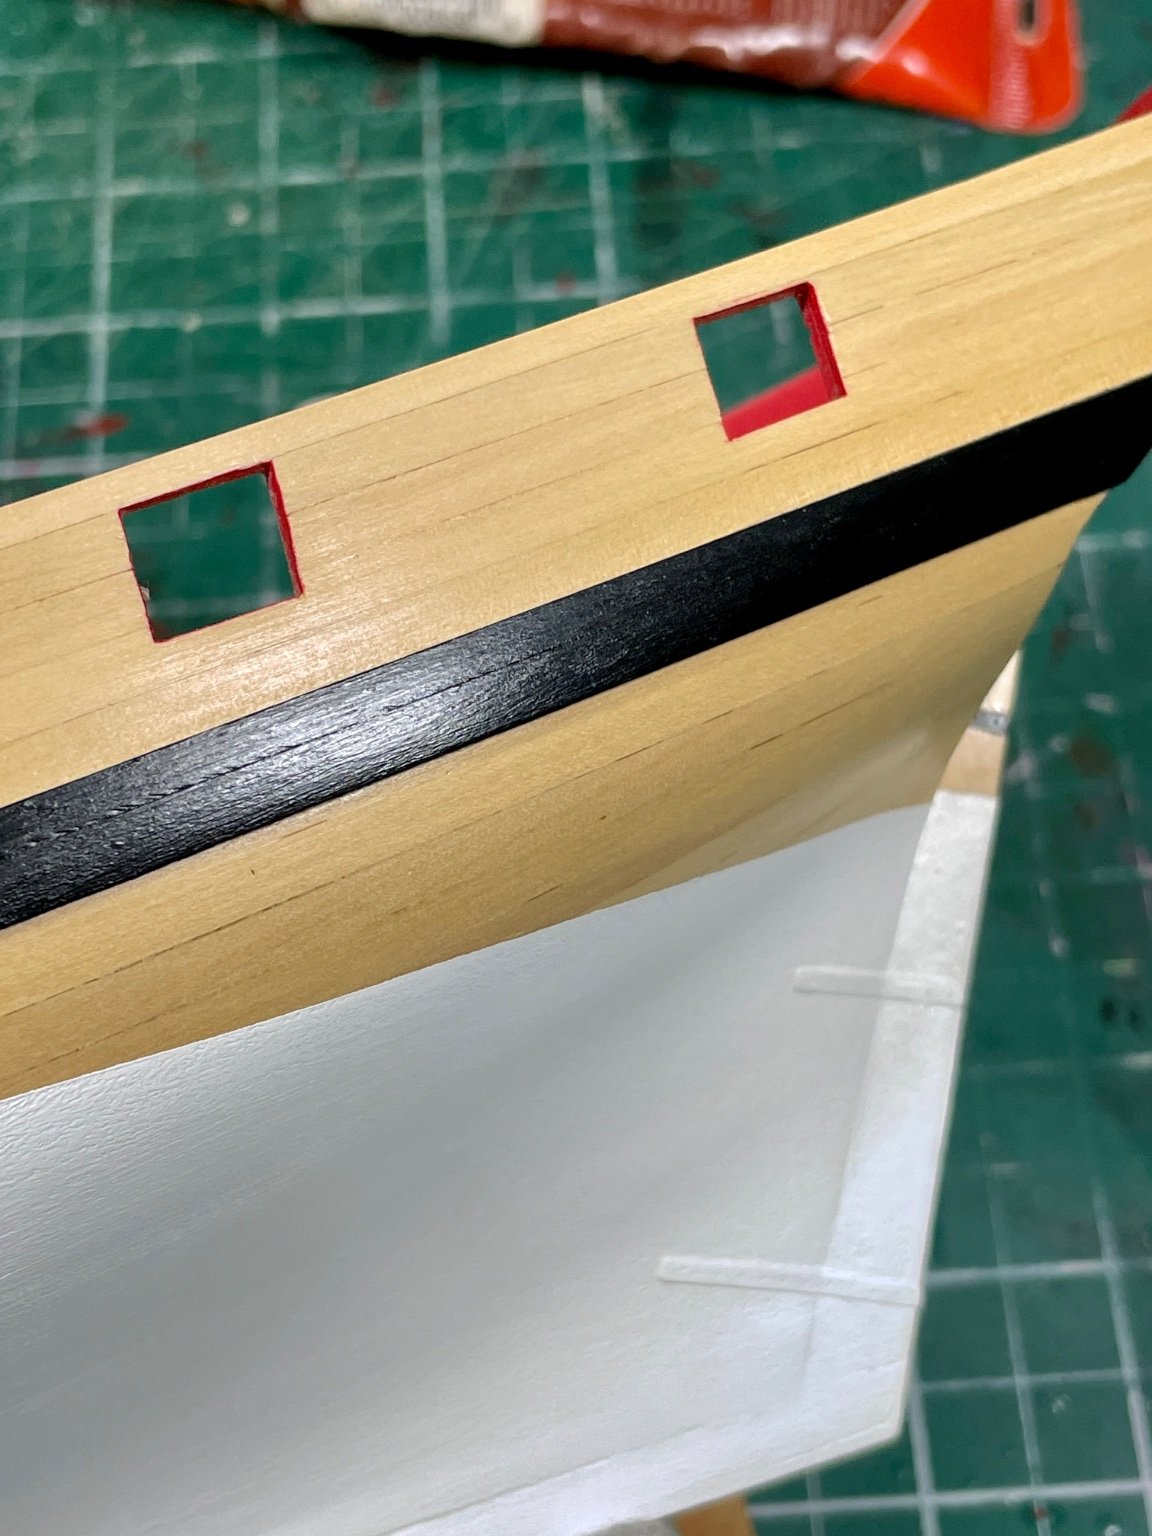
IRL the planking lines are distinct for the boxwood. As for the white I’d prefer to call it clean and clear, not sure what else i can say to your comment. Note The top half of the section above the wales has been sanded in prep for next step of hull decoration.

-
Flirt is in the mail to you for masking and rigging
-
Big steps, I’m happy you’re all in on your now full time job. We are all the better for it. I’m sure the fishing models will make nice Christmas gifts. The post may refuse to deliver much larger and heavier models 😂🤣 Will first run buyers need the revised manual or is it mostly edits?
-
Well done, such neat work.
-
Well done, another great reference log for when I start mine.