glbarlow
-
Posts
4,126 -
Joined
-
Last visited
Content Type
Profiles
Forums
Gallery
Events
Everything posted by glbarlow
-

Focus Stacking
glbarlow replied to Dennis P Finegan's topic in Photographing your work. How to do this.
Higher end Nikon cameras have feature for this I use occasionally. Set the parameters in menu, focus at the very closest point (on a tripod) click the shutter once and it will take a series of photos at incremental focus points front to back, I just wait until it’s done. Nikon calls it Focus Shift. Of course that stack of photos still has to be merged either in Photoshop or a program like Helicon Focus, which I have. While it ultimately results in an almost 3-D like photo, the down side is it takes a considerable amount of time to generate that one resulting image between taking it and processing it. -
Good use of time to map it all out in advance to ensure it works like it should. The stern is always tricky, less so when you plan it out like this. Nice.
- 857 replies
-
- 3
-

-
- Sphinx
- Vanguard Models
- (and 1 more)
-
Now having seen the guns in person I regret any role I had in persuading you to rig your Speedy. The weathering powder is a big difference maker. Model Expo has the Doc O'Brien's Weathering Powder, you need that and a dedicated weathering powder brush set. It's more than worth it, even it it takes shipping from the US.
-
That may be the best garboard plank I've seen, that's exactly how its supposed to look. Nice planking overall, well done!
- 562 replies
-
- 4
-
-

-
- vanguard models
- alert
- (and 2 more)
-
I'm anxious to get started - as soon as I get to a reasonable stopping point with Flirt - by the end of November for sure. I have the wood and chapter parts, I'm really looking forward to building this beautifully designed model. Glad to see I'll have both some starting company and some expert models already in progress to follow.
-
Much of this I learned from you by building Cheerful🙂
-
My LN and Cheerful logs will give you an idea how to go about this, both are linked below in my signature. I used the method described in the videos Gregory provided
-
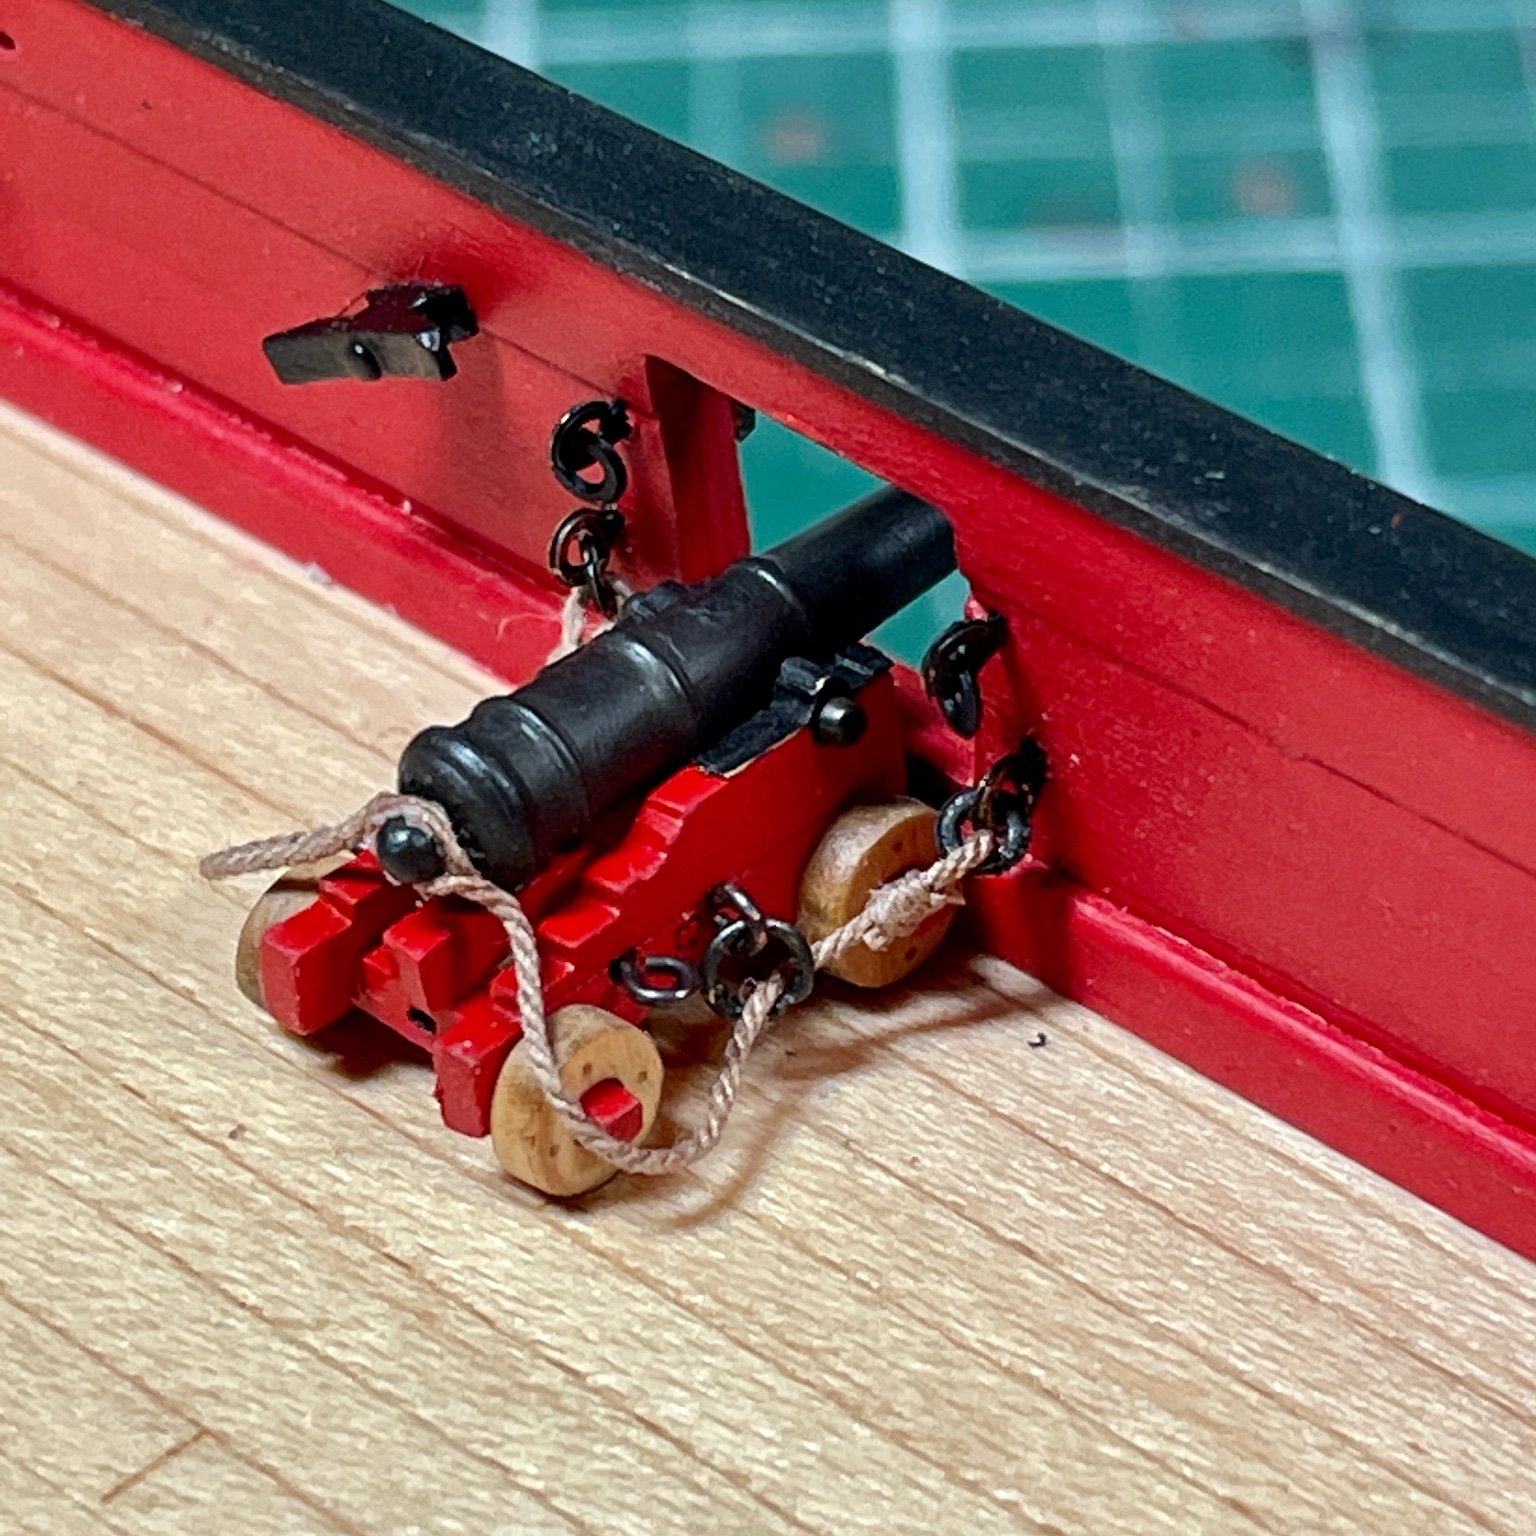
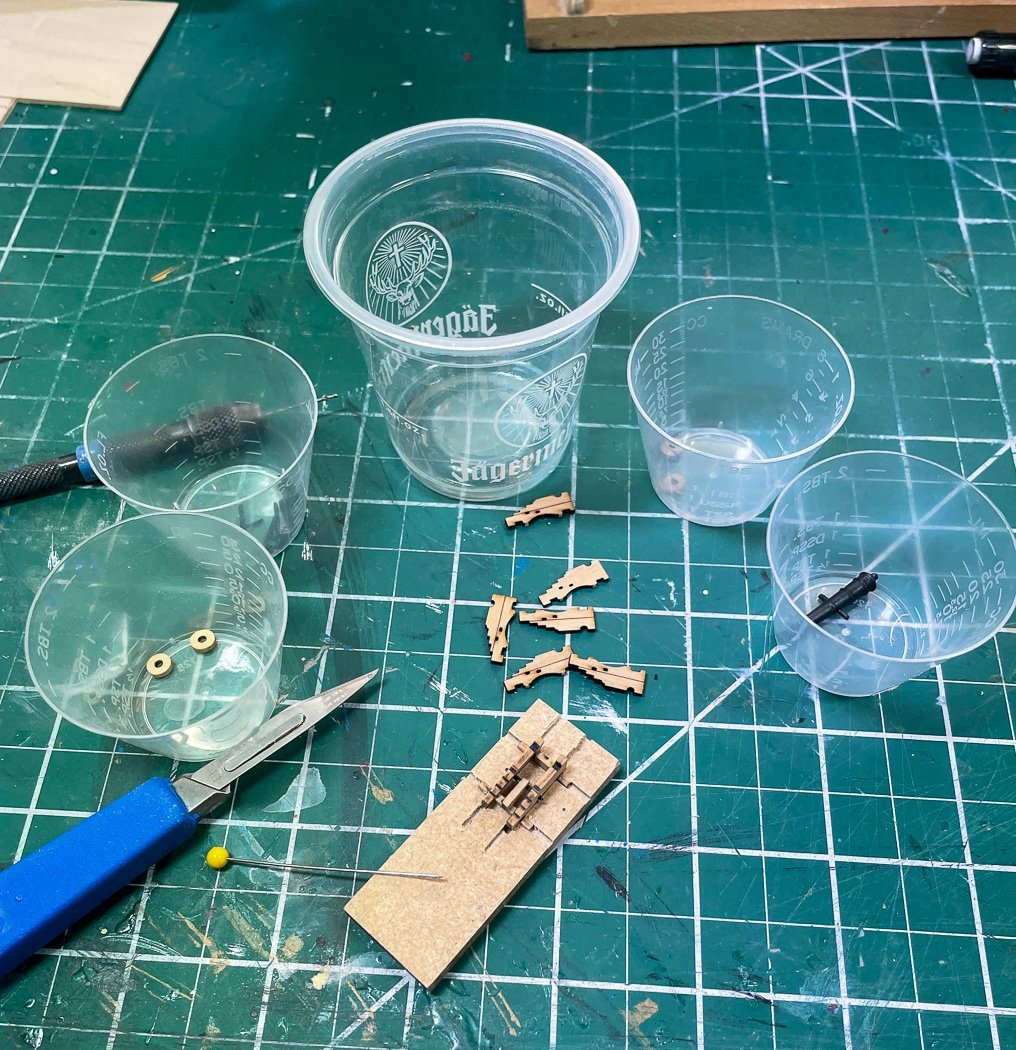
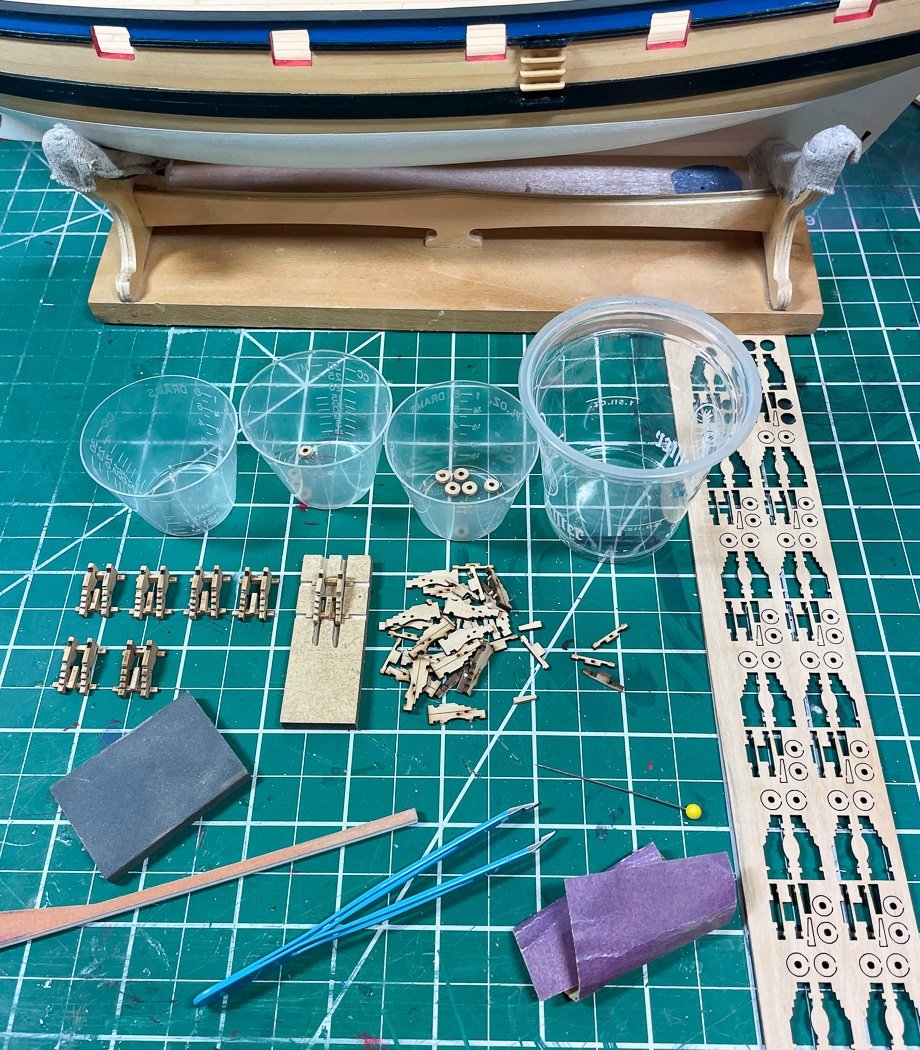
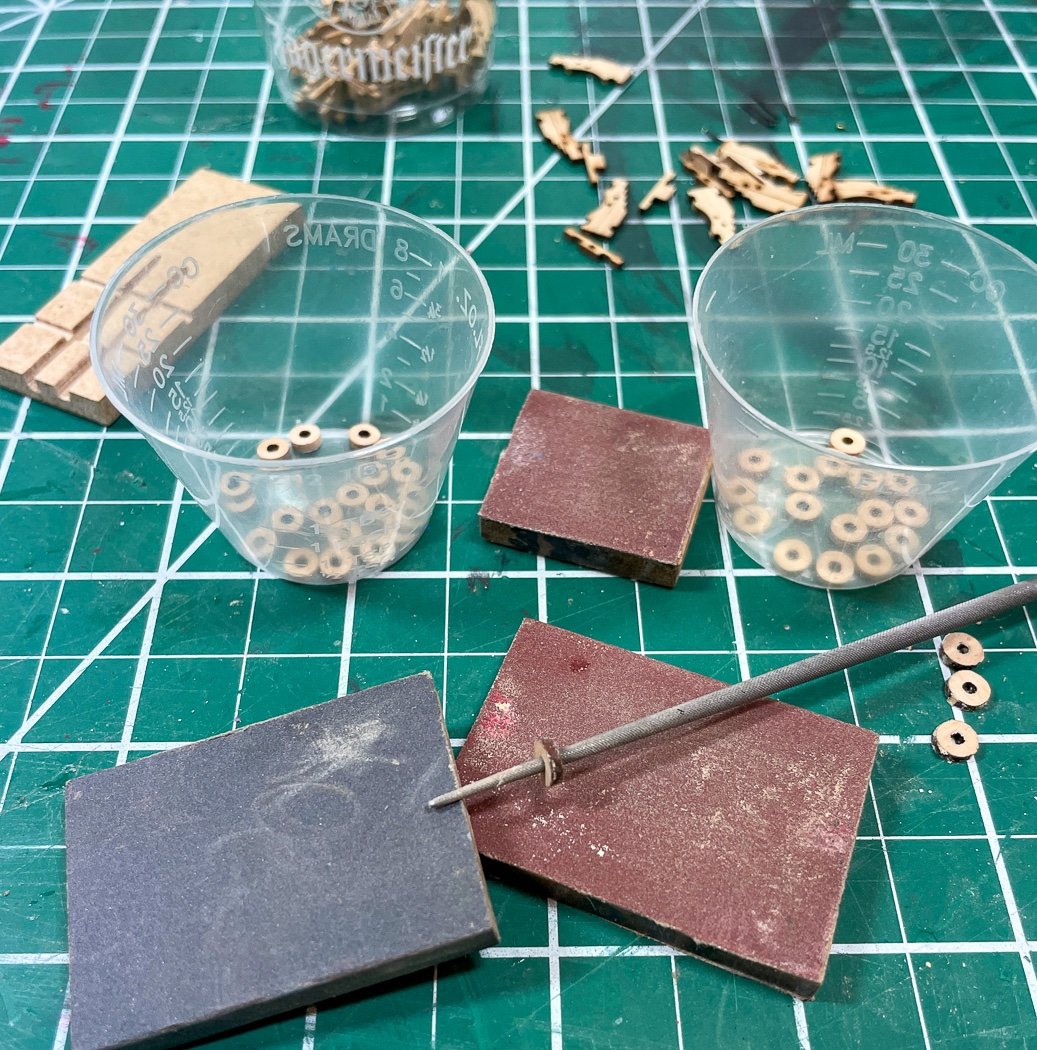
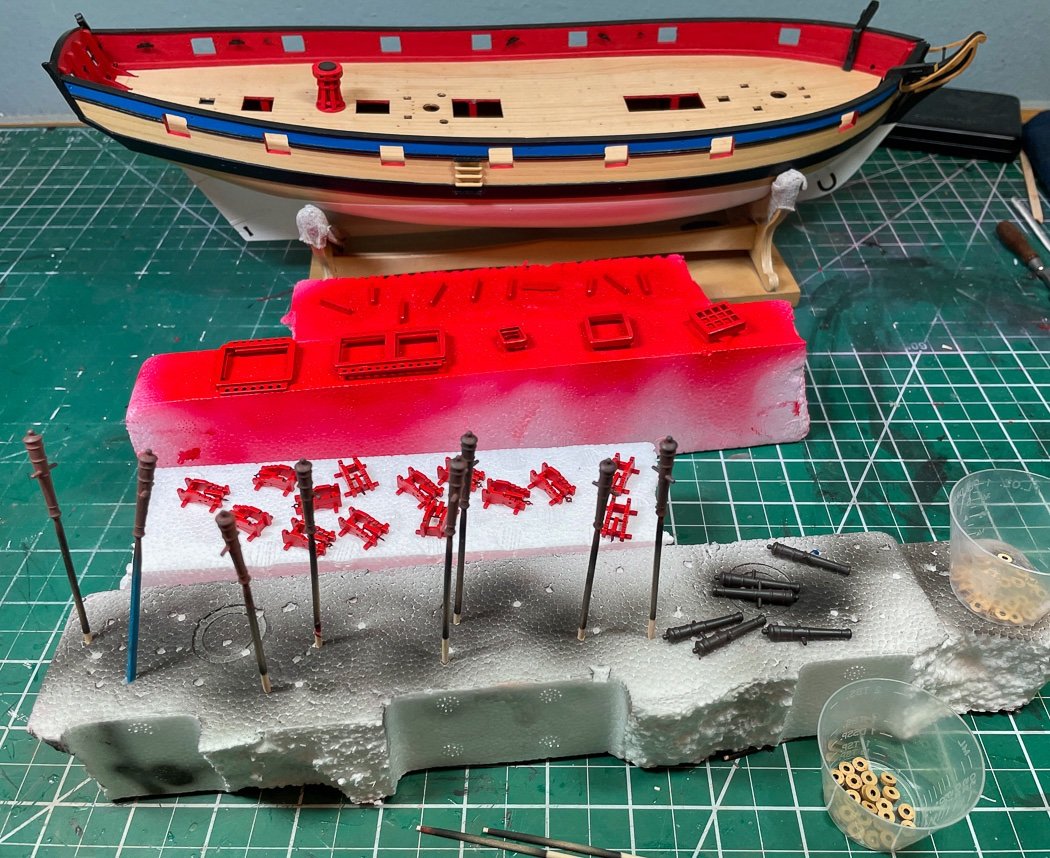
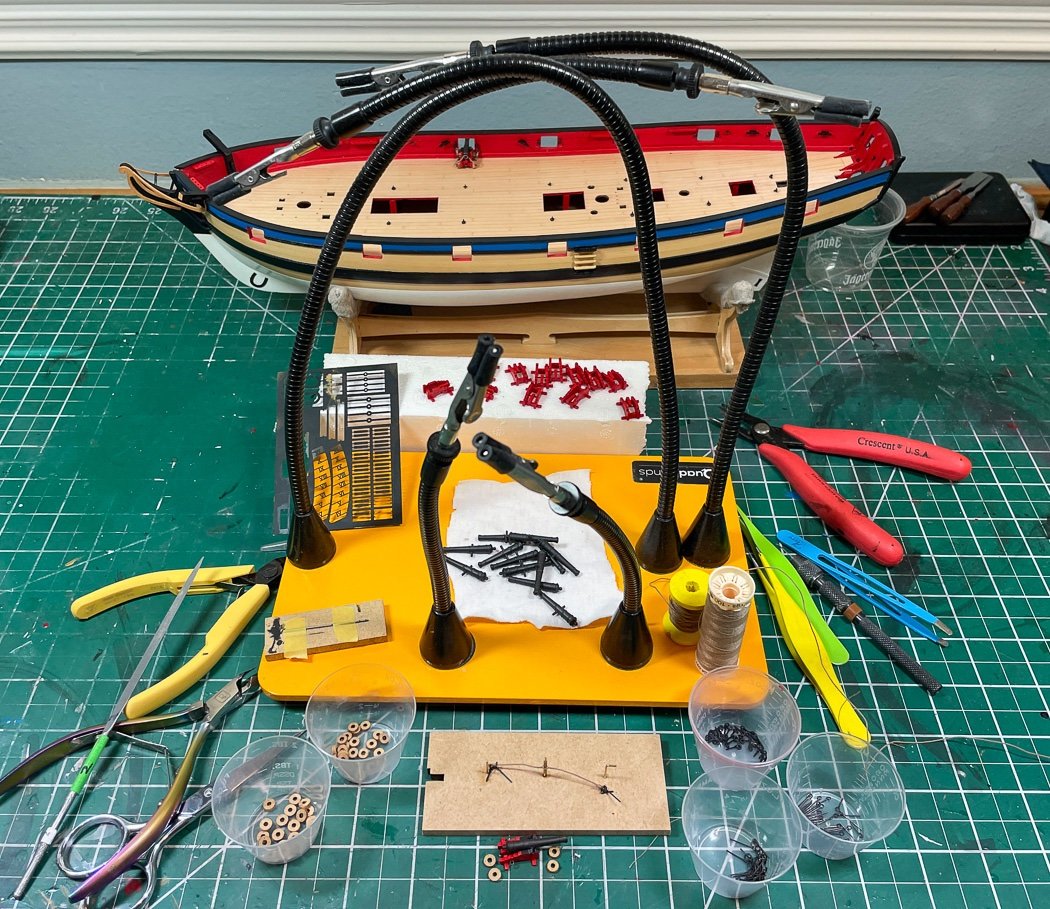
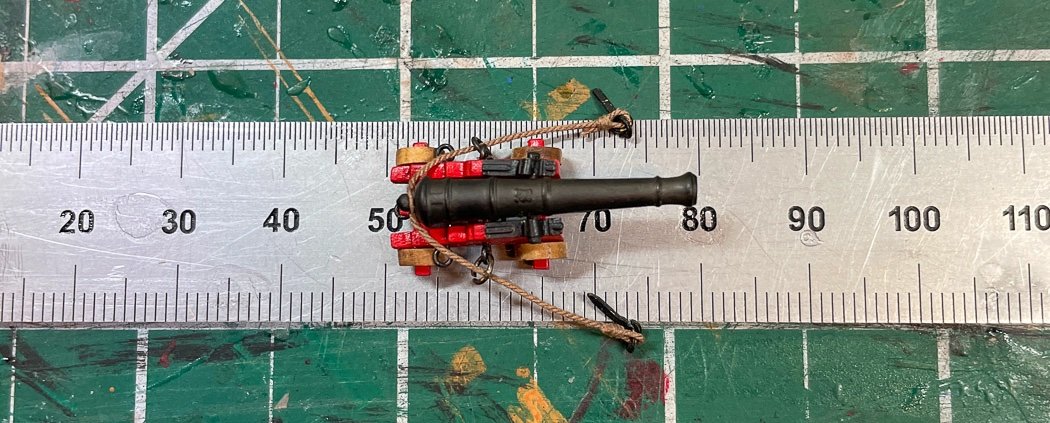
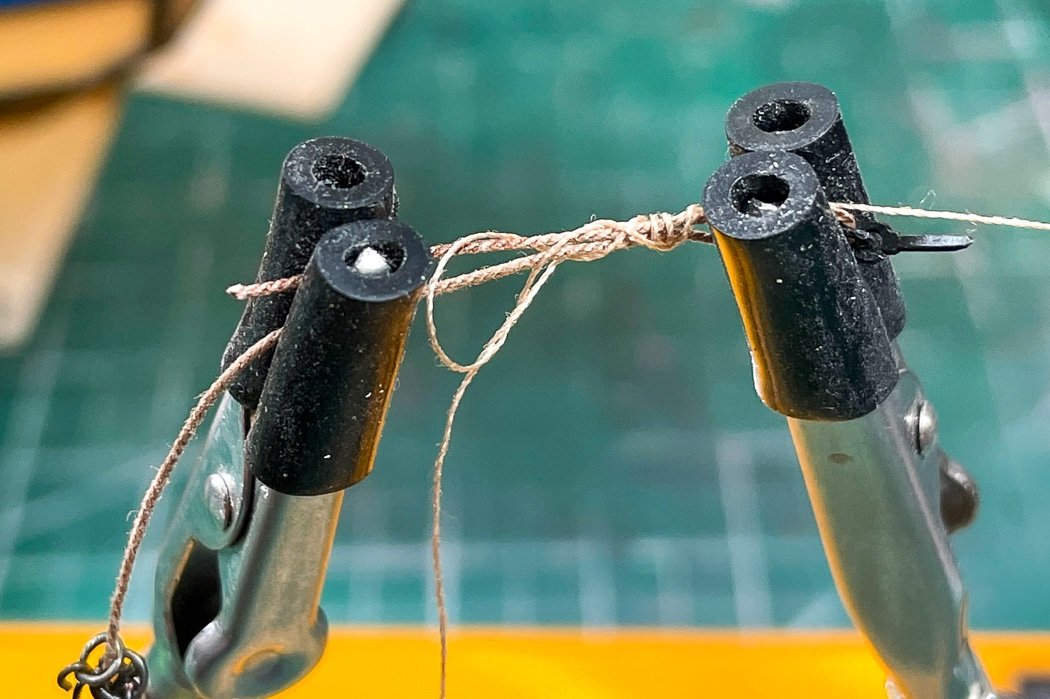
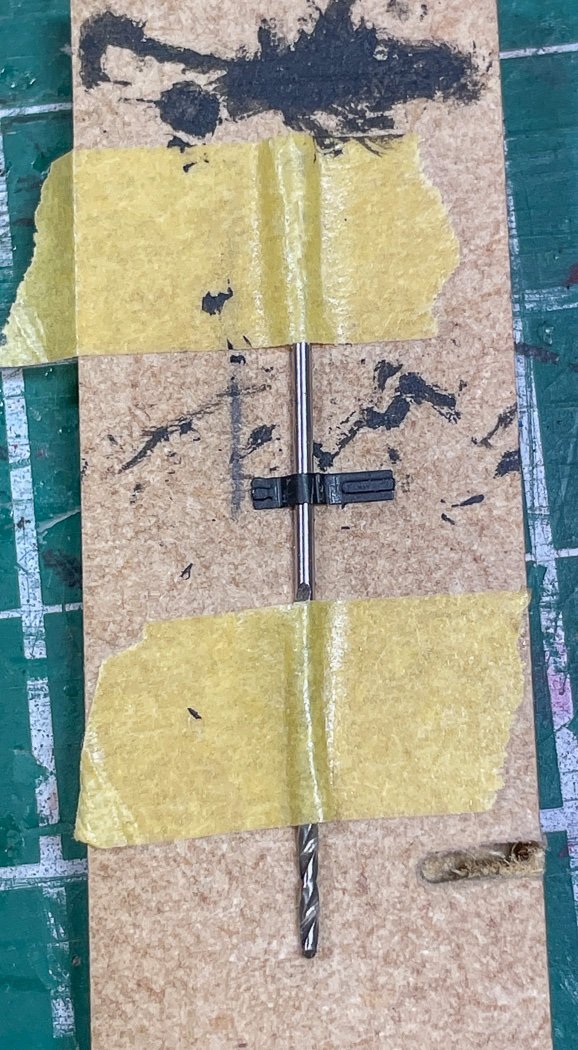
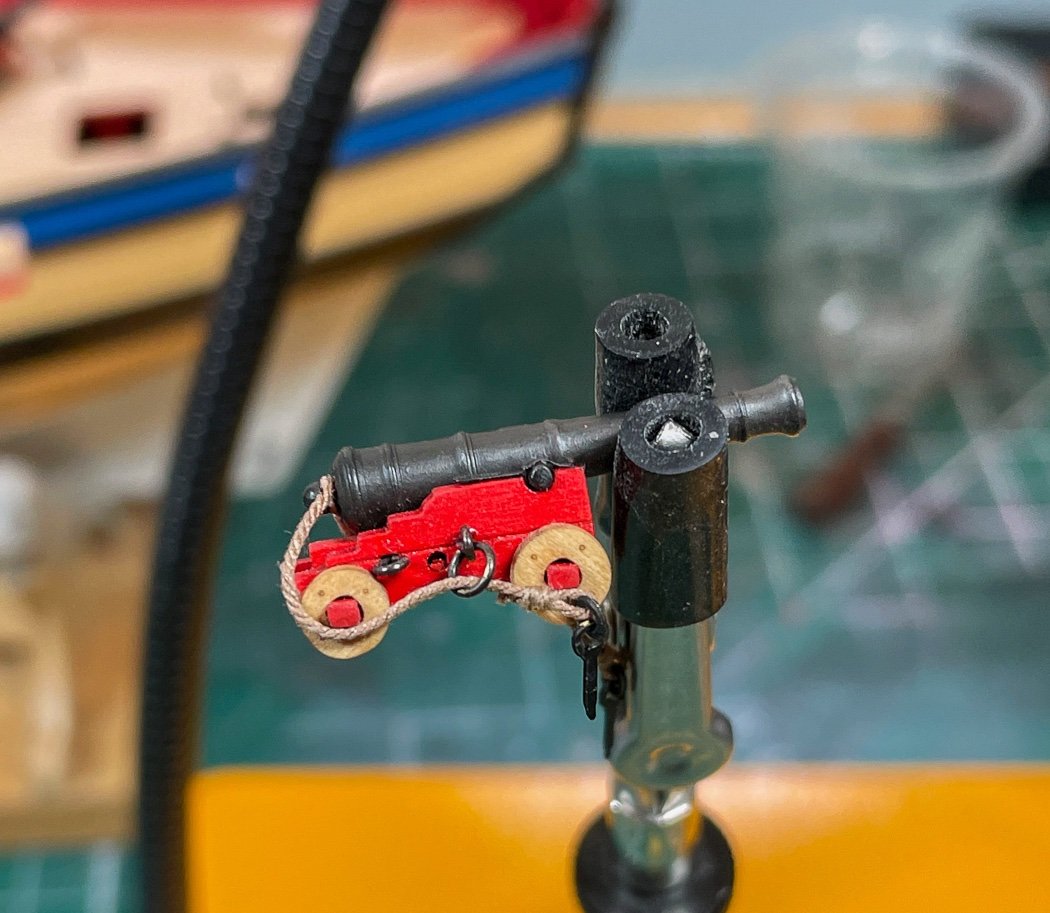
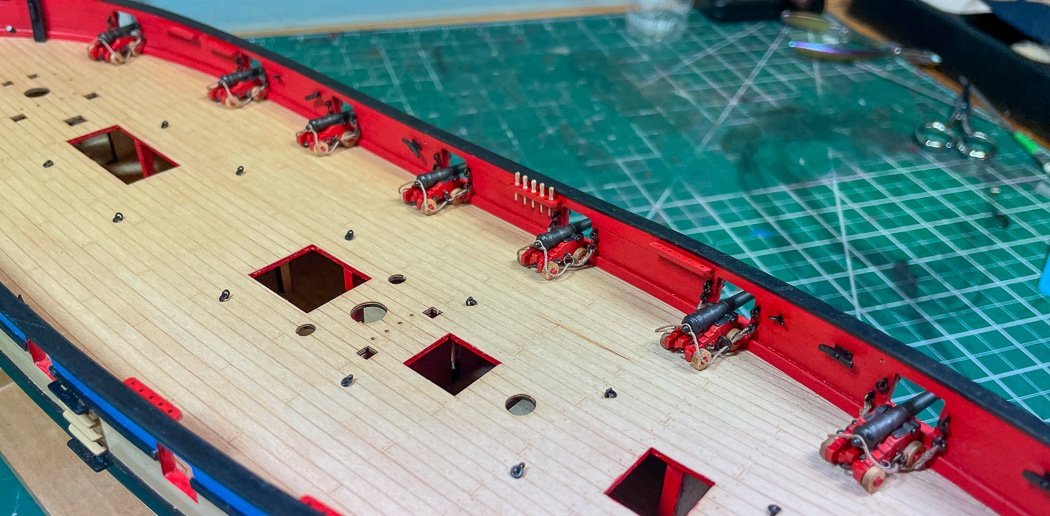
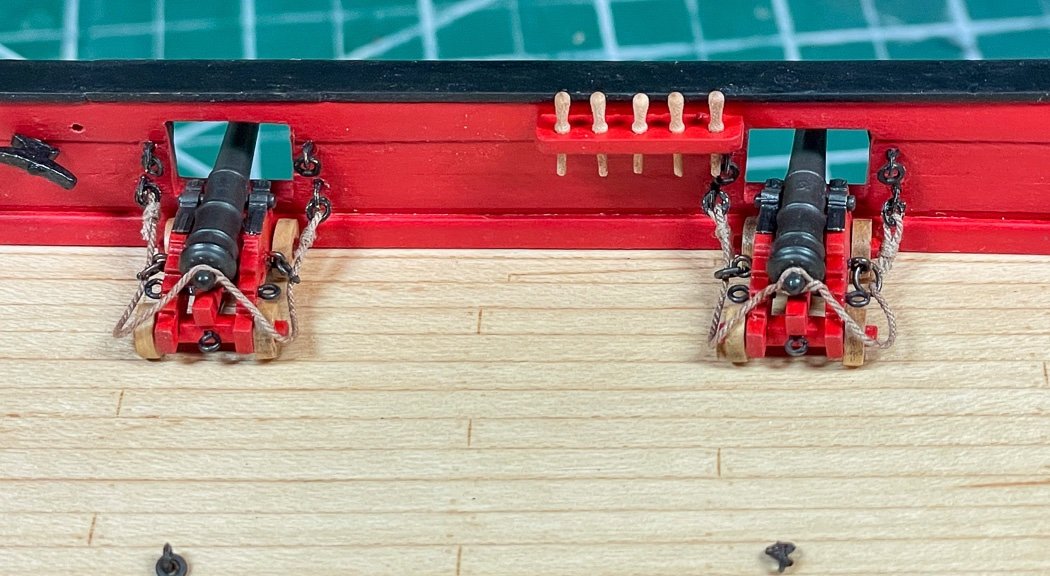
The Guns Time to assemble the cannon. Flirt has teeny tiny 4 pounders, the smallest I’ve ever seen. Admiral Cochrane noted he could carry the full broadside of cannon balls for his sister ship Speedy in his pockets, of that I have no doubt. As we know assembling 14 of anything is a repetitive process calling for a production line of shorts. I started with one to determine what process I wanted to use to get these done. First up is building a jig. Flirt’s carriages are typical for this scale consisting of six components. Always looking for an opportunity for using my mill, I carved out a block that would allow the four main pieces to be glued together consistently. Just grooves for the axels and perpendicular deeper grooves for the carriage sides, nothing fancy. Sooo much sanding of small small parts as I moved past the first prototype (shown in the previous post) into production. I use the plastic cups to keep all the parts separated (piled up here for the photo) and pull them out as I go. I kept it simple for this model rounding the char off the wheels by inserting them onto my round file and just spinning them in my hand against a 320 and 400 grit sanding blocks. The challenge is to sand only the char and not reduce the wheel in size while I’m doing it. I’d automate this more for larger wheels and more cannon but this worked fine for the 56 wheels needed. I also used the round file to adjust as necessary for axel fit. For this model I’m leaving the wheels natural. Off to the paint shed. I shared in an earlier post how I’ve gone to the dark side and purchased an air brush. I do like how it worked for the gun carriages, keeping the paint thin enough to show the laser etched sides (even at this tiny size, @Chris provides nice details with his laser talents). Plus it took only minutes to paint all 14, I’m an airbrush convert, for some things, I still prefer the brush for most work. It takes as long to clean the thing as it does to do the paint work. As shown in the photo I also painted the resin cannon with black primer. These cannon did require some removal of sprue, I felt like I was a kid again building plastic airplane models, but it really wasn't a lot. They do look so much better than the old metal ones, a lot easier to provide detail when casting them this way, even the crest is there. The black primer, with its matte finish was all I needed before applying Doc O’Brien’s Weathering Powder (Rusty Brown) to the barrels and buffing it down with a series of soft brushes I have for only this purpose. They have to be handled carefully after that but are easily buffed back up if necessary, no sealant (like Dullcoat) is needed in this case, though of course it wouldn’t hurt if so inclined. A new production line is set up for rigging the carriages, barrels, eyebolts, and trucks. I feel bad now for encouraging @Derek to fully rig his cannon on his Speedy, no way I’m doing that on these little guys for Flirt. I am including breeching lines though. That required drilling holes and adding the required eyebolts and rings to the carriages. So out came the Quad Hands and the rigging box. I used .018 light brown Syren line and made a little jig for pre-rigging them, identical to the one I used for Cheerful…just smaller. I determined two inches to be the length of completed breeching rope I wanted. I’ve seen some posts recently about difficulty in tying knots, there is nothing simpler than this standard seizing method, basically the same way a hook is tied to a fishing line. I’ve tied hundreds of these, the Quad Hands makes it easy. Normally I toss trunnions provided with a kit, if they are at all, and make my own. However the ones Chris provides in the PE are perfect, not only nice details but more importantly thin enough to fit properly on the carriage without looking out of scale. With a little assist from a drill bit to pre-bend after being primed and then painted Ironworks Black, they laid nicely onto the carriage after the barrel was glued in. They get the weathering powder brush too after being installed. Here’s a completed gun ready to mount, a couple of points: While I appreciate Chris for including eyebolts as part of the kit PE, They just looked to heavy for my tastes so I opted for the standard Amati commercial eyebolts, blacked from their copper start, on the gun. I did use the kit provided ones on the bulwarks. There weren’t enough for the breeching ropes anyway, plus the larger commercial rings are a better look here in my opinion. I softened the edge of the axels with a file, I tried rounding one with sandpaper and it broke off, there just isn’t a lot of wood there. I suppose I could have rounded them even more with the file, but frankly they are so small they aren’t noticeable at a normal viewing distance. It just wasn’t worth the breakage risk or the time. More power to all of you who did or will. In my imagination the part within the truck is rounded from use. I always recommend rigging the breeching rope in advance of mounting the gun(or any guns on any model) as shown here. So much easier than trying to fit all of it on board the deck. If I were installing gun tackle, and I have no intention to do that on this model, I’d make them up off the ship but fit them once the gun is placed - that involves two hooks into two rings once they are made up, a simpler task. These guns are really small - the carriage will sit on my thumbnail. The sailors on these ships must of felt they’d be just as well off throwing the cannon balls at attacking ships. With that the starboard battery is mounted, I need a break before moving on to the port side. I’m going to work on the deck furniture next for a change of pace. A closer look at the mounted battery. I have also installed the pin rails and all bulkhead cleats. I’m going to use these 8mm belaying pins acquired from Crafty Sailor instead of the PE ones provided with the kit, just sitting in this one rail at the moment for a test look. While I left the trucks natural and sanded off the bulk of the char I elected to leave a bit so they looked like they’d rolled about the deck (or maybe it was due to laziness, who knows). I’m sure these near macro shots will expose lots of flaws, still I think it all came out ok. Did I mention they are tiny. Thanks for stopping by with your likes and comments. Until next time…
-
So nice to see you still at it - quit the job and work on your hobby full time 😄
-
It does indeed look like a frigate, very crisp foundation for the next layer, well done.
- 857 replies
-
- 3
-
-
- Sphinx
- Vanguard Models
- (and 1 more)
-
Very well done, your craftsmanship is always inspiration, as are your clever solutions to solve problems. while my Flirt planking merited not planking the multiple problems with its stem required me to paint, plus I like the contrast of white, black, blue, and red. You have no such stem problem, you can easily not paint and it will look great either way you choose.
- 345 replies
-
- 1
-
-
- Duchess Of Kingston
- Vanguard Models
- (and 1 more)
-
Amazing work, such beautiful moldings and curves
-
I would be lost without my mini-me. He does all the up close inspections. I hope you can replace yours.
- 1,784 replies
-
- 3
-
-
- winchelsea
- Syren Ship Model Company
- (and 1 more)
-
Where they are wasn’t my question, it seemed from the photo they were sitting not on the hull but on two strips of molding, which doesn’t seem to be very secure. Perhaps they are cut with groove beneath for the molding and attached the hull and I just didn’t see it from the photo. No big deal, just a question.
-
Planking defines the model, nothing stands out or shows more. I like the process now that I have a good process for doing it. Like Derek I treat each plank as a project since each one is fairly unique and then the math of having them all fit correctly... Now making and rigging gun carriages, that’s repetitive and soul crushing, especially the teeny tiny ones I’m doing now. Even ratlines have more appeal.
-
So the braces for those channels are fixed to the molding, that doesn’t seem very secure, or am I seeing it wrong?
-
Very impressive work,
-
I think I do a lot of fiddling about😂
-
Thanks BE, these photos often reveal something I never saw even at workshop close I then feel a need to go back and correct, if I can find them without the photo 😊
-
I’m a brush guy too, but the airbrush did a nice job on the gun carriages and allowed the scored line on the side to stand out, not sure that would happen with a brush i painted the hull with a brush, I line some character to stand out from the brush strokes.
-
Assembled, rigged, and mounted the first cannon to figure out how I wanted to do them. These things are tiny. First challenge, the rope size was limited by what would fit in the kit ring/eyebolt. The weathering powder worked well on the resin cannons. My next post will be more detailed about how I got here, not another one photo wonder. Thanks for dropping by.

-
Well done. The cannons look very sharp.
-
No idea what the real white stuff looked like, but pale yellow would look sickly on a model in my opinion. I use Admiralty’s Paints Matt White on my hulls, for whatever reason Admiralty’s Dull White doesn’t cover well over large surfaces. Odd considering how well Dull Black does.
- 505 replies
-
- 3
-
-
- vanguard models
- Sphinx
- (and 1 more)
-
You’re off to a great start
-
Makes sense, I’ll cut them these the same way I did for Cheerful, not a problem. Maybe I was getting use to seeing the 95% part😁
- 1,784 replies
-
- 1
-
-
- winchelsea
- Syren Ship Model Company
- (and 1 more)