


DelF
-
Posts
1,398 -
Joined
-
Last visited
Content Type
Profiles
Forums
Gallery
Events
Posts posted by DelF
-
-
You and @glbarlow have converted me to the use of weathering powder - your buffed barrel is strikingly realistic - and I've already ordered some. I wasn't aware of the need for a fixative though - is that because you're applying the weathering powder to resin, or would you use it with any surface?
- BobG, mtaylor, Blue Ensign and 1 other
-
 4
4
-
Excellent work so far David. Great to see another Speedy on the go, and I’ll follow your build with interest. I was particularly interested to see your approach to colouring the decks. I haven’t yet decided whether or not I’m going to use the kit-supplied decks in my current build (Duchess of Kingston) or make my own, so I may try your method as an alternative.
Derek
-
-
-
5 hours ago, yvesvidal said:
Can I hire you to plank my Bellona?
Happy to help Yves. I'll be in the US next year and could do it then provided North Carolina isn't too far from Alaska (geography was never my strong subject at school 😁). Seriously though, I've just looked at your log and you've got a big job on your hands planking Bellona at that scale. Good luck, and I hope my log is of some help.
3 hours ago, glbarlow said:it will look great either way you choose
Thanks Glenn. I very much agree with the comment you made on David's (desalgu) Duchess log where you said that planking defines the model, with nothing standing out or showing more. Another reason why I'm still in two minds about covering it up.
3 hours ago, Rustyj said:Sorry no help from me...
You've already been a big help Rusty, as I've got your Duchess log bookmarked and often refer to it. I hope you can get back to it soon.
1 hour ago, RockinBudgie said:the tutorial on using the proportional dividers...i am now looking to try that method!
Thanks Gary. I'll now use nothing else for planking! Any problems or questions, feel free to send me a PM or ask on the log.
Derek
-
Starboard planking
Thanks as always for the supportive comments and likes.
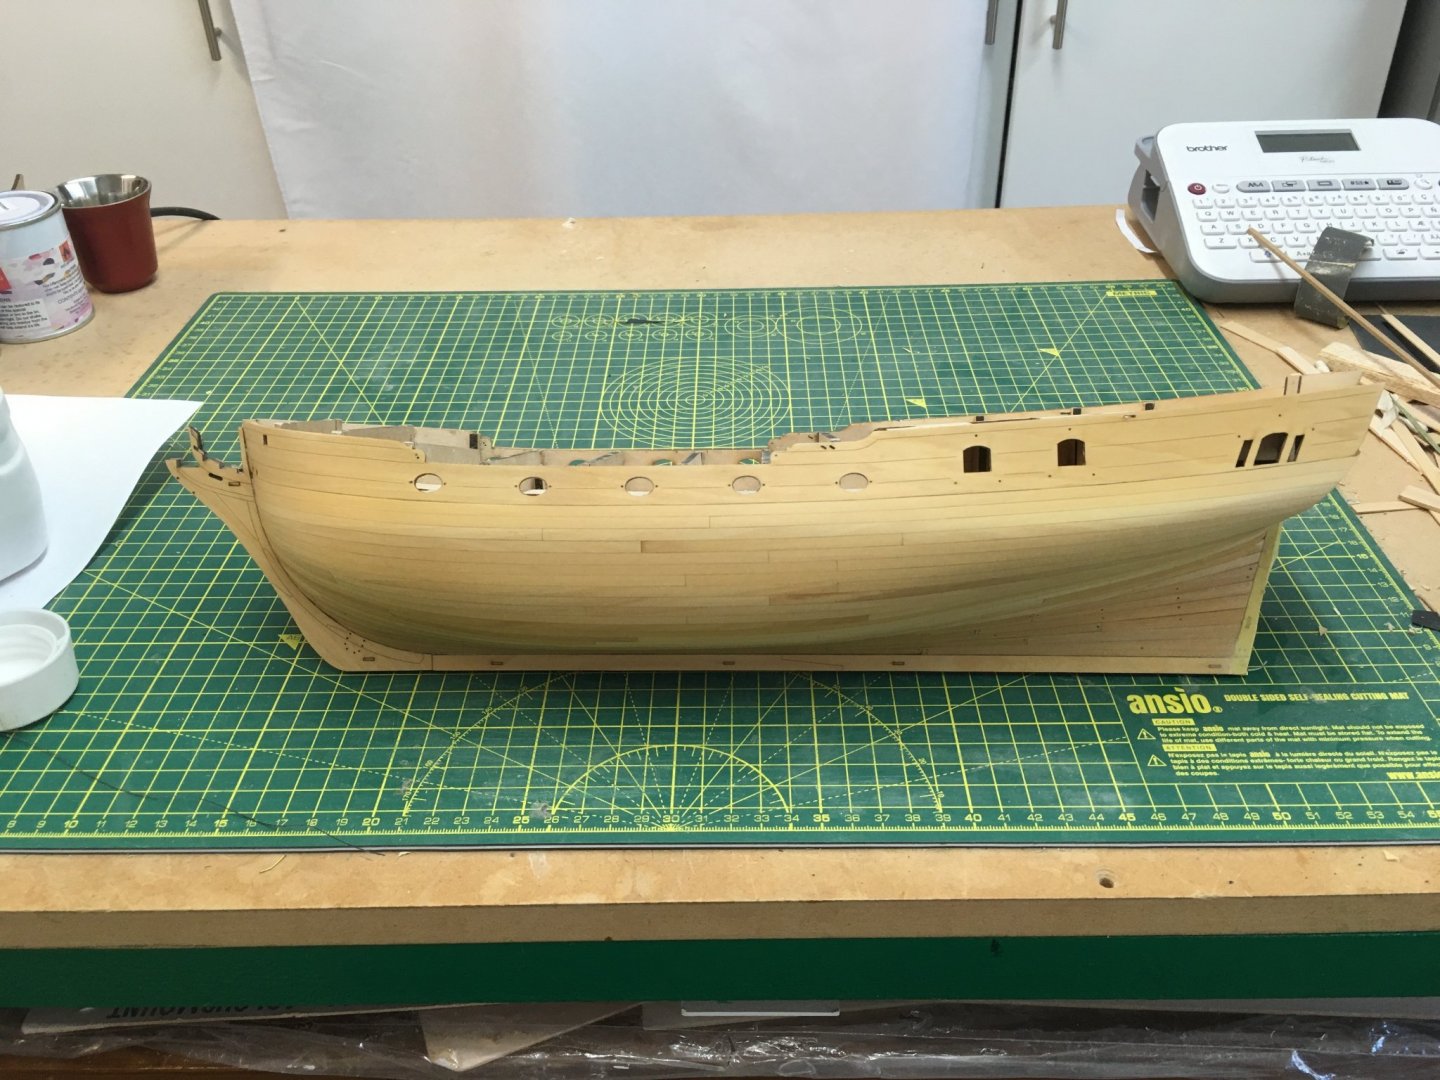
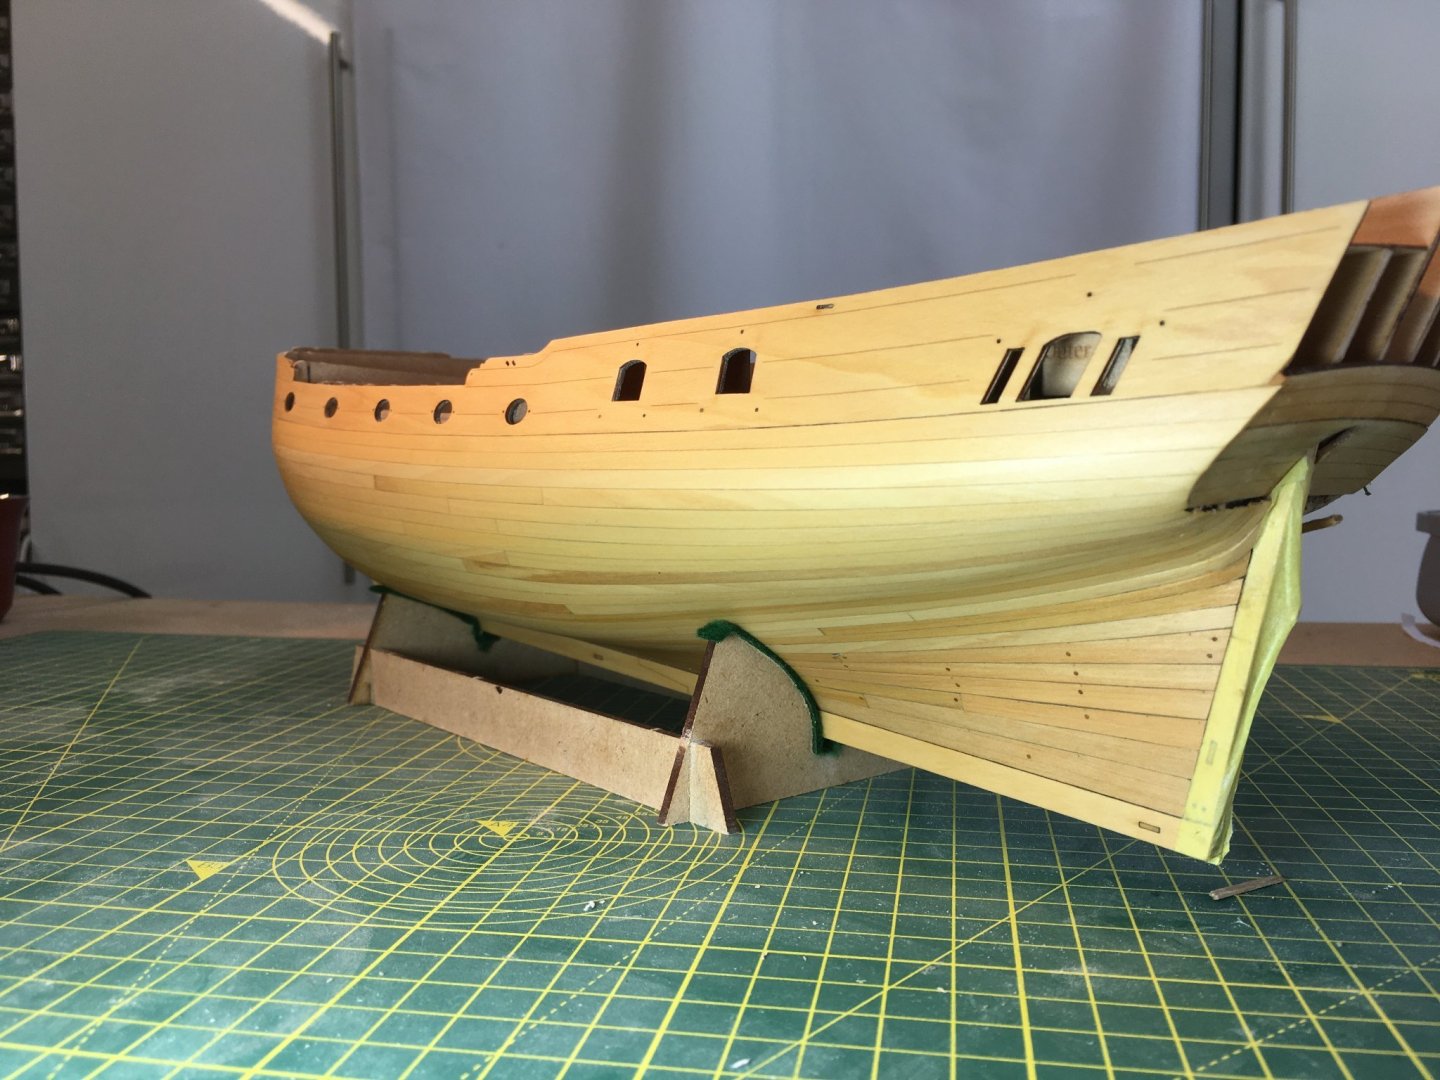
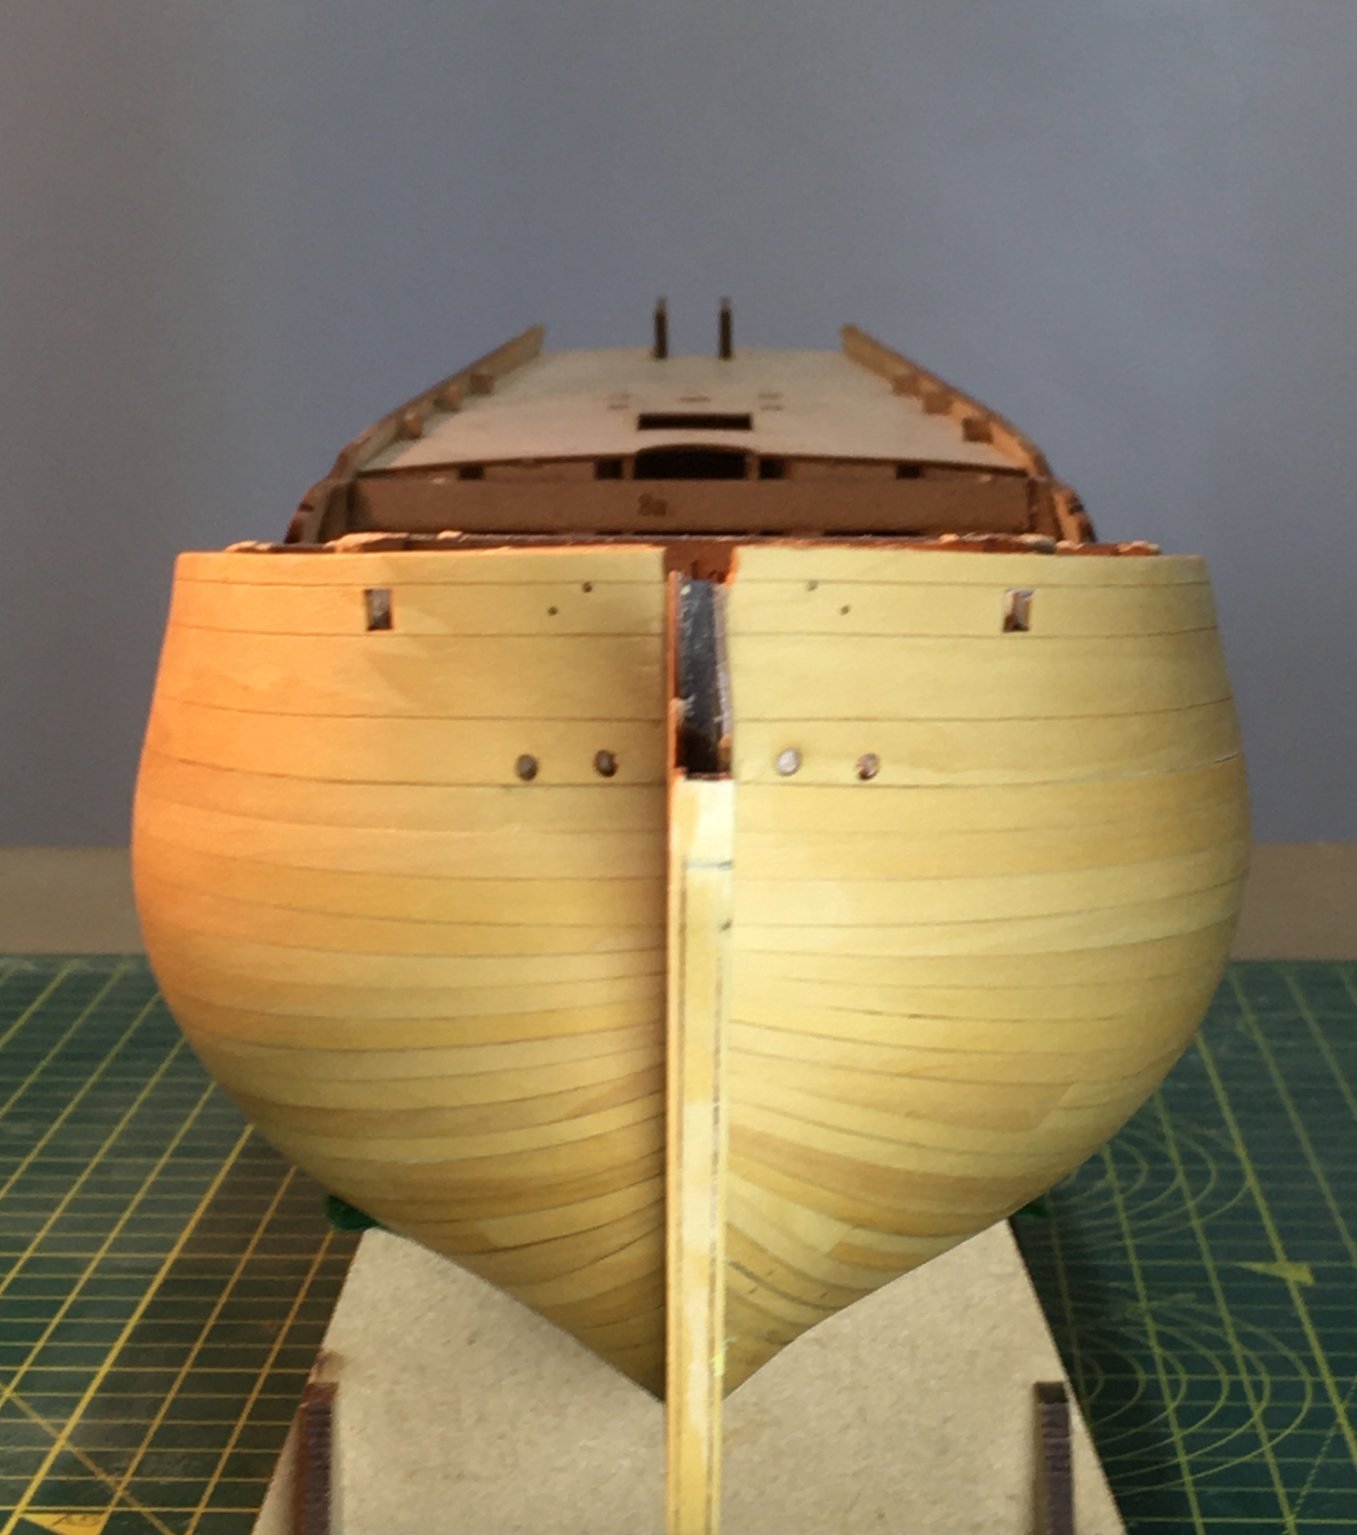
Here's the starboard planking finished:

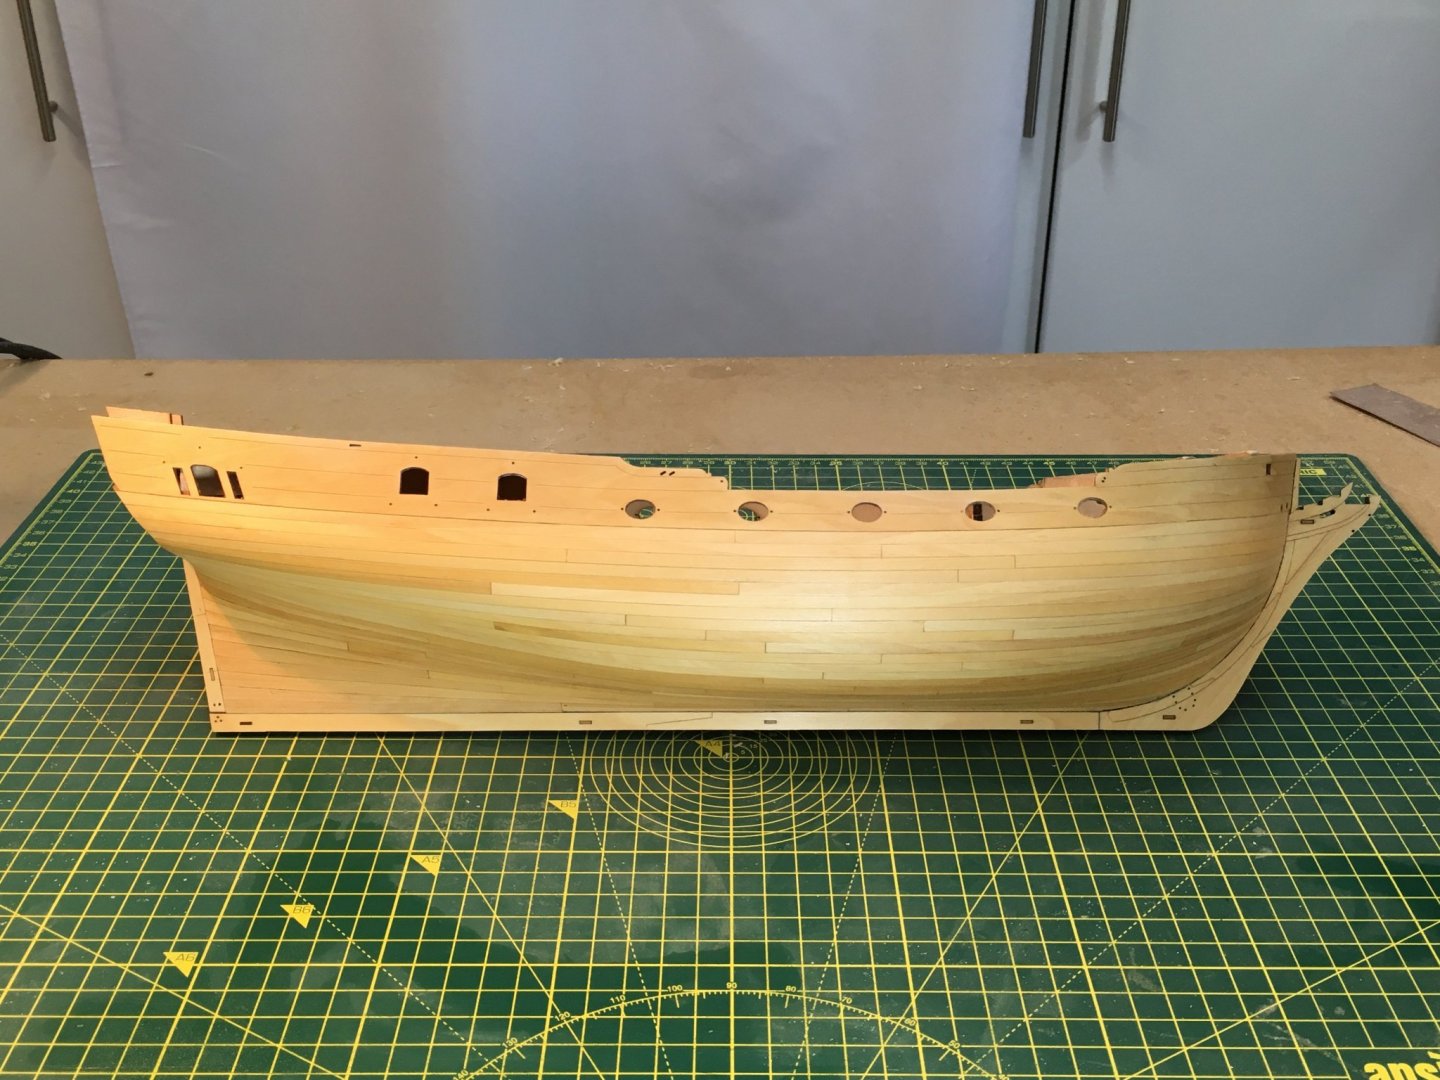

I've applied no finish yet, just wiped her over with white spirit to remove the dust.
I covered the methods I used when I described planking the port side. However there are a few points of detail I ought to mention.
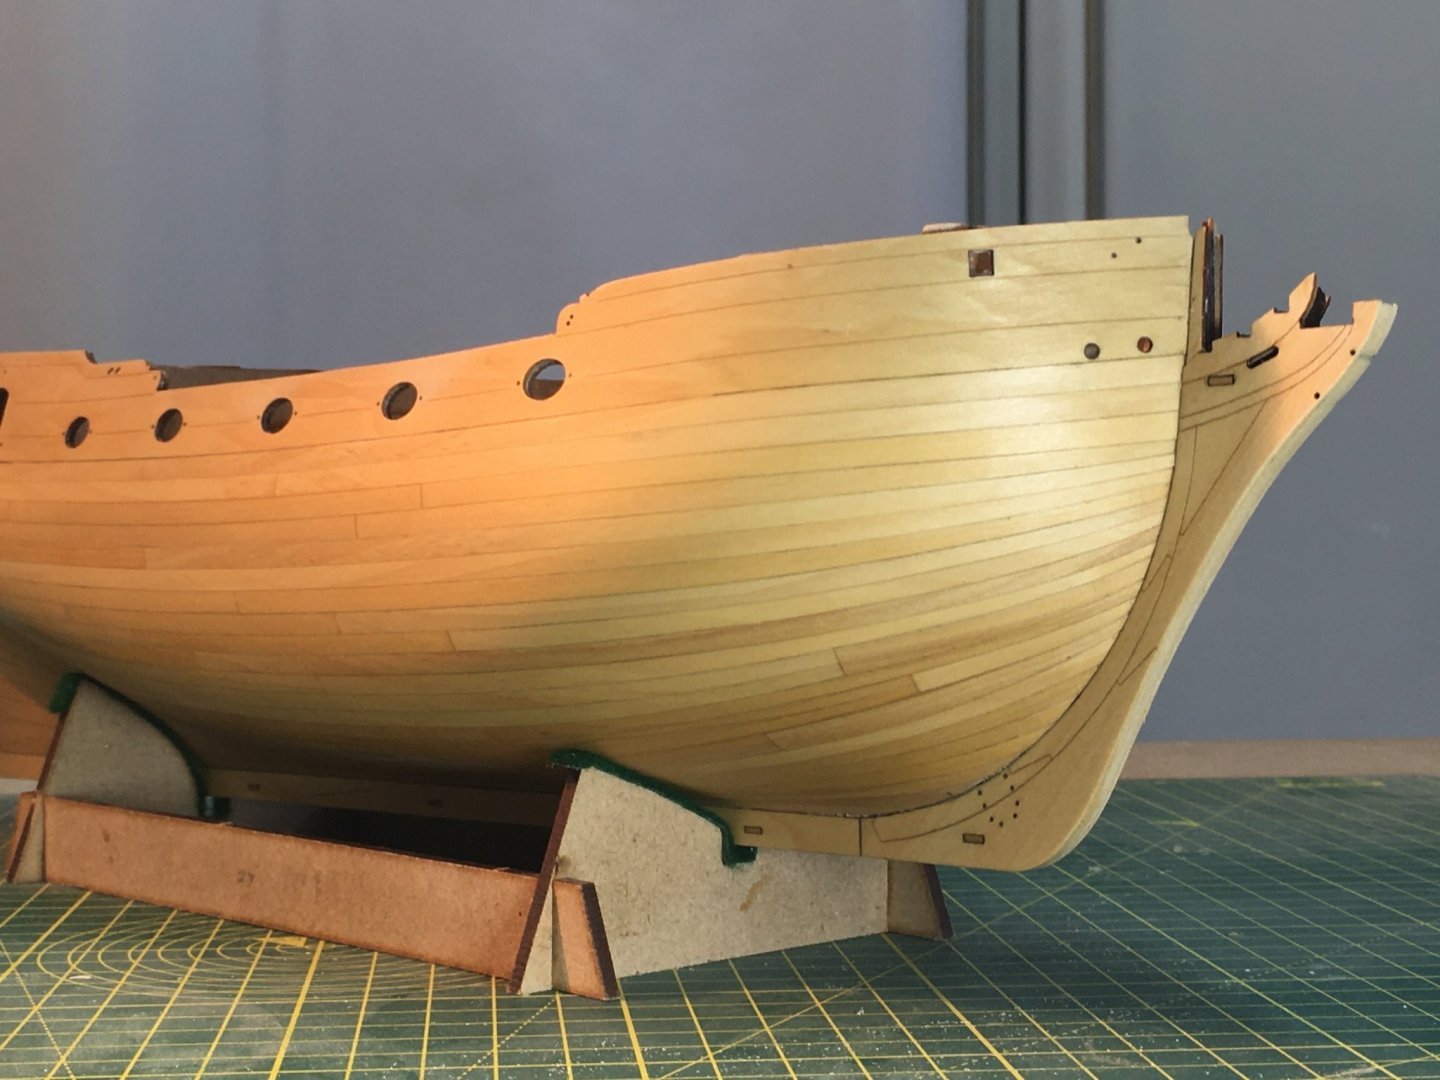
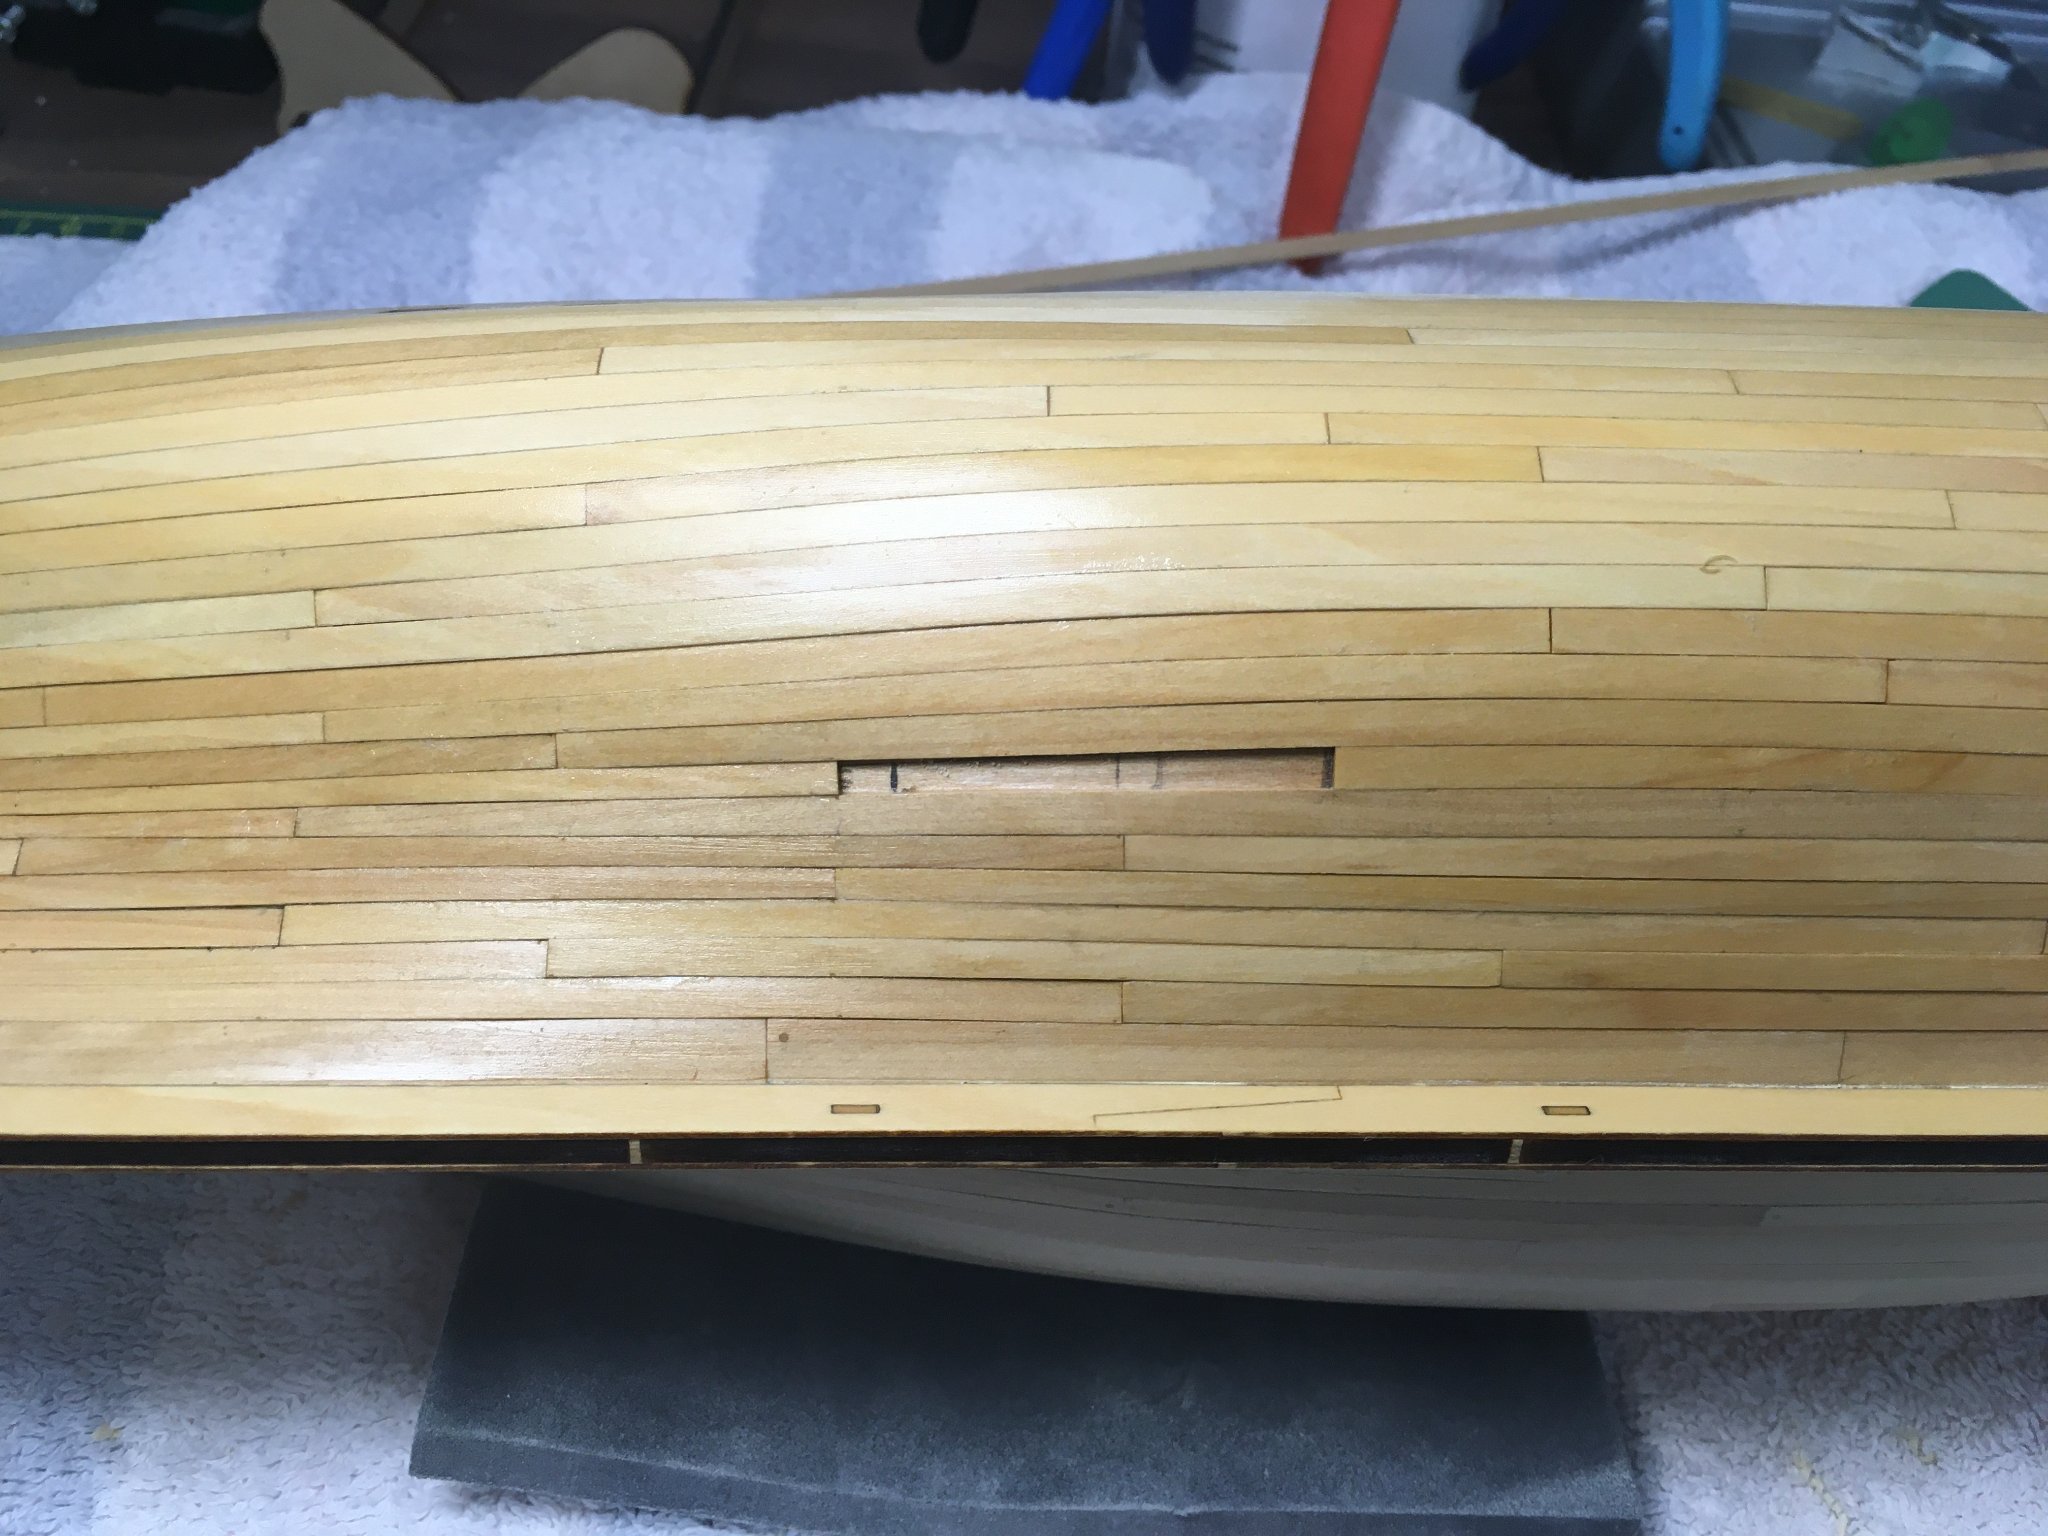
In each strake I fitted the planks at the stem and stern first then finished with one or two planks in the middle. Getting the planks shaped properly at either end of the ship is much trickier so it makes sense to get these right first. I believe the last plank fitted in a strake was known as the "shutter" plank. Here's the gap waiting for the very last shutter plank on the starboard side:

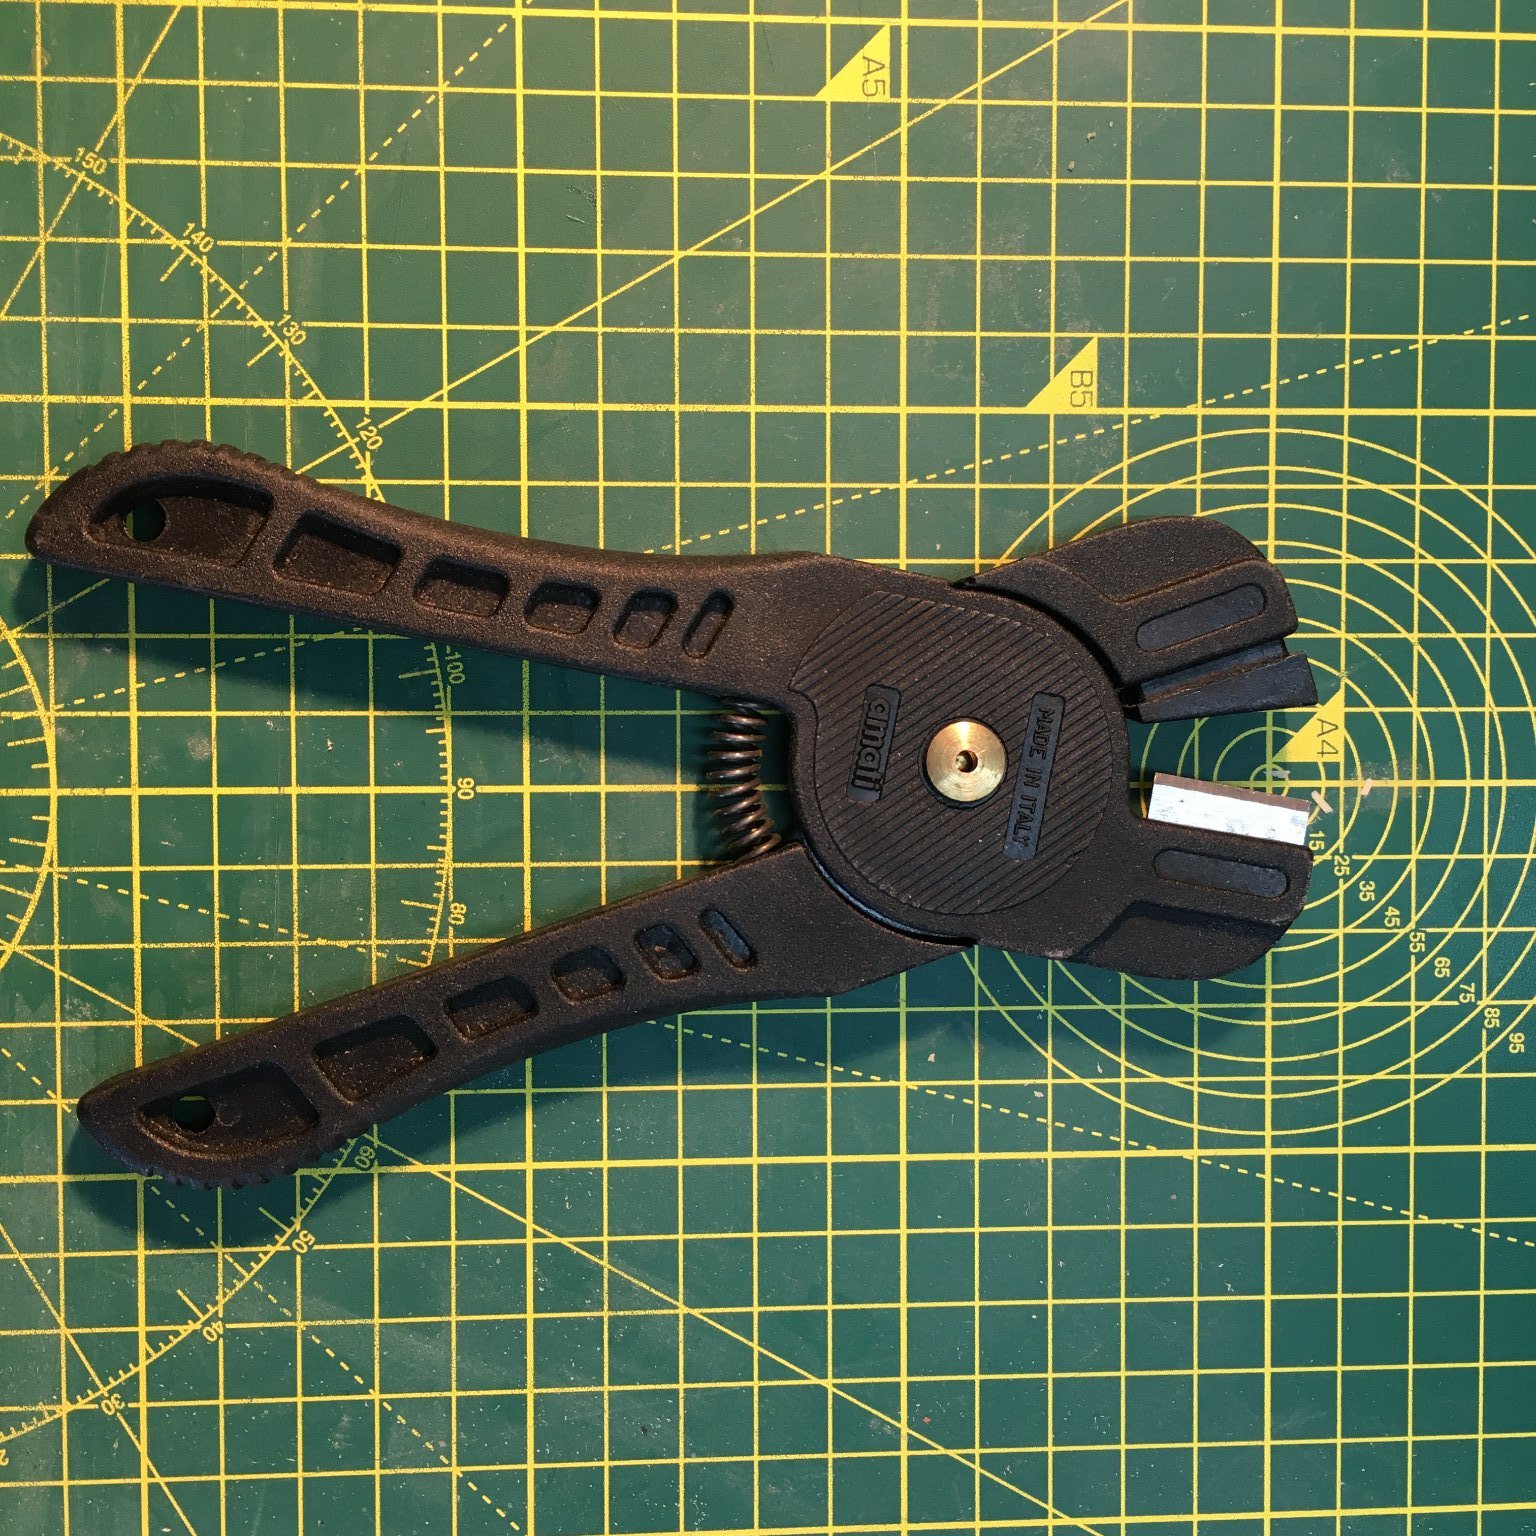
The Duchess's hull calls for some very tight curves, and I previously mentioned using my electric plank bender to achieve some of these. On a whim, I thought I'd also try a tool I bought when I first started ship modelling - the Amati plank nipper. I very quickly stopped using it when I found it left obvious marks on the good side of planks, and produced a series of straight line segments rather than a smooth curve in the wood. It's been languishing in the bottom of a drawer ever since. To my surprise I found it worked well with the thicker, better quality 1mm boxwood in this kit. Using the nipper first to start a bend, it was subsequently much easier to impart a tight bend with the electric tool:

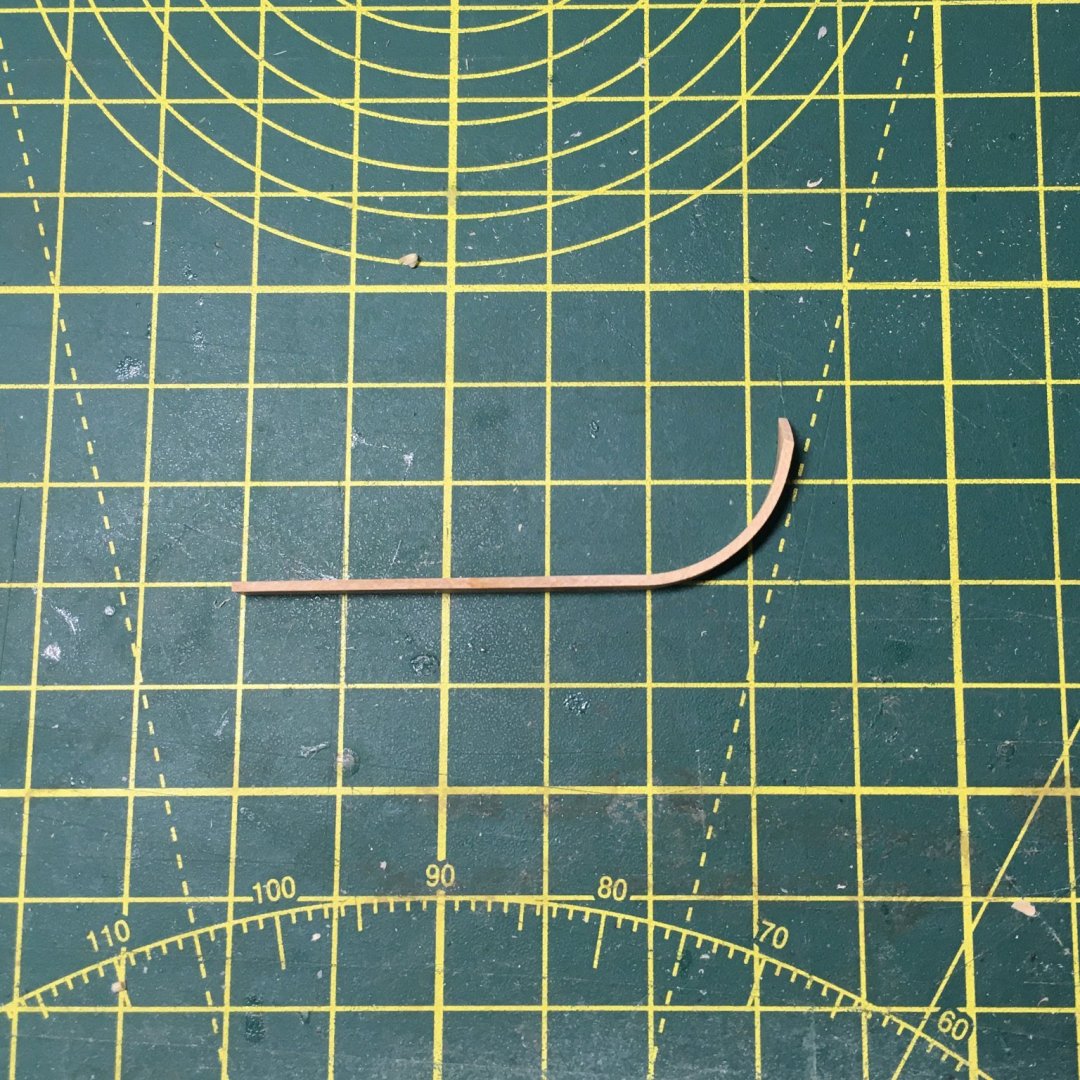
On one particularly awkward plank I found I'd left a narrow gap against part of the preceding strake, a gap that couldn't be closed by further edge bending. Rather than PVA and sawdust, I tried using a thin shaving produced with a little Veritas block plane. I glued it to the edge of the plank, trimmed it and fitted the plank as normal.
A prize to the first person that spots it!
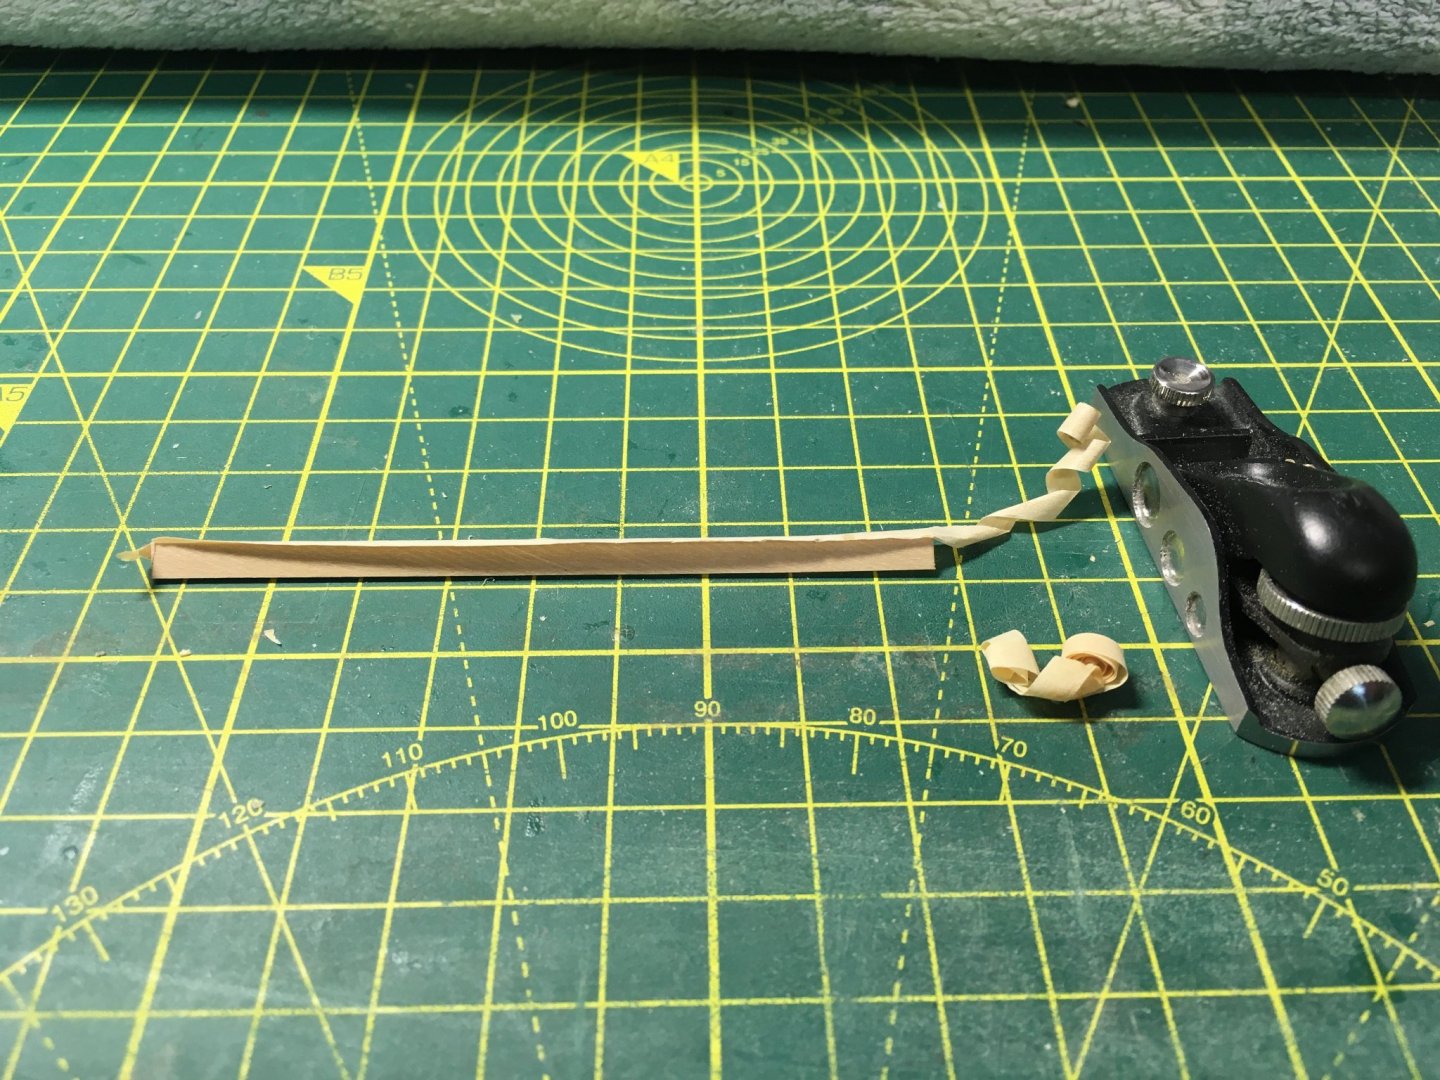
I should point out that I staged this photo with a spare piece of plank after the event as I didn't shoot it at the time. In reality I had to use a double thickness of shavings to fill the gap.
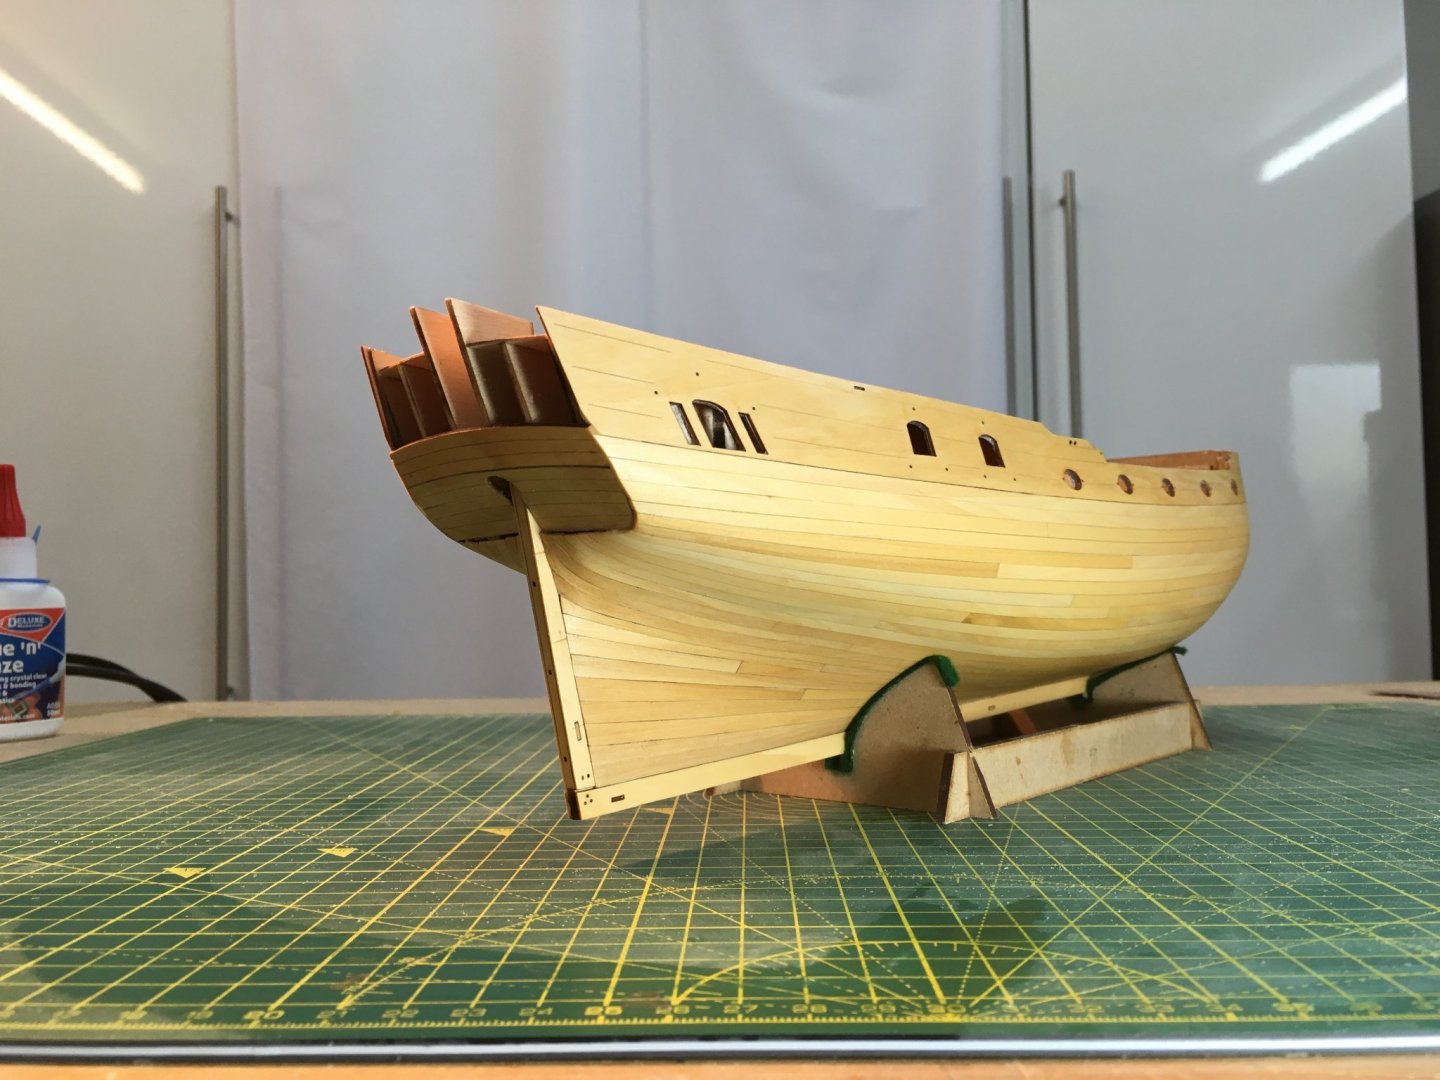
The last point I wanted to mention was the rabbet. This is one of many clever design elements in this kit, producing a neat finish at the stem by hiding the ends of the planks. However it's important to be aware that the planks are likely to be slightly thinner than the rabbet, which means that if you glue the ends down tight against the first planking, you're liable to see a gap between the planks and the stem. It's better to leave a slight 'spring' in the ends of the planks at the bows and, assuming you're using CA like me, to avoid pressing your fingers against the first few millimetres. This will allow the plank to press up against the top edge of the rabbet, eliminating any potential gap.
And I still don't know whether or not I'm going to paint the darn thing!

Derek
-
Looking good! Like you, I often get fed up with repetitious tasks like planking. However I’ve enjoyed Duchess, probably because I took it more slowly - almost treating each plank as a separate project rather than rushing to get the job done. I’m still looking forward to moving on to the next stage though!
Derek
-
Brilliant. I'm not sure how I missed this log until now, but your great model has reminded me why I love the beauty of bare wood. I was also impressed with your attention to detail - I don't think I've seen such realistic snaking before for example. I'll follow your current build with interest.
Derek
-
Rather than stones, I would suggest wet-and-dry paper stuck to a sheet of plate glass - see this. You don't have to worry about dressing stones to keep them flat, you can have as many different grades as you need, and sheets are easy and cheap to replace. Works fine with the Kell guide.
Your planking looks great, btw!
Derek
-
+1 for shellac for all the reasons Jaager and Bob Cleek describe. It really does impart a beautiful, deep warm glow to wood.
- thibaultron, Bob Cleek, mtaylor and 1 other
-
4
-
-
-
Thanks Bob. I’ll take stock when I’ve finished the starboard planking and make a final decision then.
-
1 hour ago, glbarlow said:
isn’t it drop planks
Touché Glenn.
Actually, I just "dropped" that in to check if you'd got your nautical dictionary yet. Honest.

To complicate matters, I've checked some of my references and I think what I called a drop(ped) plank is more properly called a diminishing stealer, ie because you go from two strakes to one as you move towards the bows. The drop plank is where an extra plank is inserted in the stern area to increase the number of strakes by one. Not to be confused with an expanding stealer which achieves the same effect. Differently. 🤪
-
I used 6mm rather than 4mm right at the stern, although they narrowed to 4mm midships.
-
1 hour ago, DaveBaxt said:
Sorry to take your blog off track.
Not at all - it's all part of sharing tips and ideas.
Dropped planks and stealers are OK if you really need them, but you should aim to minimise their use. I took my garboard strake too far up the stem so I ended up having to use three dropped planks whereas I probably should have needed one at most. I managed to avoid stealers at the stern because I used wider planks in the first few strakes above the garboard.
Derek
-
Thanks Dave. I'm still learning, as you can see from the mistakes like the unnecessary drop planks. However the dividers do make the job a lot easier.
56 minutes ago, DaveBaxt said:I am now on the look out for a pair of dividers.
Keep your eye on ebay. This one is open for bids now and is similar to mine. There are several others on the site today, but as I said before, I would go for a good vintage one rather than a modern repro.
Good luck
Derek
-
Hi Doug. I'll follow with interest, especially given Flirt's close resemblance to Speedy which I really enjoyed building.
Derek
PS I like the door, btw
- chris watton and Dfell
-
2
-
That last shot shows off the contrast between the boxwood and the paintwork beautifully. By the way, I'm not sure you need mechanical painting aids - your brush work is at least as good as my spraying.
13 hours ago, glbarlow said:the hawser holes (is that the marine name, sounds wrong 😄
Nearly. They're hawse-holes. The hawser is the cable that passes through them, and the hawse is the part of the ship's bows through which the hawse-holes pass (haven't you got that maritime dictionary yet?
)
While we're on vocabulary...
14 hours ago, glbarlow said:fiddling (my favorite English word)
...do you mean fiddling? That's a pretty ordinary word. A more interesting word you might have seen used by many of us on this side of the pond is fettling, originally meaning to scour rough castings after they come from the furnace, but now more generally meaning to put something in order. Used a lot by engineers and mechanics (and model ship builders), particularly in Northern parts.
- Blue Ensign and glbarlow
-
1
-
 1
1
-
This would interest a lot of people, but as Glenn says, you should consider posting on the "Photographing your work" sub-forum.
Stunning model, btw.
- mtaylor and thibaultron
-
2
-
That deck was definitely worth the effort - well done!
-
Thank you Gregory, Kevin and Chris, much appreciated.
3 hours ago, yvesvidal said:You have no rights to paint that hull !!! 🙂
Thanks Yves. I'm still in two minds to be honest. I love bare wood, but at the same time I want to decorate the upper parts of the hull and I'm concerned that it won't look balanced unless I also paint her white below the waterline.
2 hours ago, glbarlow said:if I may offer a lesson I learned from Chuck: In lining your belts you went too far up the bow with the curve from midship, meaning the width of the planks at the stem should have been wider
Thanks Glenn. I can see that that's exactly what I did wrong, and I think I made it worse by readjusting the battens after I'd fitted the garboard strake. Trouble is, I'm going to have to repeat the same mistakes on the starboard side because I think it would be worse for the two sides to be asymmetrical. Oh well, I'm learning and hopefully I'll get it right for Sphinx!
-
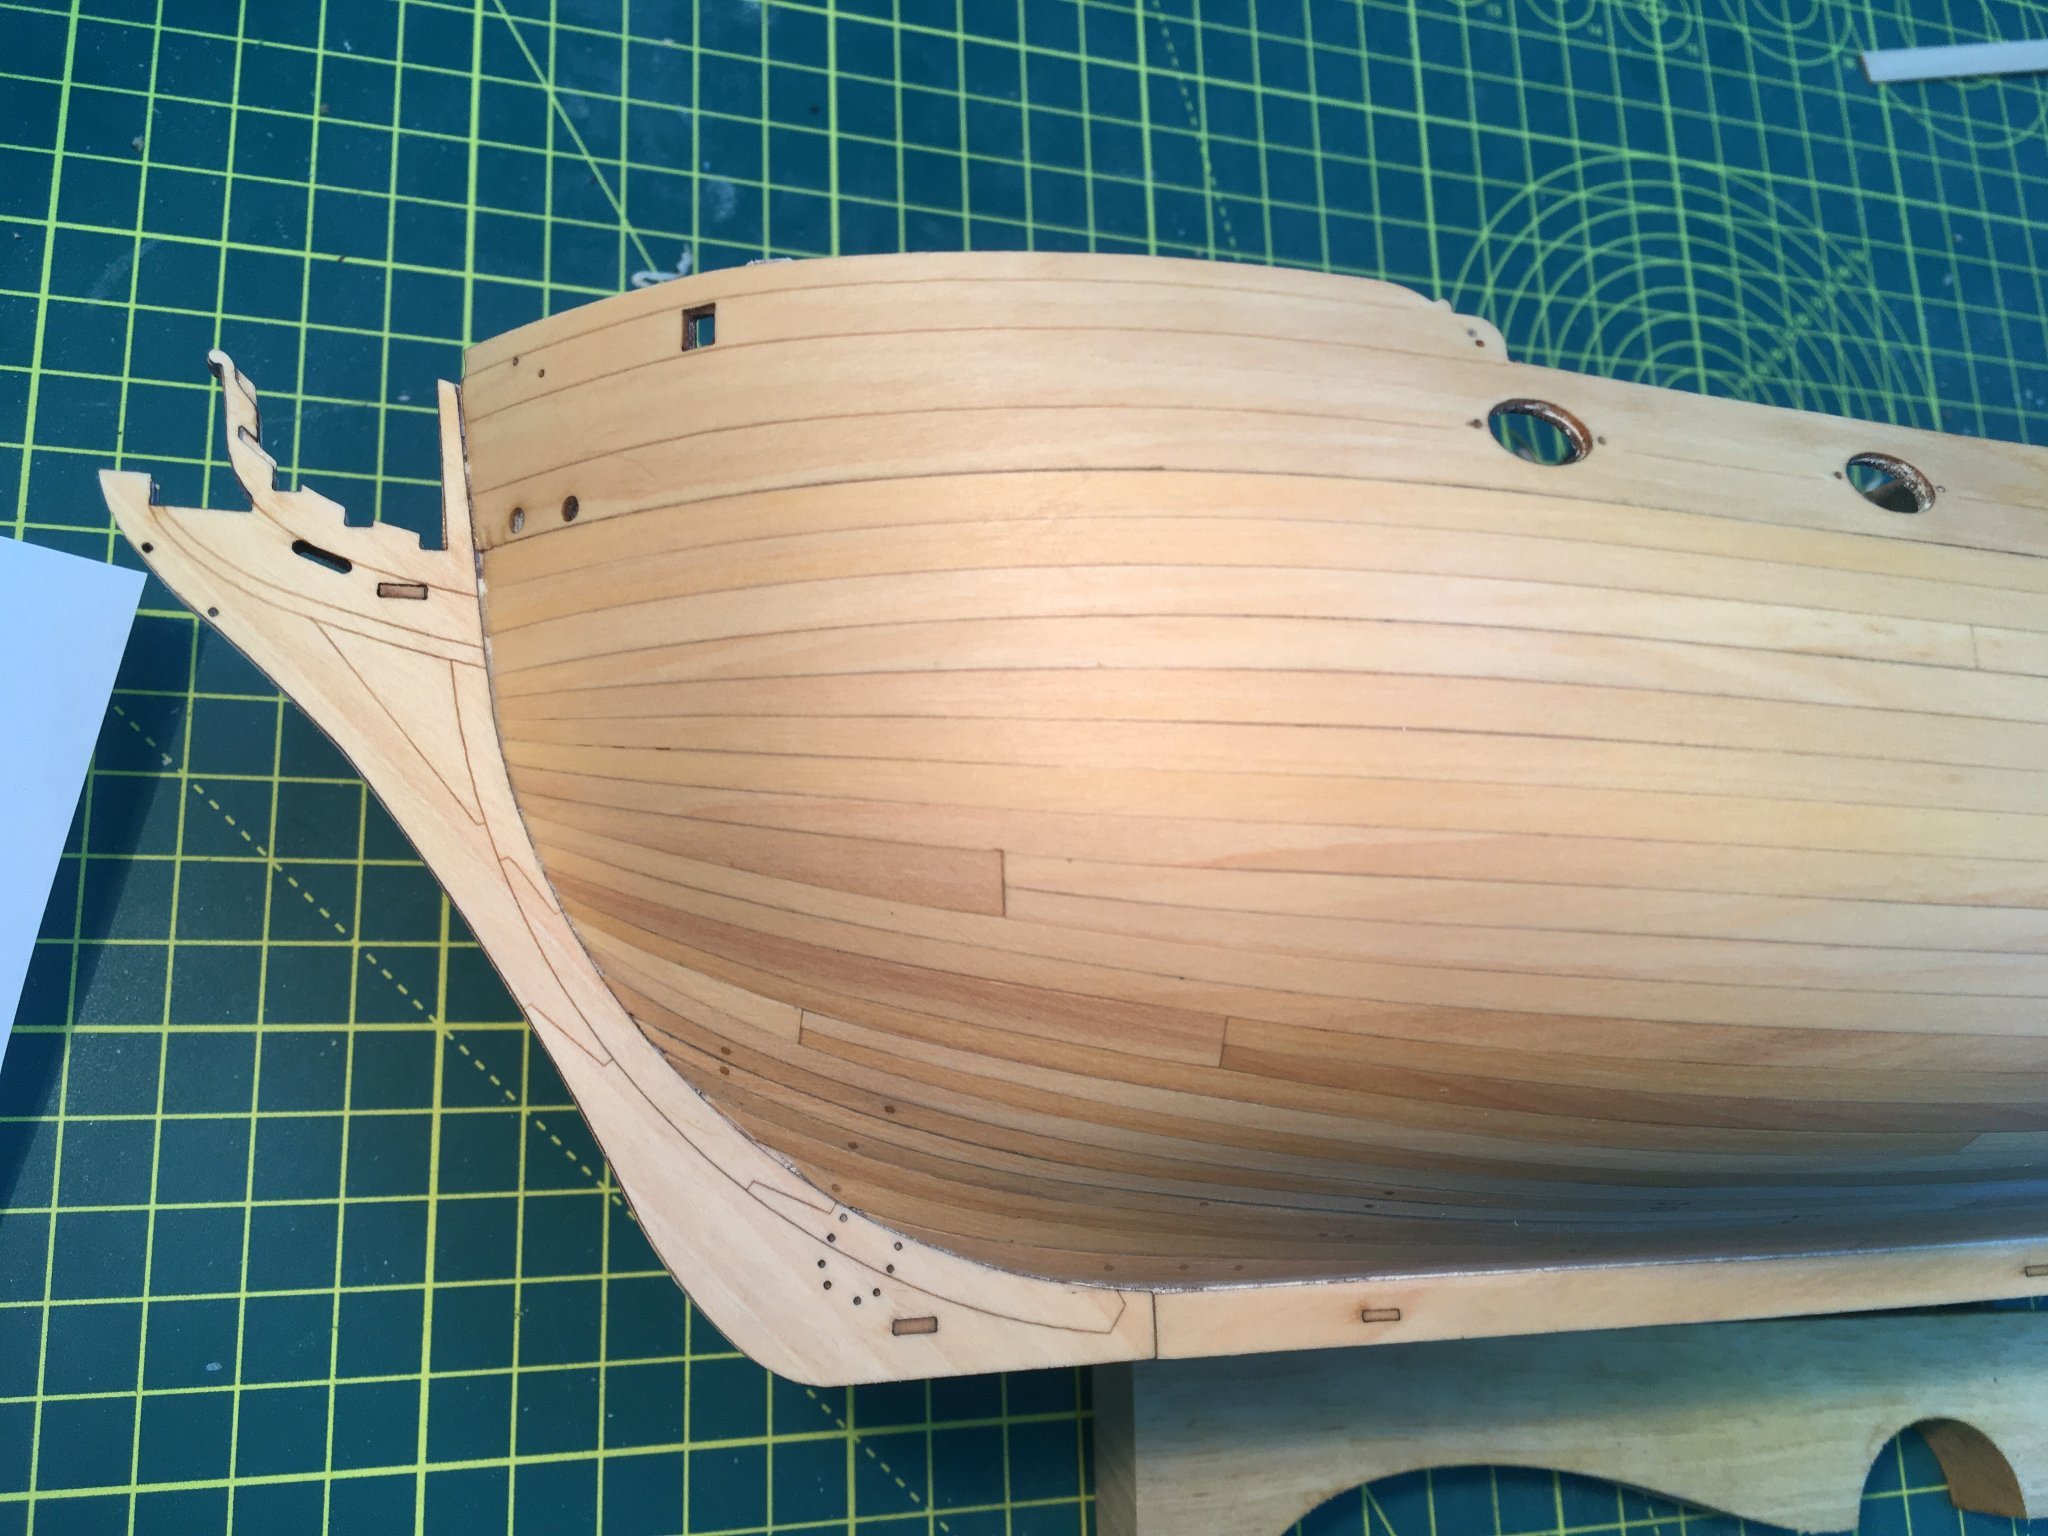
Port side planking
Thanks as always for the kind comments and likes, they are much appreciated.
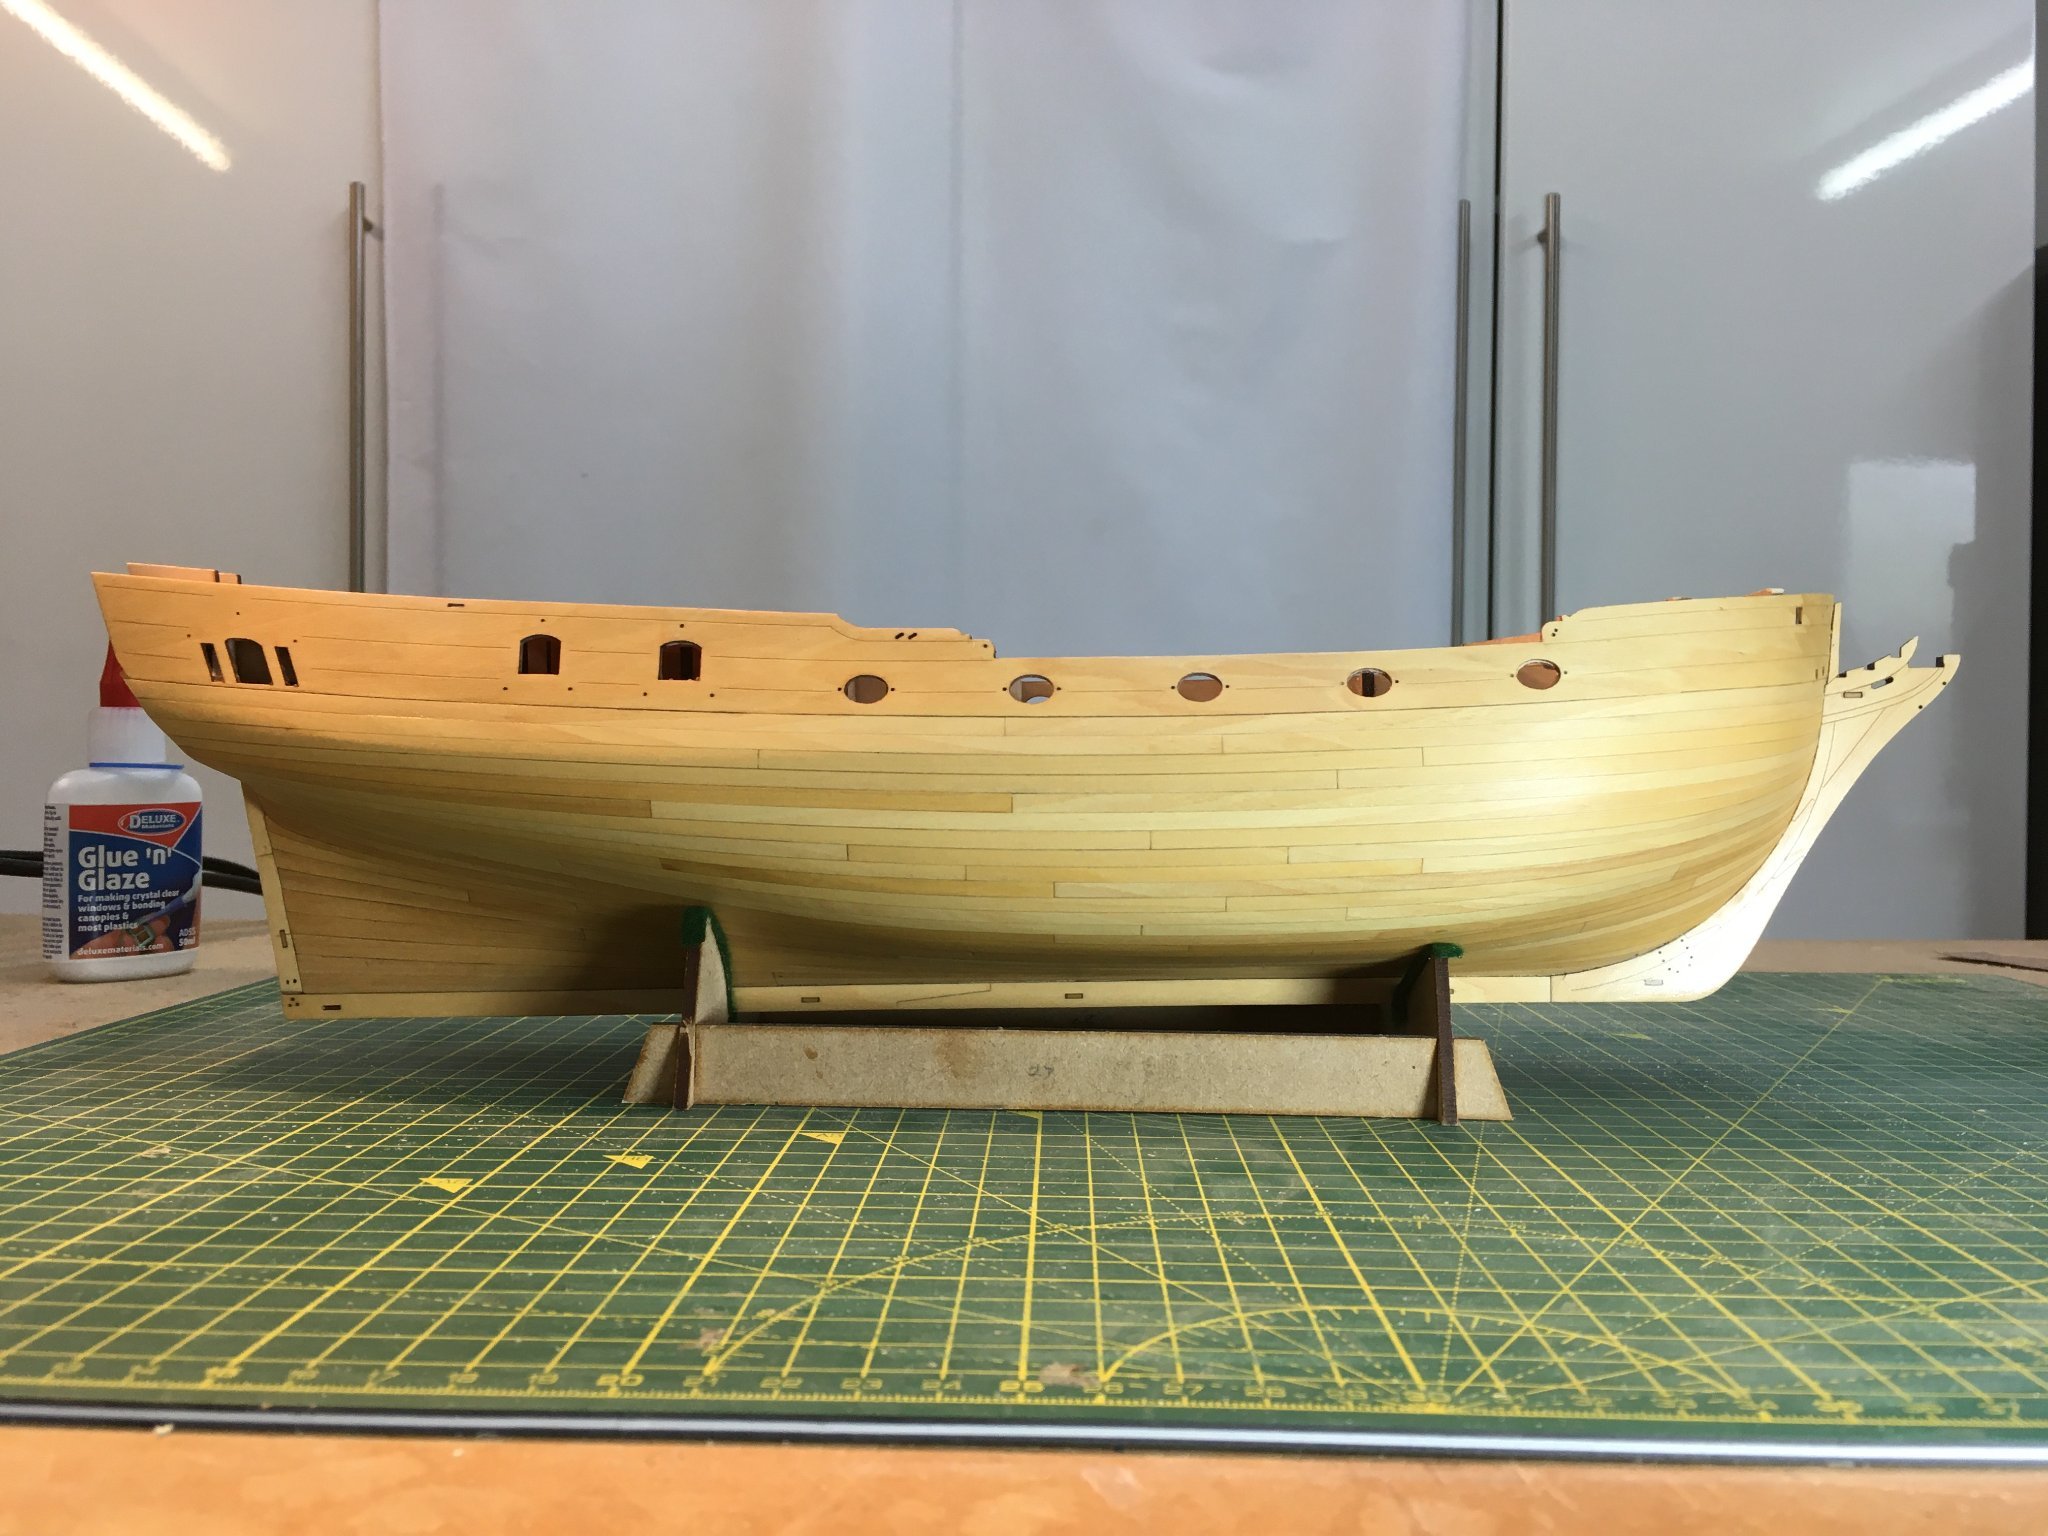
I've finished the first side of the hull, with mixed results. I wanted to tackle this planking job as well as I could and I've described how I lined off the hull and used battens and proportional dividers. On balance I'm pleased with the accuracy I achieved, with most planks fitting well. However I made a couple of avoidable errors which will be obvious in the photos.
The first was to bring the garboard strake too far up the stem, thereby leaving too little space for the necessary strakes resulting in no fewer than three drop planks in the bows. The second mistake was in failing to sort out the supplied planking material more than I did. I don't mind some variation in shades but I usually do a better job in keeping the darker planks for the less visible areas. I was so engrossed in the marking out process and using the dividers for the first time that I didn't pay sufficient attention.
Anyway, I'd more or less decided to paint the hull as soon as I had to start using trennels during my early abortive attempt to use PVA on the second planking, so these mistakes shouldn't matter. Another real positive is that after the first few strakes I was able to use the odourless CA from BSI that @glbarlow recommended. At first I was careful to limit my exposure, but now I can happily use it for extended periods without the adverse reactions I get from normal CA.
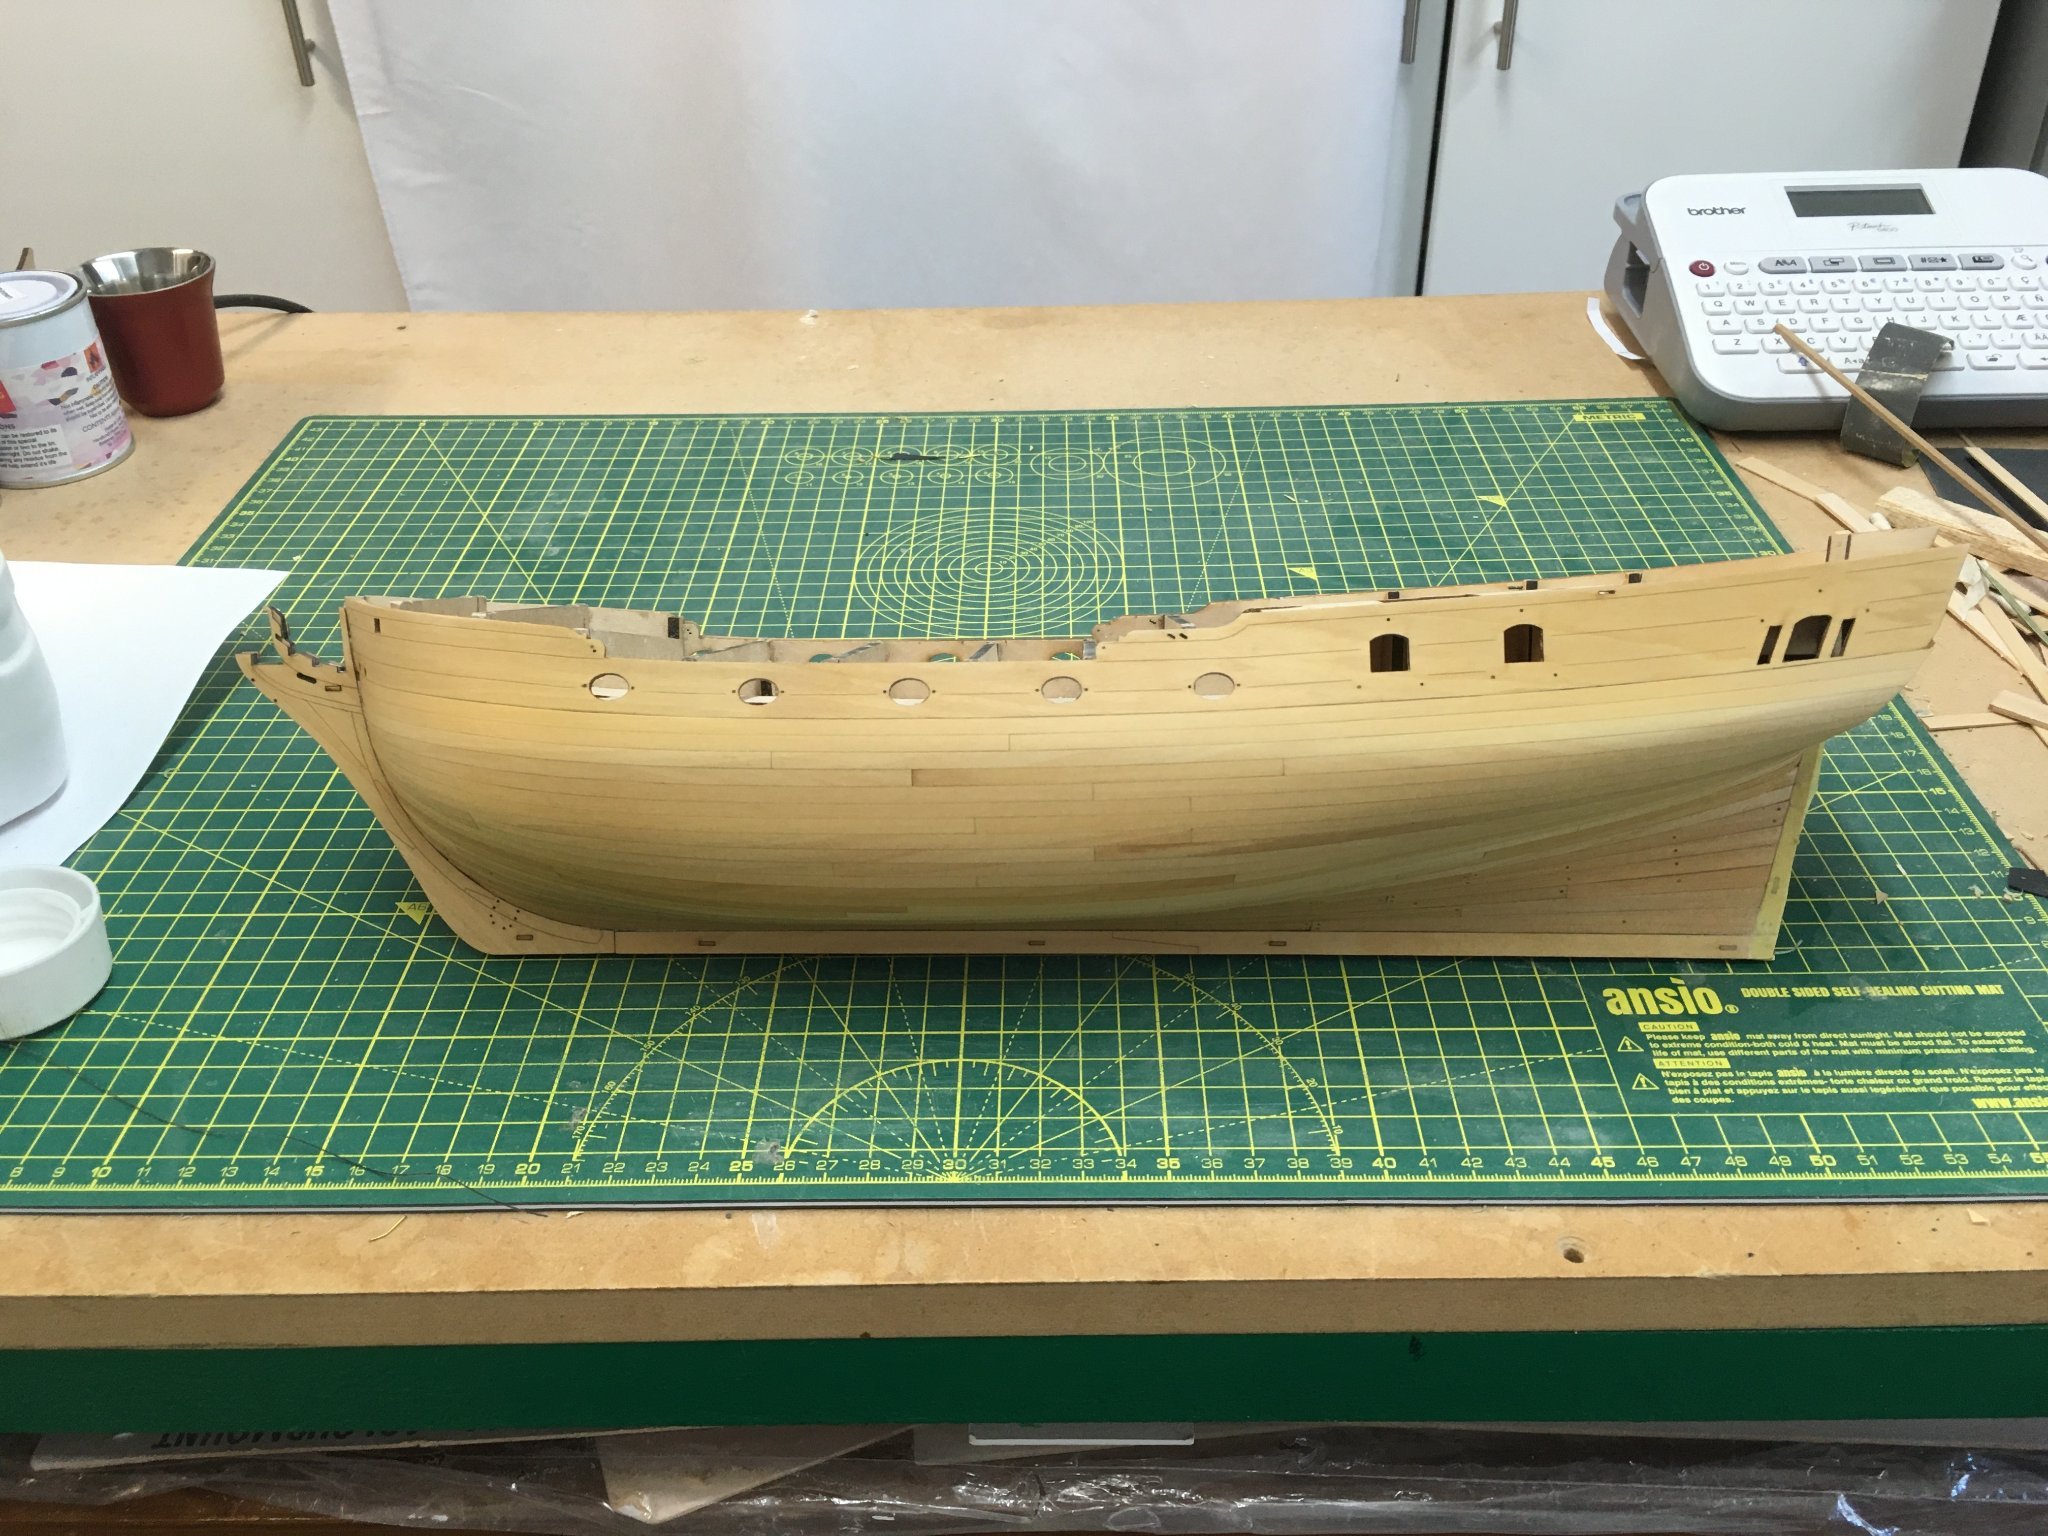
Here's the current state of play, with just a little more sanding required before WOP or shellac (I haven't decided yet).

Derek
-


HMS Sphinx 1775 by Glenn-UK - Vanguard Models - 1:64
in - Kit build logs for subjects built from 1751 - 1800
Posted
For me, the bottom line is that once someone has bought a kit it's entirely up to them what they do with it.
Speaking purely personally, when people like Chris Watton and Chuck Passaro put so much effort into designing great products I feel a duty to put my own effort in and build them as well as I can.
Glenn - I've always enjoyed reading your logs and picking up tips from them, and I know from our correspondence that you're always seeking to improve. However on the subject of running:
I used to be a competitive runner as well Glenn. However I read elsewhere that you're a sprinter, while I ran marathons. Slow and competitive works too! 😉
Derek