


druxey
-
Posts
13,390 -
Joined
-
Last visited
Content Type
Profiles
Forums
Gallery
Events
Everything posted by druxey
-
 No, I don't think so, Allan. It would blow the timberheads apart there. The carronade must have replaced a 9-pounder at one of the red locations, or mods. made to the forecastle to accommodate it.
 -
Well, now I'm also confused! I was only referring to the color arrowed plan (post #38), with two wider spaces between timberheads and gaps in the rail. I think we can safely assume a drafting error with the single line through this gap on the aft space.
-
Just carronades at the red arrows only. It could be only a single carronade with two possible positions for it!
-
Royal Louis by fmartins - multi-media
druxey replied to fmartins's topic in - Build logs for subjects built 1751 - 1800
Full marks for perseverance and creative solutions. Not, perhaps, for stabbing yourself! Please always keep your fingers behind a cutting edge or point! -
Off to a good start, Chris!
-
Please read either: chrome-extension://efaidnbmnnnibpcajpcglclefindmkaj/https://thenrg.org/resources/Documents/articles/APrimerOnPlanking.pdf or: chrome-extension://efaidnbmnnnibpcajpcglclefindmkaj/https://thenrg.org/resources/Documents/articles/LiningOffYourHullPlankingTutorialAndFan.pdf Thern is so much information at your fingertips on this wonderful site!
-
Yet Another Pandora 3D build
druxey replied to herask's topic in CAD and 3D Modelling/Drafting Plans with Software
Nice start. Two points: One, that stem would be shored up well (propped) or is would stress the boxing joint and very likely fall over! Two: As for the rabbet line, it would become the bearding. You need a good book to reference for so much of the construction of one of these wooden ships. -
But you really need to plan out all the planking runs first, or you will run planks at the bow down to points! The problem arises by running the garboard up the stem, as in the illustration above. It leaves insufficient space for all the other strakes, like crowded teeth. The only solution is to drop some strakes, which in most hulls is unnecessary. Do read the planking tutorials. It will save you a lot of grief.
-
Read the pinned articles on planking on this site!
-
The blue arrowed location was for the fish davit, I think.
-
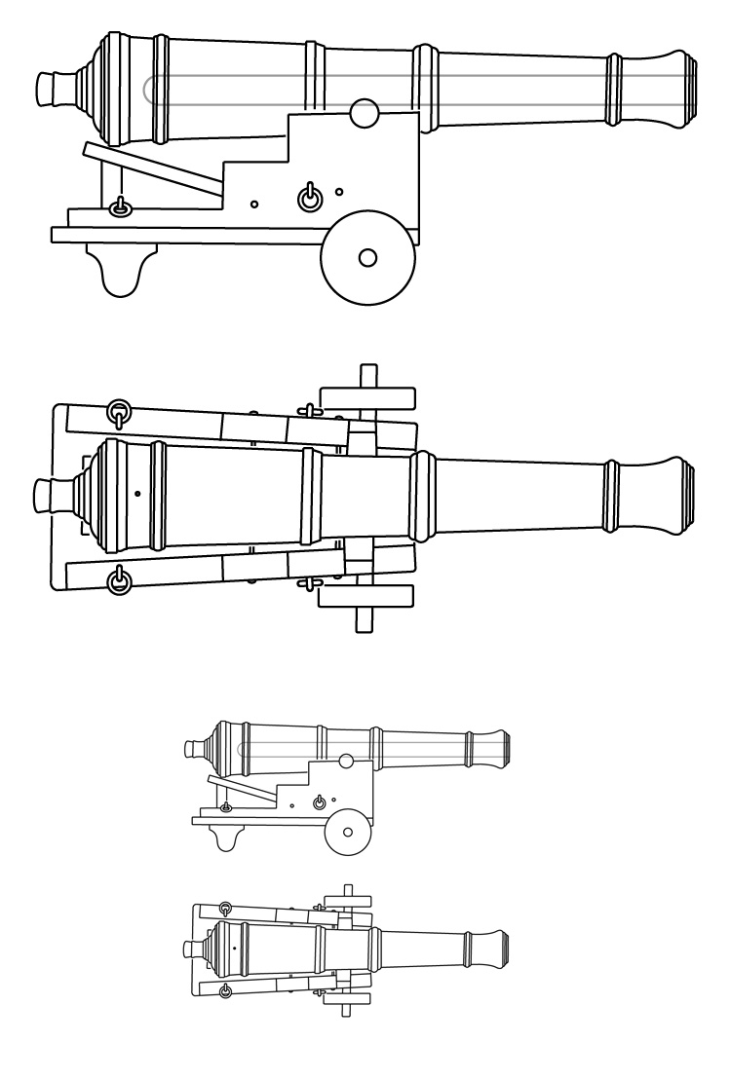
Here is a 3-pounder of the period in two scales: The barrel was 4' 0" long. Hope this helps you, Ab!
- 77 replies
-
- 8
-

-
- Royal Yacht
- card
- (and 1 more)
-
Never make anything simple if you can make it complicated! The designers back then certainly threw everything at the carpenters and shipwrights. And now the model-maker. You are doing an outstanding job, Matthias.
-
Look at paintings of the day; there are no reef points. Bonnets were used only on larger ships until reef points were introduced.
- 82 replies
-
- 3
-
-
- Yacht Mary
- Mamoli
- (and 1 more)
-
A very pragmatic and practical approach to lofting! It should work out well.
-
Sorry about the water content in PVA doing that. How frustrating!
-
Nice, neat, methodical work, JD!
-
You absolutely should keep your process proprietary, Chuck. The time as well as cost you've invested should produce a return for you. You didn't invest in all that to produce a dozen 'me too' knock-off merchants.
-
That plane is certainly not a toy! I've been using mine for the past few days tapering planking. It works a charm.
- 167 replies
-
- 4
-
-
- Norwegian Sailing Pram
- Model Shipways
- (and 1 more)
-
That is a lot of sanding and elbow grease!
-
A little bird tells me that there will be a book out later this year on all the Stuart Royal yachts, from Mary onward!
- 82 replies
-
- 6
-
-
- Yacht Mary
- Mamoli
- (and 1 more)
-
Just catching up, Marc. A fascinating volume! Your small-scale rope coils and lines look very convincing. I only use white glue on line and it works very well.
- 2,699 replies
-
- 3
-

-
-
- heller
- soleil royal
- (and 9 more)
-
That does look as if the sheet moved during laser etching. Those pieces should have been accurate mirror images of each other. Your methodical approach will pay dividends!
- 167 replies
-
- 1
-
-
- Norwegian Sailing Pram
- Model Shipways
- (and 1 more)
