


druxey
-
Posts
13,390 -
Joined
-
Last visited
Content Type
Profiles
Forums
Gallery
Events
Everything posted by druxey
-
 Very convincing framing pattern, Adam. (I missed your April post until now.) And you were so right to correct alignment early, or it would have been certain to come back and bite you!
 -
Sweet! And very rapid progress, too.
-
L'Amarante by marsalv - 1:36 - POF
druxey replied to marsalv's topic in - Build logs for subjects built 1501 - 1750
The cutaway port side of the hull in the last photo looks really cool! -
That is a fascinating looking vintage milling machine!
-
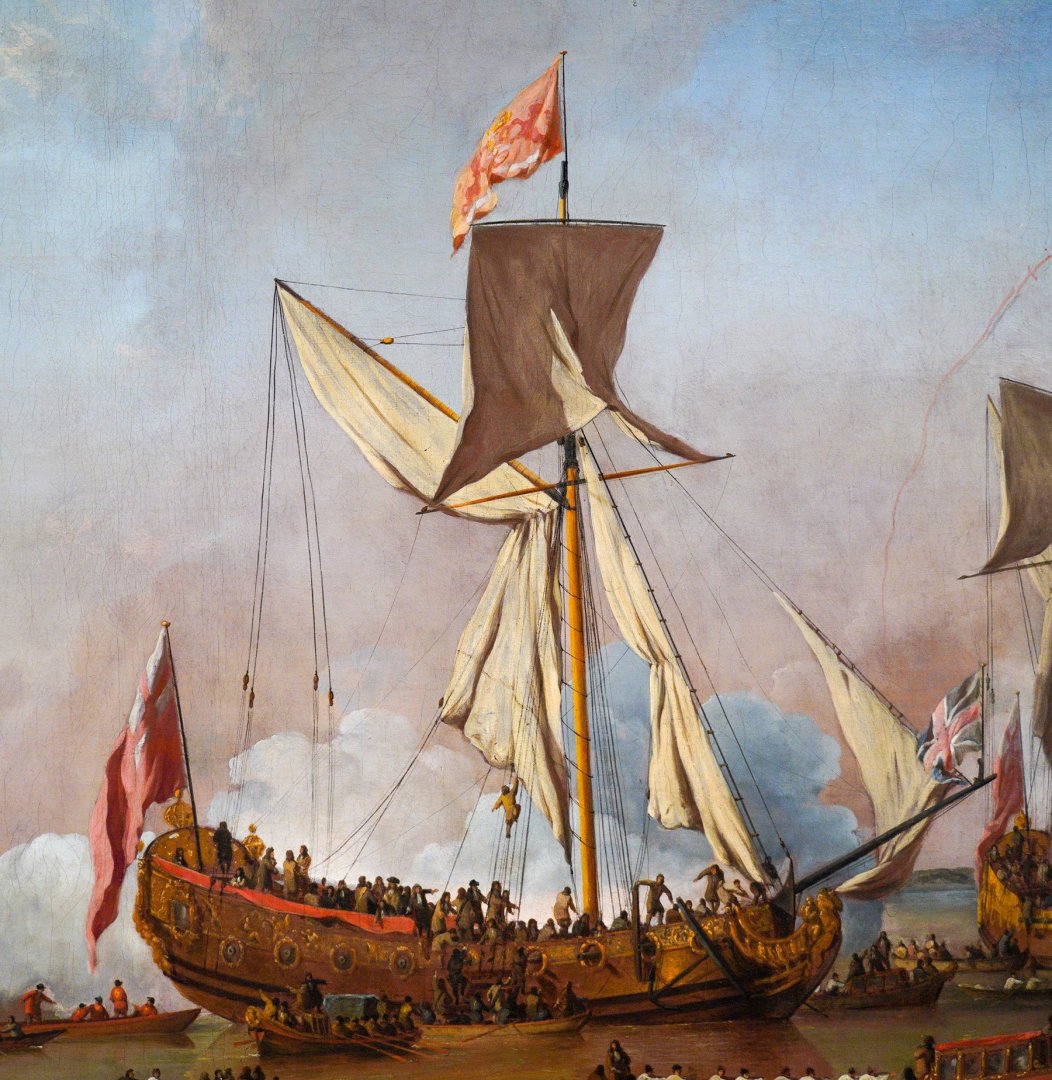
Nicely completed, Clare. The Royal Standard is flown only when the king was aboard. He must be below, somewhere aft.... Usually jack was flown from the jackstaff on the bowsprit. No criticism - just thought you'd like to know. (The painting is of the second or new Mary - not to be confused with the original Dutch Mary. In this instance, the yacht is carrying William of Orange. His standard flies from the masthead.)
- 82 replies
-
- 4
-

-
- Yacht Mary
- Mamoli
- (and 1 more)
-
I smile at the actual random pattern of deck planking - so very different than seen on most models!
-
Könnten Sie bitte entweder schreiben oder einen Übersetzungsdienst ins Englische nutzen? Danke! Ihr Projekt sieht interessant aus. (Can you please either write or use a translation service into English? Thank you! Your project looks interesting.)
-
Gold solder for brass
druxey replied to Richard Braithwaite's topic in Metal Work, Soldering and Metal Fittings
Would electroplating the fixtures be a better solution? -
I believe that the diagonal nailing pattern Trevor refers to was British practice. Perhaps what we are seeing here is Dutch. If the copper was in good shape when the ship was captured, it would not have been replaced, as this was a major expense. The copper still looks in pretty good shape!
- 5 replies
-
- 1
-
-
- copper plates
- Braak
- (and 1 more)
-
Yves: that was only for the aft accommodation.
-
L'Amarante by marsalv - 1:36 - POF
druxey replied to marsalv's topic in - Build logs for subjects built 1501 - 1750
Excellent work on that drop plank. -
Plain, uncluttered background and crisp focus are requirements for the competition. Do photographic justice to your work! If you are a lousy photographer, get a friend to take the pictures for you.
-
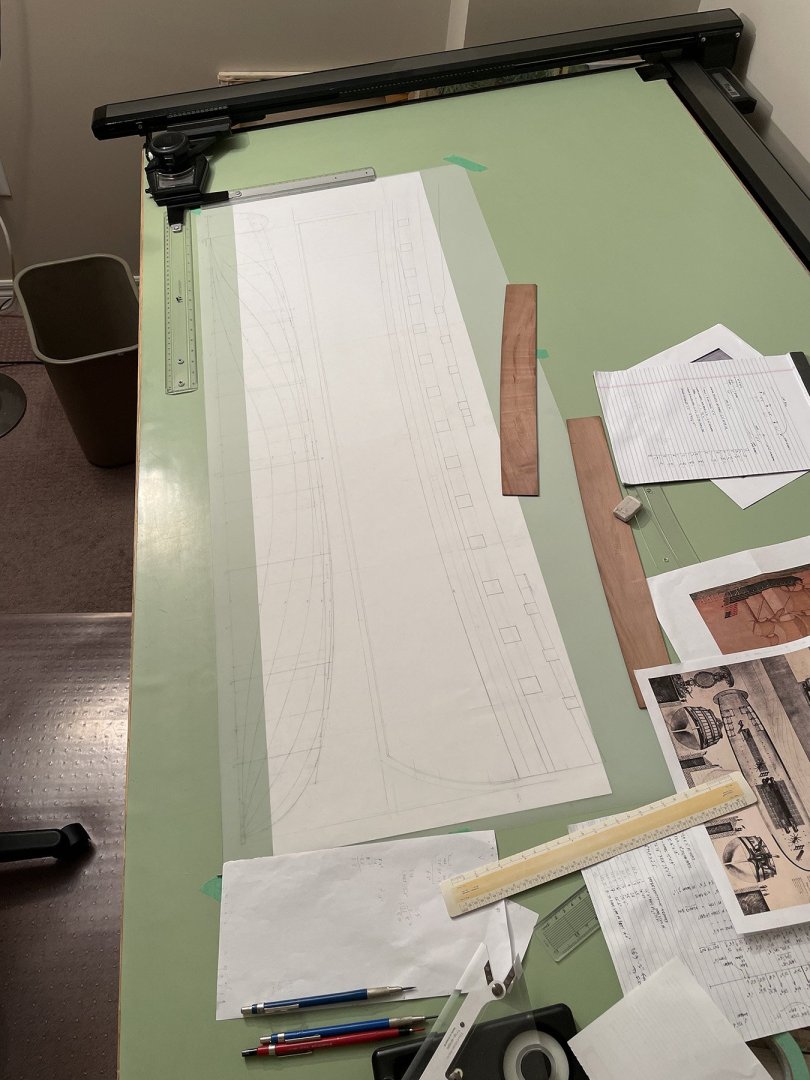
Thr problem with paper plans is a considerable degree of expansion or contraction depending on humidity. You can be absolutely 'on' with that keel today,and be off several mm by the next day. It's like chasing a chimera. Madness will ensue! Two solutions: 1) Take a known scale measurement such as keel length and apply a scale rule against your work. 2) Produce a scale drawing on Mylar sheet. It is dimensionally stable regardless of humidity. Use that rather than a paper plan. The second solution is one I've used now for decades, since I discovered paper plans were a snare and delusion for accurate work. Sure, it's more work, but saves my sanity in the long run! The photo is the prelude to my current project, the South Carolina, ex L'Egyptian.
-
Need help with building a Strap for topgallant shrouds
druxey replied to Y.T.'s topic in Masting, rigging and sails
Funny, that. The first piece - or the first acceptable one - always takes far longer than subsequent ones! Those look really nice. -
Increase the gaff angle? Slack off the vangs a little before adjusting the peak halliard. The overall 'look' of the model is nice, even if the sails aren't quite the way you'd like them to be.
- 82 replies
-
- 3
-
-
- Yacht Mary
- Mamoli
- (and 1 more)
-
Nice clean result. Can't see any sign of the struggle!
-
That is rapid progress!
-
Bonnets were used instead of reef points, Claire. Neat work on those sails. I'm so sorry about the loss of your friend Ken.
- 82 replies
-
- 2
-
-
- Yacht Mary
- Mamoli
- (and 1 more)
-
Spindle chair by kgstakes - FINISHED - 1/12th scale
druxey replied to kgstakes's topic in Non-ship/categorised builds
Very nicely done. It 'turned' out well! -
Another time, you might want to consider using SilkSpan....
- 82 replies
-
- 2
-
-
- Yacht Mary
- Mamoli
- (and 1 more)
-
It's nice when earlier attention pays off later in the build, as has happened here. Looking good! Enjoy Crete with your bride!


