HOLIDAY DONATION DRIVE - SUPPORT MSW - DO YOUR PART TO KEEP THIS GREAT FORUM GOING! (89 donations so far out of 49,000 members - C'mon guys!)
×


JesseLee
-
Posts
1,694 -
Joined
-
Last visited
Content Type
Profiles
Forums
Gallery
Events
Everything posted by JesseLee
-
 Mark I don't make many comments on your build because I feel like a dummy sitting in the back of the class , but I'm trying to absorb as much as my mind can comprehend and learn from master builders like you. Very impressive workmanship! Jesse
 -
Very fine! Jesse
-
Looking awesome Thomas! Jesse
-
Ahhhhhh, it is reminding me of my old workbench when I worked as a Bench Jeweler. Looking very nice! Kinda wish I had one for myself! They work good for our kind of hobby work. Jesse
-
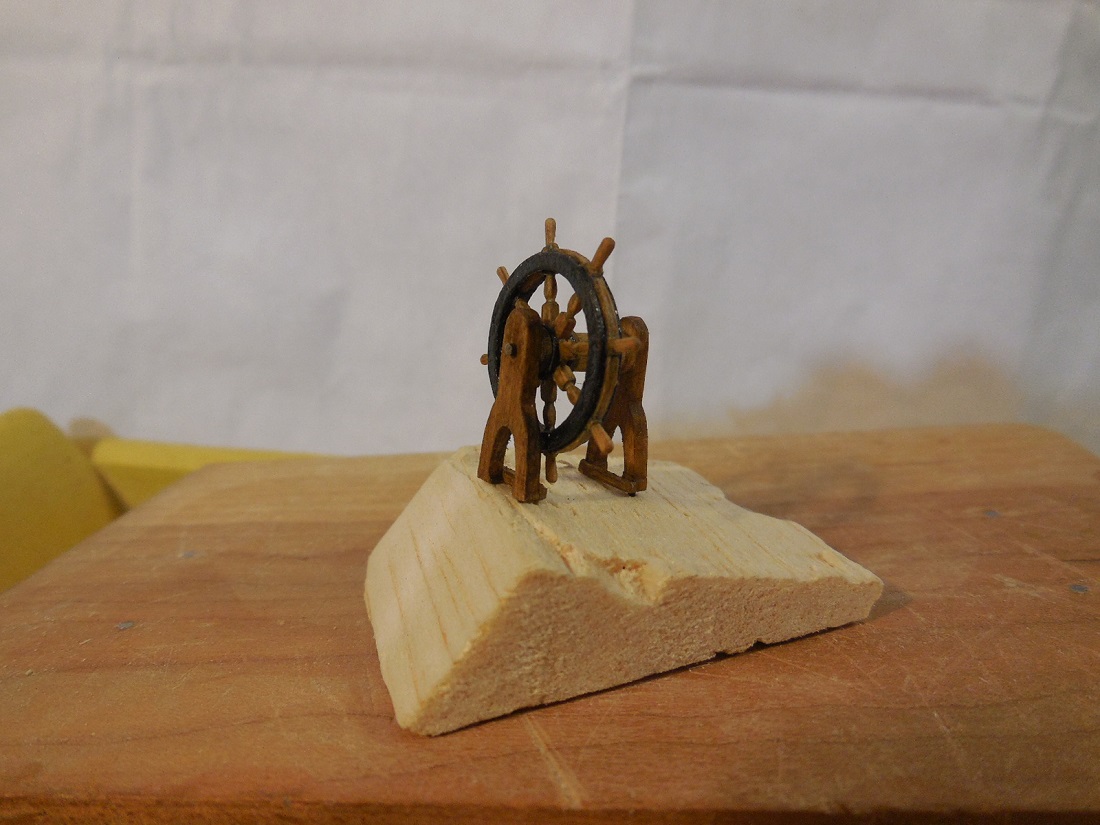
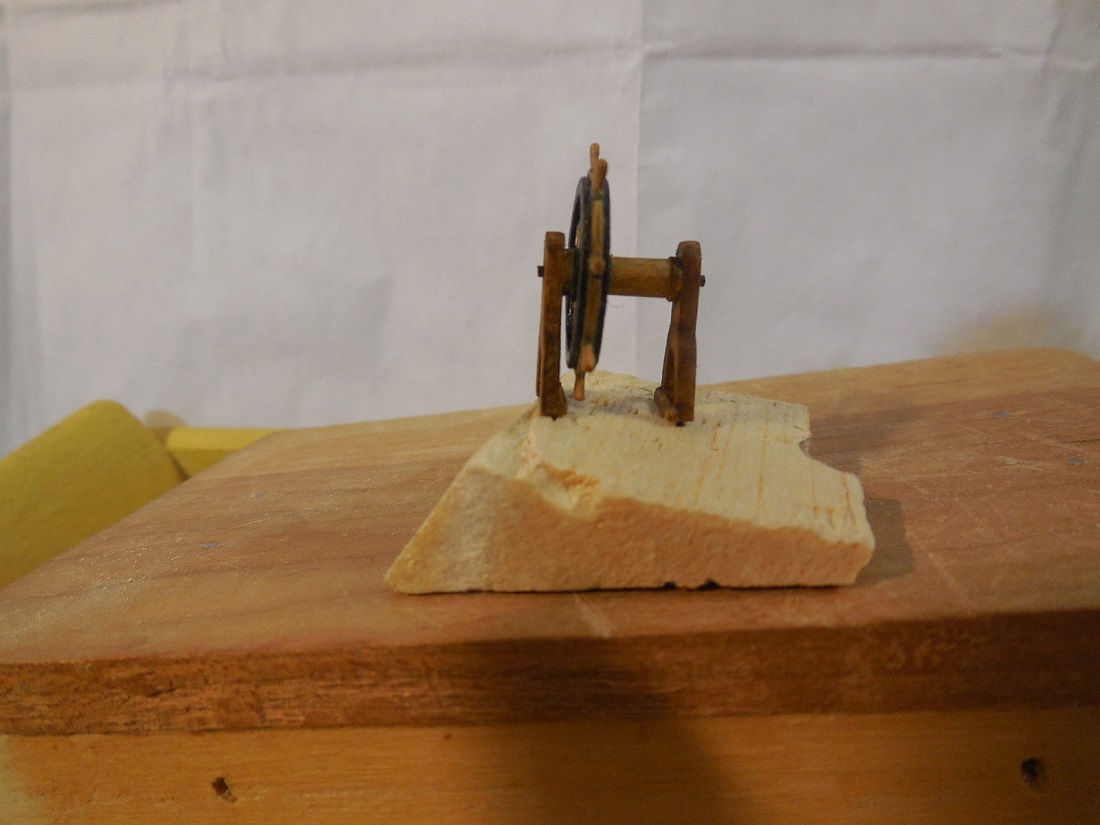
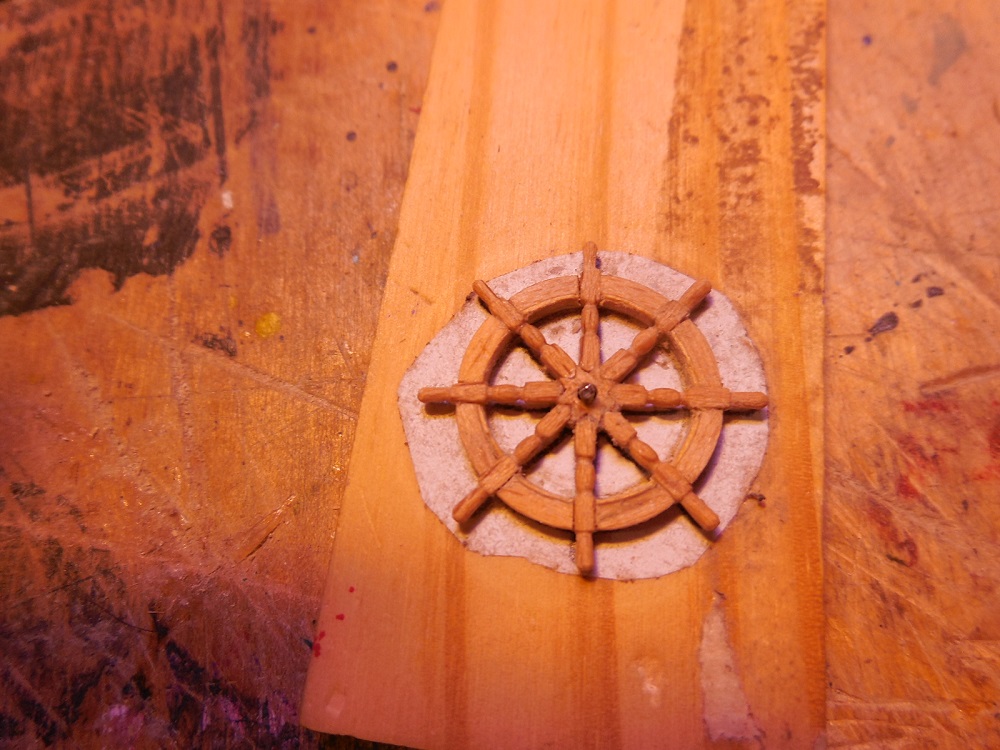
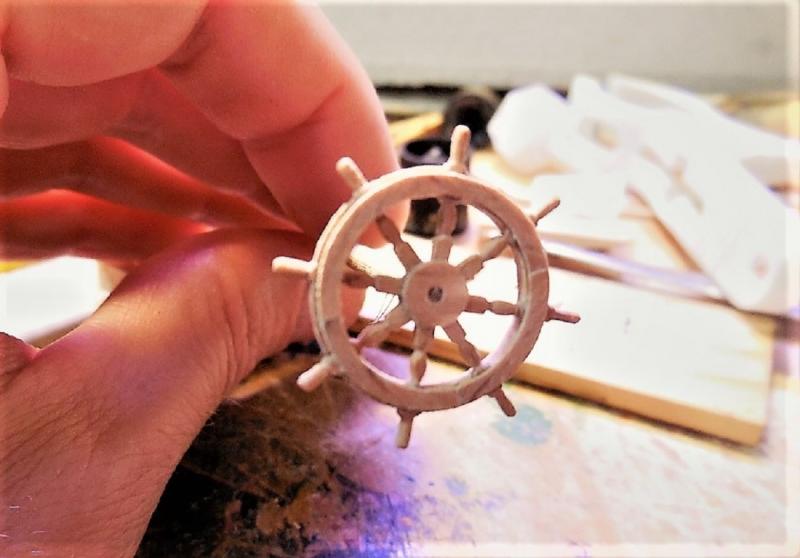
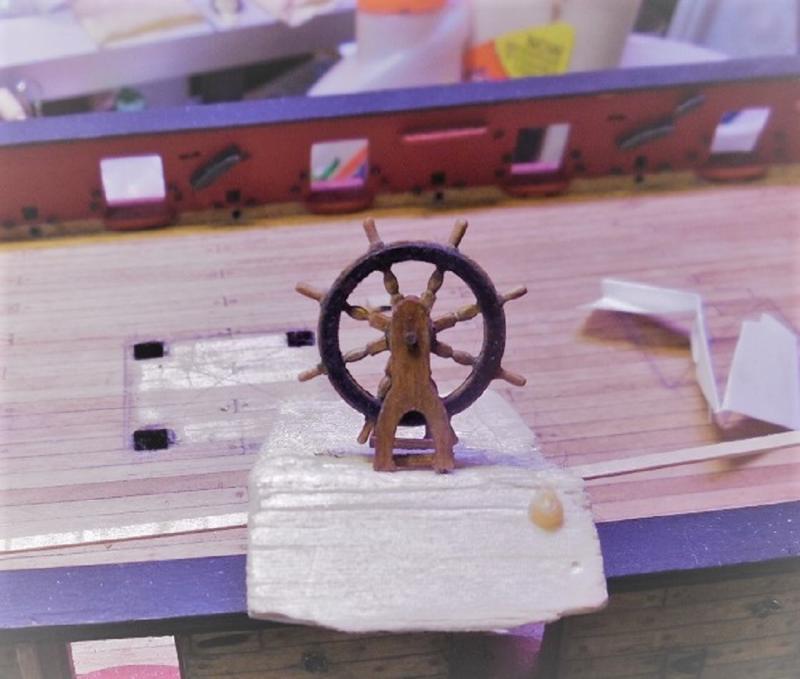
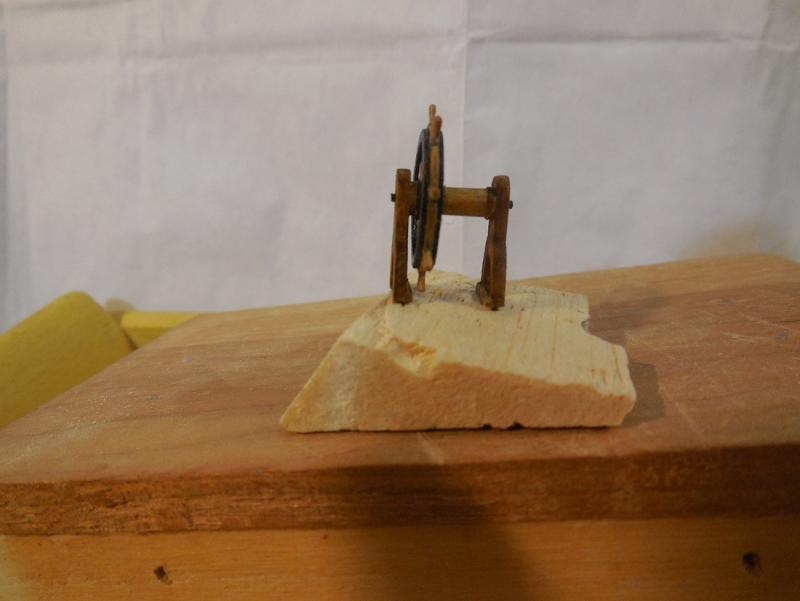
Thanks for the kind words and likes! Yes Dave, I use hand tools a majority of the time. I have better control with smaller things that way. Finished ships wheel and deck assembly. Jesse

- 1,306 replies
-
- 34
-

-
- syren
- model shipways
- (and 1 more)
-
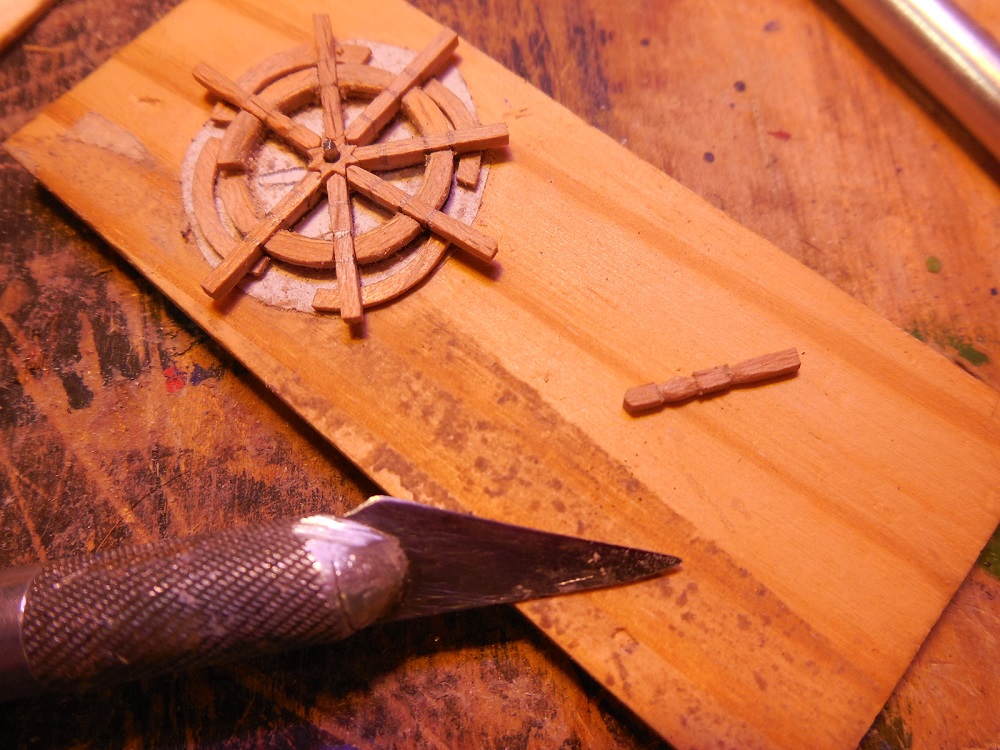
Next I made 8 shorter pieces that the spokes will lay between. Jesse
- 1,306 replies
-
- 16
-
-
- syren
- model shipways
- (and 1 more)
-
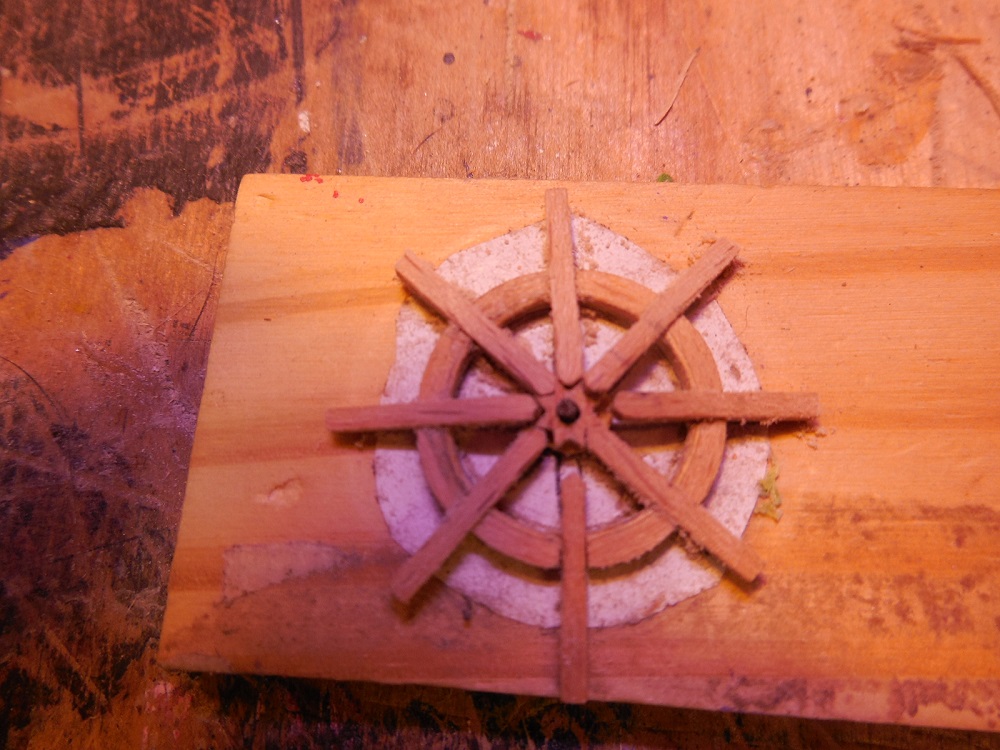
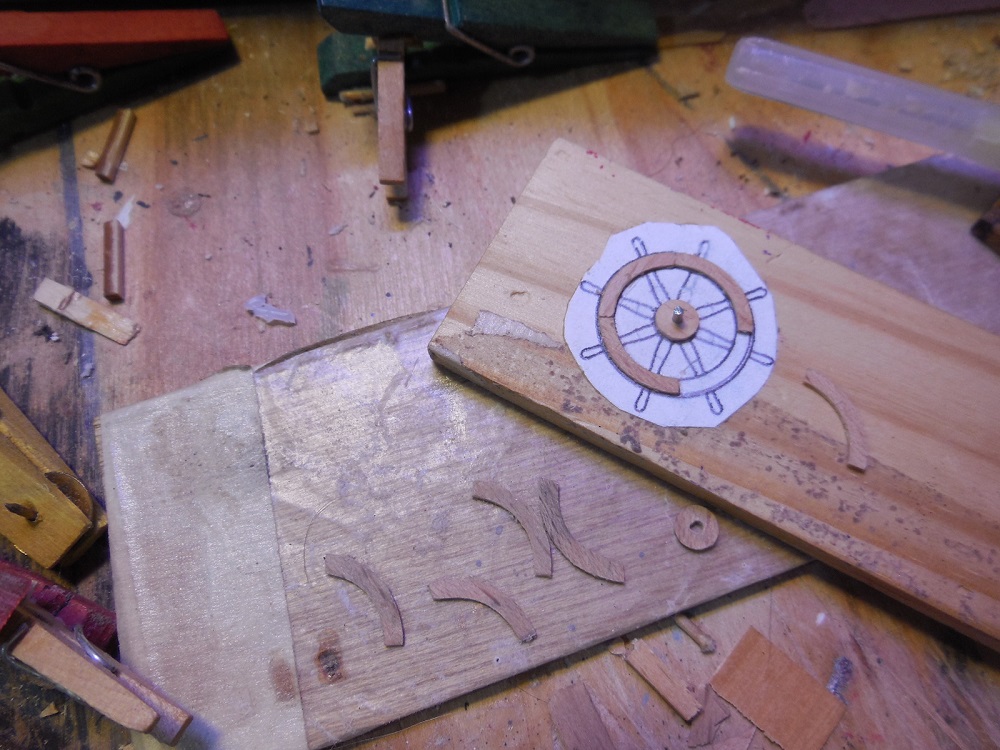
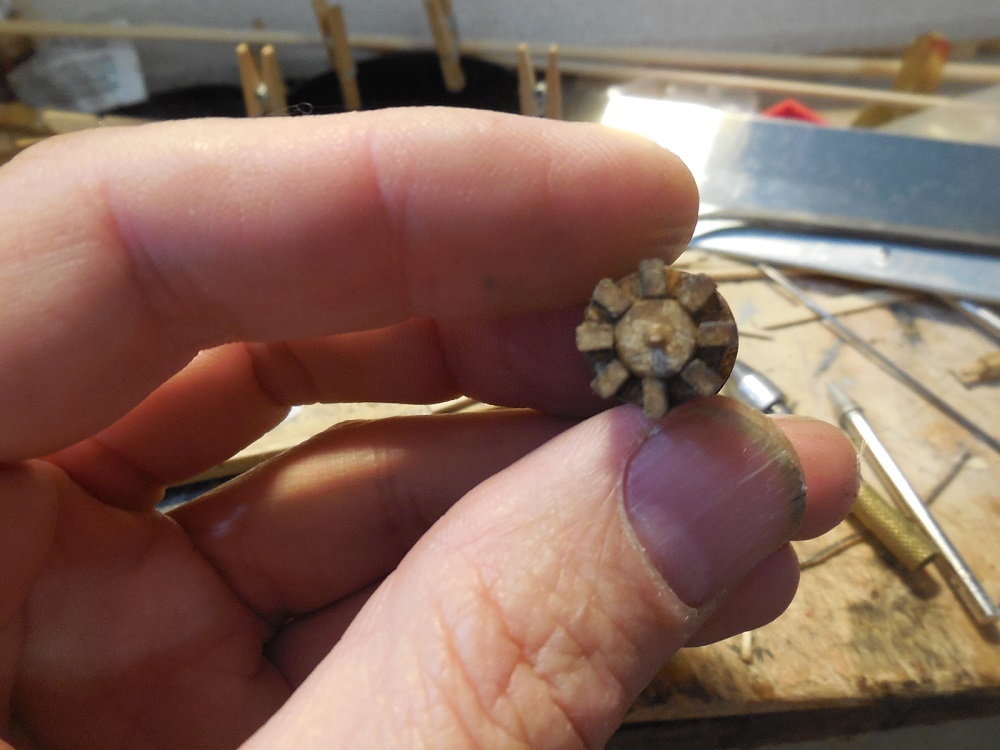
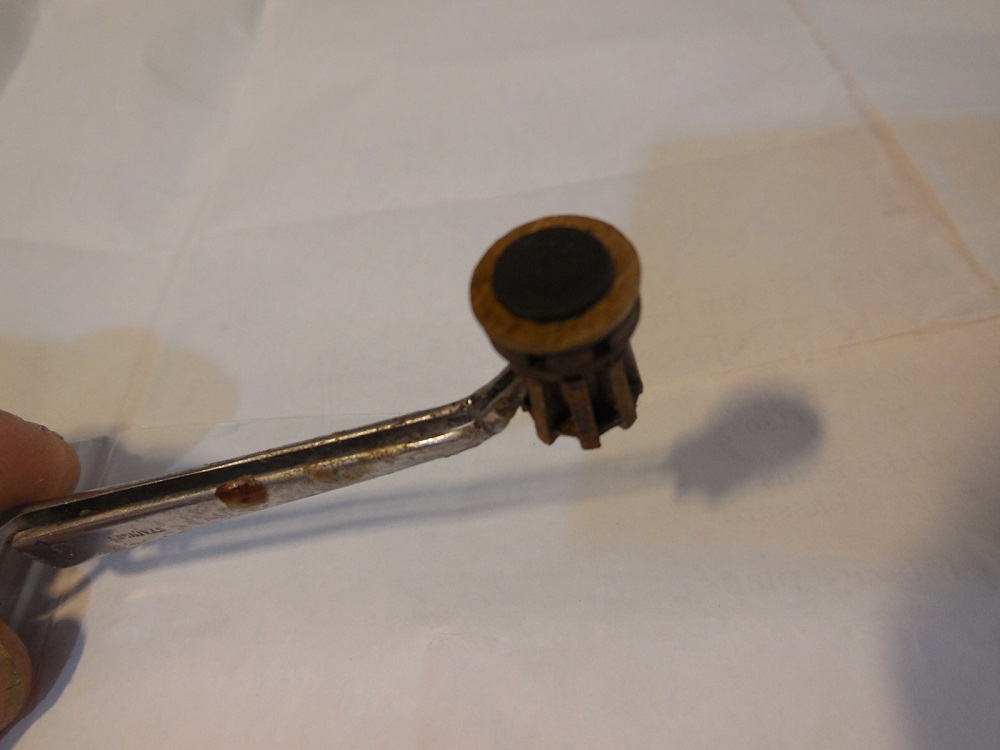
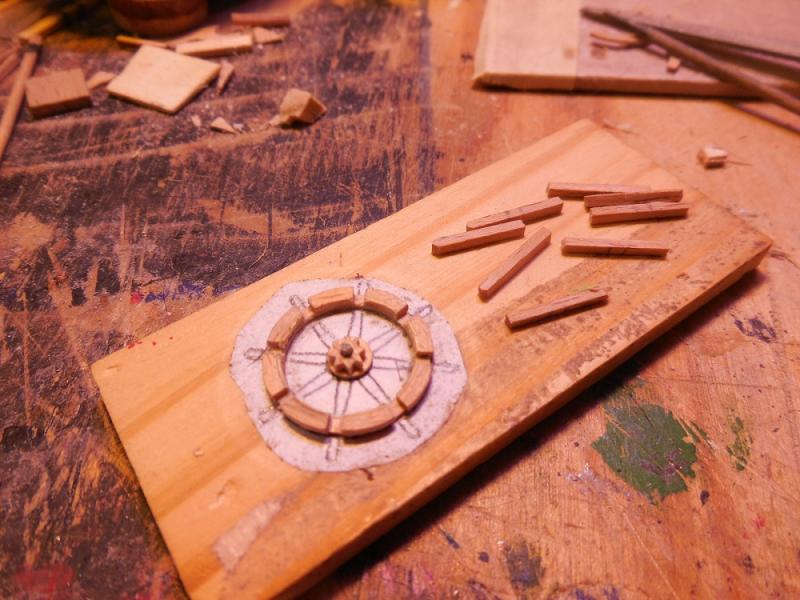
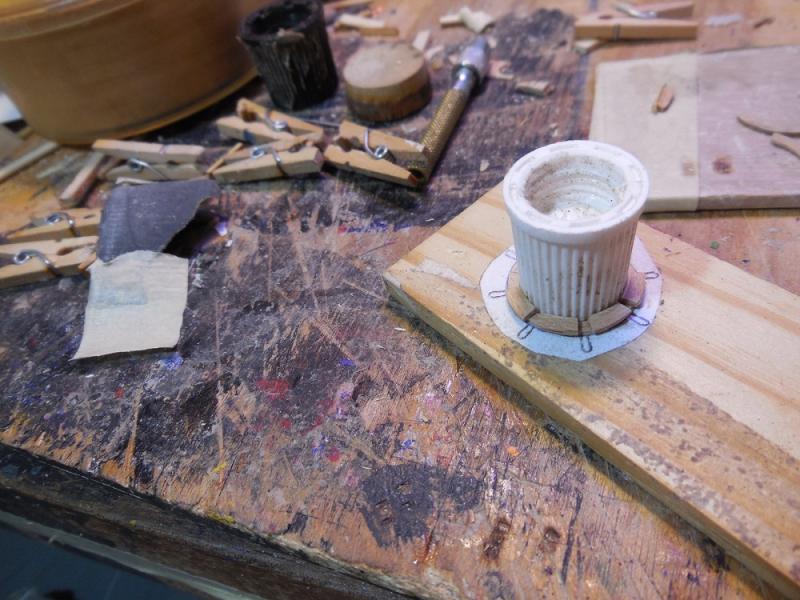
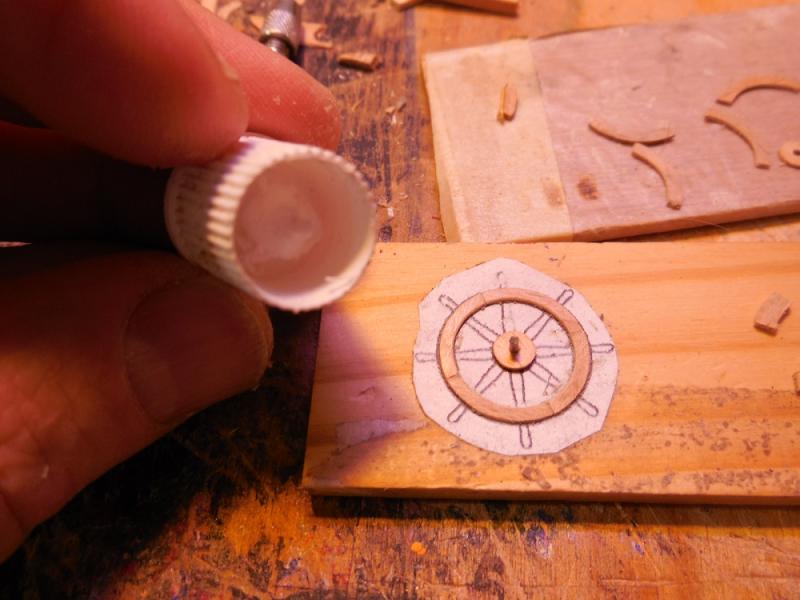
Thanks everybody. I will leave the handles on. Ben struggling with a cold which is much worse with my illness and weakened immune system but have been able to get some work in. The ships wheel the kit supplied is the worst thing I've ever seen. There is no way to make this thing work at all so I decided to try my hand at fabricating one myself. I copied the wheel drawing from the plans and glued the cut out on a flat wood base to go by. A little while back another MSW member (Dennis R. in New Zealand) gifted me with some wood samples. One of the types he sent was some flexible beech. I liked the way it looked and well it is to work with so I used it to make the wheel. Started out with 4 pieces to form a circle to build up from and a round center piece. even with the template is was hard to keep things in a perfect circle. Used this old glue cap which happened to be the exact size to keep it shaped just right. Jesse

- 1,306 replies
-
- 18
-
-
- syren
- model shipways
- (and 1 more)
-
Glad to hear you have had some communication with Keith. Last time I talked with him things were not very good at all. Jesse
- 515 replies
-
- 7
-
-
- artesania latina
- whaleboat
- (and 1 more)
-
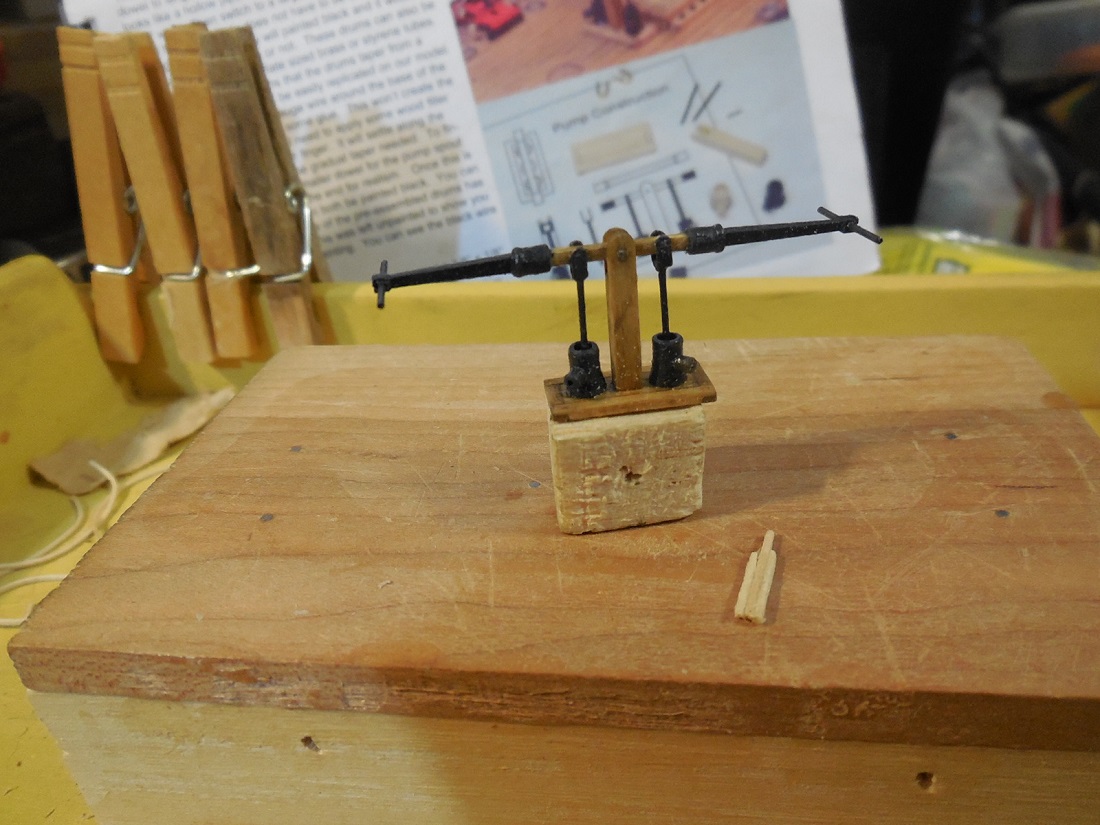
As always, thanks for all the support. Assembled the pumps. Admired how some others added the handles so I thought I'd give it a try. Made mine out of wood and used wire for the handles. Don't know if I should leave the handles on or not. I like the way it looks with them but they also take up a lot of deck room. Jesse

- 1,306 replies
-
- 28
-
-
- syren
- model shipways
- (and 1 more)
-
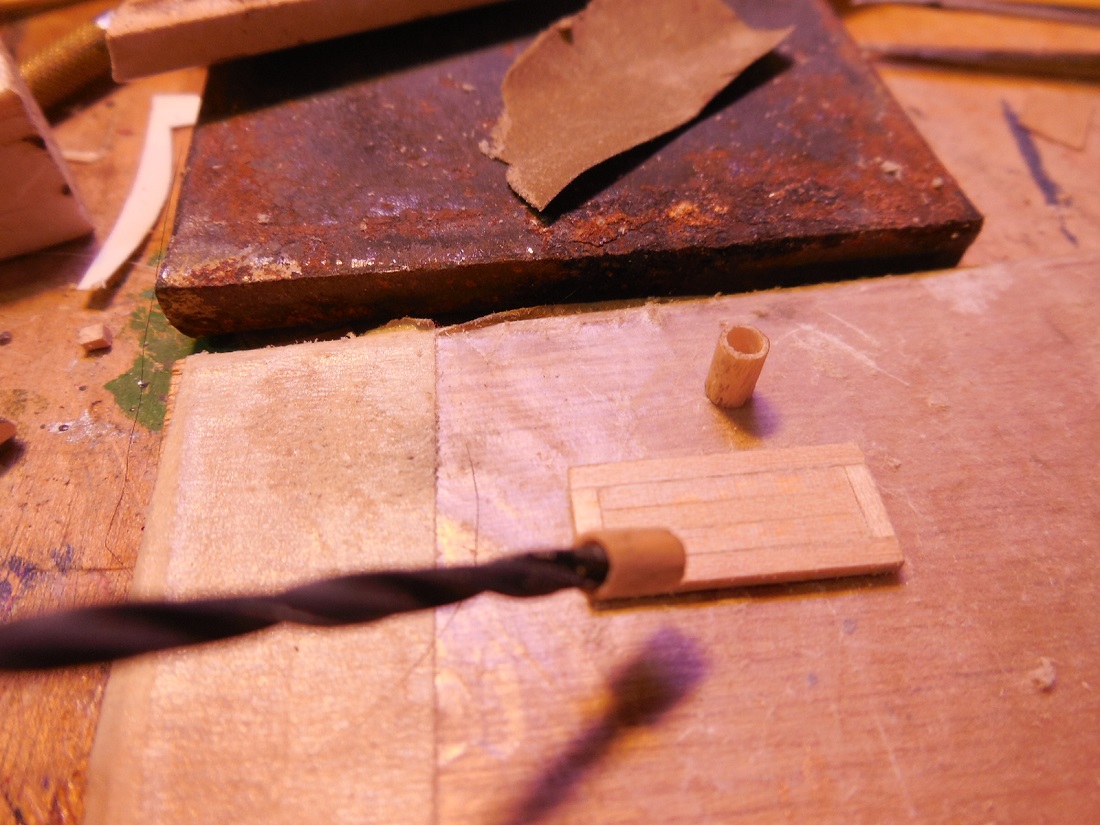
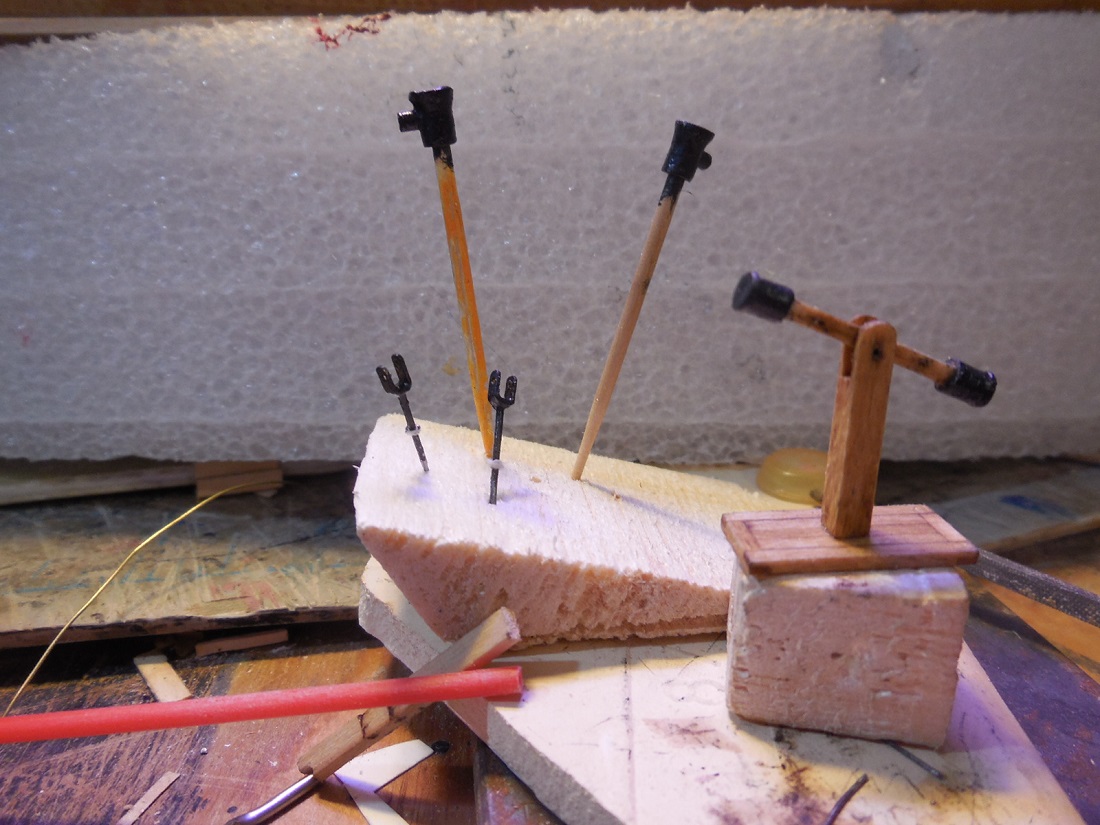
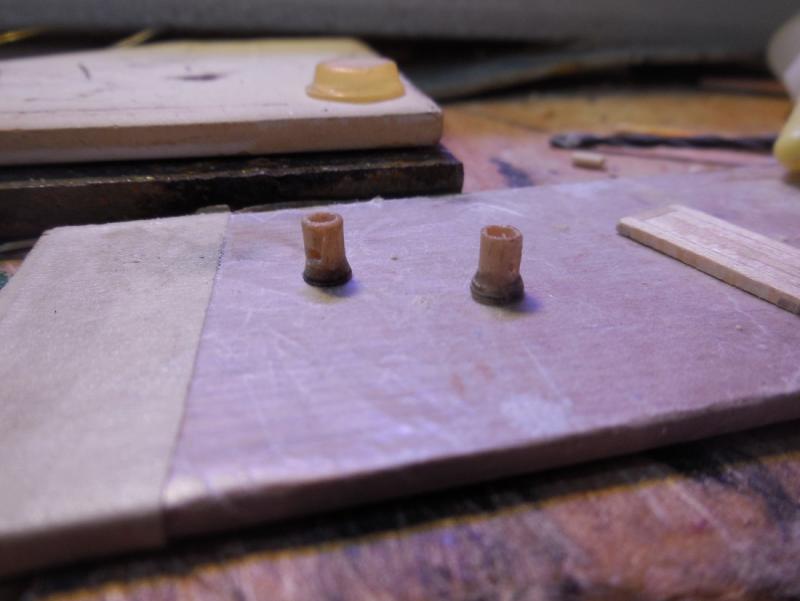
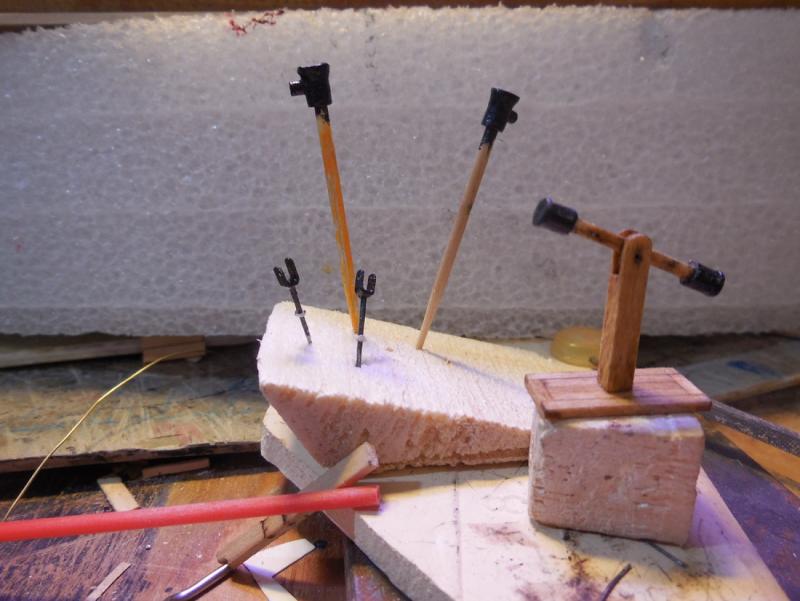
Thanks Carl, Ken and Denis. Alan, thanks for those pics. You can learn from pictures like that even if they aren't exactly the same rig. More progress on deck fittings. Drilled out dowels for the pump drums. Widened the bottom of the drums by gluing a wire around the bottom then filling it in and tapering it with several layers of CA glue. Clipped off pieces from a plastic spray tube from a WD-40 can to make the pump spouts. Made the center post and crossbar from the basswood provided in the kit. Made iron bands on the ends by wrapping with paper strips with CA glue. Following the instructions I made the pump brackets by bending brass pieces, drilling a hole in the bottom and CA gluing pieces of 22 gauge wire I the holes. Painted the appropriate parts black and have them drying for assembly. Jesse

- 1,306 replies
-
- 26
-
-
- syren
- model shipways
- (and 1 more)
-
Wow Thomas, this pump looks so good I hate to even show mine. You have an incredible talent for fabrication! Jesse
-
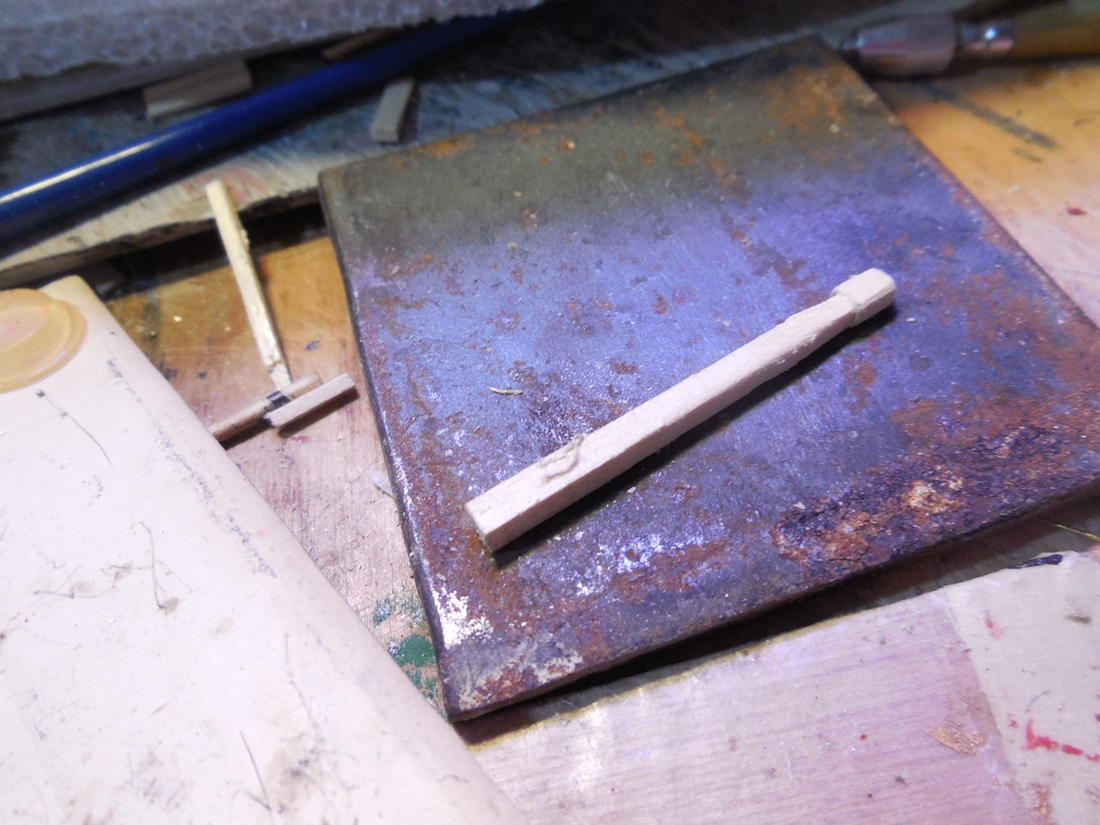
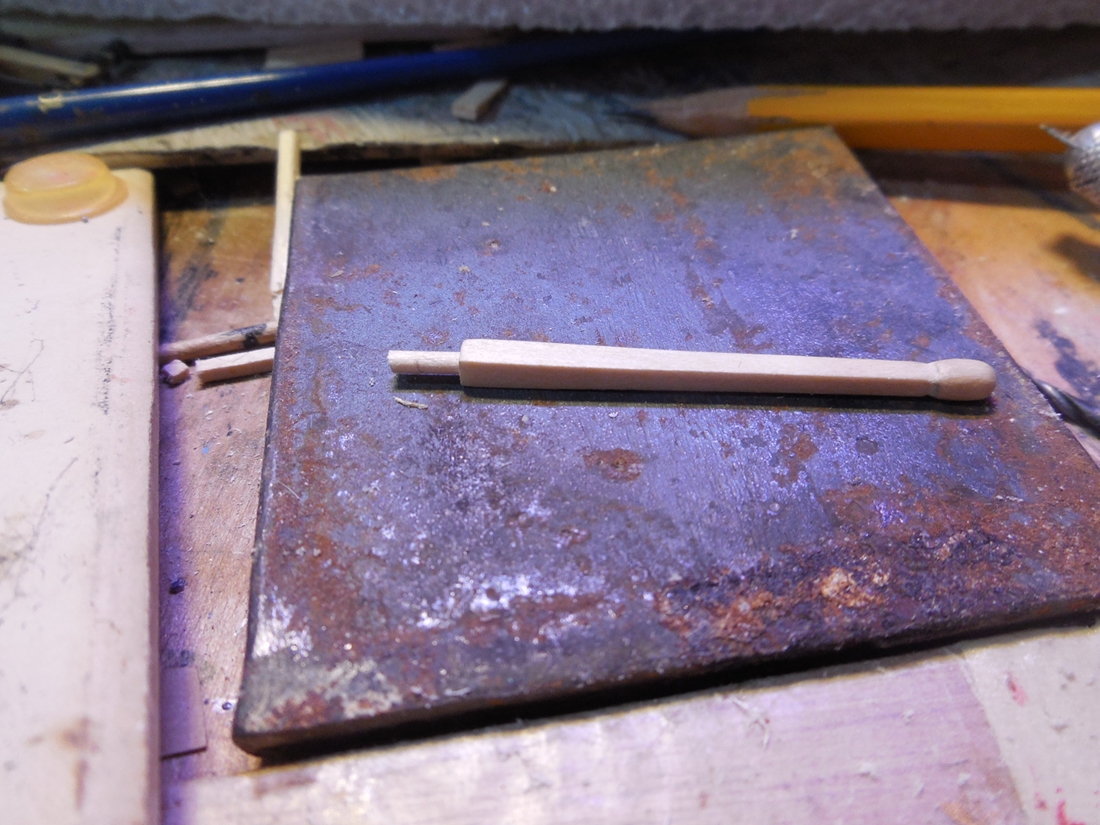
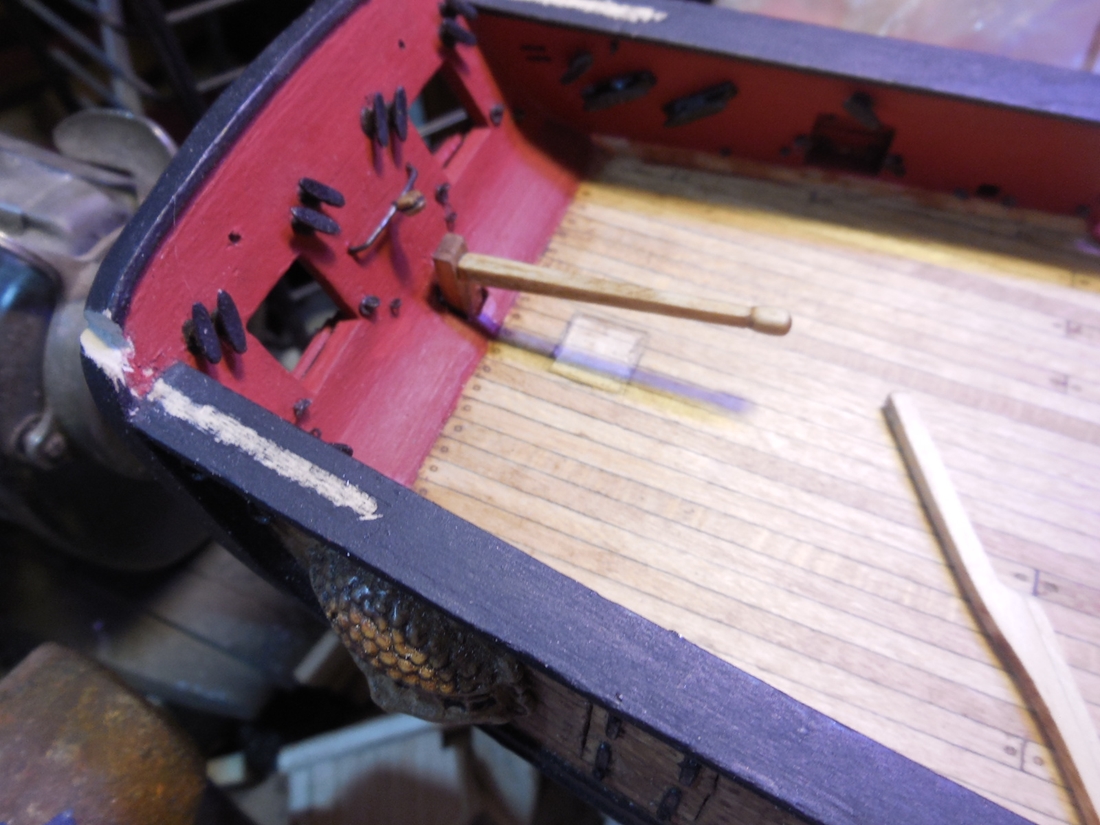
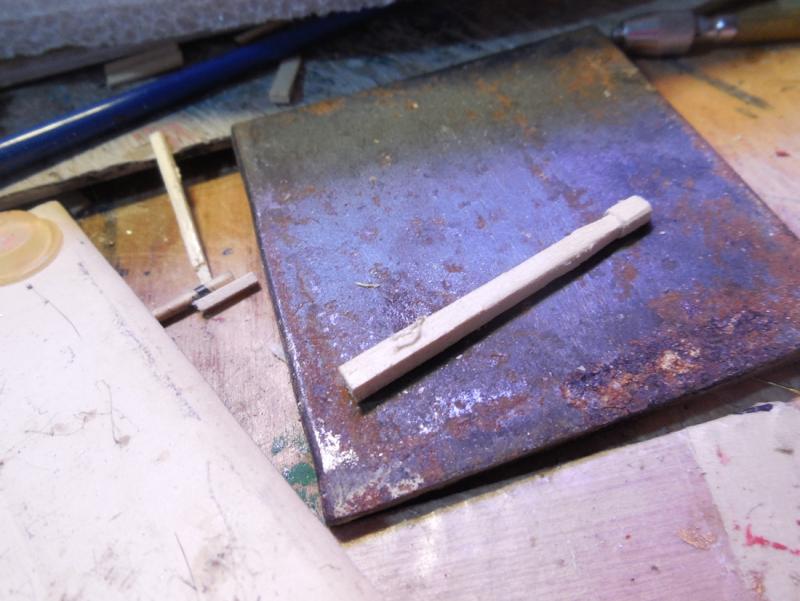
My illness is making it more difficult to get much work done at a time but have a little more progress to show.... Constructed the companionway. Pretty much by the instruction book. I had a lot of trouble making this because of how thin the walls are. Colored the edges with pencil lead to show the caulking. Couldn't keep the sides straight and square. Finally clamped them around the end of a piece of wood that was the right size to fit just inside the walls and got everything squared up. (The camera angle makes it look off but it's not) This will be added on later after the carronades are rigged into place. Started pre making the tiller. Shaped it and added a wood peg to secure it through the rudder. Dry fitted for now. Will add rings later and glue it on after the two cannons are rigged into place. Jesse


- 1,306 replies
-
- 28
-
-
- syren
- model shipways
- (and 1 more)
-
Amazing work as usual Dave. I need to learn to make anchors from scratch like you do. I have one or two that need replacing. Jesse
- 962 replies
-
- 3
-
-
- sovereign of the seas
- ship of the line
- (and 1 more)
-
Sure David, I've learned so much from others here. I love this community who helps and shares with each other. Jesse
- 1,306 replies
-
- 7
-
-
- syren
- model shipways
- (and 1 more)
-
My thoughts and prayers are with you Erik. Jesse
-
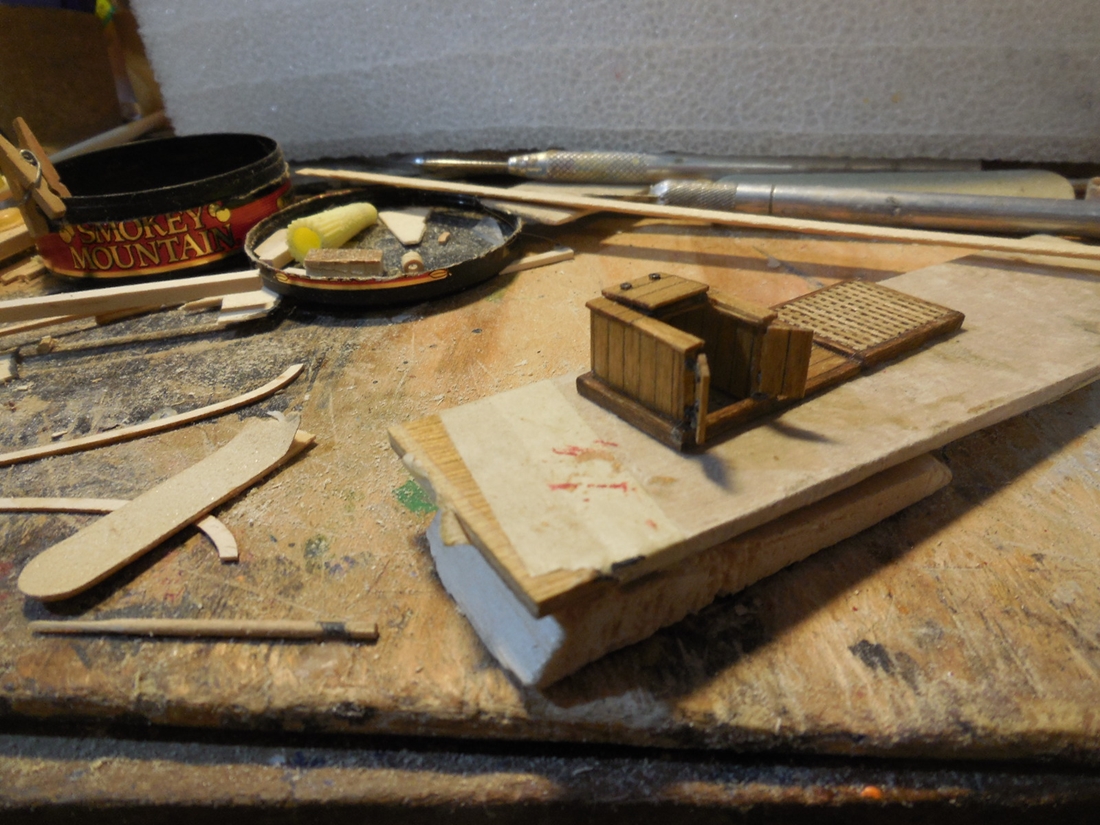
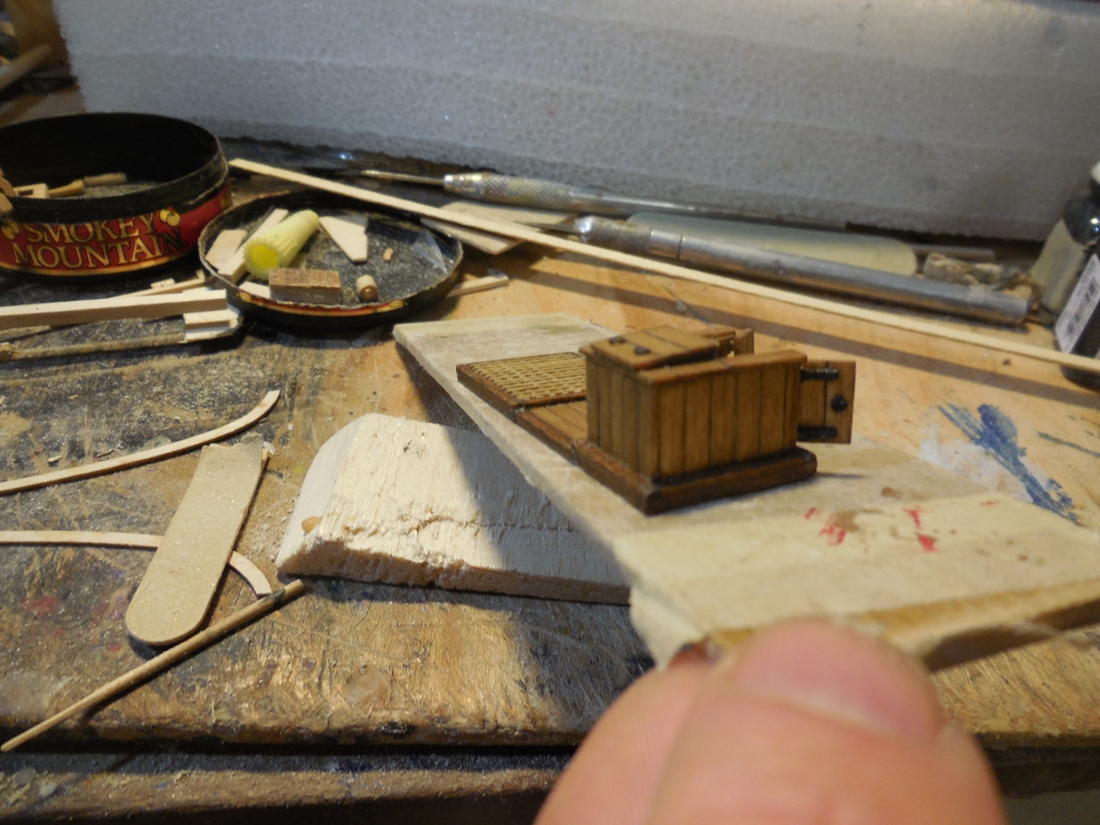
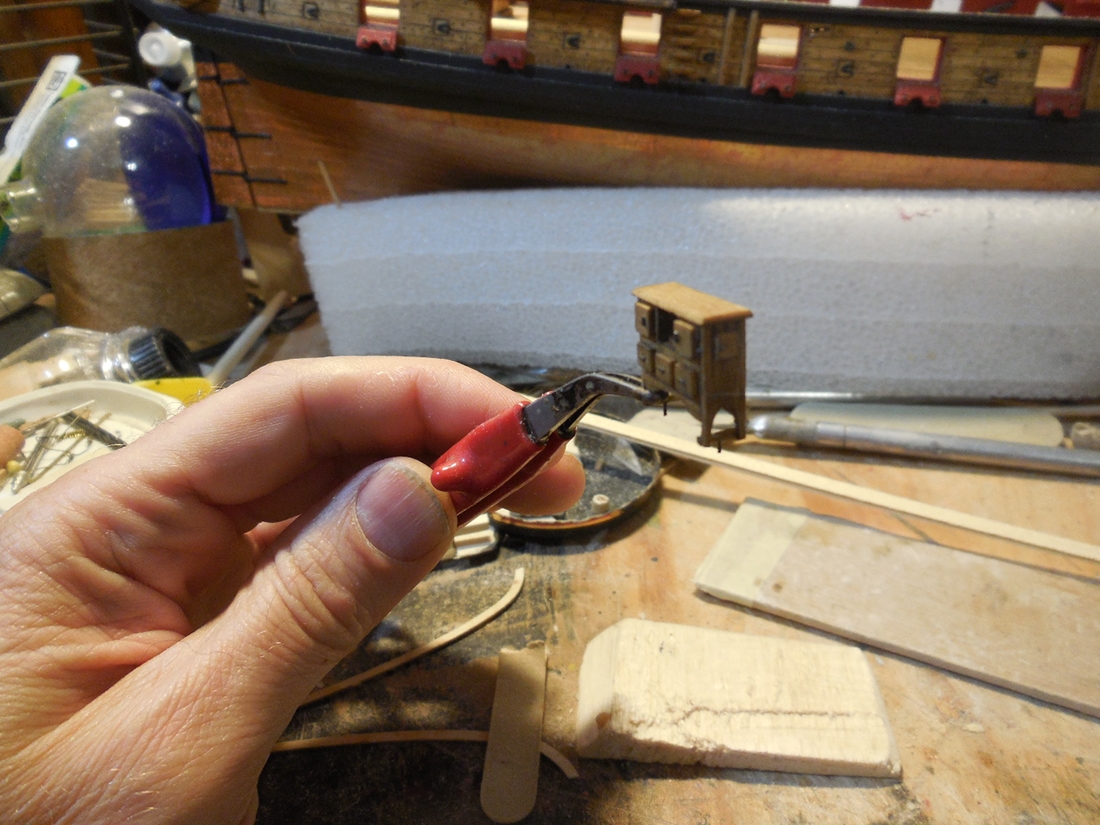
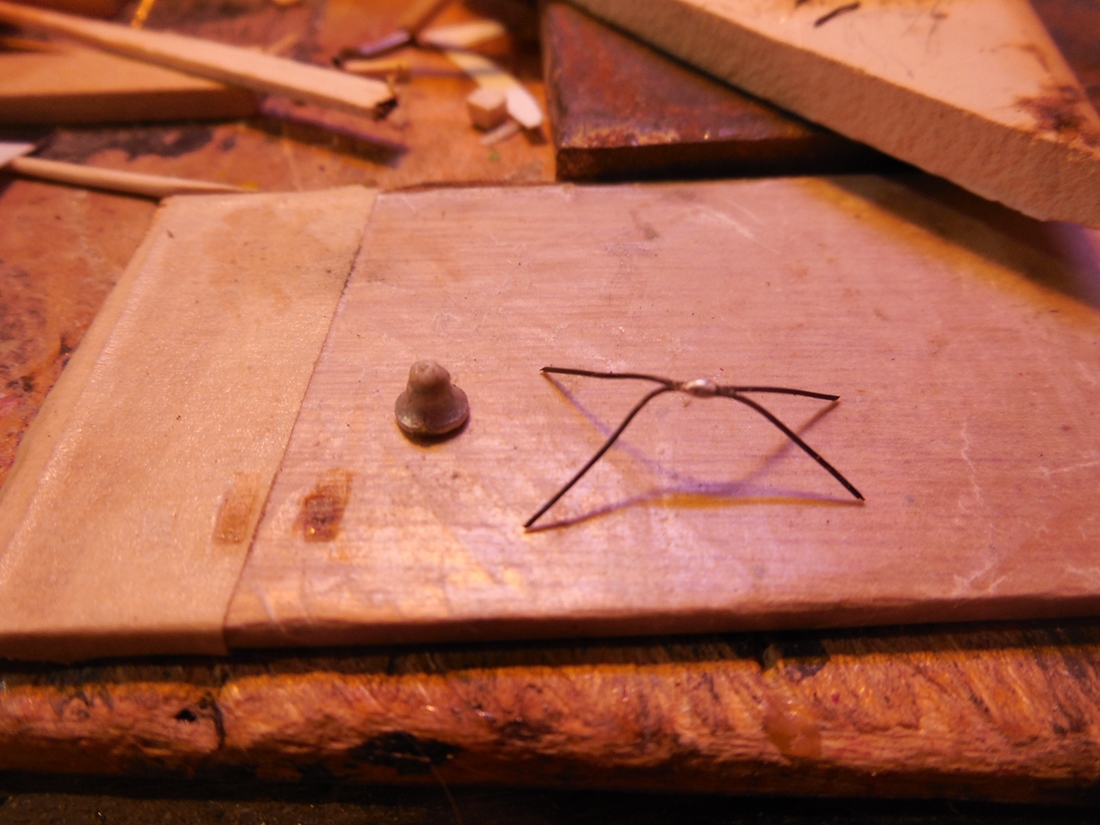
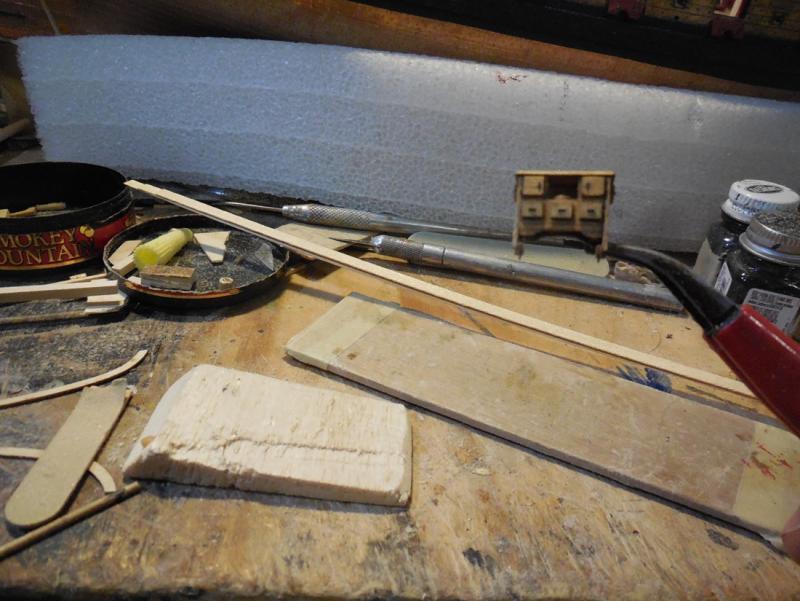
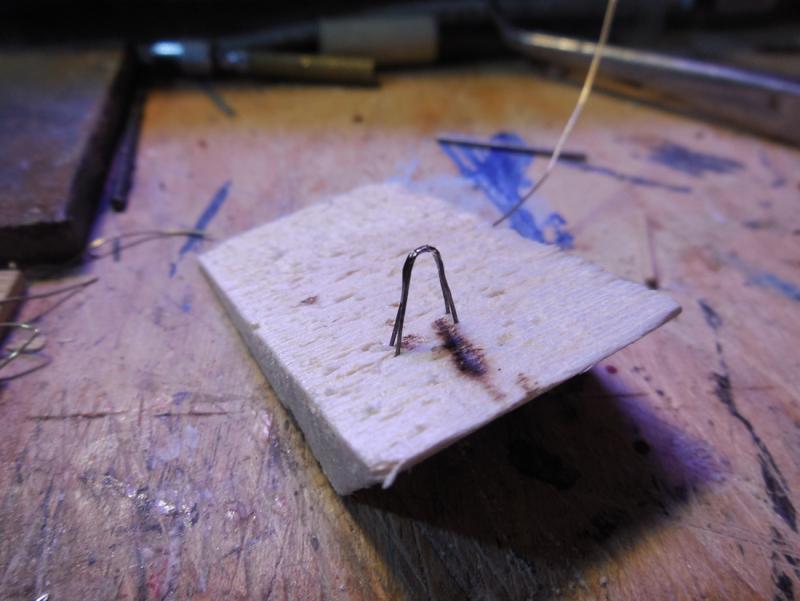
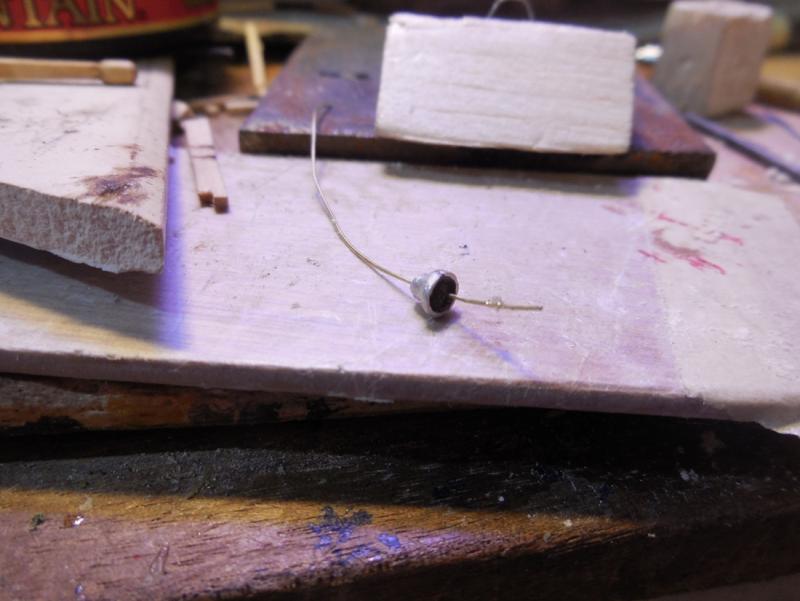
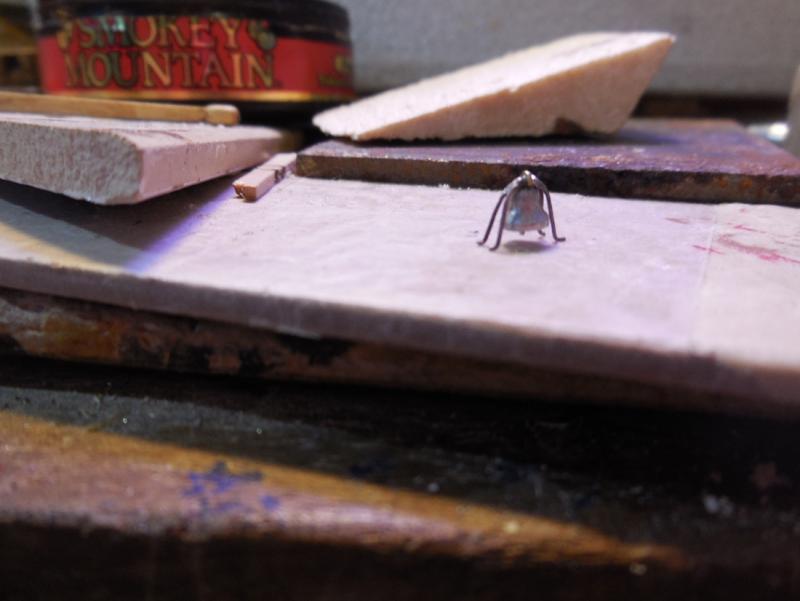
Thanks for the encouraging comments and "Likes". Made the Binnacle. Pretty standard, assembled kit supplied laser cut pieces. Added a grooved trim on the sides and back. Rather than try to make tiny knobbed handles I glued snips of wire flat to the drawers to simulate flat pull handles. Added tiny wire pins to hold it to the deck better when it is added latter Tried soldering 2 wires to make the bell holder. Don't have the best soldering iron or solder so this was very stressful. After many ties they kept breaking back apart. Was giving up on soldering and trying to glue with just as bad results. Then I remembered something from my years as a bench jeweler. I remember sometimes holding a small clipped piece of solder with CA glue on the joint. The CA held the solder in place but also acted as flux when heated. One last try this way and it finally worked. Tried to solder the bell to this but the bell melted some and warped a little bit. This turned out to be a good thing because the kit supplied bell was a bit large. After filing down and reshaping the bell it was much smaller and shorter which worked better. I drilled a hole through the top. Inserted a wire through bell to double as the ringer below and the means to attach it to the holder at the top Will finish it up later when all this is actually added onto the deck. Jesse


- 1,306 replies
-
- 26
-
-
- syren
- model shipways
- (and 1 more)
-
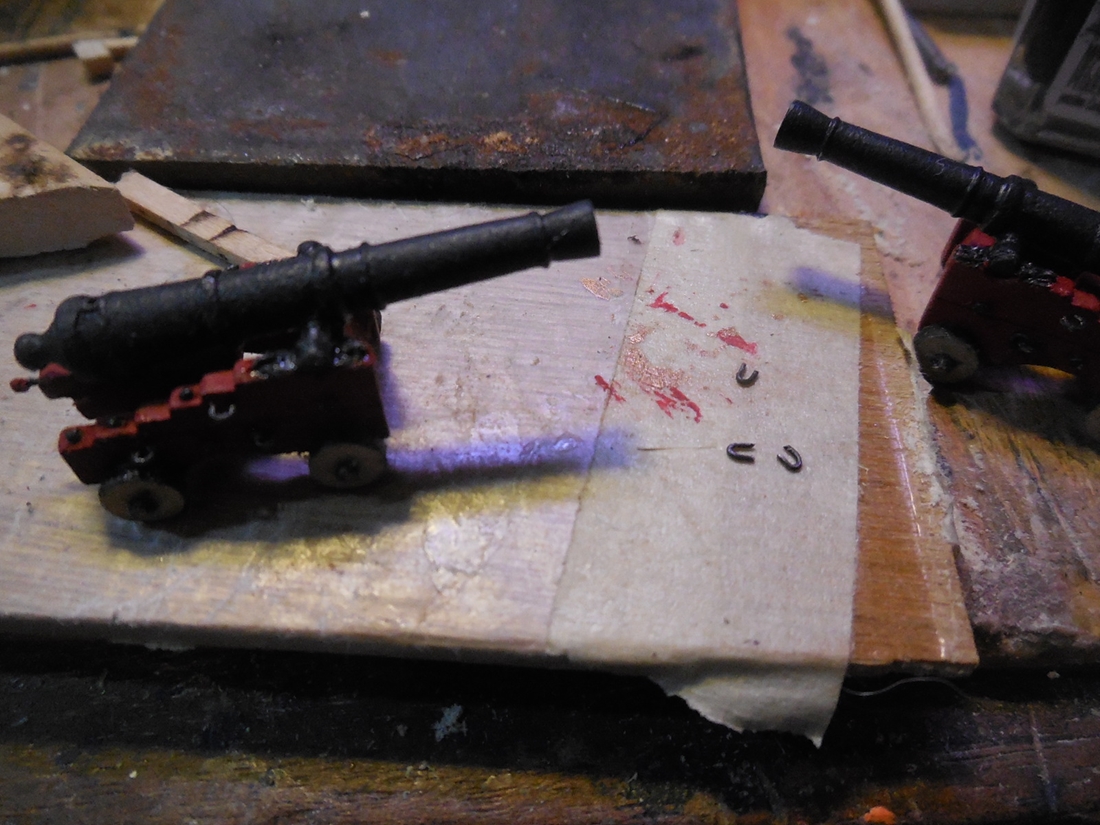
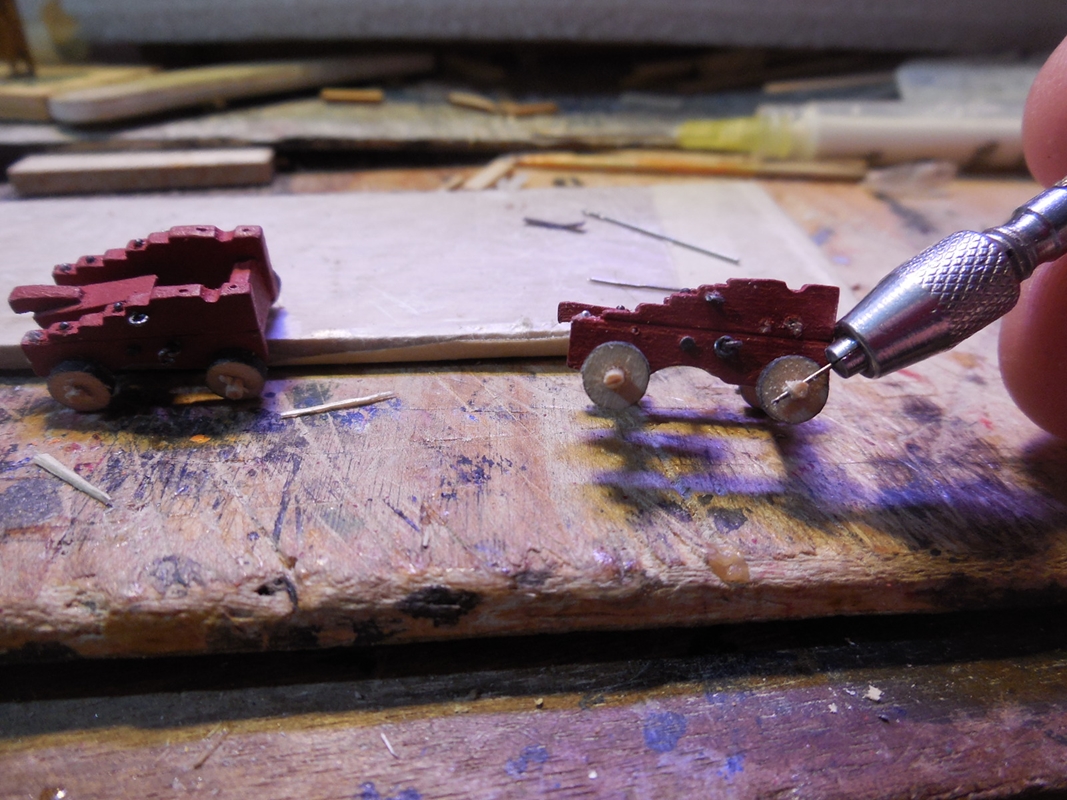
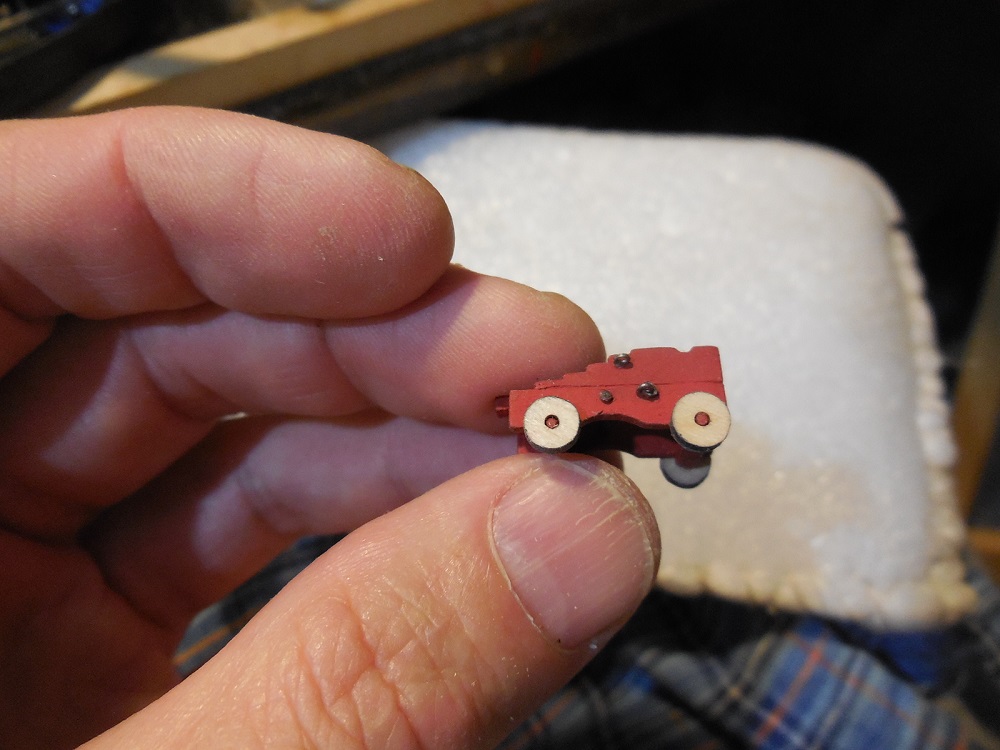
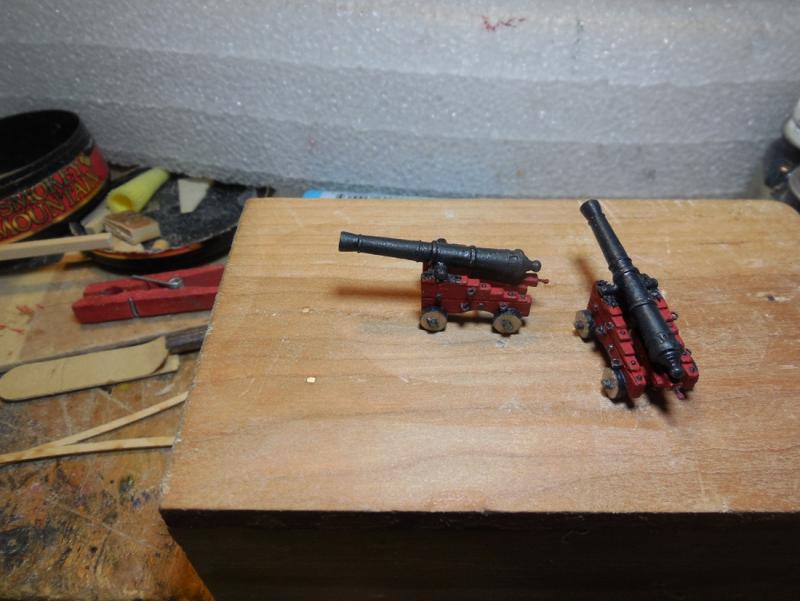
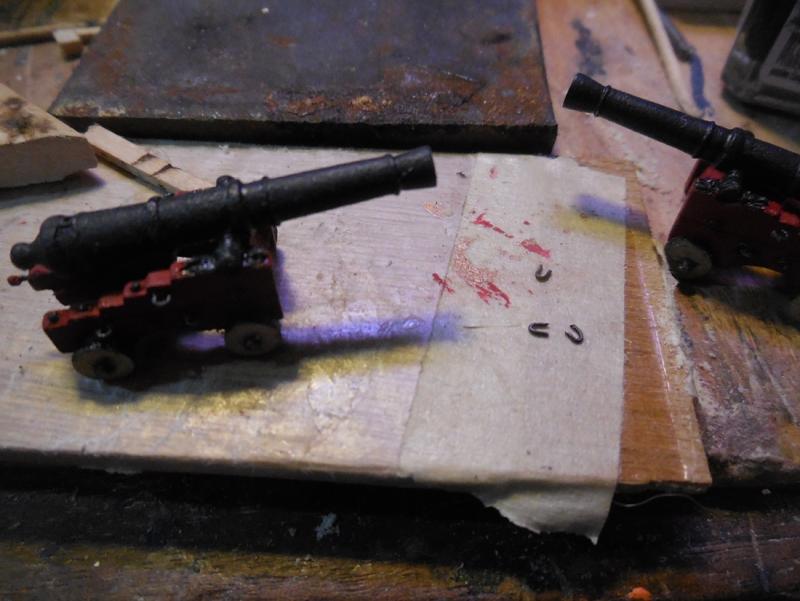
Thanks so much guys, your input is always welcome. No problem Ken! Welcome to my build Mike, glad to have you. Well I must have not fit something right when I assembled the carriages. I saw that the axles did not stick out past the trucks. I sanded a toothpick to the same diameter as the axle, drilled out the existing axles a little and glued the toothpick in and trimmed off to the right length. Used a very small twist drill to make holes for cotter pins. Because of the small scale I just used splinters of wood for the cotter pins. Looking at other builds and the diagrams of these guns in Ship Modeling from Stem to Stern by Milton Roth I made some effort to add some more small details like bolts, ring cotters, etc. to make them look a little better. Mine don't look as nice and smooth as the others who have done this but at this scale it looks ok until you blow up the pictures. There is still some minor clean-up to be done and there was a lot of very fine sawdust clinging to these in the pictures from the surfaces they were sitting on. Jesse

- 1,306 replies
-
- 28
-
-
- syren
- model shipways
- (and 1 more)
-
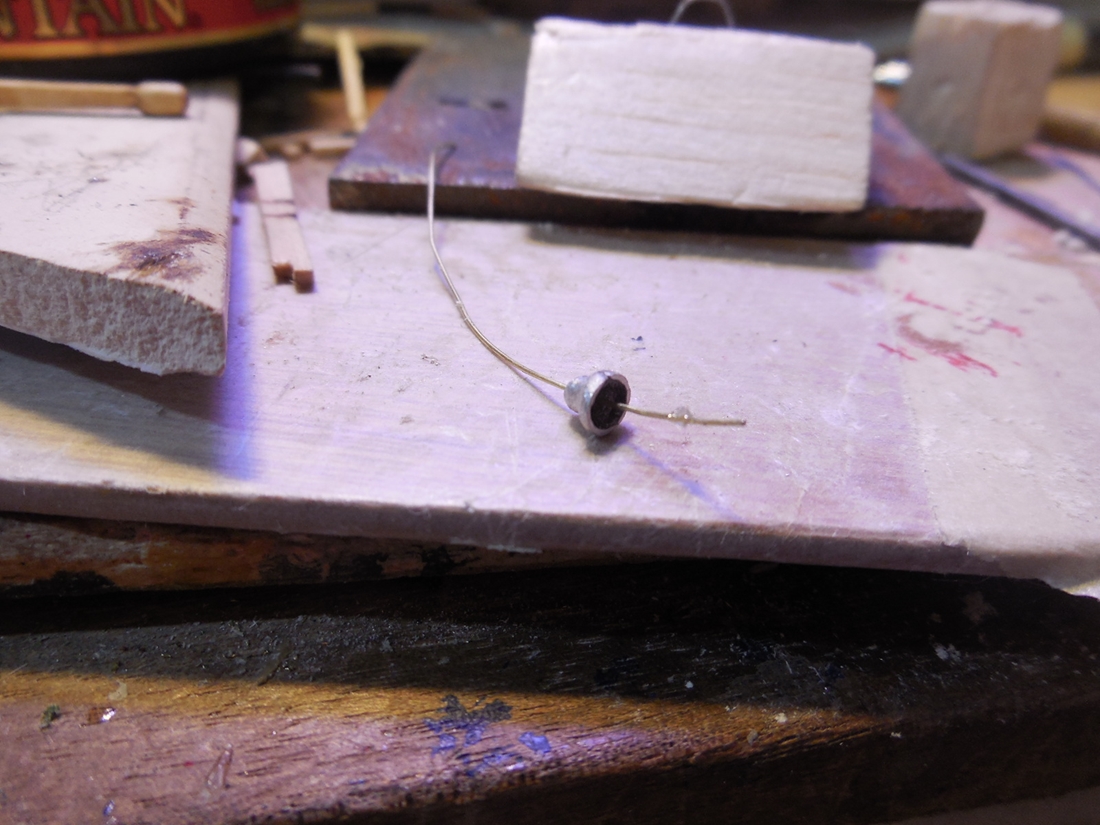
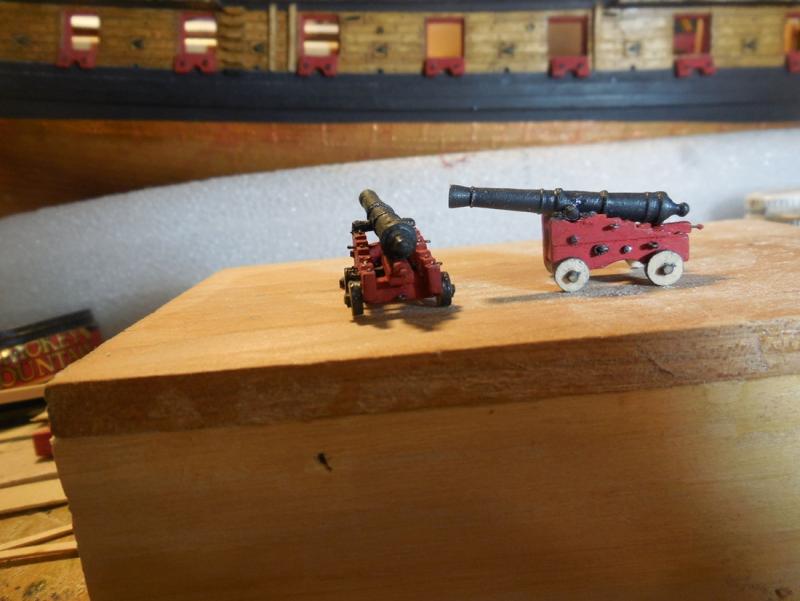
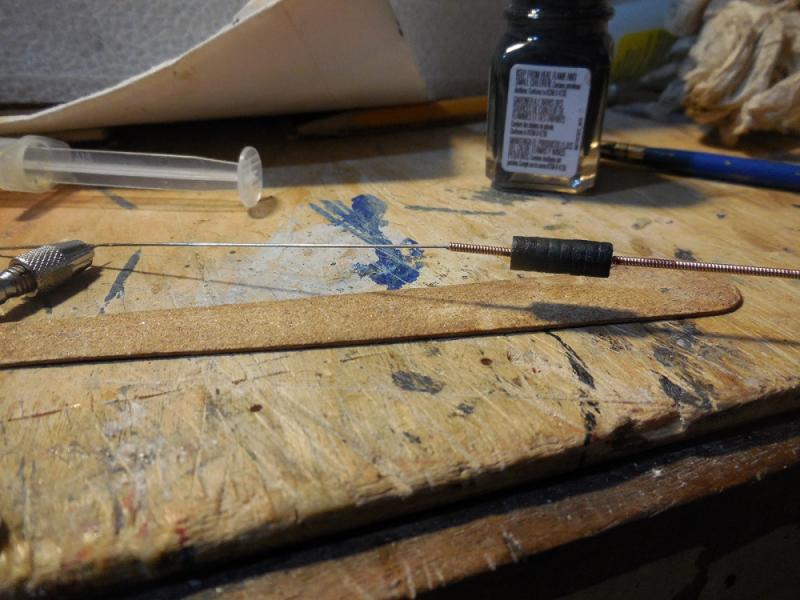
Haven't got a lot done on the ship since Hurricane Matthew came through. Things are still bad here in North Carolina. People have drowned. Farms are lost. Livestock lost. Many homes flooded. Been letting some family over to get showers. But I have been working a little. Started constructing the 2 cannon. Tried to figure out how to sand the laser cut wheels provided all the same. Played with a few ideas & came up with this. Found an old piece of guitar string left behind by our son a few years ago. The wheels screwed snug on the wrapped wire & held just enough to get them all uniform. I achieved this by rolling them all on sandpaper with my fingers. it rounded them up without taking too much off. Painted them while they were still on the wire (didn't pain the sides). Test fitting them on the partially built carriages. Jesse

- 1,306 replies
-
- 30
-
-
- syren
- model shipways
- (and 1 more)
-
So sorry for your loss Dave. Jesse
- 962 replies
-
- 7
-
-
- sovereign of the seas
- ship of the line
- (and 1 more)
-
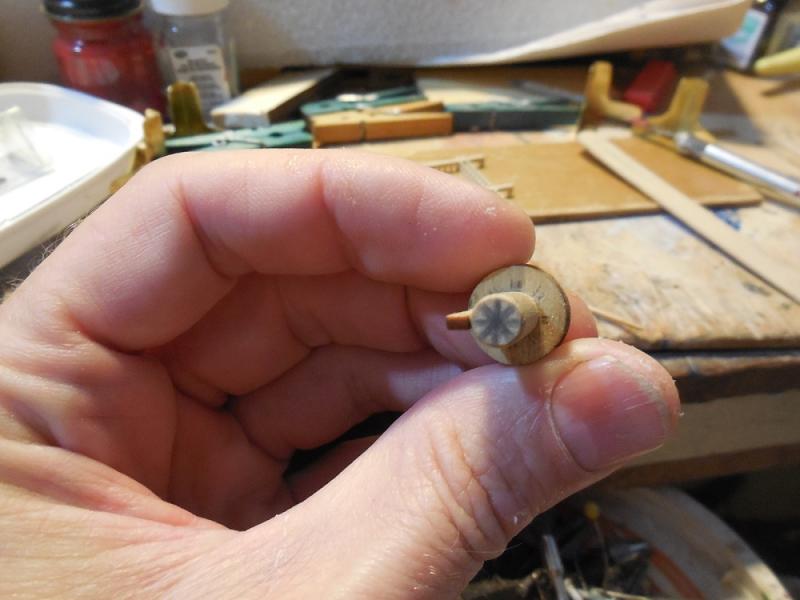
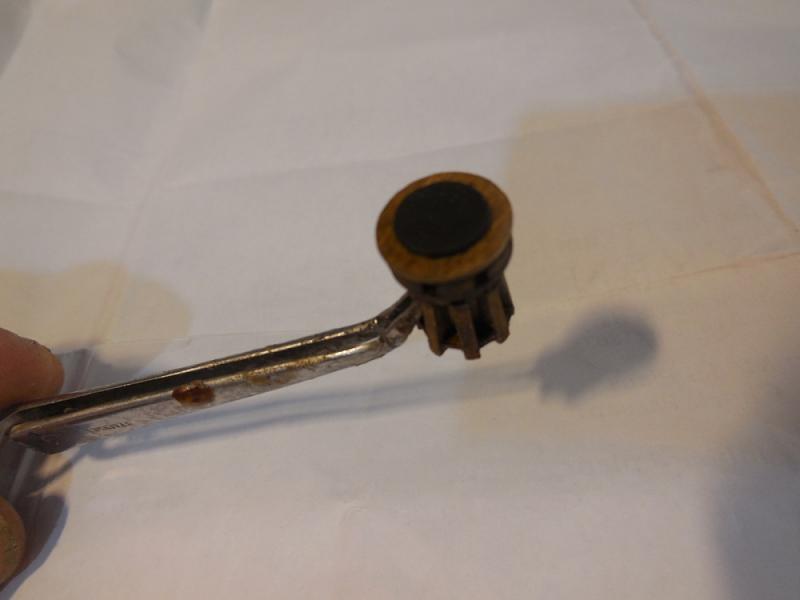
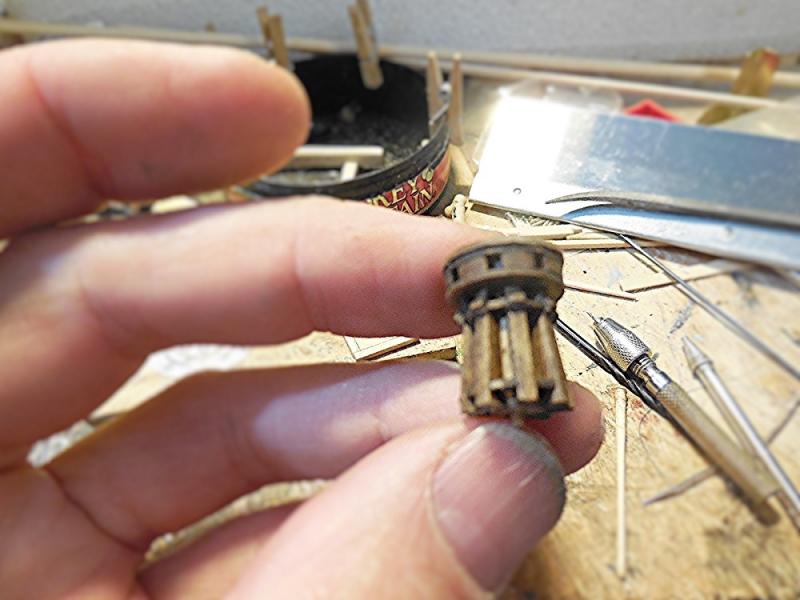
Made the Capstan. Used the kit supplied parts. The drum head was a simple layering of precut parts together. Getting the whelps spaced right wasn't working out well for me so I marked out the spacing on the bottom. My memory tells me I took more pictures of the assembly but my camera memory card tells me I didn't so I took pics of the finished piece. Sorry some of the pictures didn't focus correctly. Jesse

- 1,306 replies
-
- 21
-
-
- syren
- model shipways
- (and 1 more)
-
Wow, that's some fine detail on the compass and lamp! Jesse
-
Its not glued down yet. Didn't pay attention which way I laid it for the picture.
- 1,306 replies
-
- 5
-
-
- syren
- model shipways
- (and 1 more)