.jpg.f26acc9a74319261612561bfa7da1303.jpg)
vaddoc
-
Posts
1,601 -
Joined
-
Last visited
Content Type
Profiles
Forums
Gallery
Events
Everything posted by vaddoc
-
.thumb.jpg.6fd4c1b78768bb3efd745ab810936005.jpg)
Lead corrosion and lead free soldering
vaddoc replied to modeller_masa's topic in Metal Work, Soldering and Metal Fittings
Much appreciated Kurt. -
Lead corrosion and lead free soldering
vaddoc replied to modeller_masa's topic in Metal Work, Soldering and Metal Fittings
Kurt, you ve mentioned stay-brite before. I looked into it at the time but did not really understand how it works. Could you explain a bit more? More specifically: I presume it just needs a soldering station and not a torch? Does it need flux? Does it have gap filling capabilities or does it need to be tight fit like silver solder? Finally, what are the advantages over silver solder paste/torch? Many thanks -
Well Mark, I am following what the books say. I did quite a lot of search on the topsail previously, usually topsails are attached to the top mast with hoops or to a pole. The problem is that someone needs to go up the mast to set it up or send the pole up which is fiddly. The Deben has a flying top sail which is easier to set up but needs lots of tension as there are no real attachment points to the mast. Instead it uses a leader, which is simply a line from the top mast to the deck and the top sail clips on it on 2-3 points. This leader needs to be seriously tight hence the need for blocks. The books mention an elegant solution which is to tie the bottom end of the leader to the topsail downhaul so that one pulls the other and all get very tight. This is what I followed. As for the jibs, the top jib will just need straight lines, the flying jib one block (for each sheet) but the staysail will need some serious power so couple of blocks each side. I am struggling a bit to find space aft though, the main sail sheet and the backstays also need to be added as well as the rails. The Deben is a small boat, just five tons but this is actually the rigging plan!
-
A question about varnish.
vaddoc replied to danbloch's topic in Painting, finishing and weathering products and techniques
I did tried Shellac Bob, never really liked it! Also I dislike the smell of methylated spirits. You can get "boiled" Tung oil which polymerises much faster but I have had no problems with the normal one. Smells fantastic too! I think the main advice should be to test on scrap wood, not on the model! A few months ago I was too impatient to test thinning my polyurethane varnish and applied directly to my rudder, painted 3 colours each with a dozen coats. When the varnish congealed I had to sand it and start again! -
A question about varnish.
vaddoc replied to danbloch's topic in Painting, finishing and weathering products and techniques
There are many options to seal and finish wood and everyone does things differently, what works for one does not work for another. But technology has moved on and a lot of modern products are excellent. I almost exclusively use water based sealers and paints, they dry and are ready to sand in 20 min and are not toxic. Very easy to use and a very long shelf life. A quick touch with the sanding paper makes the surface smooth, even reflecting light if needed. I ve been so happy with the results that really did not look further. For darker woods I like Tung oil very much. Try a few things and see what you like. -
My 2 c Justin Making blocks is very time consuming. It can be done with a good result but needs to be approached as a separate stand alone project. A lot of time needs to be invested initially to standardise a method of making the blocks using whatever tools one has. Then the stropping will take a while, they are fiddly little buggers. Getting Chuck's blocks is a good option but you ll certainly be able to make acceptable blocks yourself. It will take lots of headscratching and time though. I think I made about 70 for my current boat and that was a gigantic work but I am in no hurry-I kind of overengineered it though. This can be a tedious task and if you d rather build your boat, get Chuck's blocks.
-
This is certainly an unusual shape. Looking forward to this journey, I ll take that sit in the back.
-
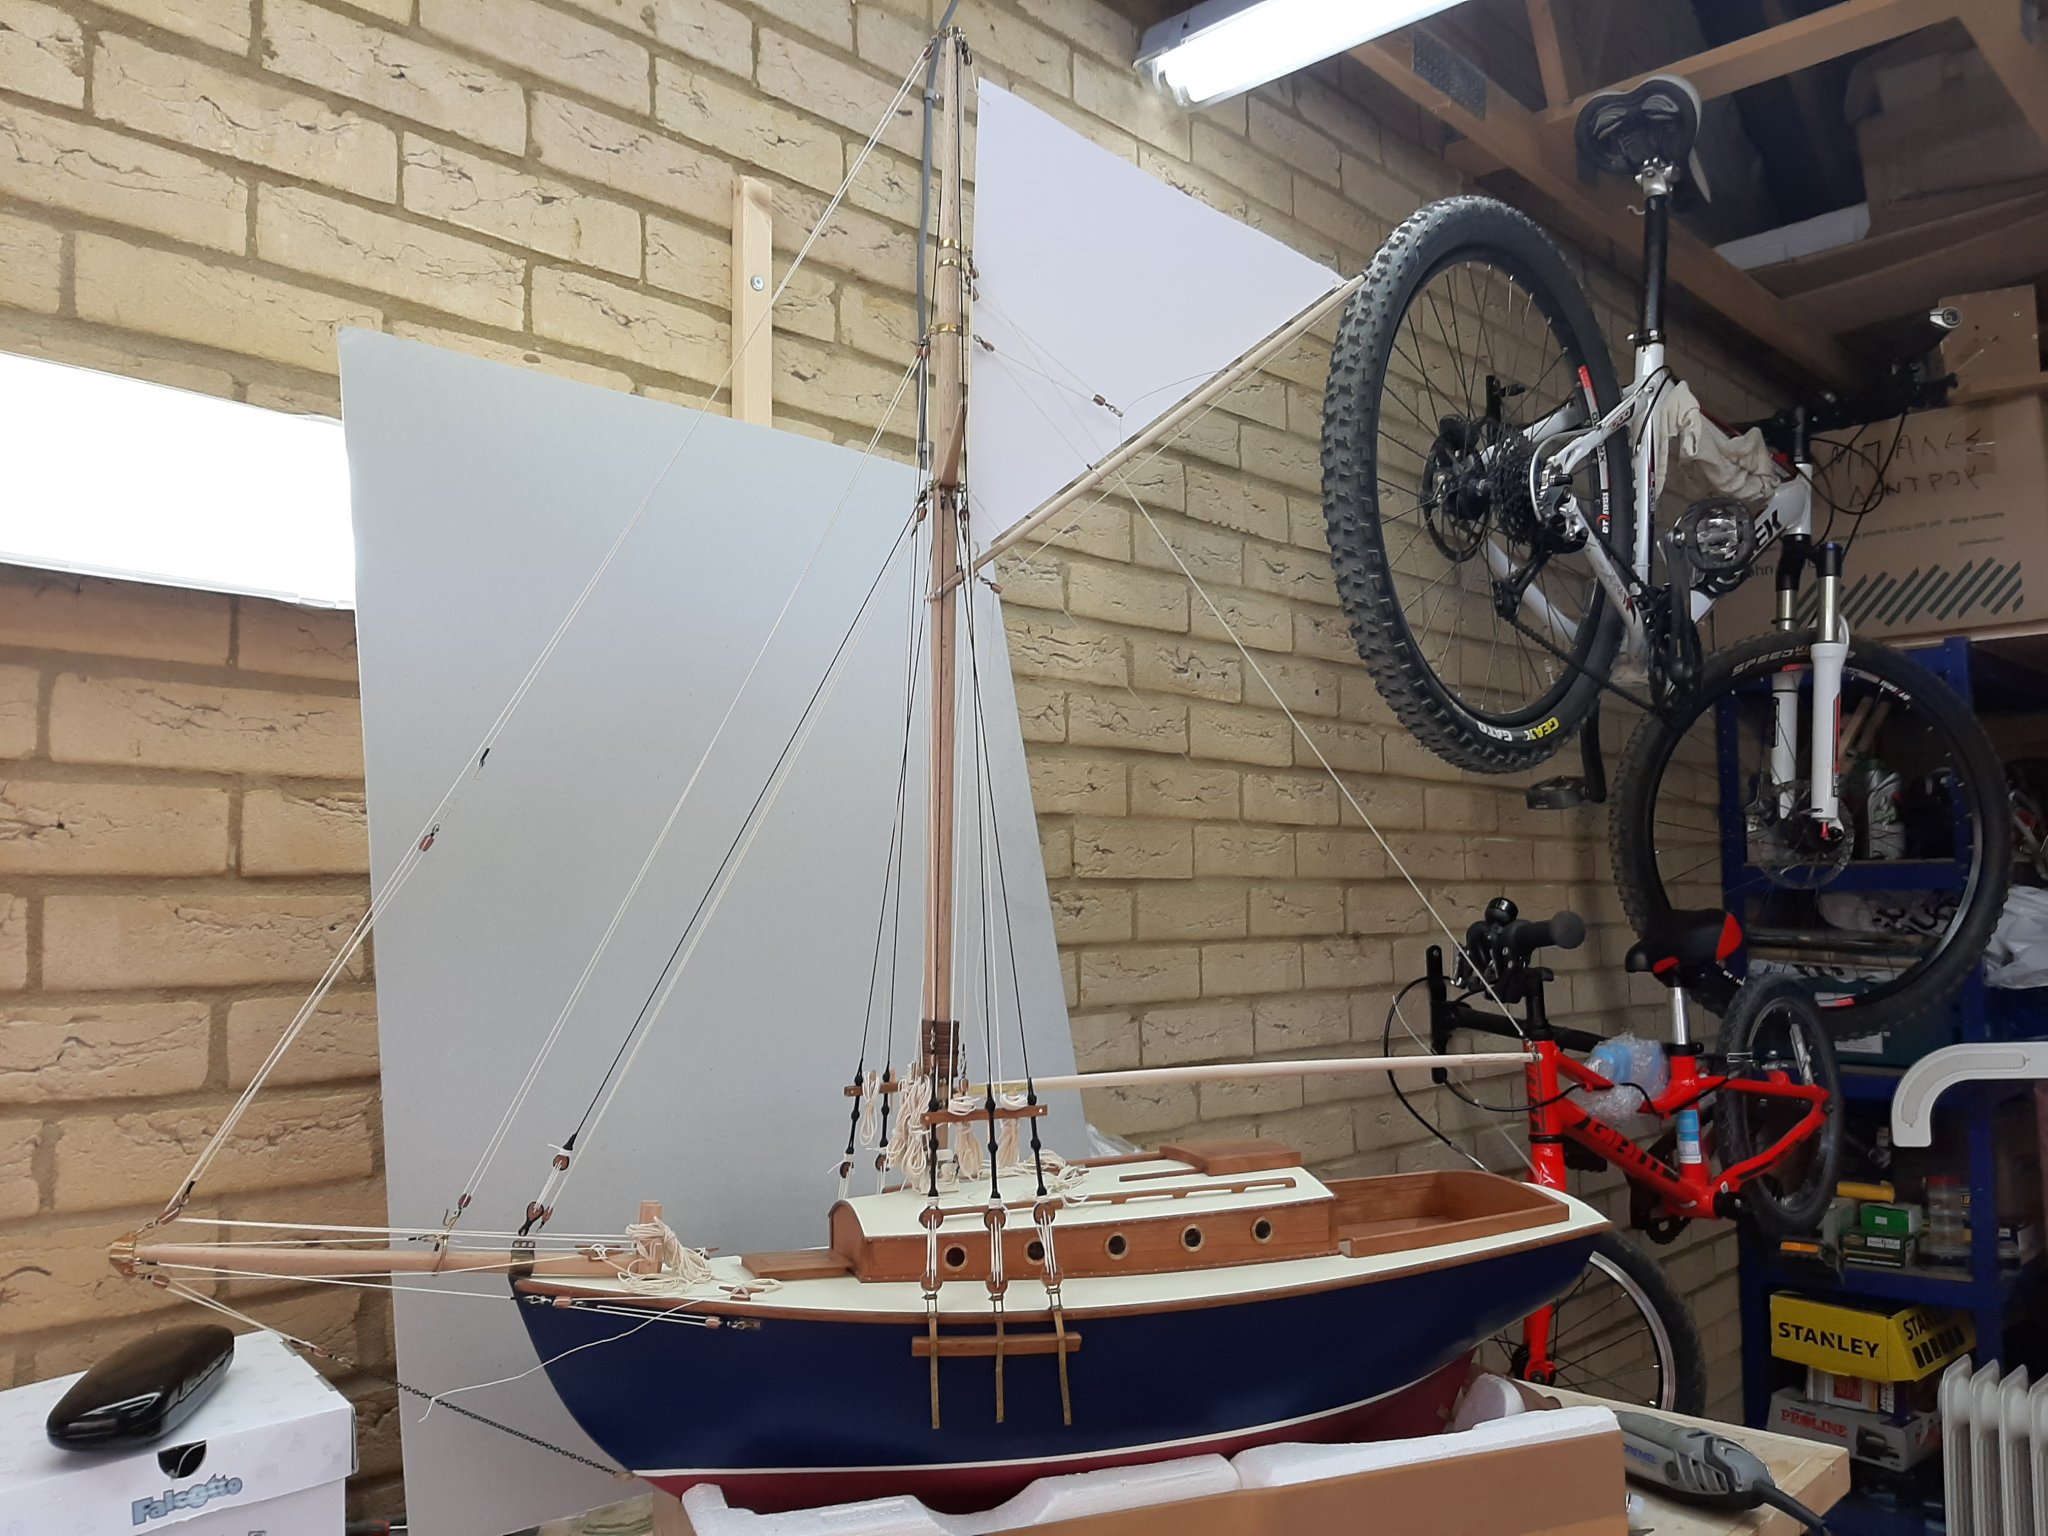
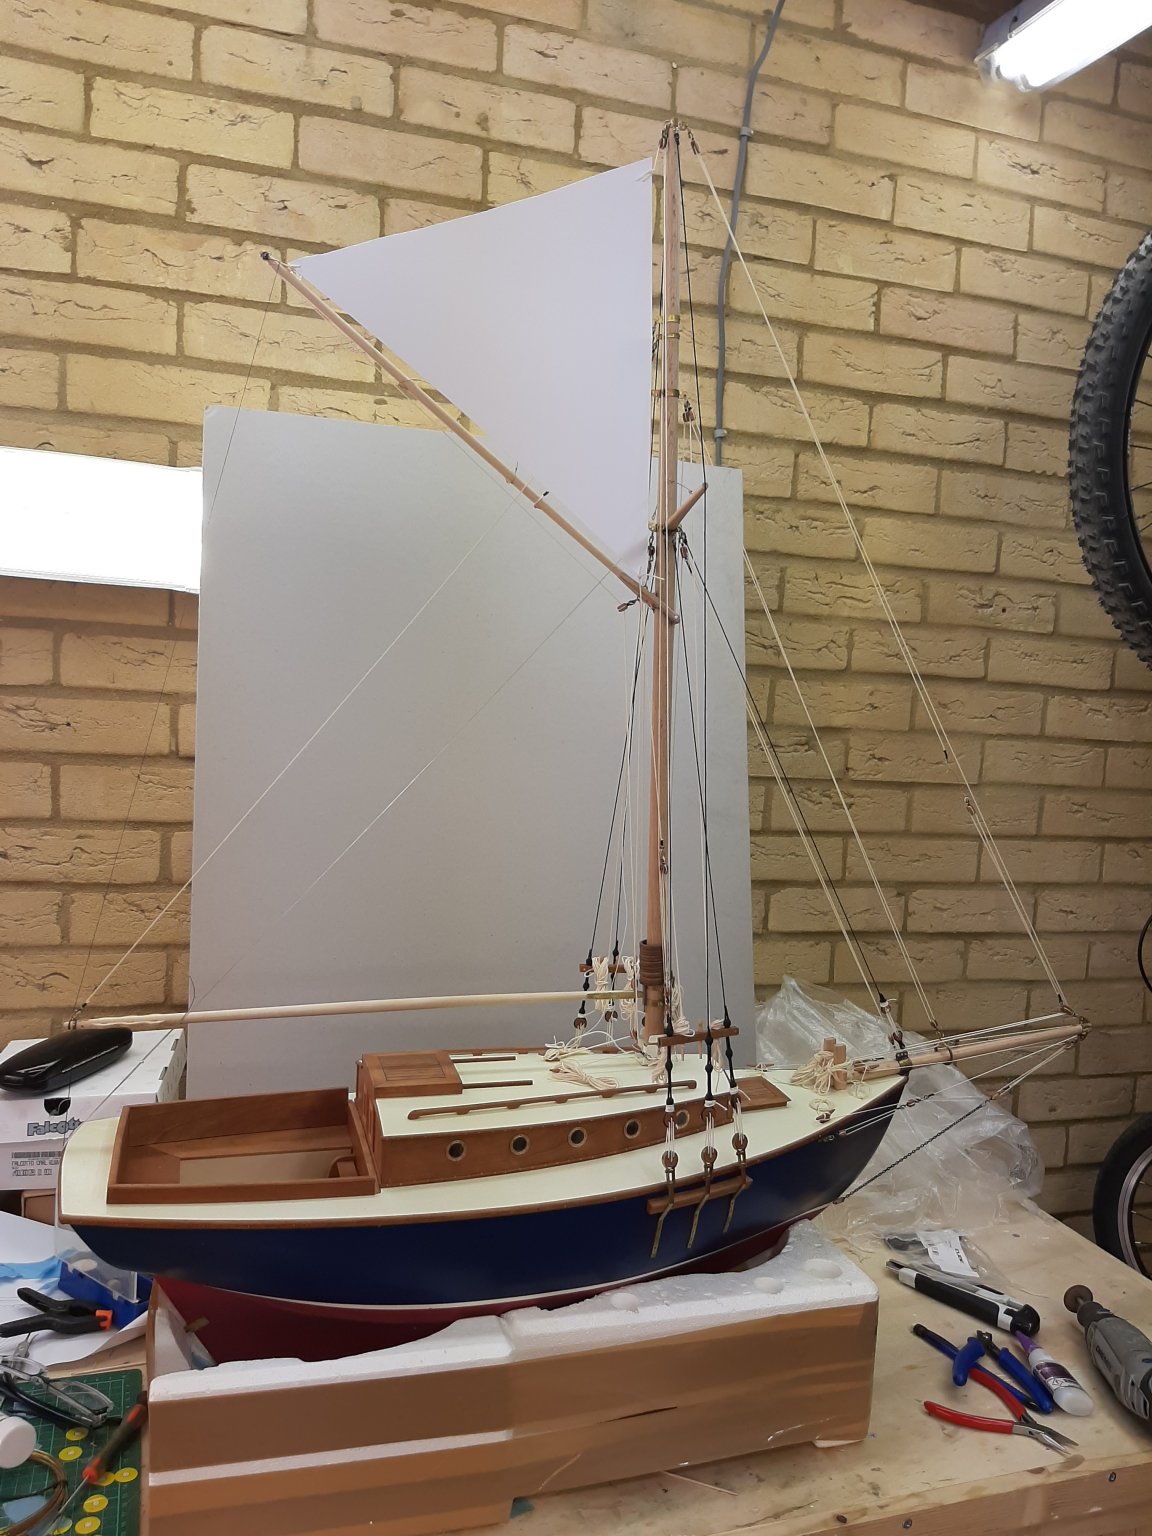
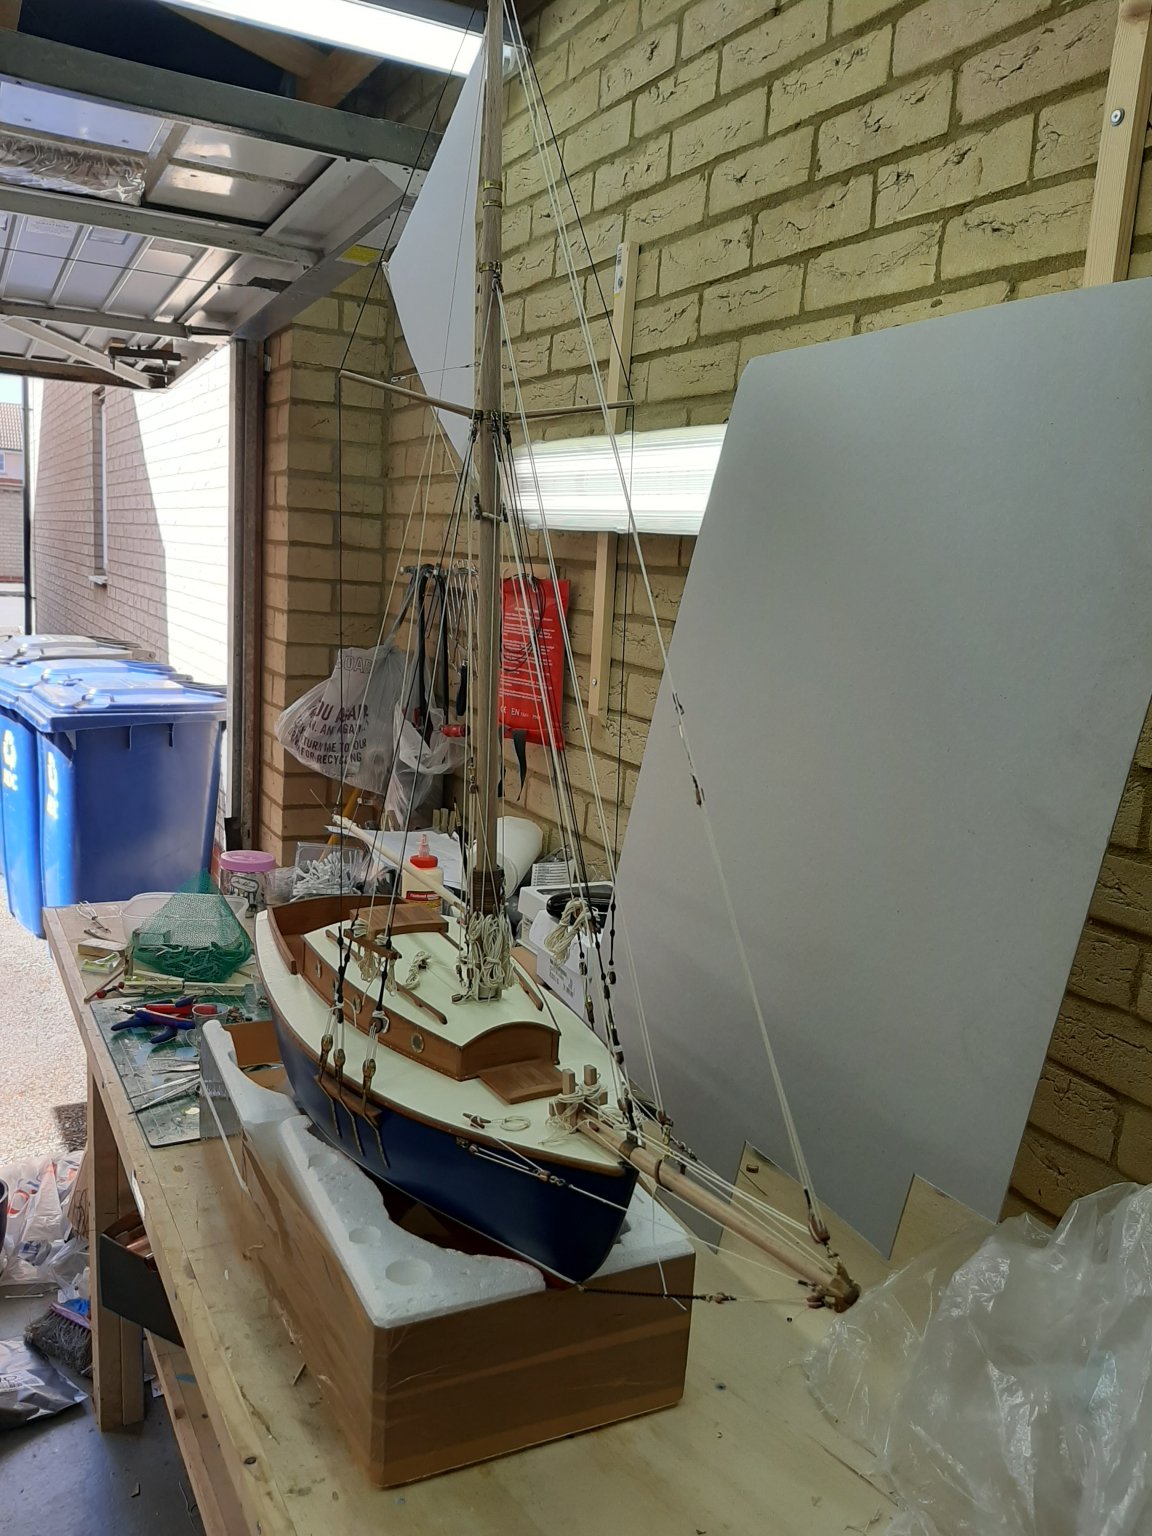
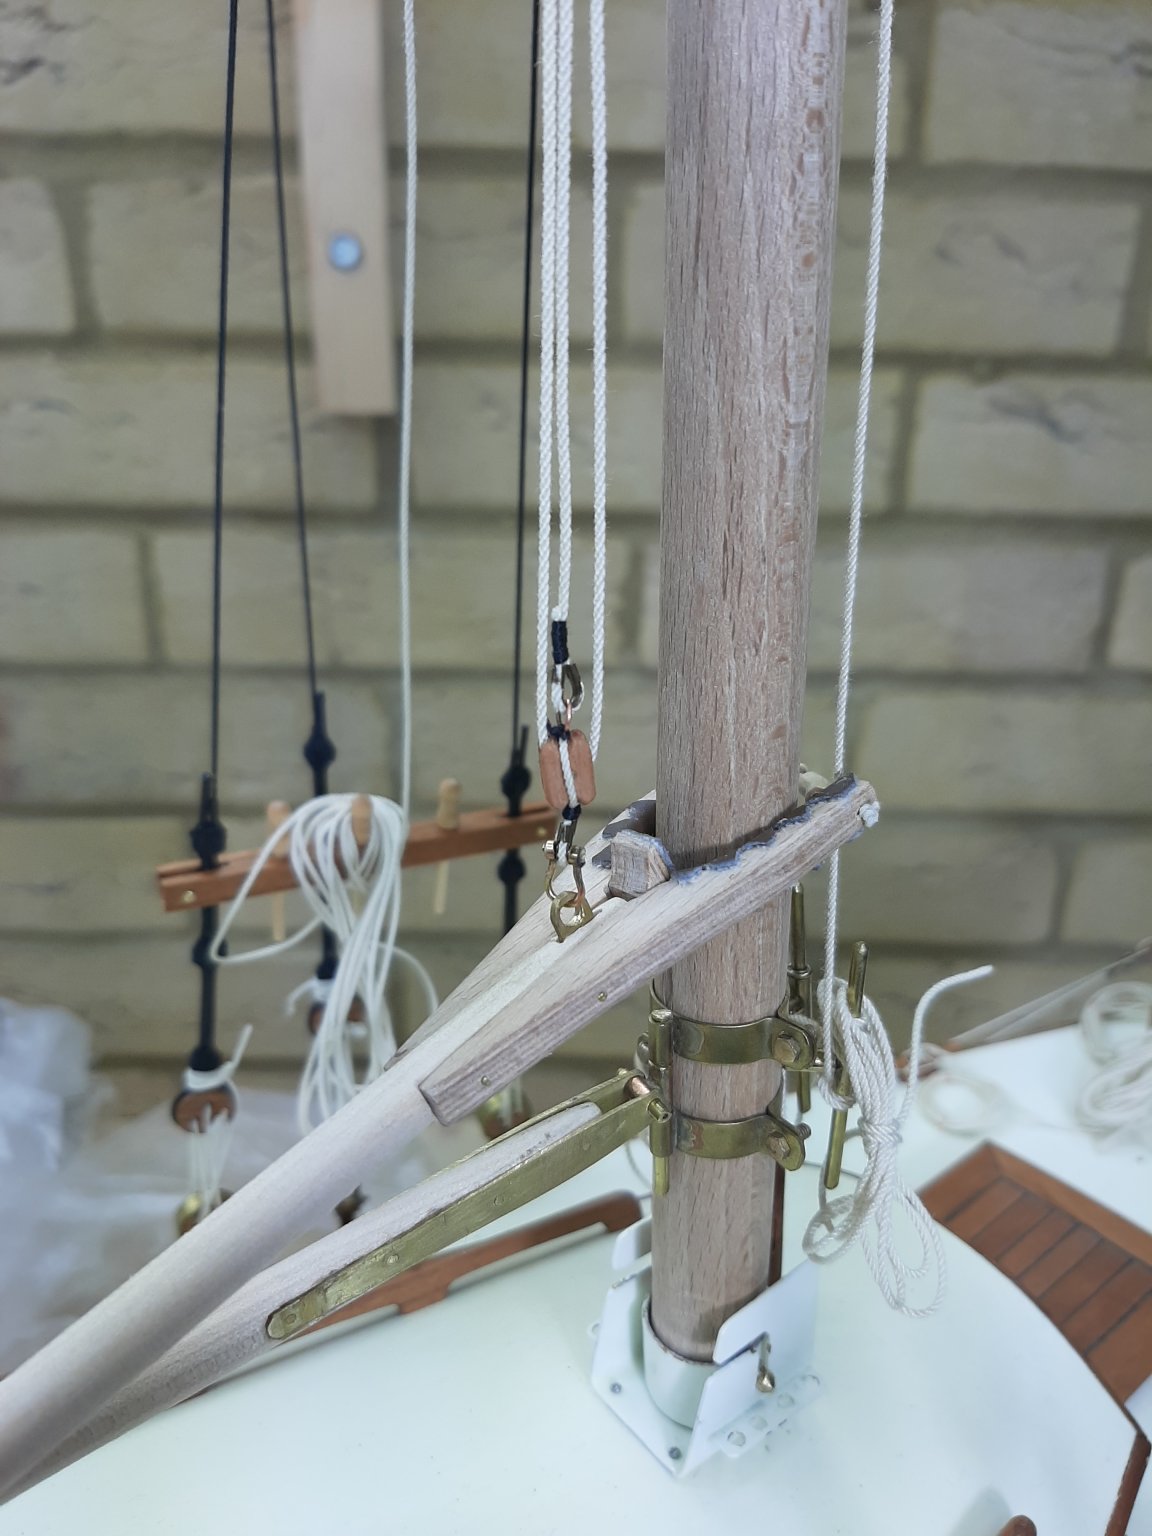
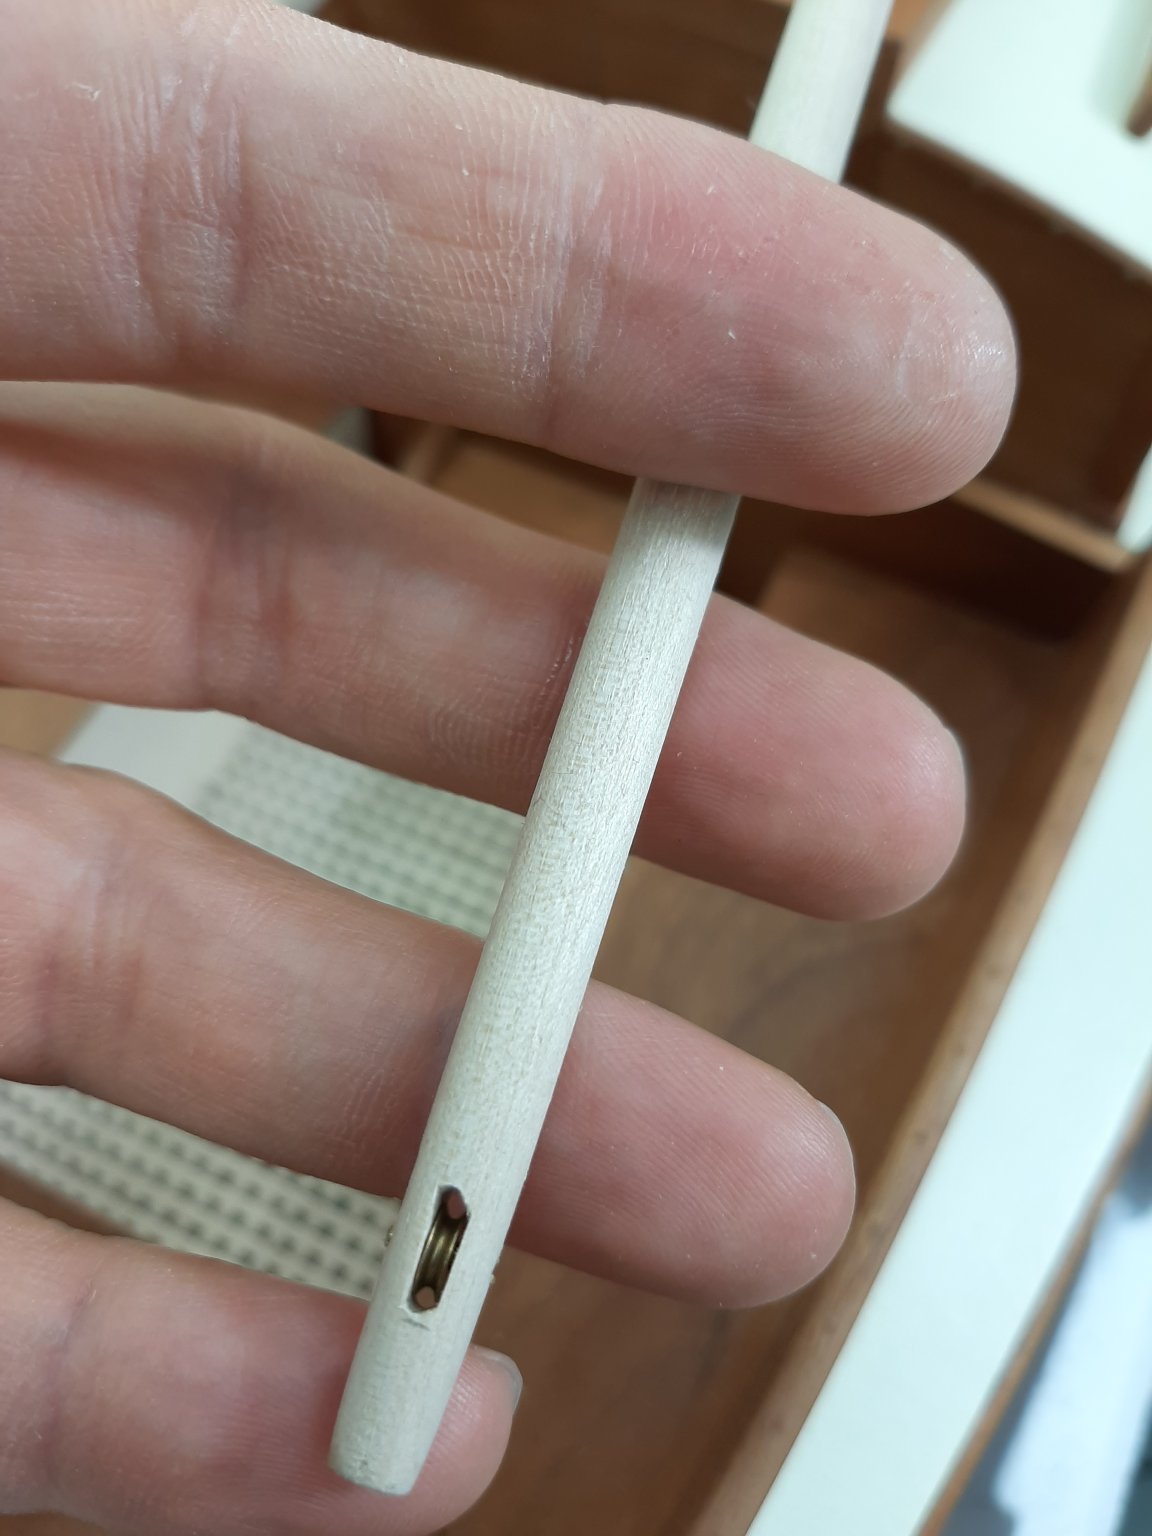
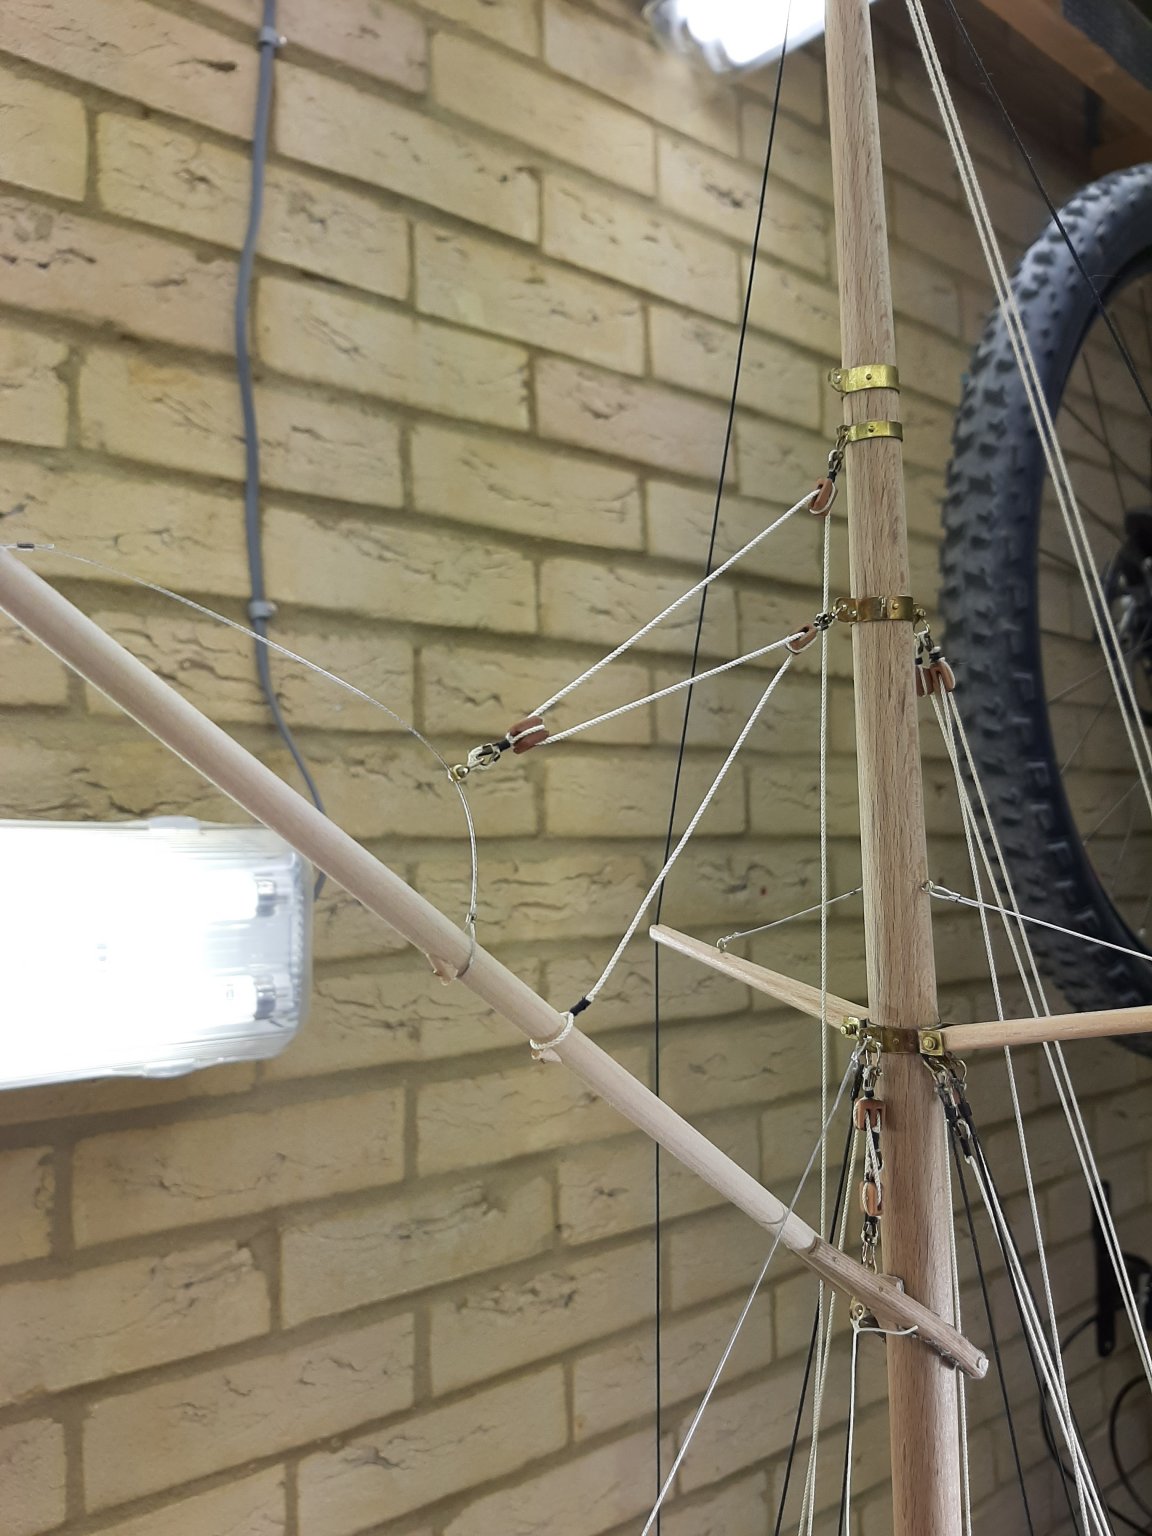
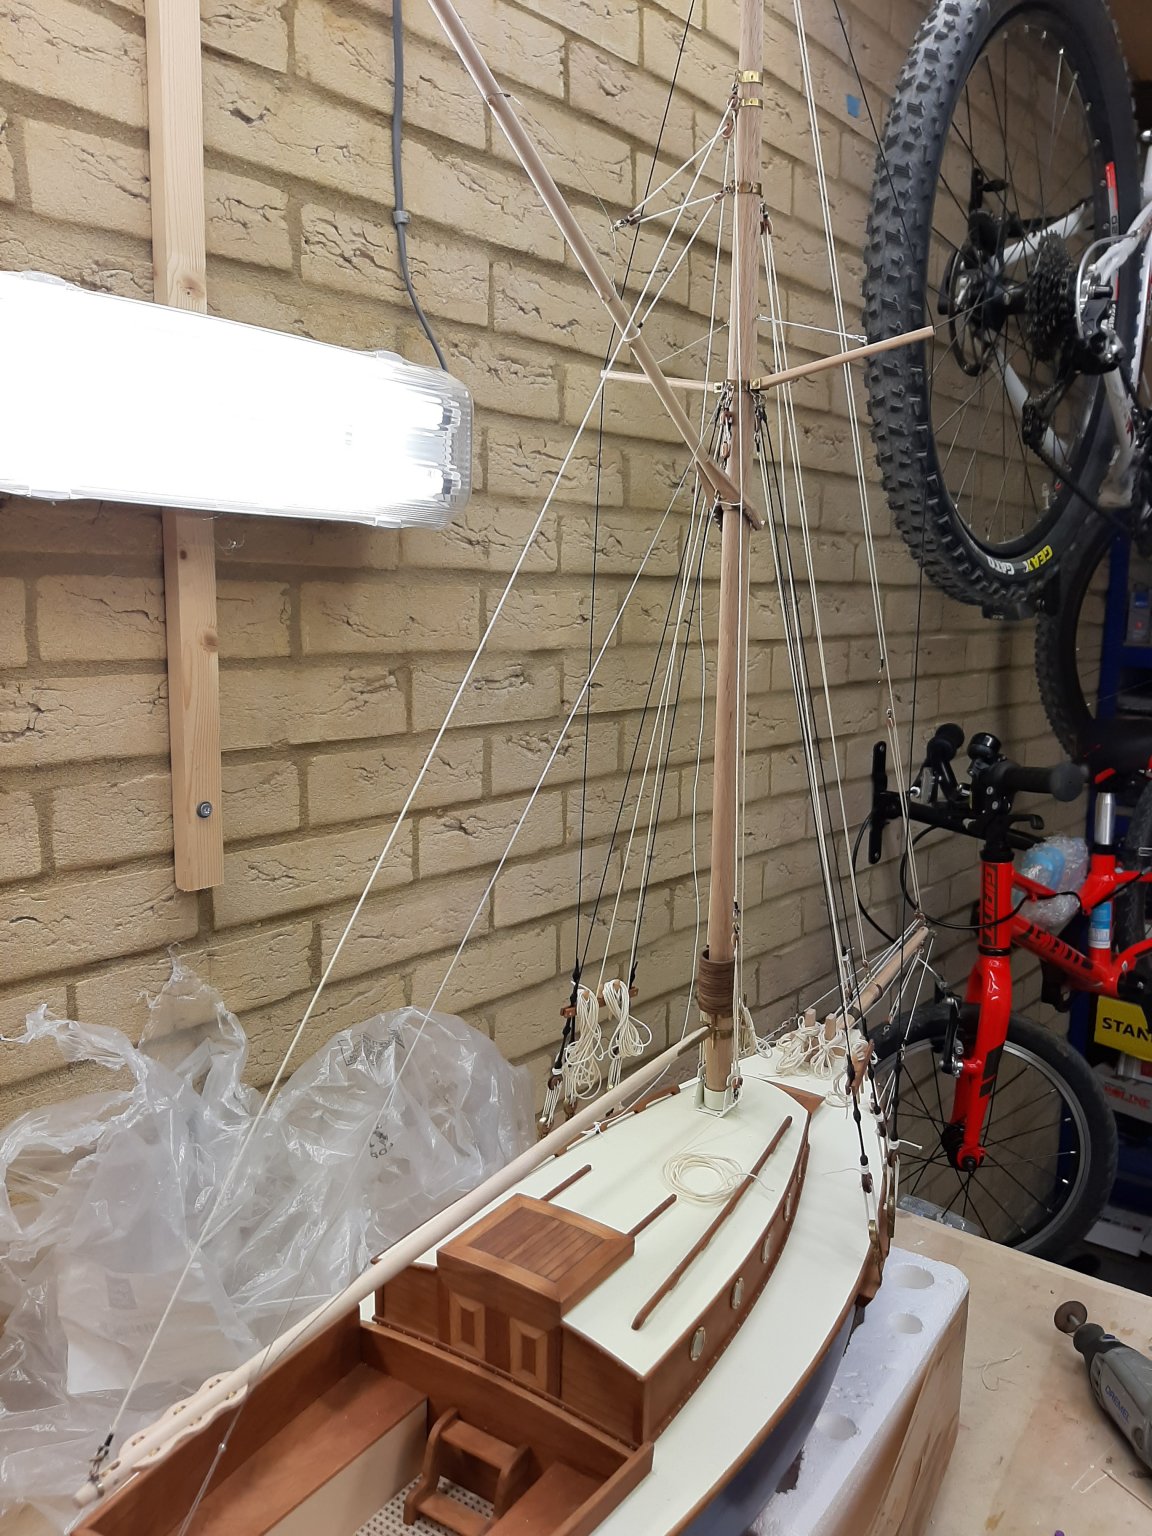
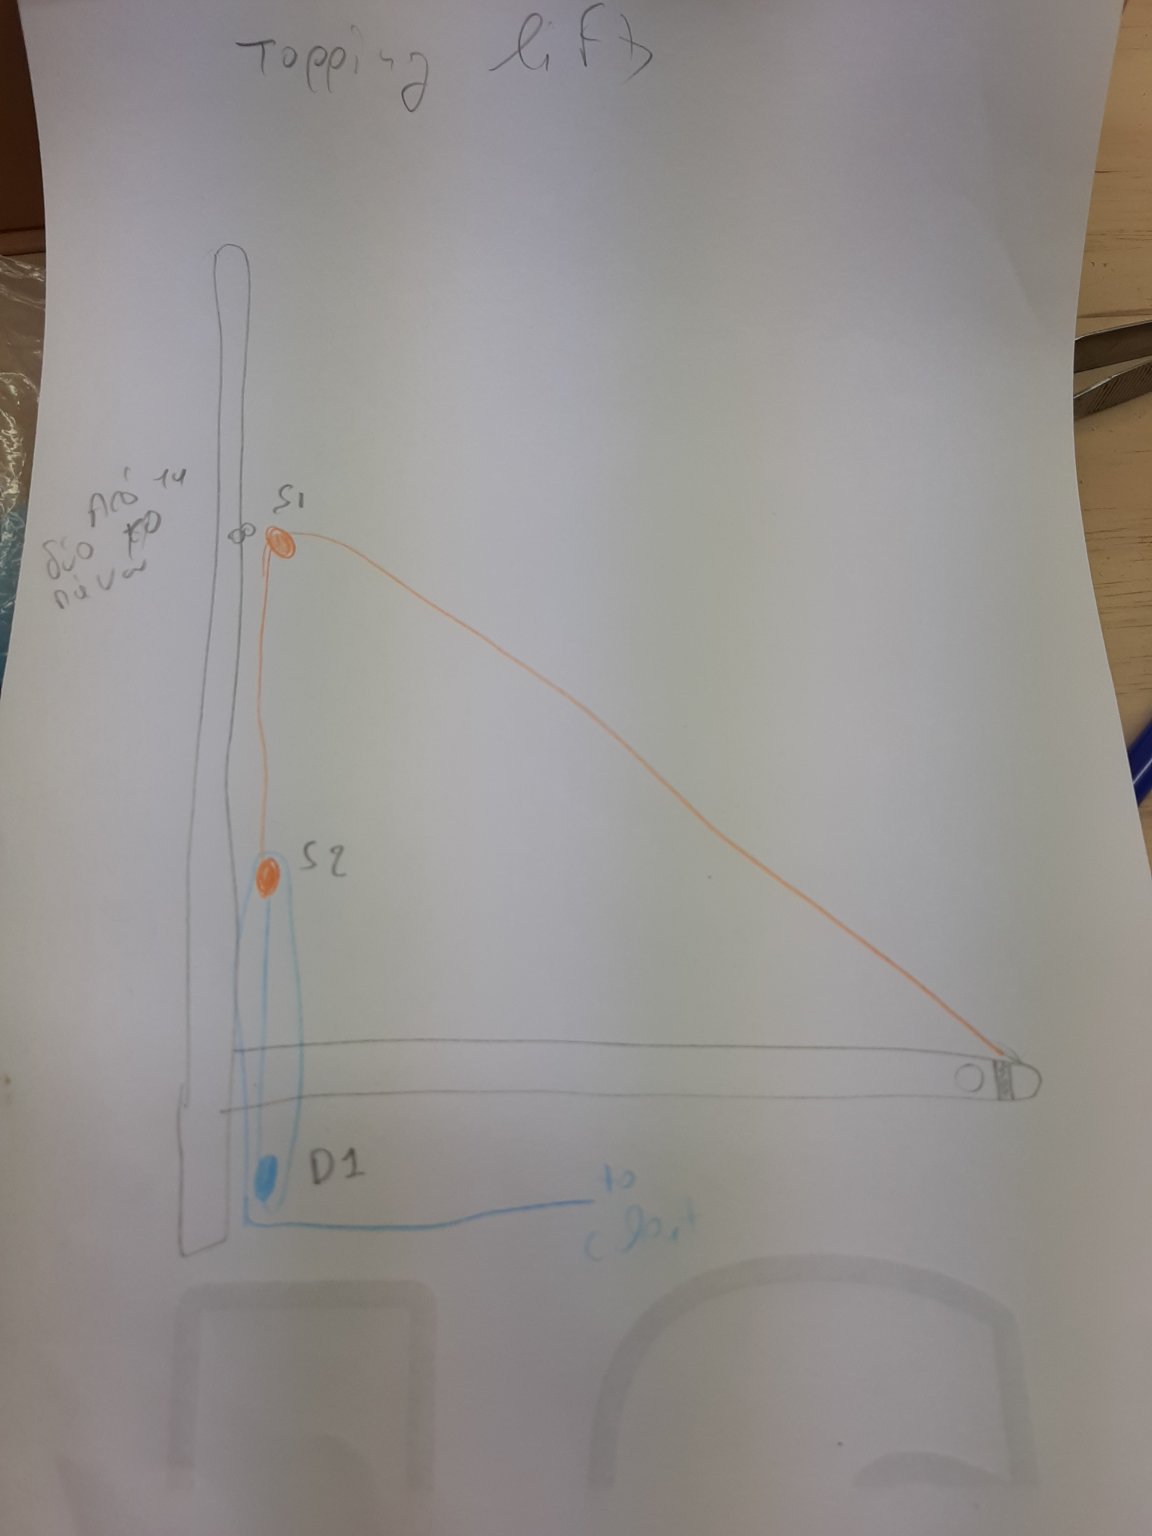
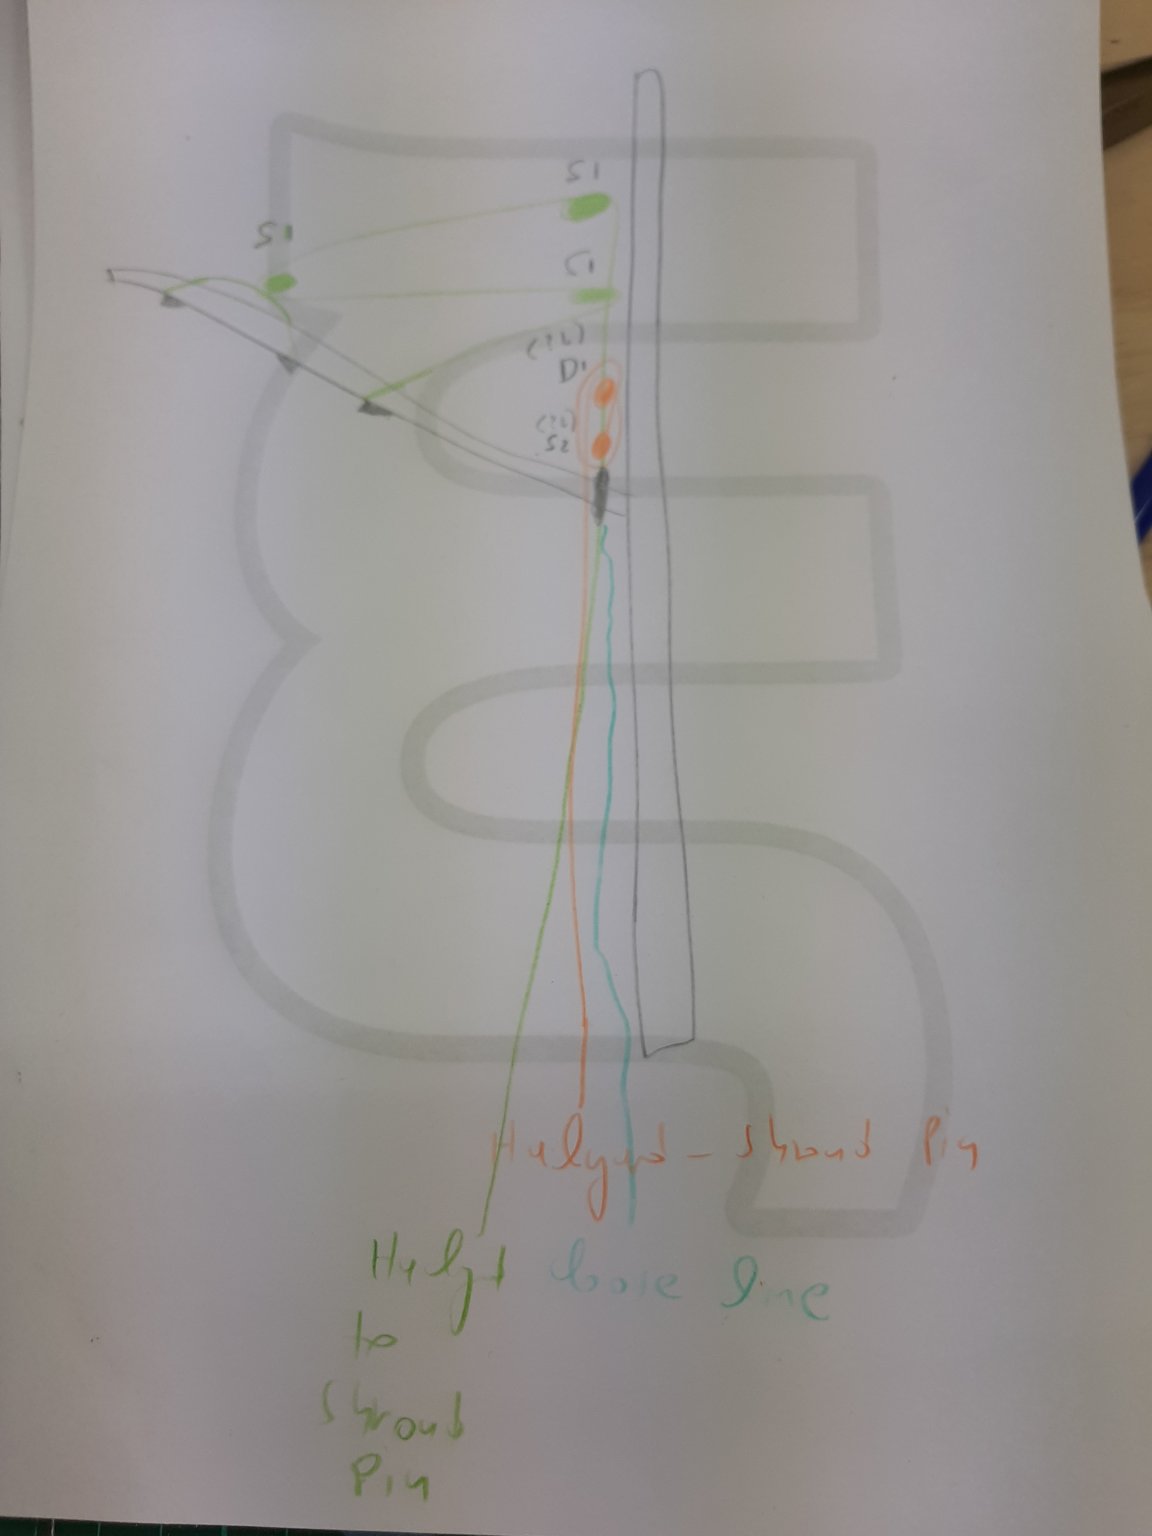
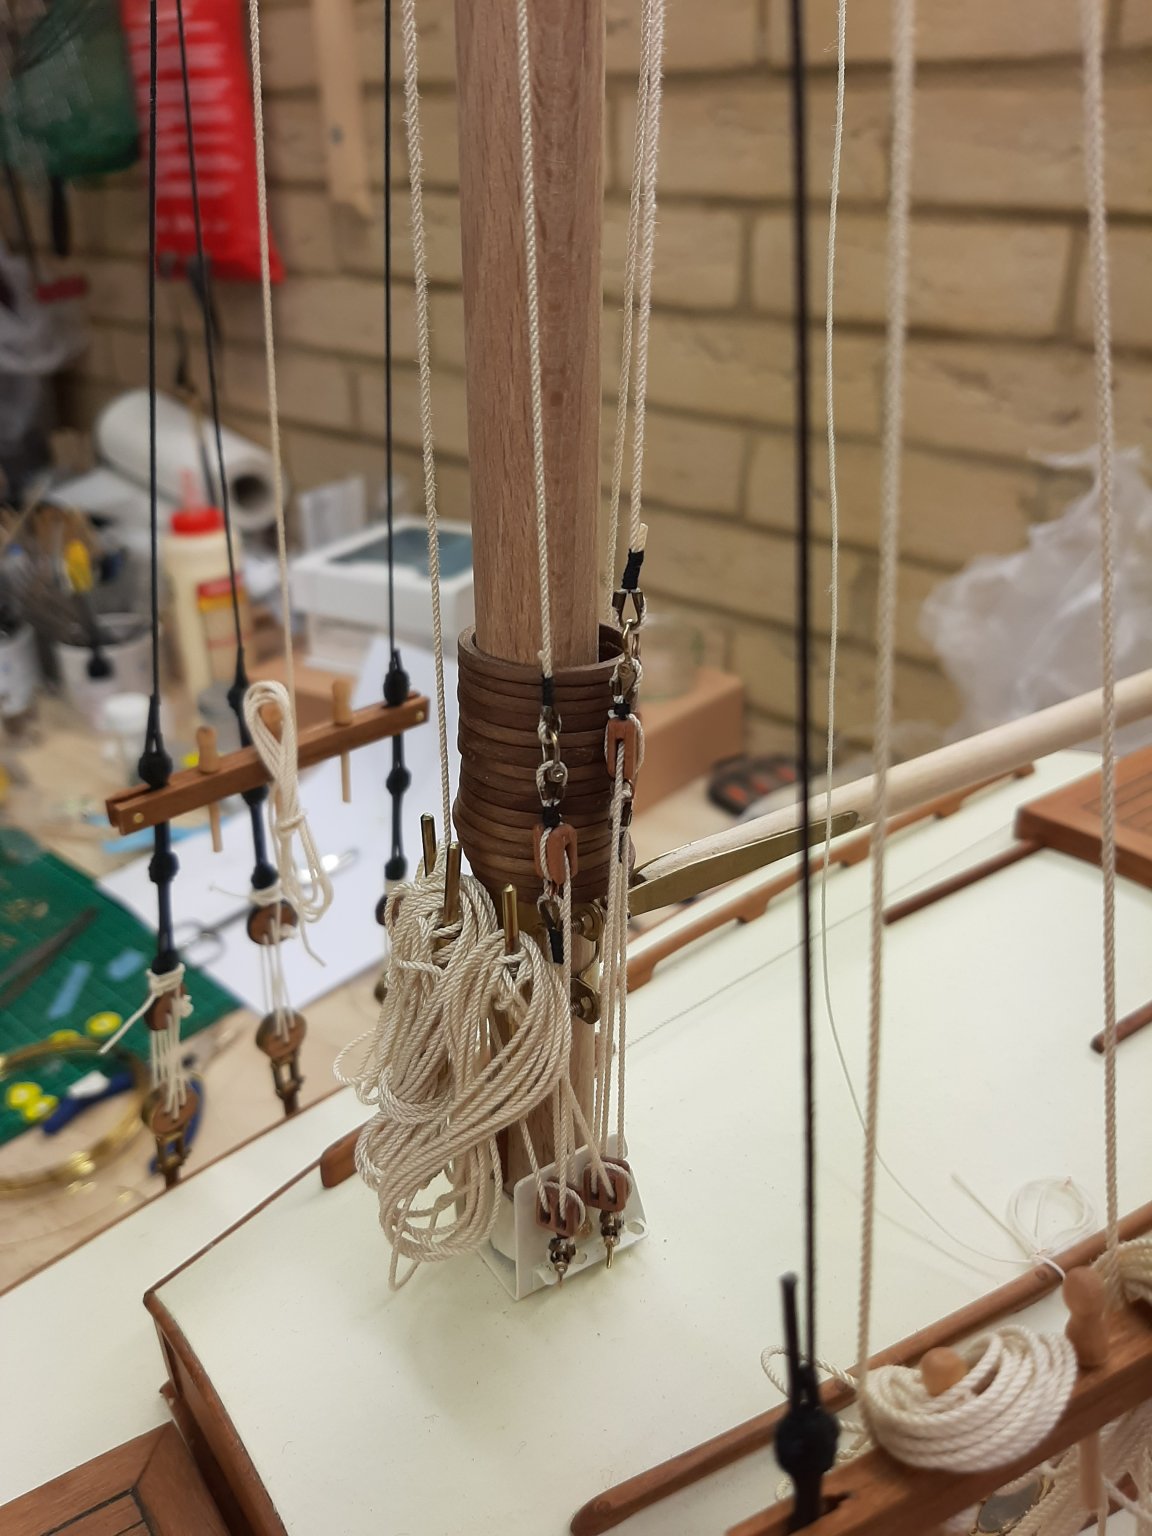
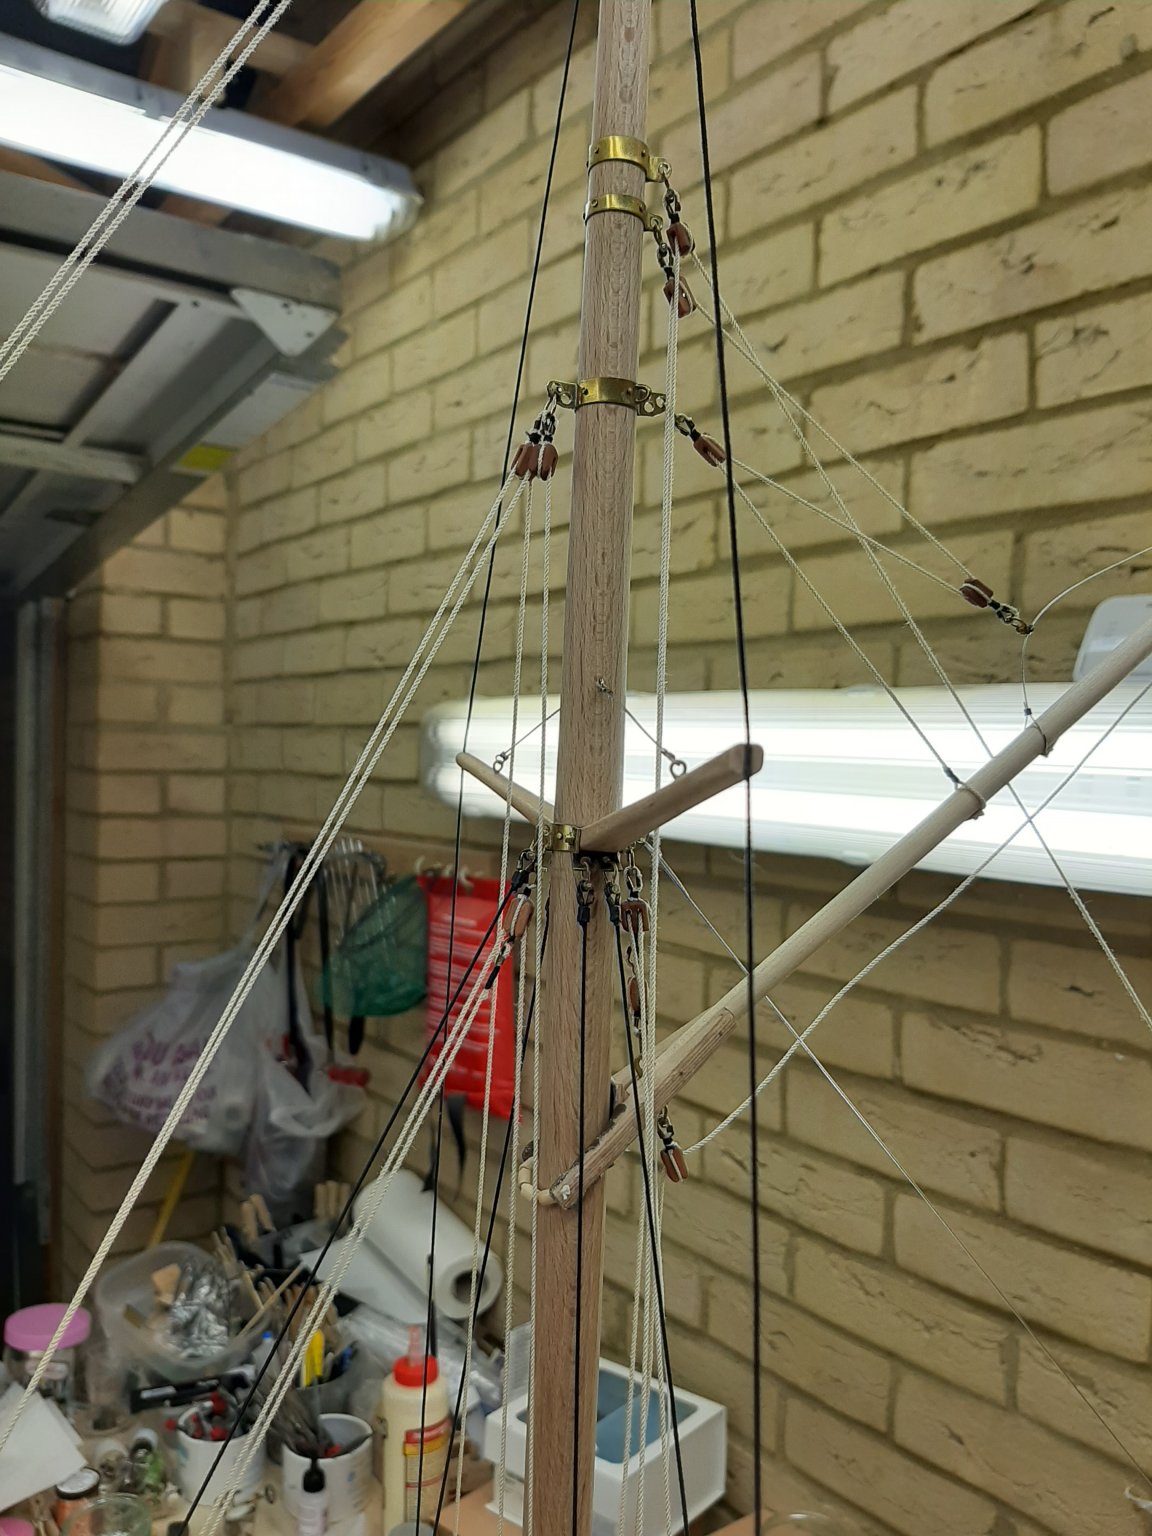
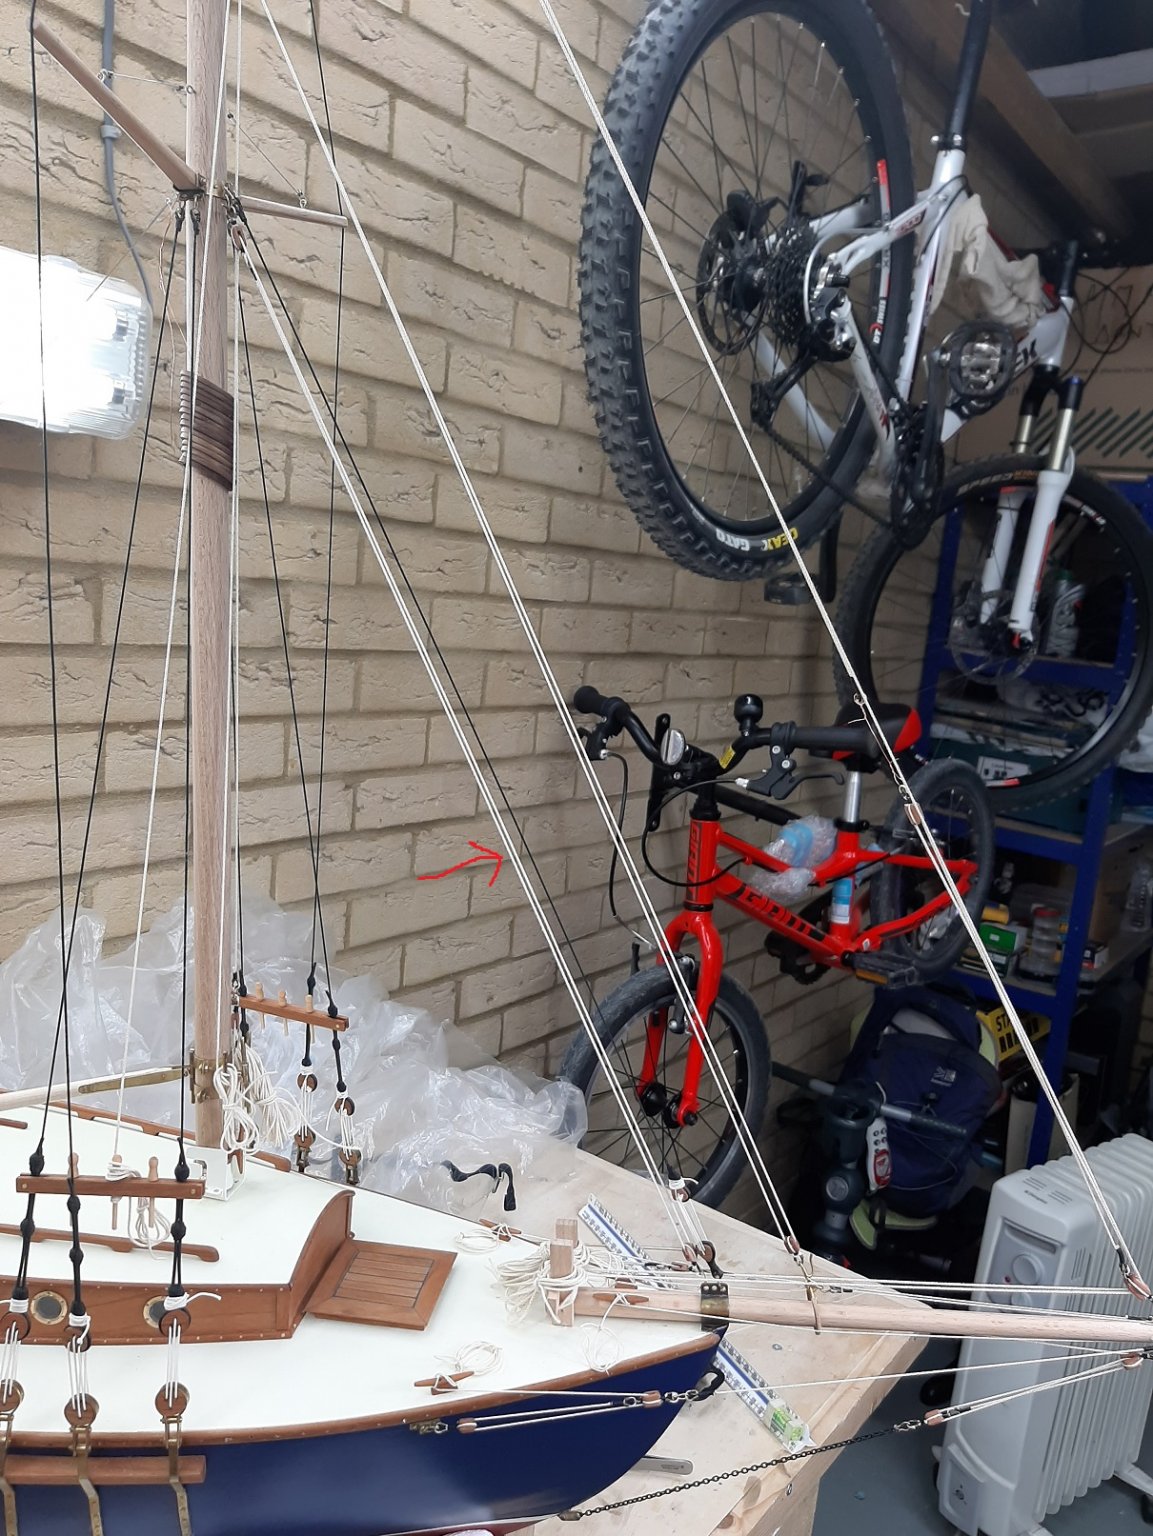
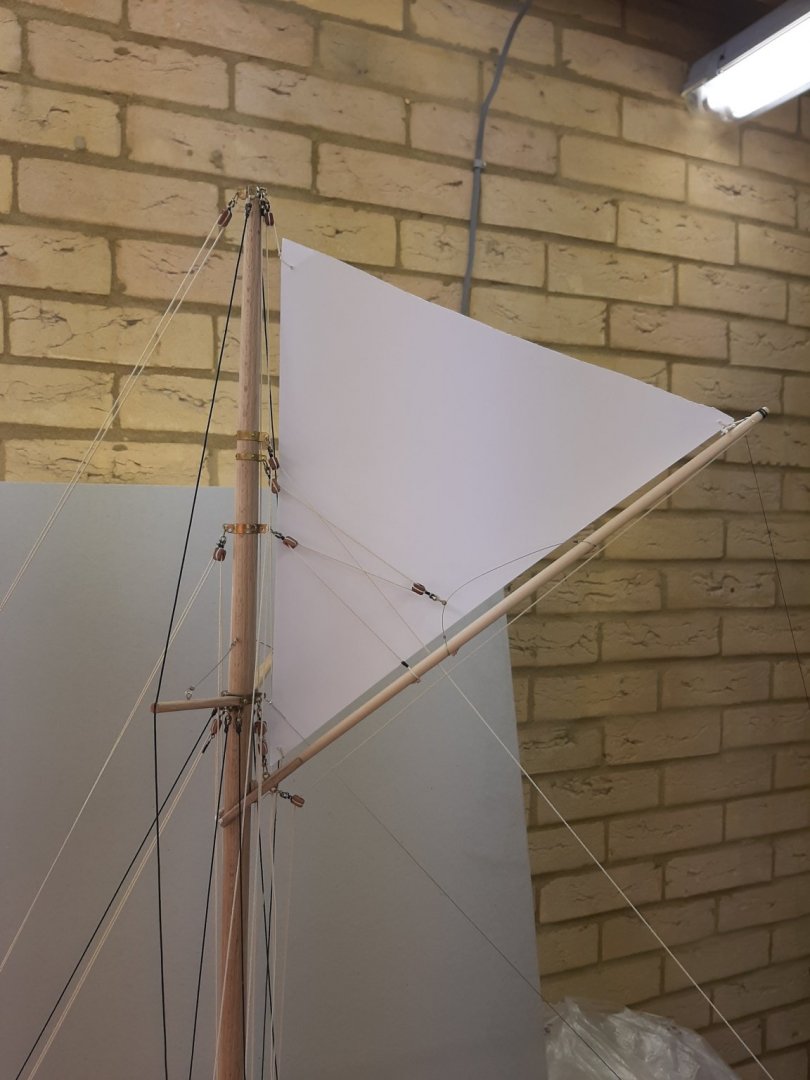
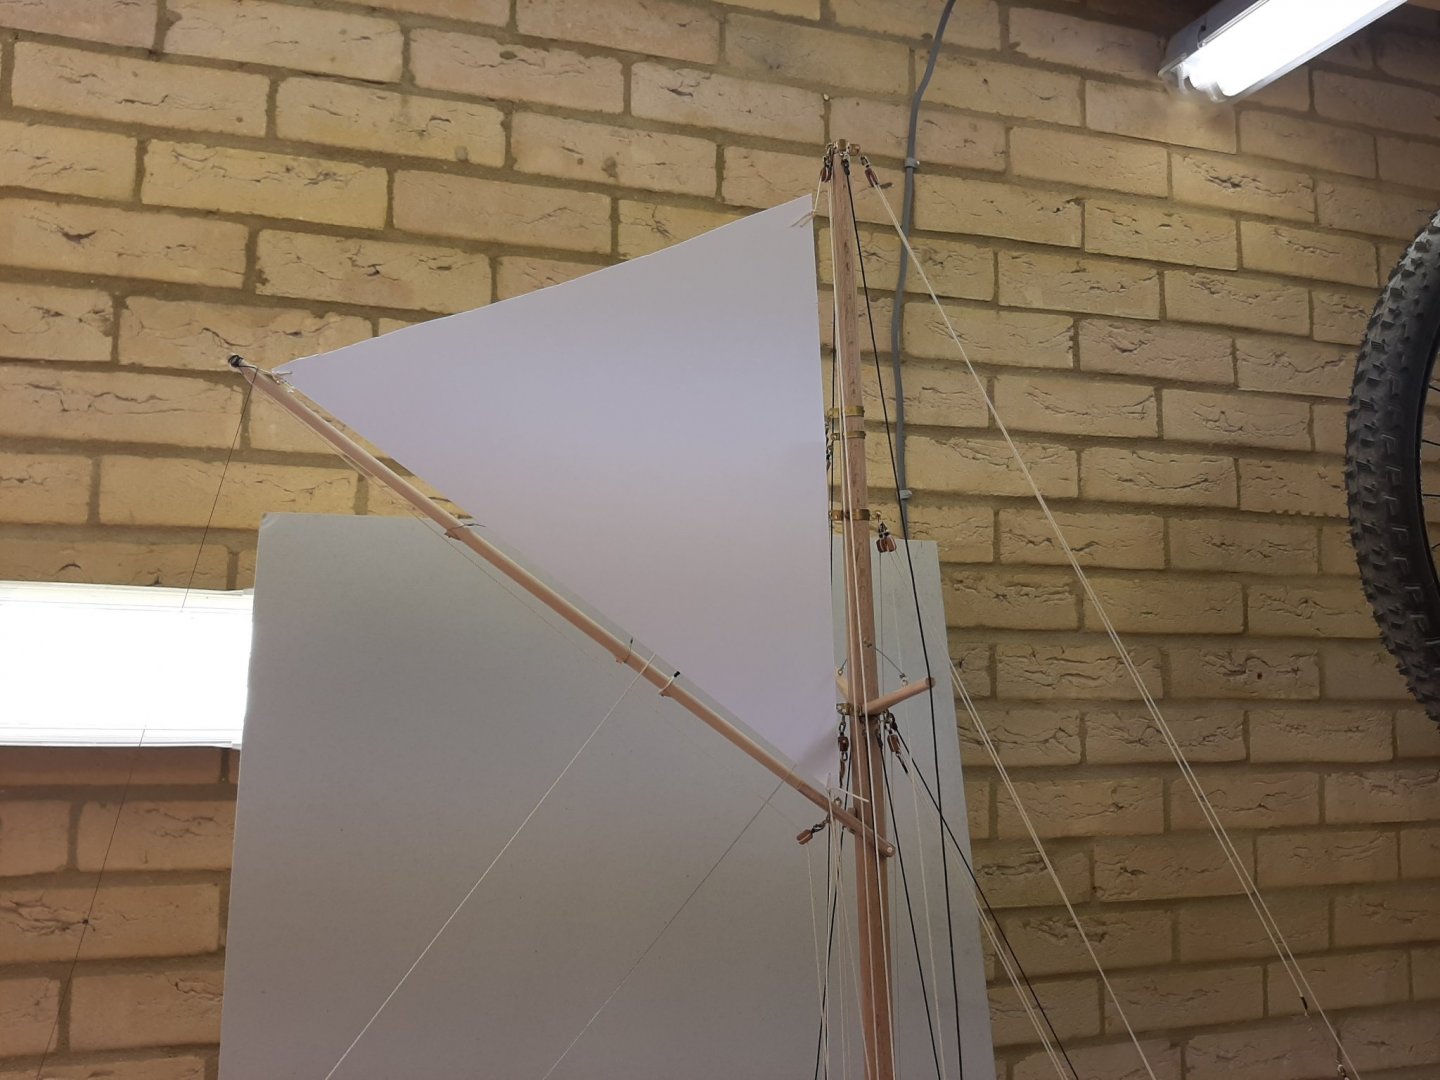
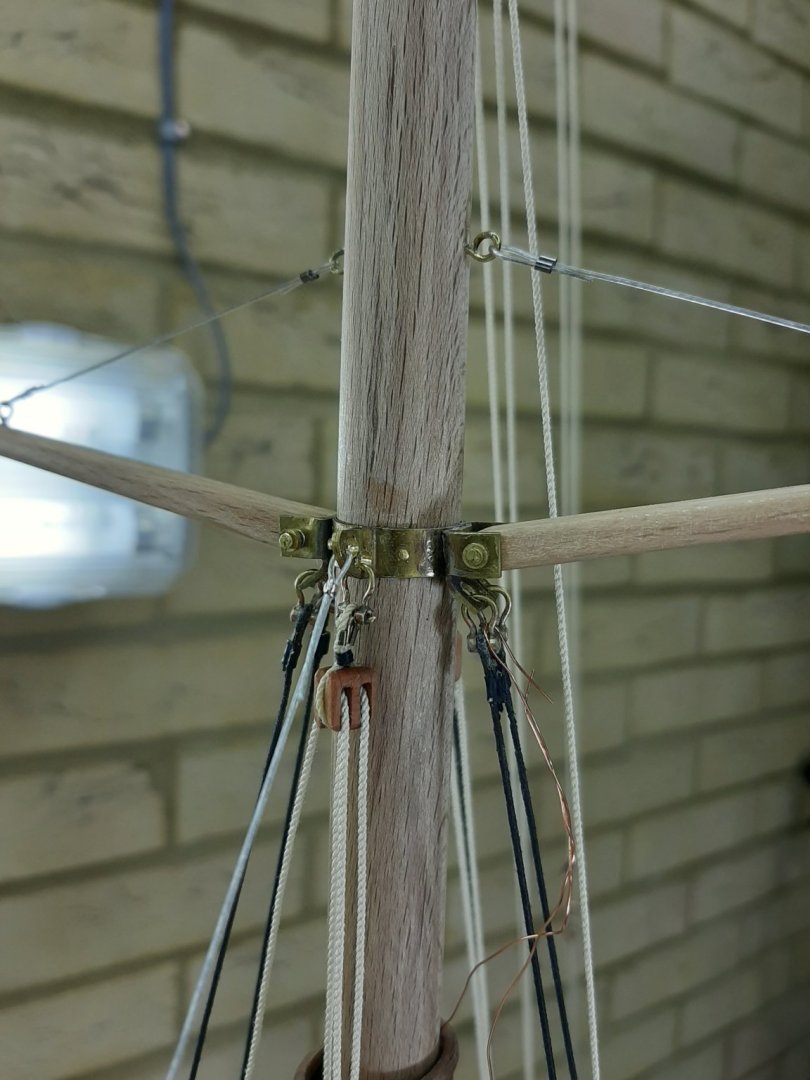
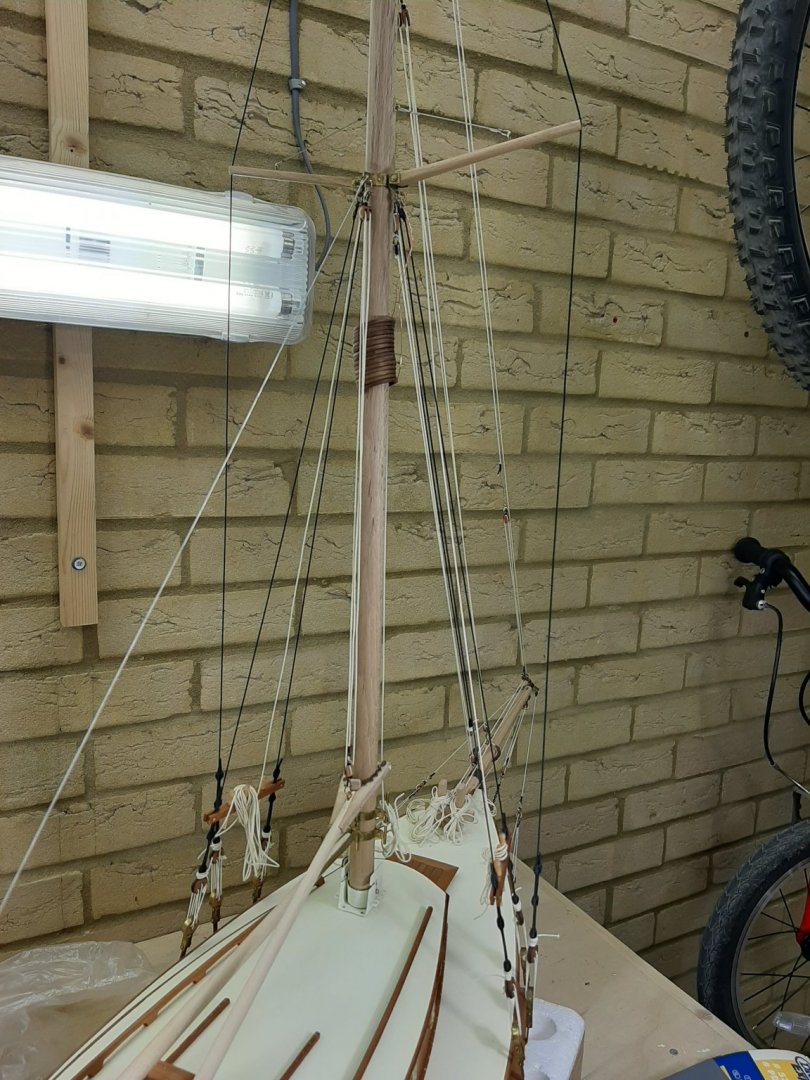
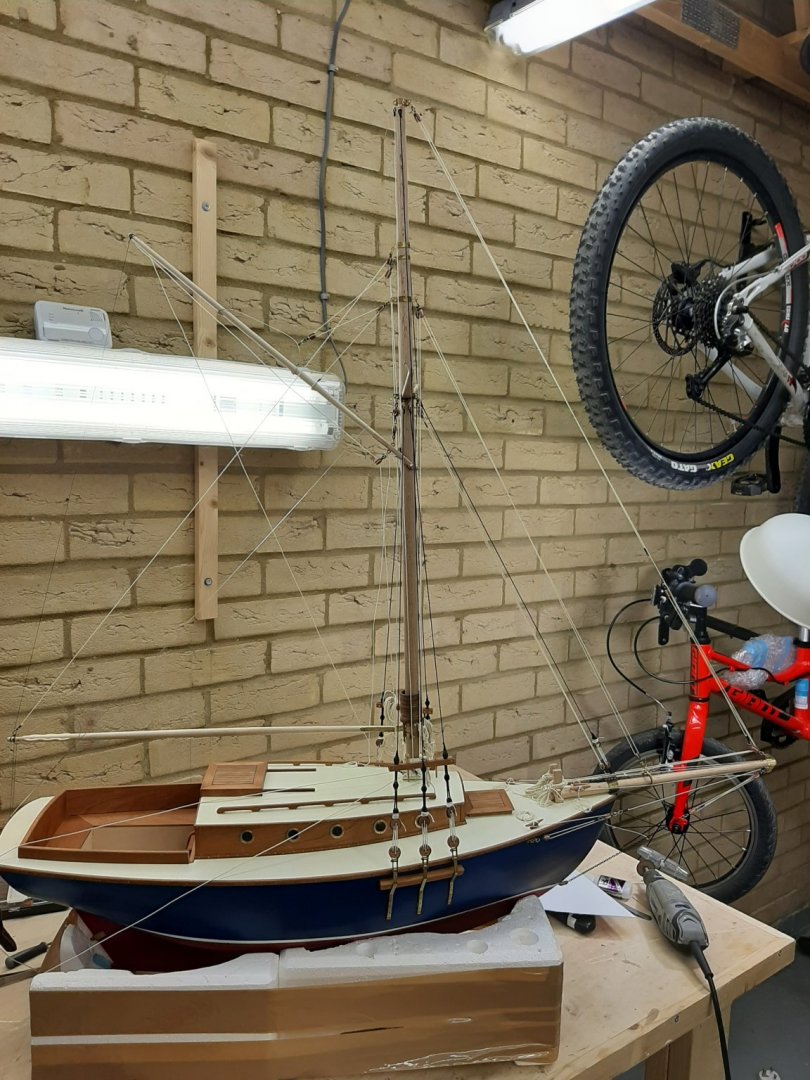
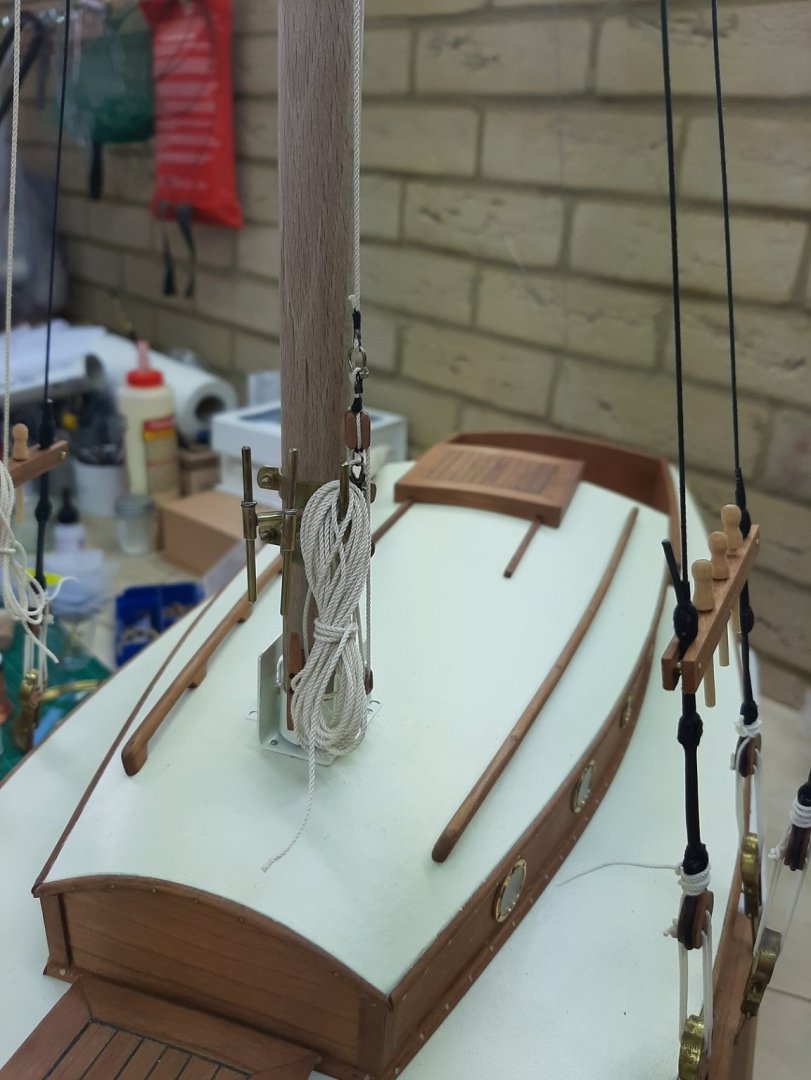
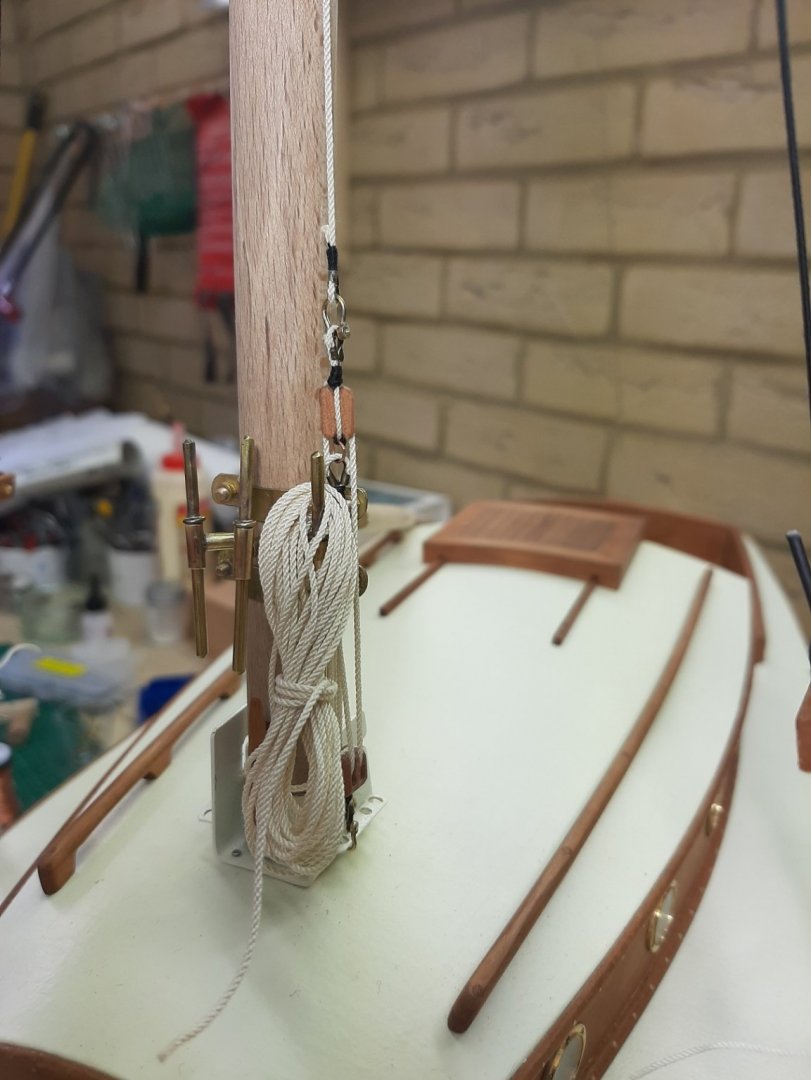
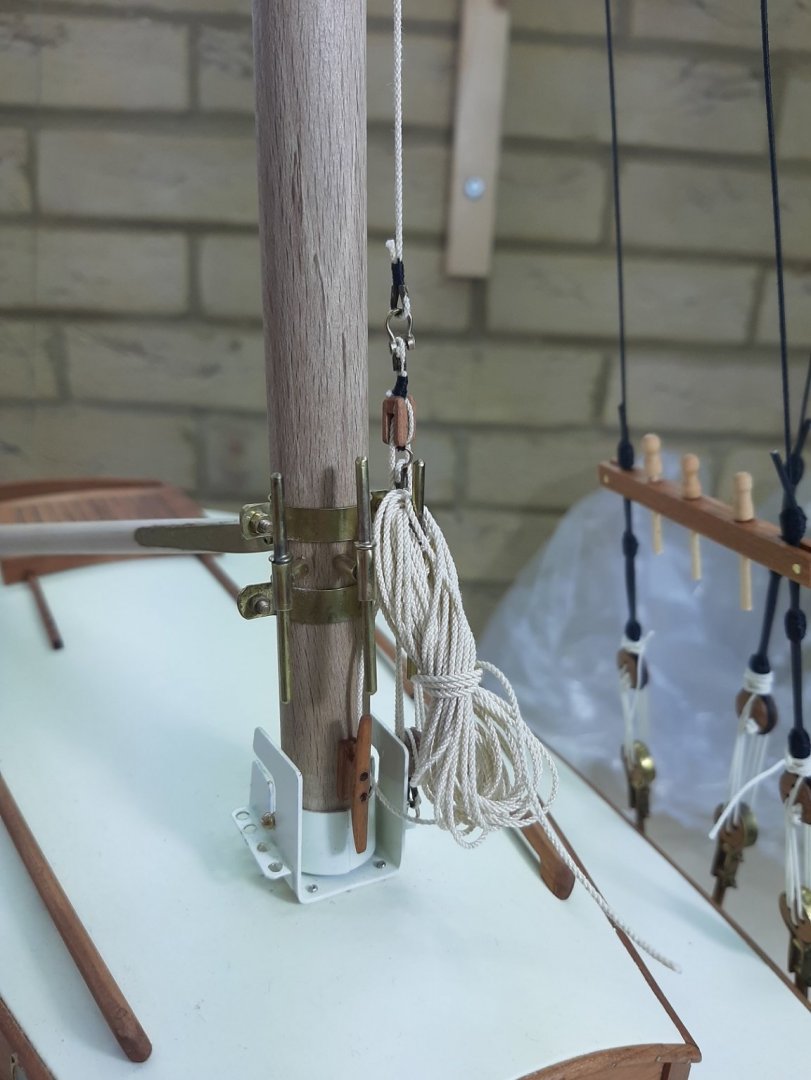
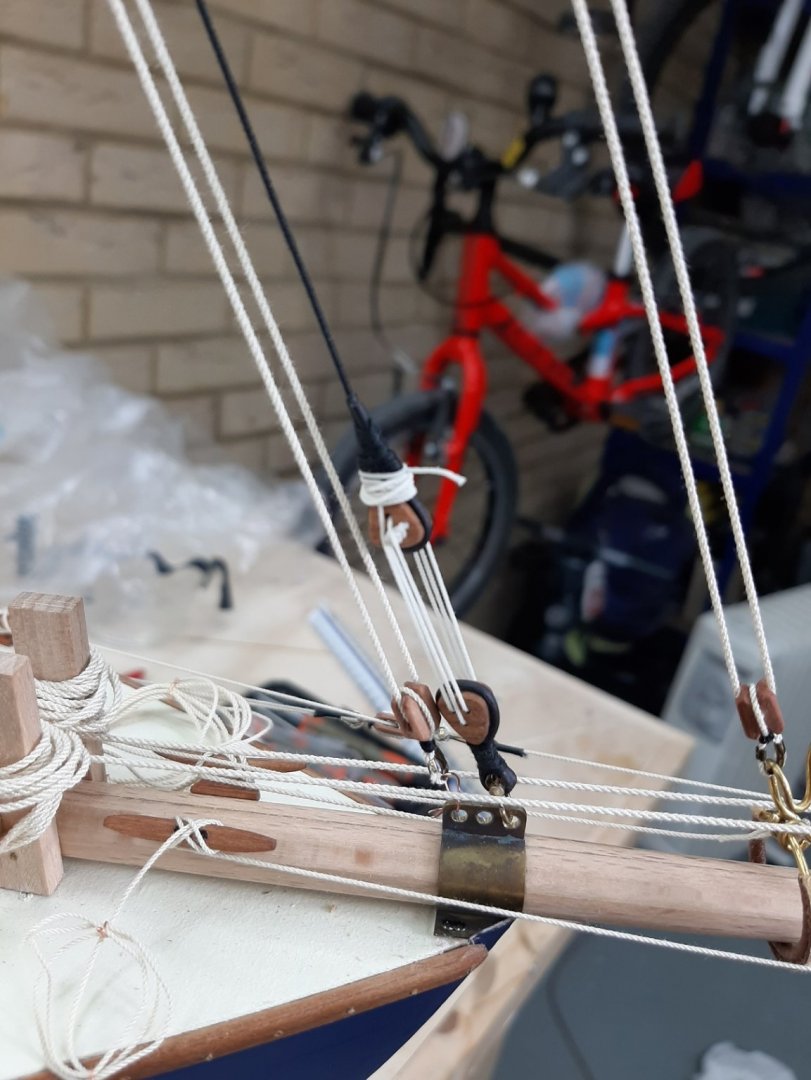
There is a heat wave here in England and the garage is getting a bit too hot so work is suspended till it cools. However, I have finished the mast part of the running rigging. 7. Topsail leader. This is essentially a line running down from the top of the mast to a block at the tabernacle. Its purpose is to provide a somewhat fixed point for the luff of the topsail to be attached. This is shackled to the top sail downhaul so that both can be tighten with the same line. 8. Topsail downhaul. As above 9. Topsail outhaul. This is attached to the clew of the topsail, through a sheave at the end of the gaff and then led down to the cabin roof 10. Topsail halliard. No purchases needed. This concludes this part of the rigging and all the lines should be visible on the photos that follow. I used two bought shackles as they have the advantage that they can be removed. This is important as the rigging for the topsail needs to be taken down when the sales are furled an in this case the topsail halliard will be shackled to the leader. You may notice an unused block at the starboard side attached to the tabernacle, it just needs to be removed. The black thread on the gaff and boom are just to keep things together Next probably to do some work on the boom, I ll need to make a mock main sail. The worrying part will be the sheets for the foresails Vaddoc


- 536 replies
-
- 13
-

-
Thanks, it was indeed a very fun boat to build. I still have not got round to taking some photos for the gallery!
- 253 replies
-
- 1
-
-
- ketkch
- gaff-rigged
- (and 1 more)
-
Hi Richard, very nice work, the boat is coming out fine. How did you apply the ink to the wood? It seems to have taken up the colour evenly, I like how it looks.
- 30 replies
-
- 1
-
-
- armed launch
- panart
- (and 1 more)
-
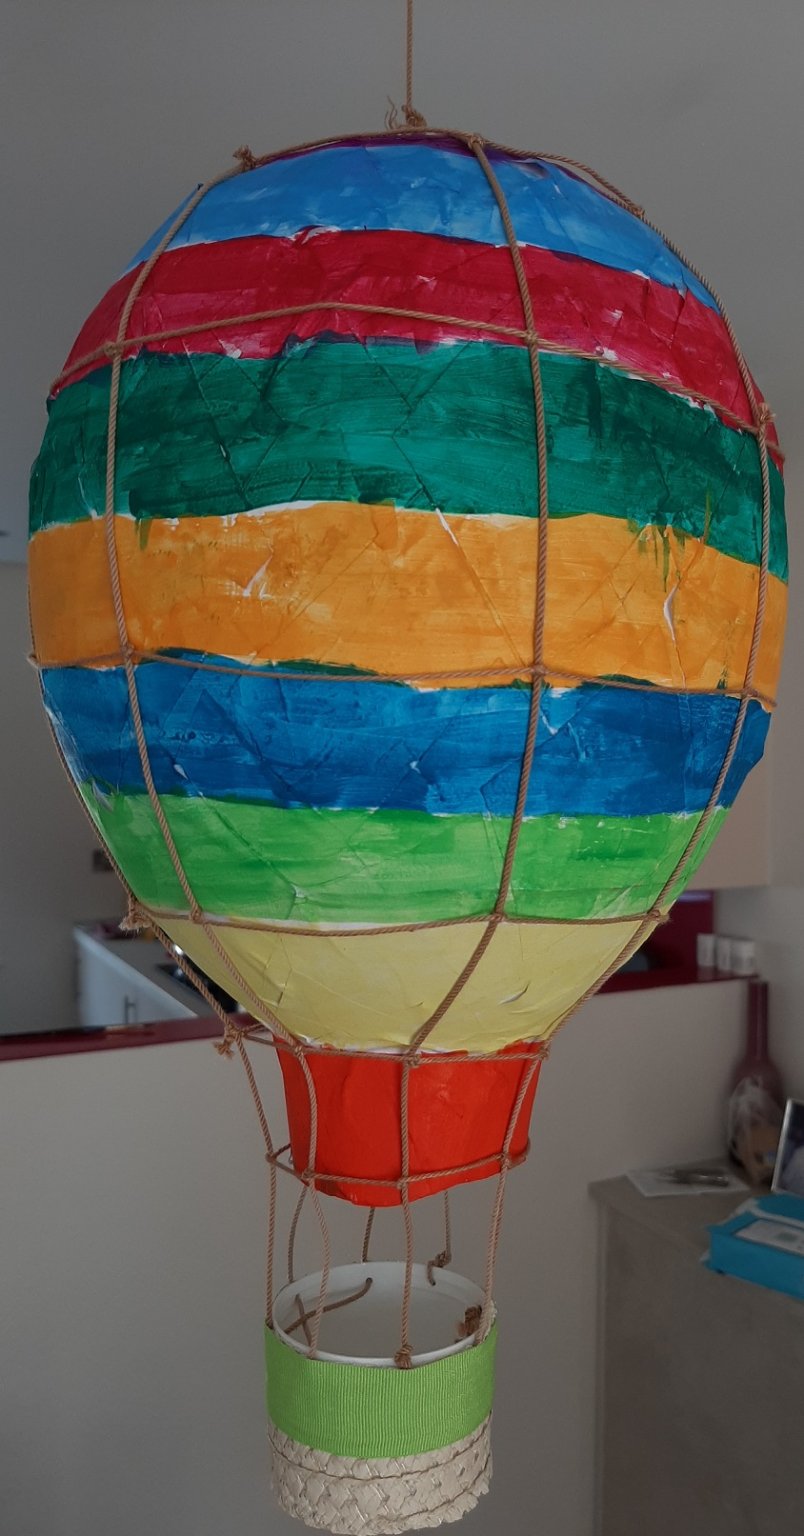
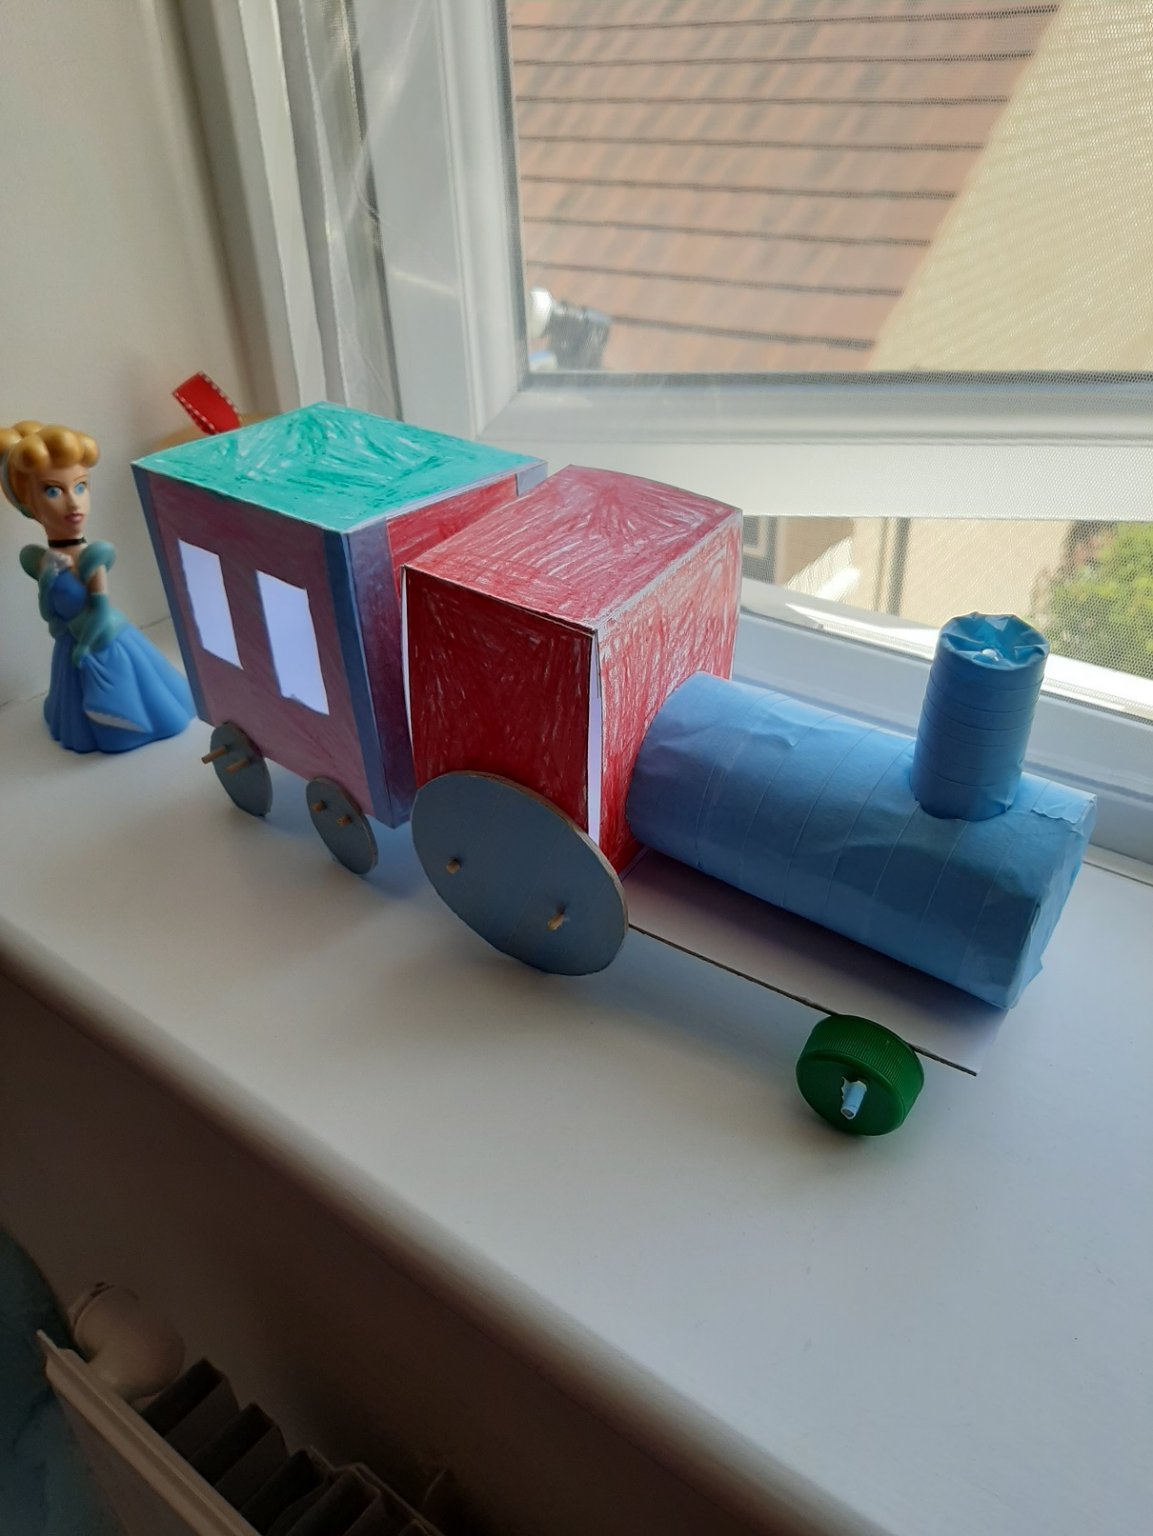
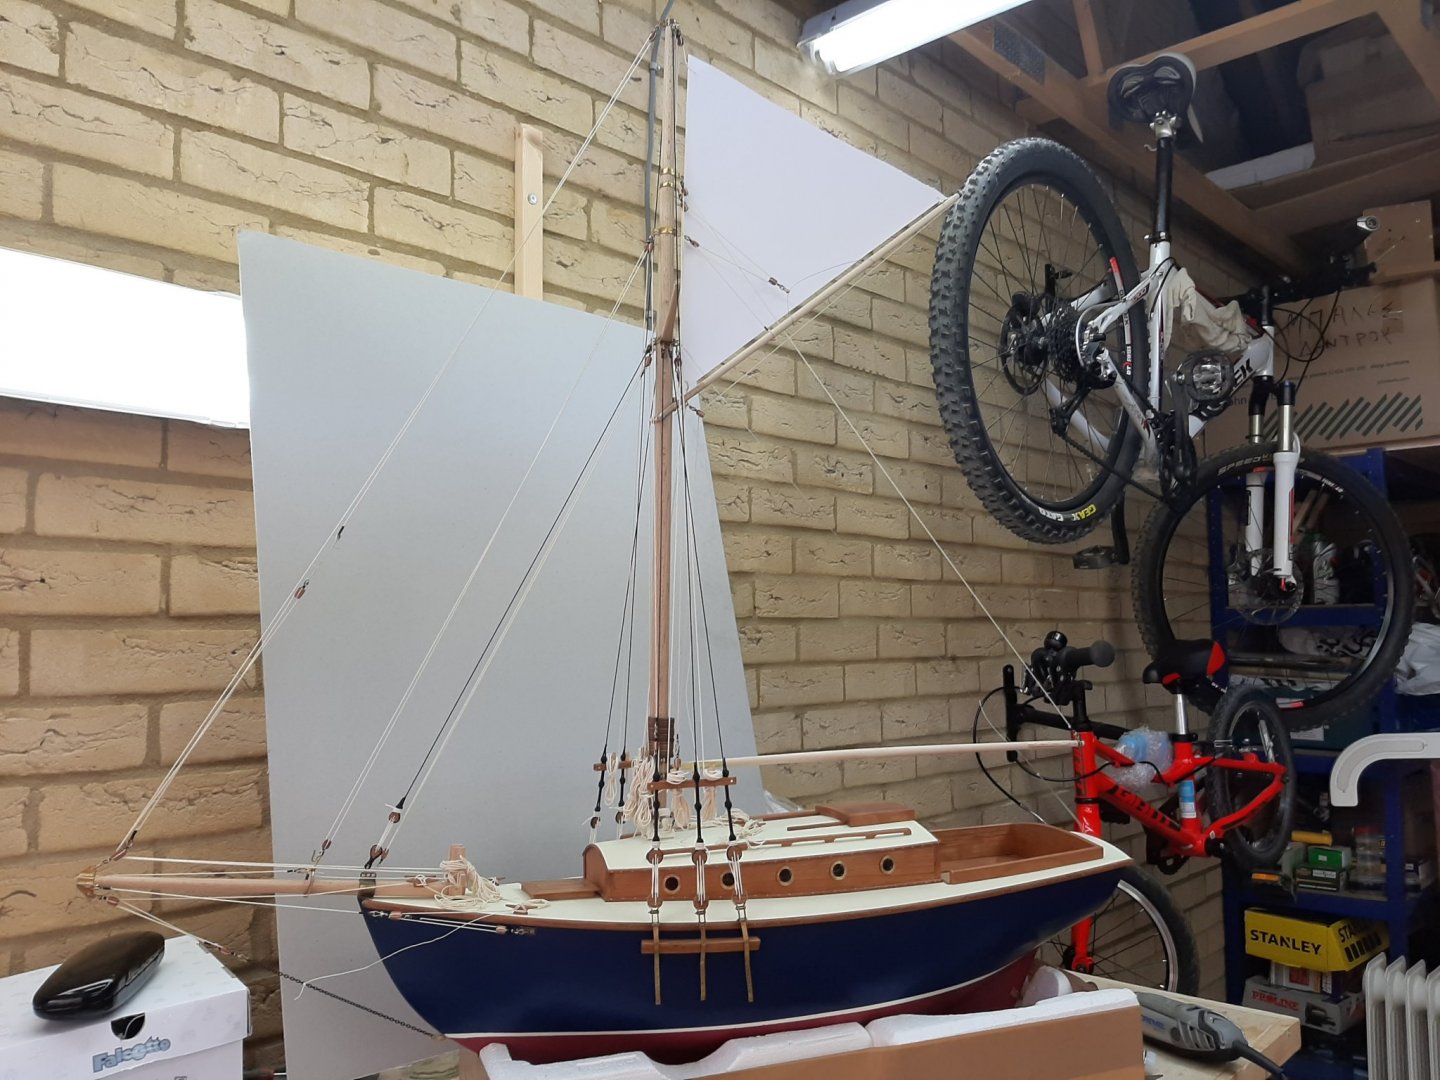
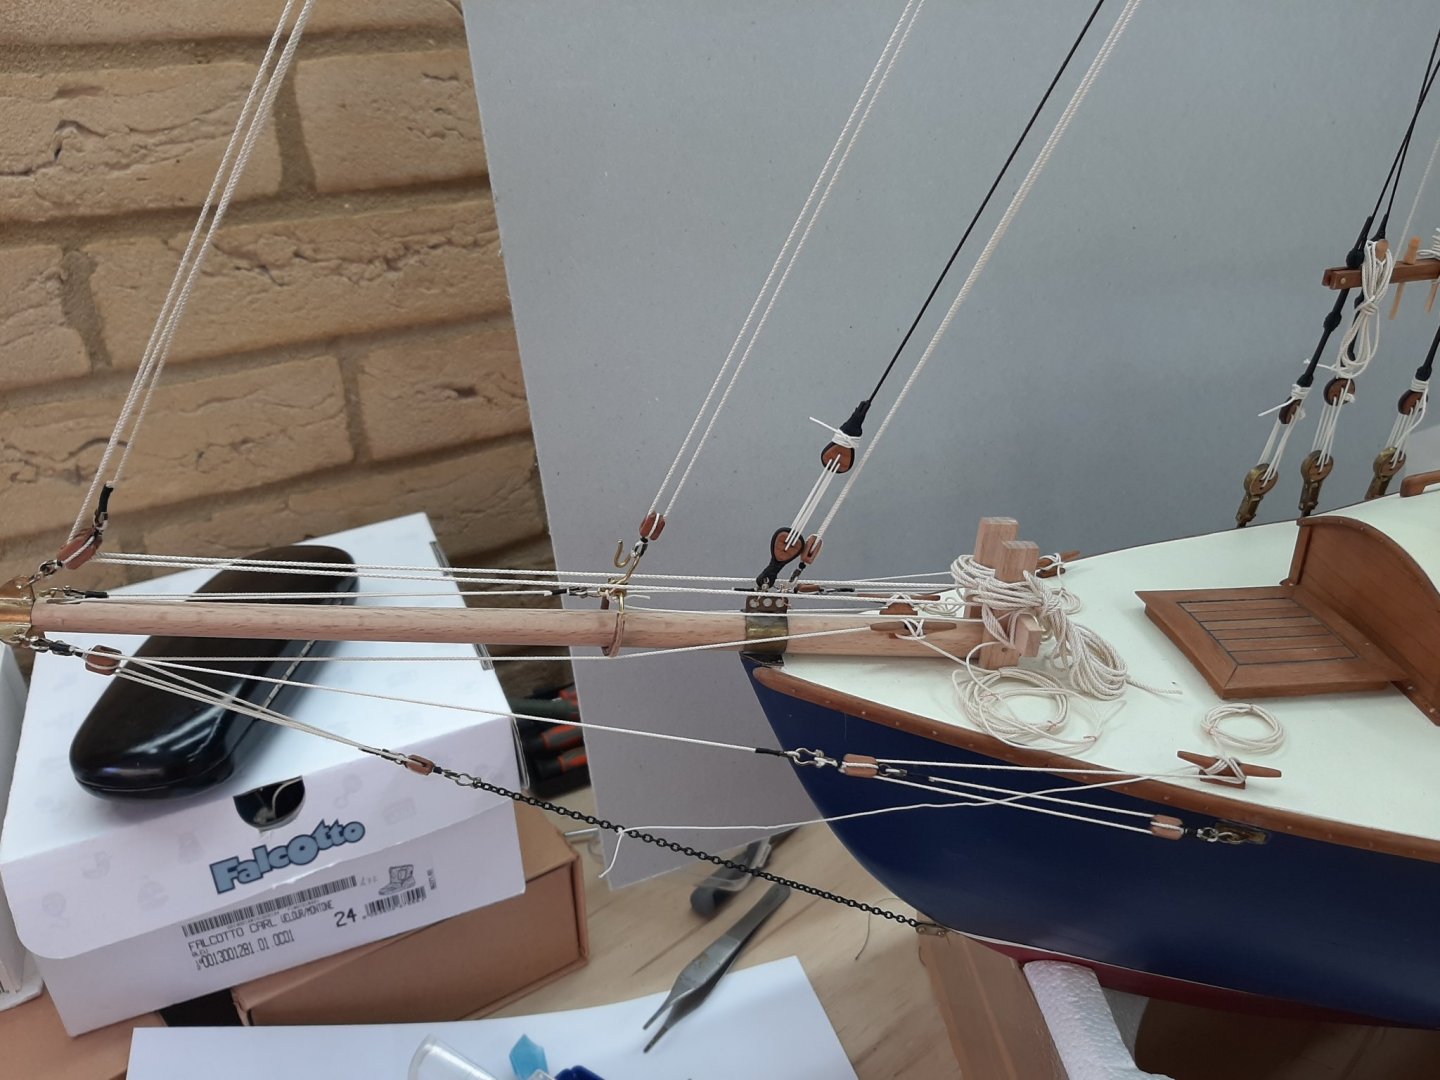
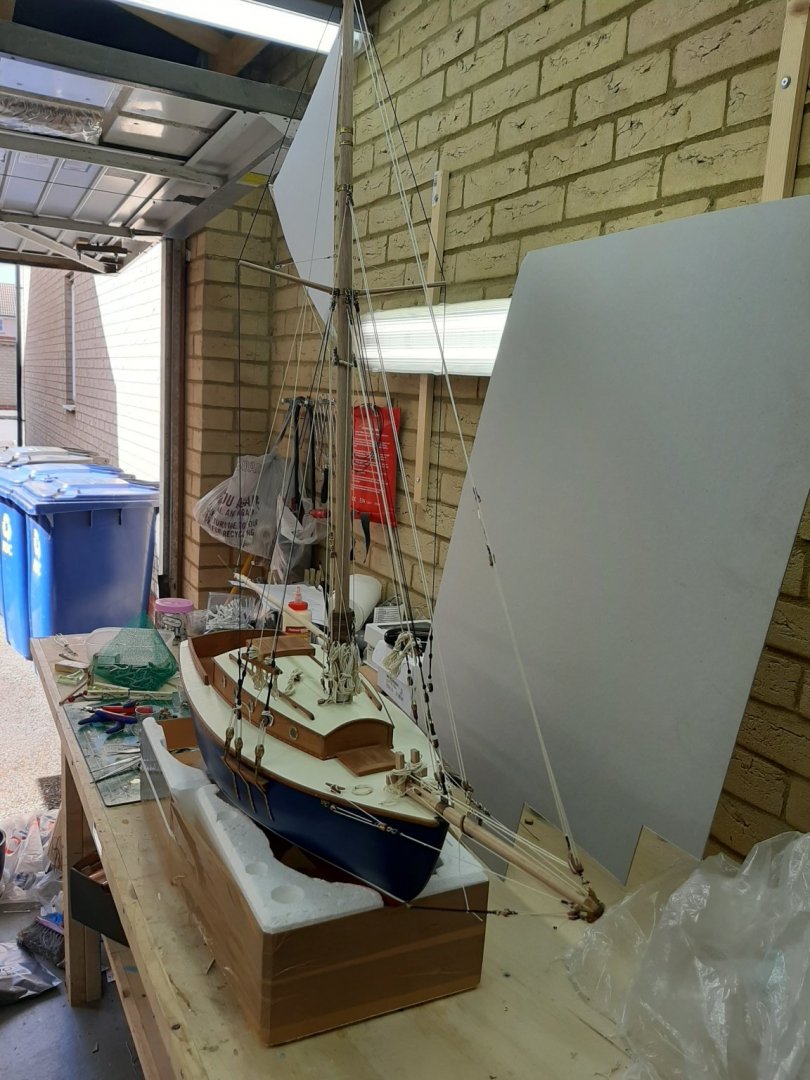
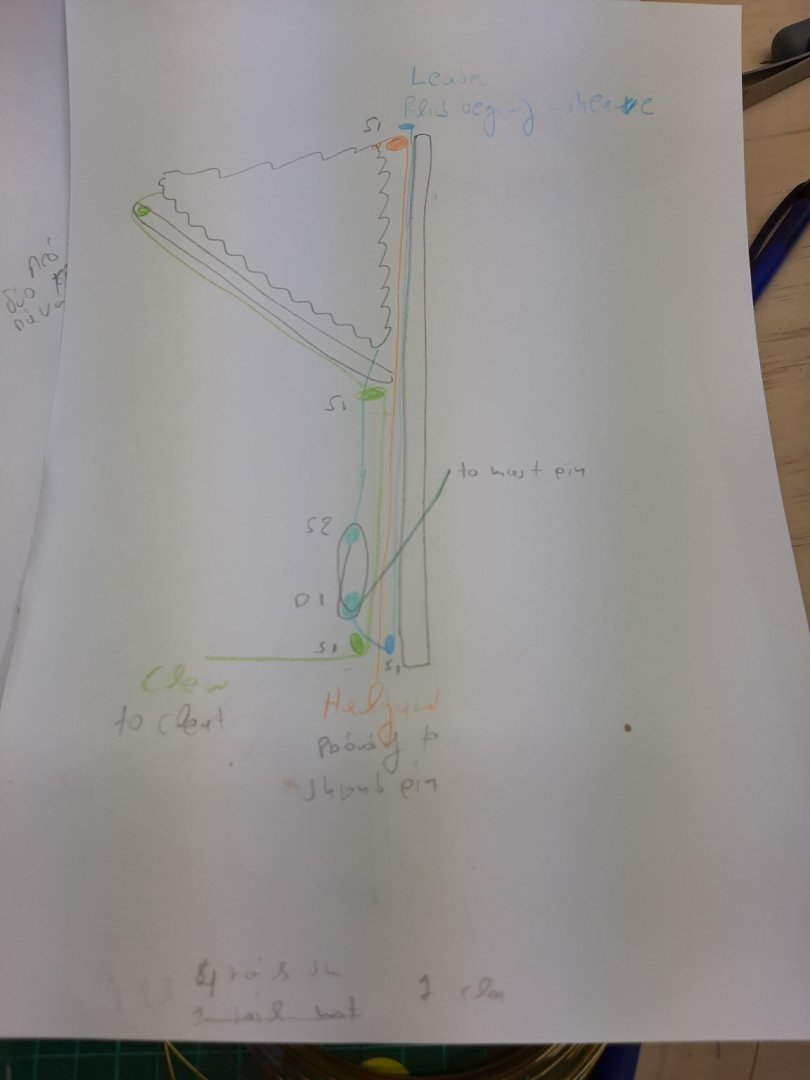
Thanks Vlad! The Deben is a very fun boat to build and like your clipper, I think deserves a large scale! Now, I d like to share with you a few more models that I ve been building. You see, I have a 3 and a 5 year old and this lockdown is an opportunity for some creative time together by doing school projects. They actually take a lot of time but the girls love it! Back to the boat, I must admit I am having a great time. Progress is now very fast, I mostly draw info from the books by John Leather and Tom Cunliffe. They do have limitations though but more on these later on. Also, the size of the boat creates a problem taking good photos. Another problem is that I am running out of single blocks, I think that I will have just enough. I really do not want to make any more! So far , these are the components of the running rigging that have been installed 1. Jib topsail, which is combined with the stay and self tensioning 2. Jib, which is set flying with some powerful blocks 3. Staysail, again with powerful blocks. Next, it was time to add the gaff. It has a sheave for the gaff top sail. 4. Throat halliard. It is currently made fast to the port pin rail but Cunliffe is adamant it needs to be on the starboard side so I ll change it later Yes, the hoops need to be bellow the gaff-fixed later on 5. Peak halliard. The wire will look fine once the sail goes on and there is a bit of weight and pull on the gaff 6. Topping lift. This again has some powerful blocks. The line will be tied to one of the mast pins-this pin will be shared with the topsail downhaul as the two lines will never be used simultaneously. The topping lift is the upper most block The next 3 sketches explain how the rigging works. S1 means single block one ended, S2 two ended etc I then actually moved the topping lift to the other side of the mast to make room for the lines rigging the topsail The next two photos show how things are currently. I started rigging the topsail but run out of time. Certainly the mast is starting to look busy! I now am confident that there will be enough room on the boat for all the above components. However, I am concerned that there will not be enough room for the sheets of the foresails. The two books I mentioned earlier, "Gaff Rig" and "Hand, reef and steer" do not elaborate enough on how the sheets are arranged. I searched the net and also watched several You tube videos and this is what I came up with: The jib top mast is a weak sail, does not need a block and the sheet goes straight to the stern The jib will have on each side a single block, one end of the line tied to the deck, the other through the block, through a lizzard and straight to a cleat at the stern The staysail needs powerful blocks The problem is that 3 cleats will be needed at the stern on each side, and with the Highfield levels and the main sail sheet blocks, I do not think there is enough space. Maybe I should not have made the cockpit so generous. Anyway, we ll need to make do. I also would like to add a boom vang but I ll leave this for later.


-
Is your rope 3 strand Vlad? I mean, is your rope made of 3 individually made smaller ropes? If so, splicing is very satisfying and ultimately quick and time effective. If your rope is made from threads, splicing does not work well. I used splicing extensively in the past and that was my experience.
- 200 replies
-
- 2
-
-
- cutty sark
- clipper
- (and 1 more)
-
A question about varnish.
vaddoc replied to danbloch's topic in Painting, finishing and weathering products and techniques
Danbloch, it is difficult to recommend a very specific finish as things work differently for different situations and people. For example, I never liked shellac and I use a lot a water based sanding sealer, Tung oil and water based varnishes-enamel varnishes if I need extra tough protection. A lot of people use wipe on poly-never used it myself. Matt varnishes can be temperamental if the mat medium within is not stirred carefully. I think you need to try a few finishes on scrap pieces of wood and see what you like and what works for you. Cheap plywood is great to try finishes. Also, there are a lot of threads with relevant discussions with a wealth of information-have a look. Do not try your chosen finish on the model itself, a failure on a large surface will need a lot of work to fix. -
Just came across you wonderful log, this will be a great model! Clearly you are having to much fun! I think the scale is spot on, you are capturing the feeling of massiveness that you get with these large ships. Looking forward for the rest of this journey.
- 200 replies
-
- 1
-
-
- cutty sark
- clipper
- (and 1 more)
-
Fokker Dr.I triplane by cog - multiple - 1:72 - PLASTIC
vaddoc replied to cog's topic in Non-ship/categorised builds
It seems that back then, if you had just a plain grey plane, nobody would actually want to fight you! I do have some thoughts but currently there is a lack of both time and funds! -
Indeed, your boat looks very nice! Yep, your description of model boat building seems accurate enough. Welcome to MSW!
-
Very nice Paul! Regarding the hatch, it took me a very long time to make mine. Looking back maybe it would be easier to make it from a solid piece of wood with grooves to imitate individual planks. Much easier to make the curved top. Indeed, your bowsprit will cost you a lot in port fees!
-
Fantastic work Gary, fantastic paint skills. Good at maths too-we will not tolerate over or undersized boards!😉
-
Building a model from 90 year old plans, isn't this fantastic! I somehow had the impression that boats with wide beam were slow. Any idea Mark what purpose this very wide beam served on this boat?
-
Fokker Dr.I triplane by cog - multiple - 1:72 - PLASTIC
vaddoc replied to cog's topic in Non-ship/categorised builds
I just finished going through the log Carl, very enjoyable, wonderful models! The strip down plane seems incredibly fragile. Lovely! -
A question about glue.
vaddoc replied to danbloch's topic in Building, Framing, Planking and plating a ships hull and deck
I think Jaager's post summarises things well, although I use epoxy a lot for laminating wood. For this task contact cement does not look too appropriate. For wood-wood you can't really go wrong with PVA. Yellow (aliphatic) PVA has very short opening time, white gives you more time to adjust the pieces. However, if you coat a large surface of thin wood with PVA it will absorb the moisture and buckle (does not happen that much with plywood). To avoid this you can wet the opposite surface. -
Many thanks Keith, indeed the plan is for full sails. The rigging is actually quite beefy and potentially could take a lot of tension. The shackles are also strong. There are 2 weak areas though that might give in. One is the cranse iron that took too many bumps and is just nailed (ca glue on the nails). The other is the backstays, I did not take into account that they would need to actually take some serious load so they are not as strong as i would like. The pull of the main sail should take some of the load off. However, it will mostly have the sails furled. Due to the functional blocks, hoisting sails is easy. Hopefully not long before we find out!
-
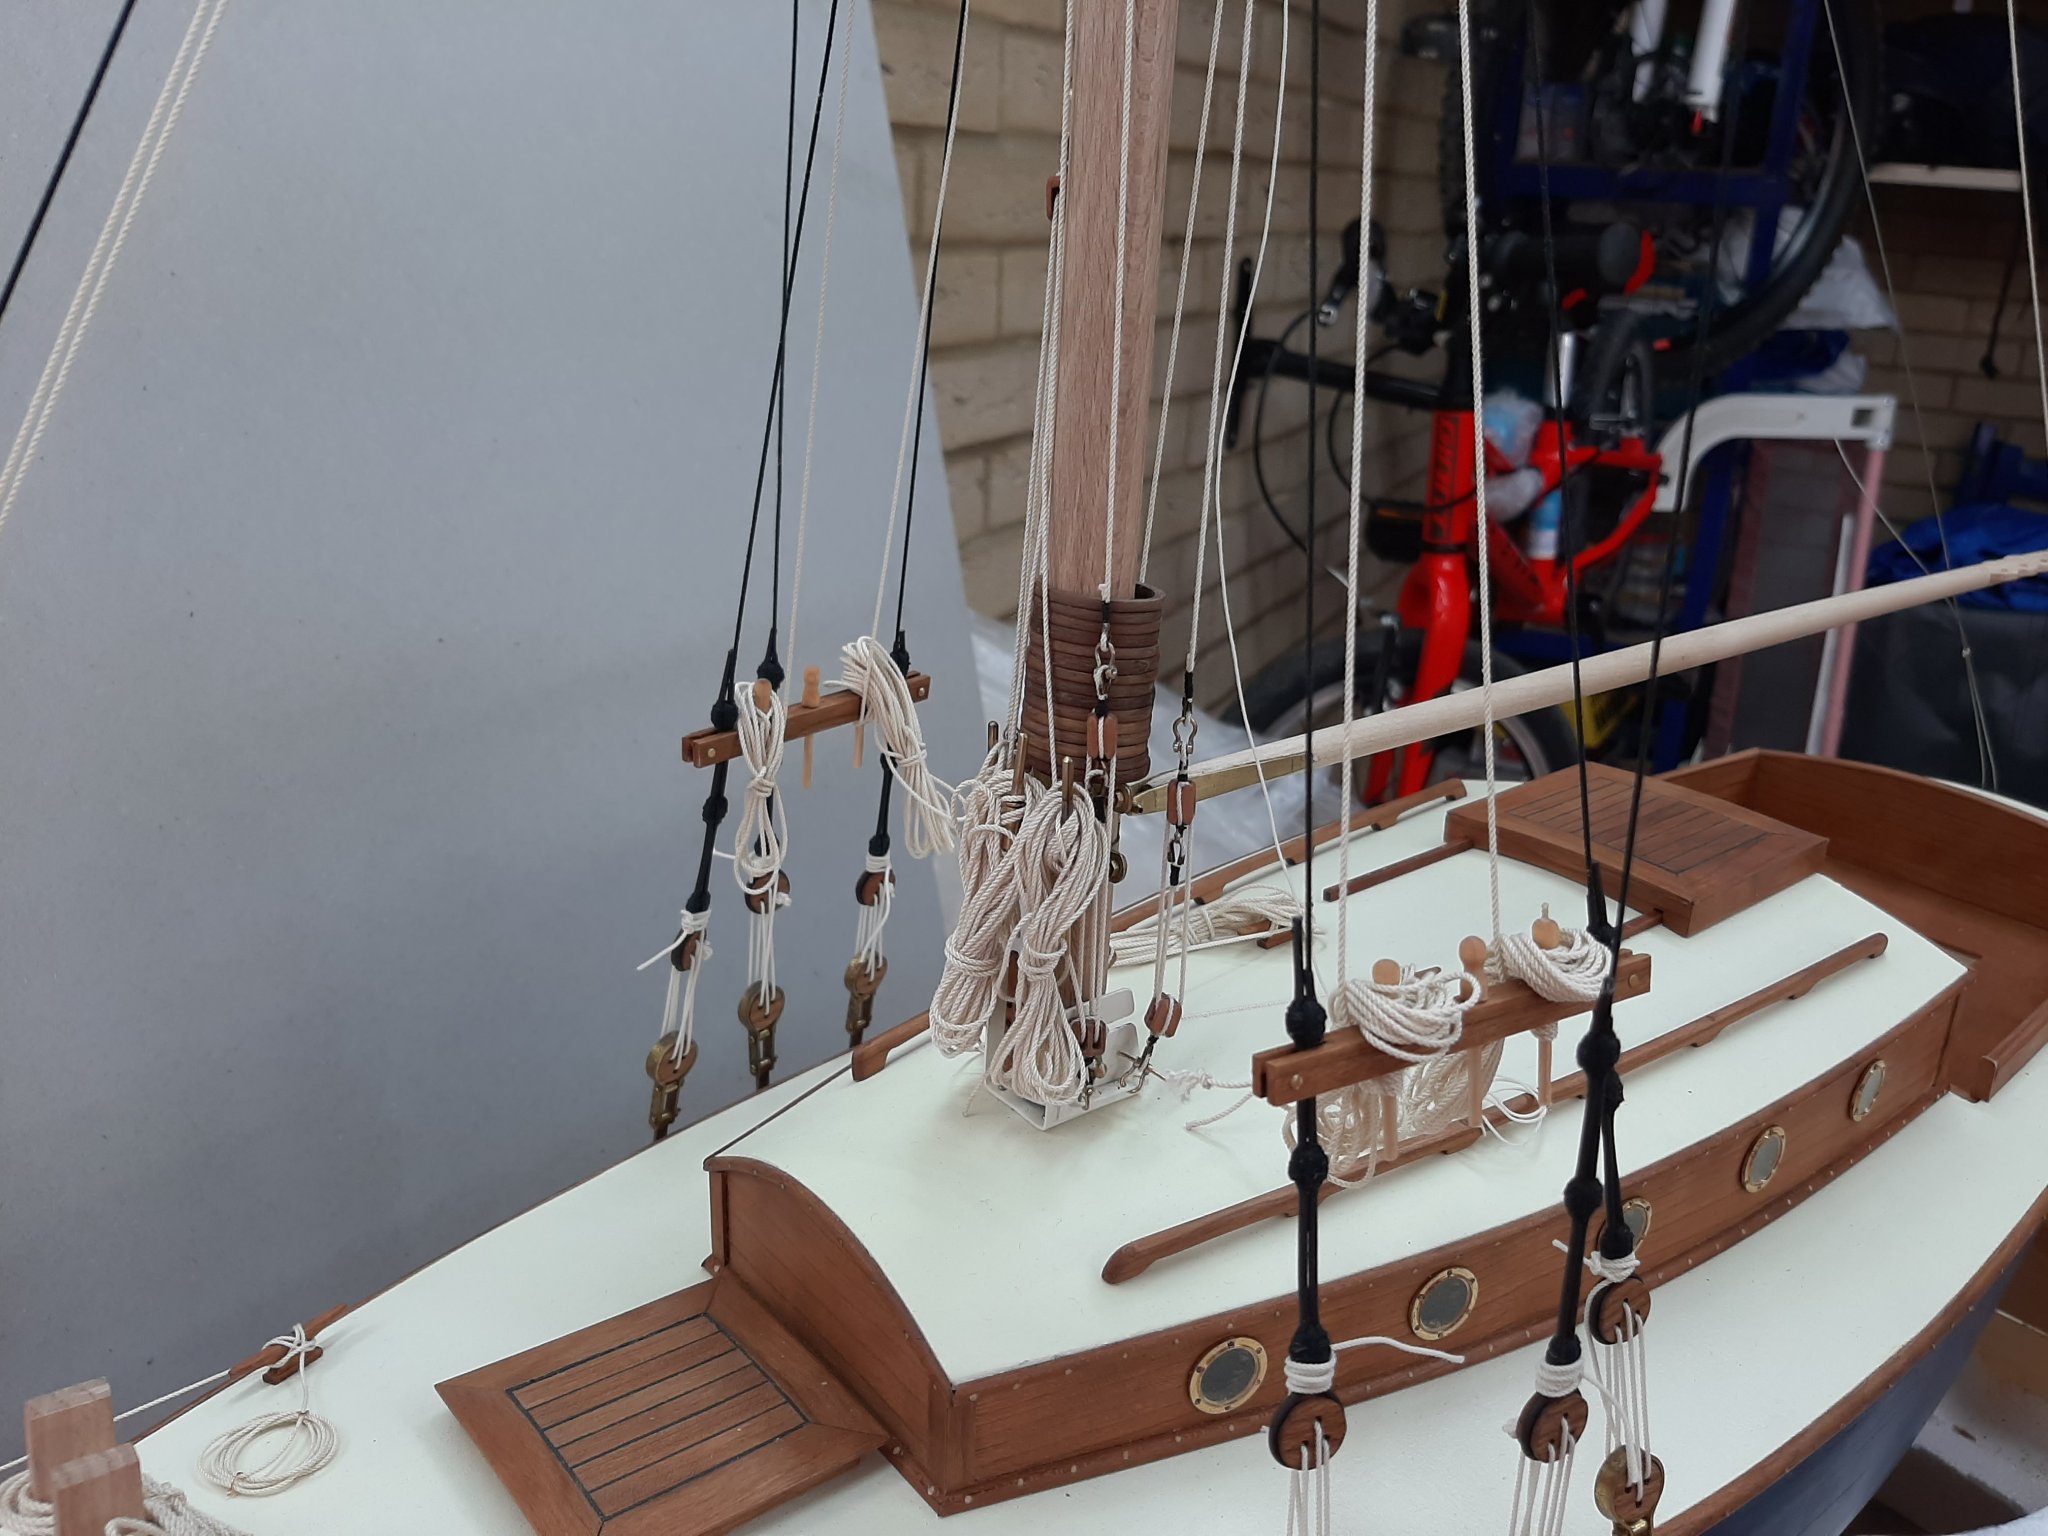
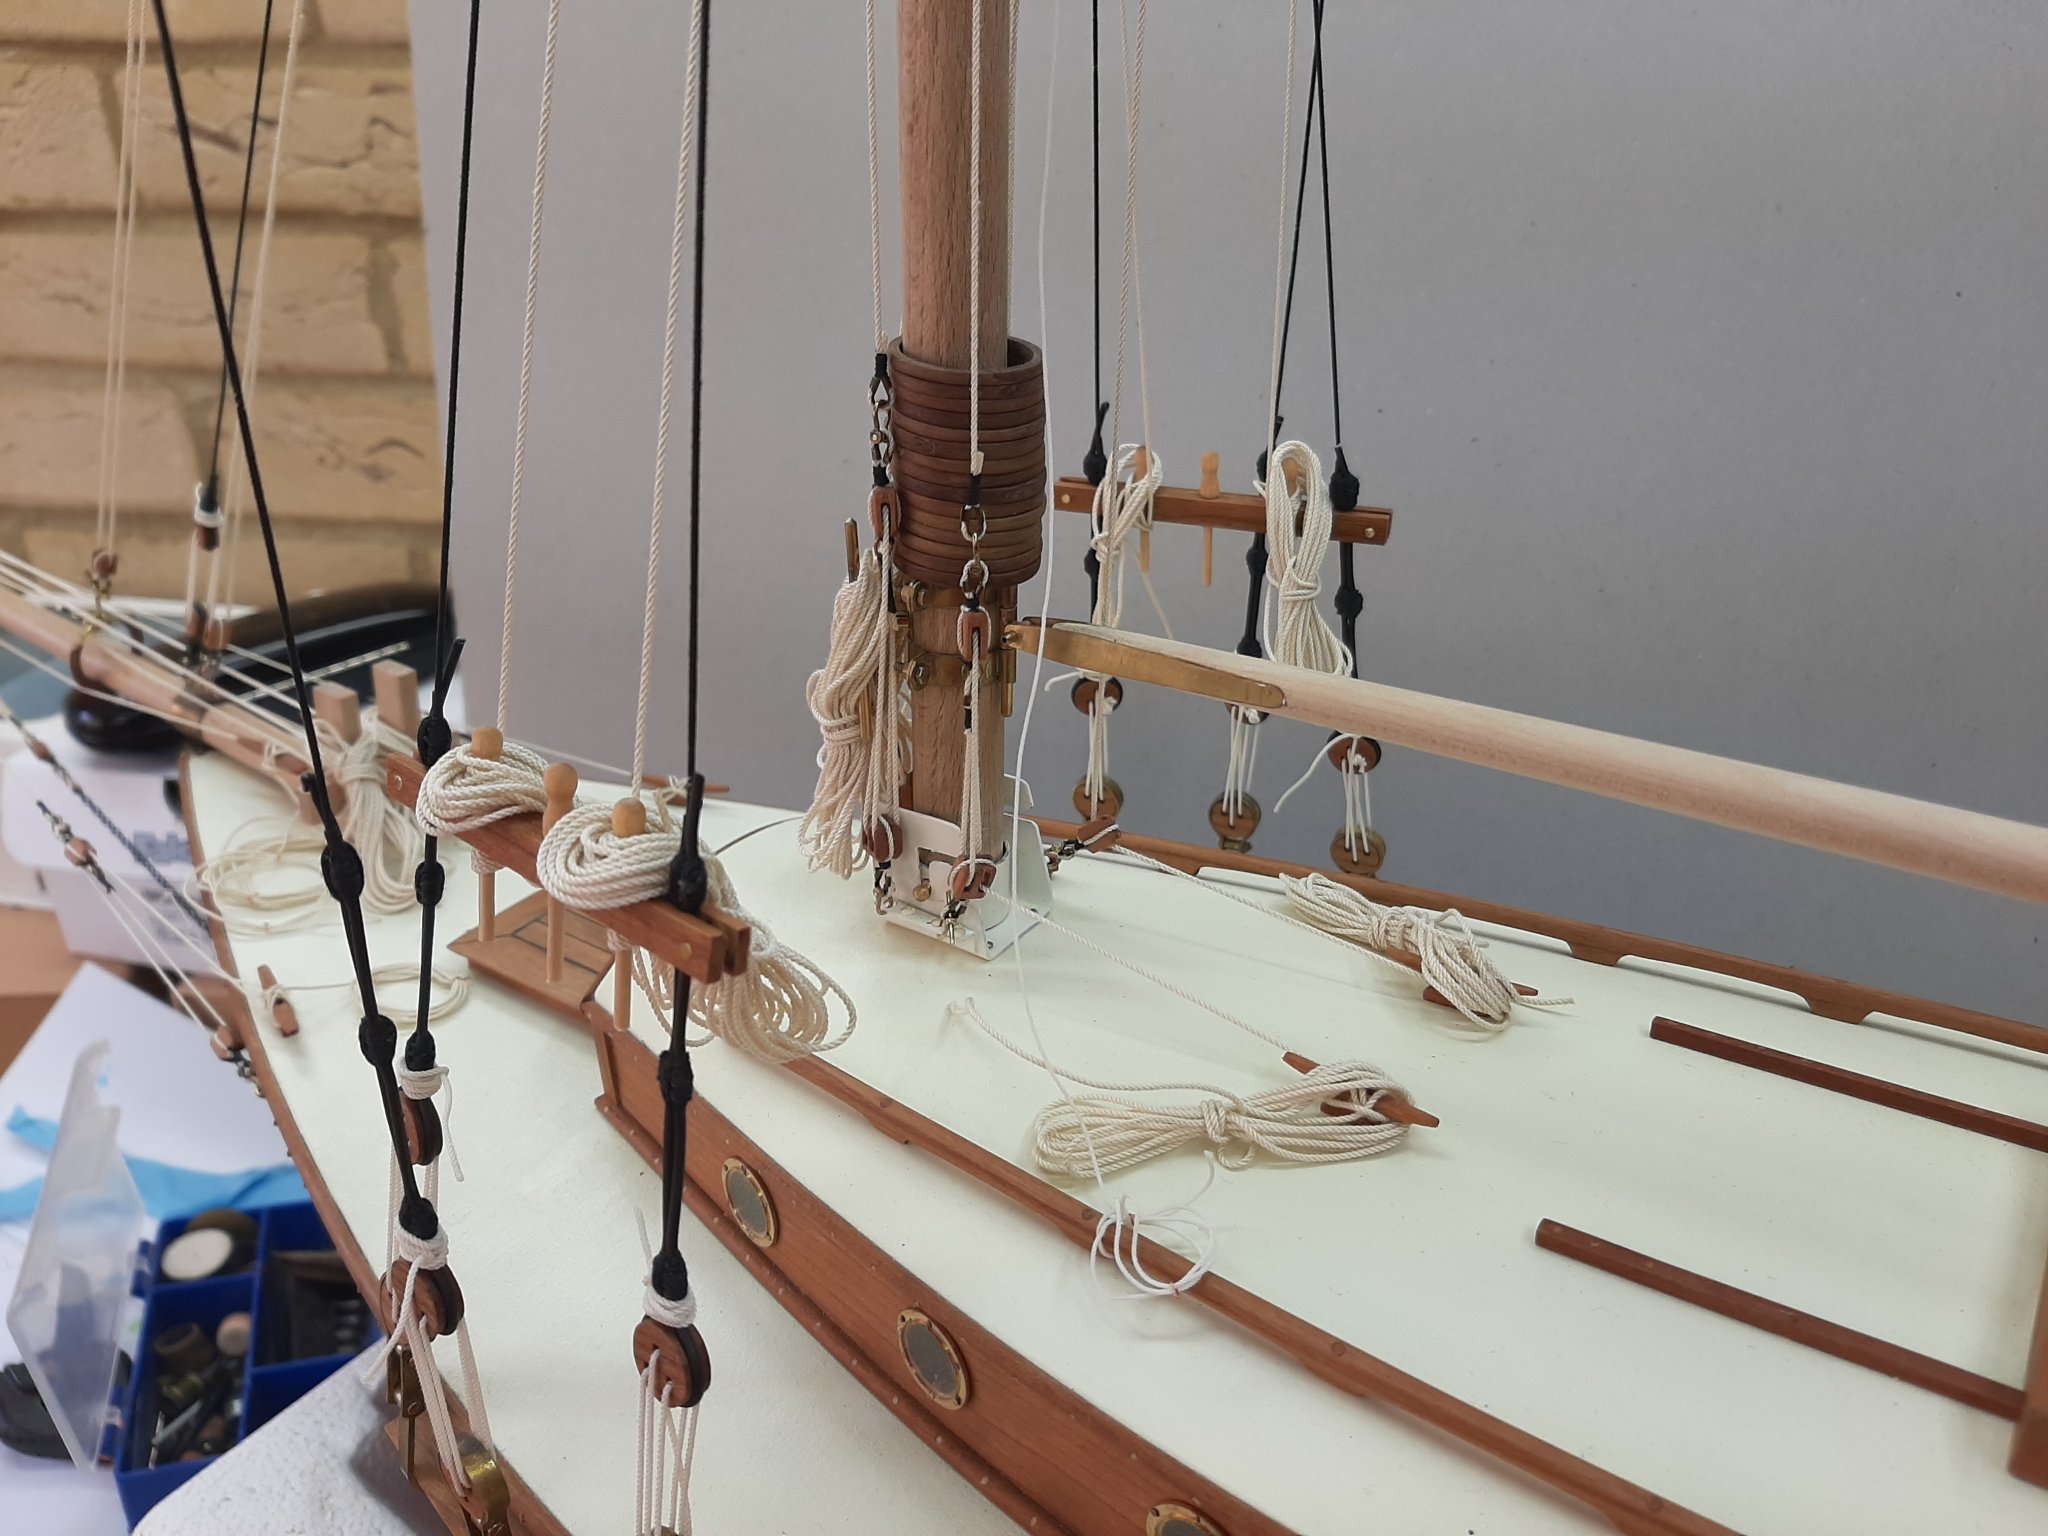
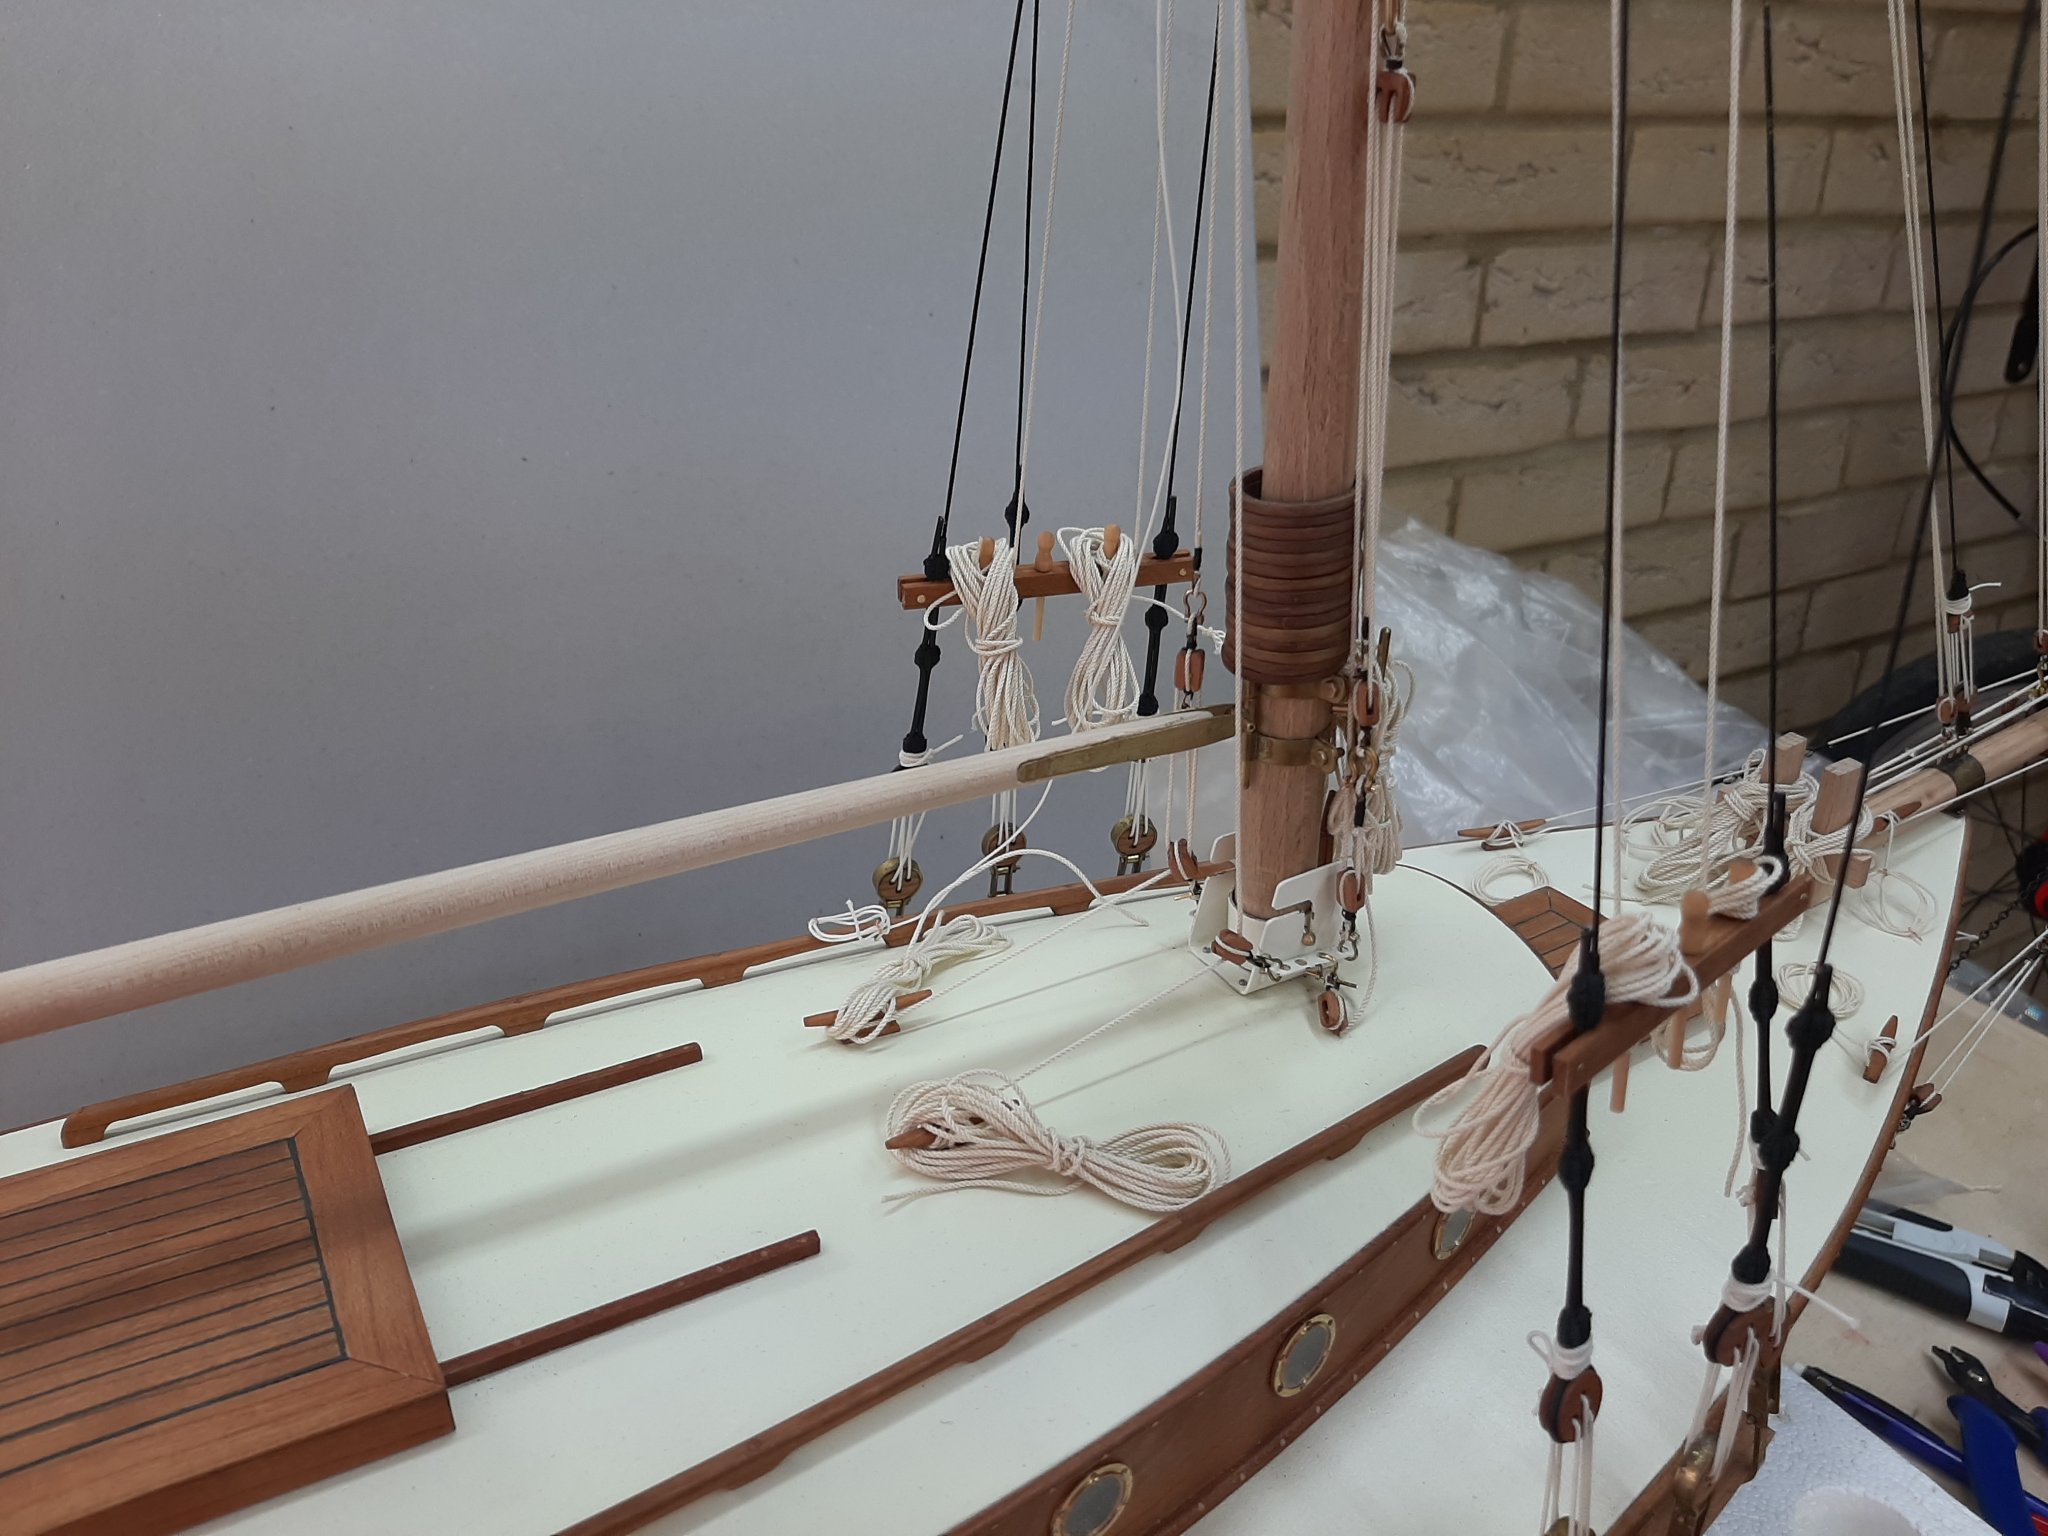
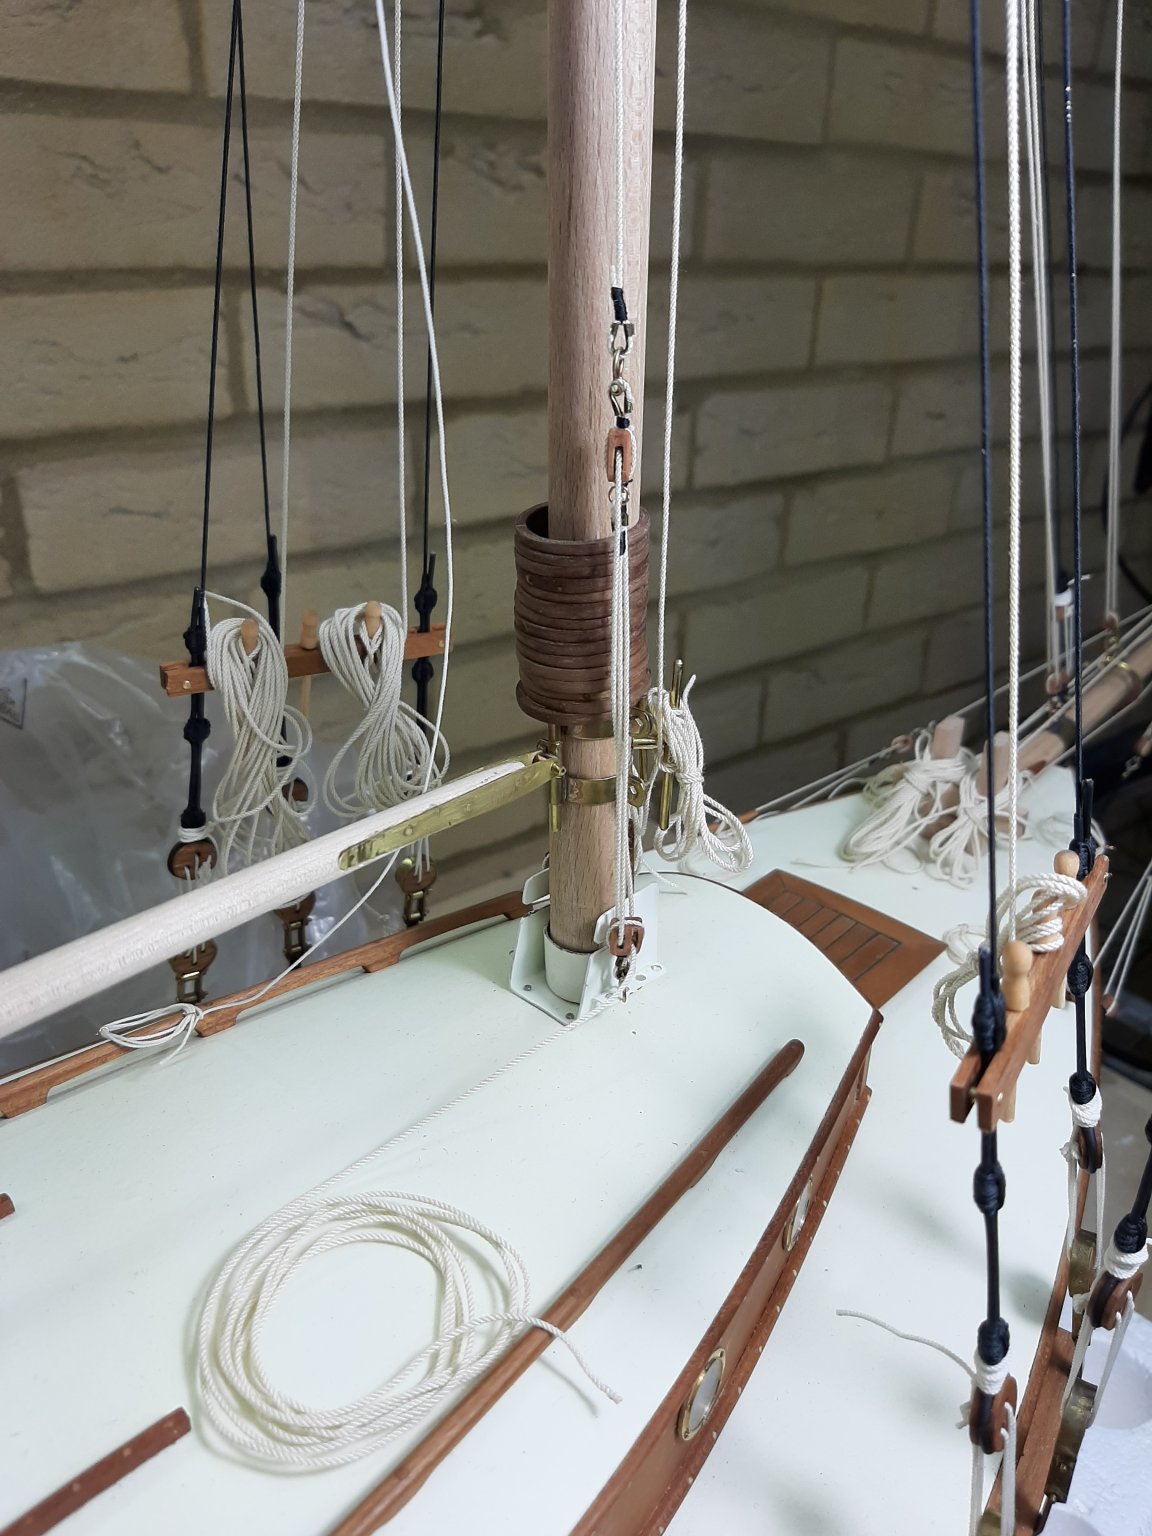
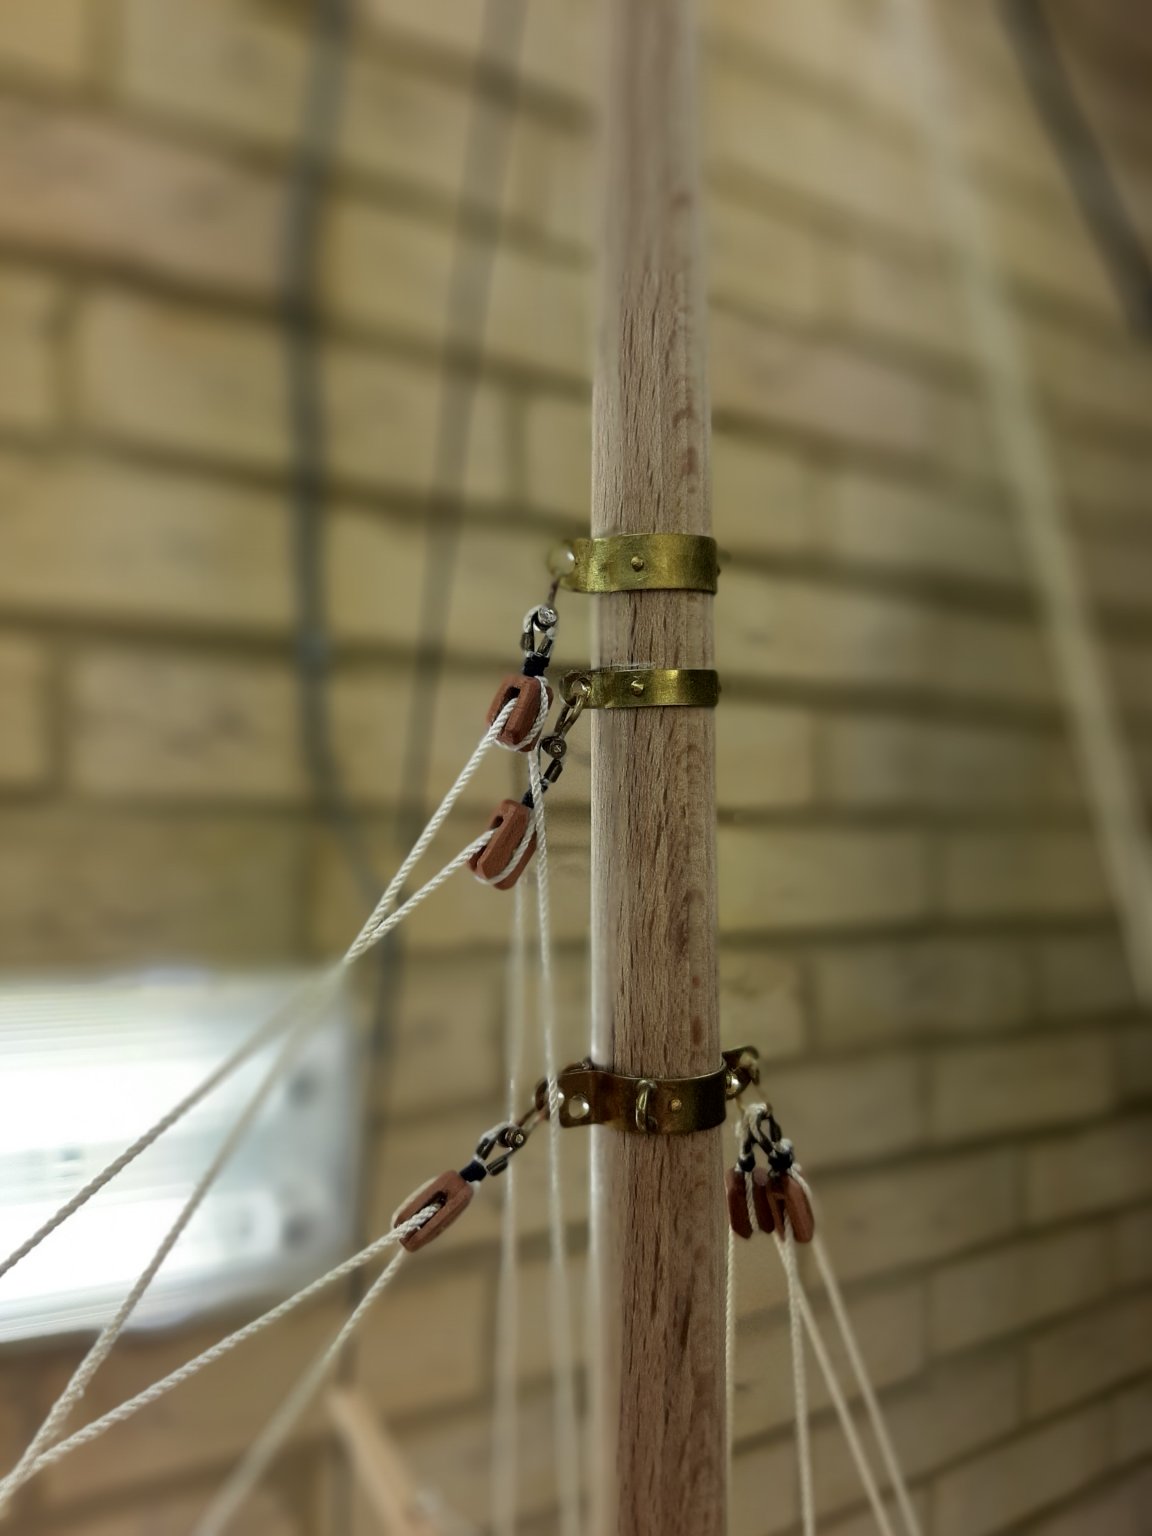
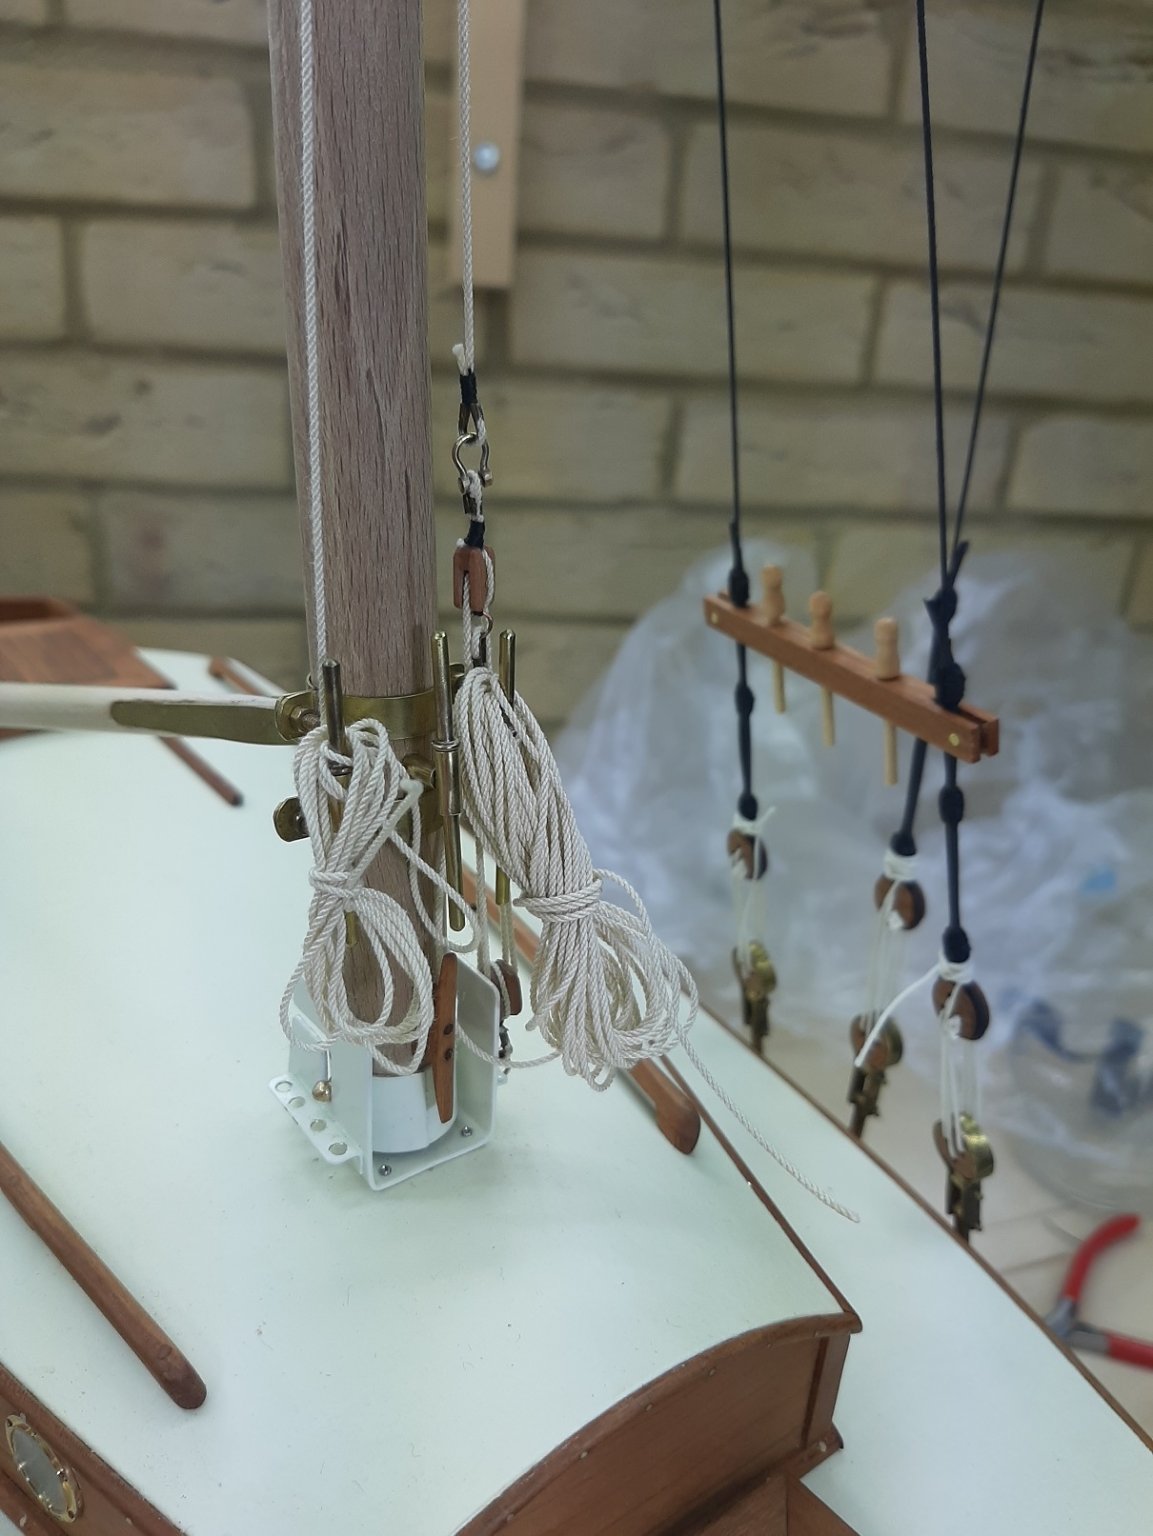
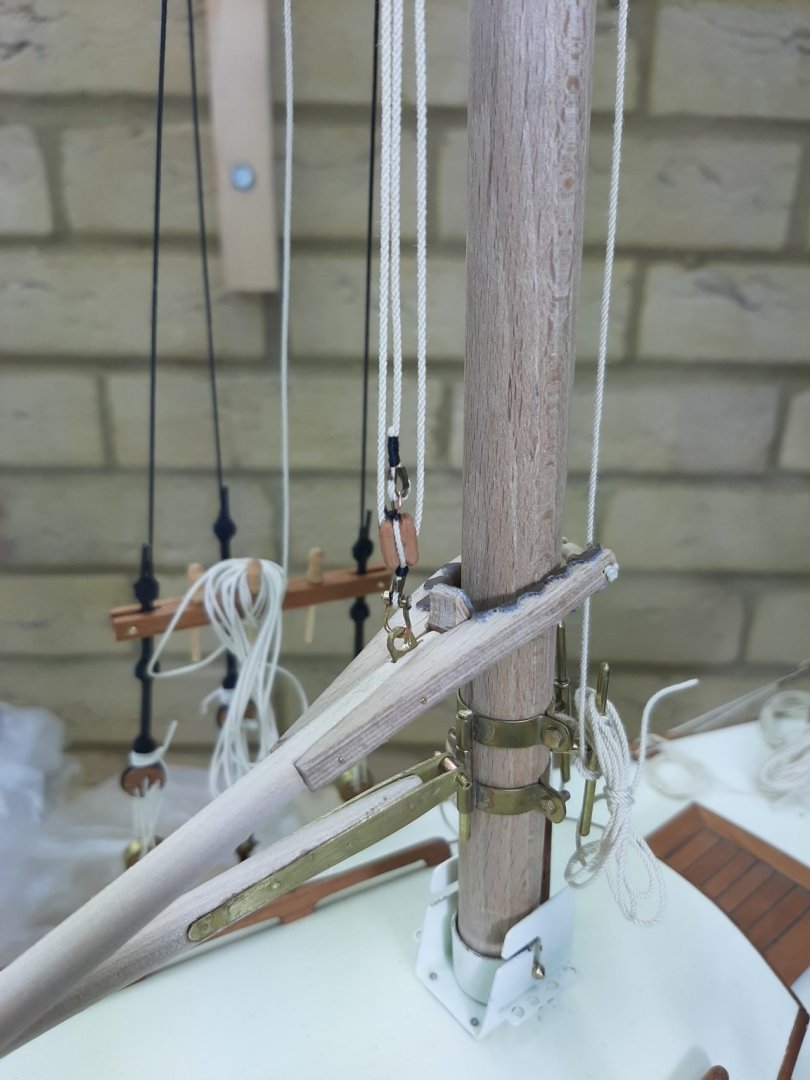
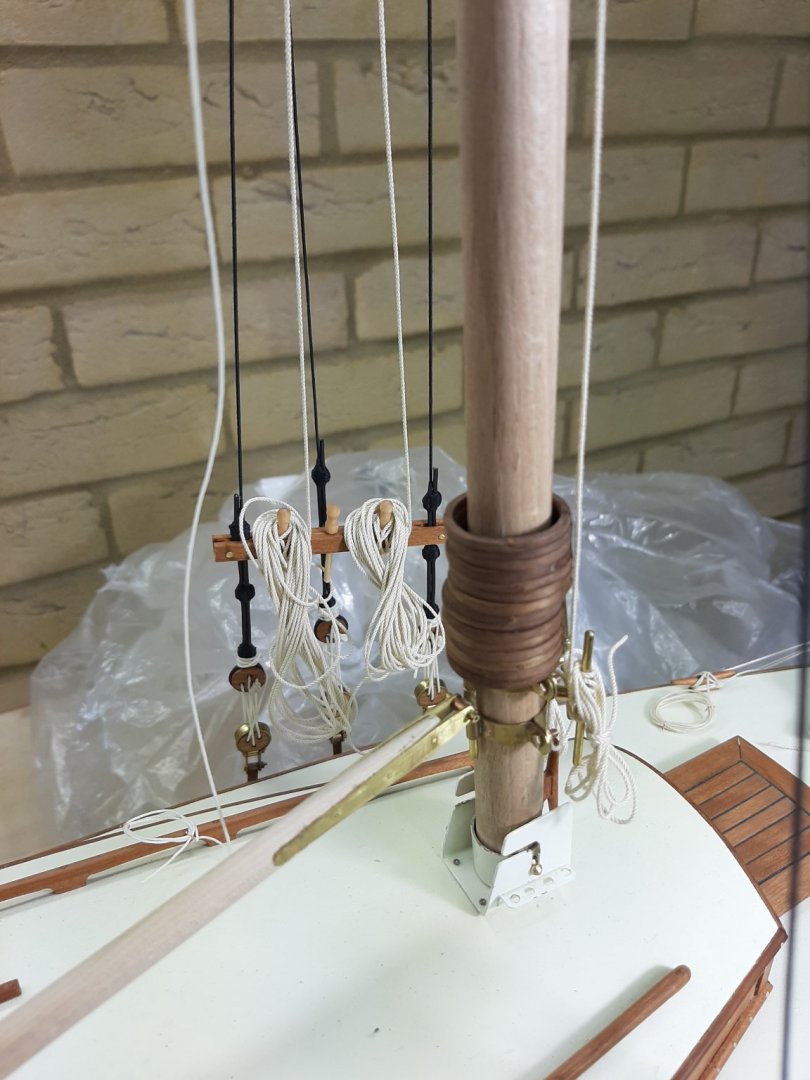
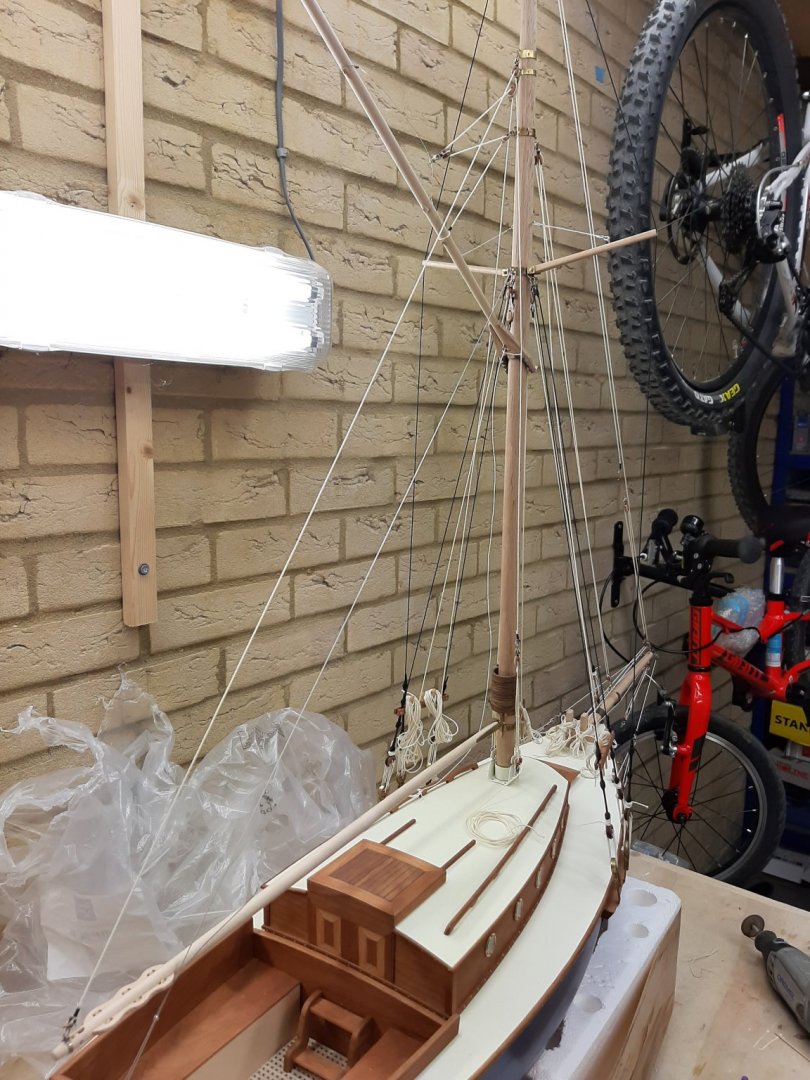
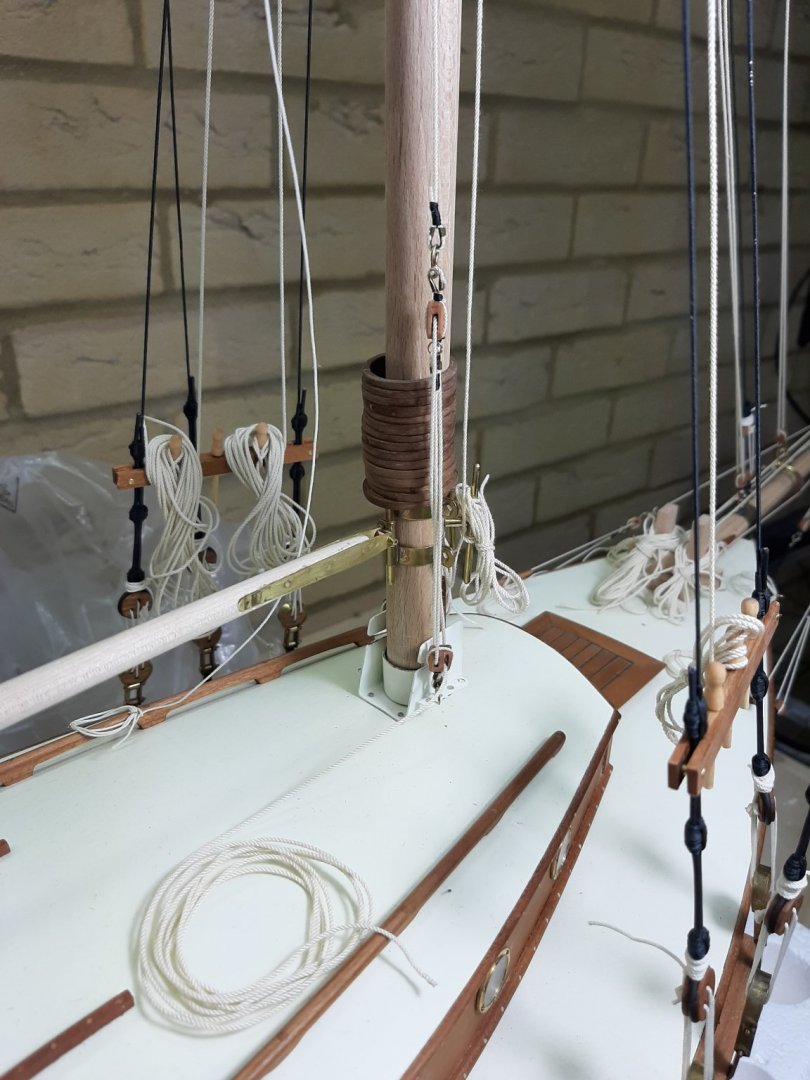
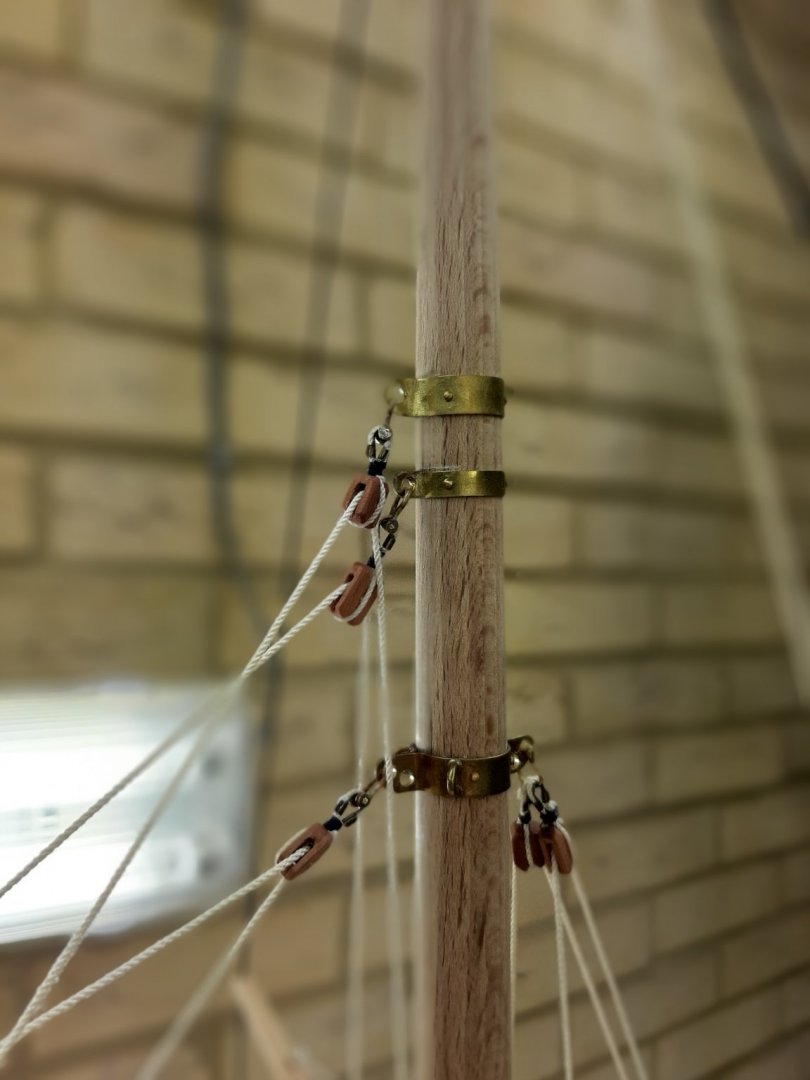
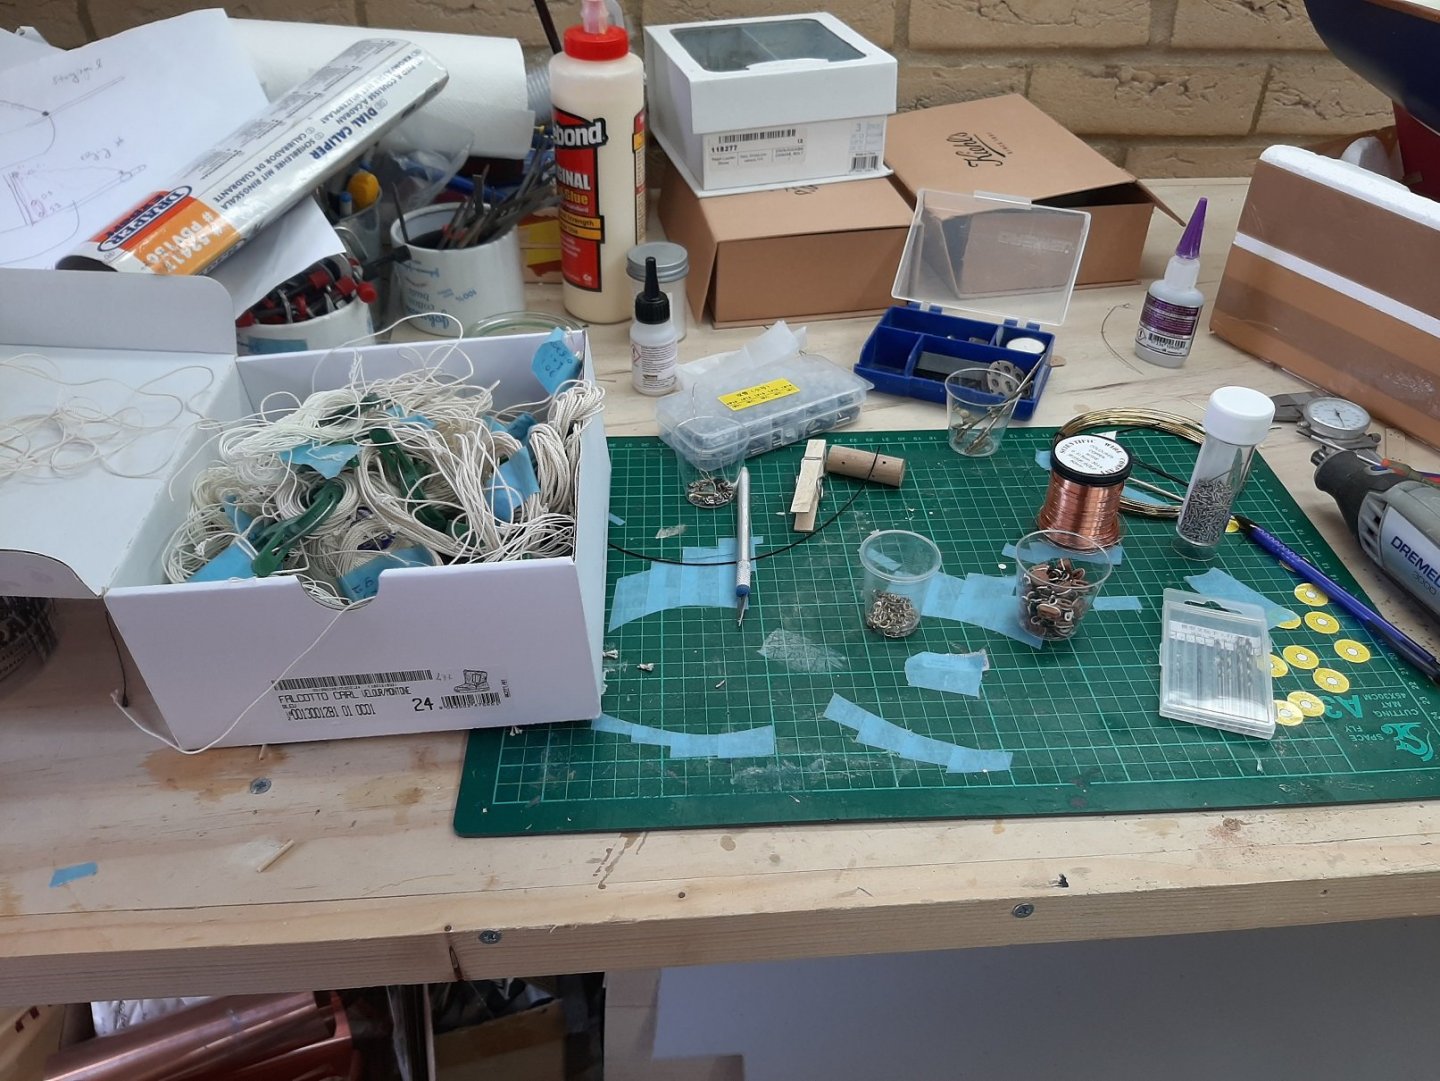
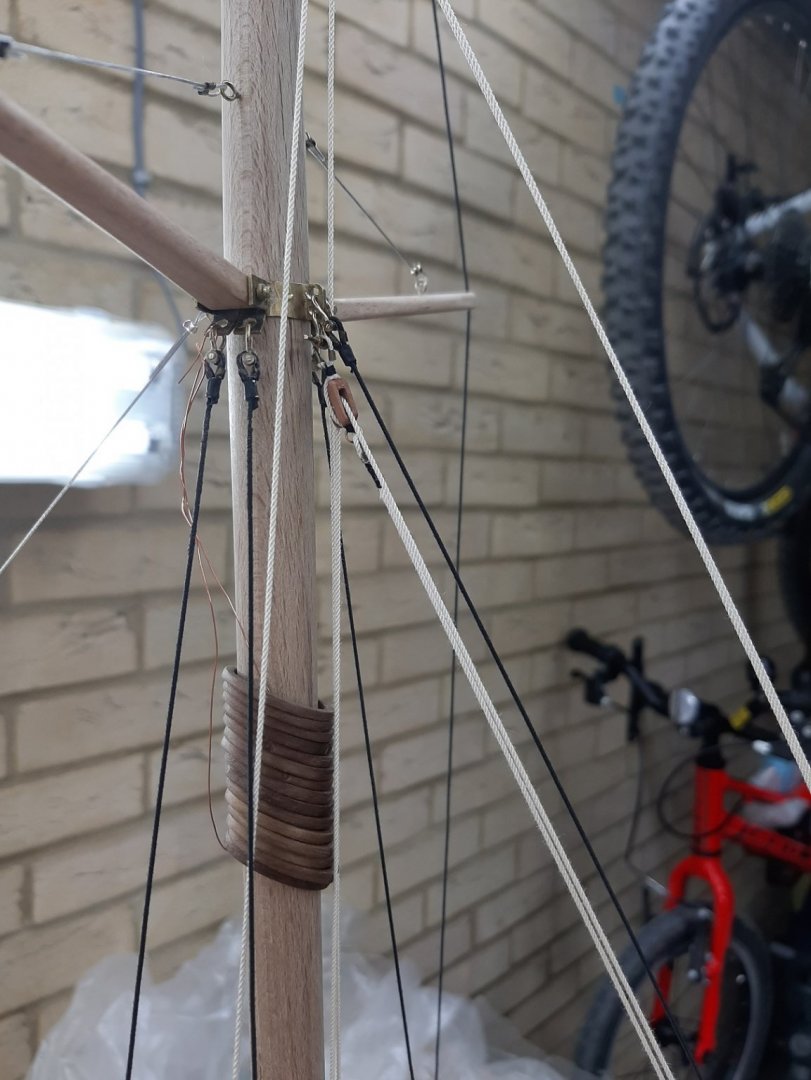
Thanks Bedford! My 5 year old daughter popped in the garage, saw the boat and asked "why boats have so many cables?" I did a bit more work today, it is really a very enjoyable part of this journey. This is how I work now, I have a pot of blocks, one with shackles and my box full of ropes. I added to the mast the three brass pin holders I had prepared many months ago and also added a cleat. I hope I won't run out of point to tie lines coming from the mast top, I think I could add a couple of more cleats to the mast-I d rather not though Next I added the rigging for the staysail. The single block that would be attached to the head of the sail is temporarily attached to the crance iron with a bit of copper wire. Plenty of pins to tie the bitter end! I also put some proper rope to the forestay tensioner. The mast hardware is certainly becoming very busy-it will get even busier. The bow is now completed, just a loose line needed to the bobstay chain. Of course, there will be 6 lines from the sails that will need to be sent aft and 6 cleats will be needed, maybe to the outside of the cockpit coaming. Next some work will be needed on the boom and gaff as they should be next to go on the boat.


-
Beginner tooling list
vaddoc replied to Paul Gardner's topic in Modeling tools and Workshop Equipment
Start building and buy tools as you go, you will know what you should get. According to the scale and whether you scratch build or not, your needs might be different. You will however accumulate a lot of staff so first get a large work bench (or two)! Regards Vaddoc