md1400cs
-
Posts
2,868 -
Joined
-
Last visited
Content Type
Profiles
Forums
Gallery
Events
Everything posted by md1400cs
-
 Frank, found these model http://gerard.delacroix.pagesperso-orange.fr/galere/plaquette-e.htm book http://www.editions-petit-vincent.com/boutique/nos-ouvrages/monographies/la-fleur-de-lis-galere-1690/ video
- 510 replies
-
- 2
-

-
- reale de france
- corel
- (and 1 more)
-
Frank, You SURE have some nice tools !! PS: doing better thanks
- 510 replies
-
- 1
-
-
- reale de france
- corel
- (and 1 more)
-
In fact you have also given me an idea. I just downloaded the instruction, and will look for the cross-section bits from them as well Cheers,
-
Ronald, UK site https://www.model-space.com/gb/model-ships.html Don't know about cross-referencing instructions for this kit. For my Vasa I used several diif. sources, especially for rigging. Creativity helps. The ST is a ship that seems to have many unknown areas of reference for the original. So just enjoy adding or avoiding kit instructional perspectives. My current cross section is also a puzzle indeed. So I'm just exploring details - many of which may just be wrong.
-
Ronald, Yes. that is indeed the case. I called them several months ago. They were not aware of when, or if it (ST) would be sold stateside. They also said that product availability does change. I also asked about their Vasa. Same reply - not available. Oooohhhh and today I went to their USA site and the Vasa IS now available to the US market. Kinda wish I had not seen that - after spending 5 years on my Corel version. That said I would, if you care to, just hold off and see what happens. That ship is a huge seller world-wide. https://www.model-space.com/us/model-ships.html PS: you could download their instruction booklets from the Euro site. https://www.model-space.com/gb/build-the-santisima-trinidad.html ------------------------------------------------------------- I did not know this - very nice add-on indeed The SantisimaTrinidad kit, also contains a cross-section kit, which provides an amazing close-up view of the interior workings of the Santisima Trinidad
-
Thanks mates for all the get better thoughts. Mark - yes it will take a while -also needed to have tendon repair. The most, for a month, uncomfortable bit is having to wear that hard framed sling 24/7 precluding any unwanted movement during "sleep" haha.... Admiral is back to 100% - though she is not happy about now having to throw the trash overboard - that was my job. Ronald noted - you are, of course, still very welcomed aboard. There are several excellent full version builds of this ship here at MSW, though I'm sure that you know already.
-
Patrick, Yes I do remember indeed. Thanks for remembering as well as noting this "how it was done". I wonder if after several shots, the barrel got too hot for the poor gunners who had to straddle these iron guns? Nice beer. Reminds me of my days living in London and enjoying a nice room temperature pint sitting outside at 10:00pm - and it still light and pleasantly warm Regards,
- 756 replies
-
- 2
-
-
- galleon
- golden hind
- (and 2 more)
-
Martyn, She's really coming along - so like all of the extra added details and bits. Cheers,
- 16 replies
-
- 2
-
-
- santisima trinidad
- deagostini
- (and 1 more)
-
E.J, Just catching up. Your build is really "over the top" brilliant. Your work with carvings is also very inspirational indeed. She will be an awesome build when completed !!!!
-
Frank, Nice to see your shipyard open again !! Nice looking kit
- 510 replies
-
- 1
-
-
- reale de france
- corel
- (and 1 more)
-
Hi Mates, Have been silent for a while. The Admiral needed to be hospitalized for several days – all ok now- And I then needed shoulder surgery, so L arm is braced in a immovable frame, so internet life has been limited to just looking. Today I can today actually type (SO happy that remote control hand still worked) Thanks for all the likes and super nice comments from my last post. My shipyard will stay closed for the next few weeks, but now I can catch up and post likes and comment for the builder’s logs that I so enjoy following. Cheers everybody !
-
I had also noticed your keel planking. Your response is indeed interesting. In April 018 I visited the Vaset Museum. I also was lucky enough to spend a very informative hour with Dr. Fred Hocker (he also builds models). He also prefers to be called Fred. Super nice person. He showed me parts of the museum’s research area, we then sat and spoke about several subjects. One of which was the DeAgostini Vasa, a project that he is very involved with. He noted that, for example, the upper and lower hull gun ports are slightly miss-located. This was a cost savings compromise for a mass produced kit. Some of the inner vertical frame locations resulted in some ports having openings that are not aligned as the 1:1. This (miss-alignment) has been discussed by other builders as well. The keel planking was not discussed however. So it is indeed surprising that something (simple) such as this would not be. at least, drawn correctly on the instructions, and that it would be possibly missed by Fred. It is a part of any kit’s build that can so easily be correctly overlaid from most kit supplied single ply-board pieces. That said, you might later indeed regret not re-doing the keel planks IMO. This kit is otherwise arguably the best Vasa available. And your build is certainly excellent indeed. Regards,
- 146 replies
-
- 5
-
-
- deagostini
- vasa
- (and 1 more)
-
Patrick, your lock slide is BRILLIANT - well done indeed !!
- 756 replies
-
- 2
-
-
- galleon
- golden hind
- (and 2 more)
-
MONTAÑES by Amalio
md1400cs replied to Amalio's topic in - Build logs for subjects built 1751 - 1800
Amelio, Its impossible to add any more superlatives in any language about this build such art. Well as young people say (in the US) when something is so awesome, "this is sick" Regards, -
Dan, Just catching up as well. Such great progress. A has been said your funnels are indeed awesome. I remember as a kid that those funnels on the ship were so beautiful and futuristic looking. Your replica so captured, in scale those as well. Well done indeed. PS: pool aint so bad either (:-) Cheers,
- 287 replies
-
- 2
-
-
- michelangelo
- ocean liner
- (and 1 more)
-
Robert, As Michael101 just posted amazing work indeed. Regarding your "how to" for the lanterns. A big thanks. I had seen your previous post for these. Tried to copy your technique for installing same in my current build. Just did not look well executed. You SOLVED this by posting how you did this. Very clever solution. Thanks for the time it took helping others - Will certainly be "the" solution for many of us who want to include working lanterns. PS: Regarding my previous envious comment - it was about your awesome shipyard set up . and, of course, your skills on this build. Regards,
- 527 replies
-
- 2
-
-
- caldercraft
- victory
- (and 1 more)
-
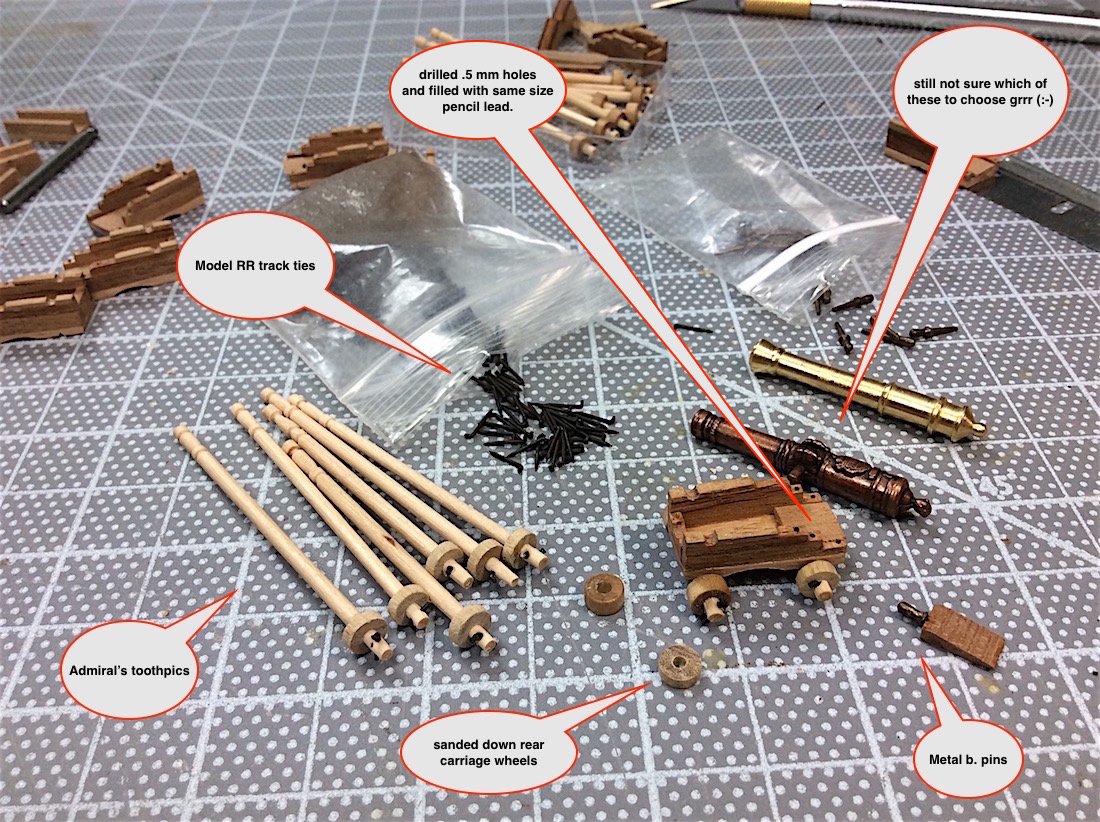
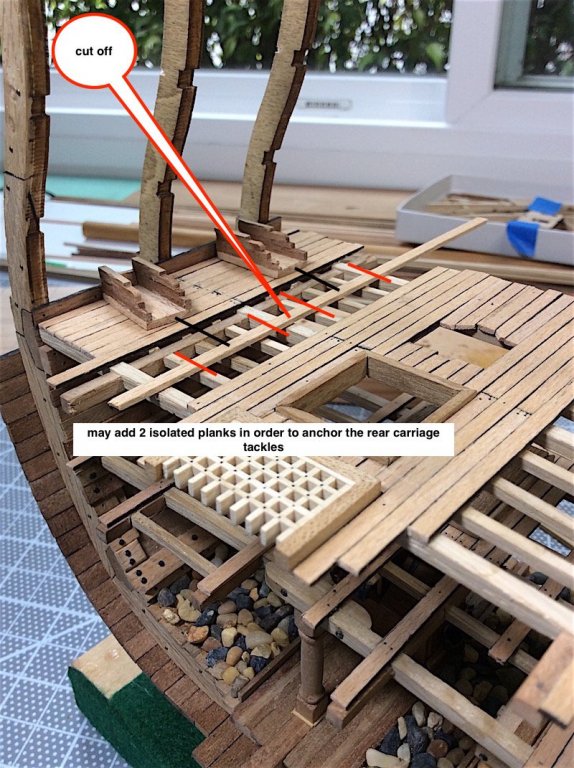
Hi Mates, Not an update. Shipyard has been very part-time for a week or so +. Now returning to same task, working on carriages. These won’t have as much detail included as those from my Vasa, but for at least the “front row” they need to be a bit more detailed (weather deck will get all the details that I can manage) Posting some obvious info, but could be helpful to members new to our hobby that might drop by. As always Mates thanks for comments, likes and just dropping by. Regards,

- 371 replies
-
- 14
-
-
E.J, Super nice - you are setting the bar higher with each update. She's looking awesome. Cheers,
-
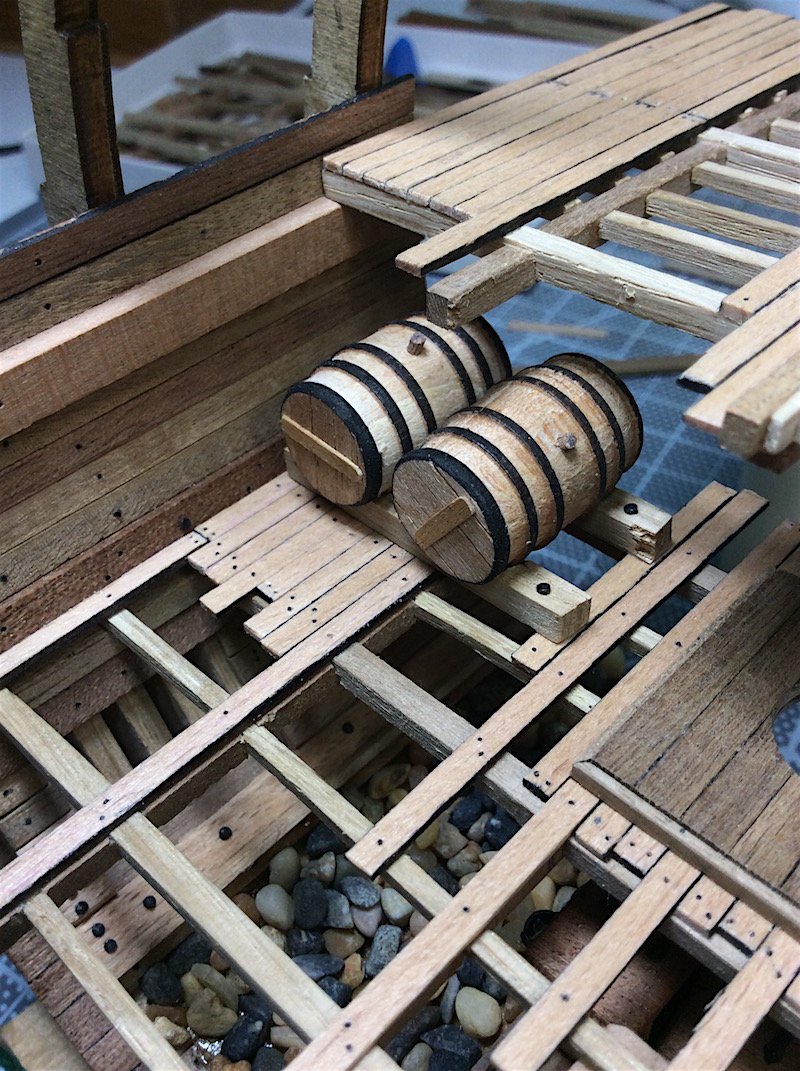
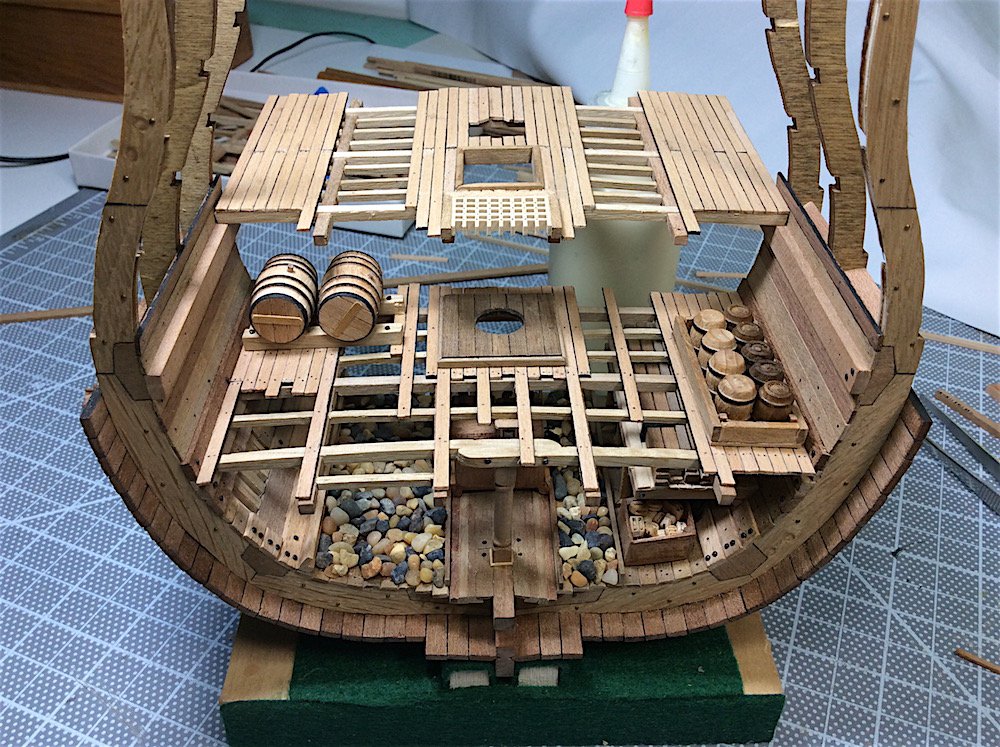
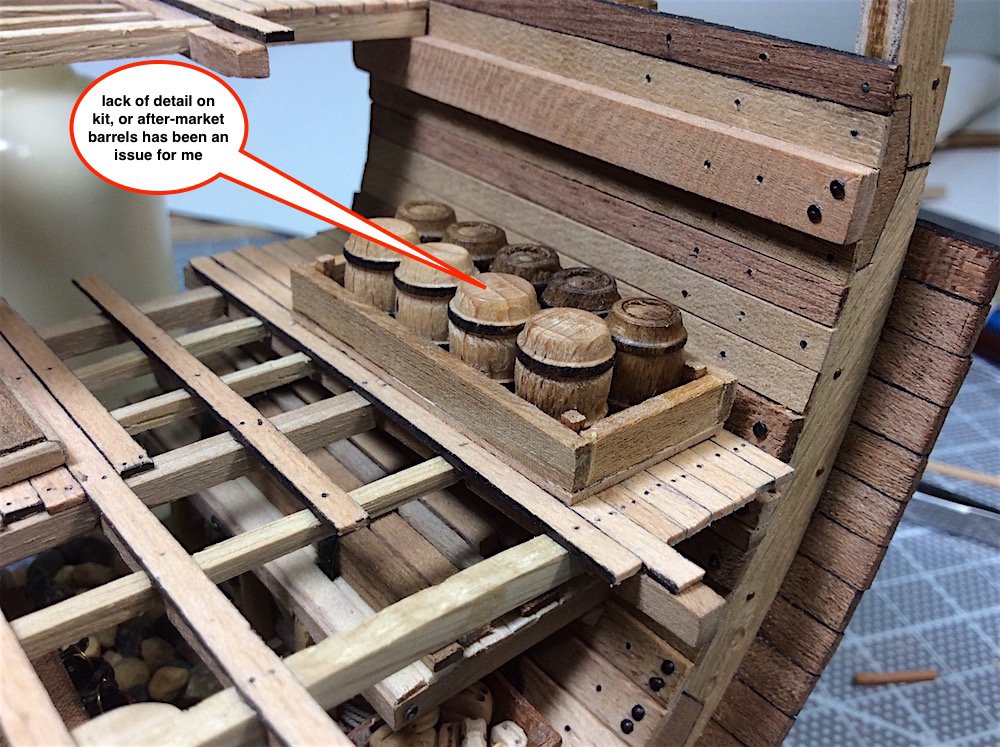
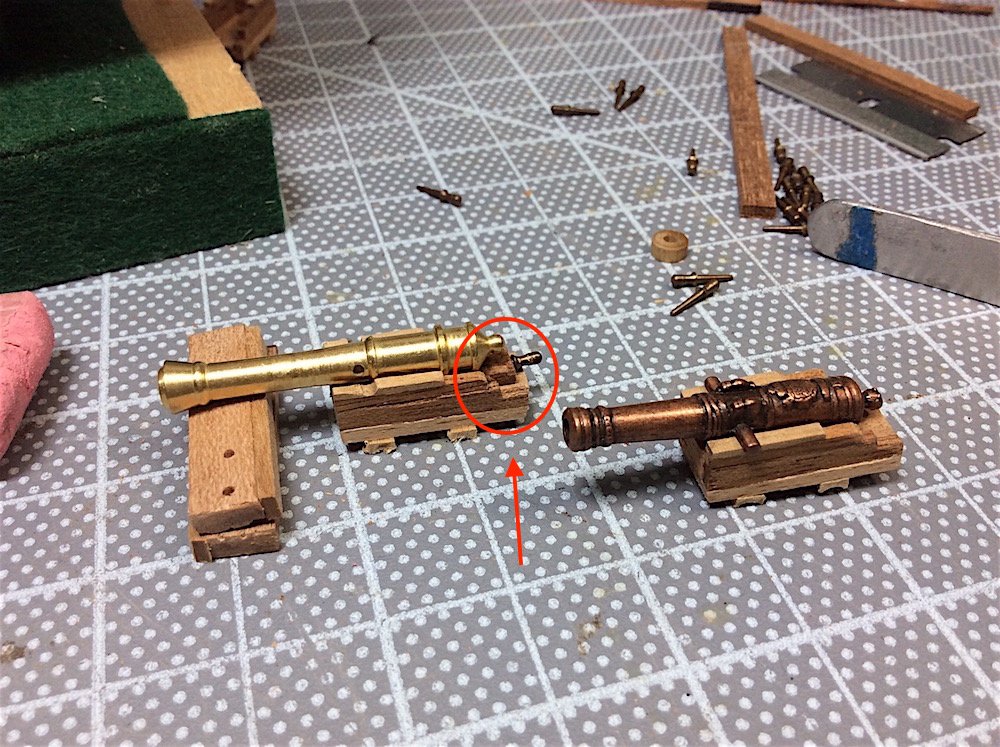
Hi Mates, Minor update. Added a bit of cargo to the orlop deck. Need to prob tie down those two large barrels as well. Now moving on to fabricating needed gun carriages. Kit furnished carriages in a single metal piece. Prefer to build wood ones. I do like the kit included cannons. Had several of the crested guns left over from Vasa days. May go for those brass ones If I decide to use kit guns will need to re-work the rear portion of the carriages a bit, and of course, air brush the guns black. As always thanks... Regards,

- 371 replies
-
- 12
-
-
Denis Very nice list. PS: American Gods, Yes indeed!! Here is an update regarding the delays http://www.syfy.com/syfywire/american-gods-season-2-starts-production
- 346 replies
-
- 3
-
-
- terror
- polar exploration
- (and 2 more)
-
Martyn, I sure am enjoying looking at all the extra bits that you are adding to your build. I think that I will copy your table idea. Can I order those bottles of beer at OddBins? I so remember those wonderful shops when I was working and living in the UK for about two years in the mid 90s
- 16 replies
-
- 1
-
-
- santisima trinidad
- deagostini
- (and 1 more)
-
And this one 1628, - as you know, We both included this bit in our builds of same.

- 756 replies
-
- 5
-
-
- galleon
- golden hind
- (and 2 more)
-
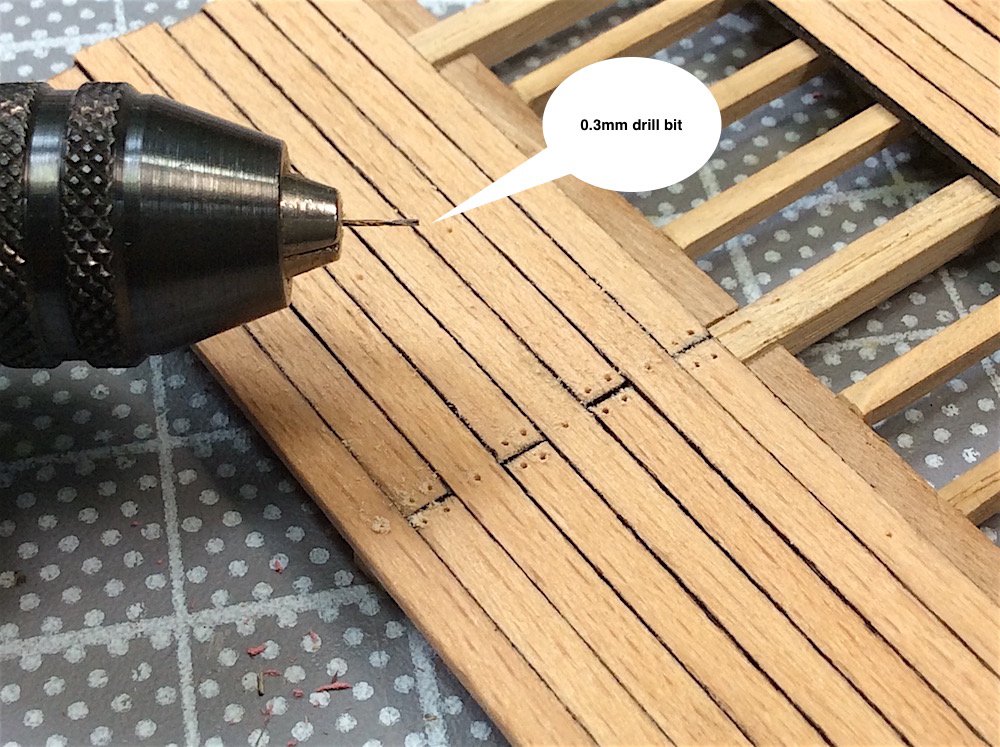
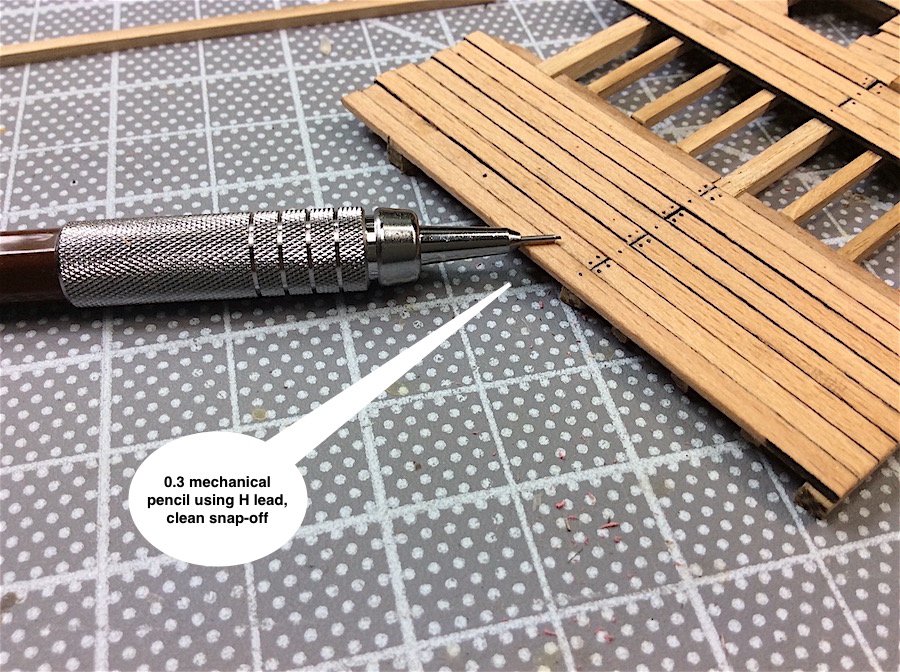
Thanks for the comments I always appreciate your suggestions, critical eyes and help mates. E.J Yes that would be an excellent next project for you indeed. We all inspire each other don't we! - you inspired me to add lighting Small info. update. Had such good luck with the 0.5 mm lead using it as the cleats for inside wall timbers, thought about using smaller 0.3 lead for the deck treenails. Wanted to get brown lead, but only red and other in-appropriate colors are available, so black it is. Tried the 0.5s too large and out of scale for these tiny planks IMO. I think that that "is it" with lower gun deck planks - no mas Also ordered a 0.2mm pencil from Japan – never know may be useful one day. Regard,

- 371 replies
-
- 10
-