HOLIDAY DONATION DRIVE - SUPPORT MSW - DO YOUR PART TO KEEP THIS GREAT FORUM GOING! (Only 24 donations so far out of 49,000 members - C'mon guys!)
×

md1400cs
-
Posts
2,839 -
Joined
-
Last visited
Content Type
Profiles
Forums
Gallery
Events
Everything posted by md1400cs
-
 Dave, Looking excellent. Your carriage riggings are so nice. Also your deck edge trim is a work of art. Though I know that this post had a diff subject (:-) Michael
- 601 replies
-
- 1
-

-
- constitution
- revell
- (and 1 more)
-
Dave, thanks for your nice posts always nice to hear from you. Buck, touched by your thoughts as well. You've also been such a kind visitor to this log - (PS you have also inspired me with your amazing amount of precise details in your log) as always cheers Mates thanks for the likes, always encouraging indeed. Michael
-
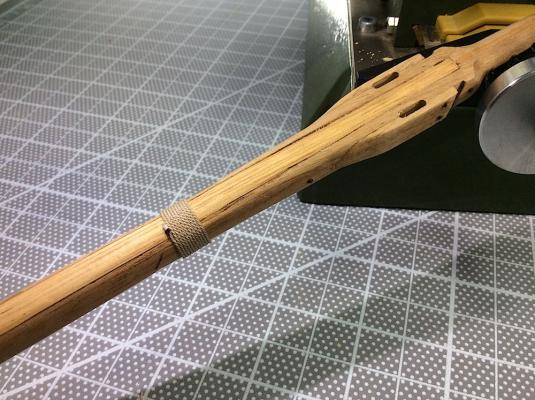
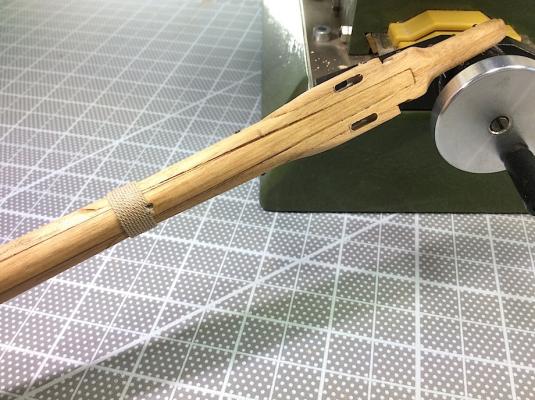
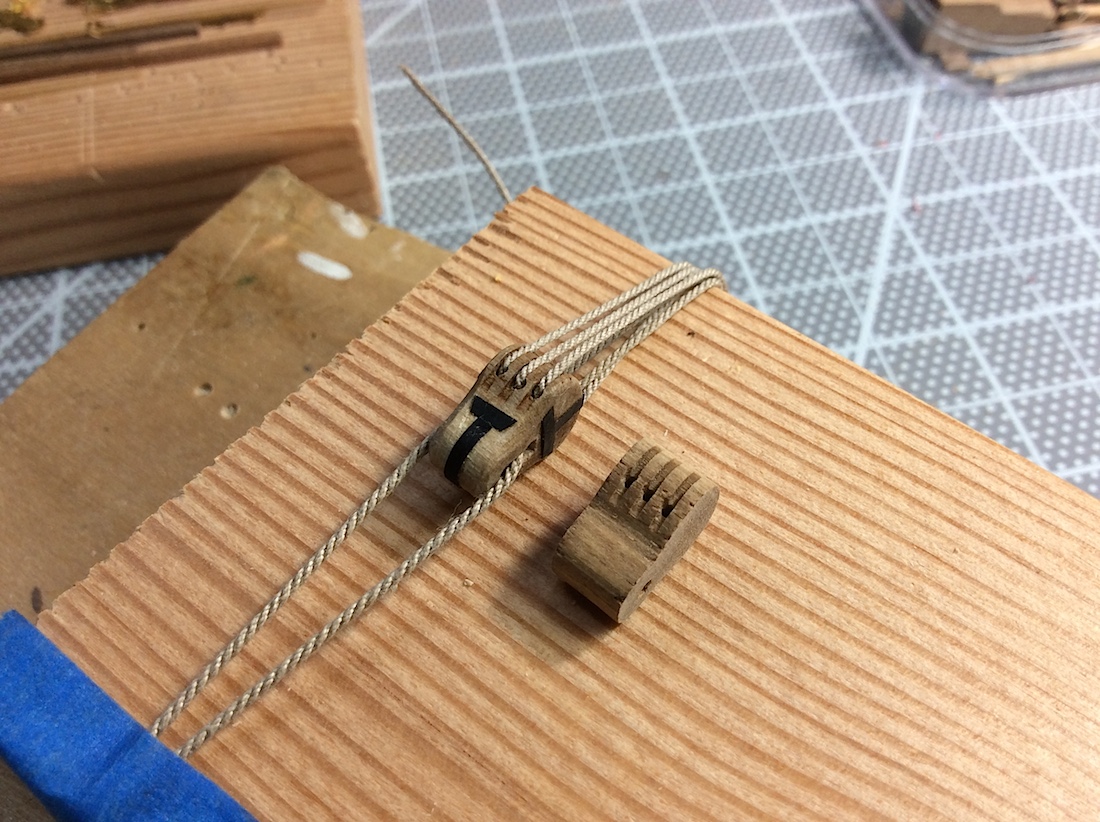
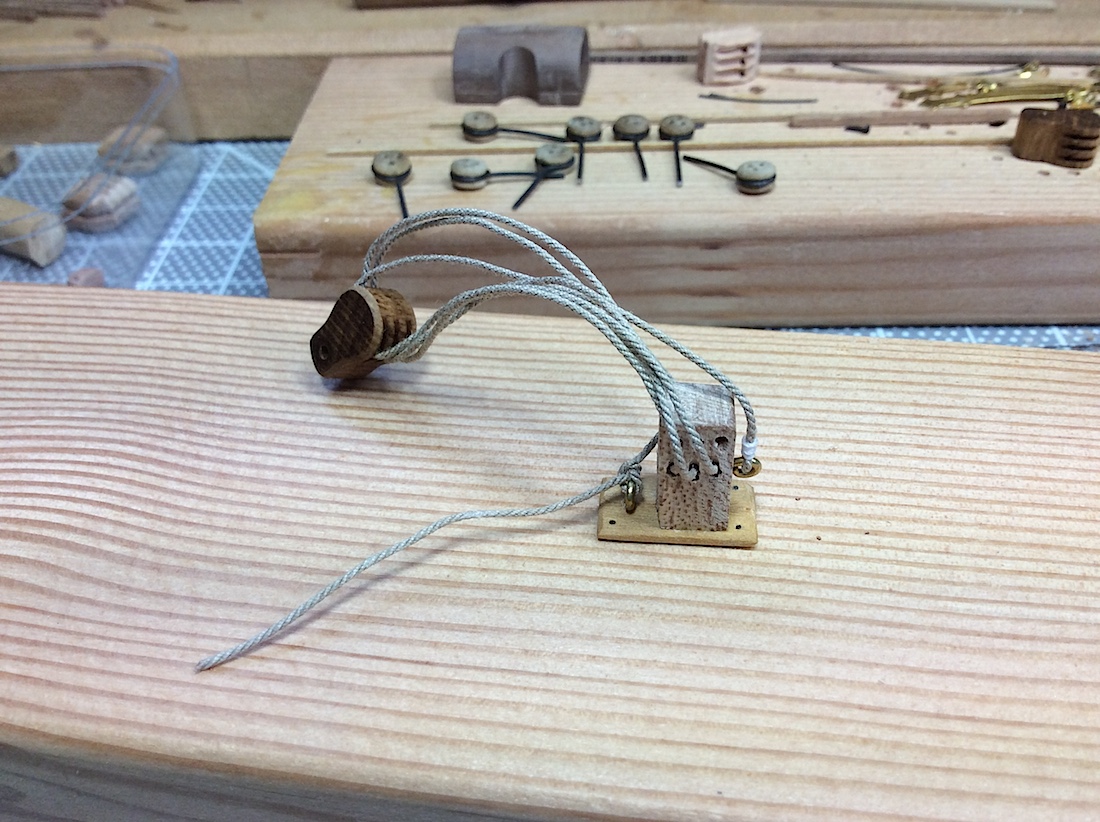
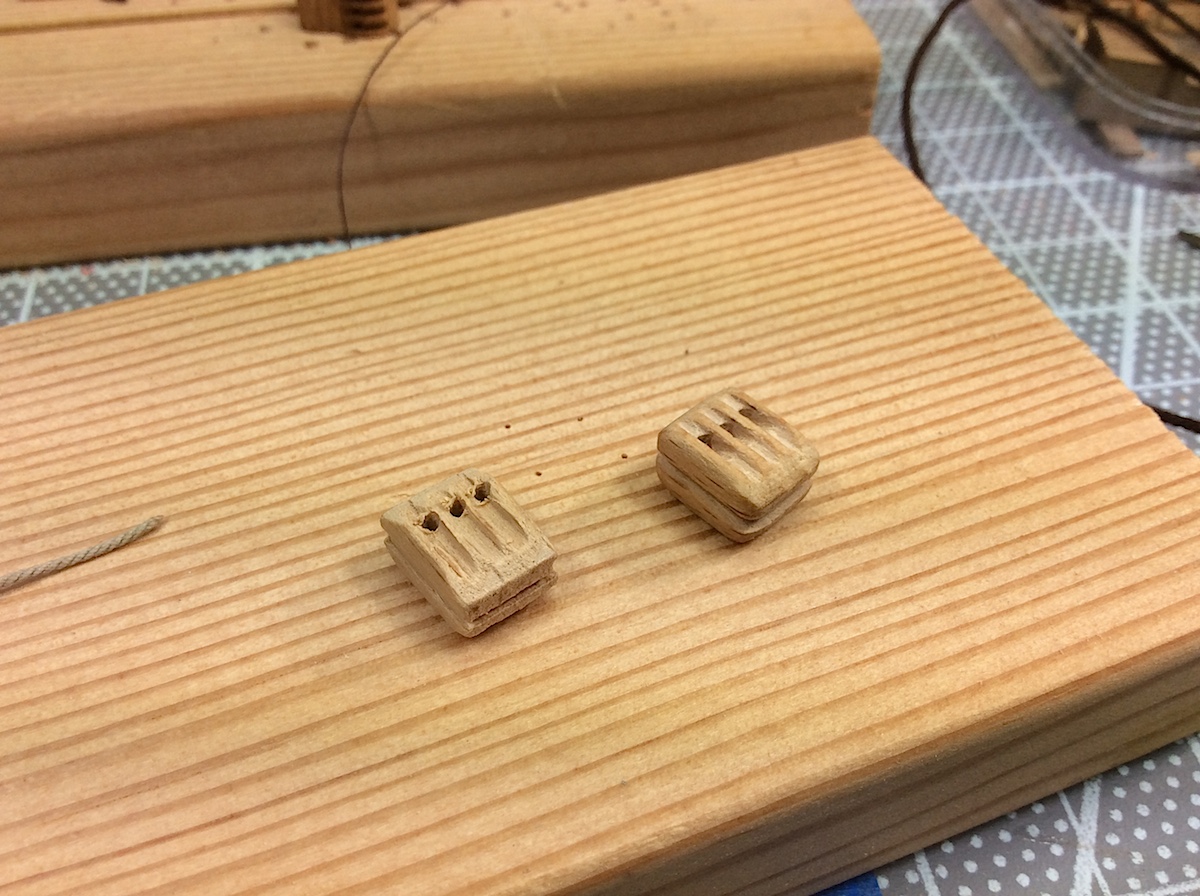
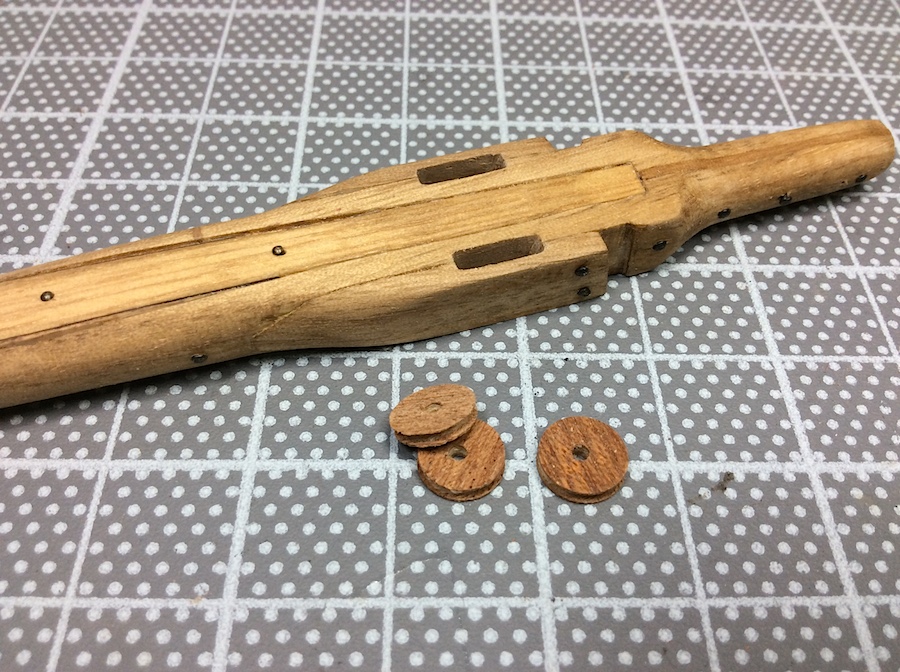
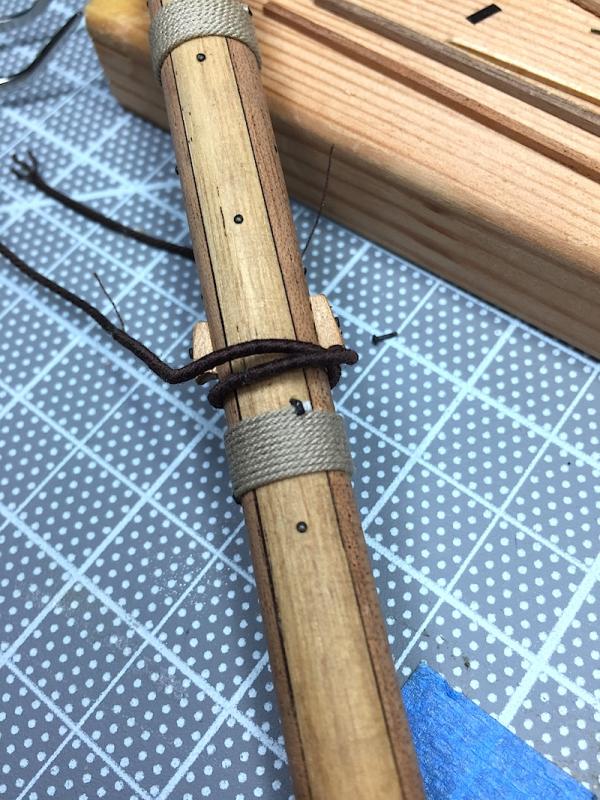
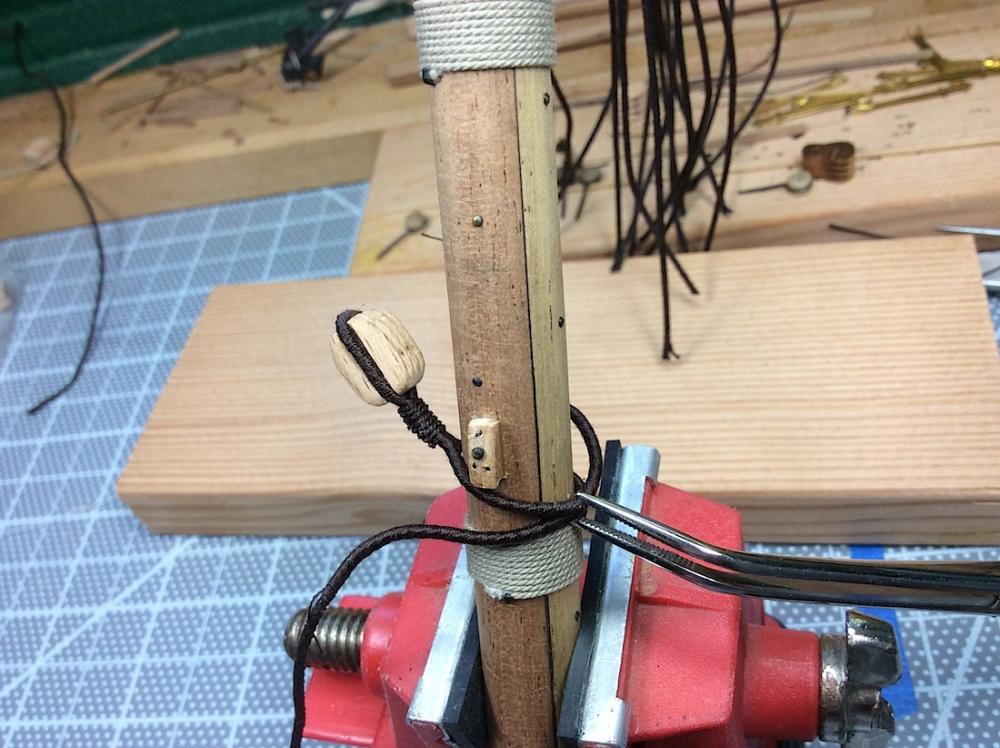
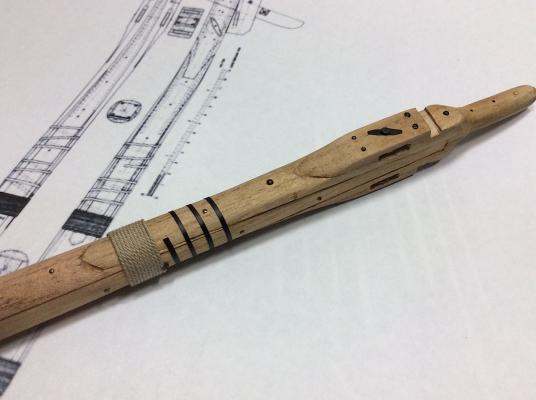
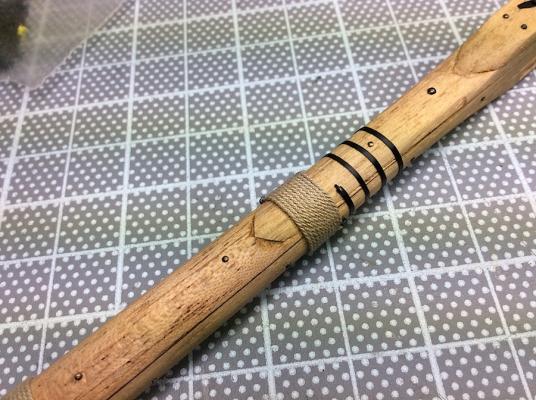
Thanks Ferit, Will follow the 1/10th Looked at, and tried to make a couple of blocks from scratch to better match the longer and thinner ones as seen on the 1/10th photo just below. Too much work, so took the kit block; minor reshape, better articulated the “pulley” areas, and added some black bands. Along with a second hole drilled to simulate the top lateral pulley. Those black bands I had mentioned in a previous post – they were from a car model. They were self- adhesive vinyl trim from an F40. Cut the strips to size, and then coated the block with clear flat gloss to “lock” the strips into place. Michael


-
Costeo, Hmmmm- Just visited the OcCre site to check out this kit. You should add to your header (Kit Bashing) (:-) Just in case you are not familiar with this idiom; kit bashing is when a builder uses a kit as an entry base and adds huge amounts of superb details to the basic kit. That, in my opinion, is where your work belongs. MIchael
-
Costeo. Hello just discovered your build log - This is my first experience in model ship work. REALLY _ you have set the bar Very High indeed for all of us. (:-) Superb work. And as has been noted, by several members, your wood tones are so visually pleasant. I will be happy to follow along as well - and certainly learn from you as well. Oh and has also been mentioned - This is a kit that has probably been overlooked by many - great ship indeed. Cheers, Michael
-
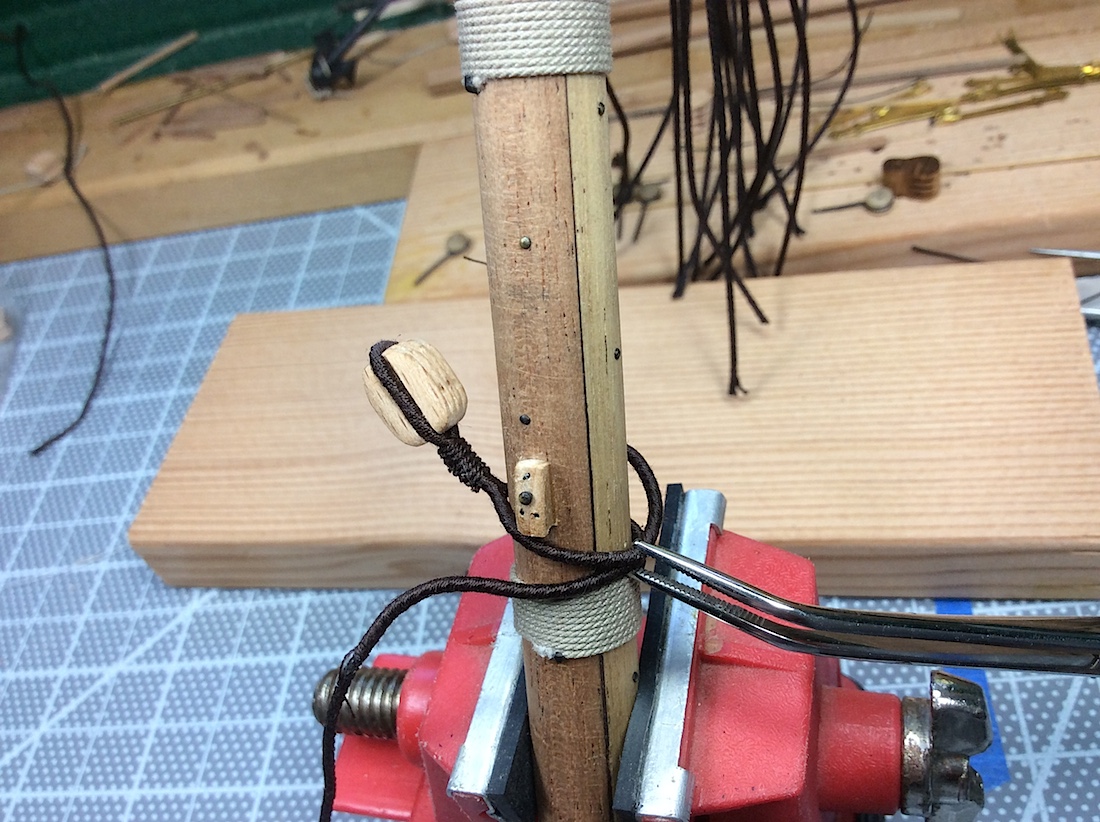
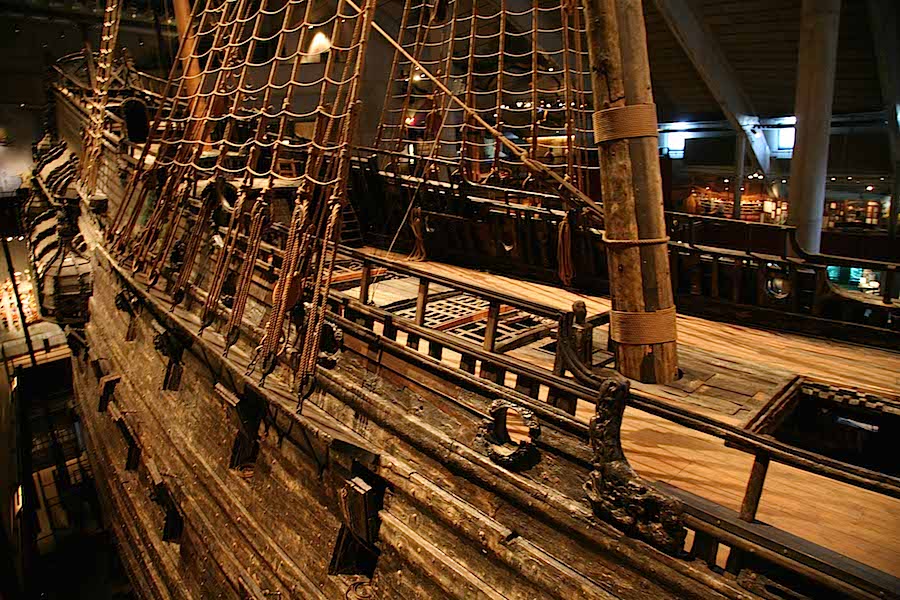
Hi Mates, Thanks for the likes and the comments Ferit, yes this bit is somewhat "not clear". The 1/10th and the museum's differ. I think that the museum just did a plain single wrap just for the visitor visuals. I then also think that the 1/10th builders decided to execute a more accurate representation of the actual block wrap. ?? In any case, I will use the 1/10th as my guide. I will, as I did for the mast rope wraps, use cleats to anchor the two ends of the ropes. Though I also noticed in the 1/10th photo, (just below) - that there seems to be two versions of how the block was attached to the mast. 1) the photo you highlighted. and 2) the other having a loop, then a second rope used for the wrap. Though bothe photos seem to be taken at diff. build stages. I think that I will use two simple cleats and just move on (:-) but, then I'm always changing my mind about things ha ha MIchael

-
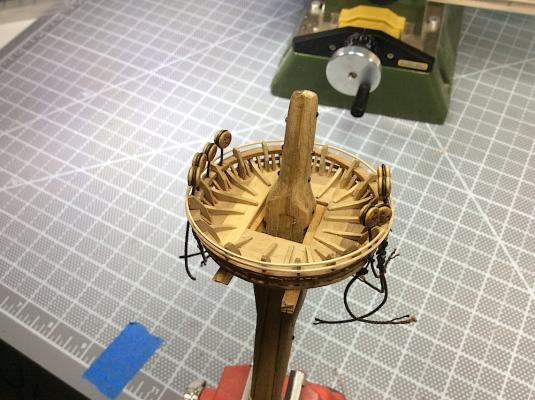
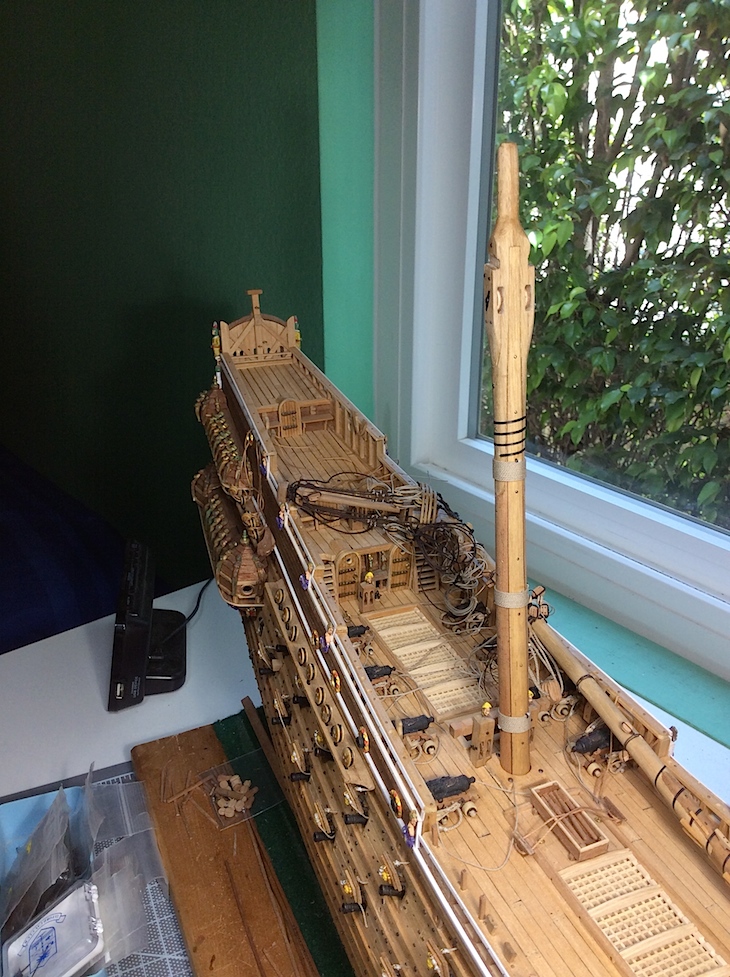
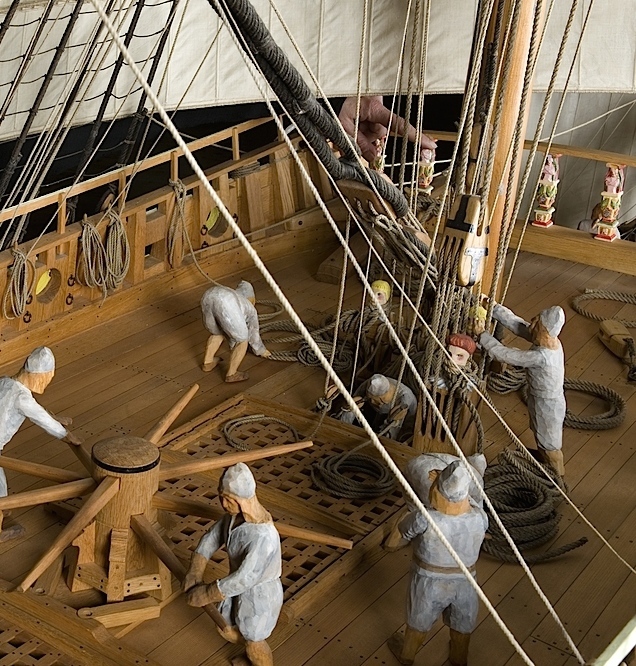
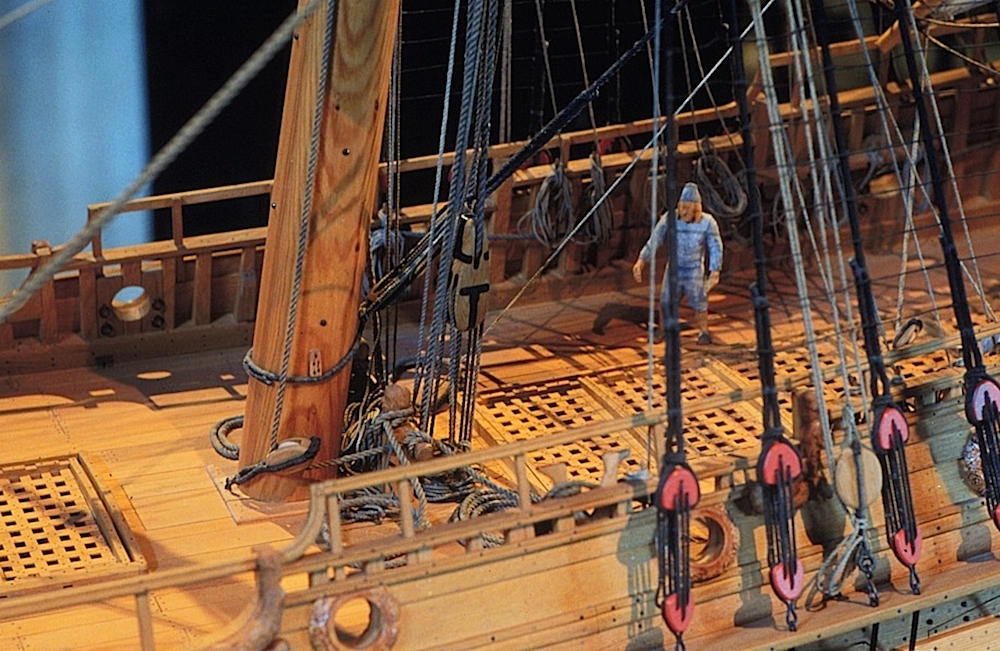
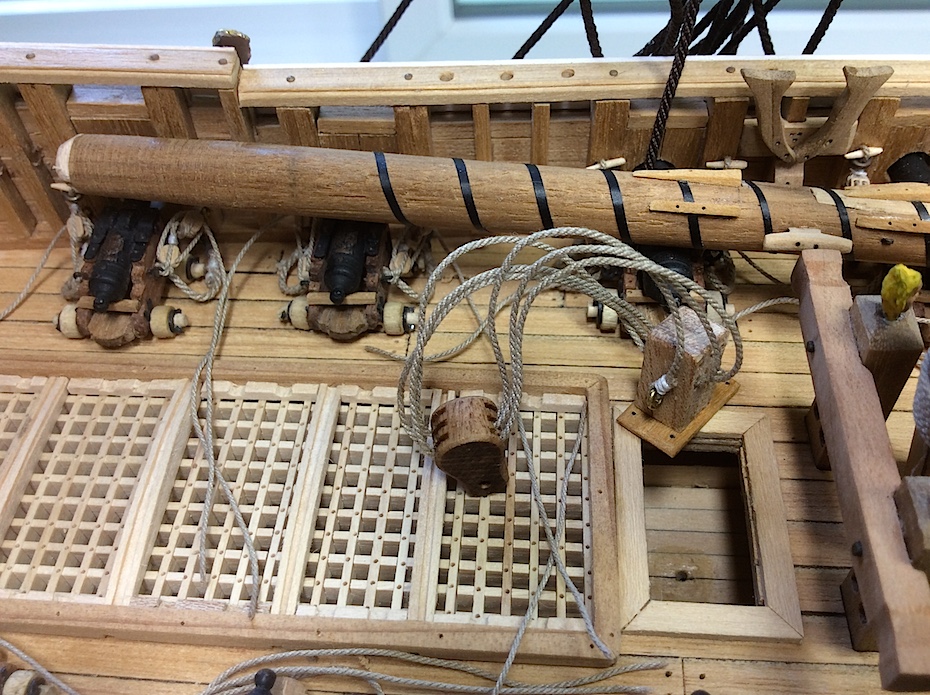
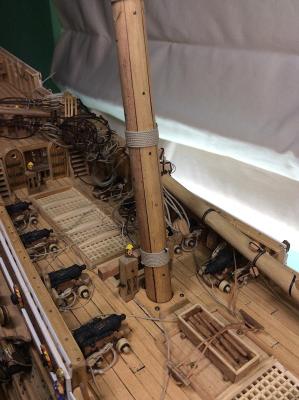
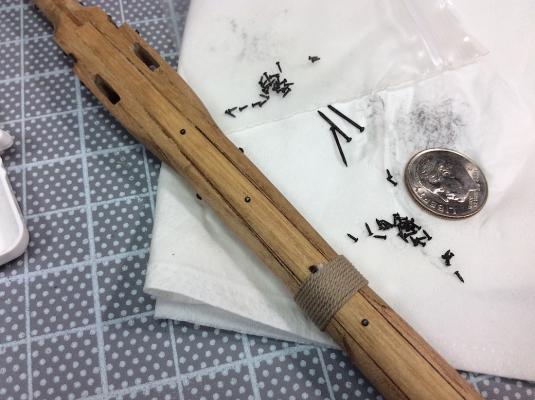
Hi Mates, Have not posted in a while, Admiral has had, it seems like a book of honey do lists. So, in between, have been doing various detail bits before attaching the lower main shrouds. Put together the rope knighthead that sits below in the upper gun-deck, along with its ropes, and block (thinking of re-doing that particular triple violin block to look more like that from the 1/10th) in the photo. Hmmmm?? ================== Then worked on a kit block that needed some plastic surgery before being wrapped around the lower mainmast ================ Finished the main lower platform. I’m very happy with how the lower main mast came out - bit-by-bit moving forward. To be continued… Thanks as always for all of the nice thoughts, likes and just looking… Michael


-
Mark, Just catching up. Yes, and as George so well said - your research is superlative. Well done indeed. A pleasure, and a learning experience to follow along with your build. Still learning, I am, and very much enjoying the "trip"... Michael
-
Nils, As always following your build, of this so complicated type of ship, is so inspirational. Superlative work indeed. Michael
- 2,625 replies
-
- 5
-
-
- kaiser wilhelm der grosse
- passenger steamer
- (and 1 more)
-
Mark, It seems to me that somewhere in her build log Doris has a section on how she makes her flags, which by the way are so amazing http://modelshipworld.com/index.php/topic/854-royal-caroline-by-doris-card-1749-140/page-1?hl=doris PS If you have not visited her build logs you are in for an astonishing treat. Her work is so over the top amazing. PS 2: plan on spending a lot of time looking at her work, if you have not already done so. Also her paper SOS is absolutely amazing. I thought that I had "saved" her posts on flags, but I can't find them. In any case BEFORE you do anything with flags look at her techniques. Maybe another member can point directly to her specific flag area. Good luck, Michael
- 249 replies
-
- 7
-
-
- billing boats
- vasa
- (and 1 more)
-
Keith, Stunning work. I may have clicked like too many times catching up (:-) Your log is a delight to follow, as well as being super informative. Michael
-
Ferit, BV, Thanks for your comments. Certainly appreciated. blush (;-) --- Also thanks mates for the "likes" always a pleasure. PS: Had I walked into this kit today after all that I have learned following other build logs, I would have done things differently with the hull planking as well as with the cannon framings. Well the two under my table should benefit, i guess.. Regards, Michael
-
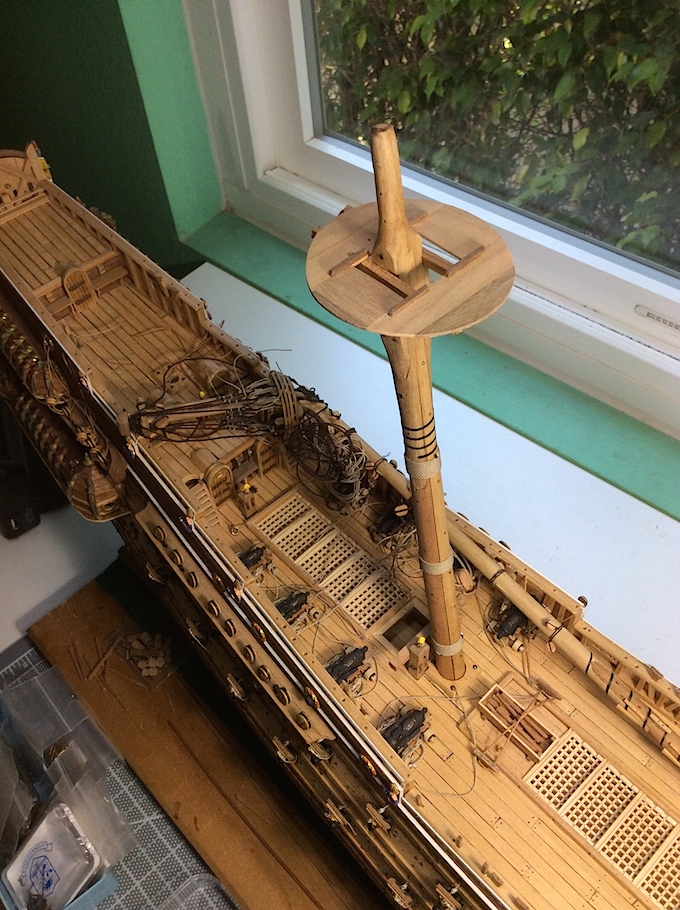
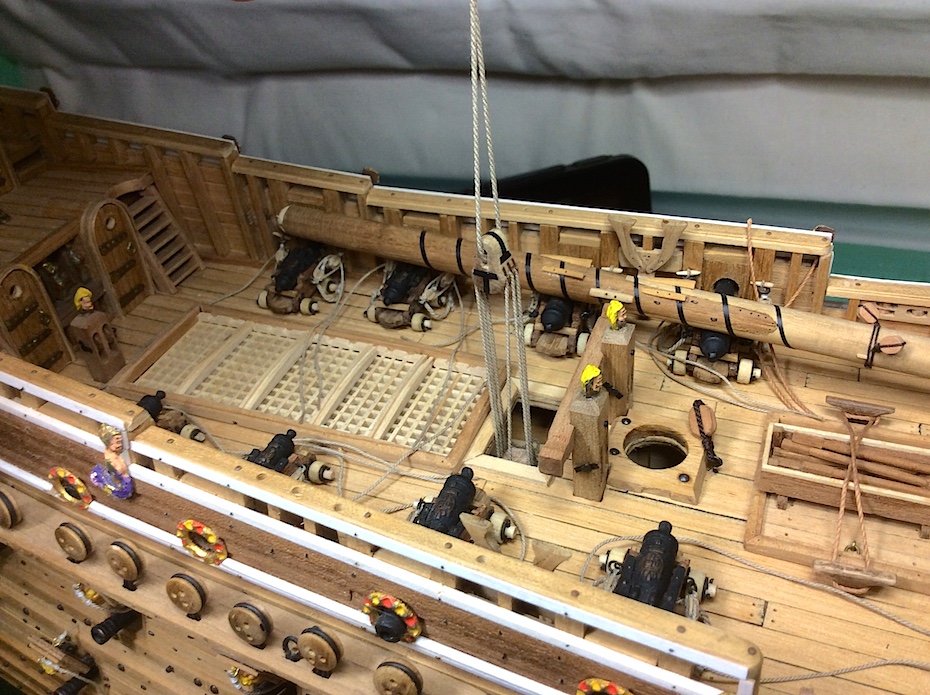
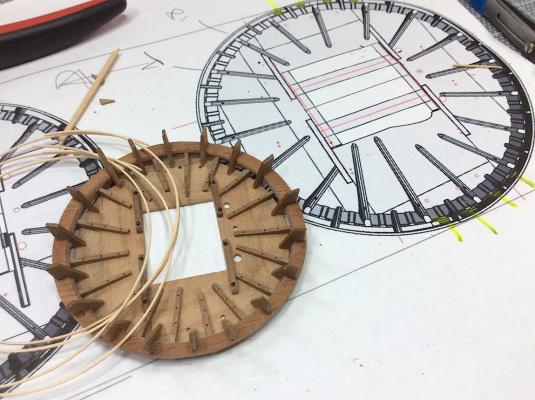
Ferit: Thanks for always dropping by and posting encouraging words. I have to assume, as also with most builders, the last bits will be the flags. Edwin : appreciate your visits and thoughts - Thanks ======================= Working on rebuilding the mainmast lower platform. The one that I had started pre-building (same size as the foremast one) turns out is a bit too small. This one is easier, having struggled through the first two; now have a better grasp on how to make the small bits at a faster clip MIchael
-
Frank, YES - a wonderful job indeed. Looks perfect in that case. PS: So on to a stage coach for you. Excellent - different segway for a nice change - but hoping to see a new ship being built in your, now empty, shipyard sometime soon (:-) Michael
-
Nils, Your build log is so "over the top" such a delight seeing your work. Michael
- 2,625 replies
-
- 5
-
-
- kaiser wilhelm der grosse
- passenger steamer
- (and 1 more)
-
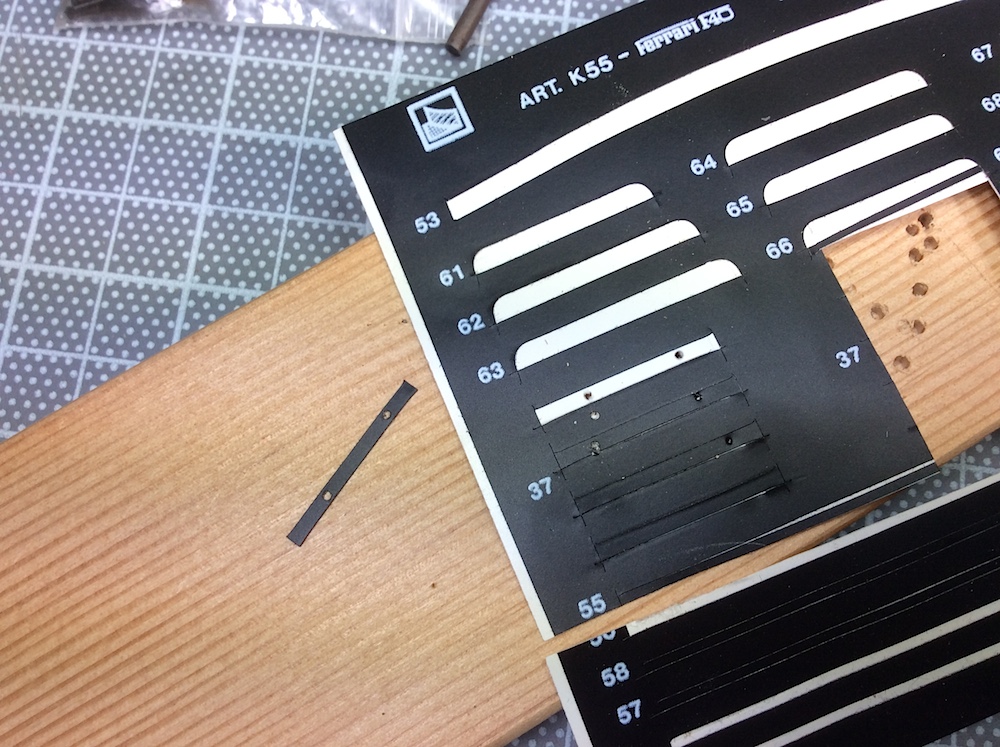
Thank for your kind posts. Frank, from a previous post: Also for the metal straps Ferrari parts have come to the rescue. Vinyl self-adhesive strips that are leftover from an F40 that my son and I built from a 1/12th kit. We had fun. I will use that as well as those small cleats at the wrap ends. - Never throw anything away right (:-) =========== -E.J: Thanks so much. We do indeed all learn from each other. I'm still "stretching" as a learner, but it's so nice when something that I may have done is inspirational for someone else as well. Your work is so excellent that your compliment is even more special. woodo: Again thanks - nice to have you on board. George: You're always so kind with your comments and your Clicks" (:-) Regards, Michael
-
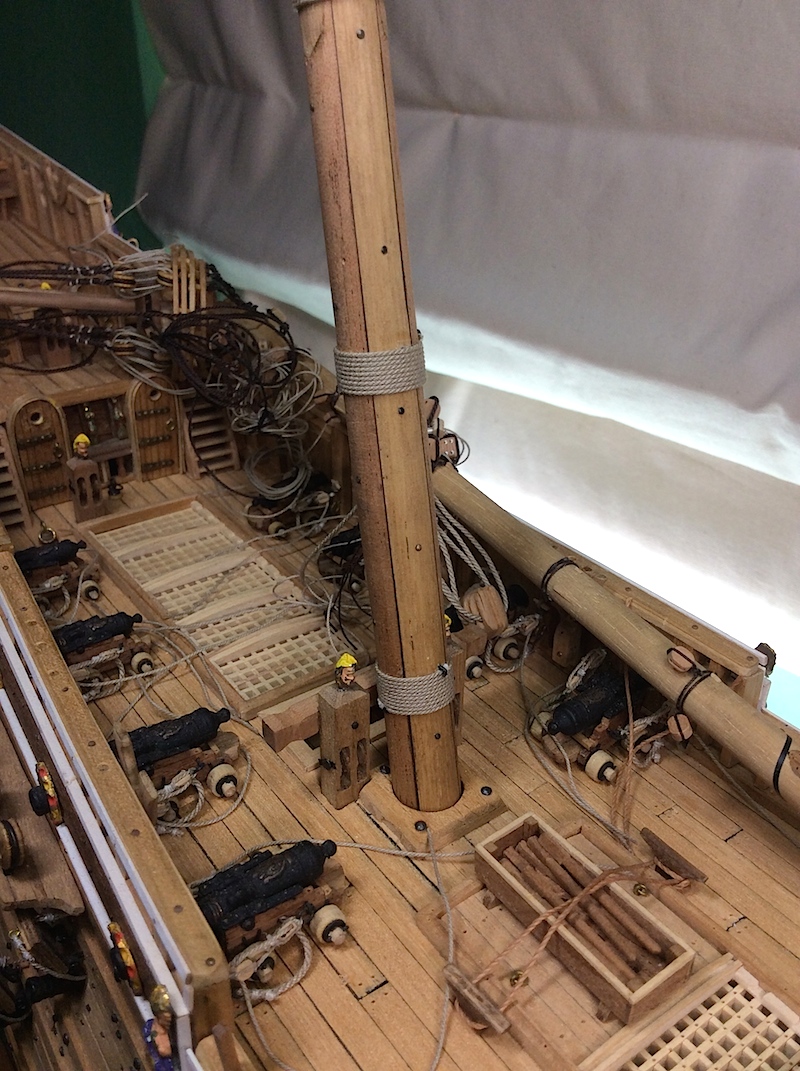
Hi mates, So lower mainmast is now completed. Here are some updated pics. Now onto re-building a lower top for the main – need to order some rope from Chuck so shrouds pending. Again – as always - thanks for the comments, the Likes and/or just dropping in for a visit. PS: Nigel your pencil suggestion made such a great diff. Thanks again. Cheers, Michael


-
Here we go again - with "little progress" awesome indeed. Brilliant work. I am learning a lot from you, apart from just enjoying the absolute beauty of your skills with this log. Thank You ! Michael
-
Backer, Thank you for your very much appreciated post. PS Love Belgium - I was born in France, we were neighbors (:-) Michael
-
Nils, YES nice to see you back as well. I also very much enjoy following your build. Be well (:-) Michael
- 2,625 replies
-
- 5
-
-
- kaiser wilhelm der grosse
- passenger steamer
- (and 1 more)
-
Very nice log. I have always been intrigued by these boats. You did yours "really good" (:-) Excellent levels of details indeed. Yes the wood stack looks great. Happy to follow along. Michael
-
Peter, Indeed a splendid job. Your pencil "stitching" for the sails was very clever. Sails, that in your build are so well scaled really add to your build. Your next build will certainly has LARGE sails (;-) PS: Nice choice if you decide on that one. Michael
- 293 replies
-
- 2
-
-
- pickle
- caldercraft
- (and 1 more)
-
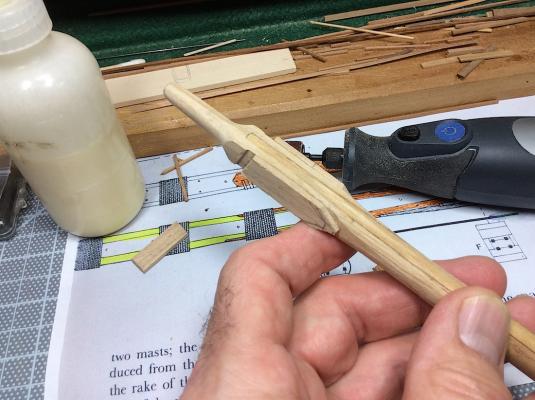
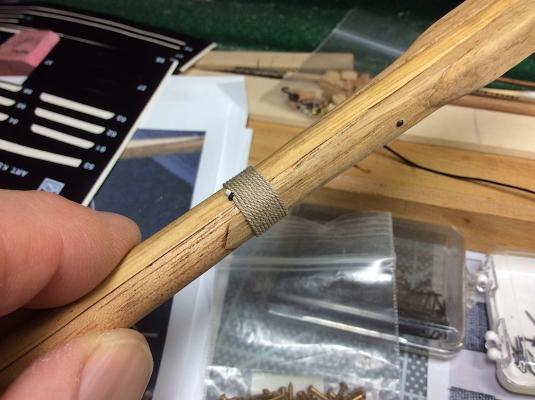
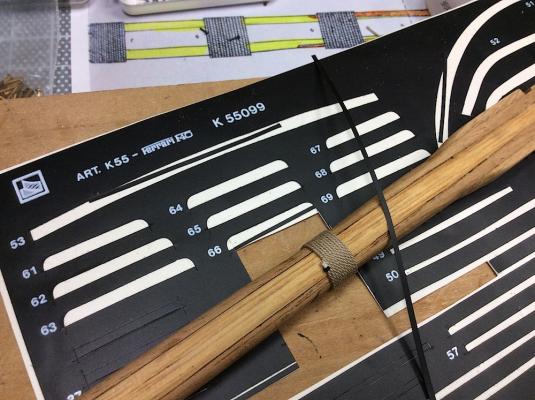
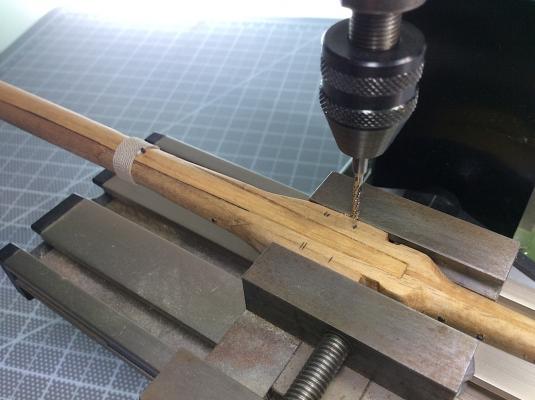
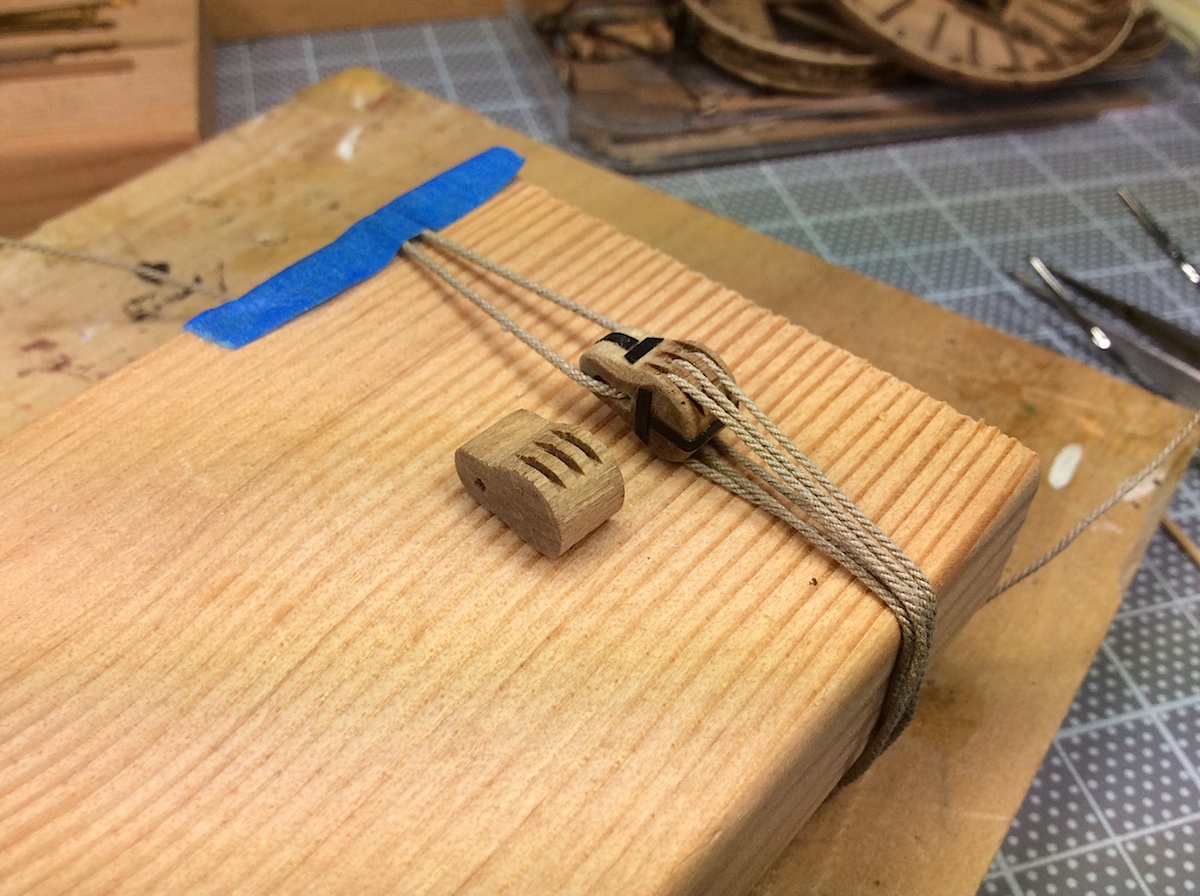
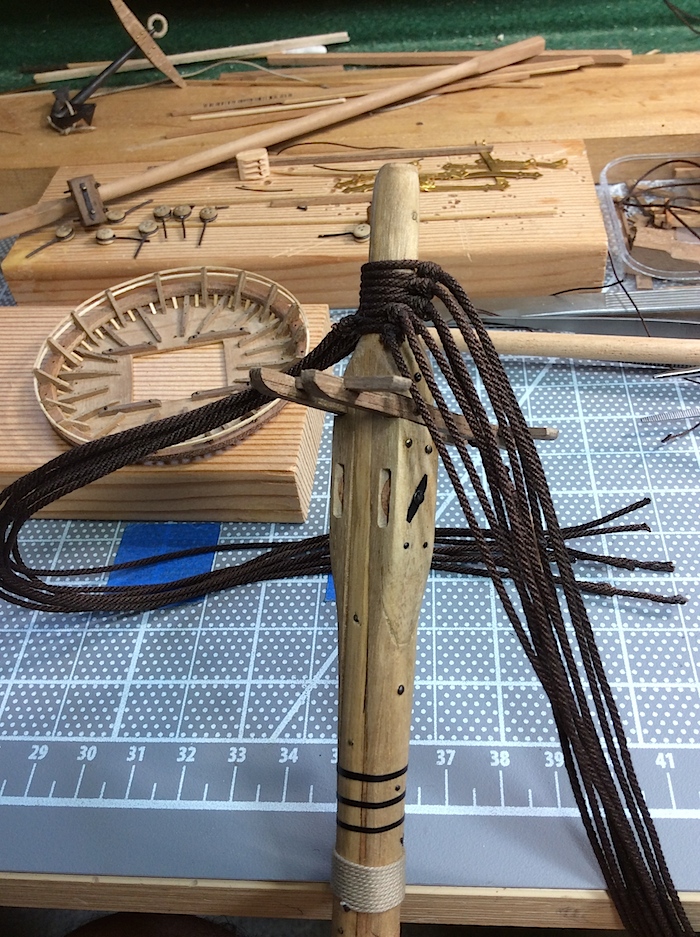
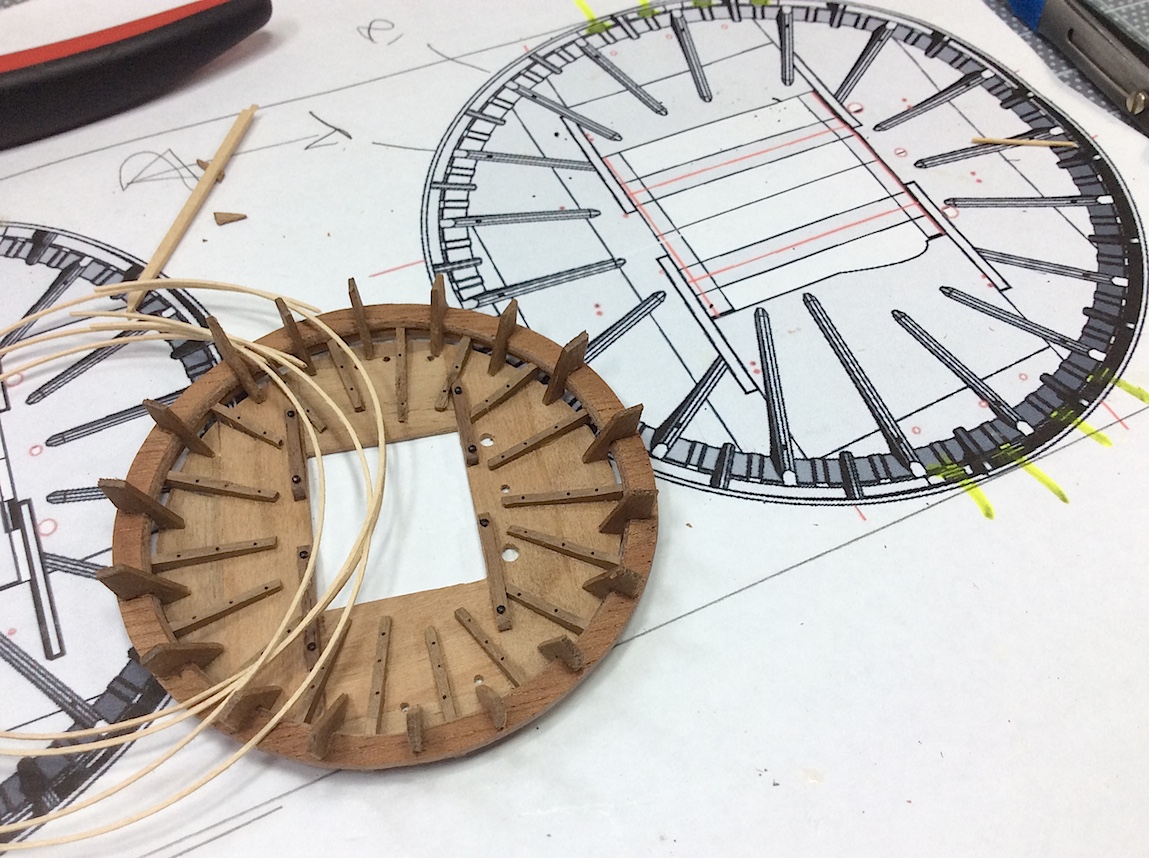
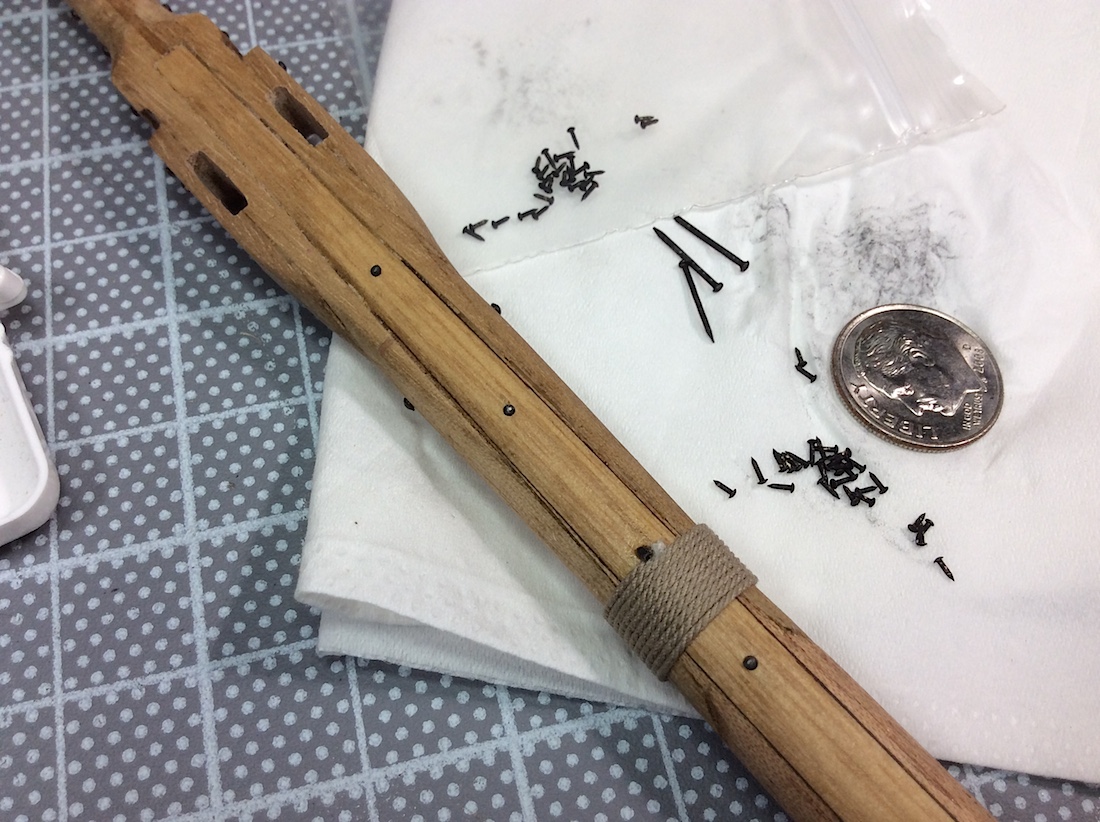
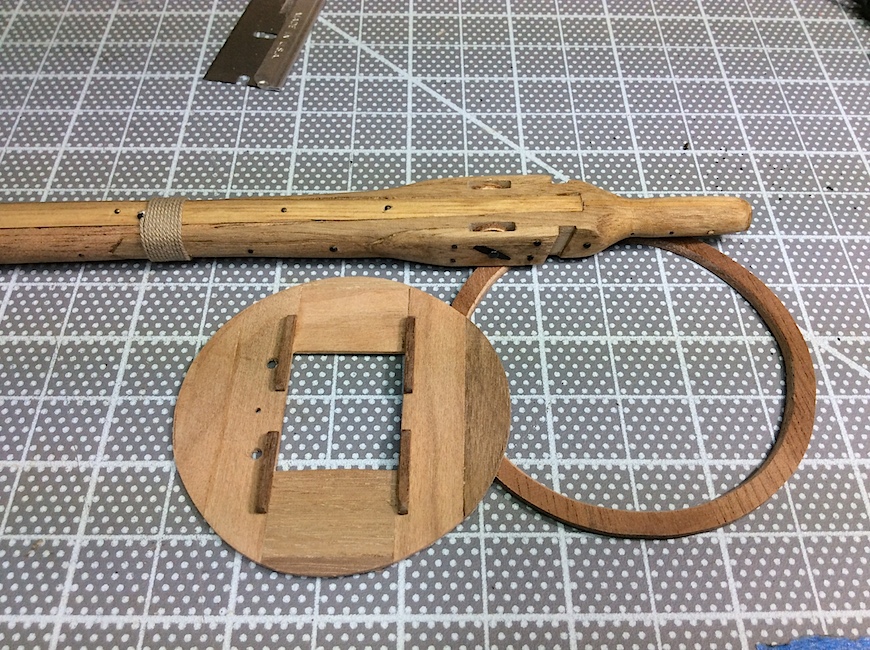
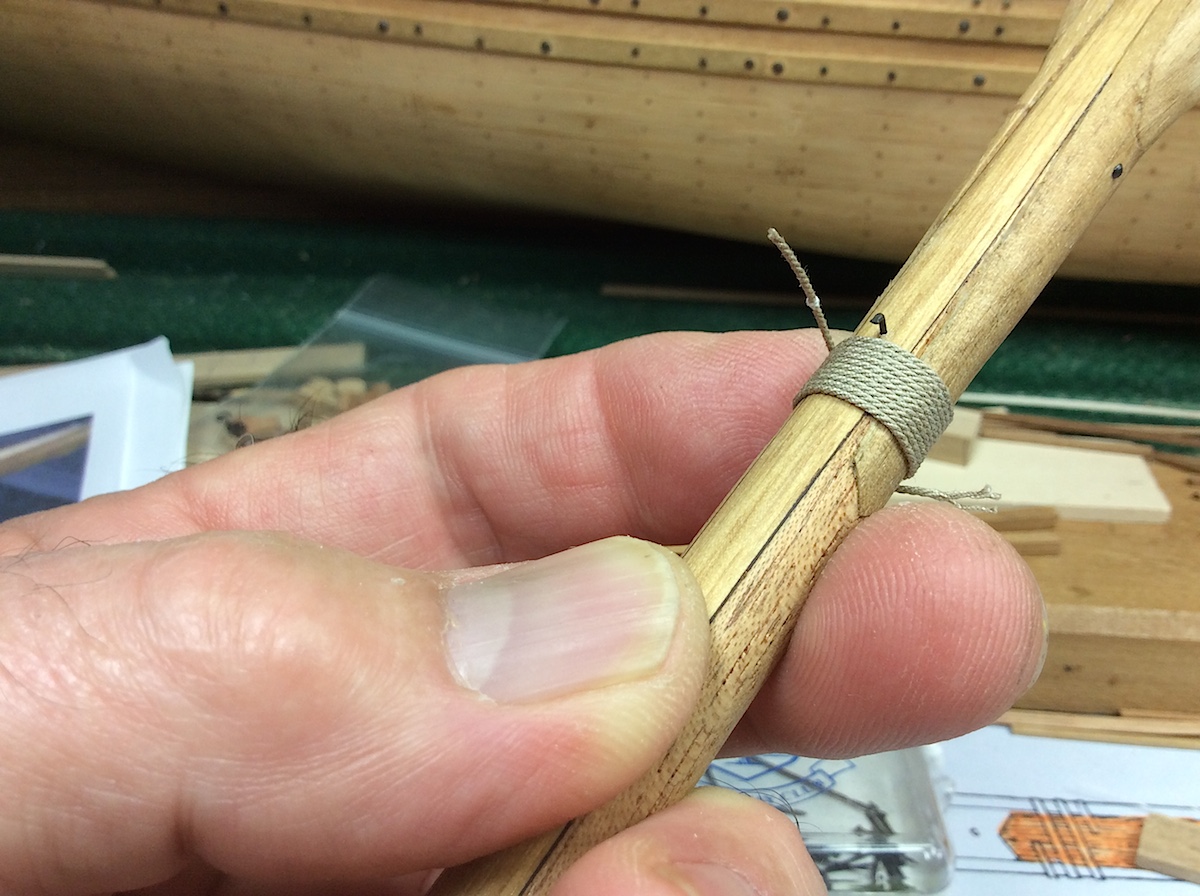
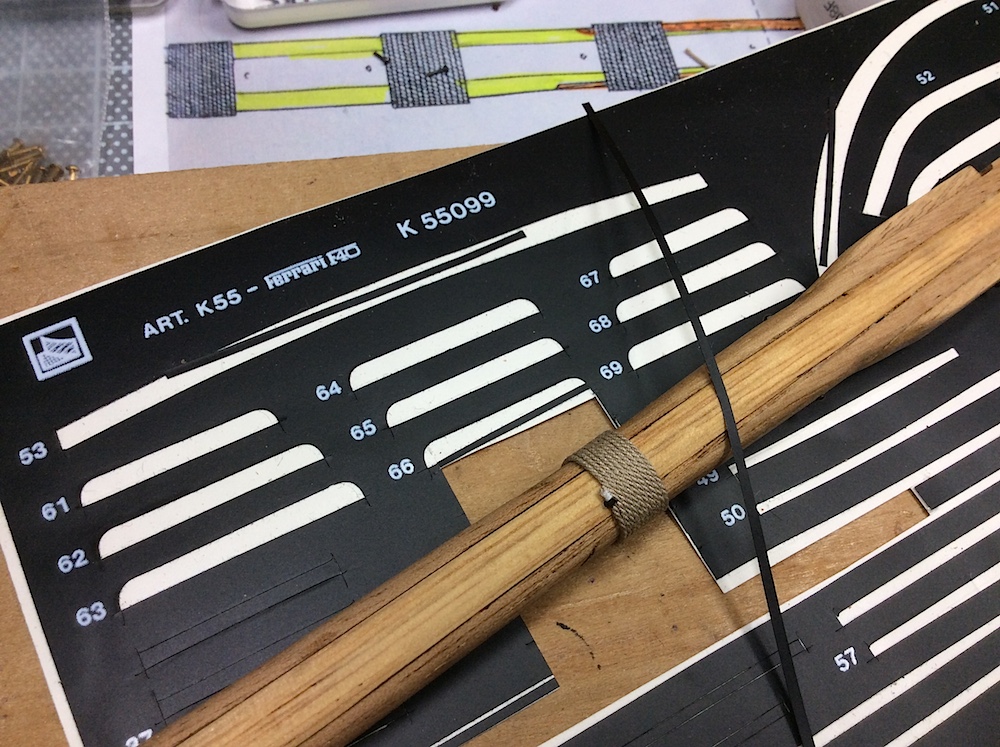
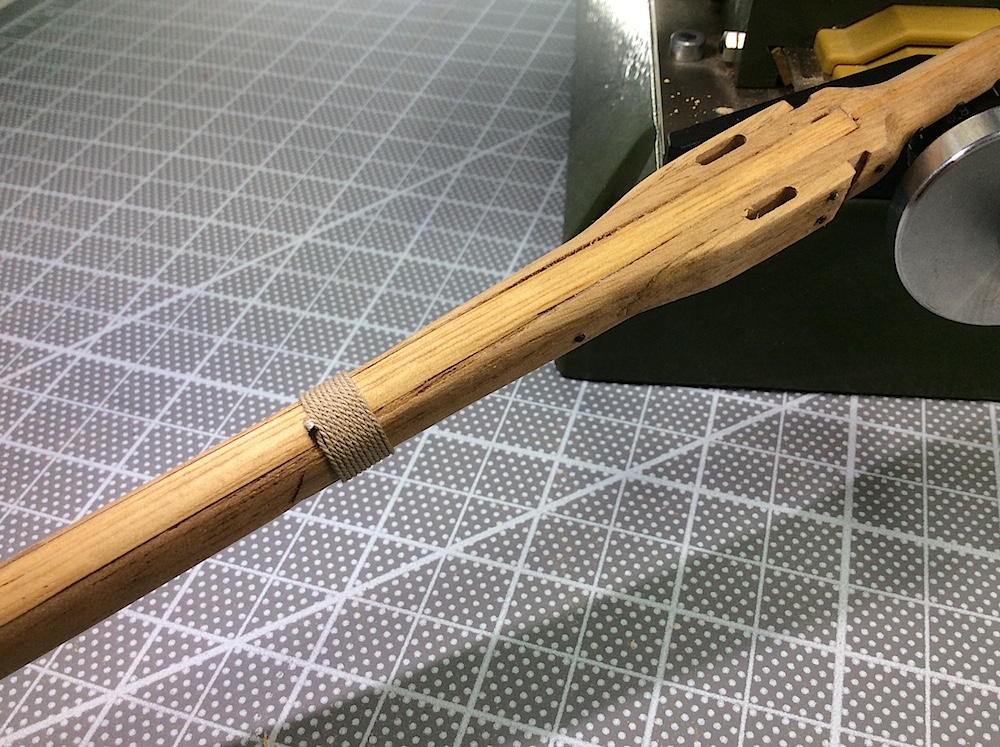
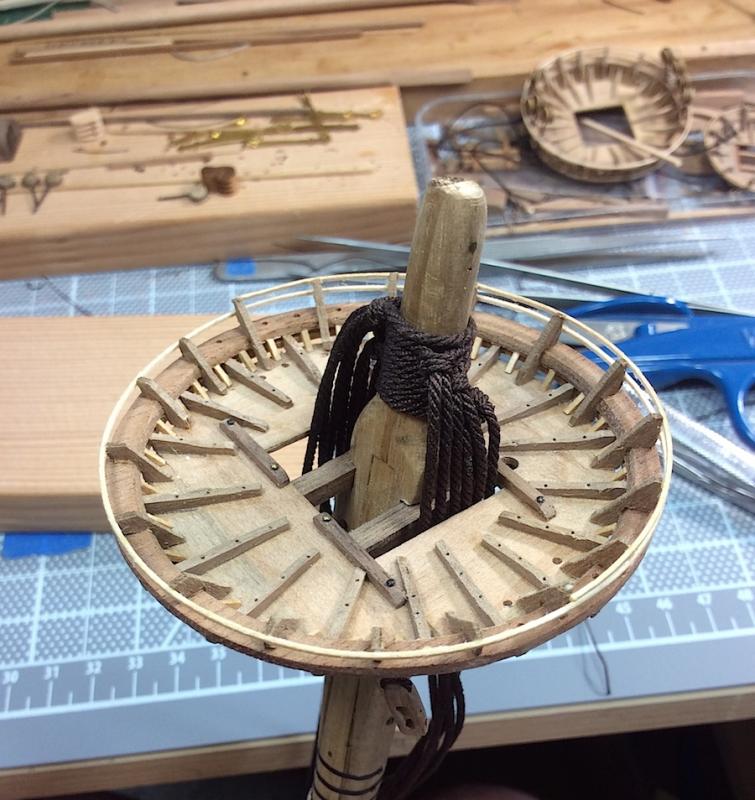
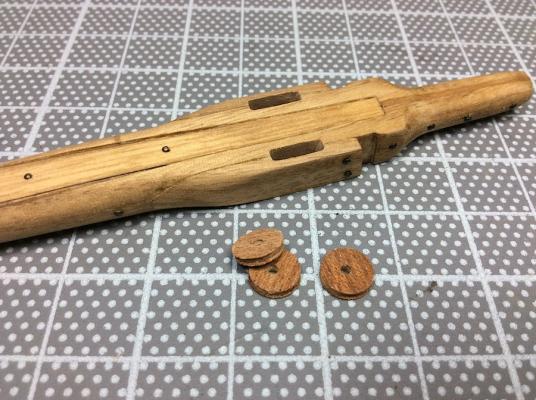
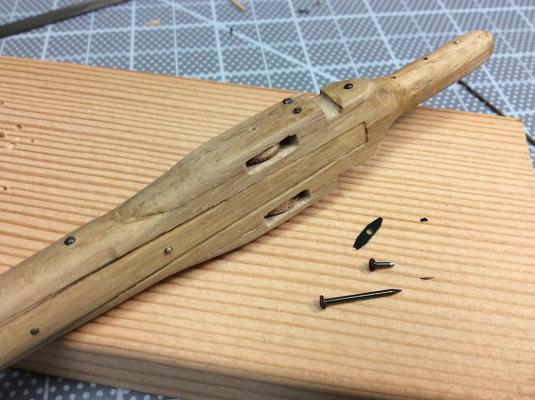
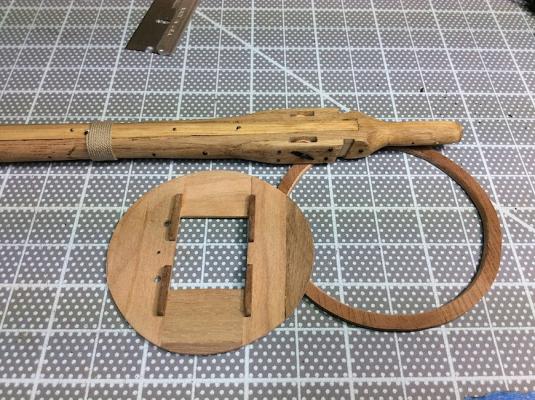
Frank - so nice thanks so much so appreciated. Hi mates, So all of the bits are finally, cut, glued, and assembled. Segway to pic after detailing, sanding, and adding a bit of stain. Starting some of the finishing detail work; Adding the first of three sets of rope wraps. Looking at the 1/10th, and the museum’s it appears as though they cleated the rope ends to the mast as opposed to a Y-Binding. So model-railroad bits to the rescue (same cleats that I used on the hull) Also for the metal straps Ferrari parts have come to the rescue. Vinyl self-adhesive strips that are leftover from an F40 that my son and I built from a 1/12th kit. We had fun. I will use that as well as those small cleats at the wrap ends. ================== But today came the “acid Test” milling the two pulley grooves. This made me a bit edgy because failure here and a lot of previous work would need to be redone. My main concern was how would the milled holes look on the bottom part of the mast, when flipped over for a look, would they also be correctly centered, and grooved?? I remember my first attempts at milling knighthead grooves. Hmmm. But it turned out ok on both sides. PS: I had pre-built a second top platform the same size as the one for the foremast (forward thinking !) Turns out that the main mast lower platform needs to be a bit larger, and the platform planks are diff. shapes Oh well…see last pic (Corel – of course – has fore and mains the same size parts) Thanks mates for dropping by – I won’t post again until mast it totally completed.