HOLIDAY DONATION DRIVE - SUPPORT MSW - DO YOUR PART TO KEEP THIS GREAT FORUM GOING! (Only 24 donations so far out of 49,000 members - C'mon guys!)
×

md1400cs
-
Posts
2,839 -
Joined
-
Last visited
Content Type
Profiles
Forums
Gallery
Events
Everything posted by md1400cs
-
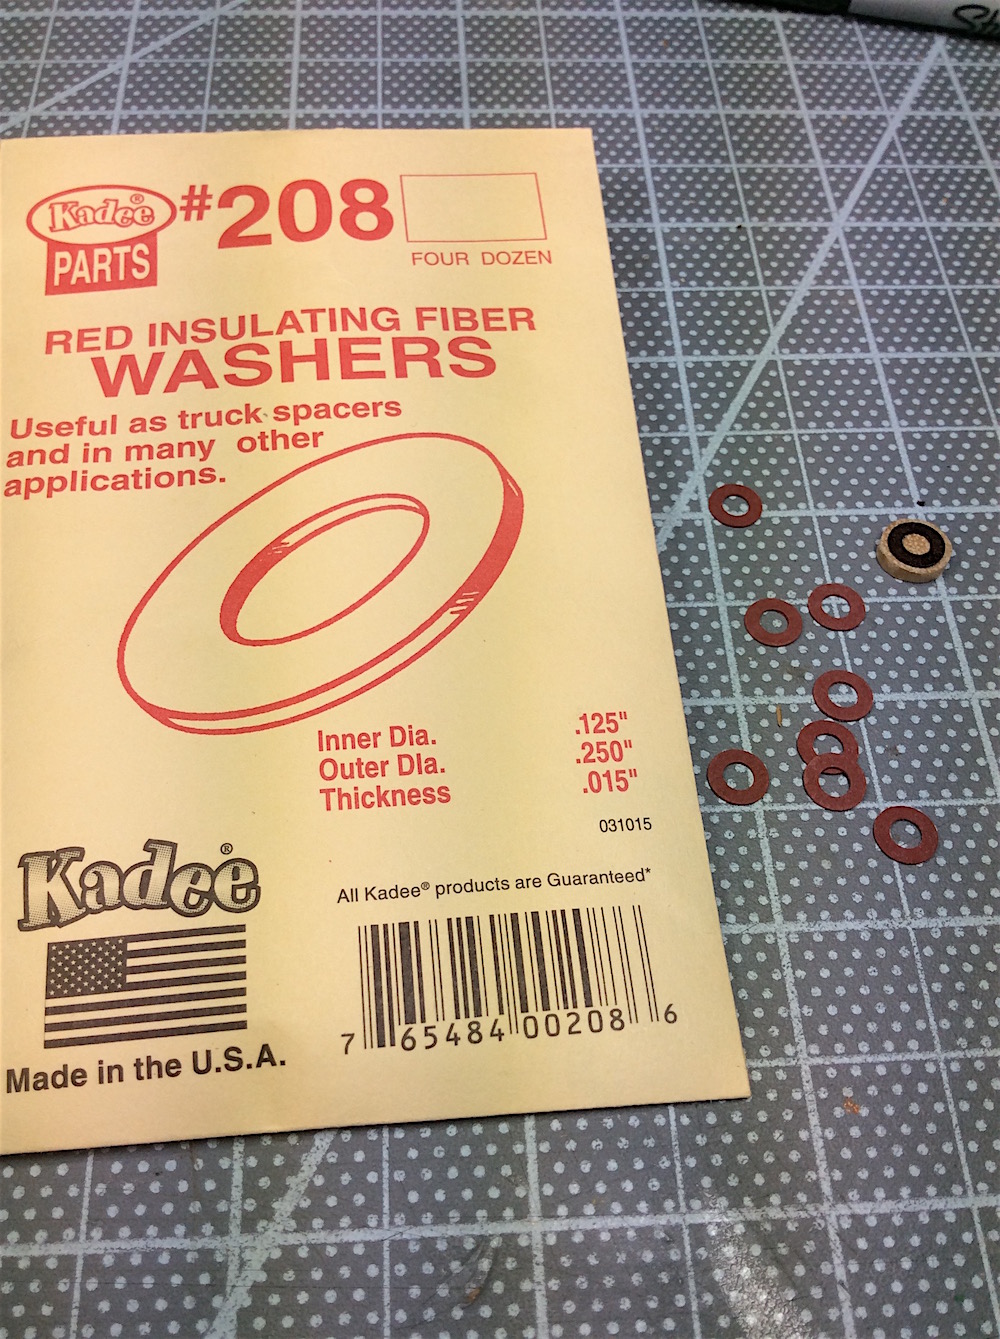
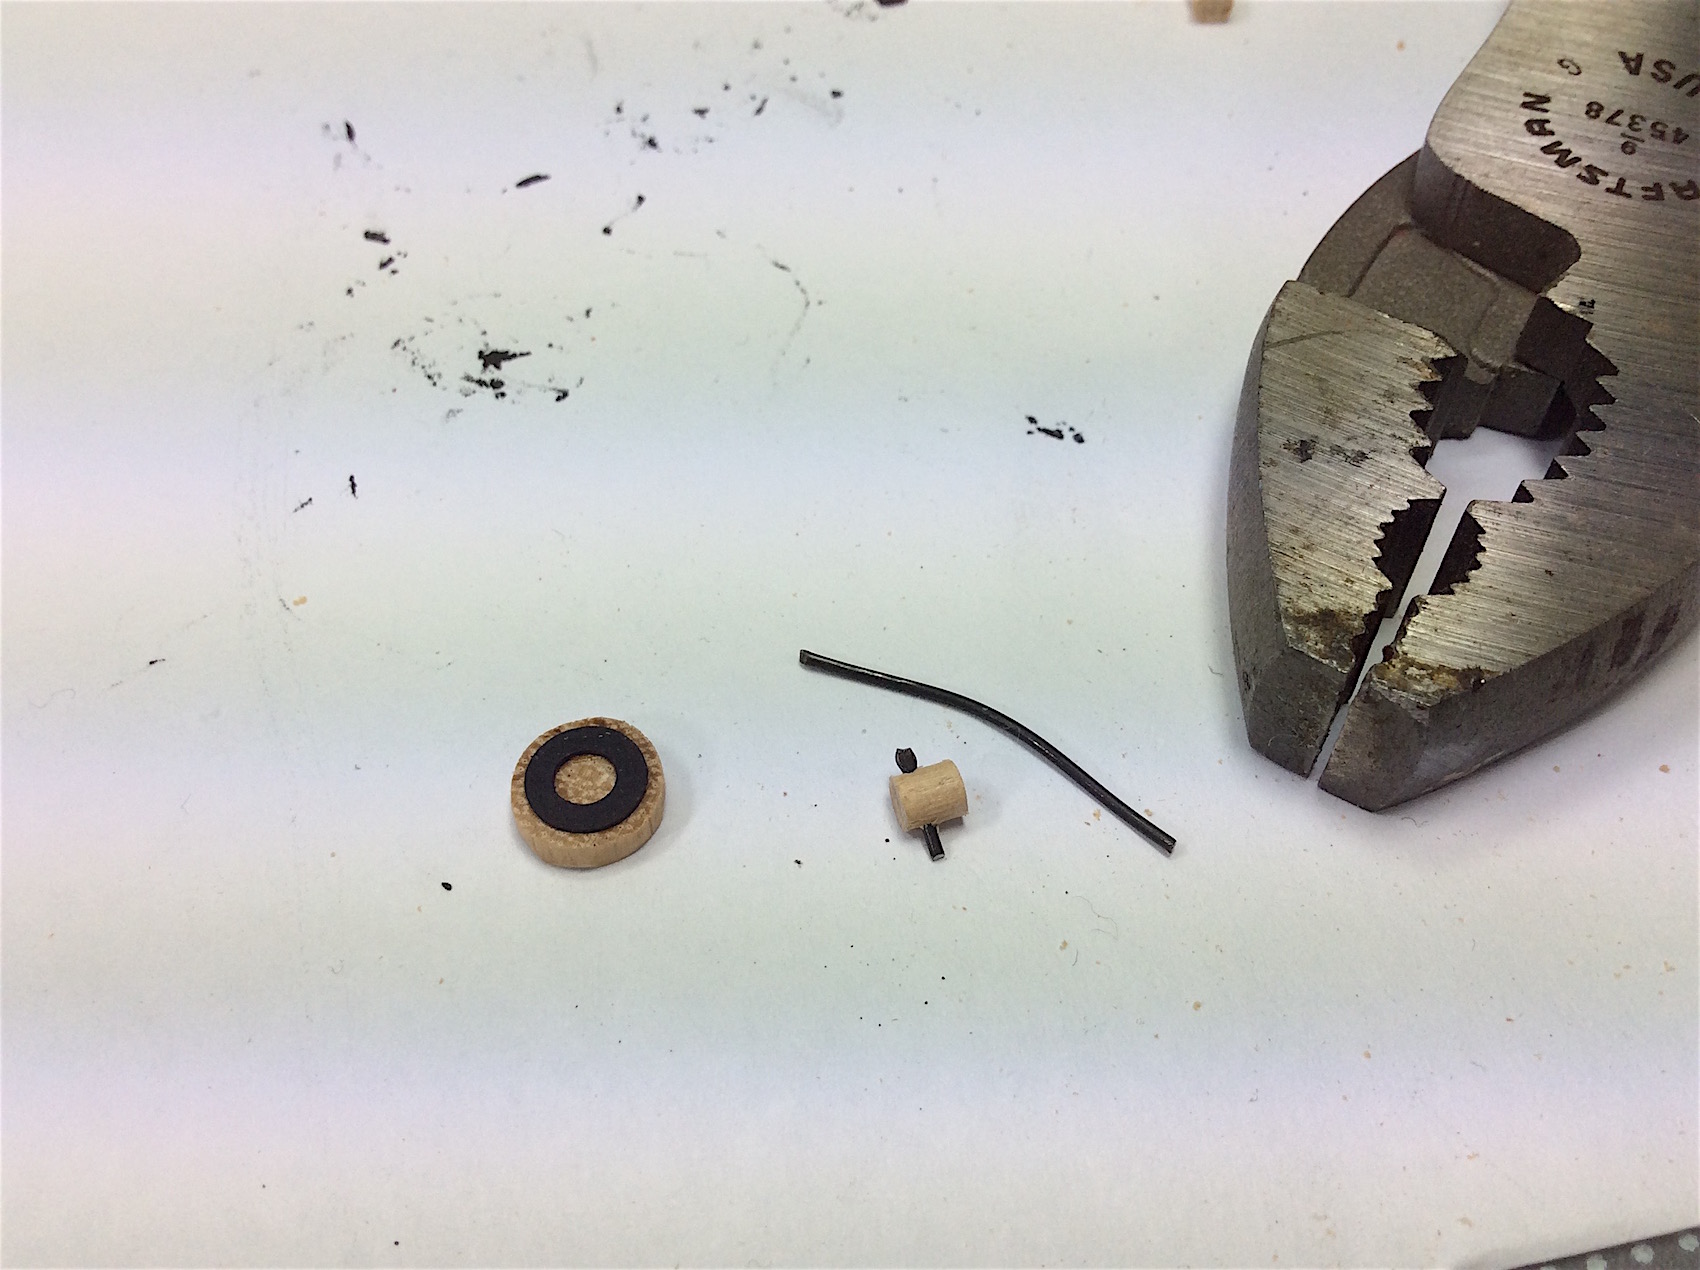
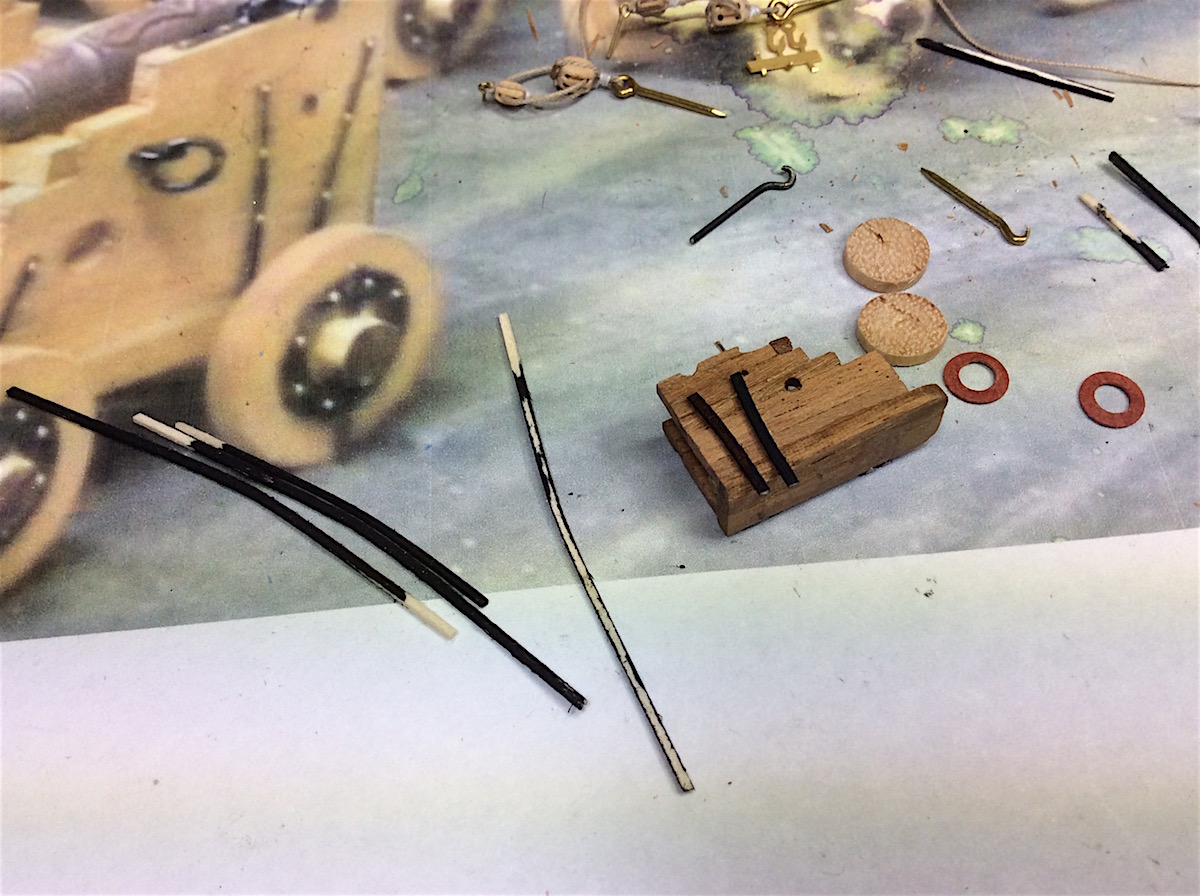
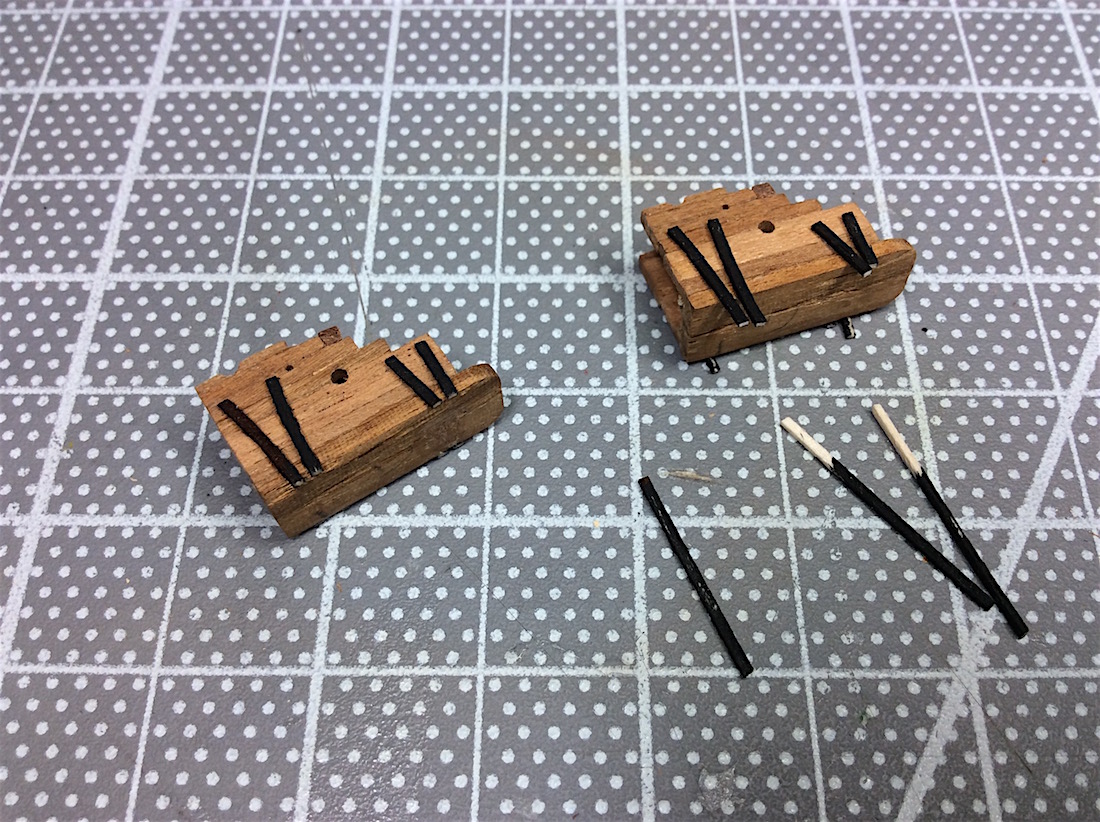
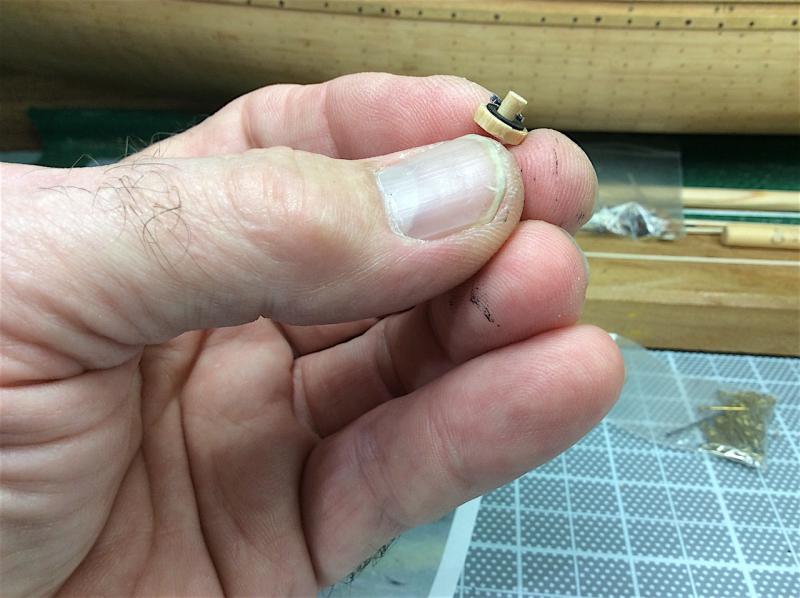
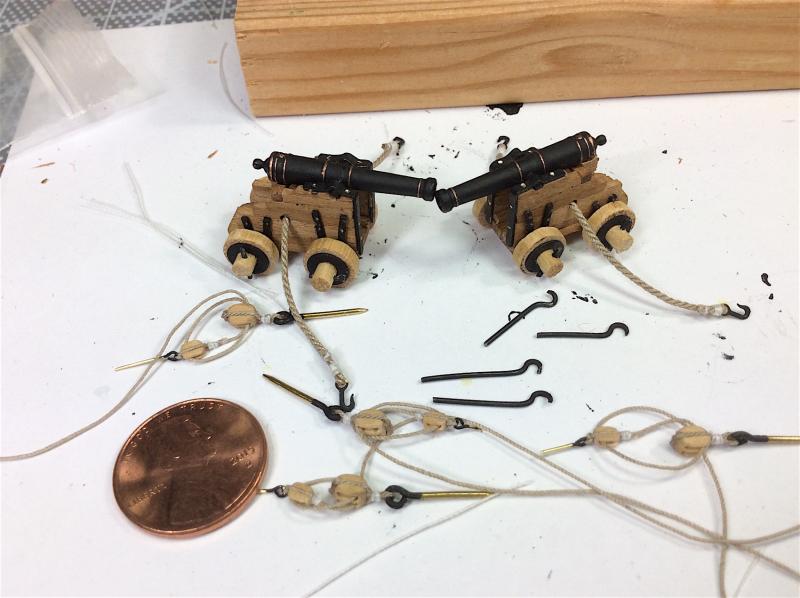
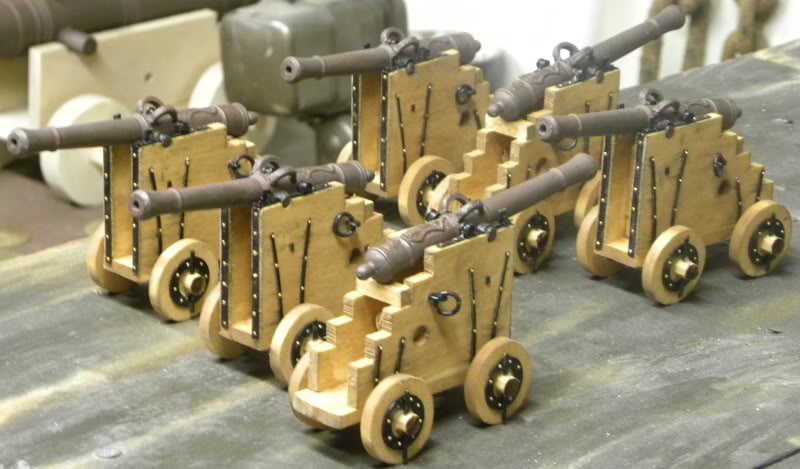
 Hi Mates, Thanks for the “likes” much appreciated, as well as for your visiting this shipyard. Finished up the falconets. Install will be easy compared to the busy work that these little pieces required, but I am pleased with the results. Pics are self-explanatory so keeping this brief. PS: I simulated the axle braces and the metal framings attaching cleats by using a small drill bit and barely indenting those surfaces. The illusion works well enough to look as if these parts are in fact properly attached to the carriages, I think J The washers that became wheel caps were sourced from a model railroad hobby company. The washers are a bit too large, but I did not want to increase the size of the wheels. Close enough hmmm. Cheers,


-
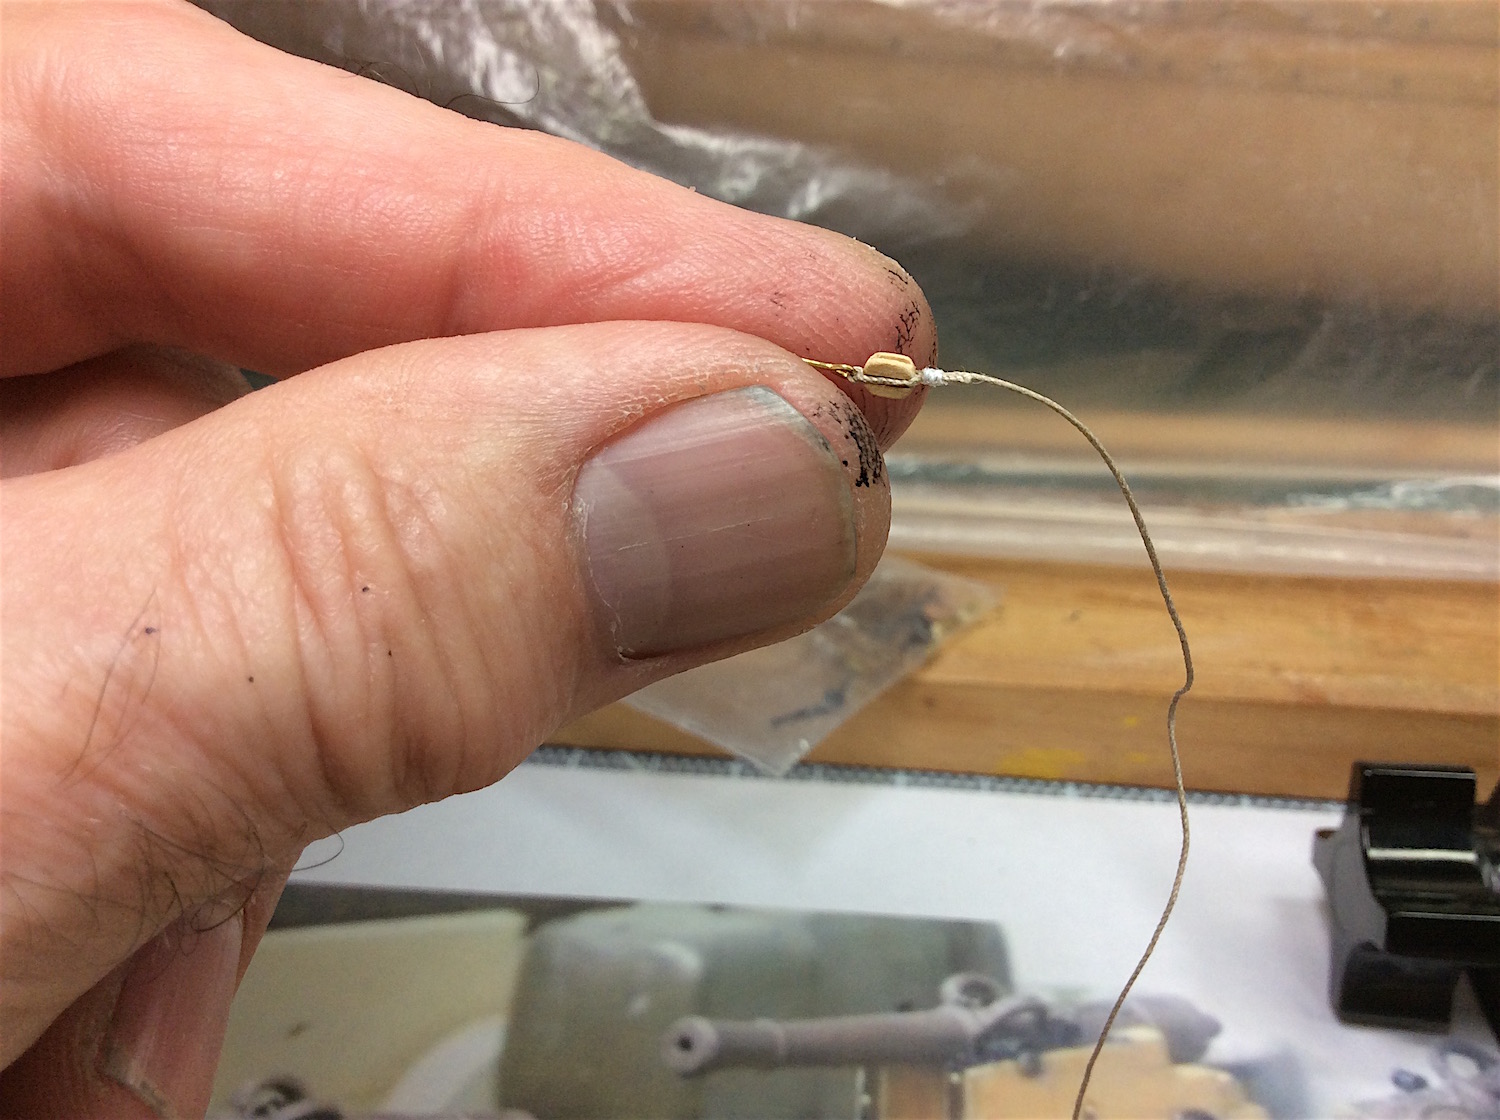
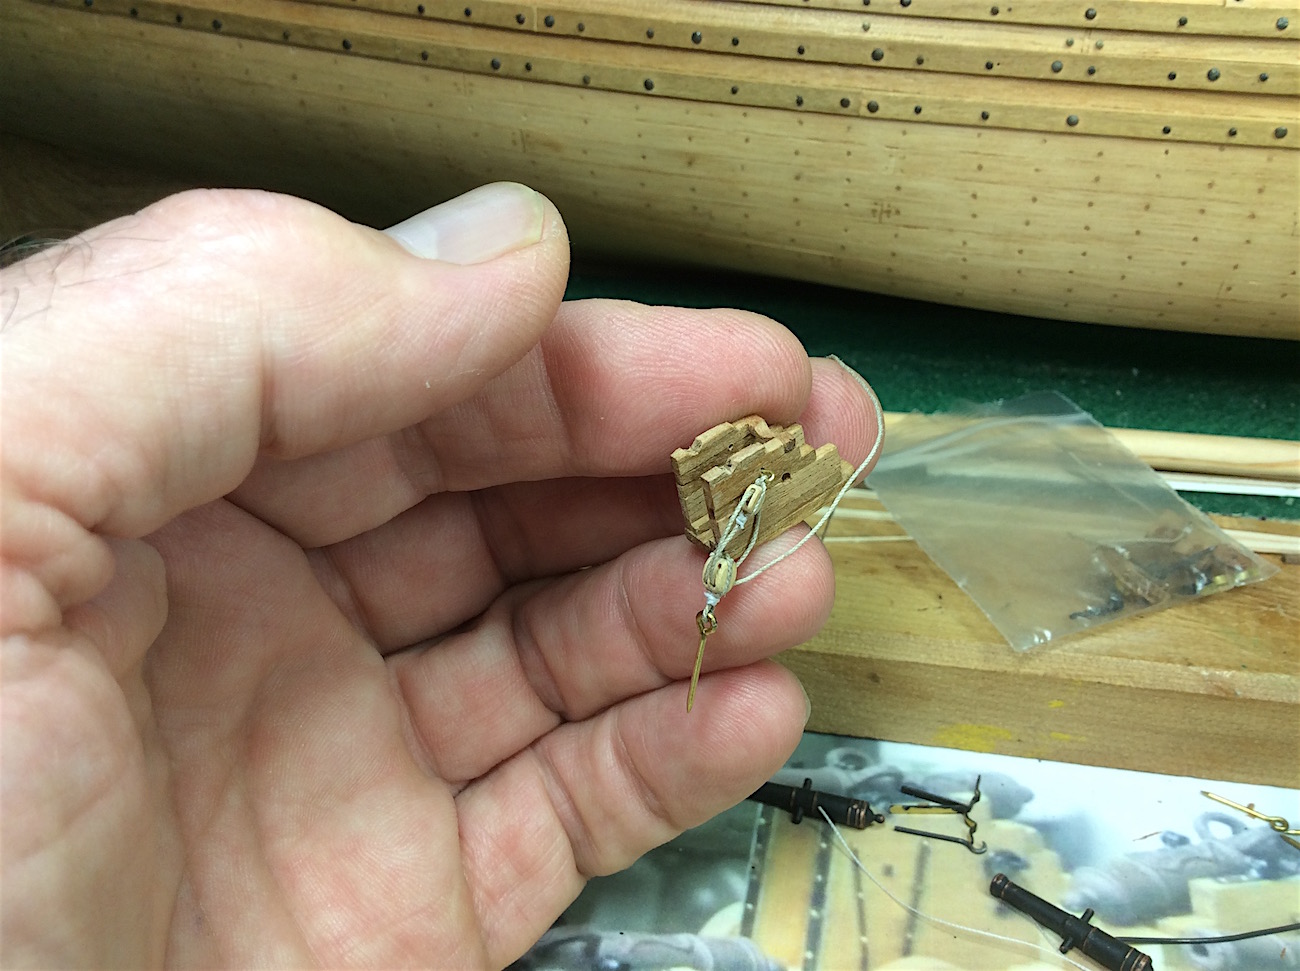
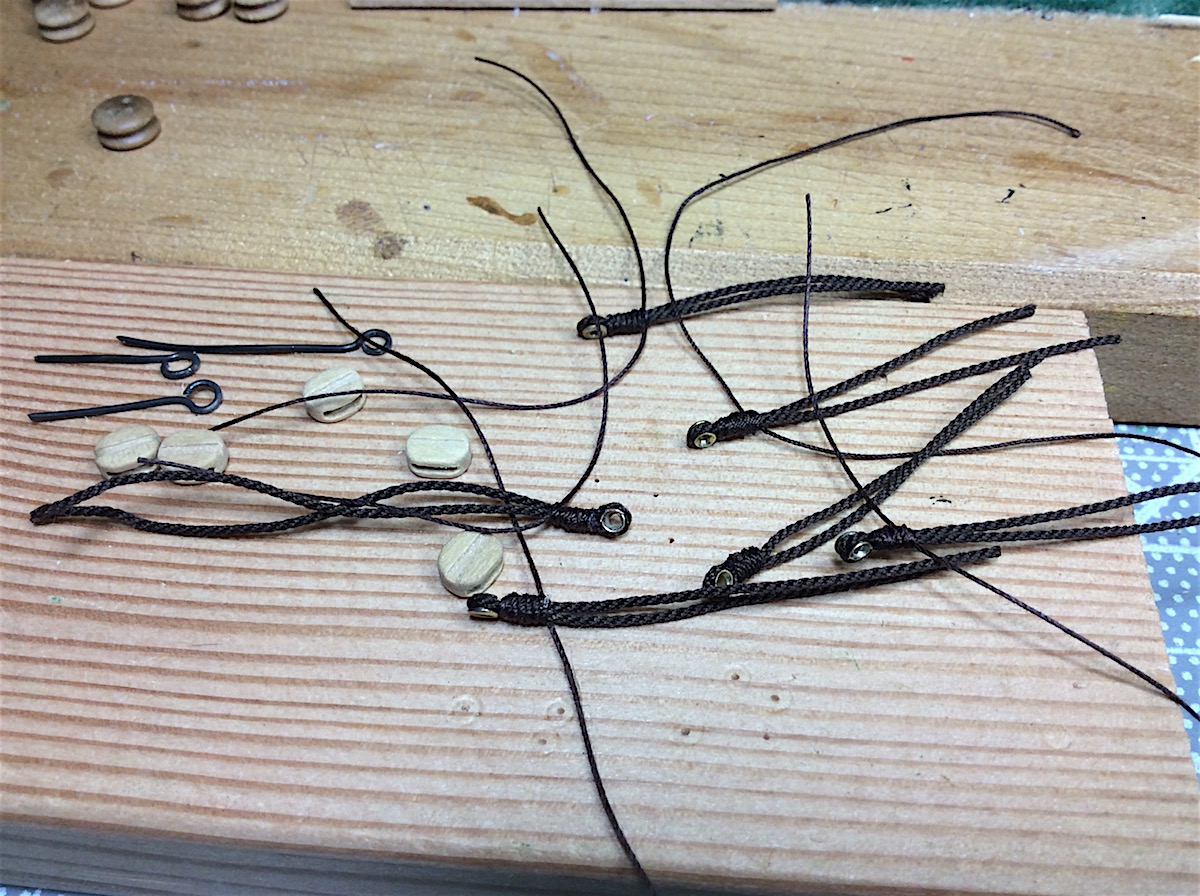
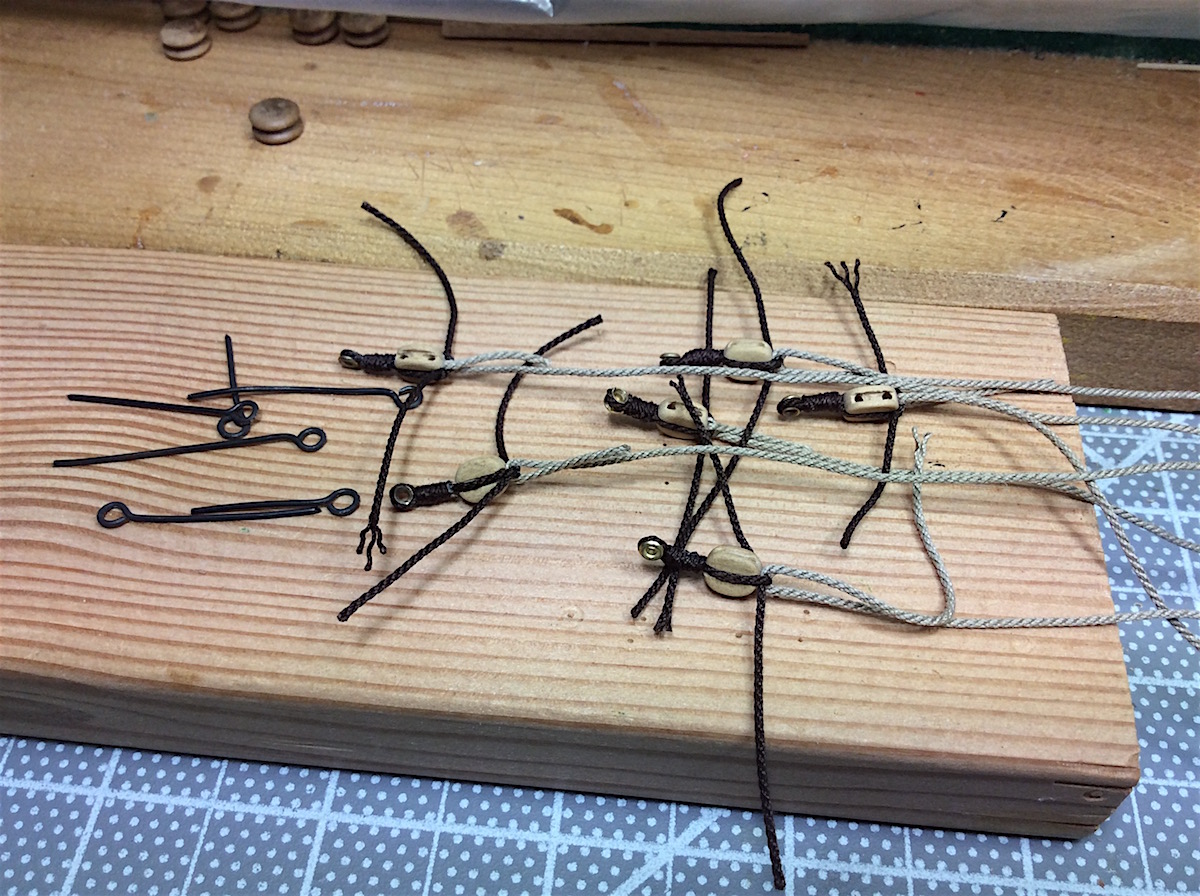
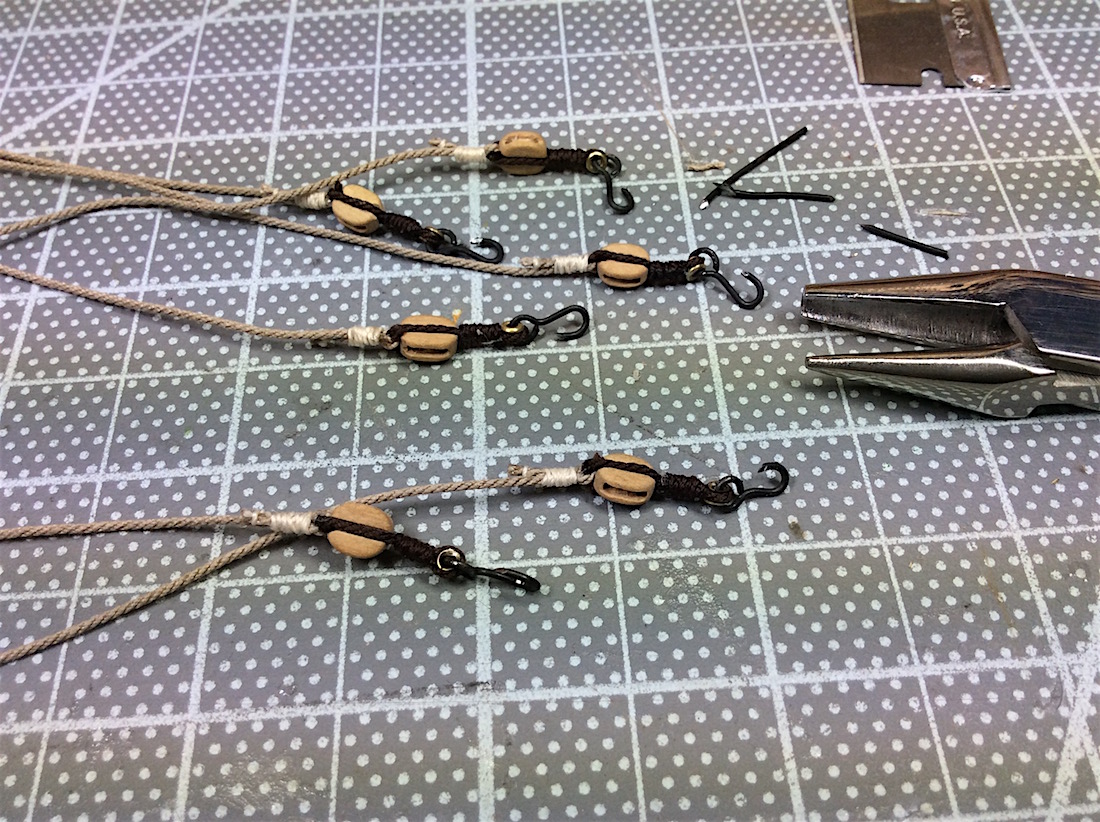
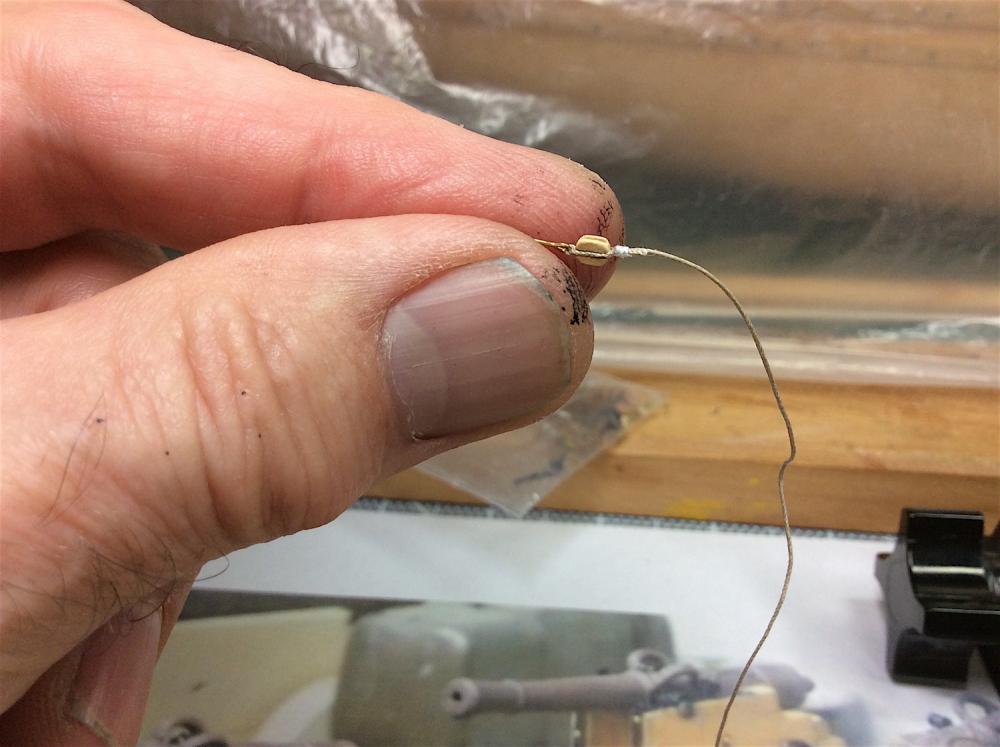
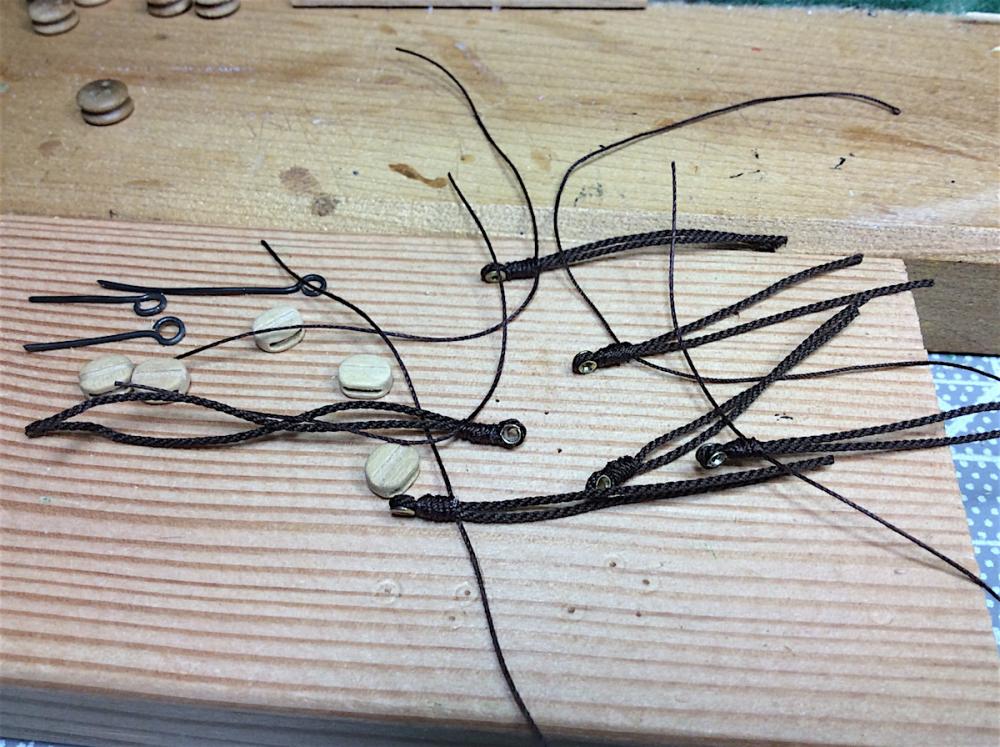
Hi Mates, Minor update, continuing work on the quarterdeck falconets; put together the needed block and tackles. Though I fear that the double blocks may be a size too big – not sure. Ferit, as you can see I added your front framing (thanks for the tip). Used small basswood strips, added a bit of a curve, painted and attached to carriage sides as axle and wheel supports. I’ll post next after these two are installed. Cheers,


-
Hi Mates, Thanks for the clicks and the comments. PKD thanks for deciding to follow along. Welcome to the shipyard. Also Ferit, as usual, you are always so helpful. Thanks for your photo/notation. Funny my eyes never saw the forward carriage wood inserts. Totally missed this. Will add them to the falconet carriages, though they will probably be hidden from view. But I so appreciate you pointing this out. And, of course, all of the other weather deck carriages are also missing those bits ha ha... Cheers,
-
Nick, Your #72 pic of the stem is indeed perfect, as is all of your hull planking. A pleasure to follow along. Cheers,
-
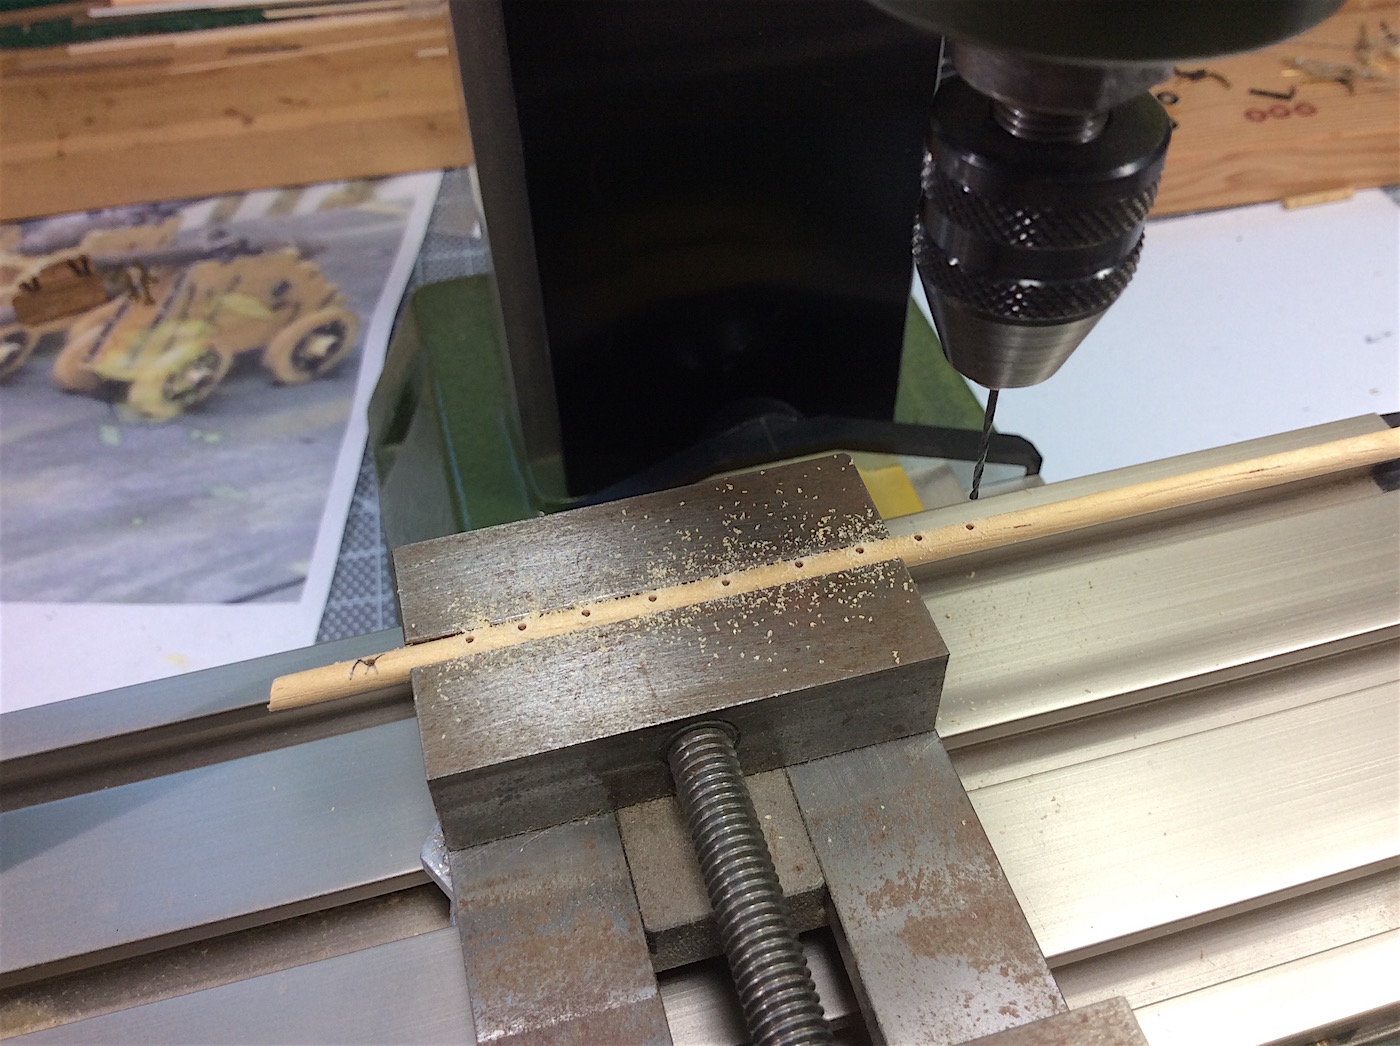
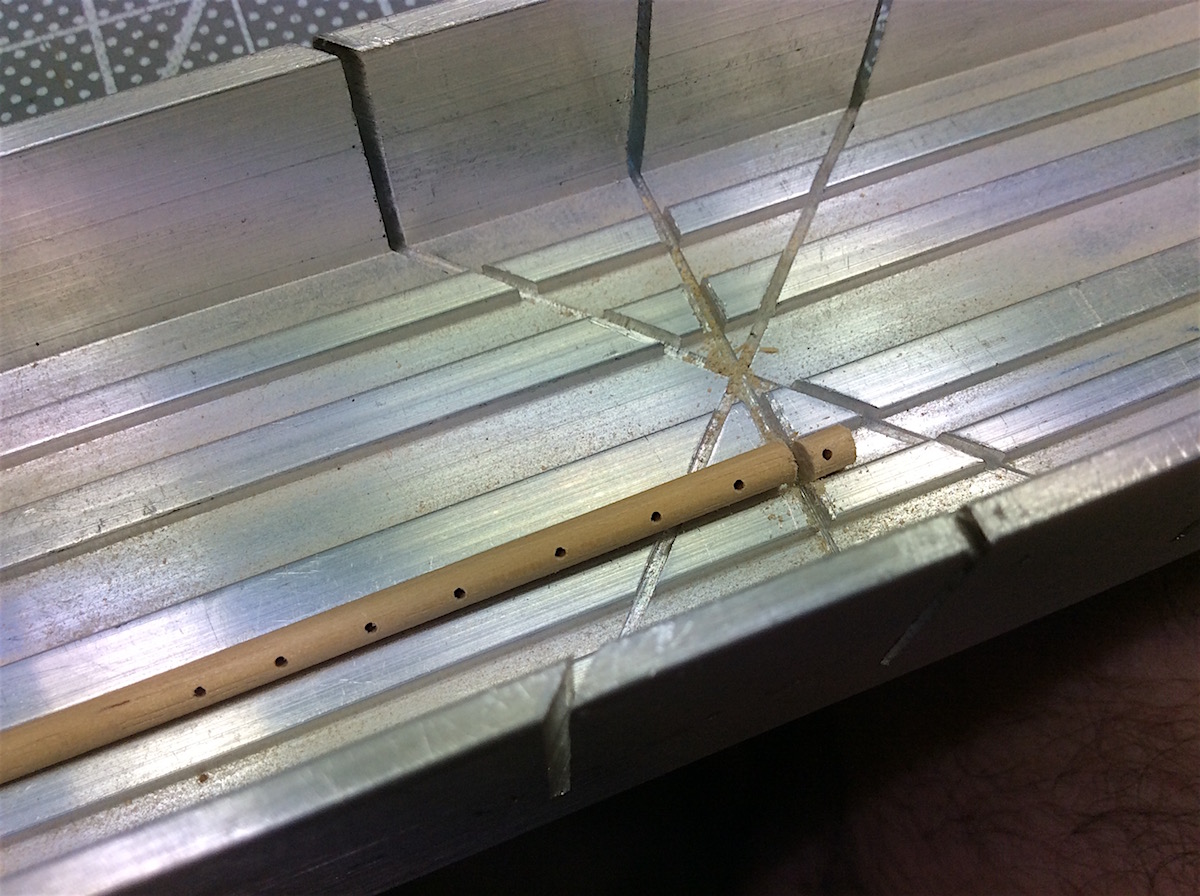
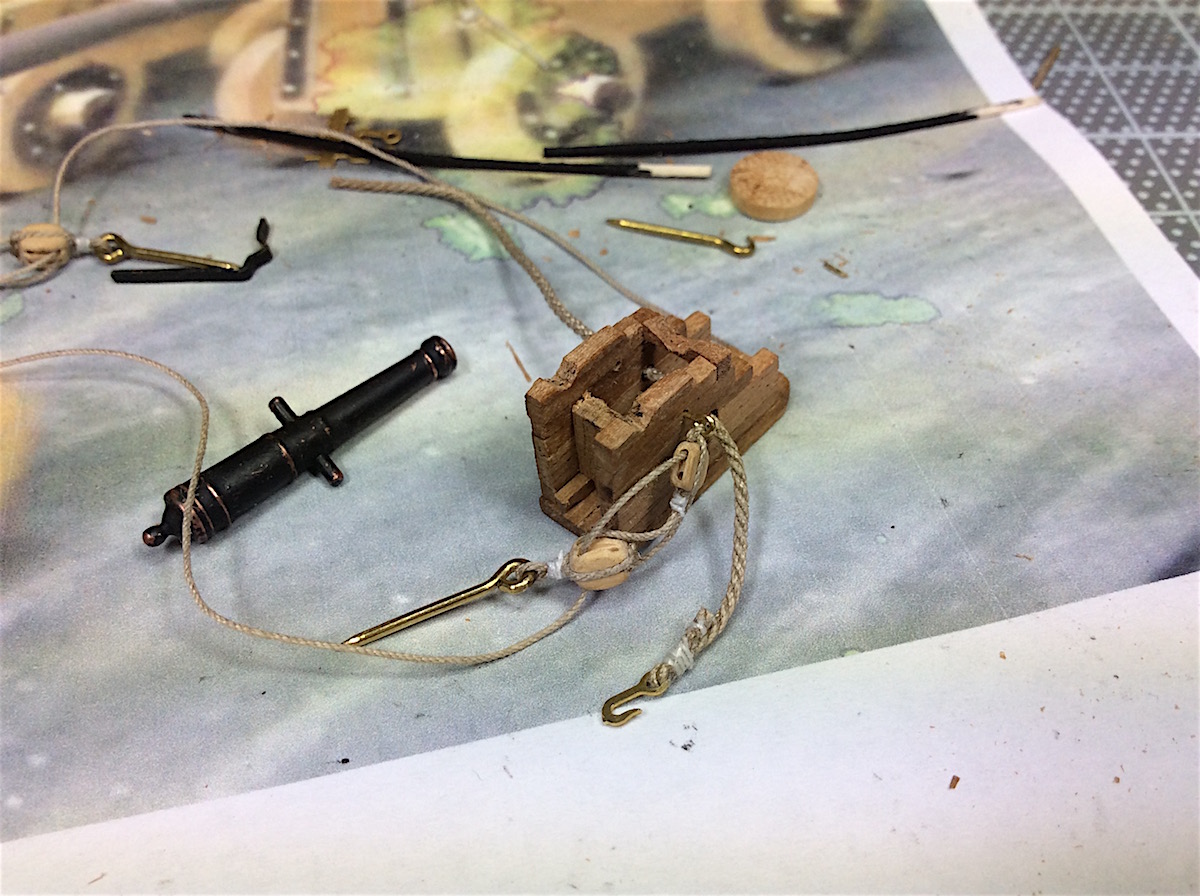
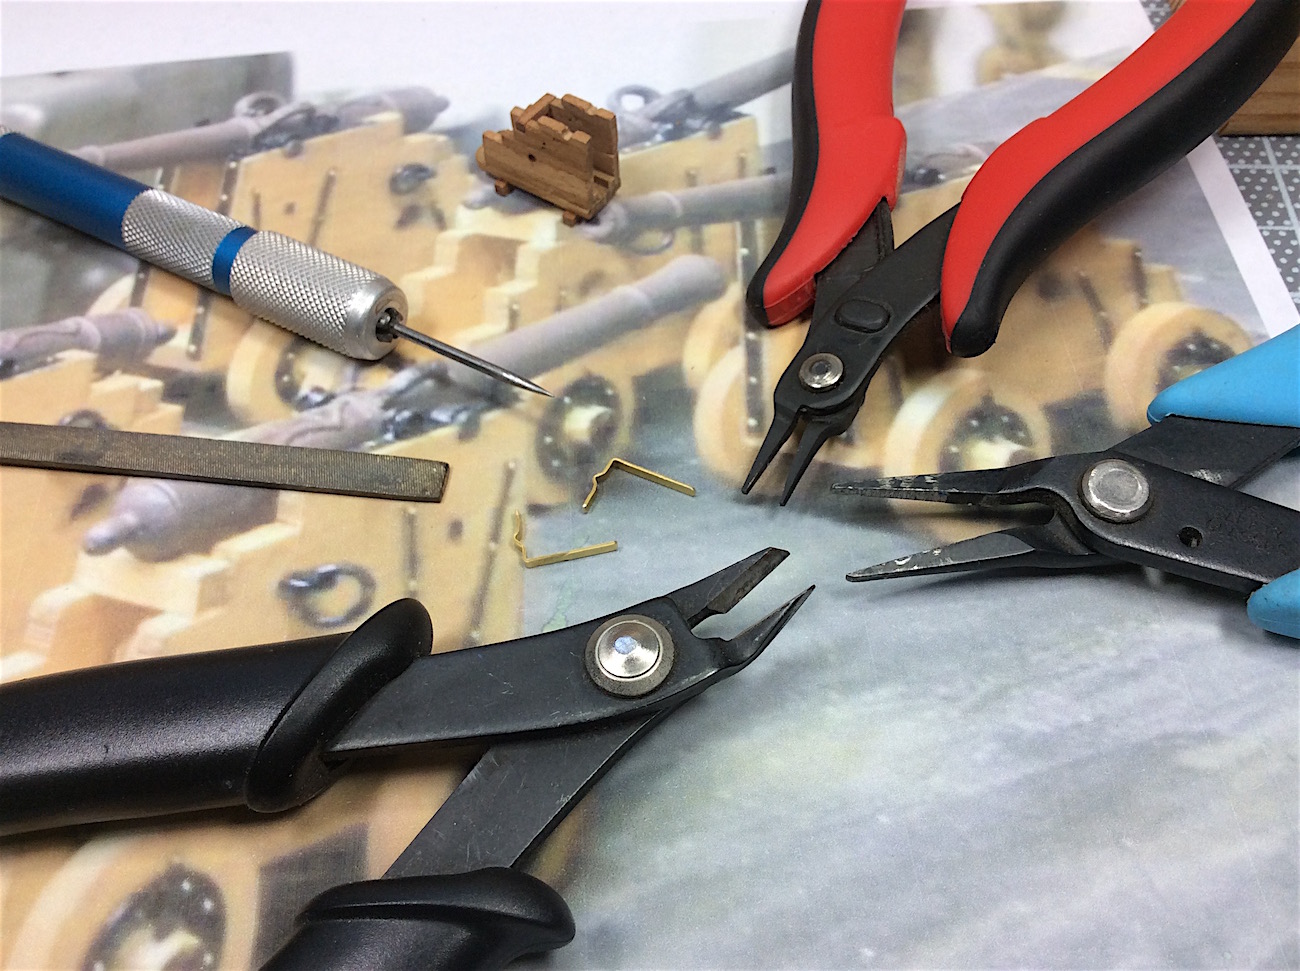
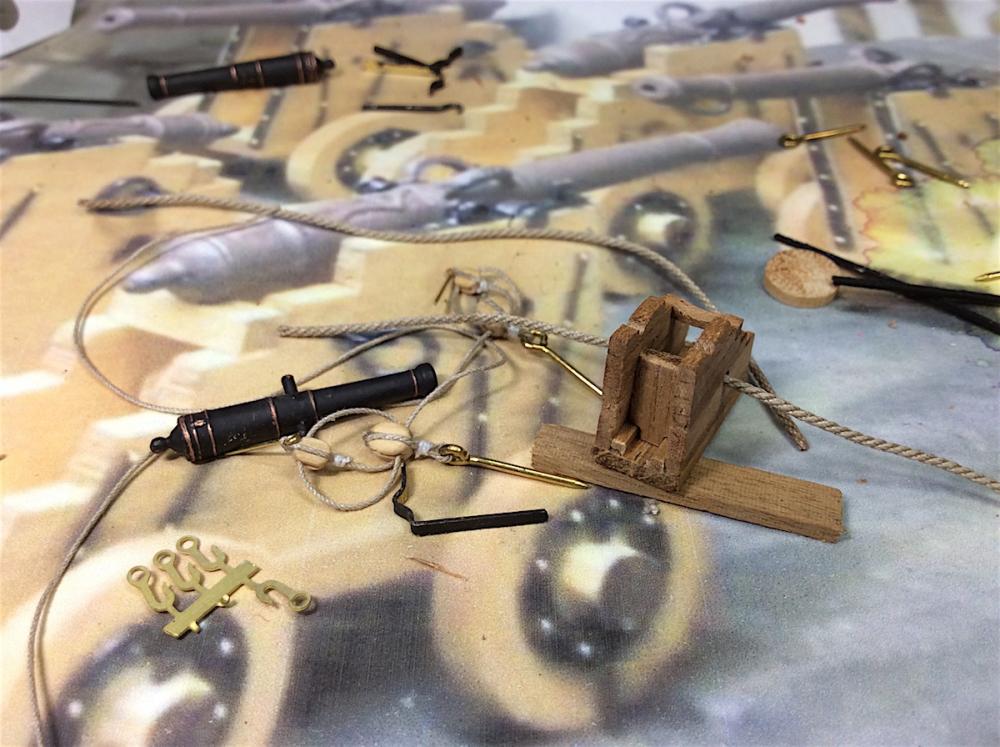
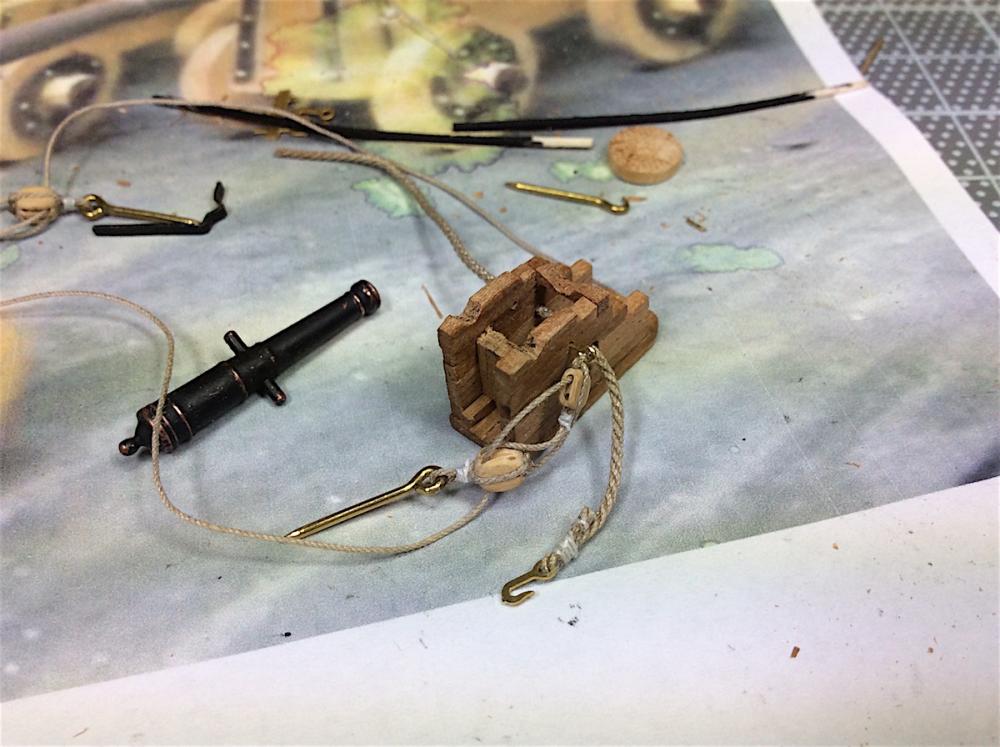
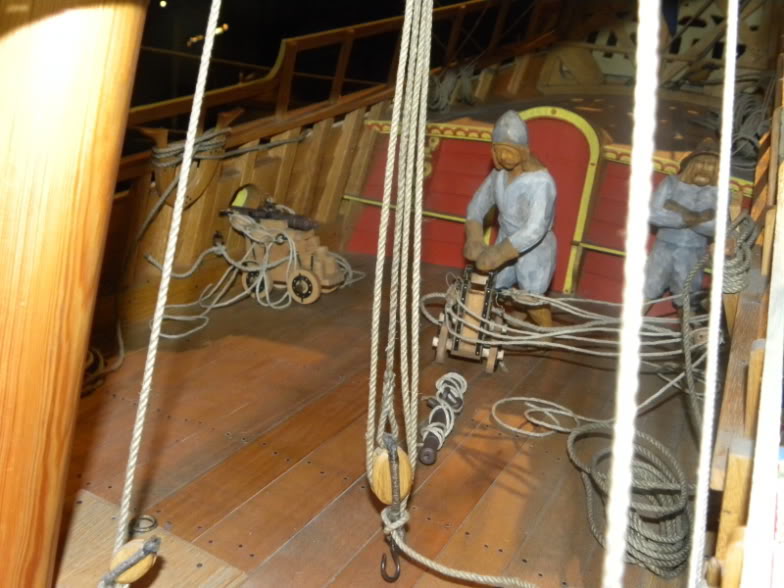
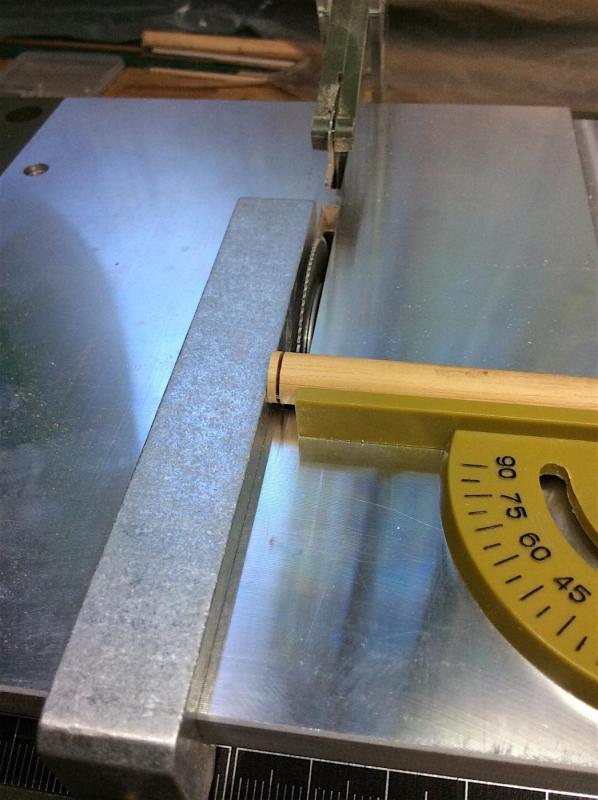
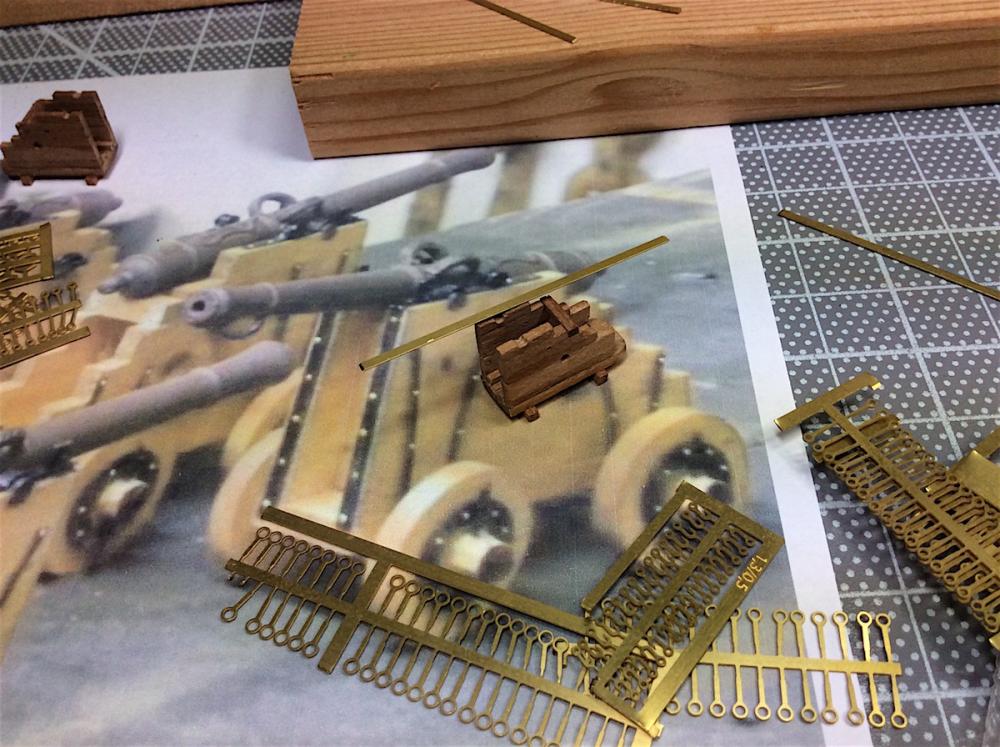
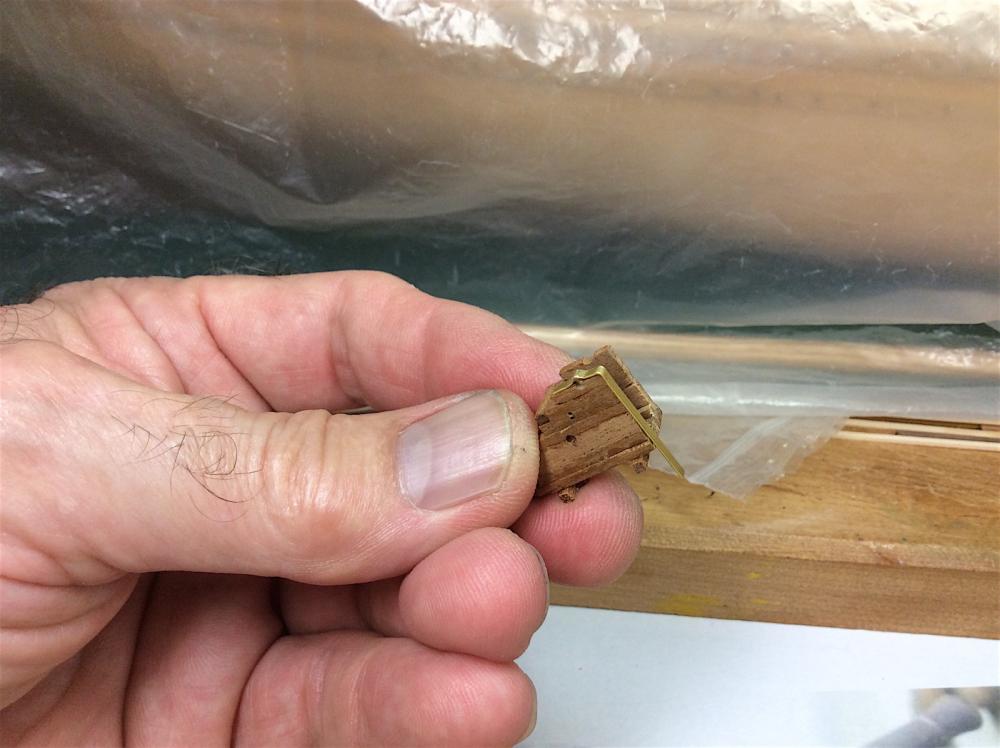
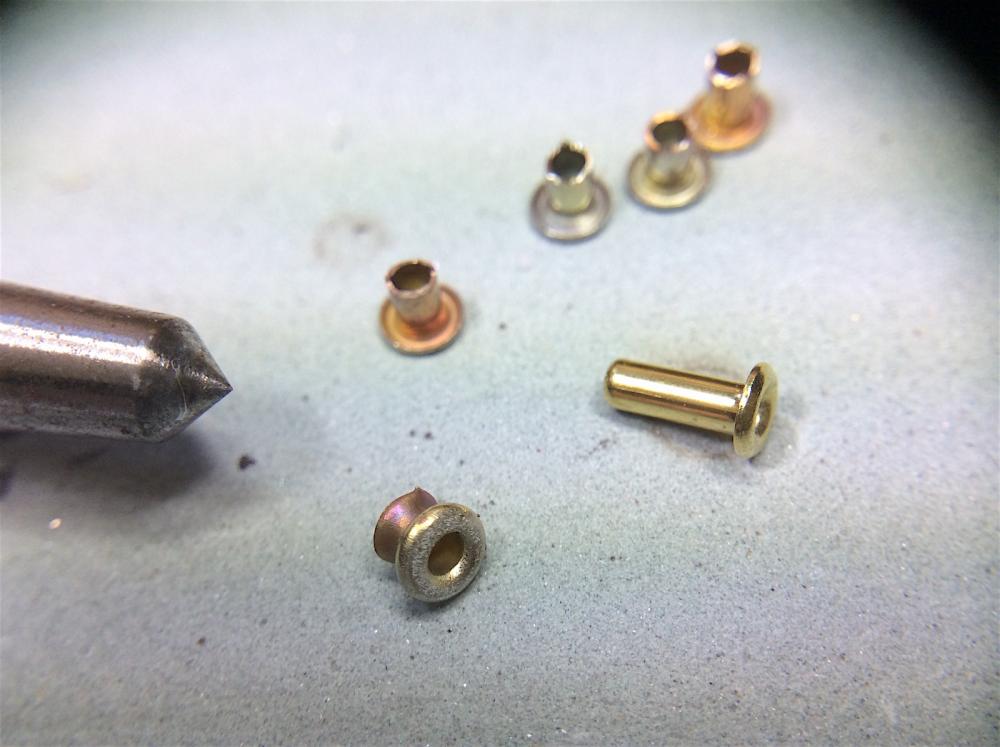
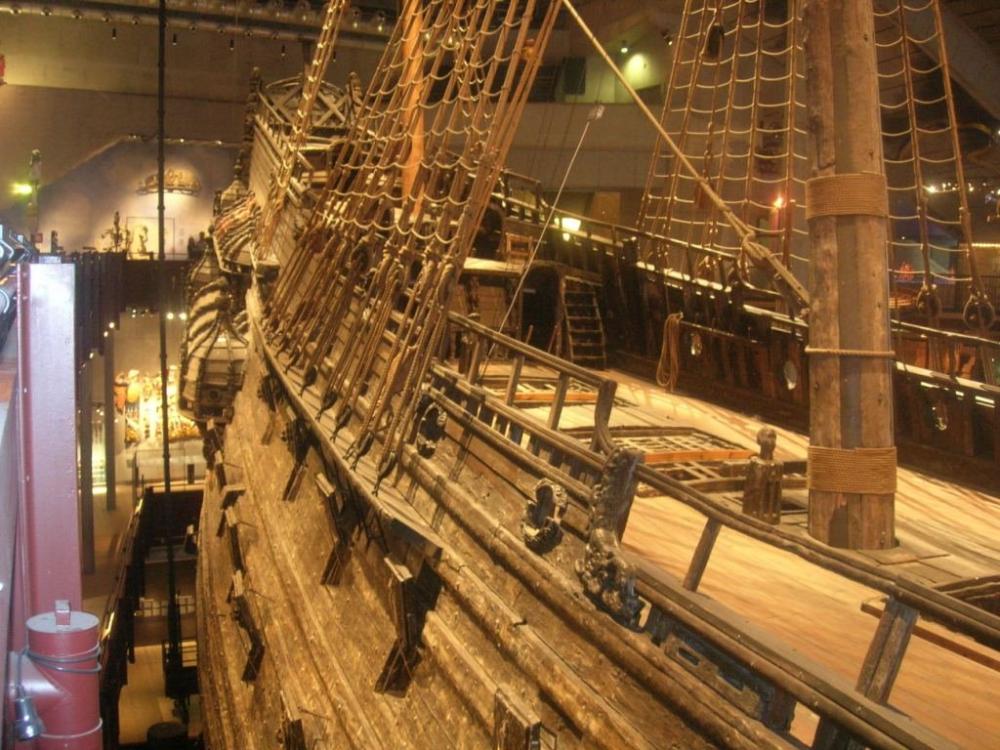
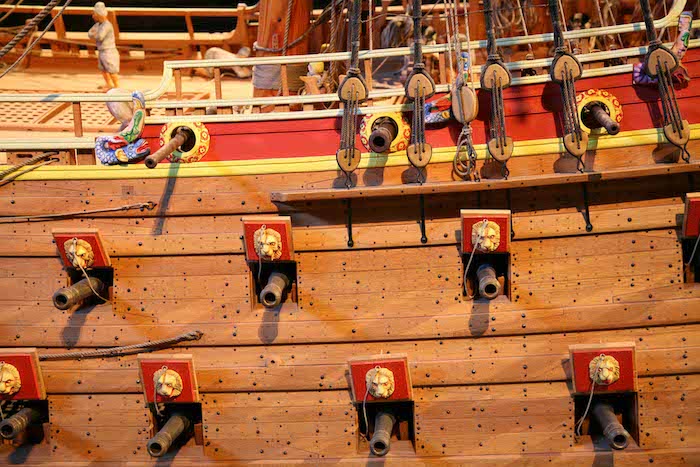
Hi Mates, Working on those falconets that seem to have also been on the Vasa. Pic 1 from the 1/10th Pic 2 are examples from Clayton Johnson’s build of all of the various canons that were cast for the ship. Here is a link to all of his work for the cannons (if you care to look) beautiful work https://sites.google.com/site/clayton707/1-10-scale-vasa-artillery Pic 3 falconets seem to have disappeared in more recent photos – hmmm?— ------- Wheels were cut from dowel. I rolled the dowel, not cutting clear through (for obvious reasons) then just sawed the inner bits. The carriages had been built at the same time that I put together the weather deck ones. Used brass framing to articulate the metal framing for the carriages (simple tools helped) - not sure how to represent their attaching pins? May just let that bit go... To be updated….. PS: My big frustration with this ship (and all Vasa kits) has to do with all of the totally incorrect cannons that are supplied. But I understand – there were so many diff. size cannons mounted aboard that it would make this bit of detail cost prohibitive just for the Vasa kit. Let’s see if the DeAgostini 1/65 get’s these right??? Cheers,


-
Edwin, thanks you are so encouraging – as always. Well there have certainly been a lot of helpful posts with us Corel Wasa builders, which may be helpful to you in circumventing some of this kits glaring errors. Thanks for following along always nice hearing from you. Frank, thanks – I am enjoying following your new project J Jan V. You have been busy building the longboat nice side project. I will certainly use your ideas when I get there. Thanks for your nice thoughts. B.E. & EJ_L thanks indeed. It is certainly mutual following along with your projects as well. ============== Minor update: Decided on starting to build the two falconets and carriages that are at the quarter deck before moving to the mizzen mast. I’ll post some updates as they move along…. Thanks all for your kind clicks and comments, Cheers,
-
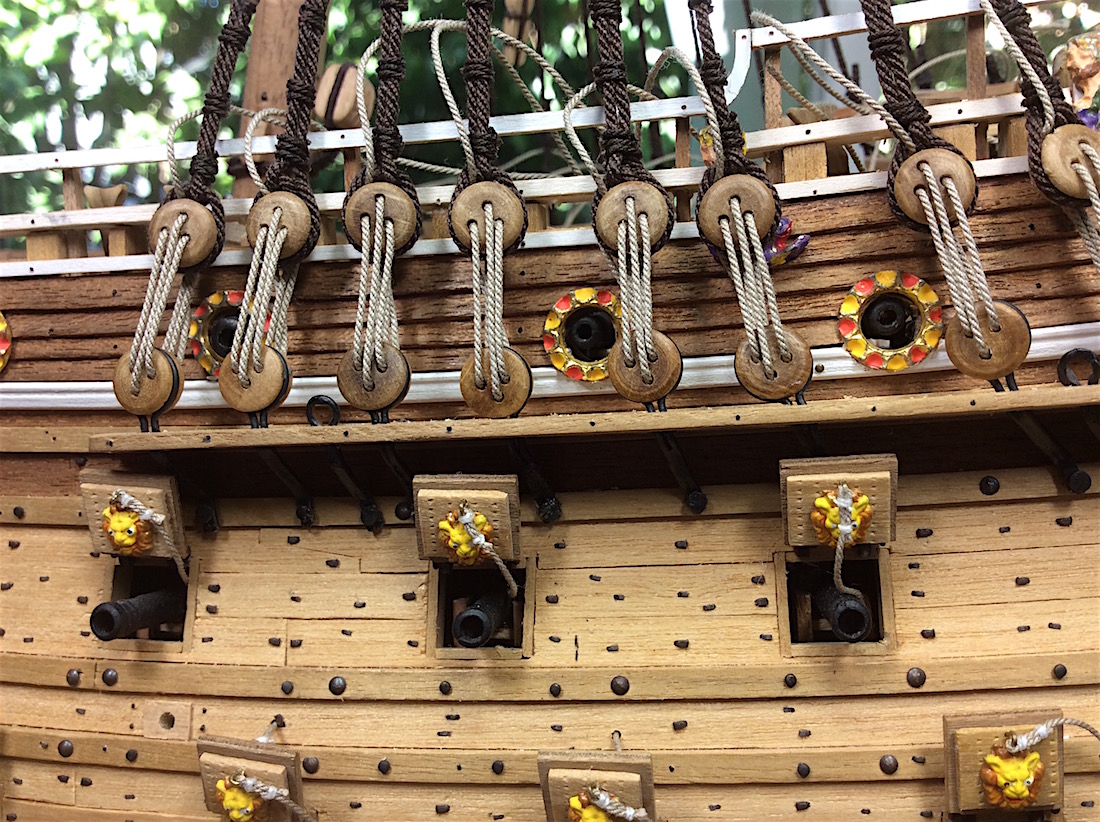
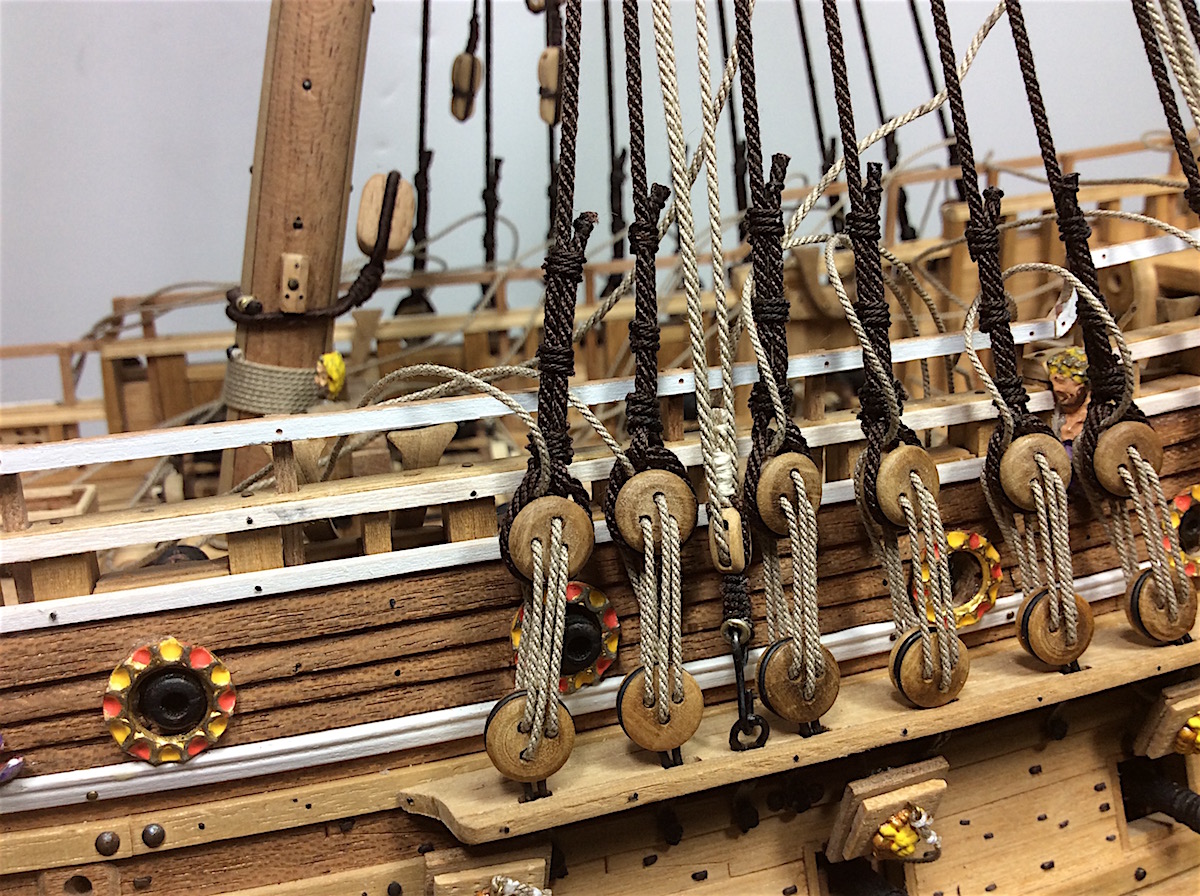
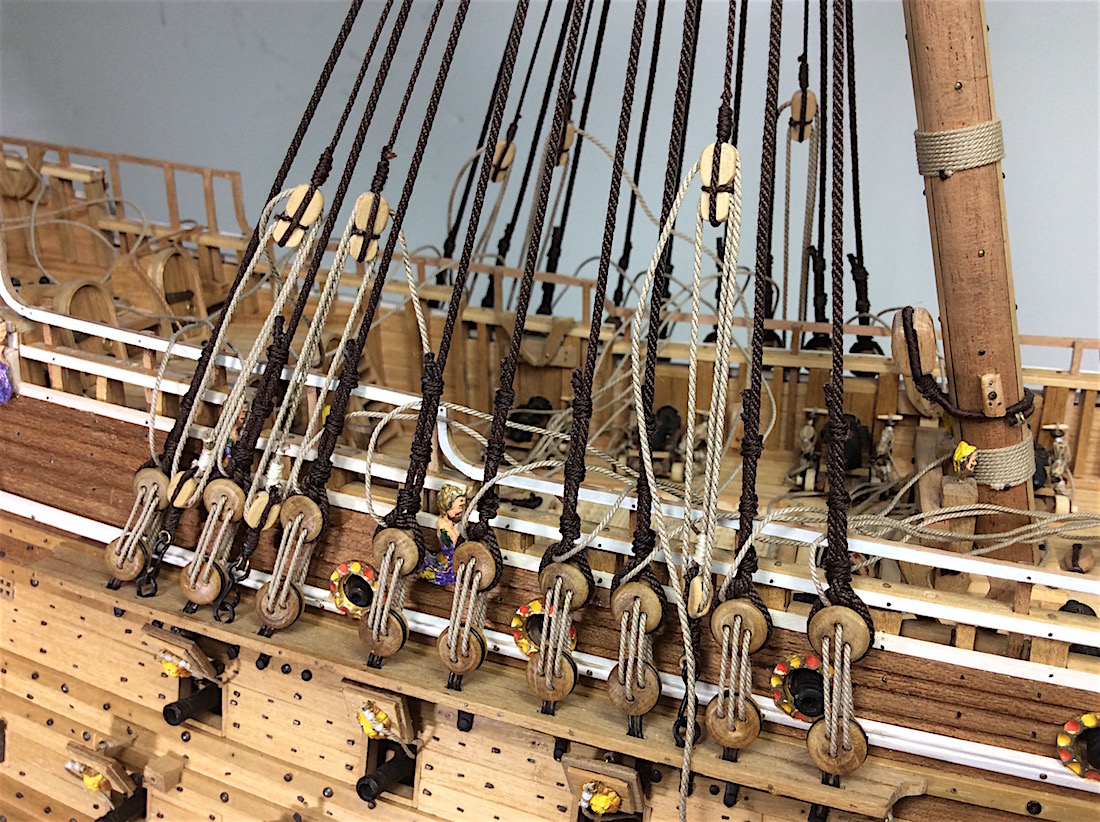
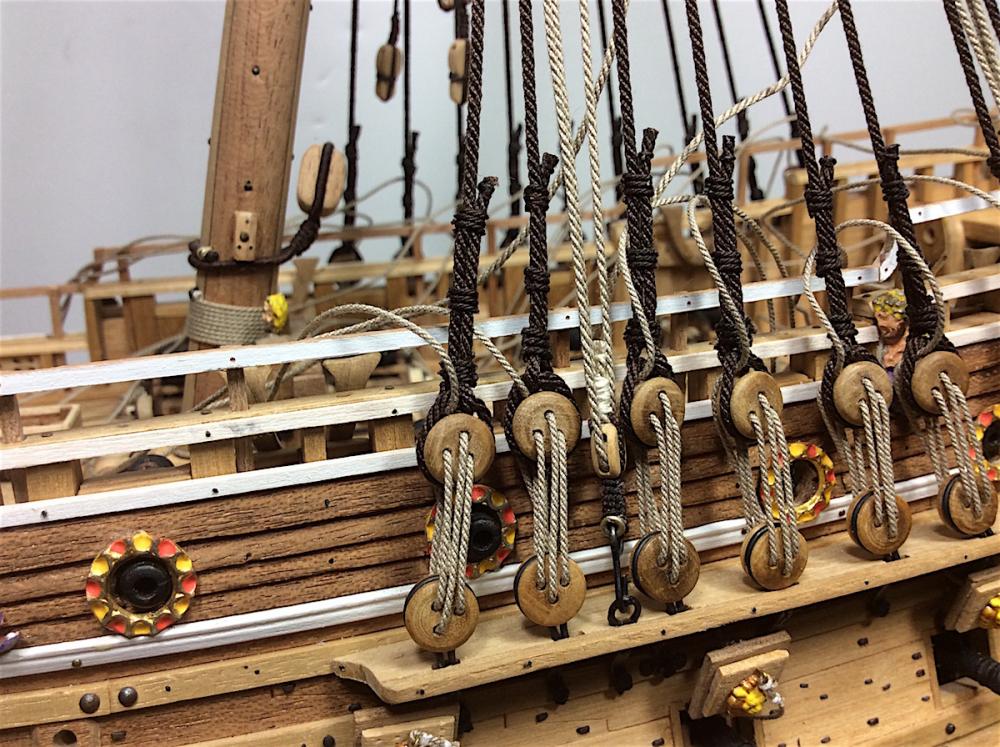
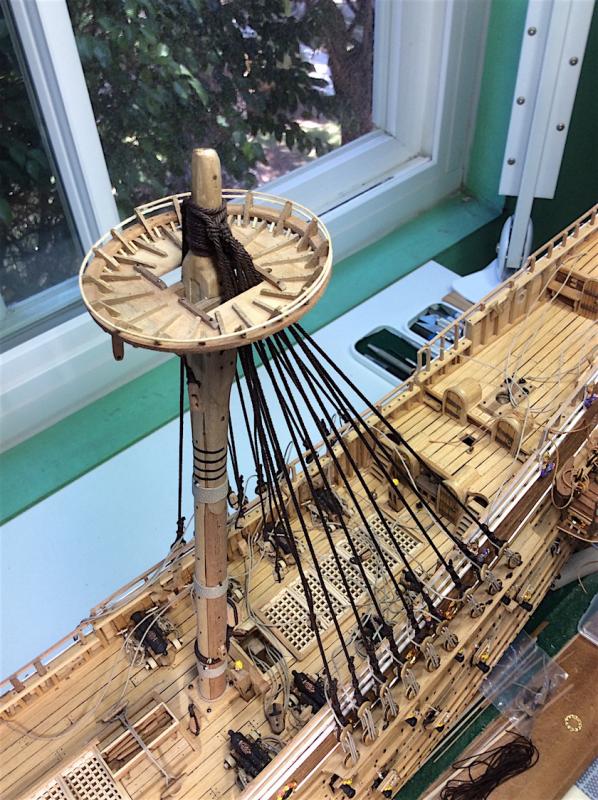
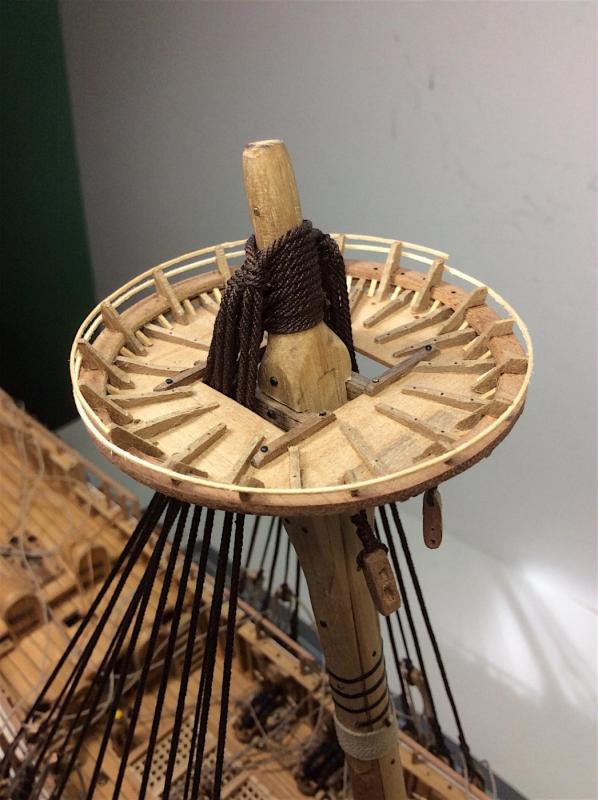
Hi Mates, Small update (well for me it’s a big one) Finished up some detail work on the upper railings adding the look of probable attaching nails (should be painted over, but the detail look is nicer IMO) Installed the lower main stays after putting the bits together. (Nigel – again thanks - annealing the brass rivets allowed for easier lip creation on the cut side) Attached the shrouds along with the blocks. One issue that I had – notice the last two photos; The 1/1 has much more rope spacing between the blocks. The 1/10th are much closer together. So took a leap and sprung the bits closer together. I think that they are too close, but so it goes. Now onto building and installing the lower mizzenmast, and its platform. As usual thanks so much for dropping by – always nice of you. Cheers,


-
Peter, Nice update. You do have Clayton's build log in your Fav's ? Just in case here are some useful links (I bet you know all of these) http://www.modelships.de/Museums_and_replicas/Vasa-Museet-Stockholm/Photos-Vasa-ship.htm http://www.wasadream.com/modeles/Clayton/wasaclaytonenglish.html Belaying positions pdf is excellent (scroll mid page) http://www.jans-sajt.se/contents/Navigation/Modelling/R_Wasa.htm The link below for a beautiful scratch built commercial Vasa is excellent. I have referred to his photos a lot. Also they blow up with incredible details http://www.modelships.de/Vasa_II_Janssen/VASA_II_ship-model.htm Hope that some of this is helpful Cheers,
-
Ulises, Hmmm did I fall behind in your build log, or have you gone "ship supersonic"? Great amount of excellent work. Looking very good. PS: Yes your part #112 is a difficult bit. I had the same issue, though I did not know how to do it correctly, and it now needs re-work. Well that is the great part of MSW - we learn so much from each other as well. You did a great job of figuring it out. Cheers,
- 786 replies
-
- 3
-

-
- Royal Louis
- Finished
- (and 1 more)
-
-E.J., Just catching up very nice - looking very good. Capstan looks excellent! Cheers,
- 608 replies
-
- 4
-
-
- la couronne
- corel
- (and 1 more)
-
Peter, Excellent re-work indeed. Welcome to the Corel Wasa - but you knew this before you started. Nice that you also noted that the weather deck width was too narrow. As you know I have gone through some frustrating after re-works on mine as well. Your up-front knowledge will be very helpful. PS: the stern is also too narrow, but given the sizes of the gilded parts - I don't think that it will be easy to widden ? PS:2 Corel is very very good about sending parts that you might request. They have sent me several extra gilded bits that have come in very useful. I will also follow along (:-) Good luck Cheers
-
Ferit, Always nice of you to drop by, and thanks so much for your comment. Much too kind (;-) Cheers,
-
Just catching up nice detail work with the towers. The metal gilded bits look nice as well, and certainly part of the original ships in those days. Yes carving IS another entire art in-and-of-itself. I'm also on the "T" ball team with that skill (:-) On MSW's scratch build side there are works there that are out of this world beautiful. Love meandering over there but makes me nervous ha ha ......
- 608 replies
-
- 3
-
-
- la couronne
- corel
- (and 1 more)
-
Mates, Thanks for the likes. Joe and Edmay cheers appreciated. John Maguire thanks for your kindness in your interest in following along. Very nice of you. Welcome to the shipyard. It appears as though, from your avatar, that we may have been the same business. Well I was for a time in my late twenties. Your avatar looks to be a newer 737 - at least a 600 series?. My next post will definitely be a step forward (;-) Regards,
-
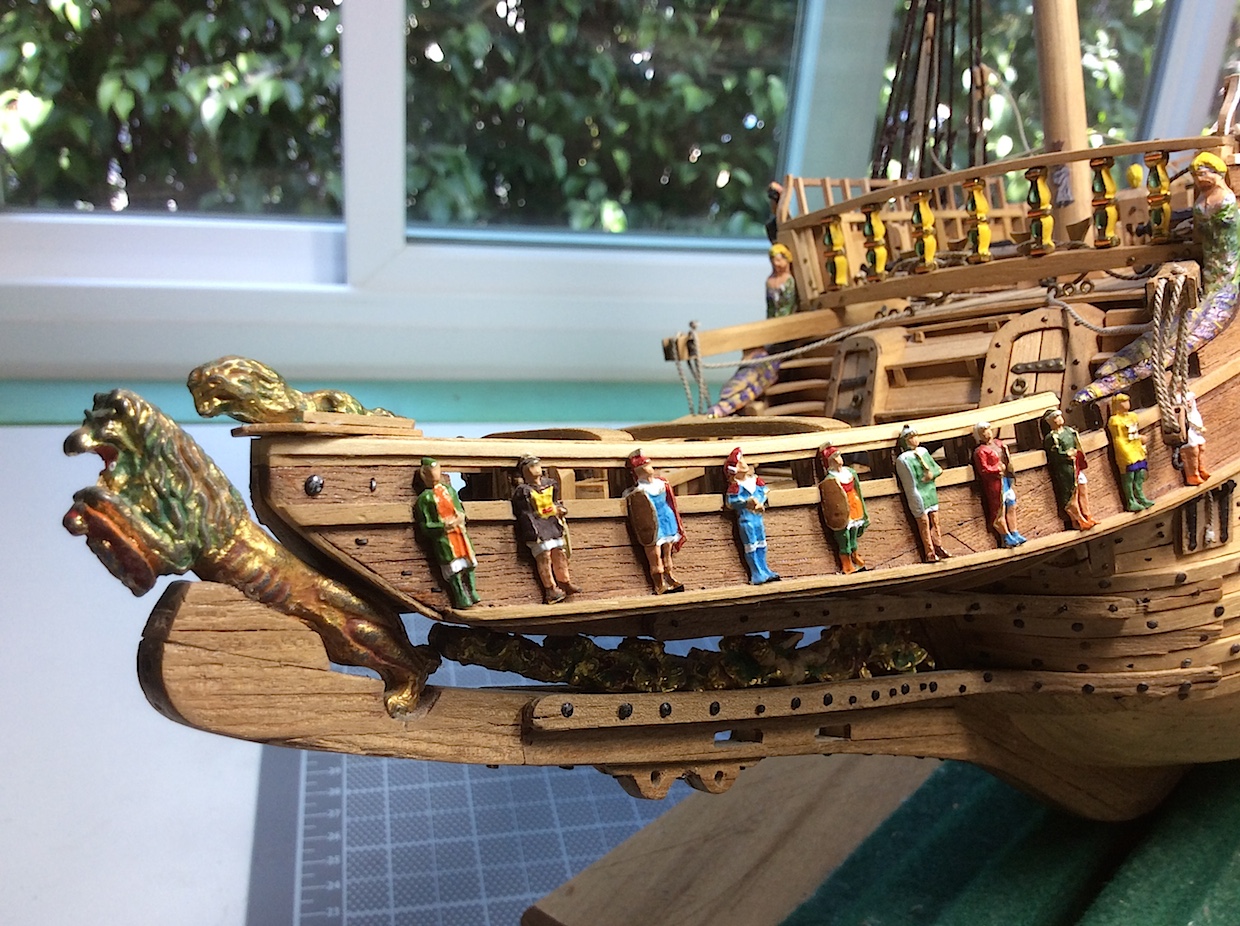
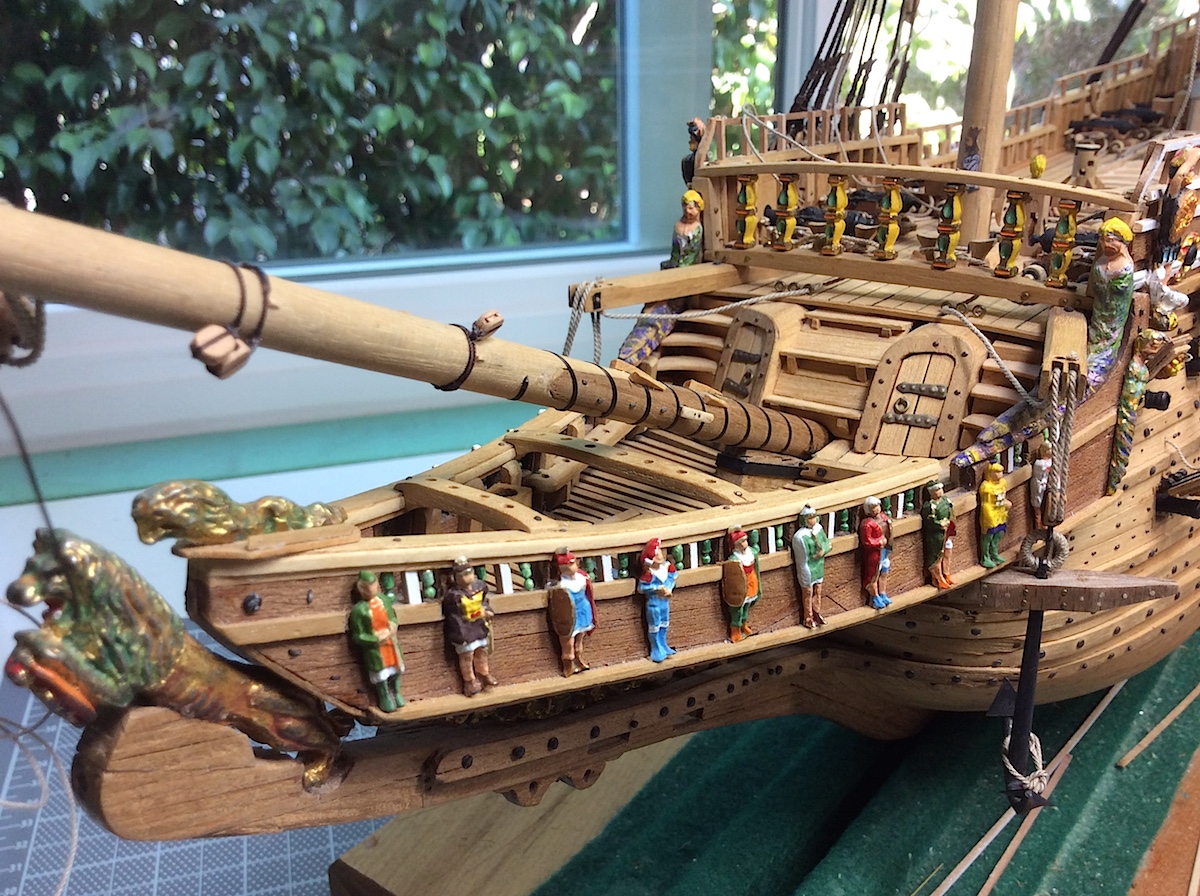
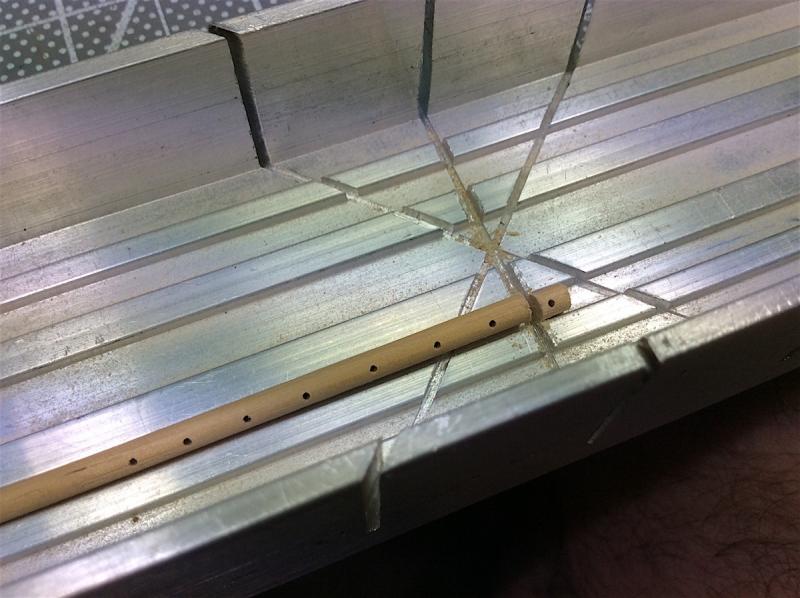
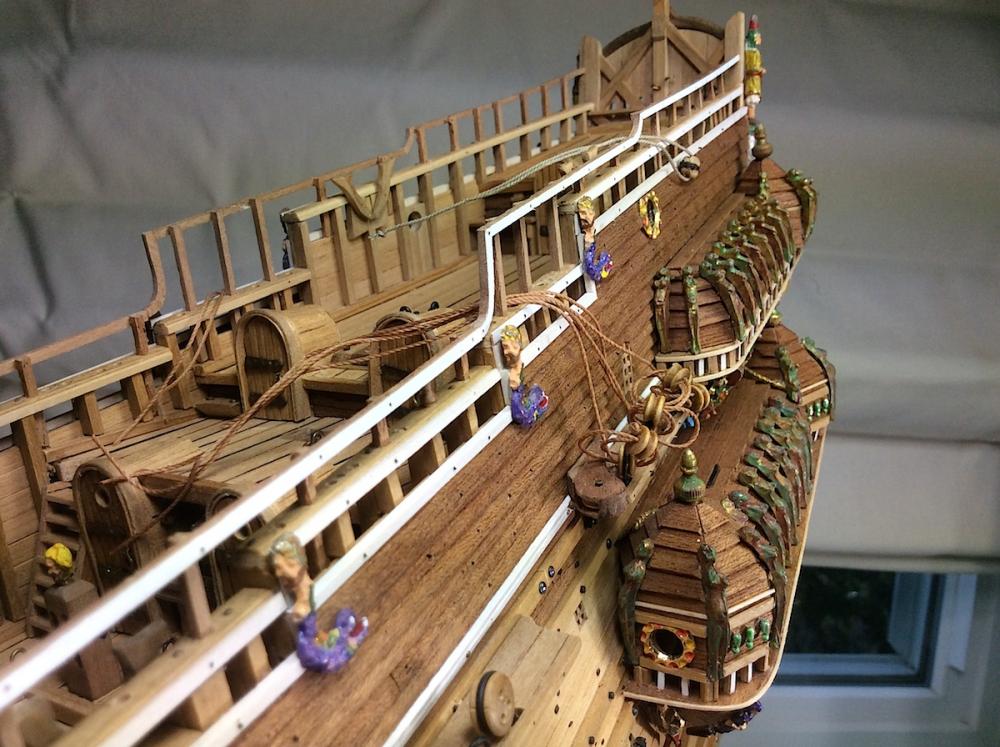
One last bit of similar “detailing”-- added some small verticals to the bowsprit framing. Pics before update And such luck!! Those left over necklace bits just sort of perfectly fit between the white trim pieces. Now that was a pleasant experience. PS: I know that the cathead braces (anchors) are not even an approximation of what they should look like – but done here – moving forward. – I think? Onto installing and attaching the lower main and its shrouds.


-
Patrick, Brilliant work with your lantern !!! thanks for the pdf. Enjoy your next project Cheers,
- 63 replies
-
- 3
-
-
- vasa
- billing boats
- (and 1 more)
-
Jan, Nice added bit doing the long boat. Good start. Have you seen Clayton's on the Vasa Forum?
-
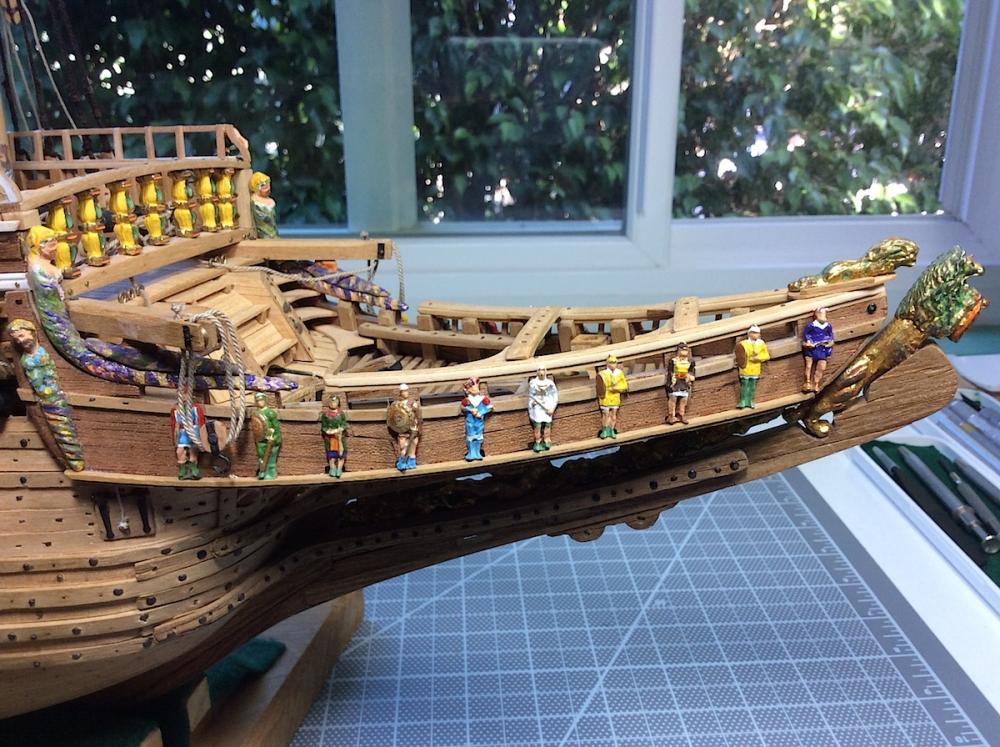
Hi Mates, Thanks for your likes. I also appreciate your comments, and thoughts regarding my comment about all of the colorful details on the 1/10th. You are all certainly correct. Jan, Patrick, Peter, thanks for your perspectives. It was wishful thinking on my part – having so missed – even coming close to how the galleries should look. Though the stern is much closer, but Corel’s entire weather deck is too narrow which squeezes stern detailing tighter than it should be. Peter also thanks for you very interesting links. Kind of you to take the time. And EJ_L, B.E., Joe, and Capt. Steve thanks for preferring the “look” of my efforts –cheers ! that is really nice of you to mention this. What I am working on now (not doing fixes) masts, platforms, carriages and other bits are coming out ok - so far - hmmm. So moving forward will be easier. Again mates, thanks for your always, kind support, thoughts and visits. Cheers
-
Bruce, Beautiful work indeed. And also as Scoot posted your sails up front are awesome. Well done.
-
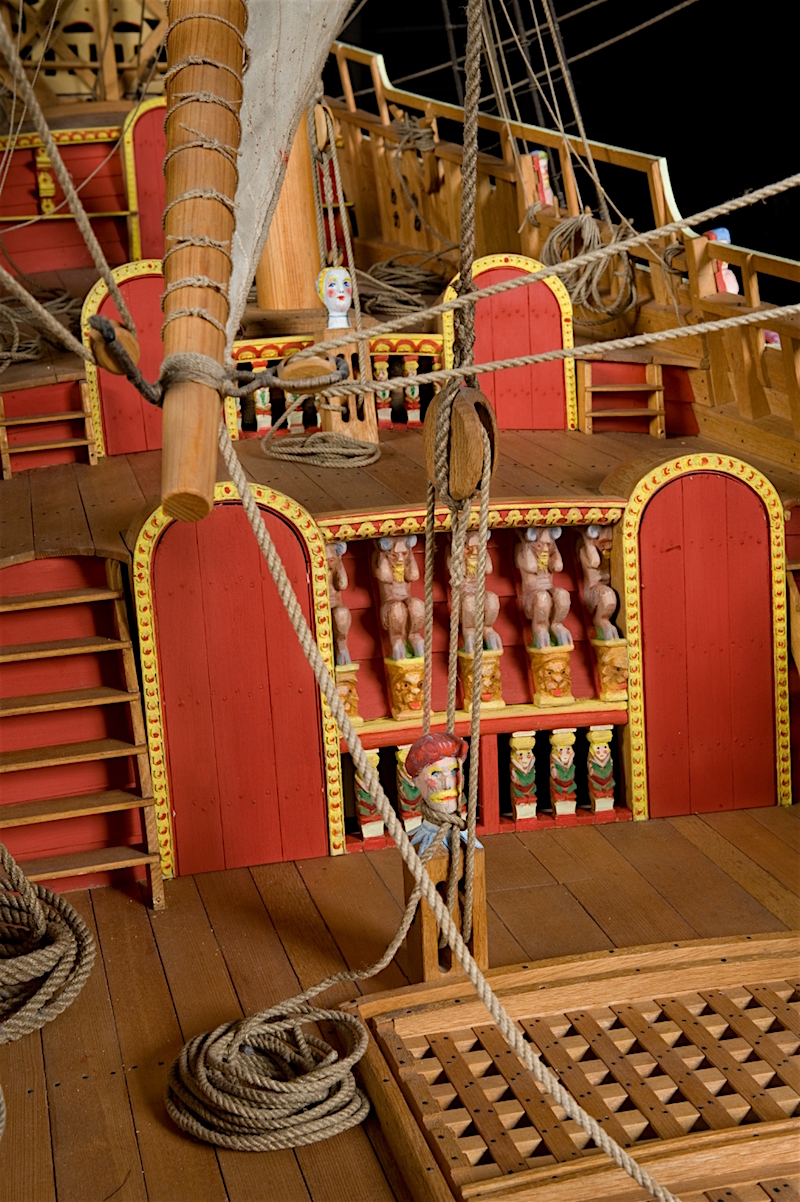
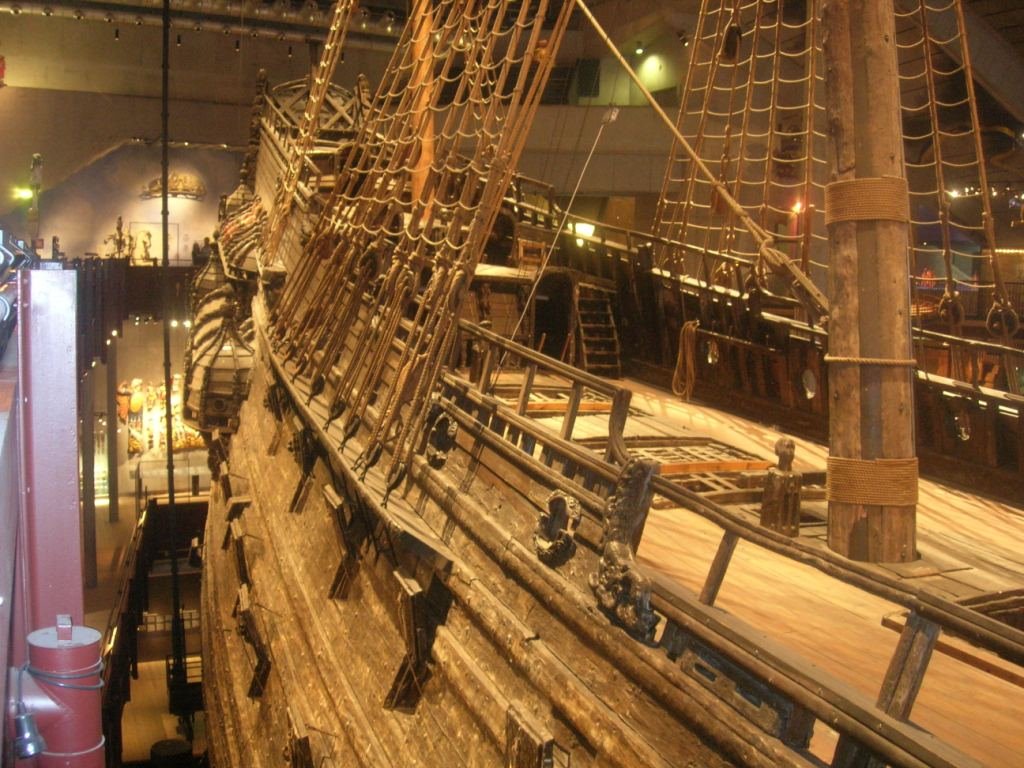
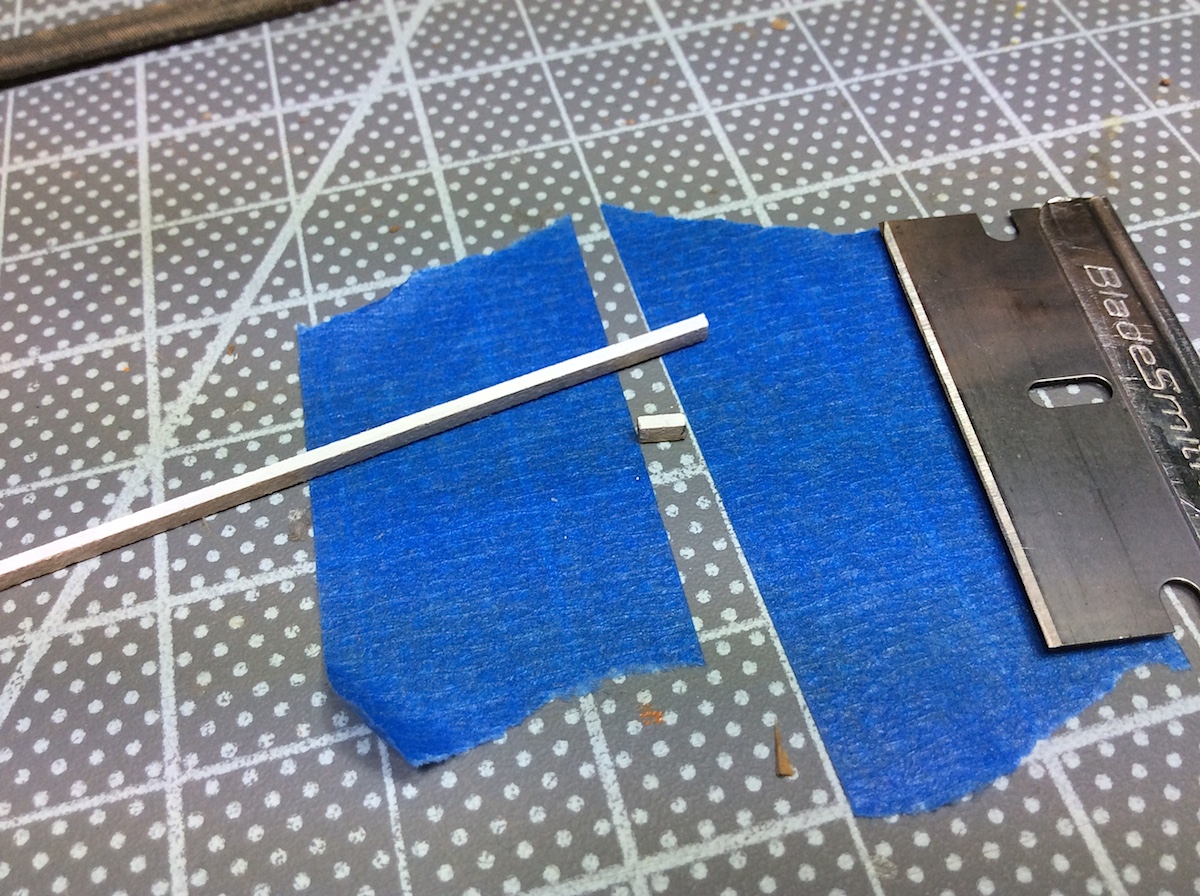
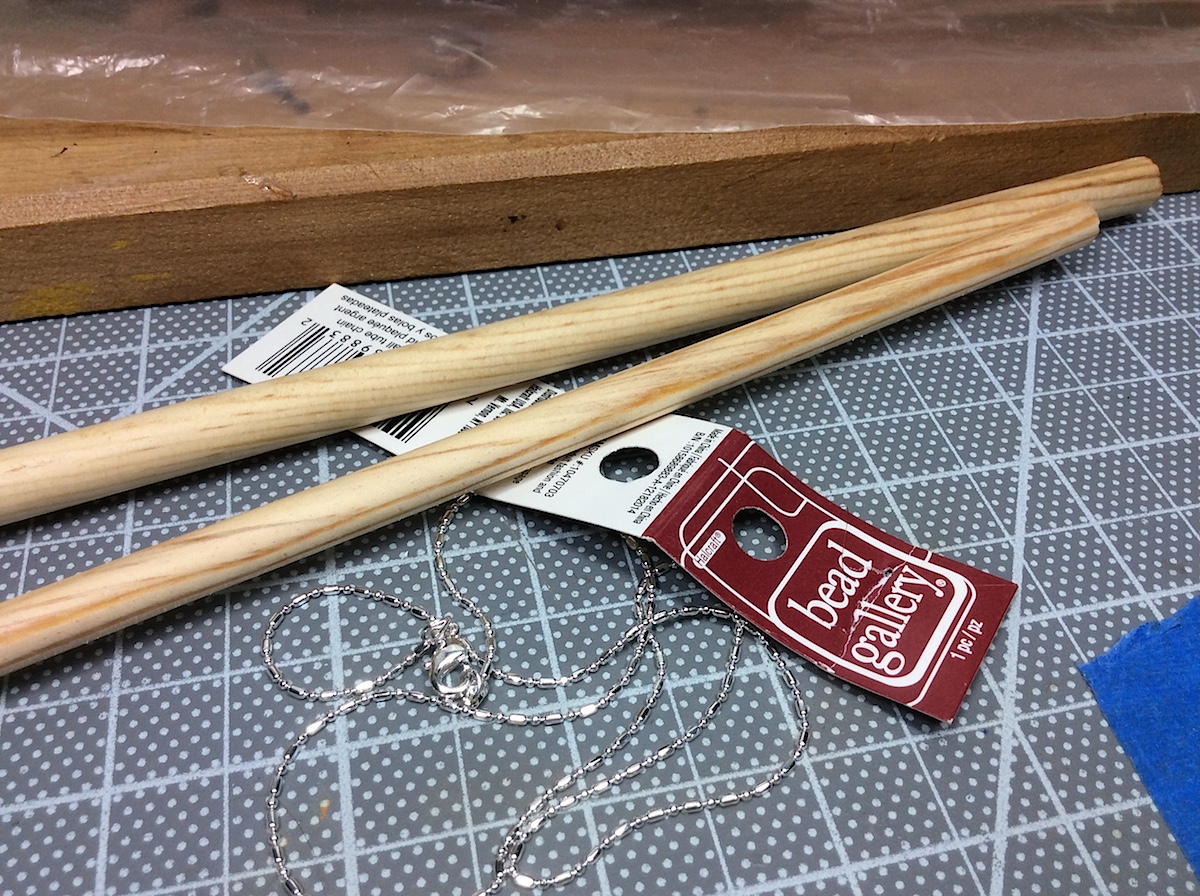
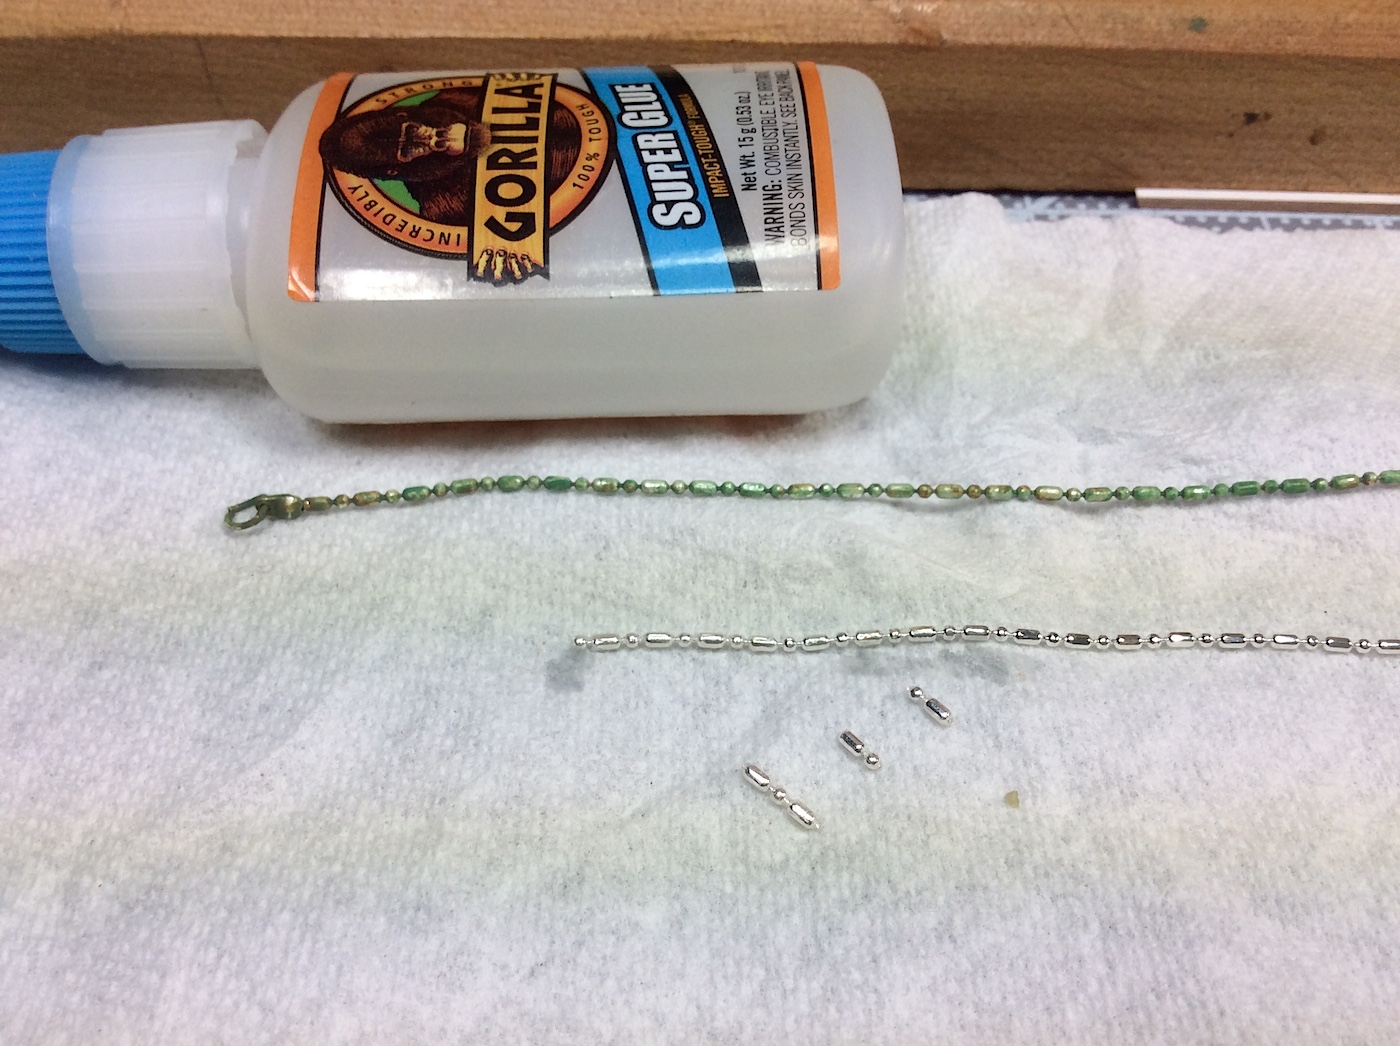
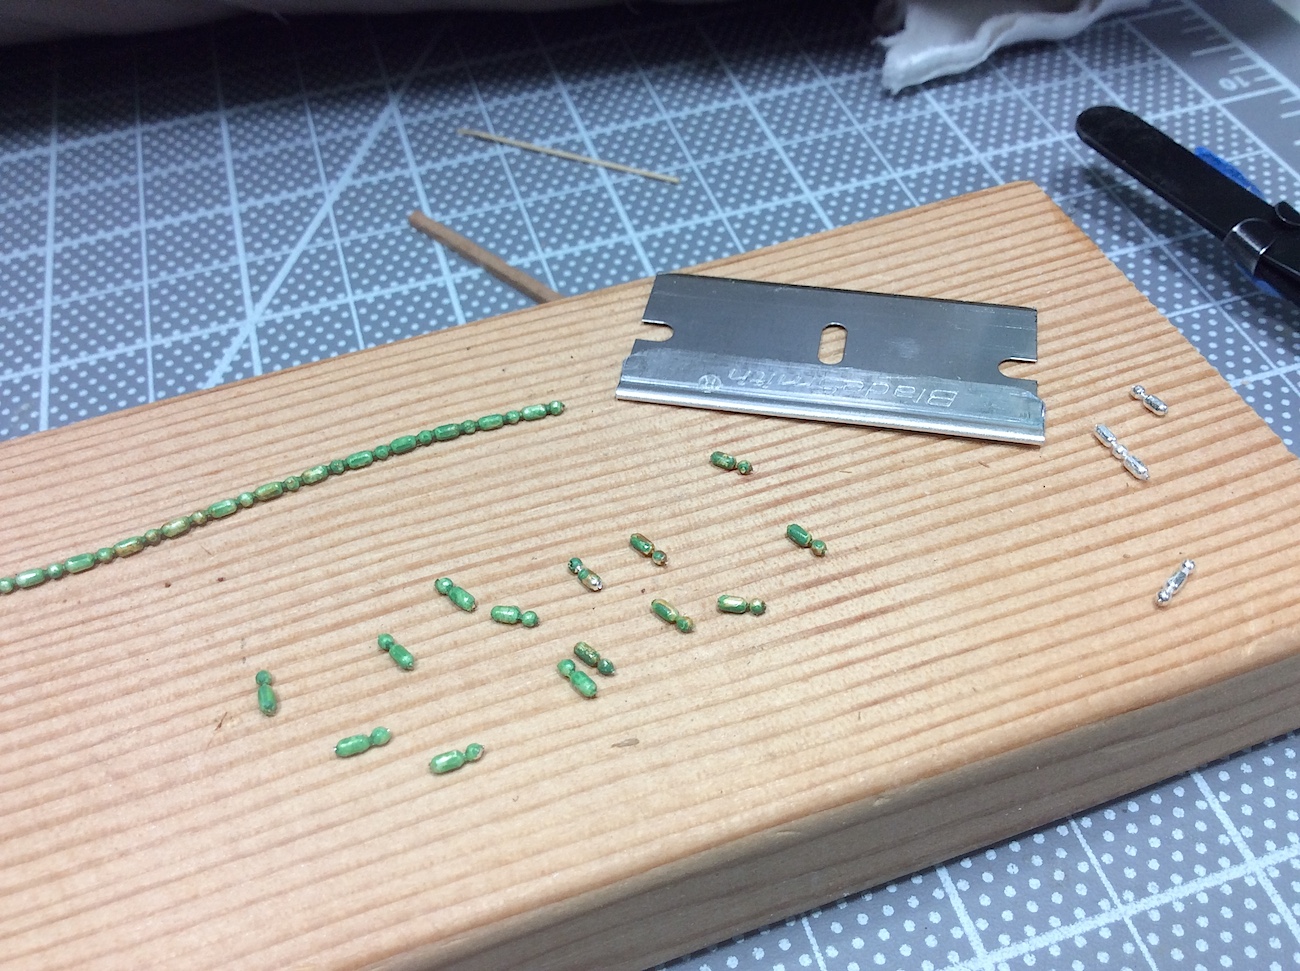
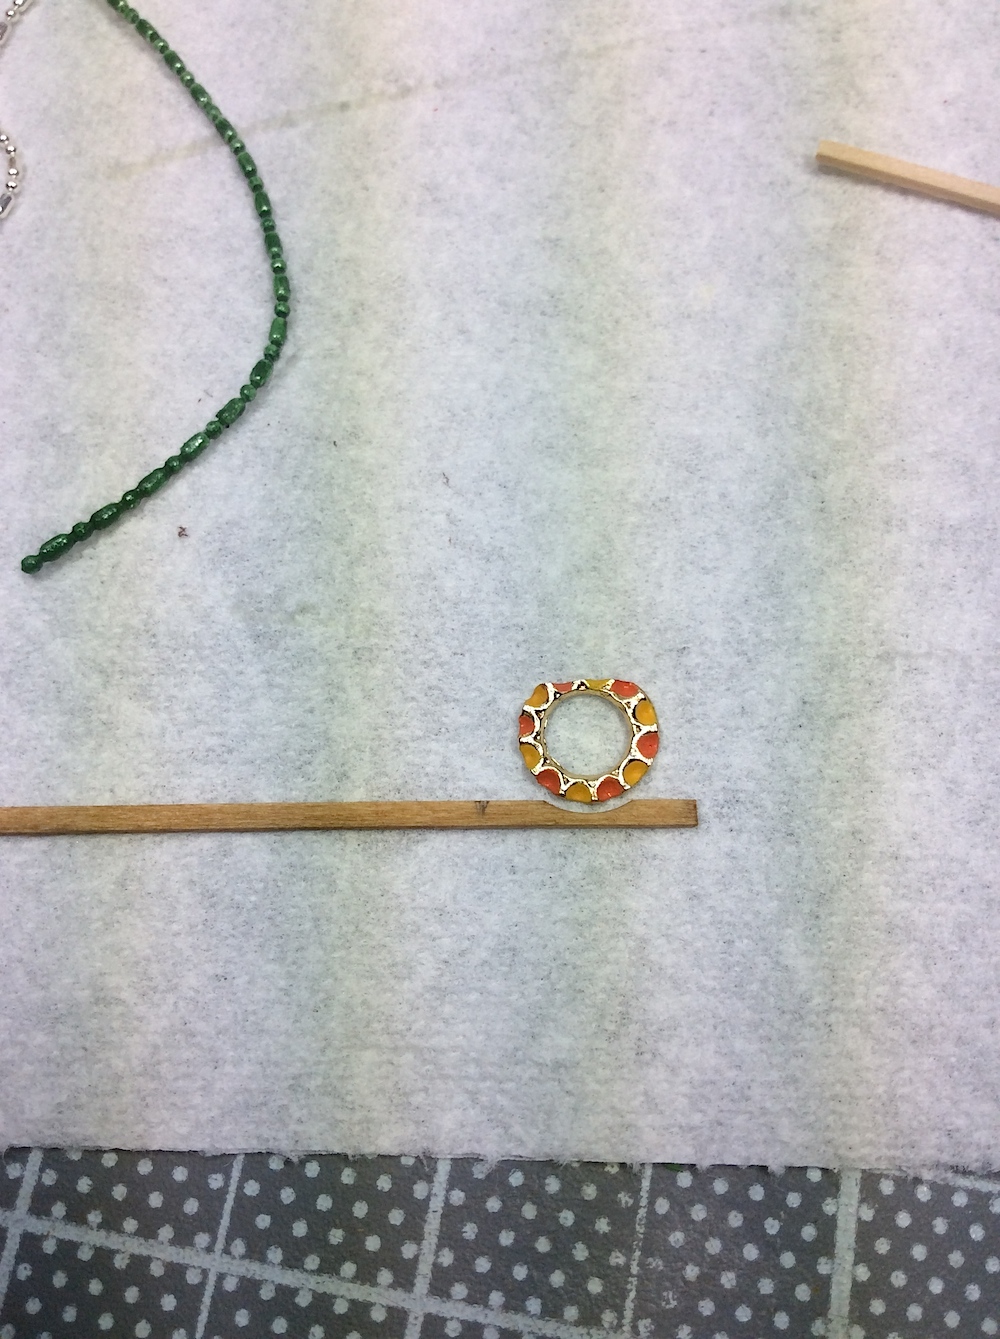
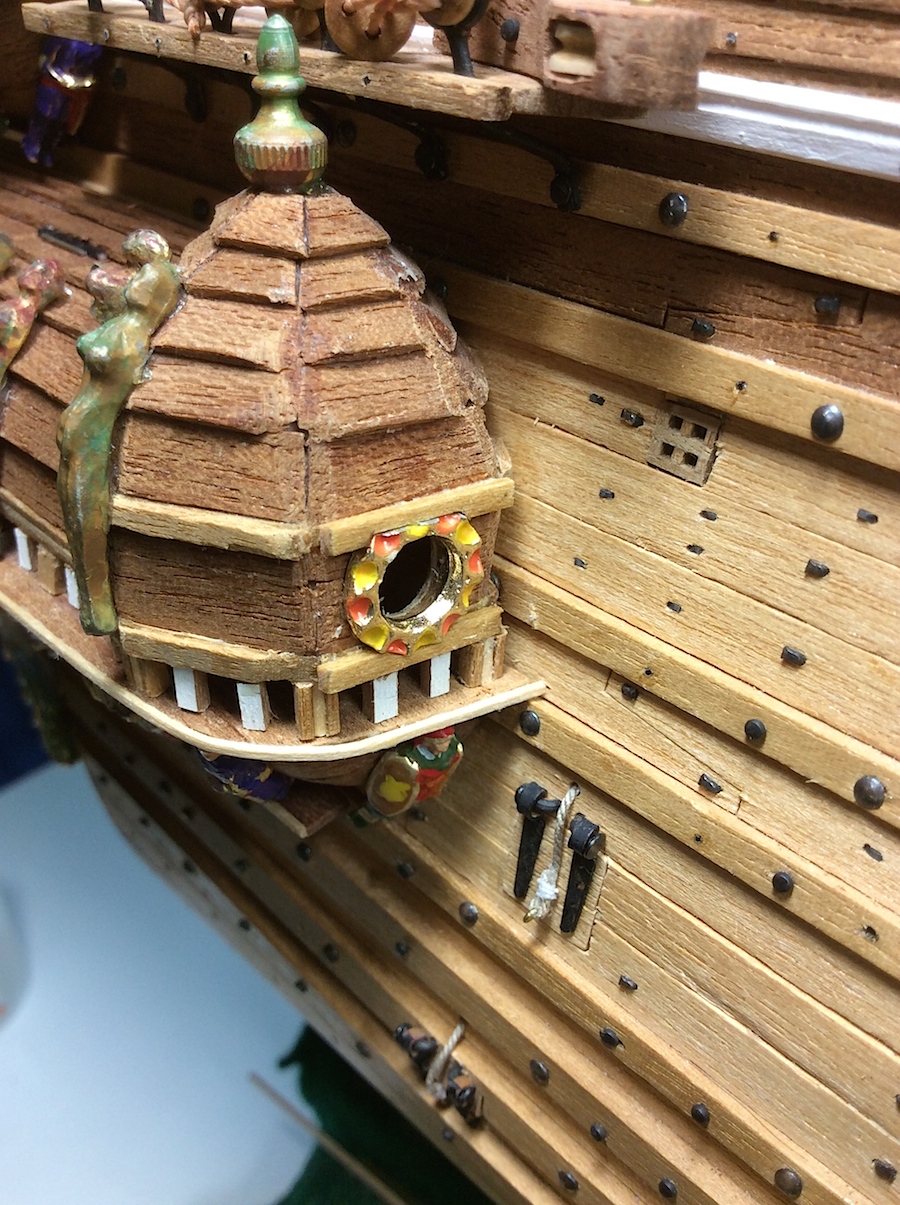
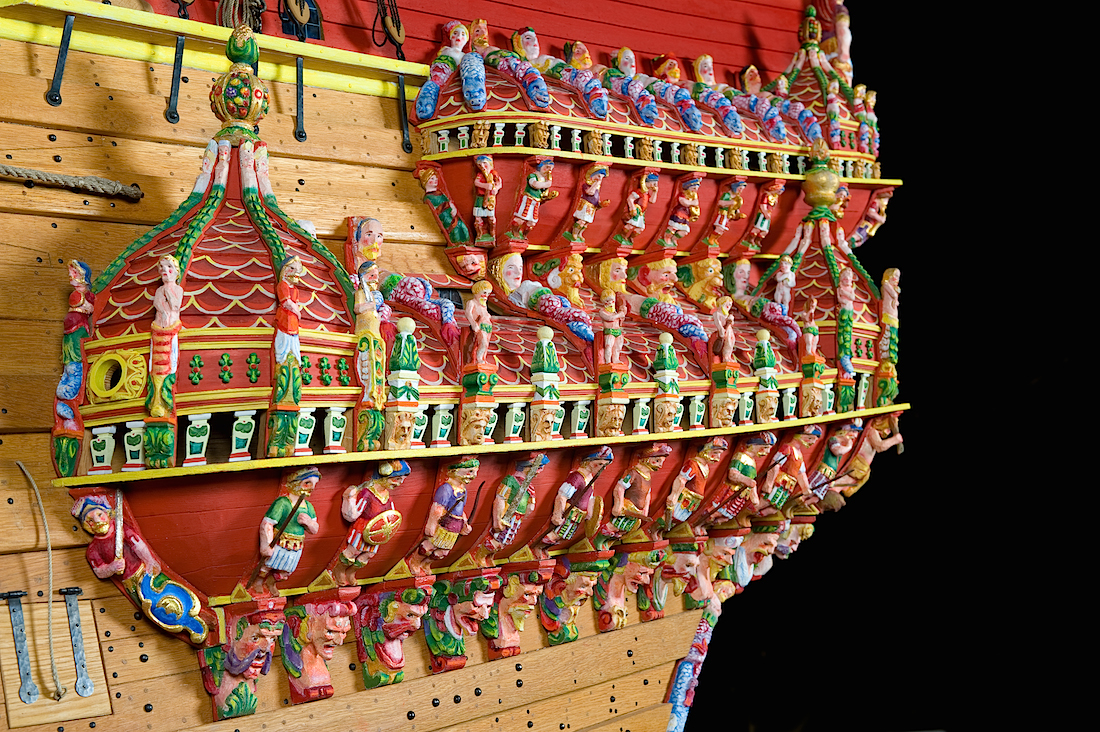
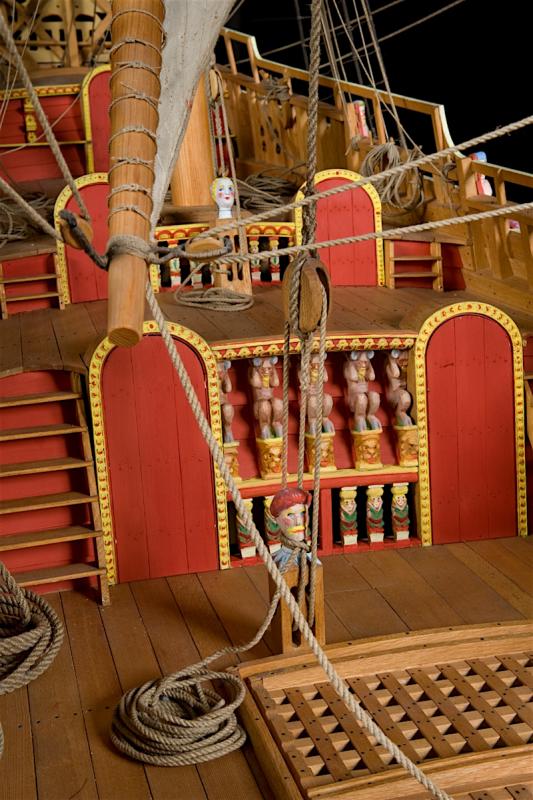
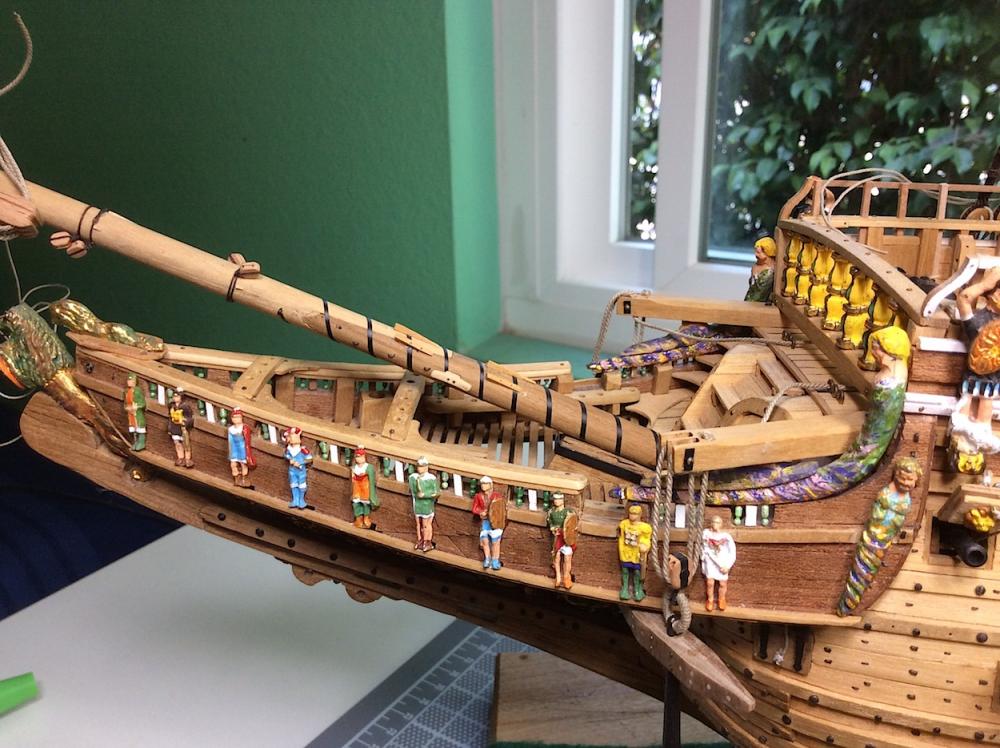
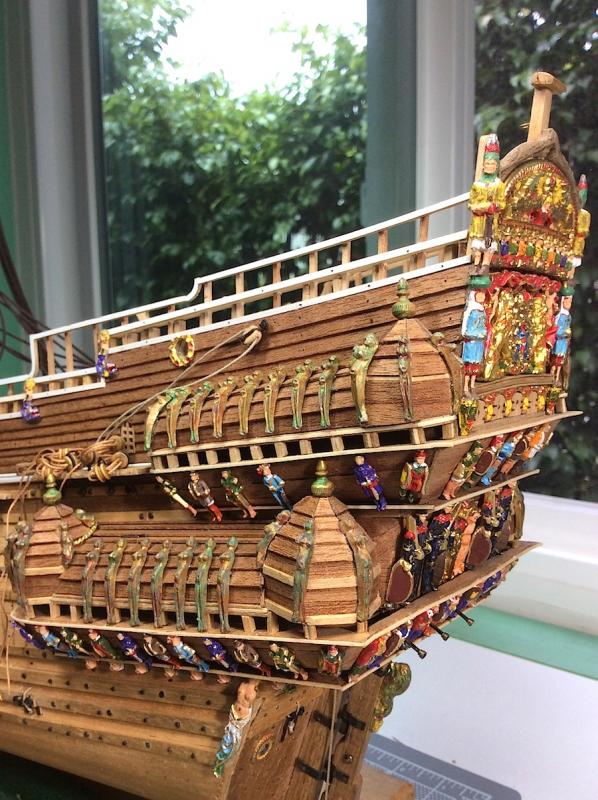
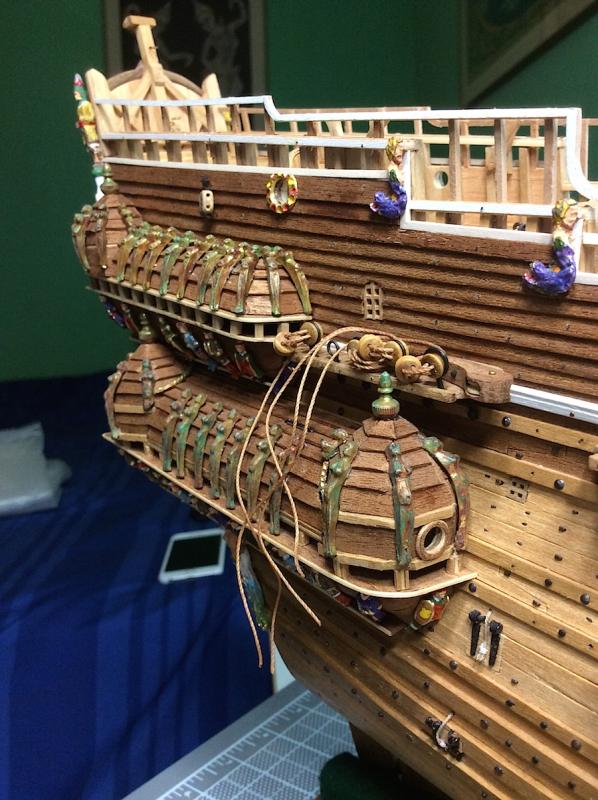
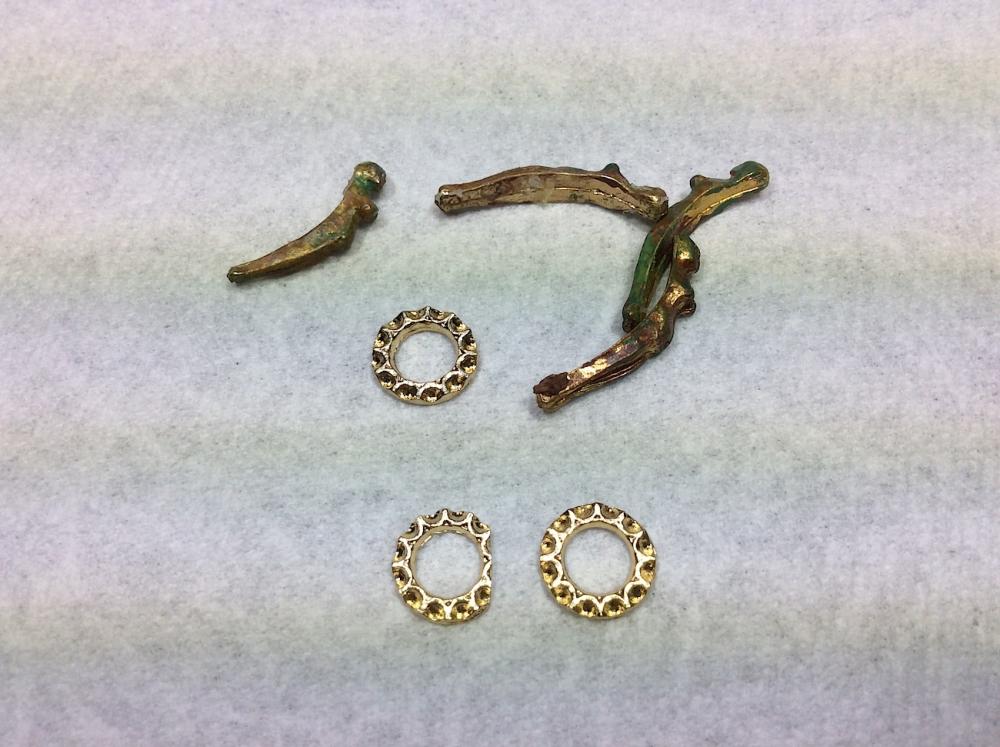
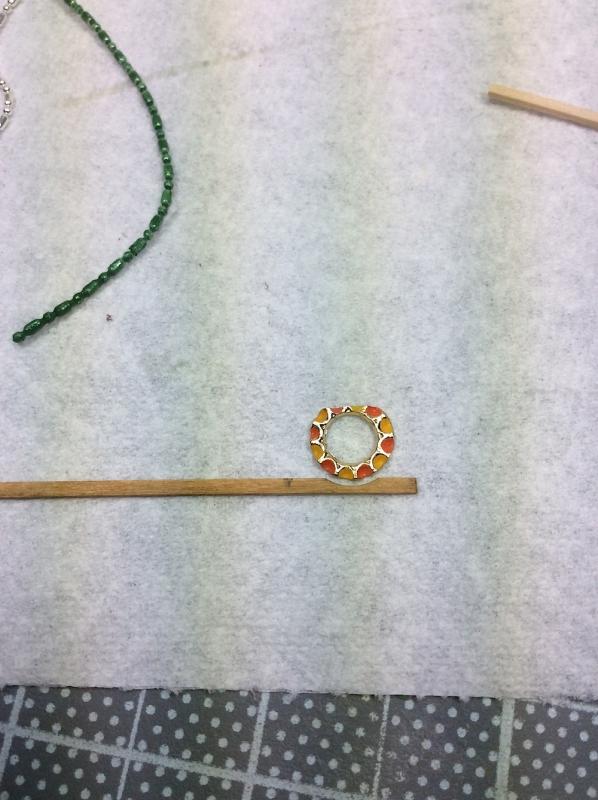
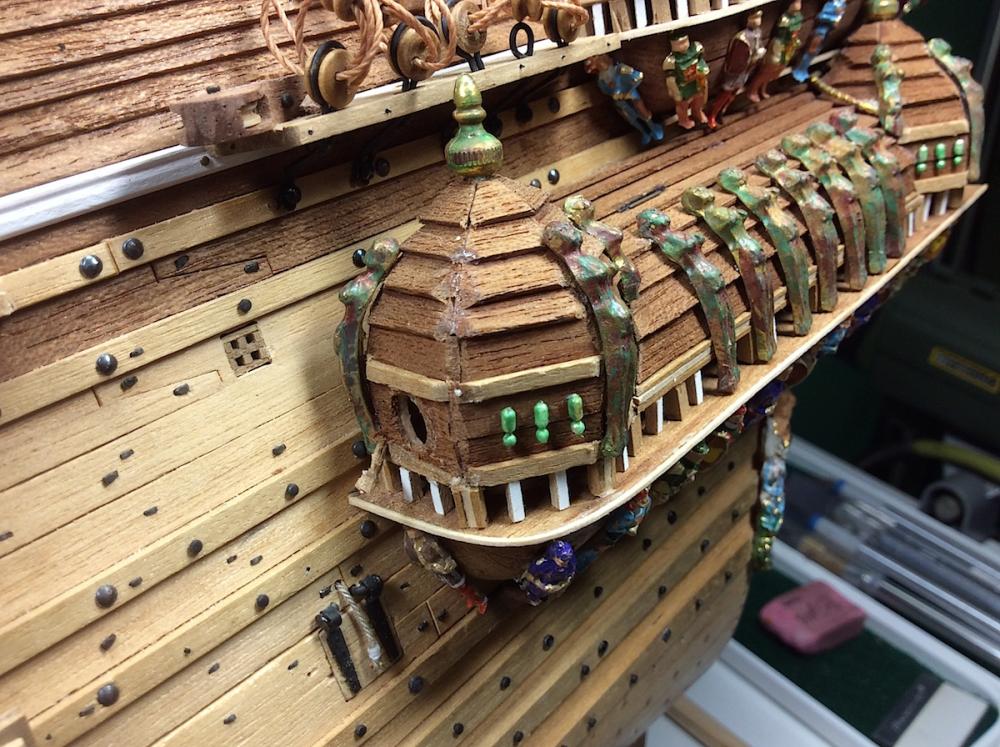
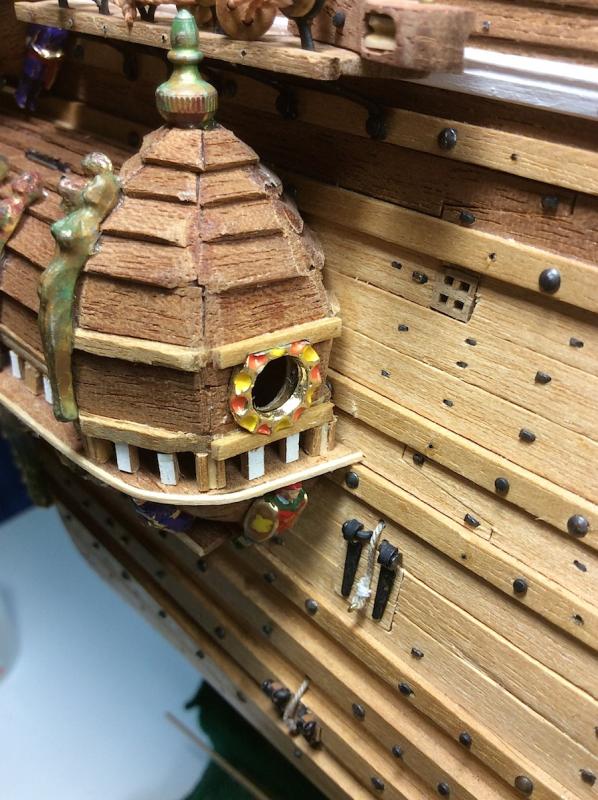
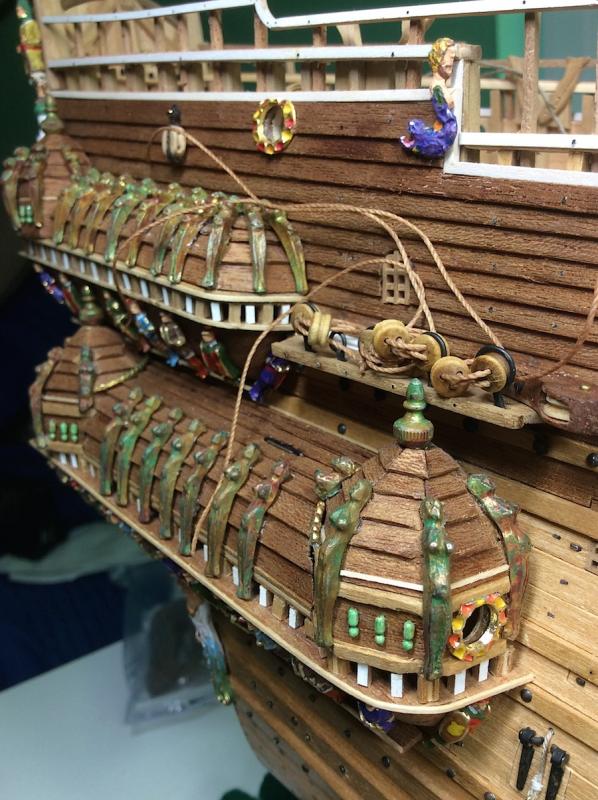
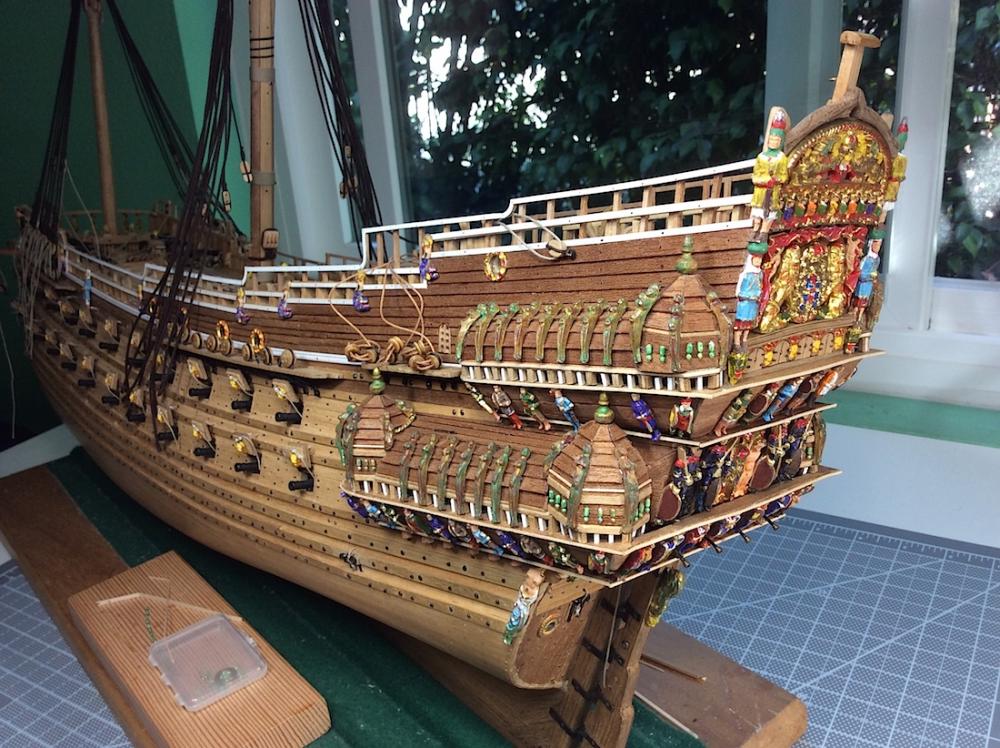
Hi Mates, A lateral update – my usual posts - ha ha.. So, I decided to add some detailing to the galleries. The Vasa (based the on super detailed 1/10th) is certainly hard to grasp from a Corel kit. PS: just a thought – Who really knows if the Vasa was as colorful and as highly detailed (art work) as is represented on the museum’s beautiful model. The actual resurrection galleries, as an example, are very plain by comparison to the model (they appear to be rebuilt as well). So it appears that the goal of many kit/scratch builders is to try to emulate the model’s look. I, then added some detail bits as well. My completed galleries before added details Used some extra painted wood bits from the just completed railings. Purchased a necklace, and used the bits for the bobbinets (glue added so that beads would not fall off string when cut) Received from Corel two new weather deck cannon opening trim rings Here are some finished up shots. Now on to some added detail work for the bowsprit framing. This 1/10th pic makes me very insecure Hmmm


-
Mark, One of your great builds for sure !! Stern work looks awesome indeed.
- 652 replies
-
- 2
-
-
- royal william
- euromodel
- (and 1 more)
-
Nils, Always such a pleasure visiting your log for this amazing ship. Beautiful work indeed.
- 2,625 replies
-
- 6
-
-
- kaiser wilhelm der grosse
- passenger steamer
- (and 1 more)
-
Daniel, You posts 1468, 1469 are beyond my comprehension at that scale BRILLIANT work that looks so perfect. Congrats. Well there are also other posts that are also superlative examples of detailing (;-)
-
Hi Frank, Well found it. Don't know how I missed this one. Looks like the front row is already full (:-)