
HOLIDAY DONATION DRIVE - SUPPORT MSW - DO YOUR PART TO KEEP THIS GREAT FORUM GOING! (Only 51 donations so far out of 49,000 members - C'mon guys!)
×


mtaylor
-
Posts
26,273 -
Joined
-
Last visited
Content Type
Profiles
Forums
Gallery
Events
Everything posted by mtaylor
-
Beautiful carving. By all means, give your eyes a break. Mine get crossed just thinking about something that small.
-
Jigs seem to be a necessary evil. This will probably be the first of many. So, enjoy the process as in the end, it makes building much easier.
-
The key is "well designed" and the instructions. Many are poorly designed and the instructions shall we say "rather vague". Those usually come from the older companies. The newer companies such as Syren and Vanguard have very good designs and instructions along with excellent support from the designers.
-
Re-do's are a part of the process to be sure. All things considered, I'm pretty "ok" with this build. It could be better but it is what it is. I have place waiting in the living room for it.
- 505 replies
-
- 10
-

-
- vanguard models
- Sphinx
- (and 1 more)
-
Thanks Glenn. I will hang in there as I'm not a quitter. I'm enjoying the trip. as they say inspite of my own limitations.
- 505 replies
-
- 8
-
-
- vanguard models
- Sphinx
- (and 1 more)
-
Introduction. Better late than never.
mtaylor replied to Dlowder's topic in New member Introductions
-
Thanks for the likes and comments. And apologies to Chris for messing up his great kit. Hopefully, I can get the hang of this PE; Took my time and got the wrong one off and the right one in place. Luckily, I followed directions and used the varnish to secure it. The ones that came were damaged in getting them off. Time for new glasses now that things have settled down some.
- 505 replies
-
- 15
-
-
- vanguard models
- Sphinx
- (and 1 more)
-
That's mildly put... the air in the shop is still blue.
- 505 replies
-
- 5
-

-
-
- vanguard models
- Sphinx
- (and 1 more)
-
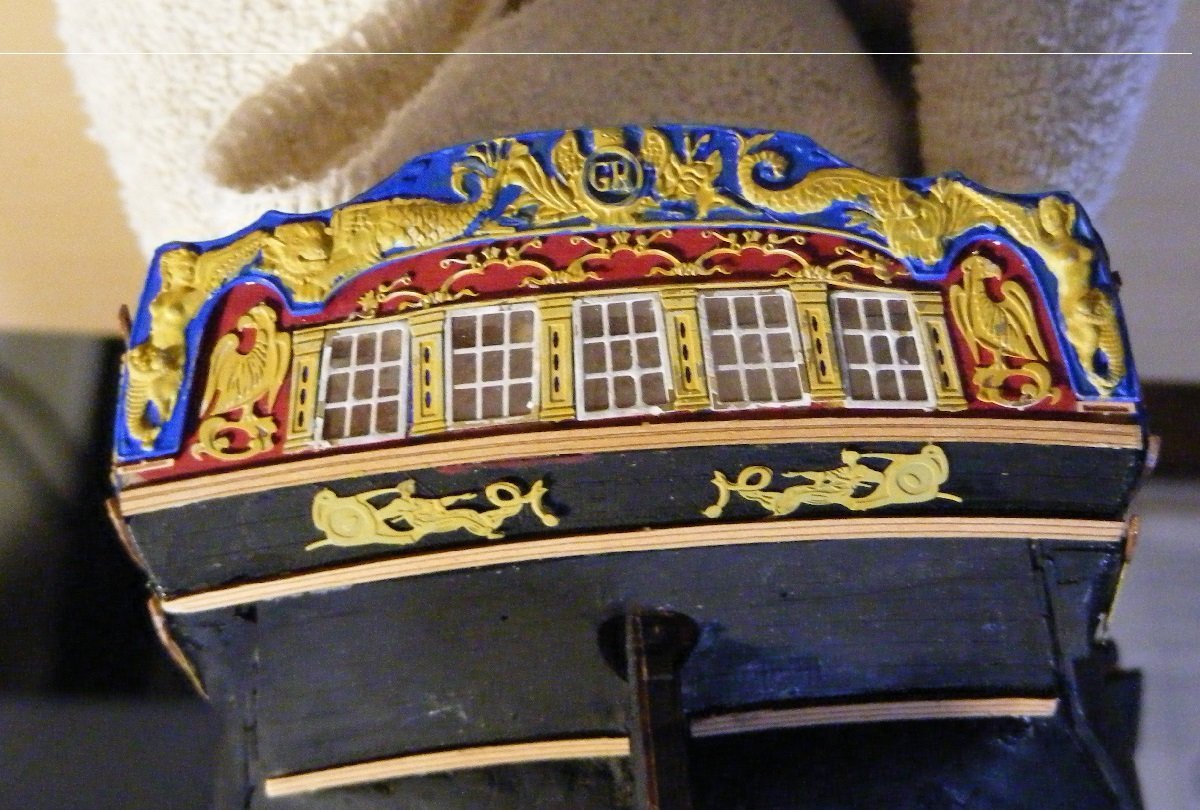
Confession time. I blew it. The gallery decorations.... I used the wrong ones. <sigh> I'm going to sleep on it as I'm not sure I can remove those without collateral damage. Lesson learned.
- 505 replies
-
- 6
-
-
- vanguard models
- Sphinx
- (and 1 more)
-
Just go down to the hardware store and look for plastic pipe of a diameter that fits what your storing. Cut into lengths, again to lengths a bit (an inch or two) shorter than the wood. You can stand them up or lay them on their sides. They also make end caps so you can pick up one tube and not have the wood falling all over the place. If I remember right, they have both round and square tubing. In my shop, I use the square fence post covers, cut down to about 2 feet long and stacked on their side.
-
New Member Introduction and Need Some Advice
mtaylor replied to Artisan's topic in New member Introductions
Welcome to MSW, Greg. Bluejacks (one of our sponsors) has two kits in limited additions on their website along with other model of the era. http://www.bluejacketinc.com/kits/index.htm As the others have suggested, browse through the logs. There's also some WWII ship wood kits. -
Tom, there's room. What I did was use the "factory" parts and just moved more to the center. Cheating? Yes but not ashamed. LOL.
- 505 replies
-
- 8
-
-

-
- vanguard models
- Sphinx
- (and 1 more)
-
Aircraft use a special place on airfields for setting the magnetic compass, Not all airfields have one though. When we asked (military aviation), we were told that this was way it been done for a long, long time. Is it possible that they an area in a harbor for setting "north"?
-
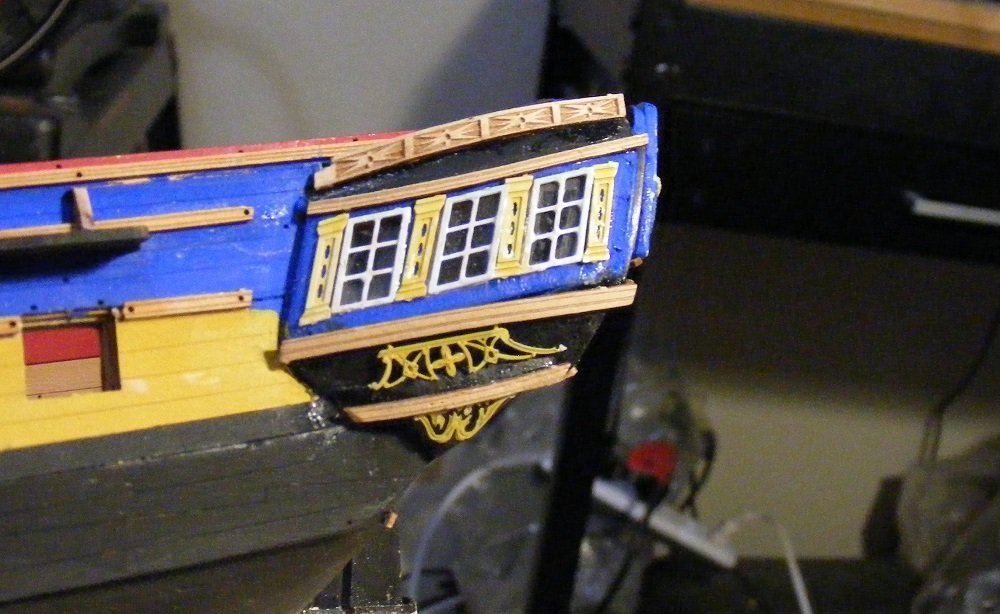
Update. I've been working on fiddly bits... stern and quarter galleries PE. Very fiddly. Looking at the rest... I hope I'm not in over my head. I suspect I've made a mistake on the galleries PE. Directions say the plans as the decoration changed. Plans show the old so I winged it. The stern was a hair puller for sure but I think I got it. I decided not to the ship's name based on historical research. It boiled down to no way is wrong for the time period. Here's the photos.... still plugging away and figuring things out.
- 505 replies
-
- 25
-
-

-
- vanguard models
- Sphinx
- (and 1 more)
-
NAIAD 1797 by Bitao - 1:60
mtaylor replied to Bitao's topic in - Build logs for subjects built 1751 - 1800
Here's hoping you have a great and wonderful new year. -
Masking tape lifting
mtaylor replied to Jeff5115's topic in Painting, finishing and weathering products and techniques
One thing overlooked with taping is "burnishing". I use strip of wood the width of the tape and then using the end to rub down the tape to secure a good seal. It's a trick I learned a long time ago from the car guys (full size) and it works well. So along with what everyone else said, I suggest you add burnishing to that. -
NEW MEMBER and new to model ship building
mtaylor replied to Peter6172's topic in New member Introductions
-
Niche is good to see and do. Looks to be an interesting project.
- 30 replies
-
- 2
-

-
-
- small
- clinker built
- (and 2 more)
-
Looks to be going well. BTW, what this that mallet used for? I hope not driving in your planking pins.
- 31 replies
-
- 3
-
-
- Borodino
- Dom Bumagi
- (and 1 more)
-
Welcome back. Retirement is a transition and needs some time to sort out. Been there, still sorting..... Looking good on the model. I hope you'll be able to continue.
-
I hope you have full and good recovery, Dave. What Bruce mentioned is well worth thinking about.
-
Welcome to MSW. If you haven't, have look at this topic.