
HOLIDAY DONATION DRIVE - SUPPORT MSW - DO YOUR PART TO KEEP THIS GREAT FORUM GOING! (Only 44 donations so far out of 49,000 members - C'mon guys!)
×


mtaylor
-
Posts
26,273 -
Joined
-
Last visited
Content Type
Profiles
Forums
Gallery
Events
Everything posted by mtaylor
-
"Splice the mainbrace, me hearties!"
mtaylor replied to Renown1980's topic in New member Introductions
Welcome to MSB, Stuart. -
Hello Ruud, welcome to MSW. For planking, have a look at the tutorials here: https://modelshipworld.com/forum/98-planking-downloads-and-tutorials-and-videos/ I suggest looking/reading/watching all of them and then pick one to use. Also, do start a log as it's one the best ways to get help.
-
There's the old saying that "It's a poor craftsman who blames his tools." A lot of truth in that.
-
Sorry to hear about Max, Bob. Losing a member of the family is always hard. As for the model, looking good.
-
Welcome to MSW. I can't add to what the others have said but only say.... they gave excellent advice. When you start the Ballahoo, do a log and above all, enjoy the process from start to finish.
-
I'm not fond of WOP... too thick. I do have some Duraclear Satin Varnish which brush on but not sure I'll use it. Right now, I'm thinking spray can... satin varnish. I'm a long way from that point so lots of time to sort it out.
-
HH60-J Jayhawk by Jack12477 - FINISHED - 1:72 - PLASTIC
mtaylor replied to Jack12477's topic in Completed non-ship models
Beautifully don, Jack. Looking forward to the next one. -
Hi Michael, welcome to MSW. Do give some thought to opening a build log as it's a great way to meet other builders and get help when you need it.
-
Hello from the little town of Woodland Washington
mtaylor replied to Roberts Orca's topic in New member Introductions
Welcome to MSW, Robert. As others have said, do start a build log. It's the best way to meet other builders and also to get help when you need it. -
I've moved this to the proper forum.
-
It looks "rough" but closing my eyes and running my hand over it, it feels pretty smooth.
-
Ron, Check with a local builders exchange service. They have the large format copiers. The last batch I had done for around 15 prints plus a thumbdrive was around $20. Just offering another alternative method.
-
You might give some consideration to drilling some air holes in the wood. I have dremel like tools and there are chucks that go down to almost nothing for a hole size. Mine are old so I have no idea if they're still available. Inside the hull is tough and the smaller the model, the harder it is to sand. I don't know of a perfect solution to that.
- 968 replies
-
- 2
-

-
- hahn
- oliver cromwell
- (and 1 more)
-
Have you looked at the other build logs for Bounty by the same kit maker? That's actually a very good starting place to find out what others have done.
-
Yellow cedar isn't a bad wood. It is on the "soft" side. You might place a small order and do some testing for yourself to see if it meet your needs.
-
-
Nice work on the those two water casks, Keith. They almost remind me of a beer cooler for some reason. Must be the holidays... LOL. I hope your have a great Holiday period.
-
Great to see you back and at the bench, Hakan. Old habits are hard to break, like keeping the work area spotless.
-
Happy Holidays, Johann. Even your videos are works of art. Very well done.
-
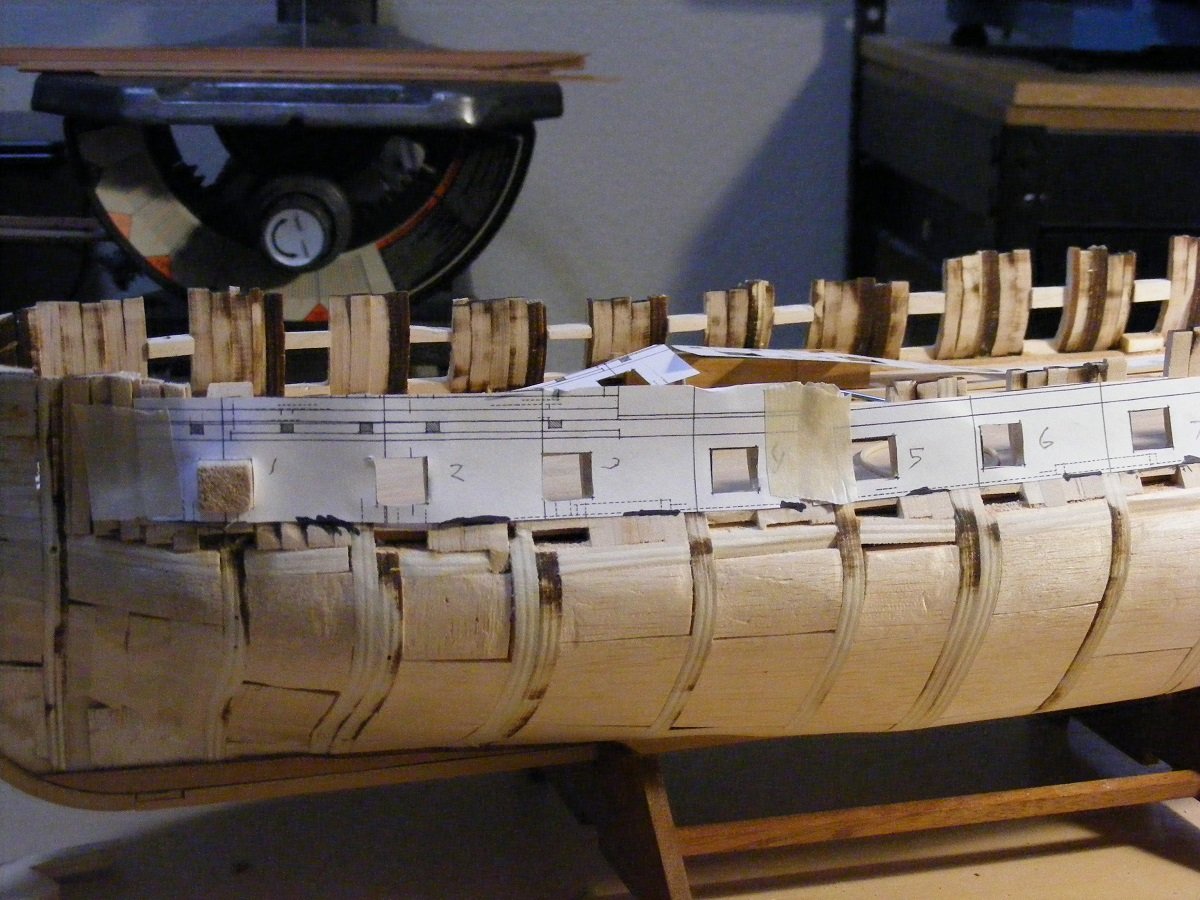
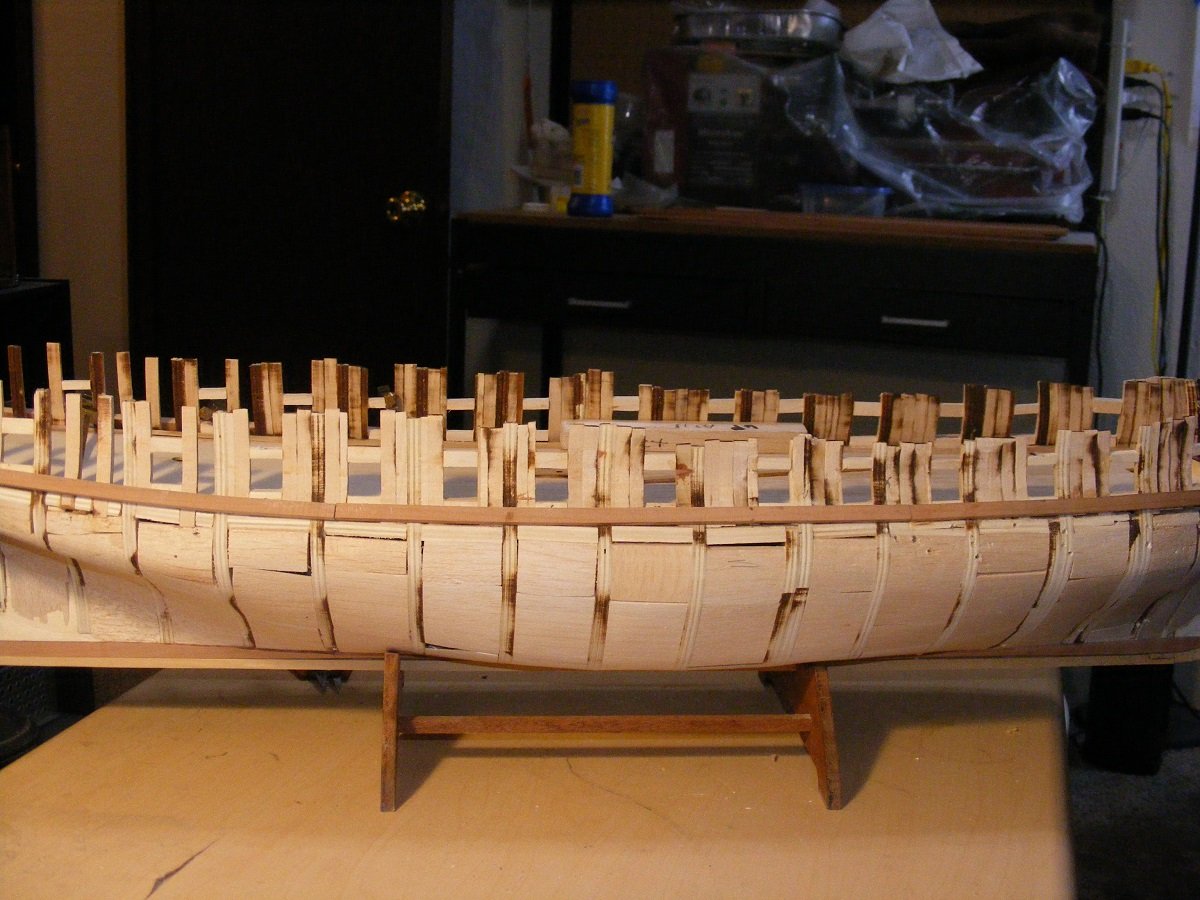
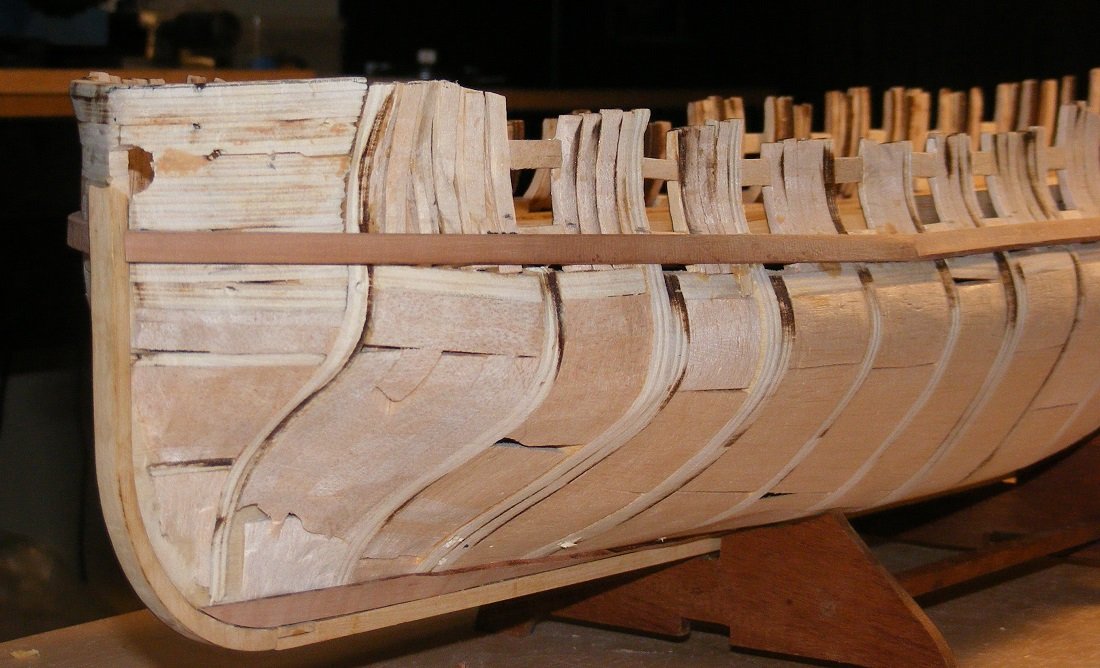
Hi Druxey, I'm using Swiss Pear wood. As for the bending method... due to thickness I've found basically that the planks must soak for several hours. I then use Chuck's method of clamping the piece to some scrap plywood and hitting it with a heat gun, moving it constantly to dry the wood for about 10 minutes or so. Then let it cool. I've found it takes the better part of the day to sit as anything less then about 5 hours leaves center still damp. On that note, the upper wale (and the thickest) is on and the glue is drying. For the hull below the wales, the planks are thinned out some and tapered eventually to the final thickness I think I posted a copy of the cross-section that shows this. So unless there's outside distractions, planking should pick up speed. I found that in order to get the top wale in position (it's the key to the rest of the hull planking) I needed to identify accurately the wale location. I did this by printing out the Hull Plan and cutting it up. There's a line that not's mentioned in the text but it's the top of the wale so I cut the plans, taped it to the side using the gunports as a reference and marked up the hull. I then put the wale planks in place. Three long planks per side. The most troublesome part was getting the bow plank fitted. It needs to be bent in two directions and also as a small twist. Here's some photos of the process. Note that I've not done any cleanup work. I still need to blend in the joins on the planks and some shaping. At some point I'll pull back further and get the whole hull in a pic. Things still look pretty ugly but then, like my Dad used to say about Corned Beef.... you really don't want to see it being made...
-
It's great to see you back, Mike. I love that mini-drill. My only question is how hot does it get inside the wood housing? I hate to hear that the motor got too hot and burned up.
- 968 replies
-
- 2
-
-
- hahn
- oliver cromwell
- (and 1 more)
-
-
If it's not specific to a given ship, I'd recommend zu Mondfeld's "Historic Ship Models". While it has it's issues, it's pretty comprehensive as far as terminology and general ship knowledge.
-
Welcome to MSW, Arthur. Lovely boat sitting there, and certainly something to be proud of. When you're ready to start your new ship, do start a build log in the kit as it's a great way to get help and meet people.
-
Thanks gentlemen. I'm slowly making progress. Once the first line of wales is done I'll post pics. I think I got it right this time, but it did cost me some hair that I pulled out. It's taking more then I expected to bend and shape a piece of wood that roughly 1/4" wide and 1/8th inch thick. But I'm patient. Bruce, I think this is only POB monograph ANCRE did but I know it was one of the first. Always room for one more.
