


mtaylor
-
Posts
26,273 -
Joined
-
Last visited
Content Type
Profiles
Forums
Gallery
Events
Everything posted by mtaylor
-
Congratulations on the new member of the family, Mike. Well done on the ship. That first photo is pure wonderful.
- 969 replies
-
- 3
-

-
- hahn
- oliver cromwell
- (and 1 more)
-
Greetings from New Jersey
mtaylor replied to EricWilliamMarshall's topic in New member Introductions
-
nubie question regarding string and knots
mtaylor replied to EricWilliamMarshall's topic in Masting, rigging and sails
There is a site for knot tying with just about any knot you'd want. Once section is for nautical knots: https://www.animatedknots.com/ -
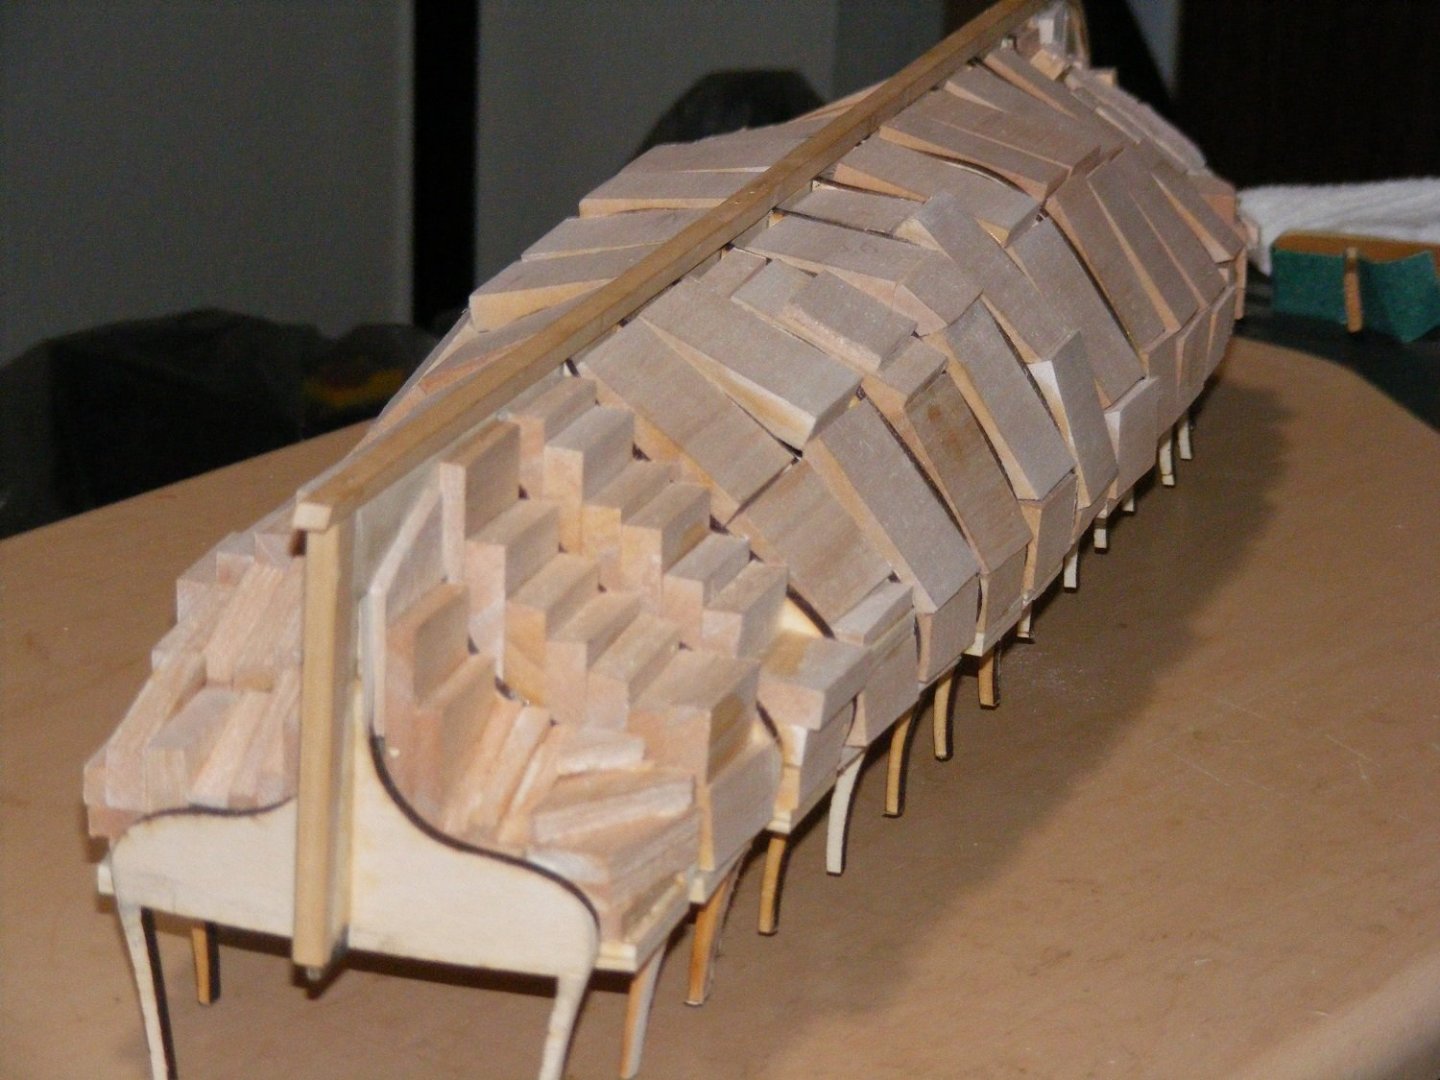
Well, the is filled with balsa except for the area in front of bulkhead #1. I'm going to hold off until I get most of the sanding done as it presents a few challenges that need to be sorted and having things close will help me out. Once sanded, the forward area filled and sanded, I'll move on to the interior and laying out the gundeck ports, etc. Here's pics... ugly but ready for various instruments of destruction to be used.

-
Cutty Sark by NenadM
mtaylor replied to NenadM's topic in - Build logs for subjects built 1851 - 1900
Looks superb, Nenad. You are doing a beautiful job.- 4,152 replies
-
- 2
-
-
- cutty sark
- tehnodidakta
- (and 1 more)
-
Didn't the "flak" cars on the trains have two mounts of 2 to 4 guns each? Plus ammo, some armor on the mount?
-
Welcome to MSW, Pieter. I agree, the best way to get help and improve skills is to open a build log.
-
Thanks for the likes and the comments. I hope to have a photo update this weekend. Thanks, Pat. It's an interesting approach. The laser I love as everything is precise and no sawdust!!!!!! I came across a few challenges... mostly my own doing. The 3mm lite ply was not a good choice for the false keel. Even braced the thing still had some flex. So, instead of just filling in the bow and stern ends with balsa, I'm filling in the whole hull. For the most part, it's just 1/4" thick blocks of wood to hold the bulkheads and also, once sanded to shape will give me a solid surface for planking. The fore and aft areas are pretty much solid balsa due to the radical shaping.
-
I've been looking at his log on the scenery, etc. Very impressive.
-
Amazing detail and work, Danny.
-
Welcome to MSW. What Chris said will work. If your friend is up to it, have him post a log of the Schnellboot.
-
Welcome to MSW. Looking pretty good from here. If I may make a comment or two.. the bulwarks seem bit thin looking that gunport openings. The other thing is the cannon smoke. The smoke would go with the wind and not consistently move towards the stern. It also seems that from the side views of the cannons firing, looking at the smoke the barrels would have to be pointed downwards towards the water. Nothing serious there but that's what caught my eye.
-
If you have a small hobby lathe for metal, turn your own pedestals. If not, check around there are hobbyists and even some small shops that will turn them.
-
Peter, Are you using 3-ply birch.. the so-called "Lite" plywood? Check around with some hobby shops as I've seen 5 and 7 ply wood in small thicknesses. I'm using 3 ply Lite on my latest build and the backbone is 1/8" and it's very flexible. I've had my moments where I wished I'd bought the 5 ply for that part.
-
The book Mark recommends is here: http://www.google.it.ao/books?id=PK50sbOOfjUC&pg=PA400&focus=viewport&dq=editions:STANFORD36105044360084&lr=&output=html_text You can also order the book from various sellers, just Google: "'A Treatise on Naval Gunnery' by General Sir Howard Douglas"
-
-
nubie question regarding string and knots
mtaylor replied to EricWilliamMarshall's topic in Masting, rigging and sails
For cotton thread, use a new blade in your hobby knife or sewing scissors. I find that it helps to brush the area of the cut lightly with a 50-50 mix of white glue and water. Let it dry so while it's drying, do something else on the model , then cut with hobby knife or scissors. I'm partial to using sewing scissors. I have one that is only used for rigging thread. -
Tough question to say the least. The best answer I've found is here: https://en.wikipedia.org/wiki/Naval_artillery About halfway down the page is a table. The problem is that wind, waves, etc. could impact the range and accuracy as well as the age and condition of the gunpowder. Wear on the barrels and the degree of precision or lack there of during casting usually meant that the bores were never exact and thus the "windage" varied or the space between the cannon shot and the barrel. Which probably leads us to how far apart the ships were in battle? From accounts, they could be practically muzzle-to-muzzle or at the maximum range. Accuracy did decrease as the range got longer, though. And since the normal strategy was "close with the enemy", I'd assume they were pretty close to each other.
-
Impressive work. The time spent getting things correct in CAD are paying off in the wood.
-
I agree with Keith. I have to look twice to make sure I'm seeing a model and not a real boat.

