mtaylor
-
Posts
26,273 -
Joined
-
Last visited
Content Type
Profiles
Forums
Gallery
Events
Everything posted by mtaylor
-
Here in the States a quick trip the local pharmacy and pick up insulin syringe and needles in various sizes. I have to thin wood glue a bit but it works very well with he largest needle. Also, many craft stores sell syringe like glue applicators for very little money.
-
There's another discussion from about a year ago that mentions problems with them.
-
Cutty Sark by NenadM
mtaylor replied to NenadM's topic in - Build logs for subjects built 1851 - 1900
You're doing what is good for your soul, Nenad. Which is good so keep doing it. When it's time to go back to her majesty, you'll know it.- 4,152 replies
-
- 1
-

-
- cutty sark
- tehnodidakta
- (and 1 more)
-
Hmmm.... for that much money, one could by a scroll saw and have cash left over for wood, beverages of choice, and books on ships.
-
What Jaager said is essentially it. I've not had to use heat yet with the alcohol to separate PVA glued pieces. But there's always a first time. For the bending.. it's a matter of preference and what works for you. The mechanical type that look like a pair of pliers are, in my opinion, a waste of money. They achieve the bend by crushing the wood fibers. I use an old curling iron. Soak the wood for a bit, put to the hot iron and bend. When the bend gets "stiff" while bending, back in the water for a bit. Best bet it try the soaking and using the coffee paint can, or curling iron (get your own or buy a new one for the admiral (wife) and take her old one. I think the soldering irons get too hot but that's me.
-
Ah... I was looking at the drawings you showed and wasn't sure if the frame was perpendicular to the keel or the waterline since it seems they did them both ways. Glad you got it sorted out.
-
Well... there's bashing and then there's bashing.... I did the AL Constellation some years ago. The kit sold as the original frigate. Nope... the hull was actually the 1854 version. So it got "bashed"... "cursed" at times... and finished as the 1854 Sloop of War.
-
Hi TMJ. Welcome to MSW and what John said applies. Lots of builders just build the kits out the box. Others go that extra mile and bash it, research and make it correct. There's a great feeling of success when you're done bashing the kit and it looks "right".
-
Sweet! I like your miniature slipway also. Watching SIB's being done is fascinating.
- 24 replies
-
- 1
-
-
- peter the great
- boat
- (and 2 more)
-
Drilling 2mm Brass Rod
mtaylor replied to spill50's topic in Metal Work, Soldering and Metal Fittings
Do you have a drill press? Kind of small to be doing by hand. If so, use a small file and flatten the side a bit where the drill will enter. Also a very small punch or nail and a hammer to put a small "dent". Then drill the hole. Just make sure work piece is securely mounted. You might be able to do this without a drill press but I've never been able to. Maybe some others have a better method. -
Mark, Are doing this all in one bend or bend it some, soak, reheat, bend again. Repeat as needed. There's some woods that just don't like to bend in one go. Ebony is another.
-
Welcome to MSW, Yoshka. I hope you'll do a build log on this model. Looks interesting.
-
-
What Chris Coyle said is true. As your skills improve, you can make a silk purse out of a sow's ear. Go slow, study other logs, but be determined to allow mistakes and then correct them. I daresay that 90% of ship modeling is mindset more than the kit itself.
-
So far so good, Jack. I wonder about that 3-ply. I'm using the 3-ply "Lite" ply (sheet stock) and periodically it comes apart. I'm thinking inconsistant gluing but who knows?
- 52 replies
-
- 3
-
-
- artesania latina
- titanic
- (and 1 more)
-
Welcome to MSW. Indeed, we have logs. Back on the front page, scroll down just a bit and you'll see the build logs. Inside the "Kit" area, near the top, you'll see an index listing all the kit builds.
-
360 Virtual Dive of an Icelandic Shipwreck
mtaylor replied to Binho's topic in Nautical/Naval History
I watched the video on my Win 7 PC. Worked well. Interesting find and some very good research and cooperation by those involved.- 1 reply
-
- 3
-
-
If you're going to do the rail gun, the camo makes sense to me.
-
Well done, Craig. I do like the looks with the rocket in launch position.
-
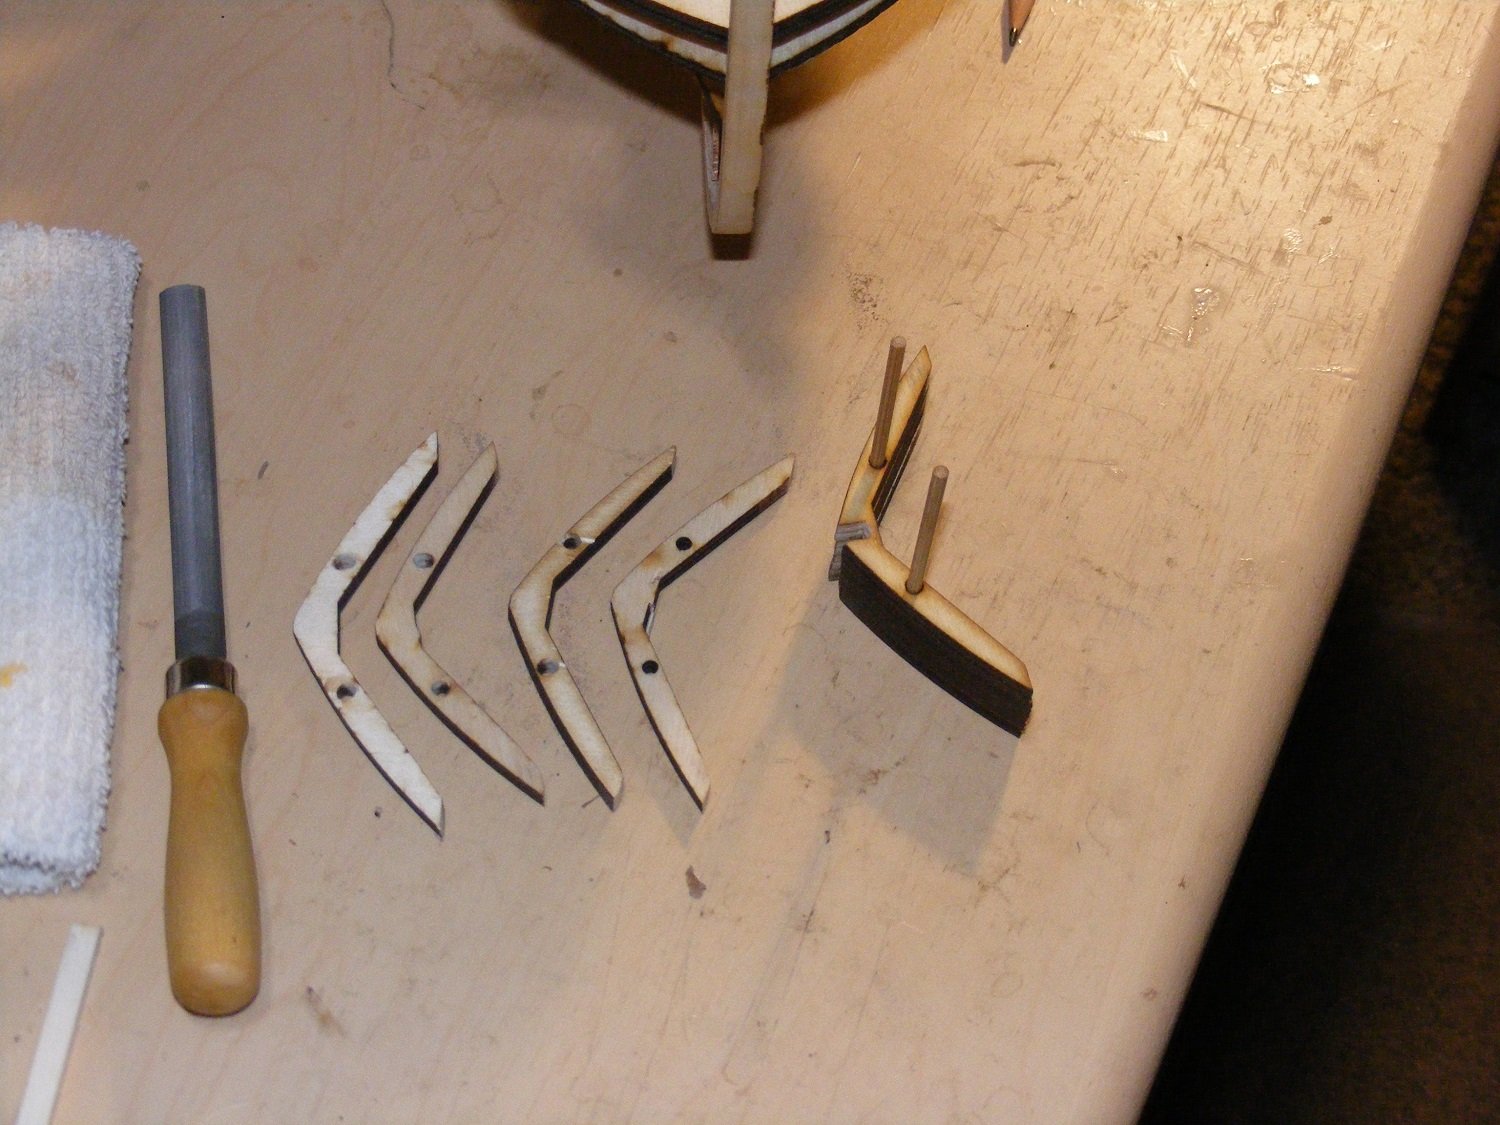
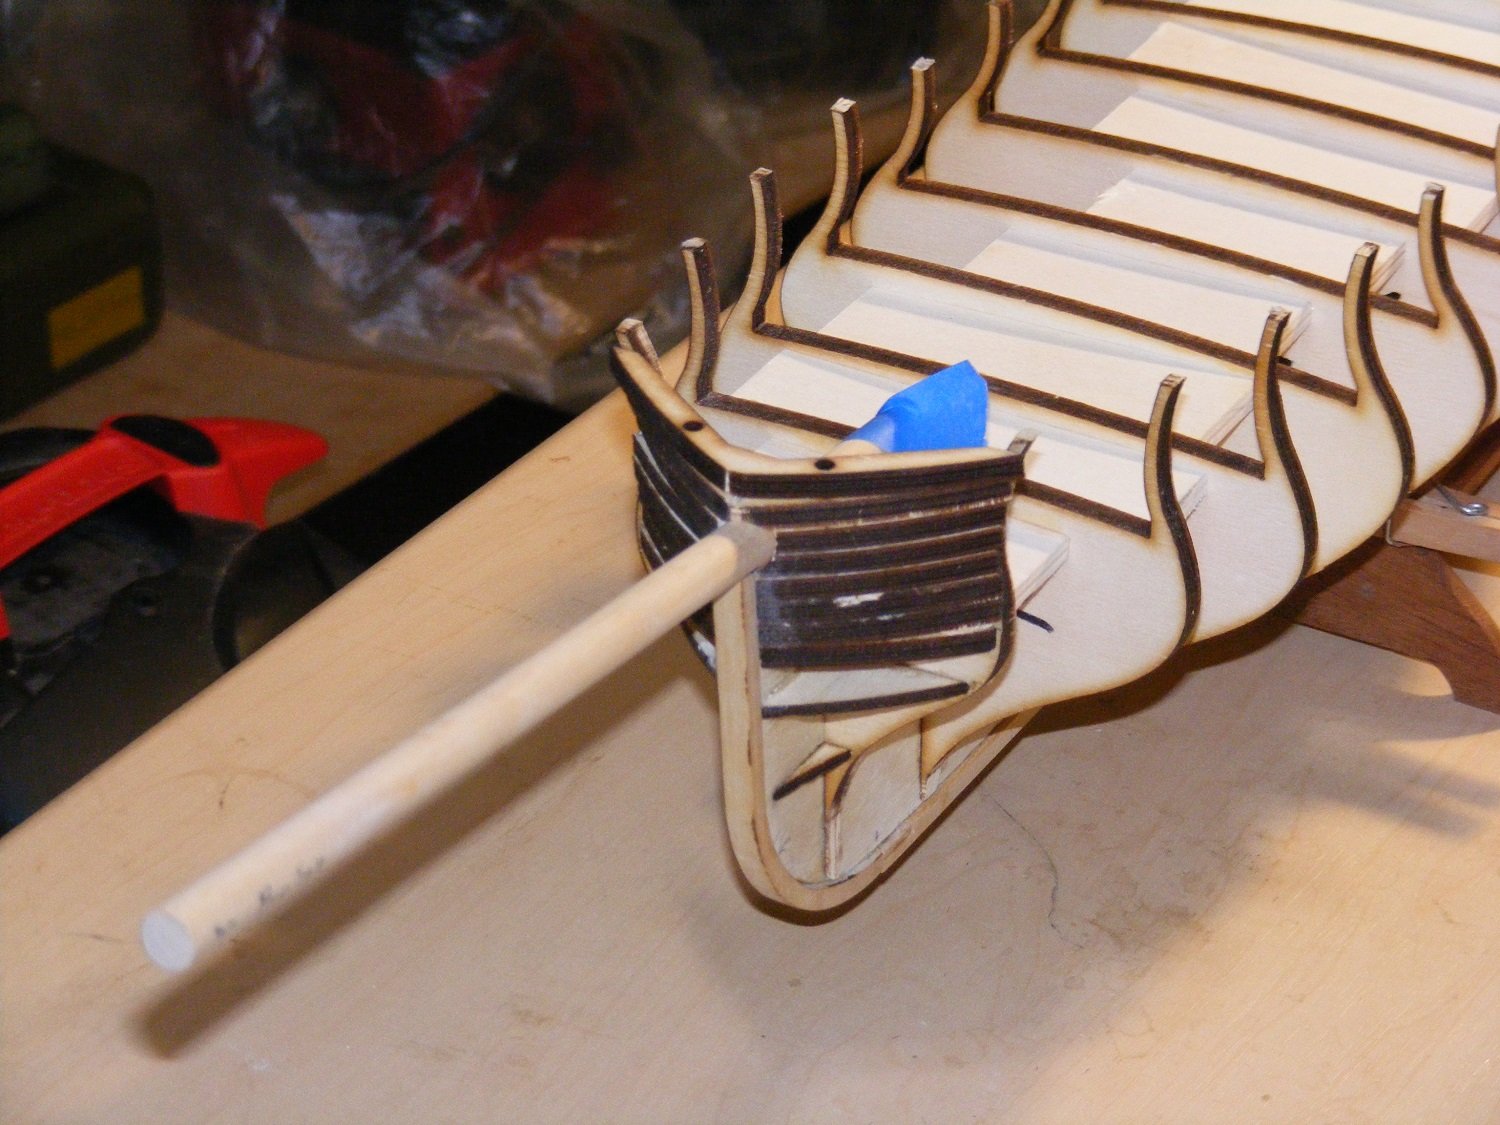
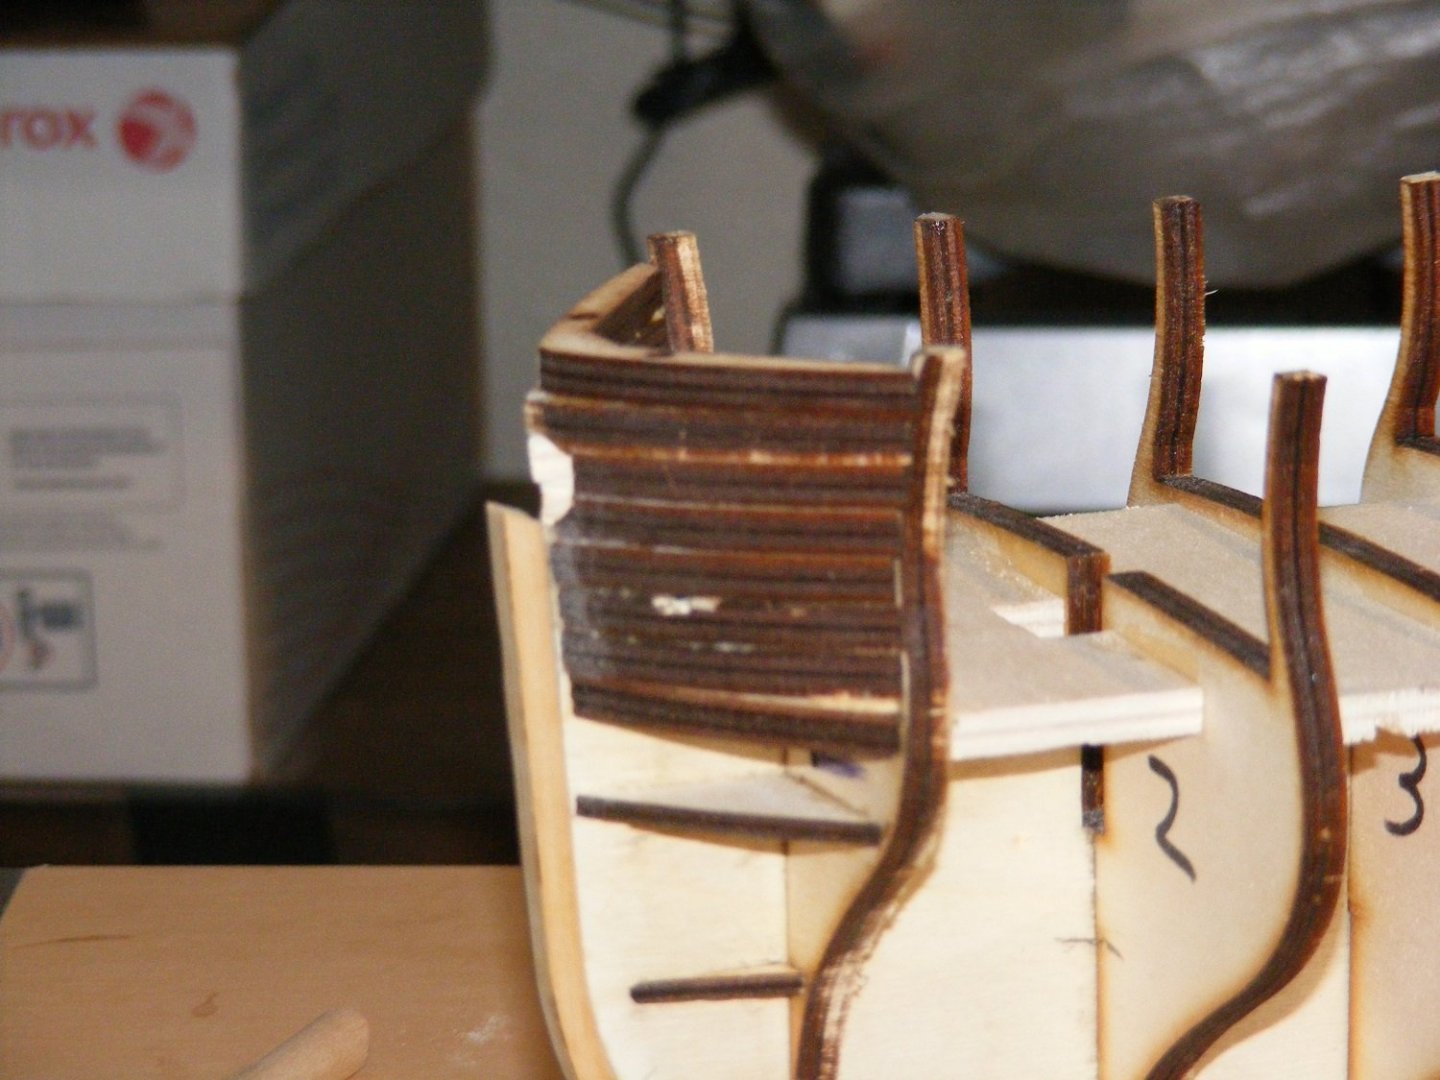
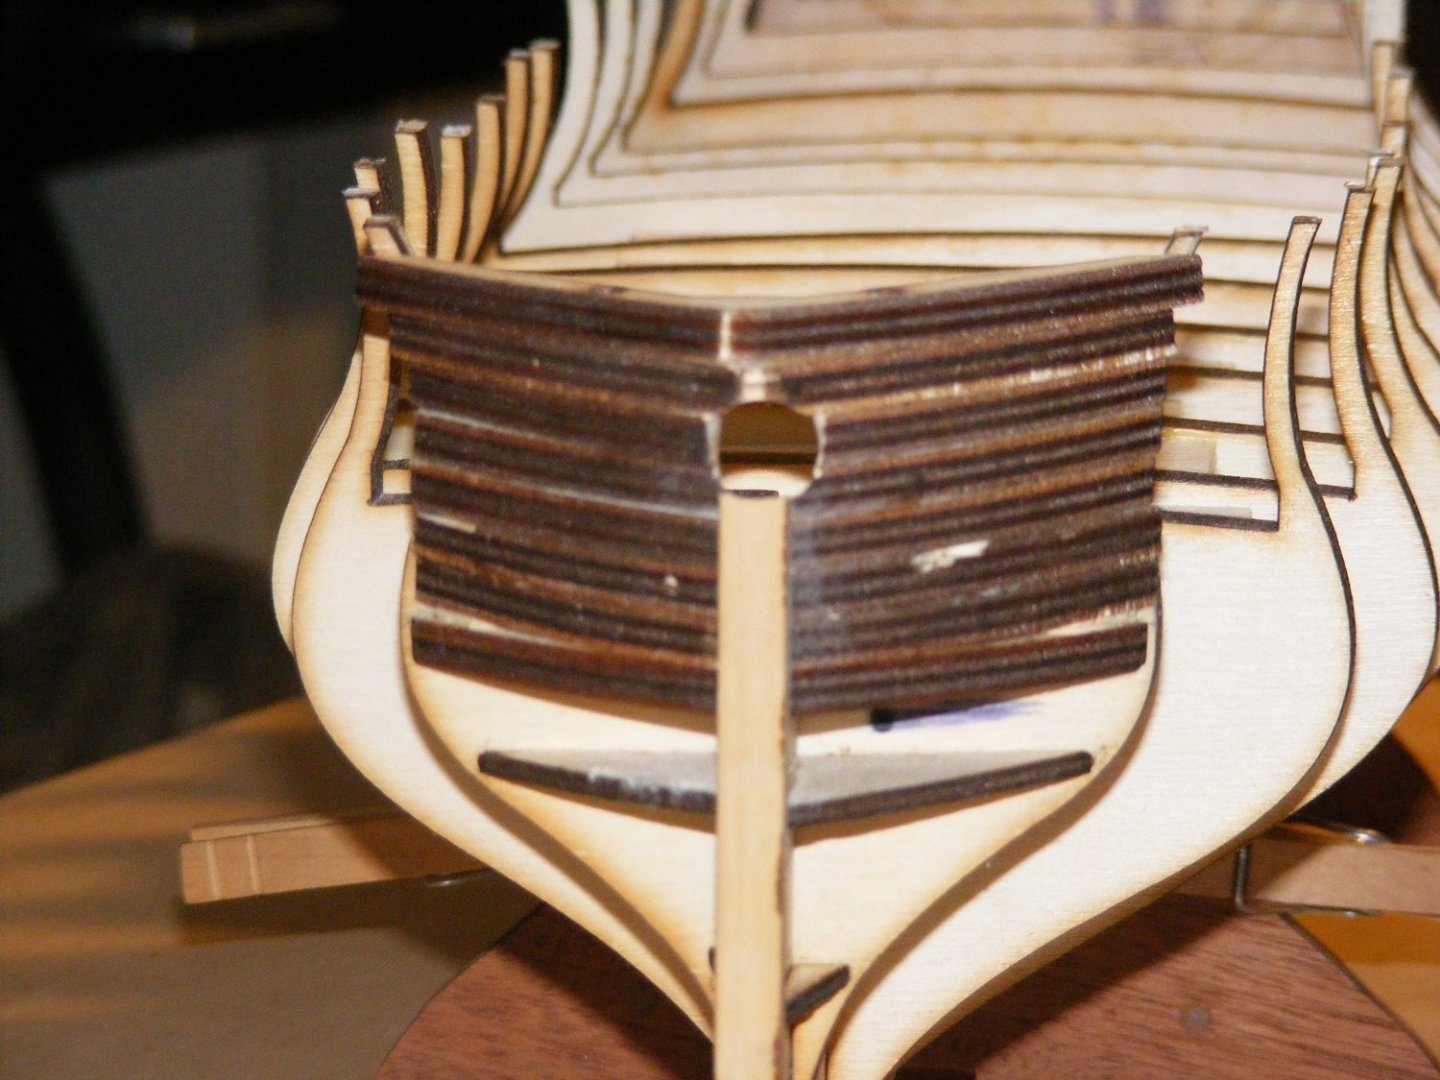
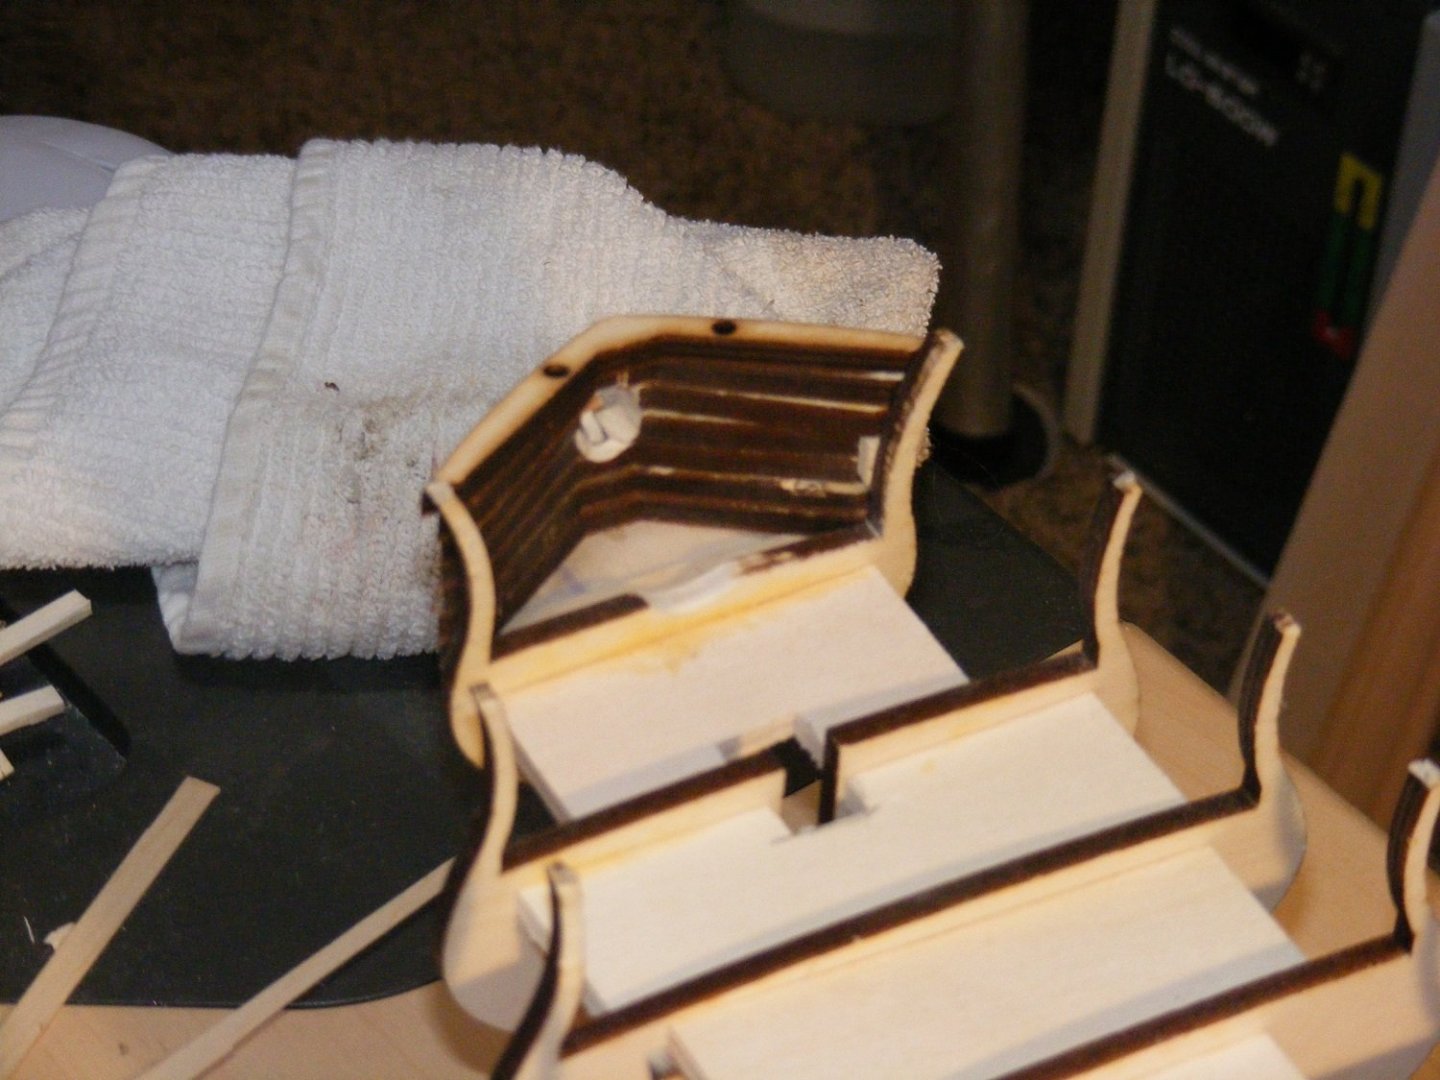
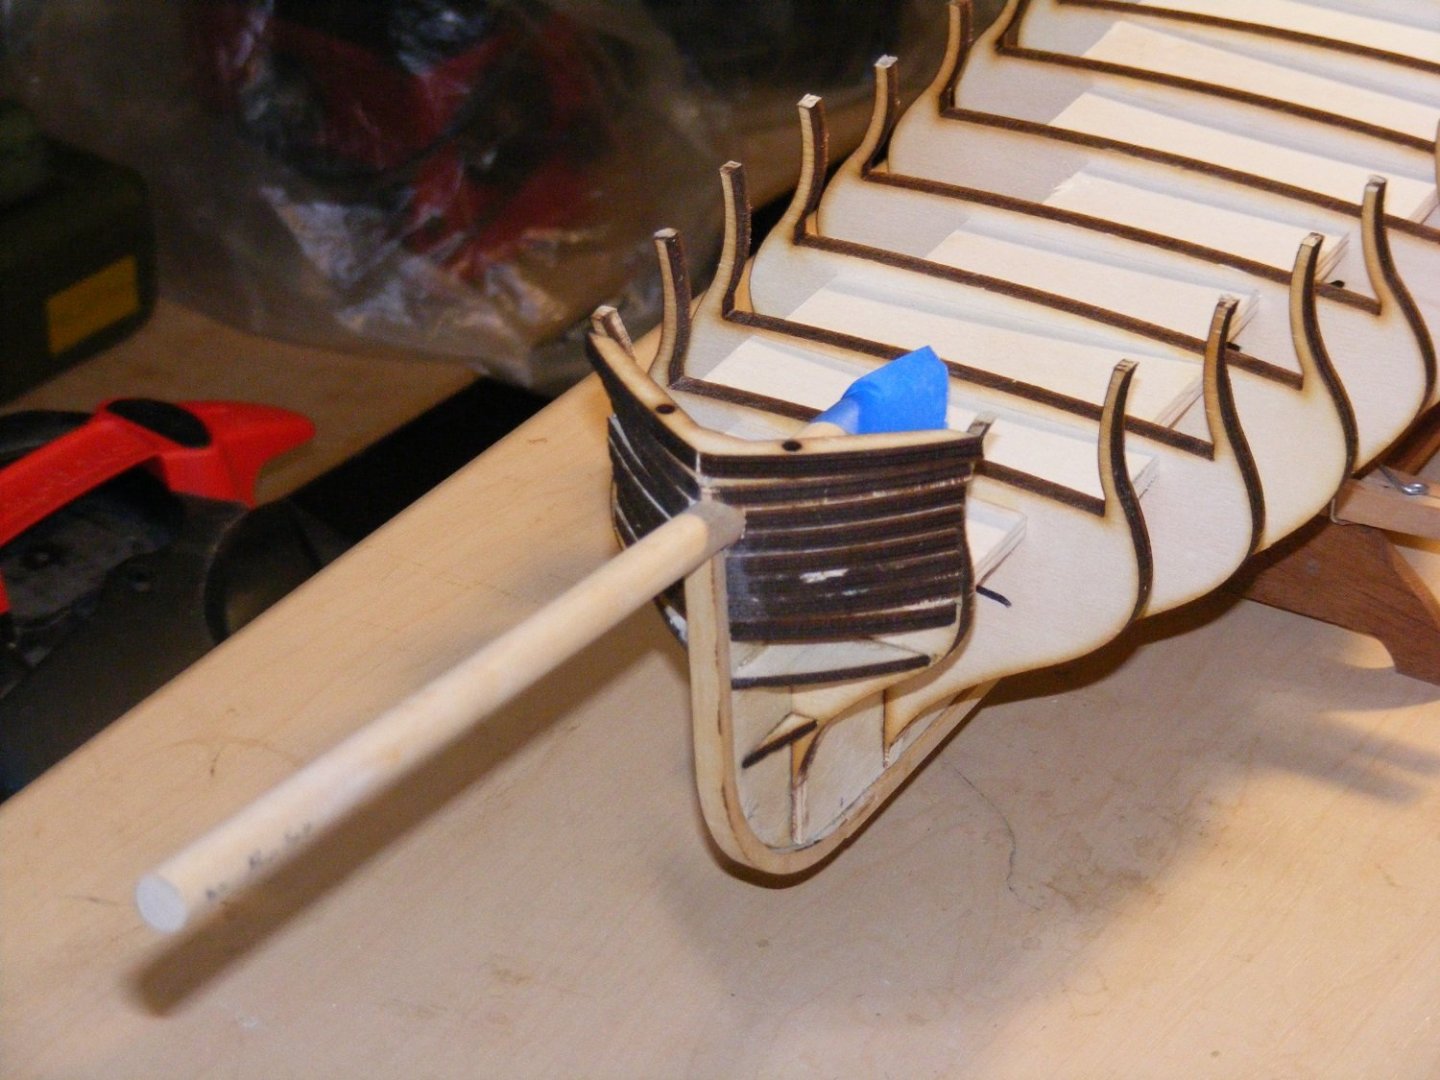
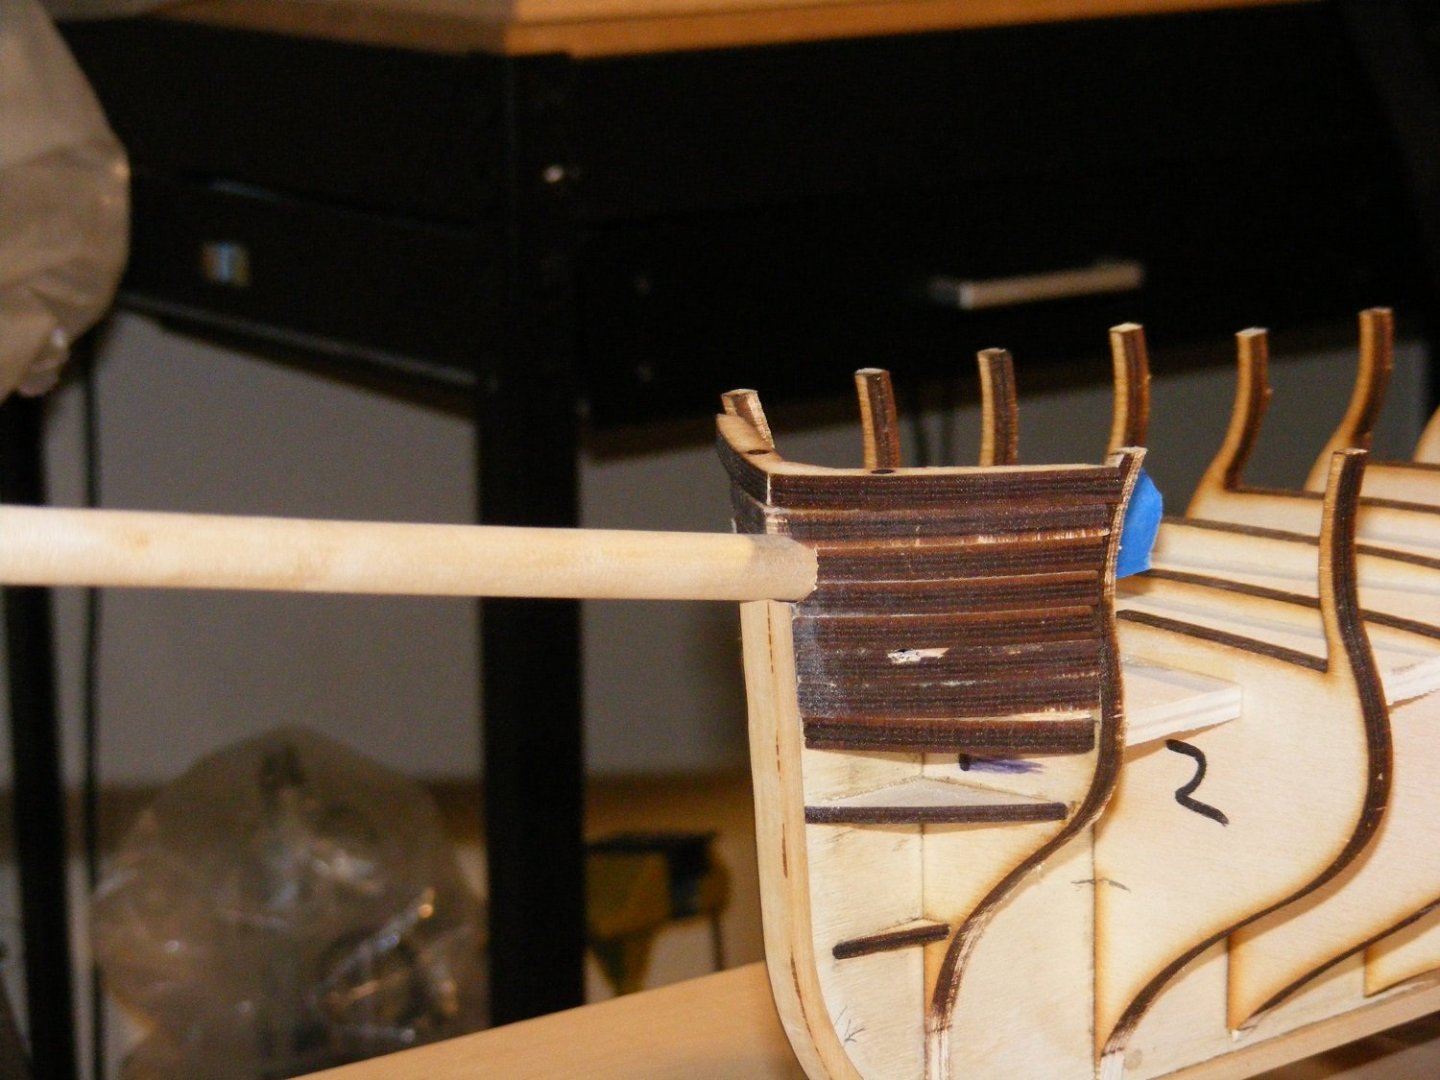
Thanks for the likes and comment. Update time. I did a lot of reading of other logs (not many out there) and tried several different approaches. The pics below show the method and result for the bow. I'm heading towards an "extra" half-frame on each side between the next 3 full frames. This is to give me some extra "meat" for planking and also to assist in frame part above the main deck. I have to remove several of them for gun ports and put them in a different spot. Testing and thinking will continue as start filling in the lower hull with balsa. Here's photos.... The last few show a dummy bowspit in place as I had to account for angles, diameter, etc. BTW, the bowspit is square to the bulkhead but looks off center due to the angle of the photos.

-
AUTHENTIC ACCOUNT OF THE DEATH OF LORD NELSON.
mtaylor replied to AON's topic in Nautical/Naval History
Thanks for posting that Alan. Very moving. -
Afonso,, I go along with what ChadB said. Start simple... trust us on this. As for kits for ships of the period you're looking for... the only one I can think of that IS accurate is the Billings Vasa. They worked with the Vasa Museum and were constantly updating the model. But it's not of countries your looking for and it is considered an "Advanced" kit. I did build it and it was my only second ship build. I had a lot of problems learning how to do it so it looked good. Anyway, we're here to help which is a big reason MSW exists. If you go for a bigger model, then we'll help when we can. While you're thinking about it, go ahead and finish your Golden Hind, It will be a good learning experience especially if you open a log.