archjofo
-
Posts
1,475 -
Joined
-
Last visited
Content Type
Profiles
Forums
Gallery
Events
Everything posted by archjofo
-
 Fantastic work !
 -
Finest detail work !
-
Hi Ron, you are doing a good job. This will be a very nice model.
-
Brig Le FAVORI 1806 by KORTES - 1:55
archjofo replied to KORTES's topic in - Build logs for subjects built 1801 - 1850
This looks very good. As expected from you, very clean. -
Brig Eagle 1814 by bdgiantman2 - 1/48
archjofo replied to bdgiantman2's topic in - Build logs for subjects built 1801 - 1850
This looks very good. -
Good work !
-
This is top class, looking incredible!
-
How to seize a block to an iron band
archjofo replied to Laggard's topic in Masting, rigging and sails
@Laggard Hello, maybe this fits your question: LINK -
@shipman Thank you 👍
-
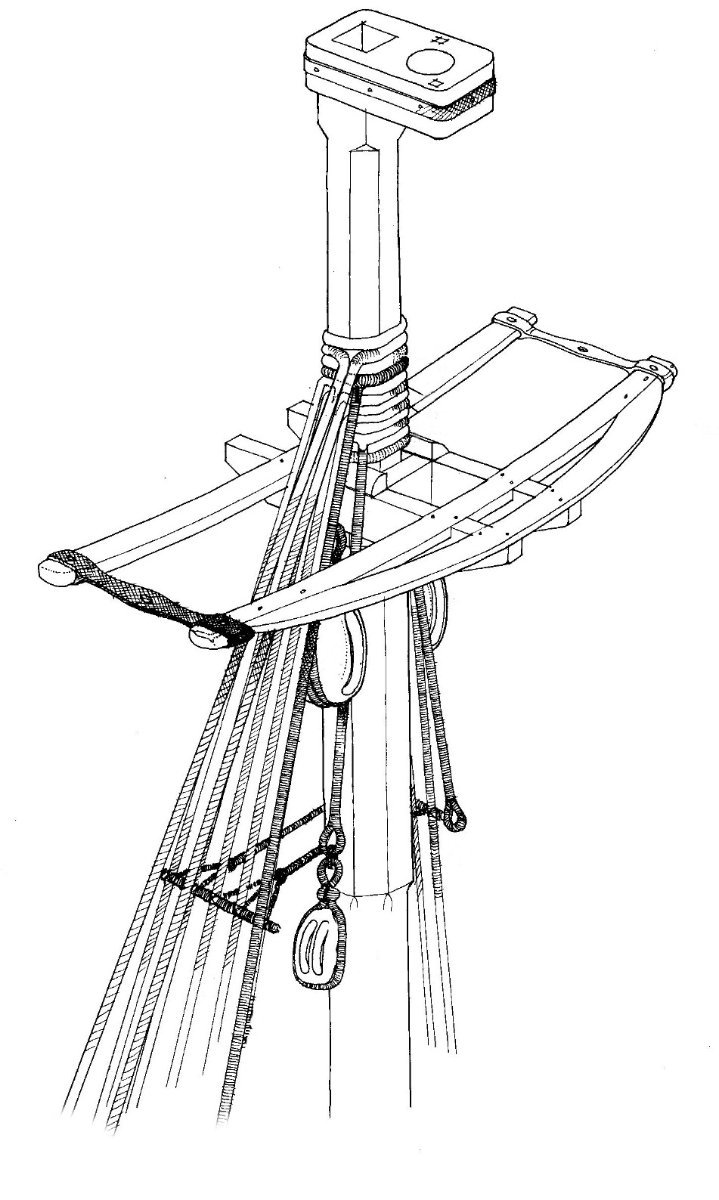
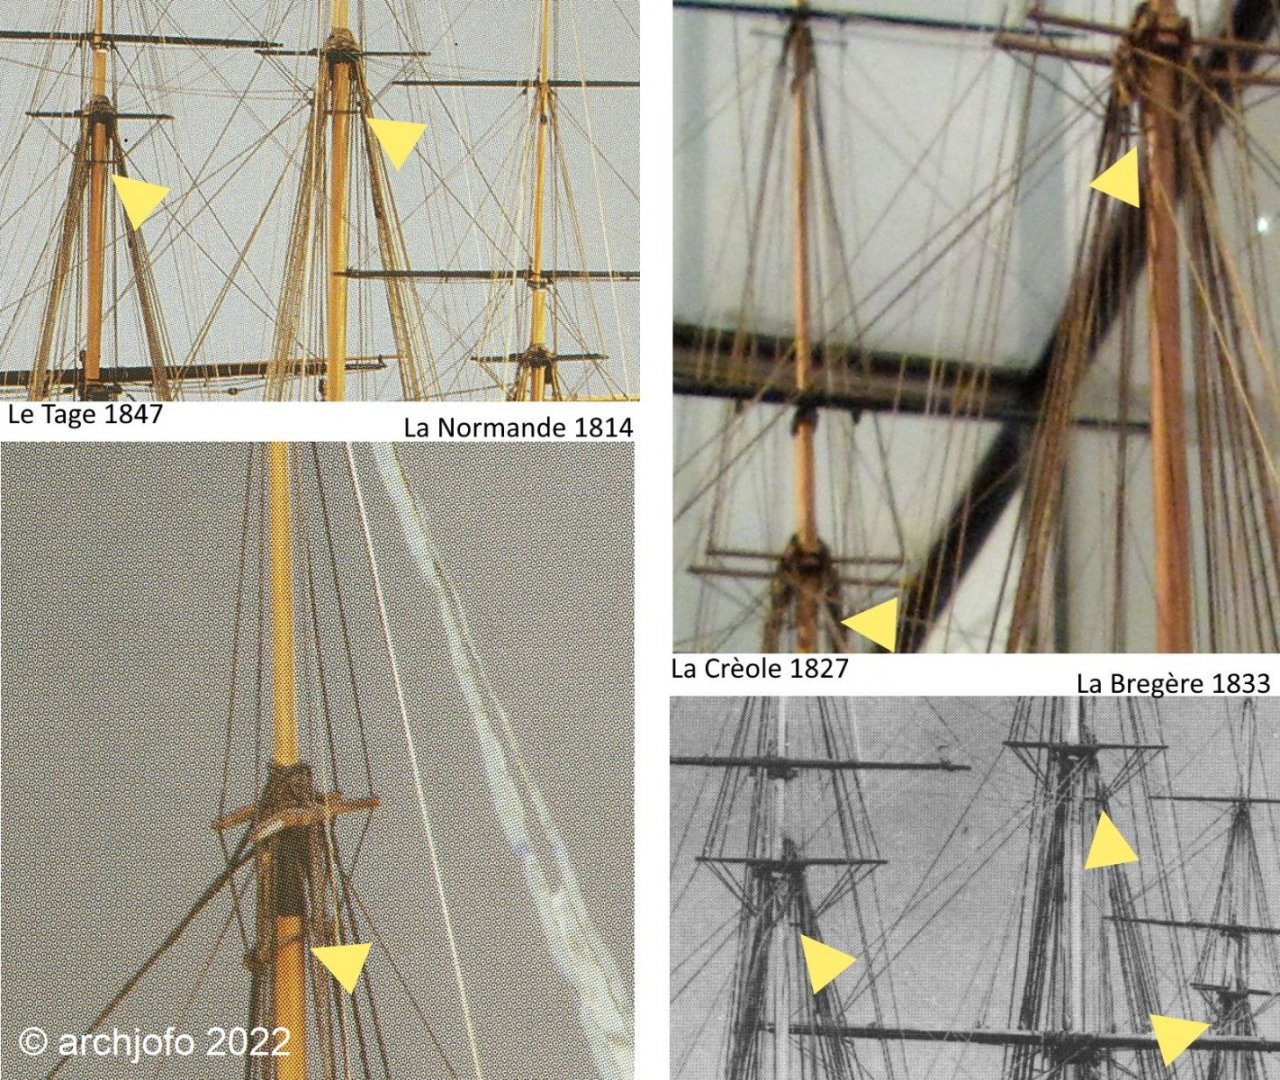
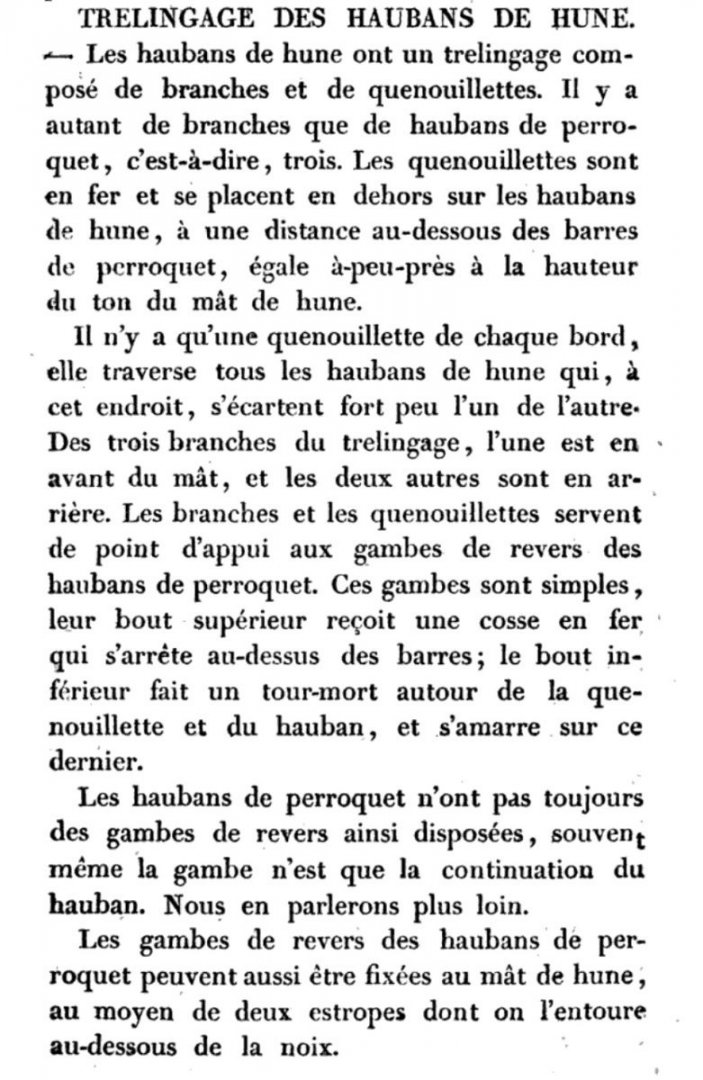
Hi there, Thank you in advance for the good wishes. As is well known, I have to pause for a few weeks with the practical implementation in model building. In this respect, I am currently only dealing with the theory and have worked on the following topic. I can now write fairly well with the thumb of my right hand and five fingers of my left hand. Catharpins of the topmast shrouds - Trélingage des haubans de hune In the course of the rigging for my French corvette, I got to know many different detailed designs as far as the English and French way of rigging was concerned at the beginning of the 19th century. Based on my research so far, I have come to the conclusion that, especially with English rigs, catharpins have obviously been dispensed with on topmast shrouds and topgallant mast shrouds, or that no need was seen for them. Correspondingly, Klaus Schrage also only describes catharpins of the lower shrouds in "Rundholzer, Tauwerk und Segel" (Rundhölzer, Tauwerk und Segel). On the other hand, I can state that it seems to have been quite common among the French during the period in question to also provide the topmast shrouds and topgallant mast shrouds with catharpins. This is proven by contemporary models in the Paris museum, as shown in the exemplary compilation in the following picture: Furthermore, I refer to the explanations in Jean Boudriot's "Le Vaisseau de 74 Canons" Part 3. The following figure from this source: Source: 74er J. Boudriot As further evidence, I cite relevant contemporary literature, as can be read in a test excerpt below. It is true that this book deals with the rigging of a frigate with 44 guns. But I think that in principle this can also be applied to smaller units such as corvettes. This in turn corresponds to the corresponding representations on the contemporary models. Source: Manual du jeune marin - page 121 - Louis-Stanislas Baudin · 1828 So that's how I'm going to do it on my corvette. Up soon ...

-
Hello colleagues, Thank you for the recovery wishes. According to the results of yesterday's examination, surgery is now not necessary. I got a new splint. I have to go to the examination again next Tuesday. If everything remains stable, then no surgery will be performed. In about 5 weeks the hand should be fully functional again.
-
Hello, I have to let the model building rest the next time. Broke my metacarpal bone. Will probably need surgery, which will be decided tomorrow.
-
Hello, today I would like to present you a new video. It deals with the rigging of the standing rigging of my corvette. I hope you like it. VIDEO
-
@Jim Lad Hi John, many thanks for your nice comment and the others for the LIKES.
-
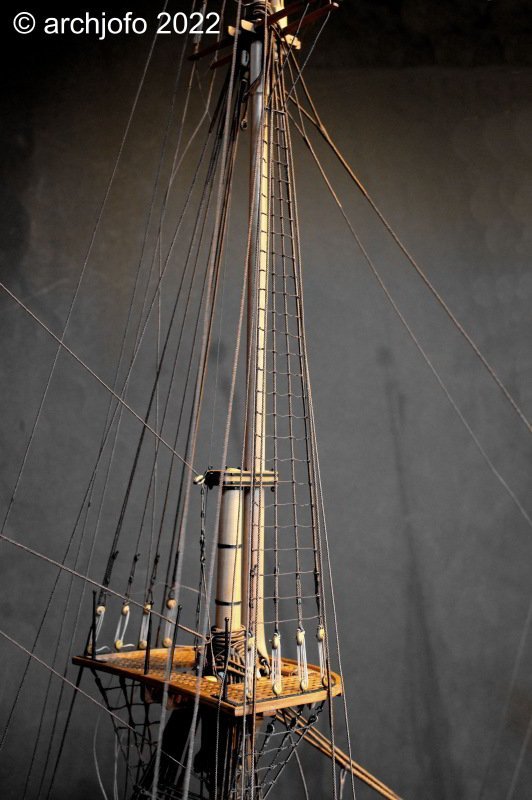
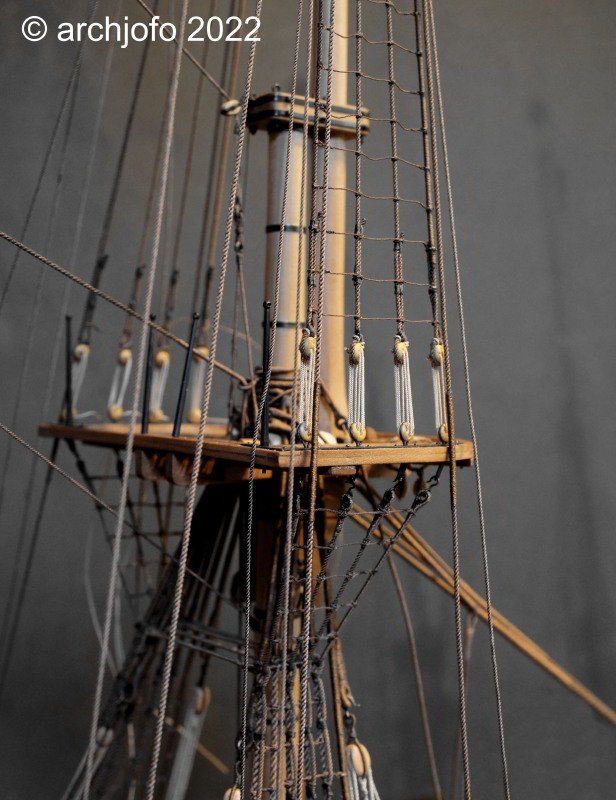
@Gregory @Keith Black @mtaylor Hello, your kind comments make me slightly embarrassed ...🥵 In this context I would like to mention that it gives me a lot of pleasure to be able to exchange experiences with ship model building with you here in this fantastic forum. So everyone can learn and profit from each other. This also contributes to the development of my model building skills. Therefore, at this point to all a big thank you. Continuation: Ratlines for the top mast shrouds - Enflechures In the meantime, the main mast has received the ralines at the top mast shrouds, at least on the starboard side. The futtock stave just below the crosstrees, I have also already attached. Here are two pictures: See you soon ...
-
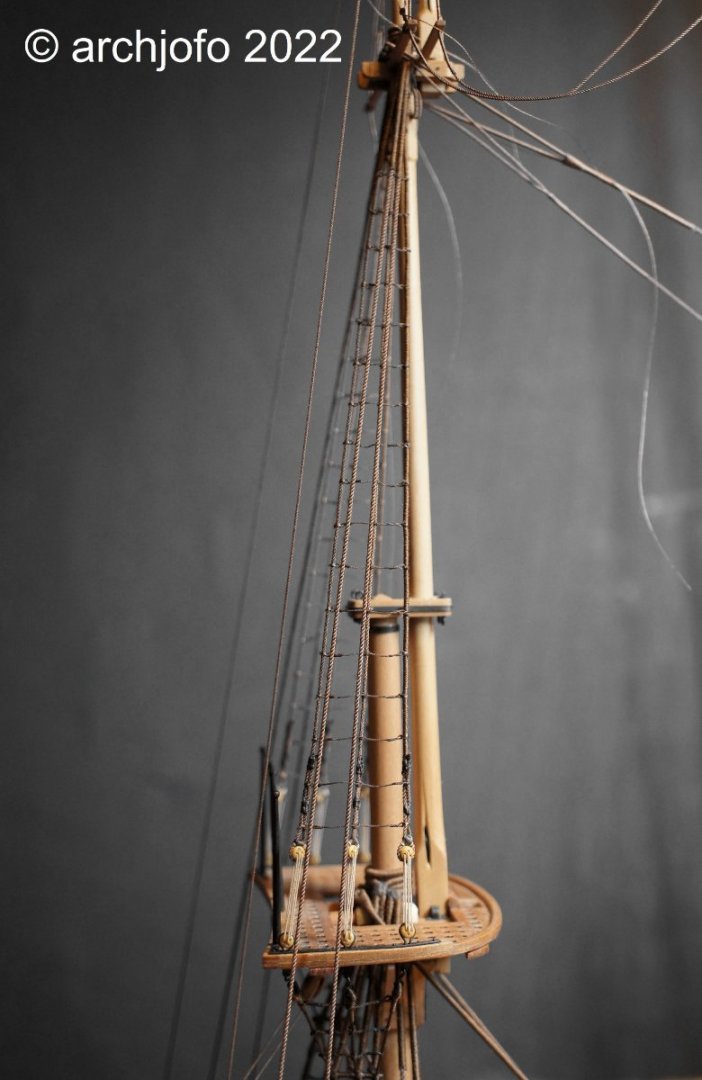
Continuation: Ratlines for the topmast shrouds - Enflechures In the meantime I was able to finish the ratlines on the starboard side of the mizzen topmast shrouds. The tangle of ropes in the upper right corner of the following picture are the topgallant shrouds and royal shrouds that have not been fixed yet. In the next step the main topmast shrouds will get the ratlines. To be continued ...
-
@mbp521 Hi Brian, I use silk yarn to make the ropes. There is a longer review on this and can be read here if you are interested: LINK
-
Hi Brian, you have created a wonderful model with an interesting historical background. Also the detail design is unique and very high quality craftsmanship. Regardless, you are obviously very well organized in terms of your workspace. I also like that very much.
-
@tlevine Hello Toni, thank you very much for your nice comment.
-
@Wintergreen Hi Håkan, Thanks for the encouragement. If I understood your question correctly, this is what you meant?
-
@Keith Black Hi, thank you for your interest in what I do, and thanks for the nice comment.