Old Collingwood
-
Posts
12,106 -
Joined
-
Last visited
Content Type
Profiles
Forums
Gallery
Events
Everything posted by Old Collingwood
-
 You have us in your corner - an extended loving family. OC.
 -
I too use Masters to clean my brushes after every use and often inbetween different colours - helps to keep their spring back and shape. OC.
-
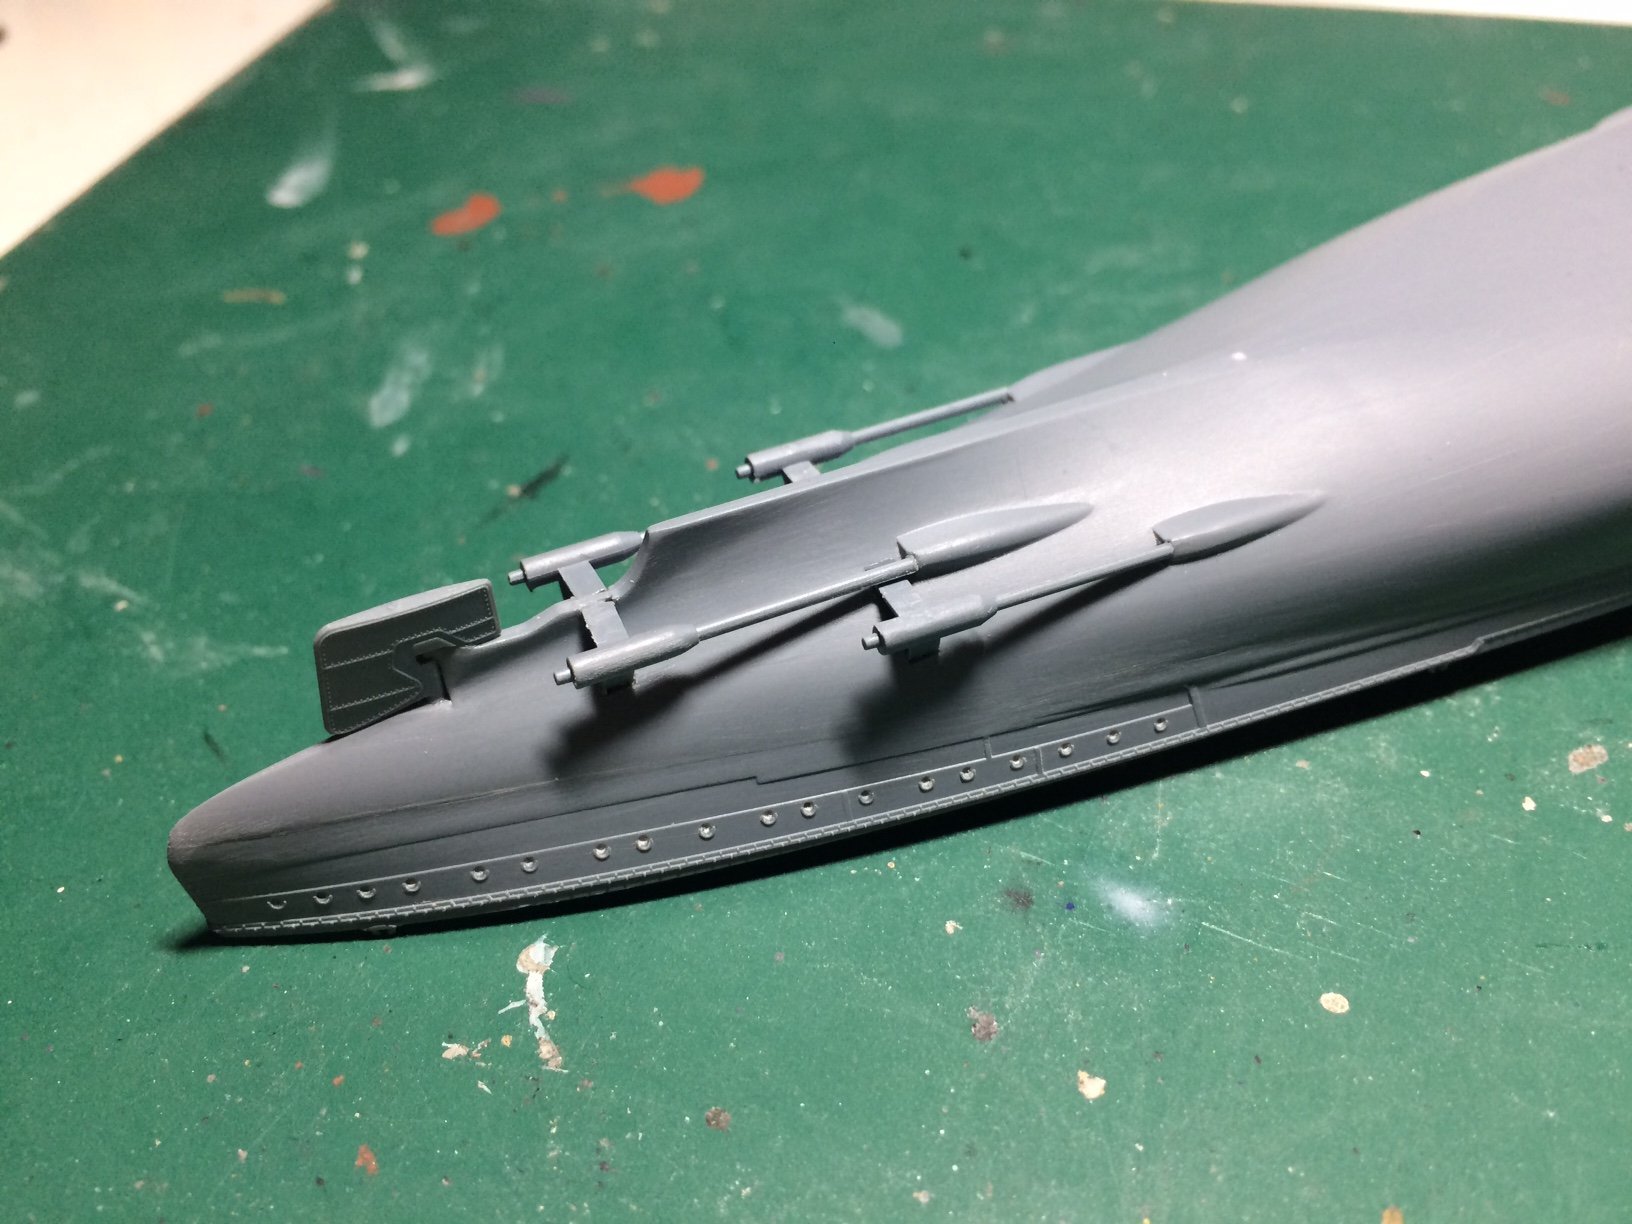
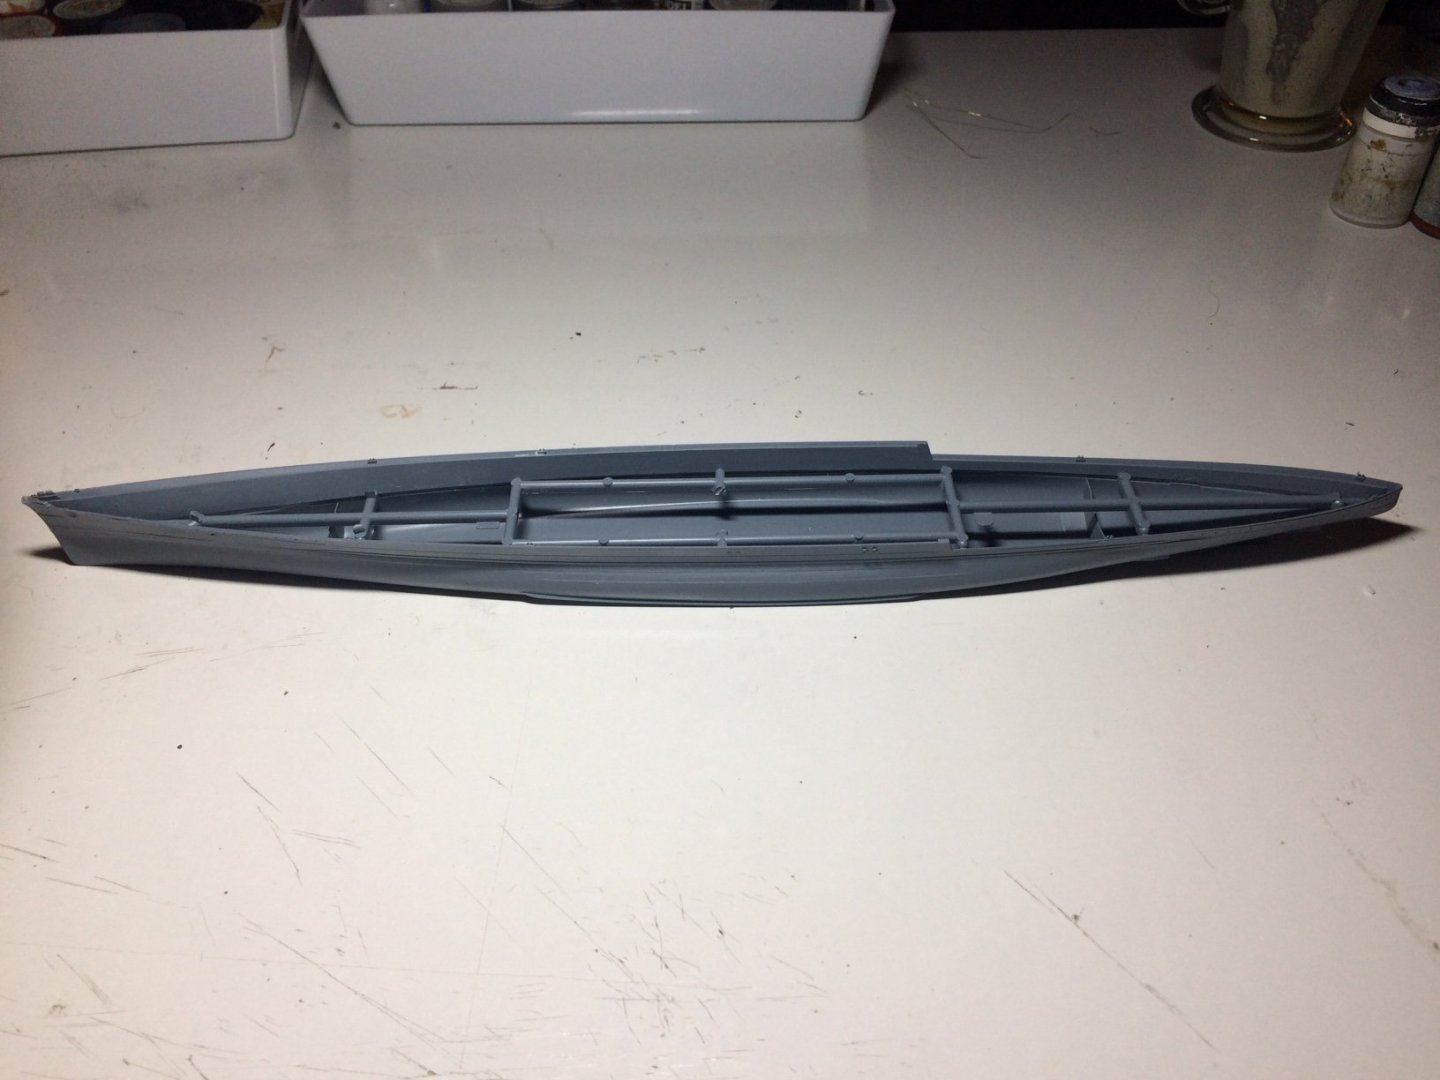
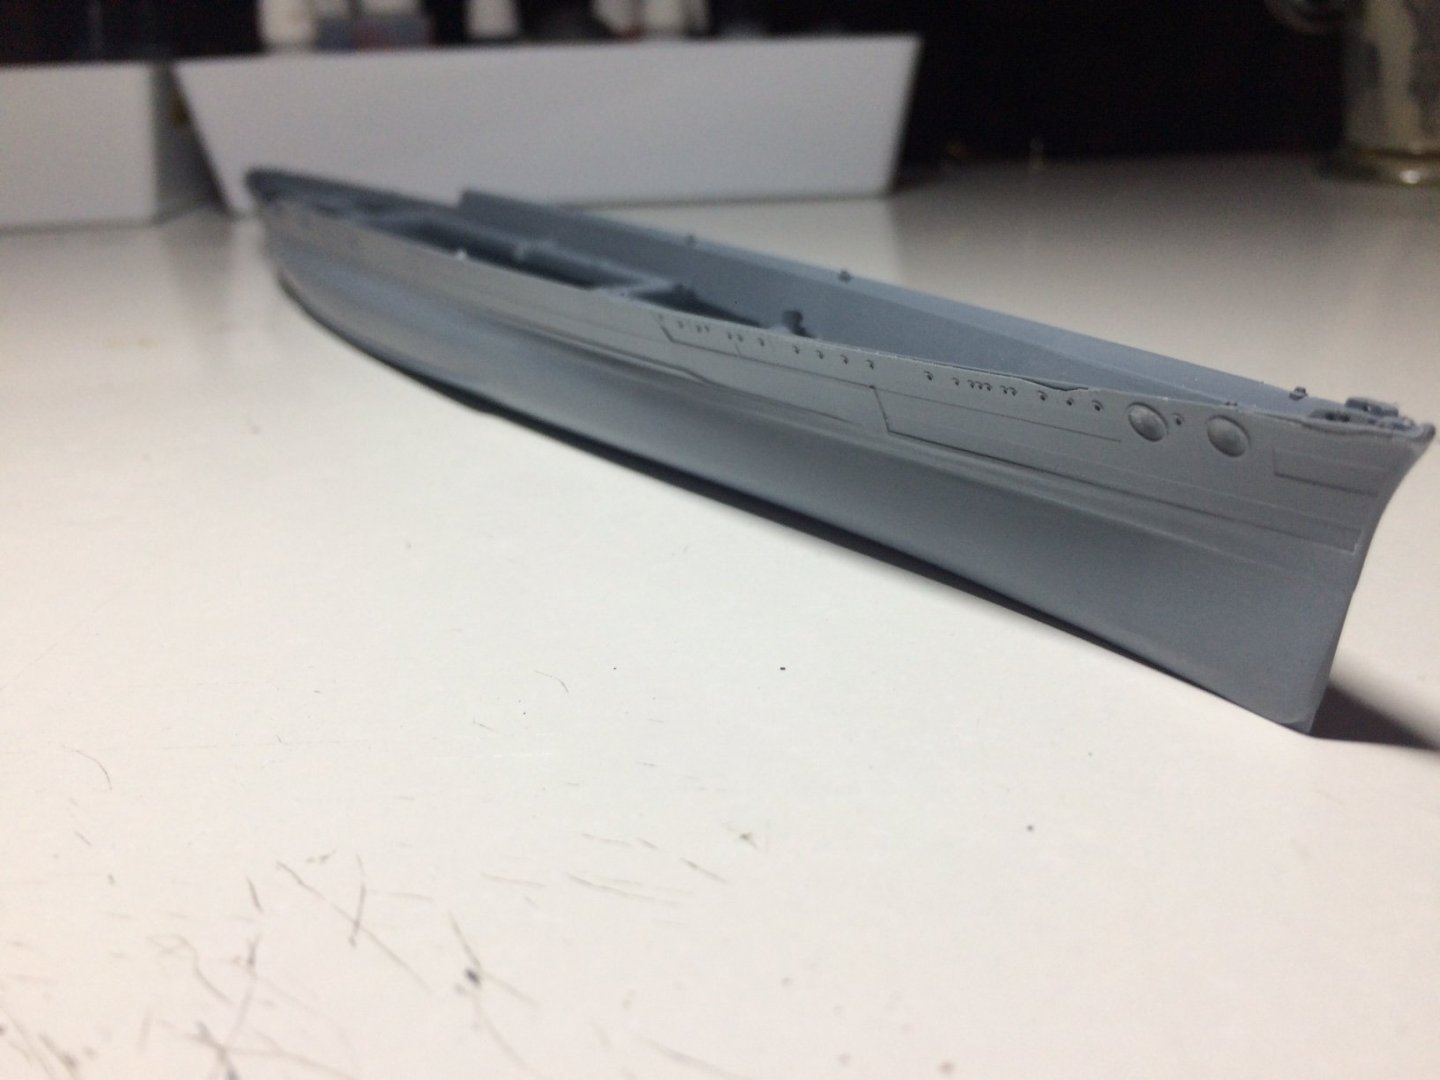
Evening all, I got some good progress done this eve - nothing really to explain except the props and rudder are now fitted - quite straight forward, this completes the hull it will just need priming then putting a side. OC.
-
Trust me. OC.
-
Please dont give up - Fight Like you was fitghting for a love one, and try everything outside the box - things can and do happen. Trust me blessed be. OC.
-
This was great to see as I have had a couple of holidays in Brixham and never got tired going over the Golden Hind there. OC.
- 28 replies
-
- 3
-

-
- vanguard models
- Brixham trawler
- (and 2 more)
-
So I guess my next stage is to fit the prop shafts and A frames and the Rudder - then I think the hull can be primed, Im going to use my Vallejo Black primer as it seems to do the job, and will be a good base for the anti fouling Grey, I might use Vallejo's London Grey for this (need to check how dark it is compared to upper hull colour) OC.
-
Thank you kindly brother, go me a new model of interest to sink my teeth into - my Hood build. OC.
-
Thank you kindly Alan. OC.
-
Thank you kindly Mark. By the way Please take care of your self my friend. OC.
-
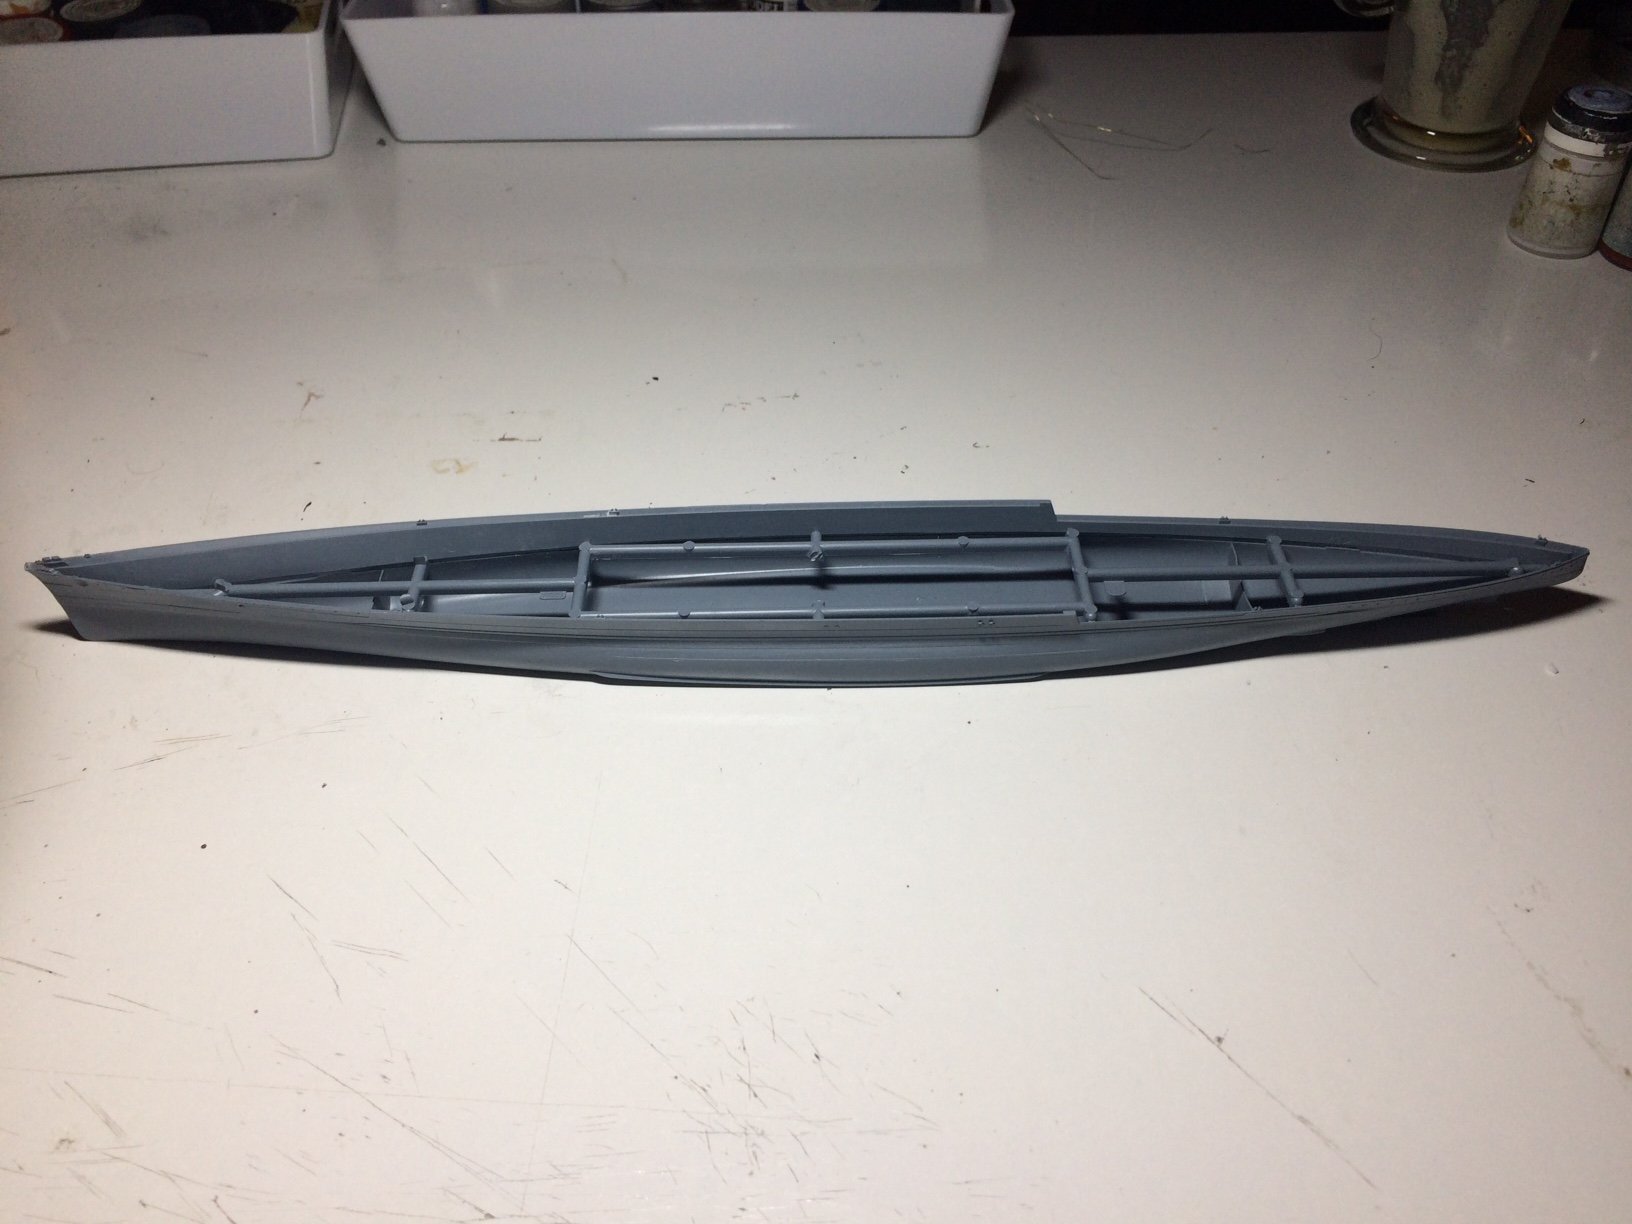
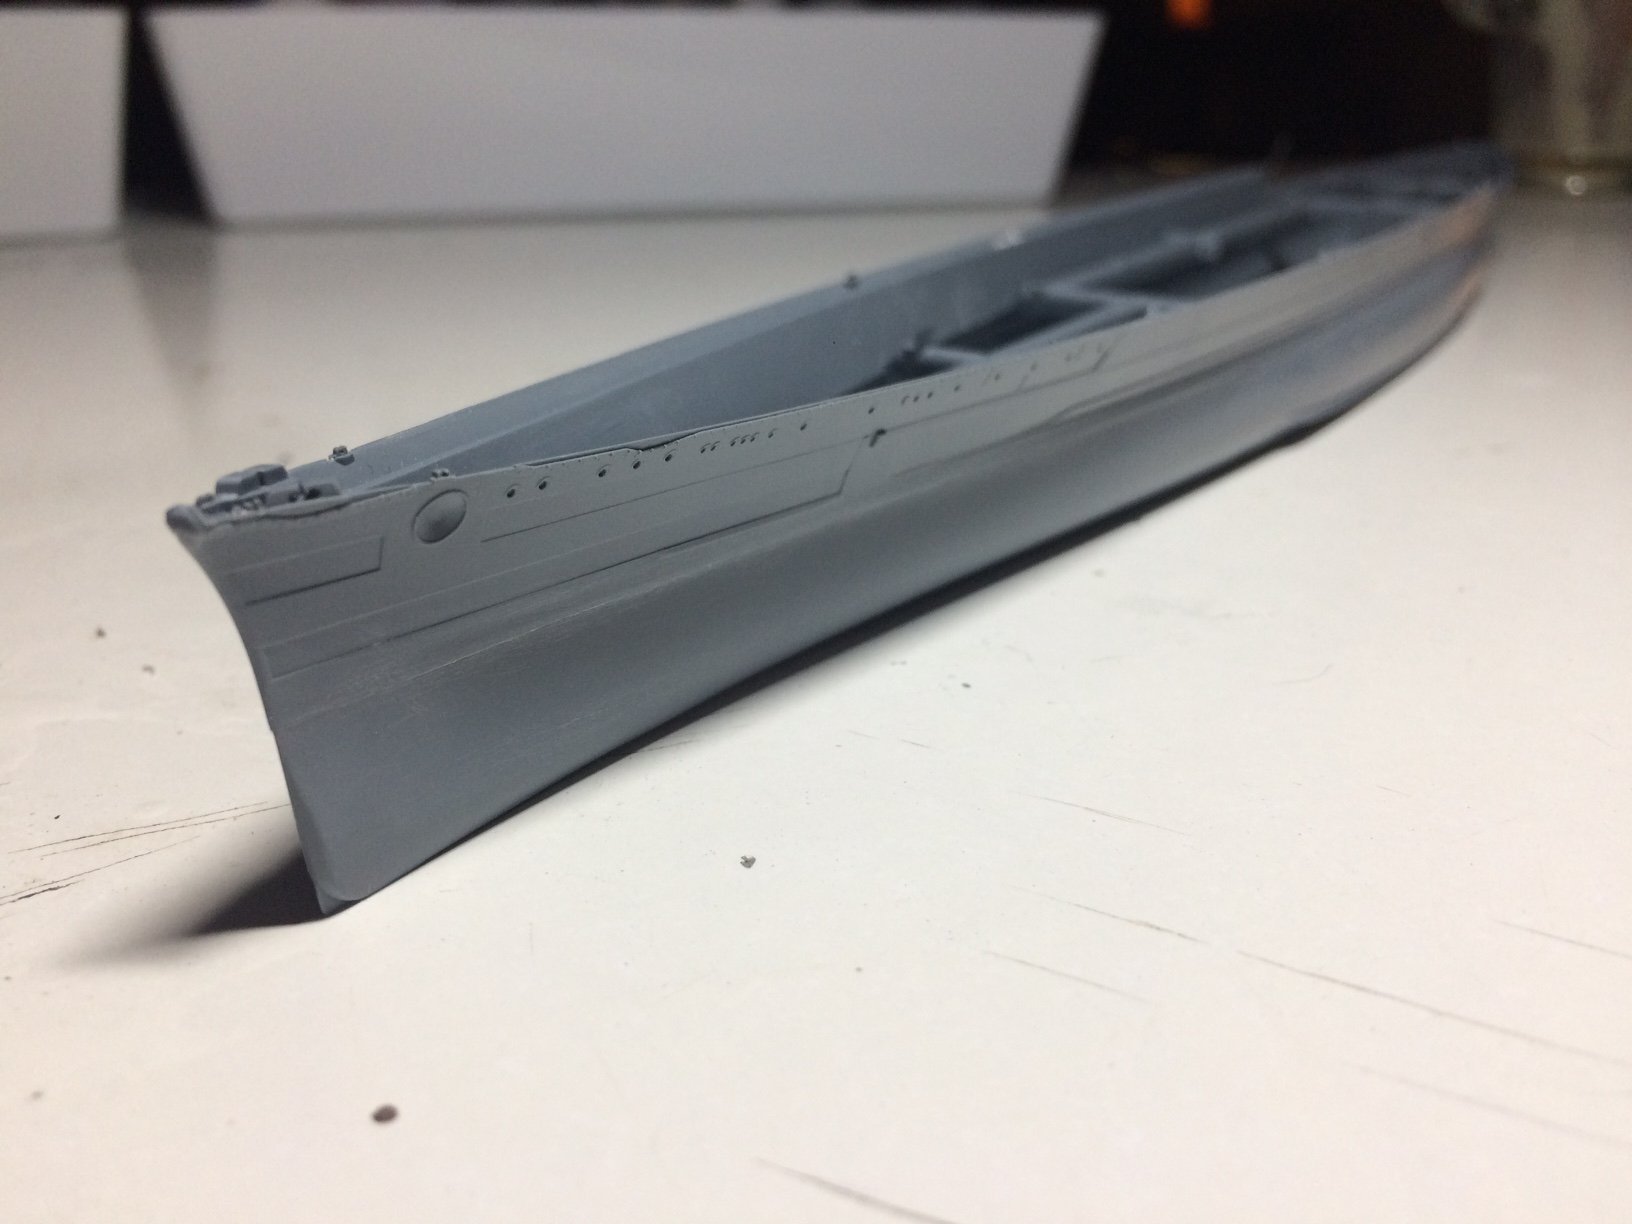
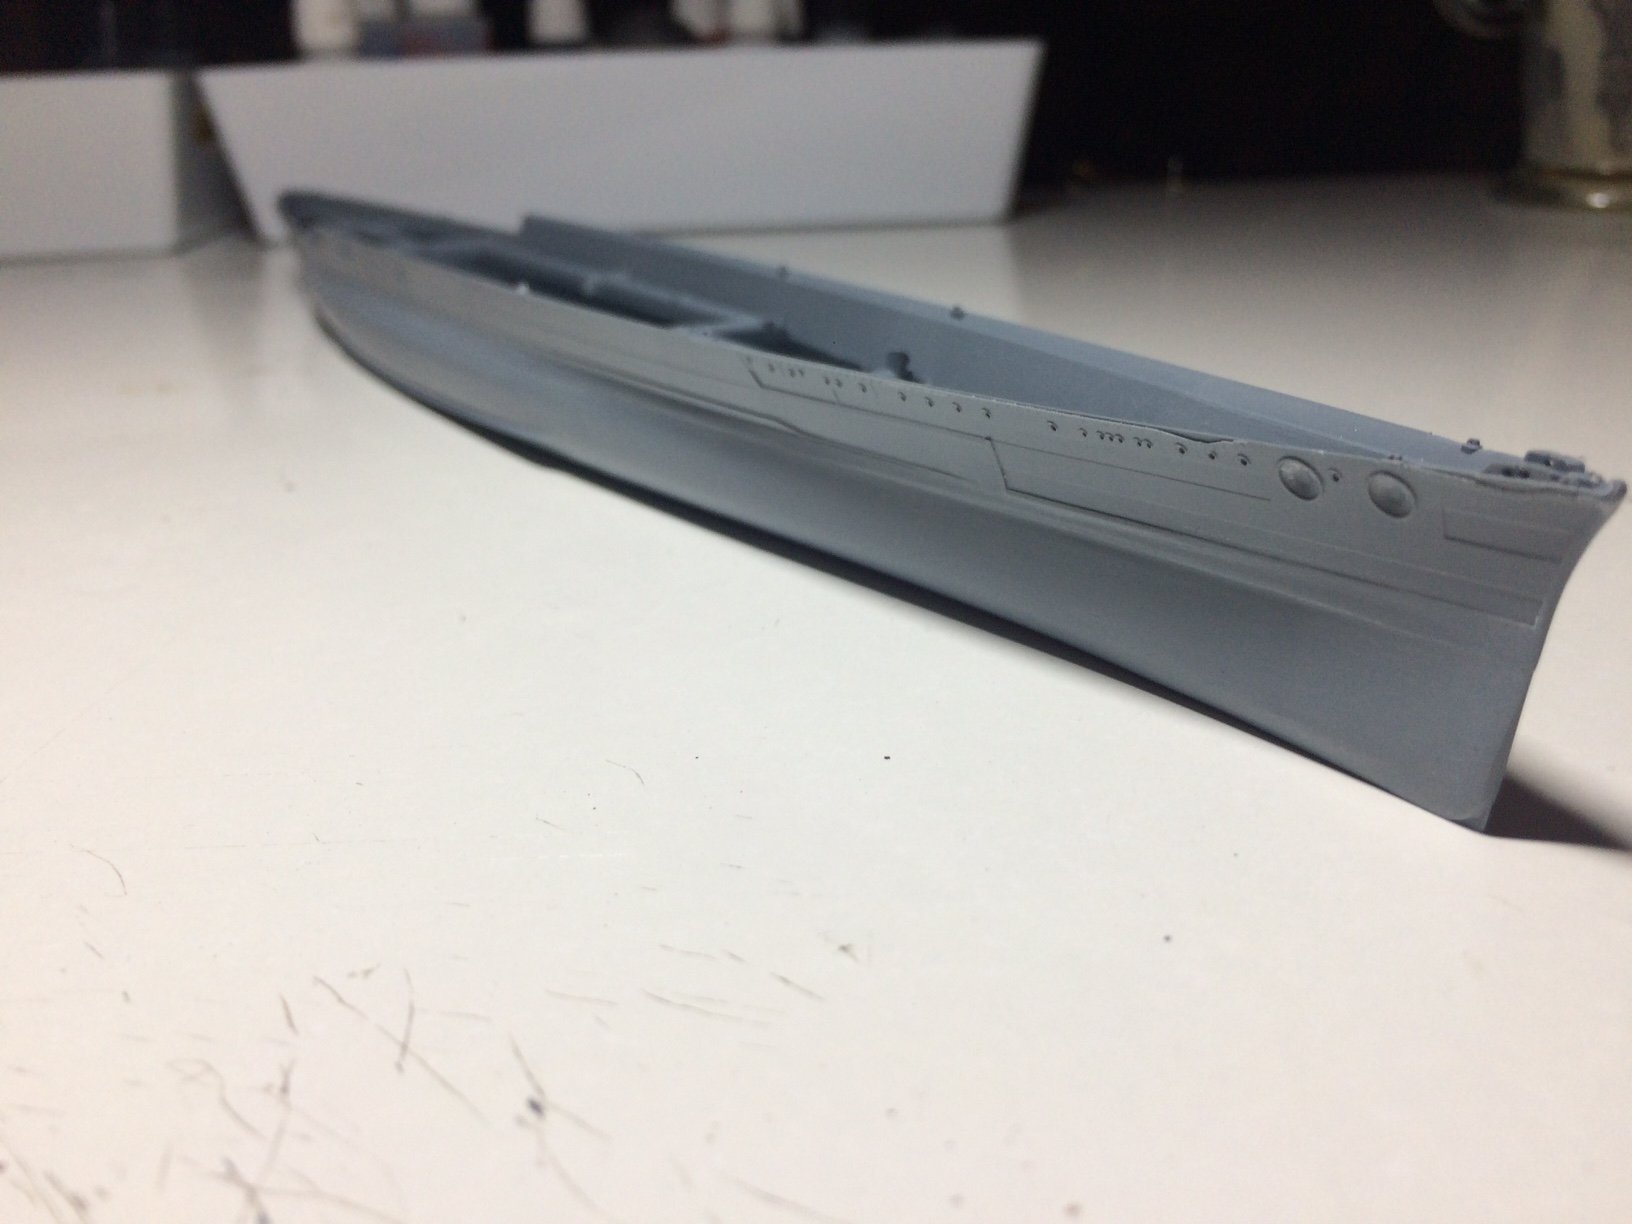
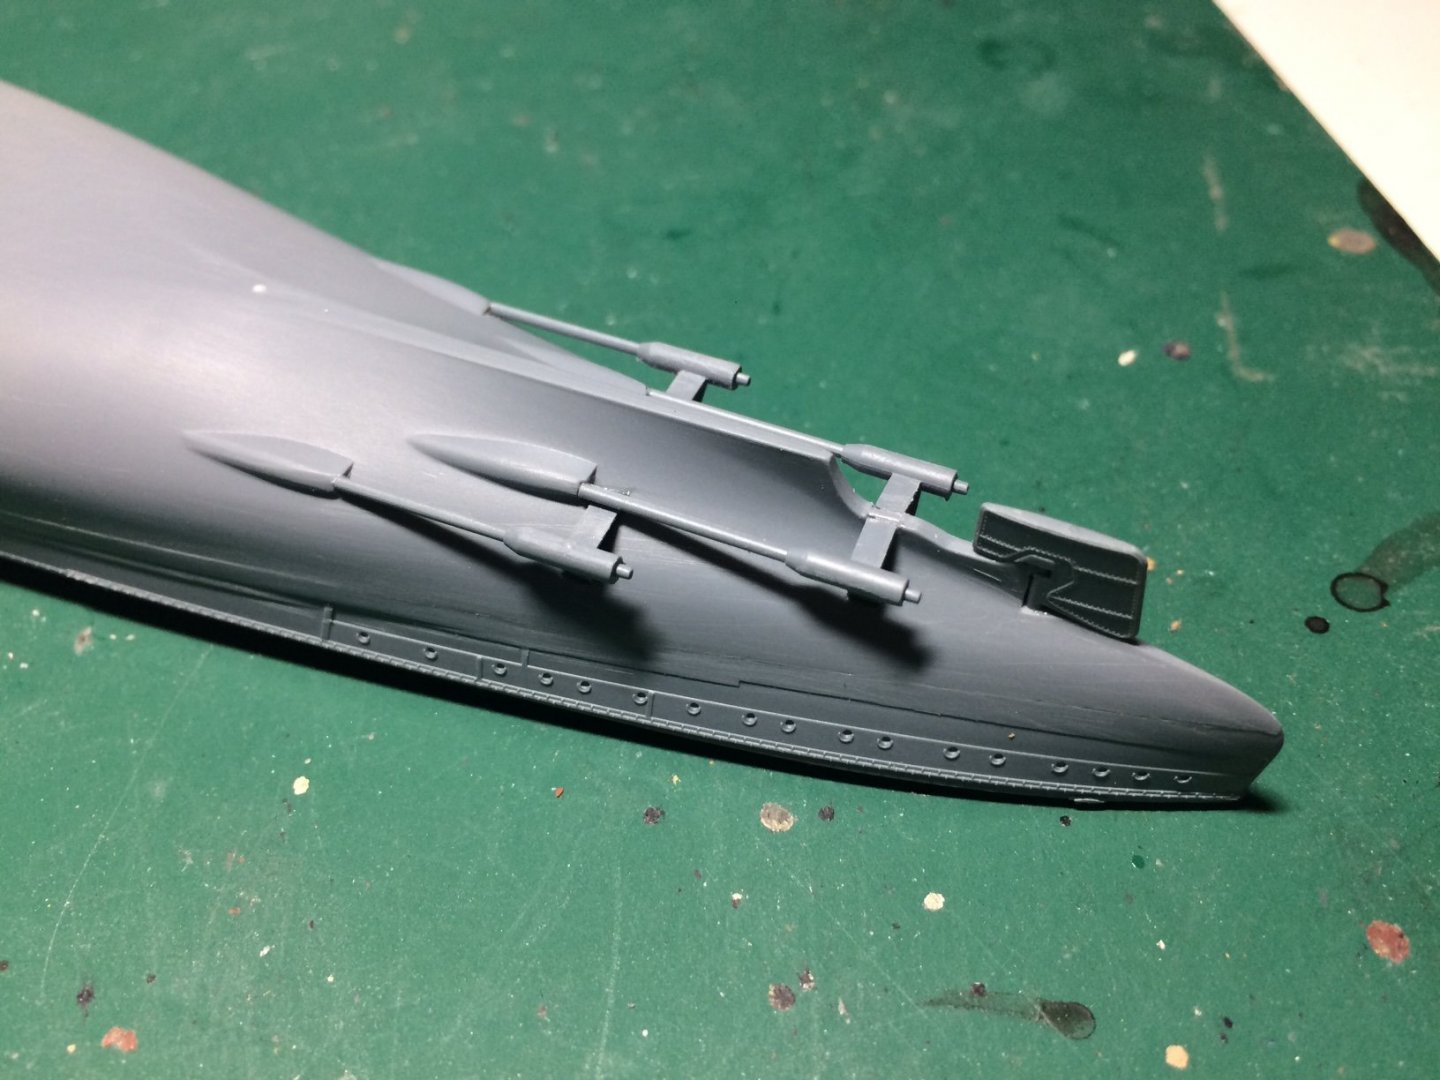
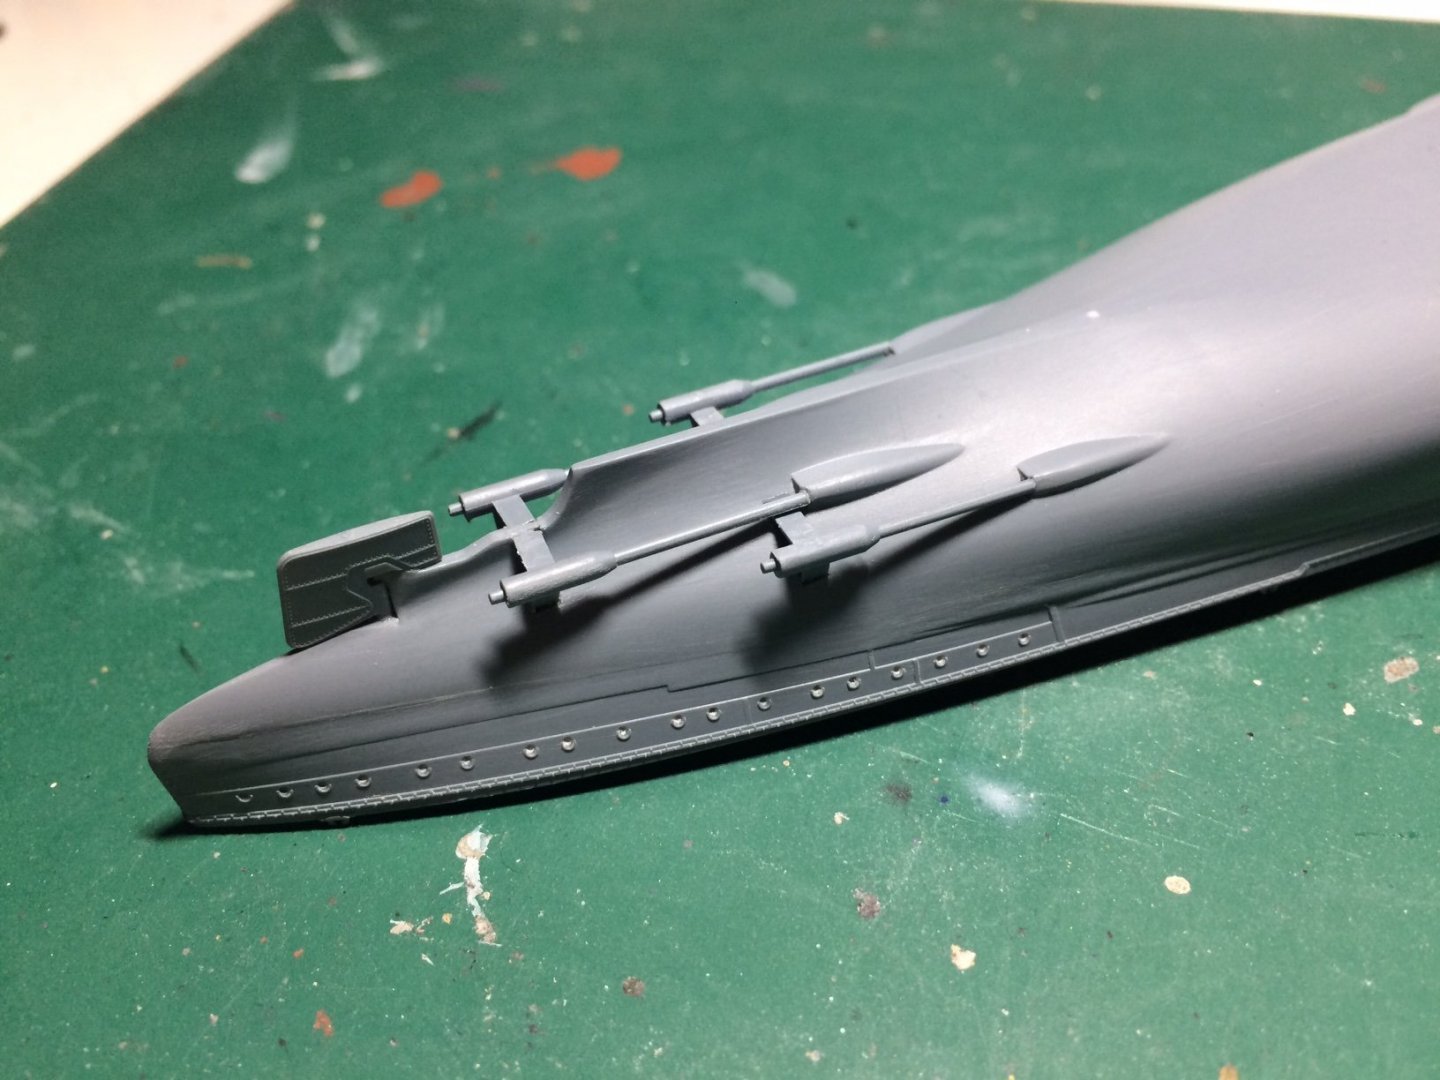
Right then folks looking for something different - I have started this. So first thing I had to do was to remove the hull sections from the wrapping and found some warping from the bow to stern, I corrected this with a hairdryer, then I dry fitted what I thought was Three sections - but I soon worked out the middle section is only a false bottom to be used when the hull is set up as a waterline model. Where the lower meets the upper hull there are a series of lugs and sockets - I put a smear of glue into these and offered up the Two sections, then a smear of glue along the inside and pushed together - then my normal routine using the hair dryer, then it was put a side for a bout 30 mins, I then did a wee bit of wet sanding to clean up a wee bit of glue seepage. So this is the start. OC.

- 510 replies
-
- 10
-
-
Folks I have scrapped this - its currently in the bin, it started just having far too many problems I went to do the rotor heads and one of the rear leg oleo's broke away where it had bee repaird before, it wouldn't glue back, then one of the windows fell inside and could not be rescued due to the internal framing, just too many issues so I binned it. No worries it was one of those builds taht went wrong so many different ways.. But I have started something else - OC.
-
Thank you for posting those Mark. OC.
-
2021 NRG CONFERENCE
Old Collingwood replied to kurtvd19's topic in NAUTICAL RESEARCH GUILD - News & Information
That is Great news. Thank you Kurt☺️👍 OC. -
Not sure what to say Mark - words fail me and are meaningless - very sad news. OC.
-
Yes indeed Ken, I had no gloss to hand and was eager to get her finished - so I did the naughty deed and put them down on the flat paint work. OC.
-
She is looking really nice Mark - I have an idea to catch all the dust - its called a Tak Rag Its a tacky glove you wear all the dust is attracted to it leaving a dust free surface - I used to use then in the cycle industry removing dust on the frames before they where primed and painted. Take good care mate. OC.
- 505 replies
-
- 4
-
-
- vanguard models
- Sphinx
- (and 1 more)
-
2021 NRG CONFERENCE
Old Collingwood replied to kurtvd19's topic in NAUTICAL RESEARCH GUILD - News & Information
Is everything healthy Kurt within the site? I hope it is as its so important for so many people - its a genuine family here, I for one would not want to imagine an everday world without our site. OC. -
That is looking so cool. OC.