Old Collingwood
-
Posts
12,106 -
Joined
-
Last visited
Content Type
Profiles
Forums
Gallery
Events
Everything posted by Old Collingwood
-
 Thanks Dan. OC.
 -
Thanks Ken. OC.
-
Thank you kindly Alan, yep I'm quite pleased how it turned out. OC.
-
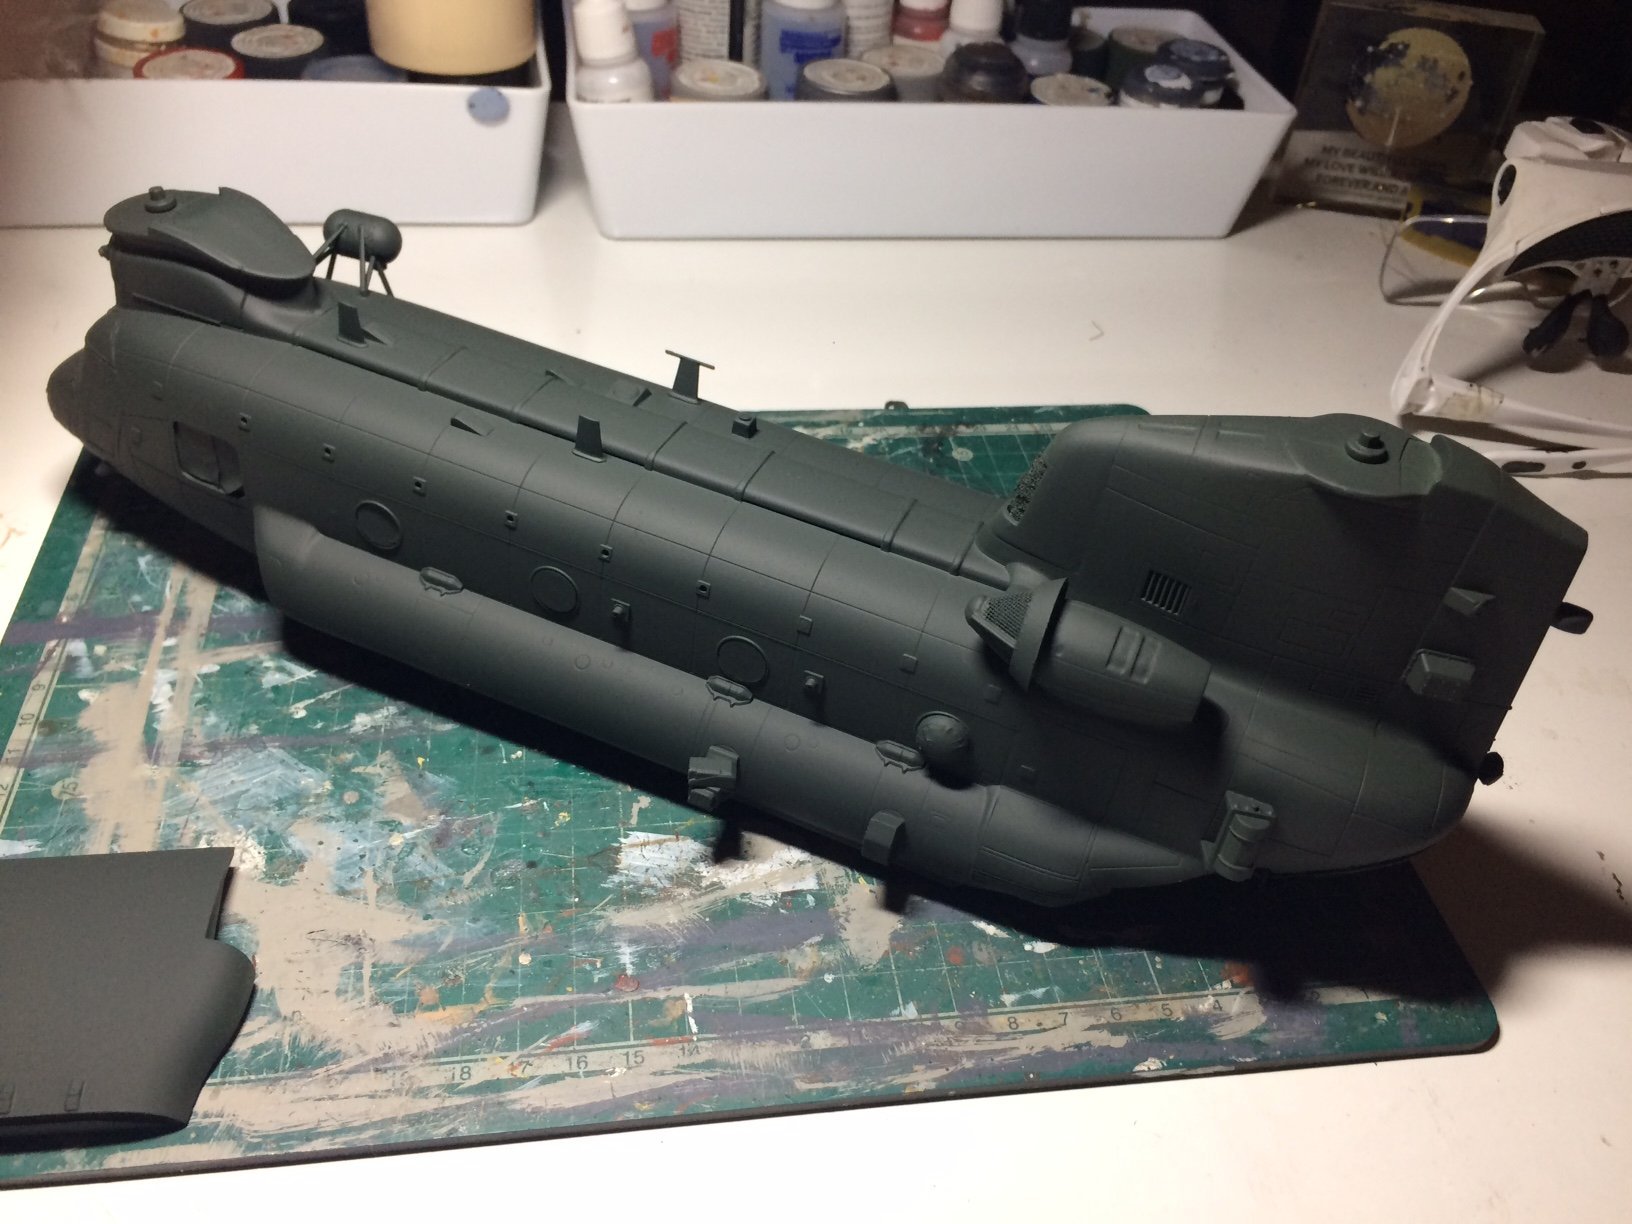
"I'm Back" So after putting my Hawk on the back boiler - I decided to have another bash on this, if you remember I was struggling with rattle can painting it, so I decided to give it a bash with my airbrush, I mixed up some Nato Green in my airbrush cup with 50% water and started several coats all over my wokka, drying it before turning over to paint the bottom. When finished I also sprayed the tail gate. Think it has painted up quite well.


- 283 replies
-
- 12
-

-
1/48 Italeri Hawk T.1A (On Hold)
Old Collingwood replied to Old Collingwood's topic in Non-ship/categorised builds
Folks I have decided to put this on the back boiler - lost my mojo with it. But Im back on another fave - OC. -
1/48 Italeri Hawk T.1A (On Hold)
Old Collingwood replied to Old Collingwood's topic in Non-ship/categorised builds
Thank you for all your imput Dan👍 OC. -
1/48 Italeri Hawk T.1A (On Hold)
Old Collingwood replied to Old Collingwood's topic in Non-ship/categorised builds
Thank you All for the kind help and advice, moving forward and taking all the advice into account - I think my best move is to leave the canopy in place as it might break trying to remove it then re-mask it, I will continue to add the decals and in the mean time get a jar of a clear acrylic gloss top coat and when the decaling is finshed and the top coat arrives - airbrush it over. OC. -
1/48 Italeri Hawk T.1A (On Hold)
Old Collingwood replied to Old Collingwood's topic in Non-ship/categorised builds
Is this the right "Future" Acrylic Polish that people use, it seems to be hard to get over here this is the only one I found in Flea bay. https://www.ebay.co.uk/itm/222435349634?hash=item33ca2e1482:g:sucAAOSwuxFYuGv~ OC. -
1/48 Italeri Hawk T.1A (On Hold)
Old Collingwood replied to Old Collingwood's topic in Non-ship/categorised builds
I was a bit hasty and took the masking of the canopy thats glued down - so to finish it off correctly (it needs to be quite shiny) I think I will need to spray over the whole thing after my decs are on, its like a satin smooth finish now but not a high gloss like it needs to be. OC. -
1/48 Italeri Hawk T.1A (On Hold)
Old Collingwood replied to Old Collingwood's topic in Non-ship/categorised builds
Thank you Lou, should airbrush OK I take it? OC. -
1/48 Italeri Hawk T.1A (On Hold)
Old Collingwood replied to Old Collingwood's topic in Non-ship/categorised builds
Sorry just seen your reply, thank you Kevin. OC. -
1/48 Italeri Hawk T.1A (On Hold)
Old Collingwood replied to Old Collingwood's topic in Non-ship/categorised builds
So thnking about where I am - will it work? after applying all the decs and touching up the frame work around the canopy, If I get a small jar of Acrylic Clear Gloss and spray all over Including the canopy will it be Ok and not haze the galzing on the canopy - I know some have used Future or over here its called Pleadge - or would another modeling brand work? OC. -
1/48 Italeri Hawk T.1A (On Hold)
Old Collingwood replied to Old Collingwood's topic in Non-ship/categorised builds
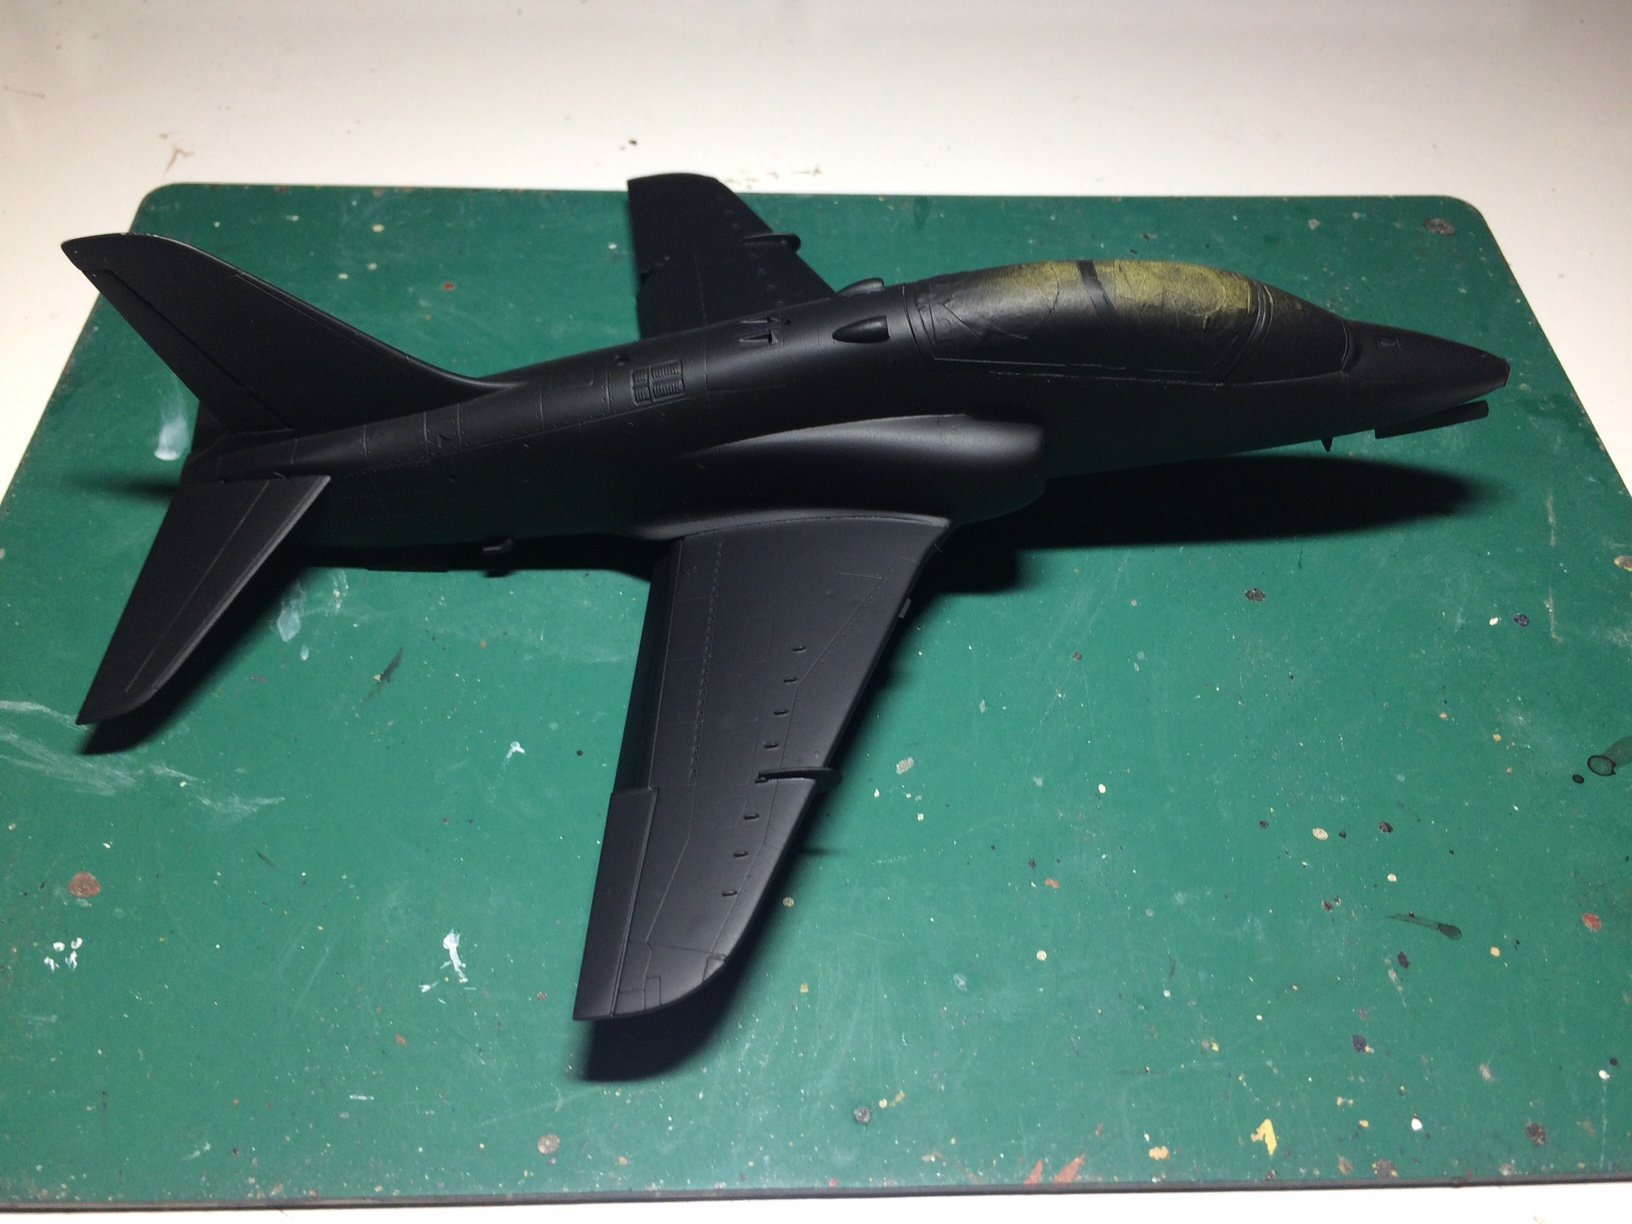
Evening all, so another update - well you know those "Two steps forward - Three steps Back" situations? yep that gremlin has bit me with this - I decided to polish up the Black primer and it buffed up quite well, then I thought "Heck im going to use it as the top coat" so there was some White detail that needed painting on the canopy I masked it and painted it by hand - saved getting the airbrush out and easy-er to control, this was then dried and little bit of tape I found in my box removed, its left quite a messy job to be honest and will need re masking and painting. So I thought I would bang on with the decals - starting with the Two tail decs, they are colourful pieces and cover the whole tail, I cut the first one out put some micro set on then placed it - its slightly over size to part wrap and meet in the centre of the leading edge, nope wasn't going to work and it split near the edge - so off it came, plan number Two or Three make it a normal Navy version or the Anniversary version but minus the tail detail - So I have started placing some of the other decs on it for now. So not as I had hoped and a bit disappointing. OC. -
D9R by Kevin - Meng - 1/35 - PLASTIC - started 2015
Old Collingwood replied to Kevin's topic in Non-ship/categorised builds
Excellent work Kevin - and what a Superb rectification - love it mate. OC. -
1/48 Italeri Hawk T.1A (On Hold)
Old Collingwood replied to Old Collingwood's topic in Non-ship/categorised builds
Thank You Dan. OC. -
Excellent work really authentic looking burned wood. OC.
-
1/48 Italeri Hawk T.1A (On Hold)
Old Collingwood replied to Old Collingwood's topic in Non-ship/categorised builds
Thank you kindly for explaining that to me, I have the Vallejo acrylic flow improver (put a few drops into my airbrush bowl with the paint and mix with a brush) do you recomend Tamiya's X1 Gloss Acrylic for spraying with? I have a round spray table I tend to use that to spray on putting the plane first upside down and spray the underside turning the table round as I need, then after drying with a hairdryer I then turn the plane over and paint the top surfaces turning it round as needed. Its a learning curve - but an enjoyable one. OC. -
Mate your box type radar ariel did she ever have that just found this link and nothing shown with that type of device - https://www.navy.gov.au/hmas-vendetta-i OC.
- 1,090 replies
-
- 3
-
-
- showcase models
- vendetta
- (and 2 more)
-
1/48 Italeri Hawk T.1A (On Hold)
Old Collingwood replied to Old Collingwood's topic in Non-ship/categorised builds
So my next stage - will be to do a very minor slight sand to a very minor ridge on the one cowling - then a very quick blast over, then I will do a White paint over the centre frame on the canopy, this will then be tapped over and a Gloss Black paint will be spayed all over (I will have to wait for a bit as I currently do not have and Gloss Black or tamiya tape) - so this bird may be put on the back burner while I find something else to start/continue/finish don't worry I still have enough sins to work on / I mean kit projects. OC. -
1/48 Italeri Hawk T.1A (On Hold)
Old Collingwood replied to Old Collingwood's topic in Non-ship/categorised builds
No Mark, she will be a Shiny Black bird with a colourful tail. OC. -
1/48 Italeri Hawk T.1A (On Hold)
Old Collingwood replied to Old Collingwood's topic in Non-ship/categorised builds
Thank you so much Alan. OC. -
1/48 Italeri Hawk T.1A (On Hold)
Old Collingwood replied to Old Collingwood's topic in Non-ship/categorised builds
Evening all - Day Three of my airbrush experience - after being more methodical and cleaning the plane with wet sanding, I think I got a better finish from my airbrush, just one tiny area that needs a bit more work - but I am more happy with it. OC.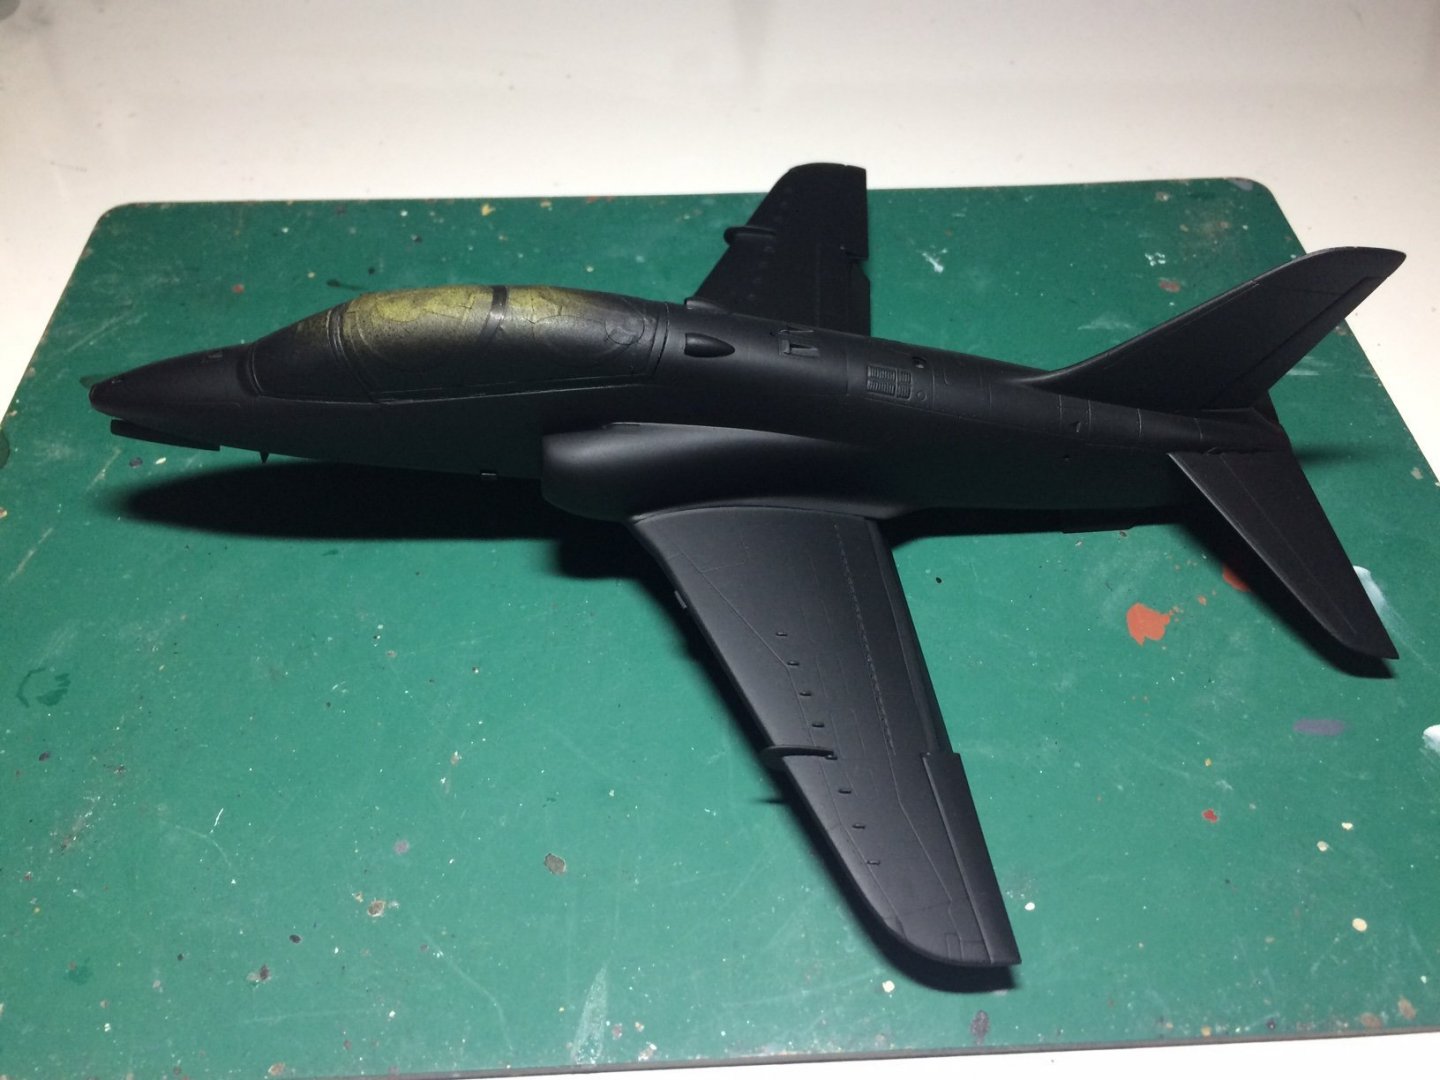

-
1/48 Italeri Hawk T.1A (On Hold)
Old Collingwood replied to Old Collingwood's topic in Non-ship/categorised builds
Indeed Mark, you should see me today - mask on with my glasses and optovisor trying to stop them steaming up so I can see what I am doing. OC. -
D9R by Kevin - Meng - 1/35 - PLASTIC - started 2015
Old Collingwood replied to Kevin's topic in Non-ship/categorised builds
I too am finding airbrushing is a learning curve - mine has taught me it needs to be surgically clean, and the paint/primer needs to be the right consistency - looking forward to seeing more Kevin. OC.