Old Collingwood
-
Posts
12,104 -
Joined
-
Last visited
Content Type
Profiles
Forums
Gallery
Events
Everything posted by Old Collingwood
-
 Superb work Chris - really top notch workmanship. OC.
- 55 replies
-
- 3
-

-
- Blue Ridge Models
- Normandie
- (and 2 more)
-
Apperntly nice - but they do have smelly feet........😁 OC.
- 1,090 replies
-
- 6
-
-
- showcase models
- vendetta
- (and 2 more)
-
Or spending most of the time on the carpet looking for those tiny parts that went "ping" OC.
- 1,090 replies
-
- 5
-
-
- showcase models
- vendetta
- (and 2 more)
-
Same as Edward - sincerley sorry I missed your build log on this - atleast I have caught it now - loverly work indeed mate. OC.
- 90 replies
-
- 2
-
-
- finished
- Midwest Products
- (and 1 more)
-
I thought the same Mark, just looks like an accident waiting to happen - like we see in the films... OC.
-
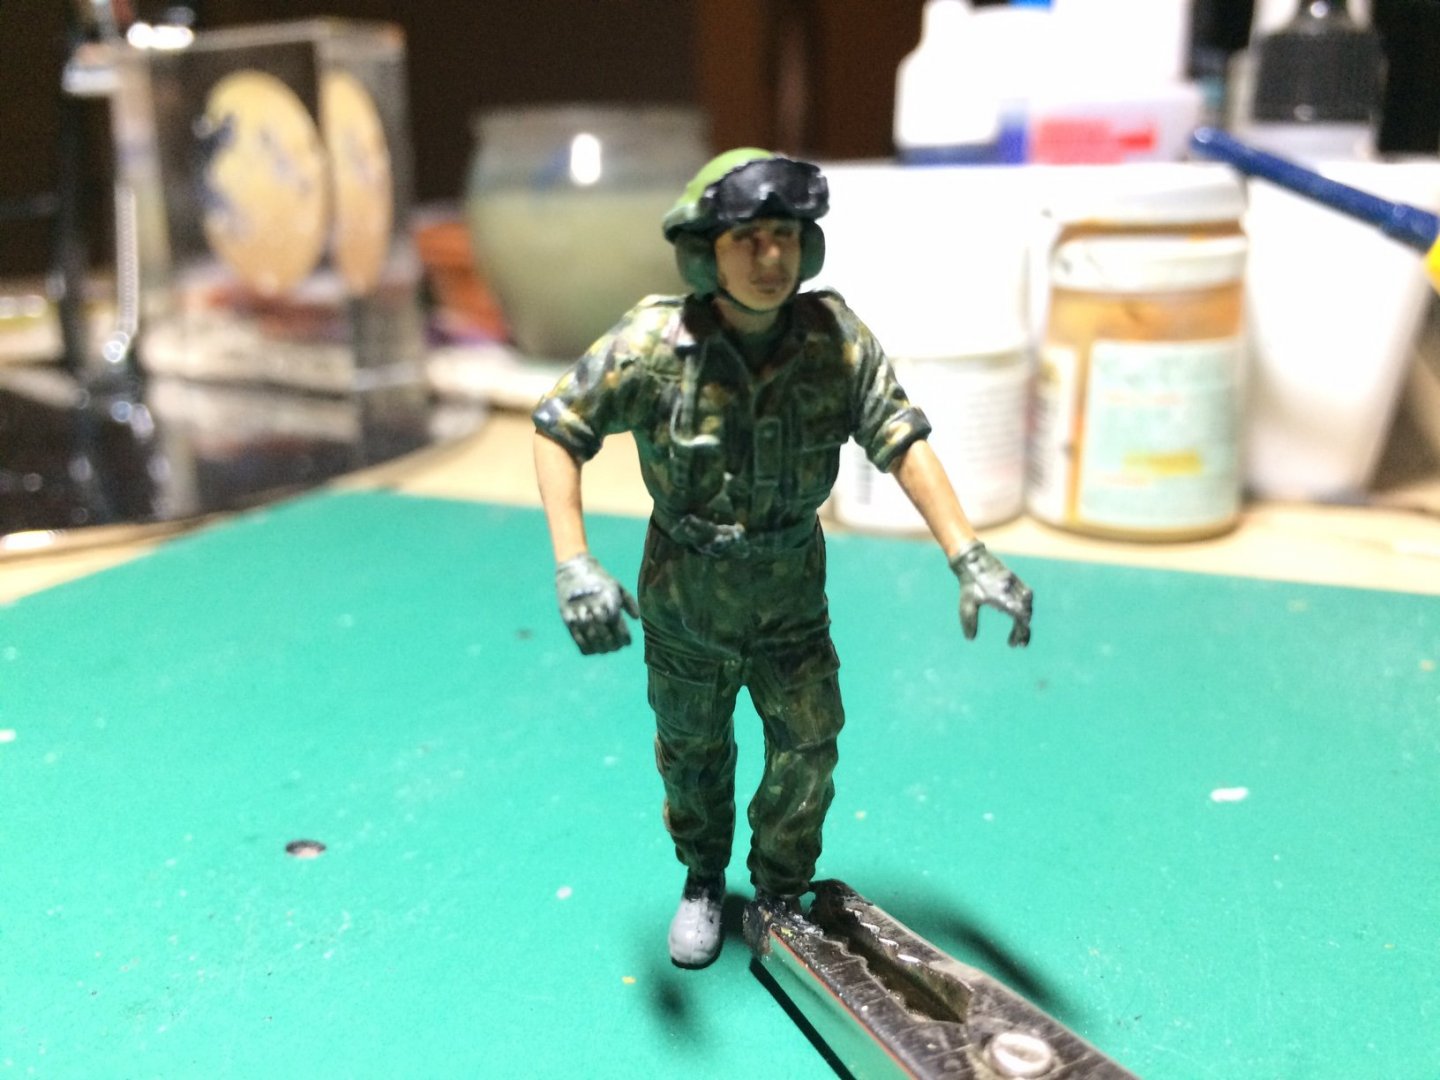
Hi all, a wee bit of an update - I have managed to tidy up the hull, I used some small pieces of fine wet and dry - and gently rubbed over the areas where the dust specks were, did quite a good job, I have made a temp holding device in the shape of a lolly stick that spans under both edges of the turret ring its wedged one end and secured by a small clip the other - I will be able to hold it now without fear of it falling. So tomorrow I should be able to give it a bit more paint in a couple of light layers - same with the turret. I also decided to make the Chrome Dome on the commander a wee bit darker so I used a darker shade of Green. OC.
-
Looking good, good move on filling in the lower ports at the stern, as they would have been a wee bit close to the sea from her extra weight, I see you are doing her with the 6in barbetts on her waist, cool if oyu have the brass barrels they will super nice. OC.
-
Thanks Ken, all One persons fault - Mine, I rushed - didn't prepair and didn't consider that the old glove (the cheap throw away surgical type) would be no good to re-use after priming, also I did not have a propper hold of the Hull (yes foreget to mention it fell away from a plastc clip I was using - and fell to the floor onto slabs) nothing broke or fell off (told you those Challies were tough. I was cursing and got one of those looks off the admiral as I am creating a history off the same disasters when it comes to me Rattle can painting, nothing I can do though - I have to use them if I want a smooth paint finish. Planning for when I tidy up the hull and go out and re-spray - I need to rig up something I can trap between the turret opening in the hull that would allow me a way to hold it and rotate in my hand to spray all over it side to side - top to bottom, without dropping it this time. OC.
-
I brought both sections in the house after the smell had gone off and surveyed the damage - it looks like it is deffinatly fixable, do you know what would be perfect to fix (Isolated fine sanding) like a pointed q -tip but made from fine grade wet and dry, so I could just sand the specks away in hard to reach areas where there are lots of fittings like the top of the engine covers. OC.
-
Good day all, bit of an update - another nice day here so without delay I decided to take the Two sections out into the yard with the intention of putting on the Nato Green with my rattle can - first I put my disposible glove on - shook the can for sevaerl minutes then trying to hold the turret first using a tube I had a mde from a pringles tub, this was tack taped underneath with tamiya tape - first coat went on not too bad, I put it down on my chair and picked up the main hull - Im used a gorrila clip to try to hold as by holding it before with my fingers inside the turret ring - was before causing me to catch my glove on the painted surface, anyway spraying away then I noticed bits started falling on the wet paintwork as I was spraying - it was dry dust fragments falling off my glove, it fell on the wet paintwork like embers from a fire. Yep wrecked paintwork - I will try to sand off the damage latter. Always fun and games with my painting technique - but frankly its inevatable with how I have to work.😬 OC.
-
No problem my friend, I was abit ocdc with mine hence why I did underneath aswel, but the side will do just as good. OC.
-
Oh, If your still going to have a go at doing some armour belts I would do them before putting your prop shafts on (like I didn't) it will help tp get a smoother run - nothing in the way. OC.
-
Thats a great start with the hull - if I remember mine was quite good the way the two sides went together. When you get to put the deck pieces down I think mine had a slight gap that wasn't a real issue as the wood stick on deck covered that. OC.
-
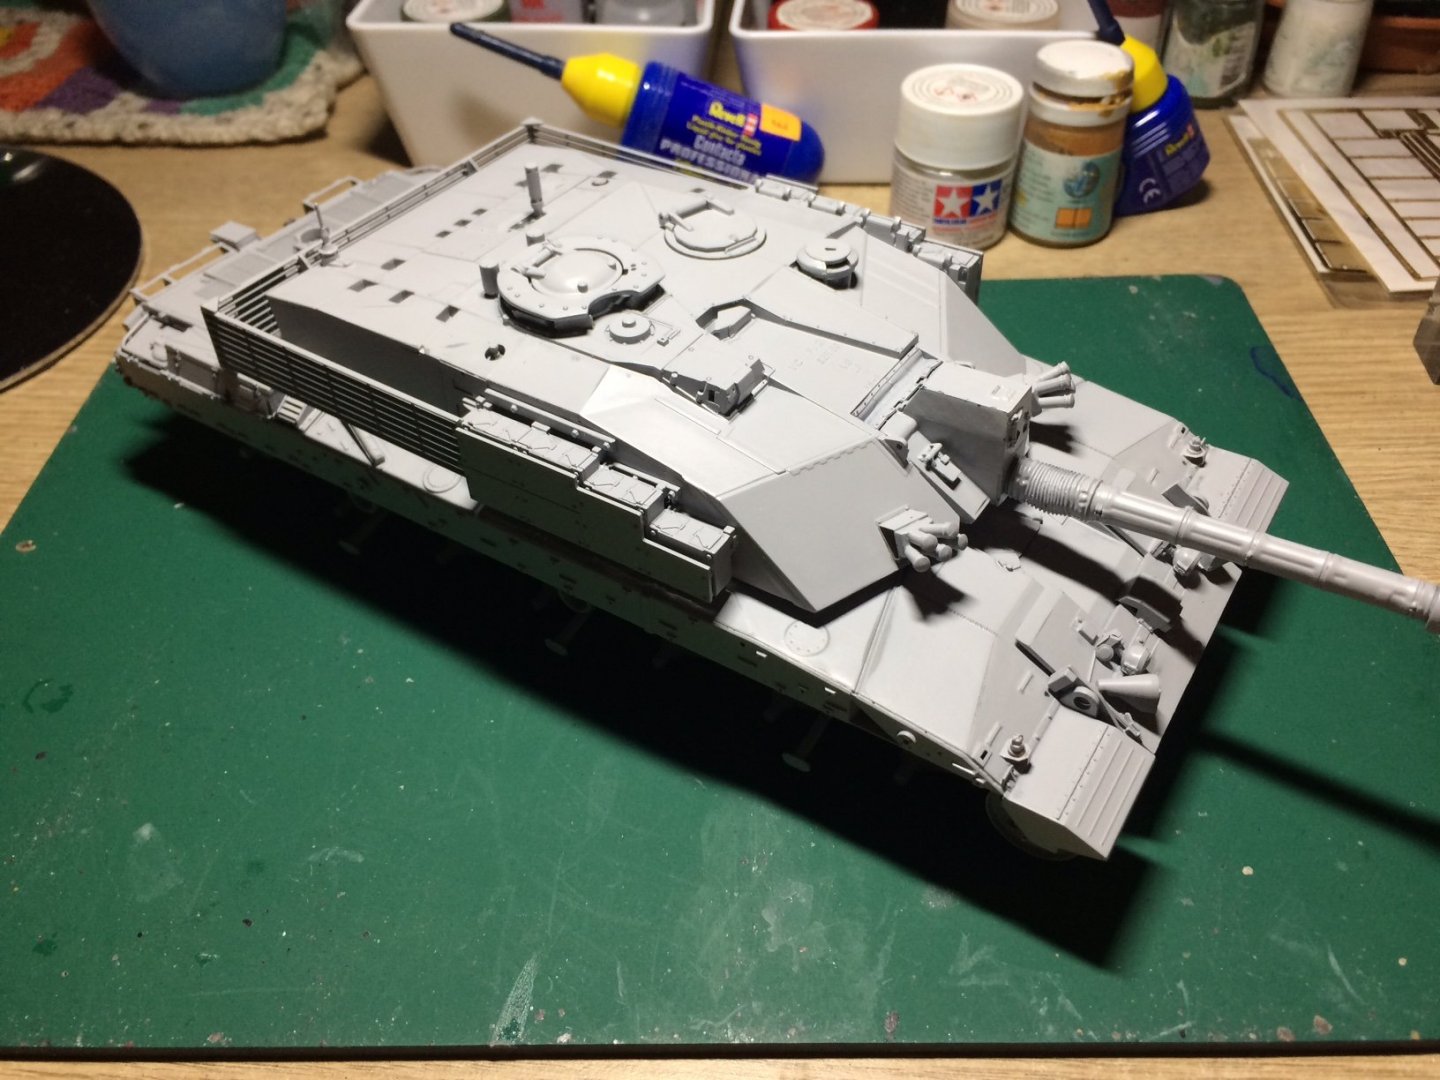
Evening all, starting to get some wet stuff layed down now - used my normal Tamiya surface primer in rattle can, normal procedure - weather has settled down so I was able to go into the back patio and with door closed - I sprayed the hull and turret, I then left them outside most of the day while I did some aicraft spotting/photography. I brought them in this eve - gave them a look over - not too bad just needed a slight wet and dry in small areas just to take a few dust specks off. The main sections are now ready for thier first layer of Nato Green, again by rattle can. OC.
- 367 replies
-
- 10
-
-
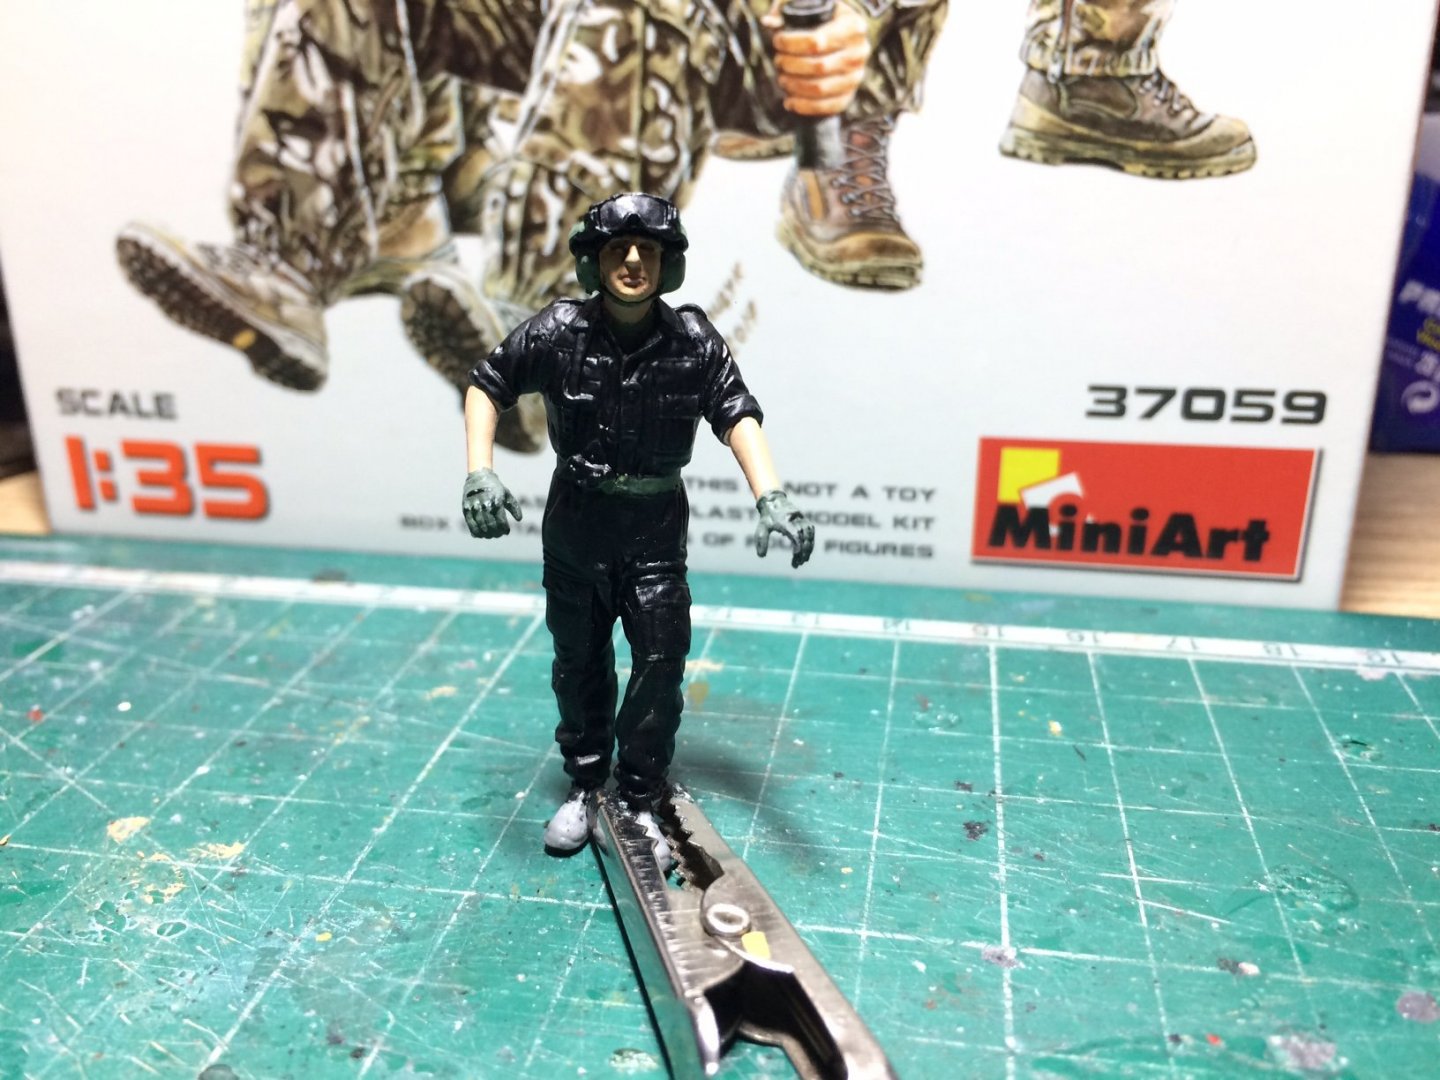
Thanks Lou, yep its light from direct above causing the strong light - but yep he is doing moon walking - I taught him how to - something for him to do when he is boared - cheers up the other tankers aswel.😁 OC.
-
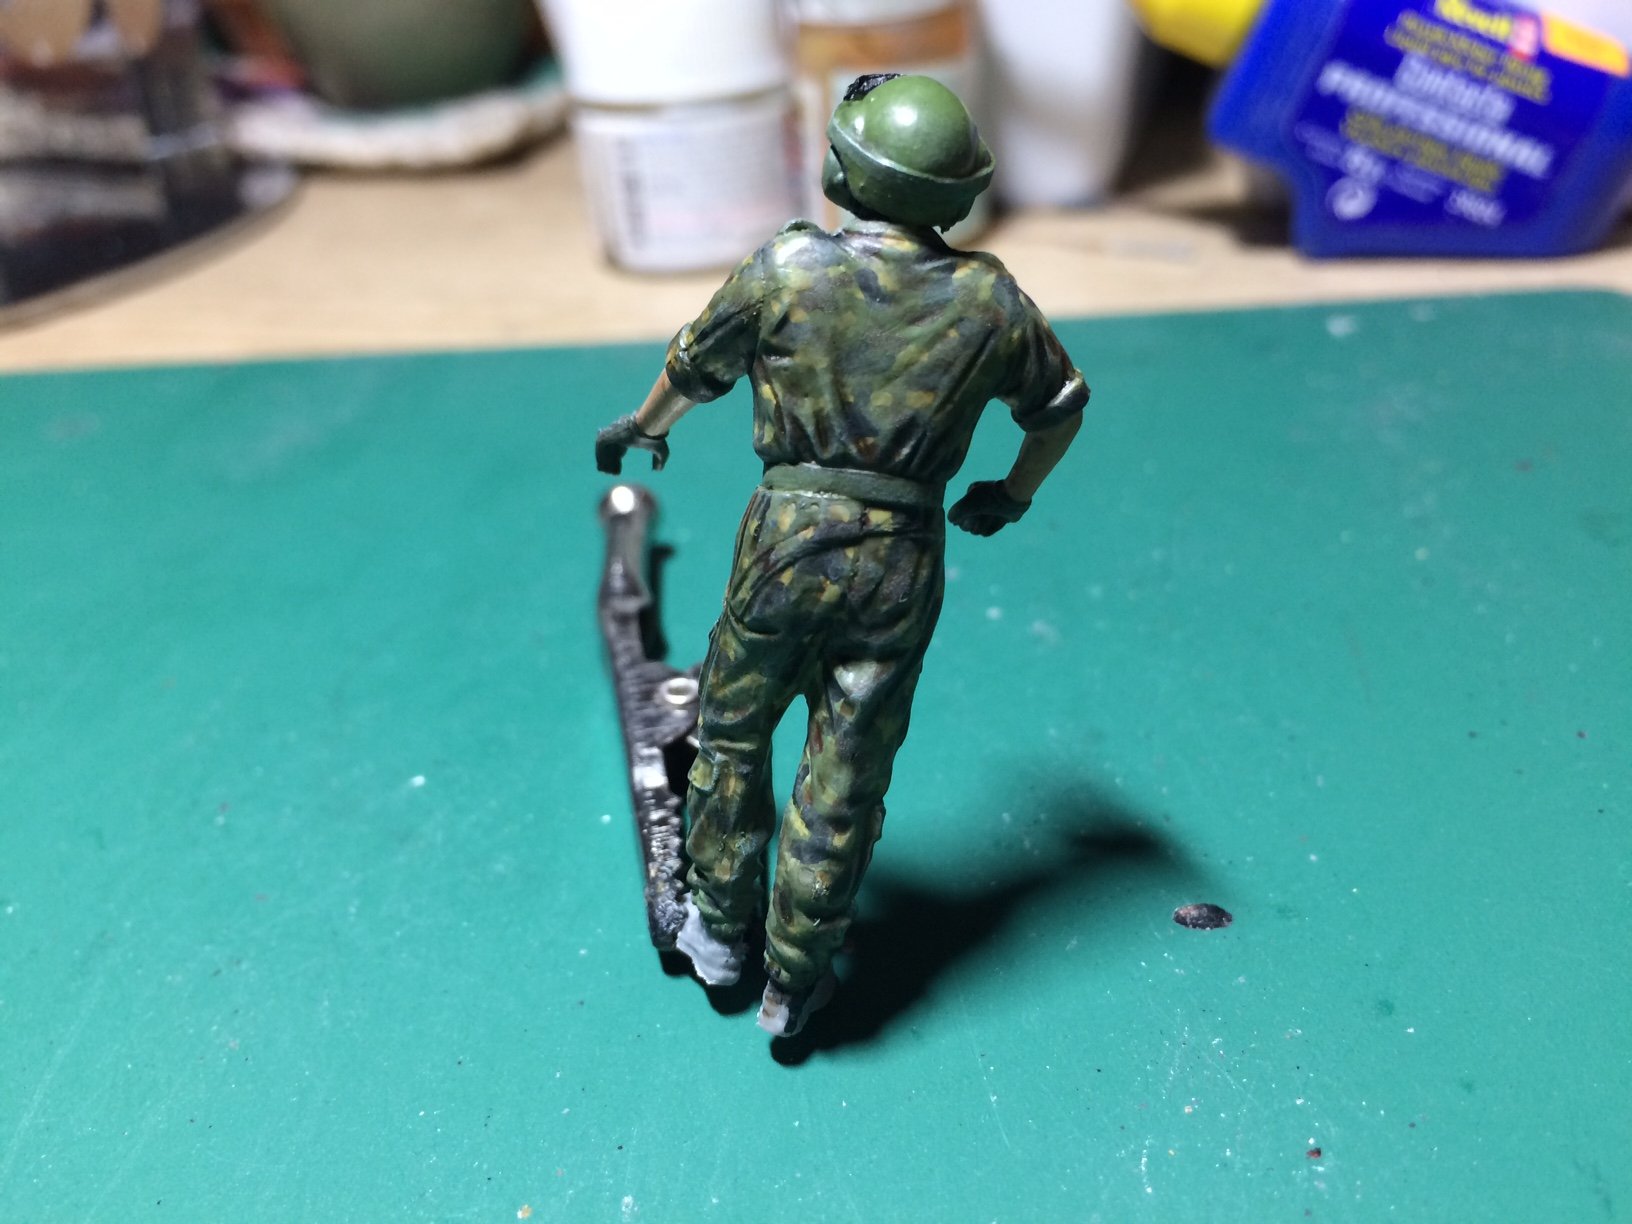
Evening all - right commander "John-Michael Peter Simon Junior the Third" has had his uniform painted, I first gave a basic Green coat then followed this with splotches of Sand, Brown and Black, then a subtle dry brush of Green followed by a wash and followed by another dry drush of white to bring out the details - just needs the glass in his goggles bringing up with some gloss then the rest off him a Flat coat. Oh - and his boots. Not bad for my very first camo uniform. OC.

- 367 replies
-
- 12
-
-
Deffo. OC.
-
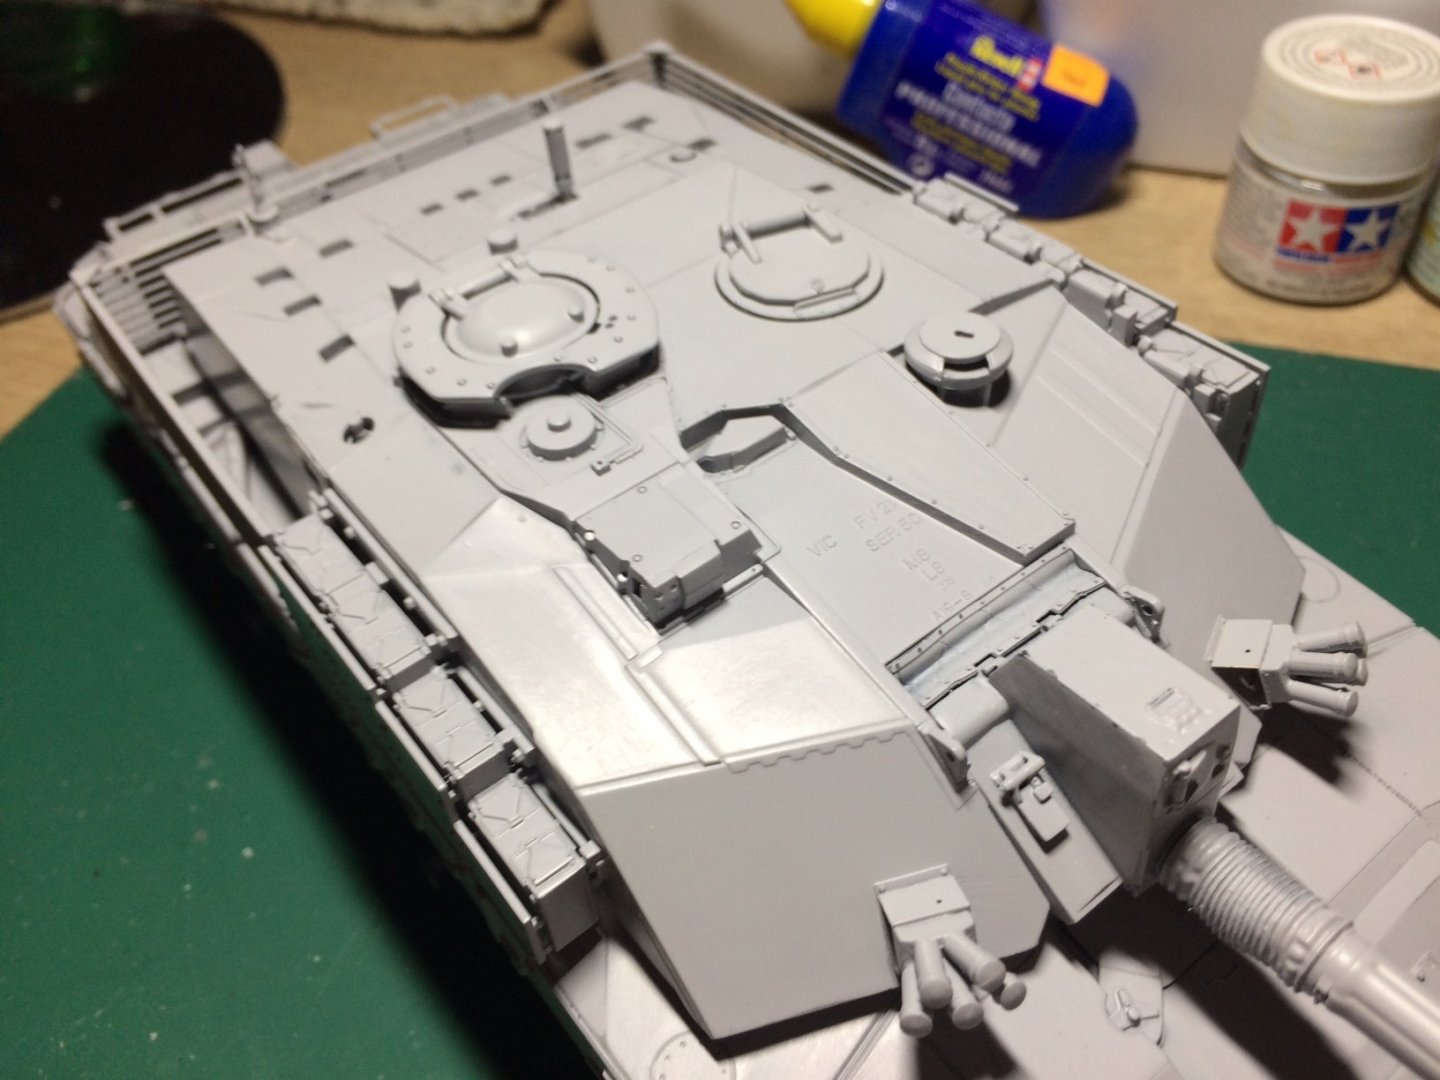
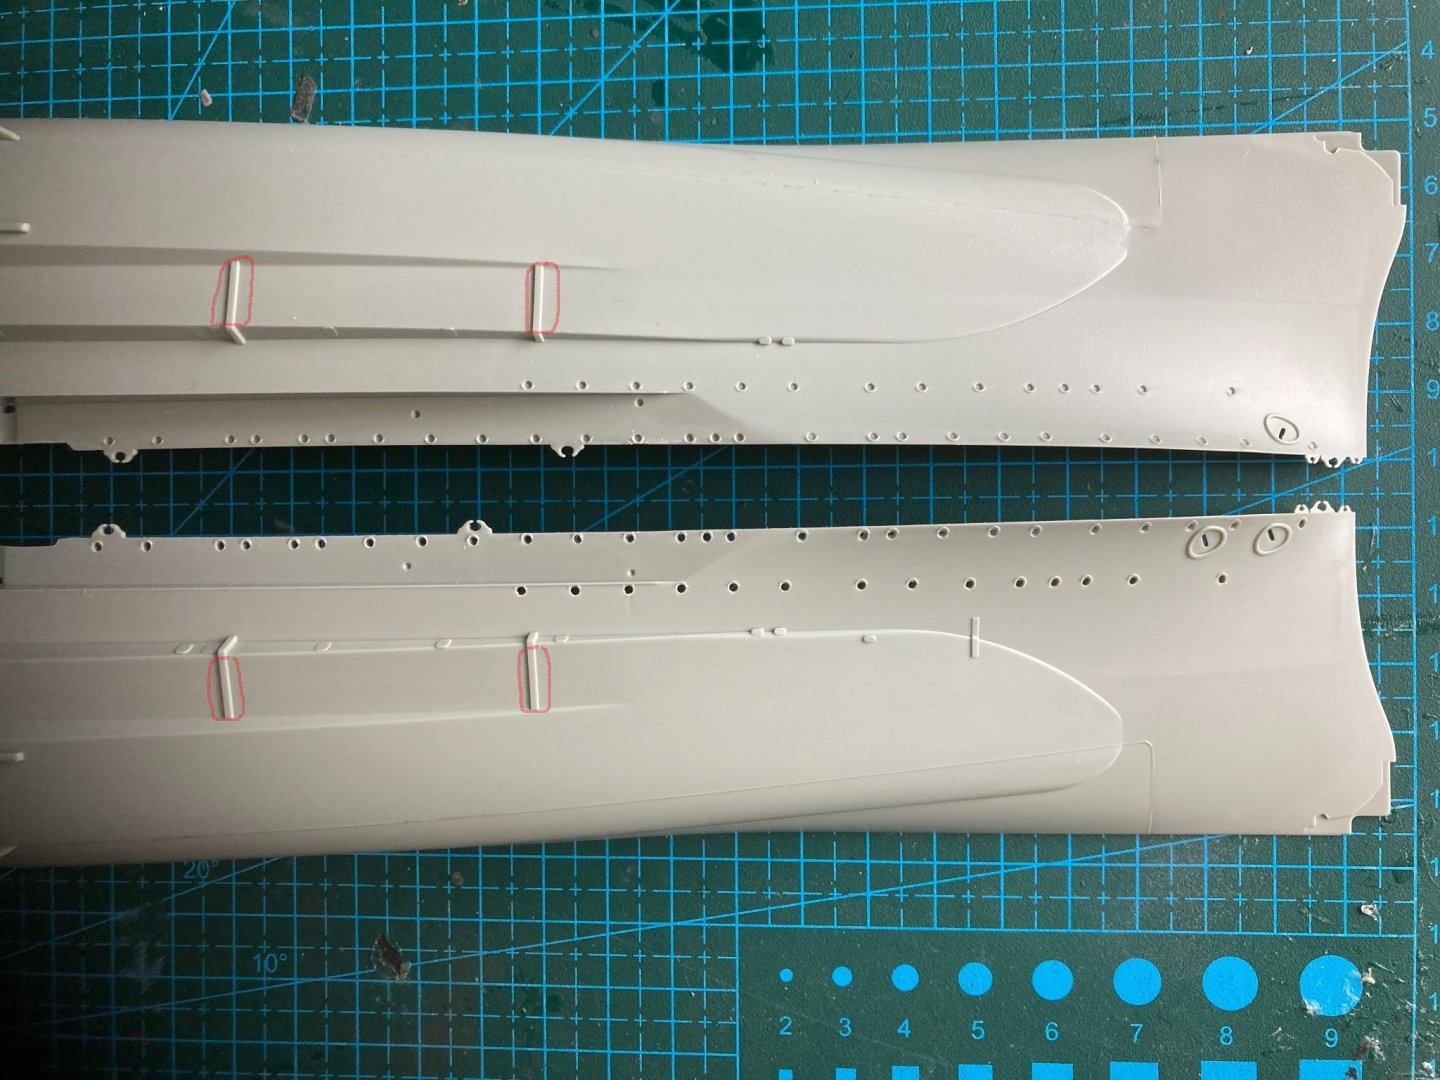
All those port holes "yep remember them" those square pieces running down from above the torpedo bulge slope and down the flat ridge, they need sanding flat with the flat ridge but keeping on the slope as they represent drainage pipes. (the areas I have marked within the red area - the same for the whole length of the hull) OC.
-
Thank you Patrick, thats to stop him running away...😁 OC.
-
Thank you kindly Denis, thought I would break the sequence by doing the figures - actually its because its to wet outside to paint and the tank has reached that point. OC.