Old Collingwood
-
Posts
11,492 -
Joined
-
Last visited
Content Type
Profiles
Forums
Gallery
Events
Everything posted by Old Collingwood
-

1/48 Seafire Mk. III (Late)
Old Collingwood replied to Old Collingwood's topic in Non-ship/categorised builds
More progress later on today as I fell asleep again - must be the pain killers I am on for me gob. OC. -
1/48 Seafire Mk. III (Late)
Old Collingwood replied to Old Collingwood's topic in Non-ship/categorised builds
Indeed Joe, it helps having the fuselage buttoned up, glad the dry fit was ok after closing the halves together, OC. -
This would make one Seriously Fantastic diorama, great work. OC.
-
I think they look fine Mark - the only one that you could move if you want is the very first middle deck opening as its not for a canon but a double door hatch for ventilation, you could try just moving it a touch more forward towards the beak (not a lot just a bit) I think that will help a lot. I do feel your pain as I had to do the exact same thing on my Corel HMS Greyhound Kit as they were interfering with the frames on several gun ports, I just did as you are doing and moved them. OC.
-
Looking good Kevin each part you do is adding to her. OC.
- 337 replies
-
- 3
-

-
- finished
- mountfleet models
- (and 1 more)
-
That looks ok to my eyes Mark, I think if you can go with the easyest option (if it looks good to you) or failing that you could go the more fiddly option to cut through the bulkheads causing the problem (I assume you are doing dummy guns in the lower decks, by making a box with a barrel sticking out) that would work then just fiddly. OC.
-
Curtiss P-40B Warhawk by Asat- Airfix- 1/48
Old Collingwood replied to ASAT's topic in Non-ship/categorised builds
Craig is the guy to go to for Plane builds on here CDW is his name here, if he cant help no one can. OC. -
Curtiss P-40B Warhawk by Asat- Airfix- 1/48
Old Collingwood replied to ASAT's topic in Non-ship/categorised builds
I dont know but know a man who does ..........".Craig " "Craig" OC. -
Finished - 1931 Cadillac by CDW - JoHan - 1:25 Scale
Old Collingwood replied to CDW's topic in Non-ship/categorised builds
Hope you and the family are all good my friend. OC. -
Finished - 1931 Cadillac by CDW - JoHan - 1:25 Scale
Old Collingwood replied to CDW's topic in Non-ship/categorised builds
Great find craig, nice seeing you back on it wondered where you had been mate. OC. -
1/48 Seafire Mk. III (Late)
Old Collingwood replied to Old Collingwood's topic in Non-ship/categorised builds
Found this pic on the net - this is where my farther worked at the beginging of his service, also quite possibly doing the same kind of work. OC.
-
1/48 Seafire Mk. III (Late)
Old Collingwood replied to Old Collingwood's topic in Non-ship/categorised builds
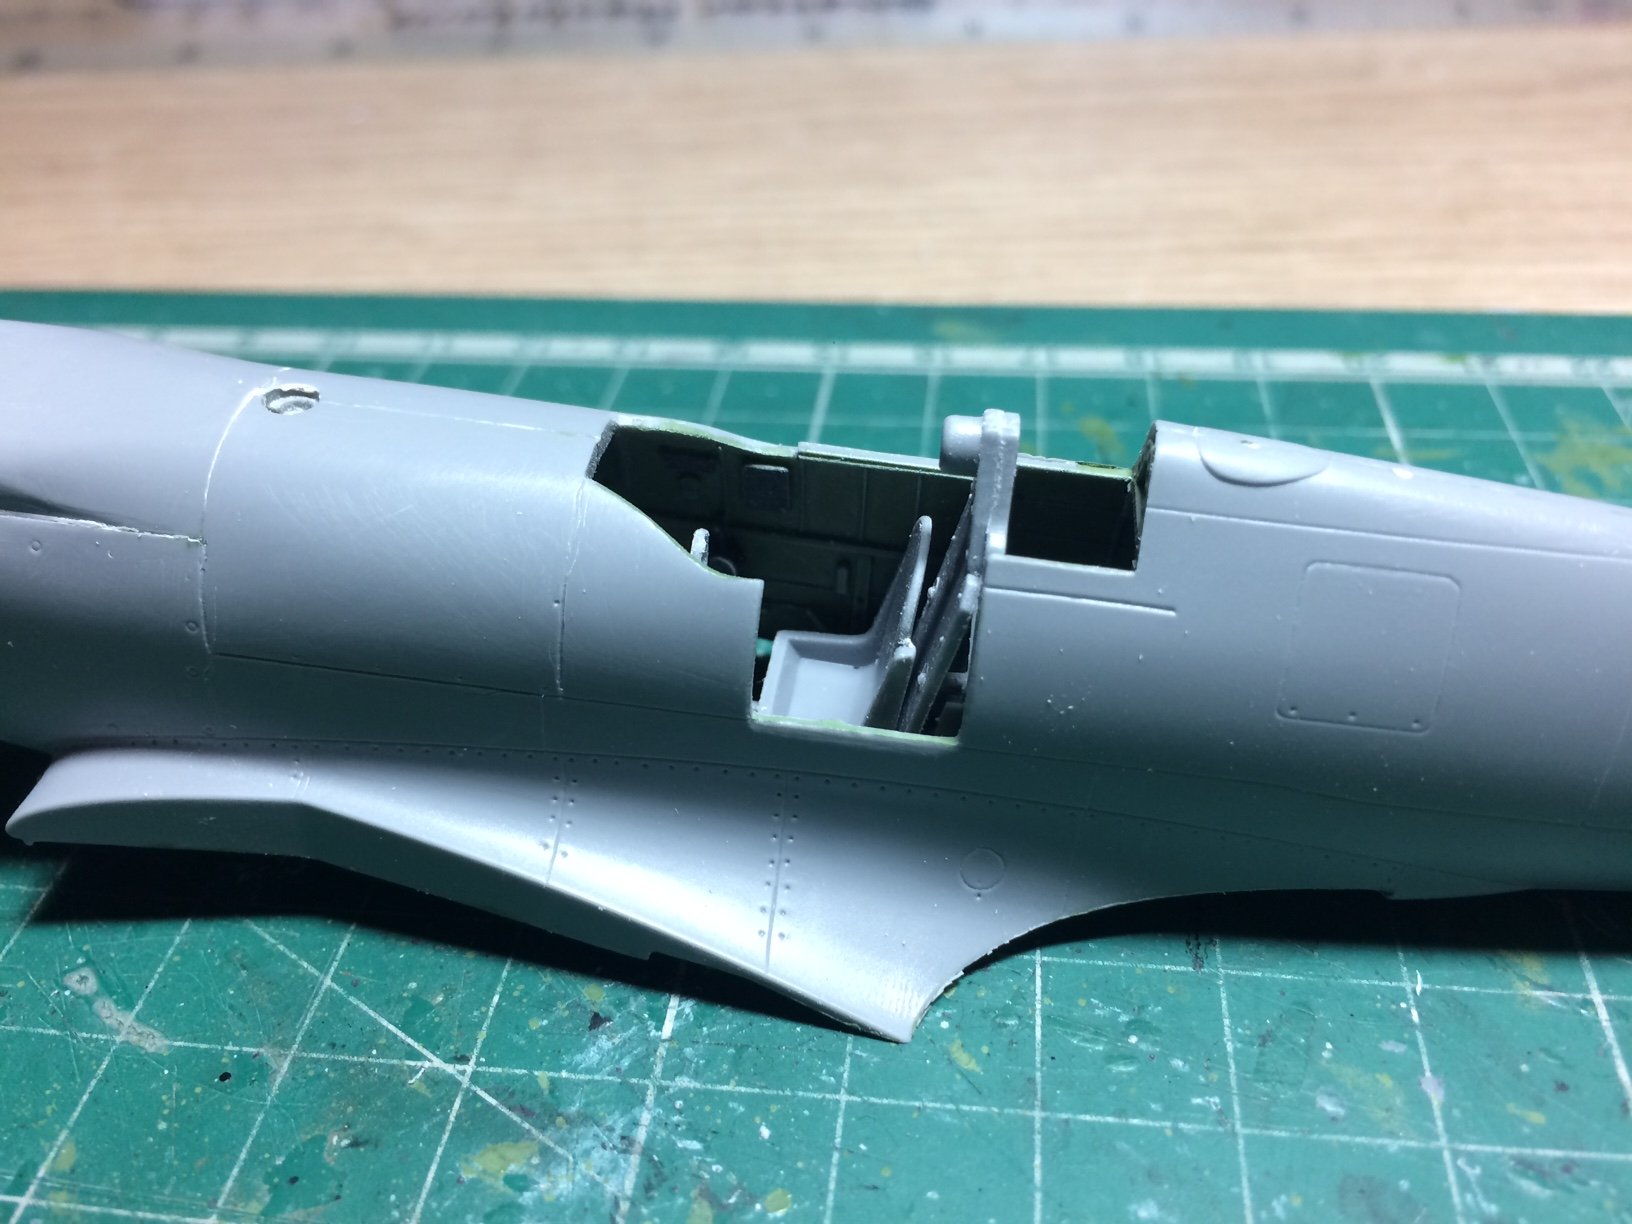
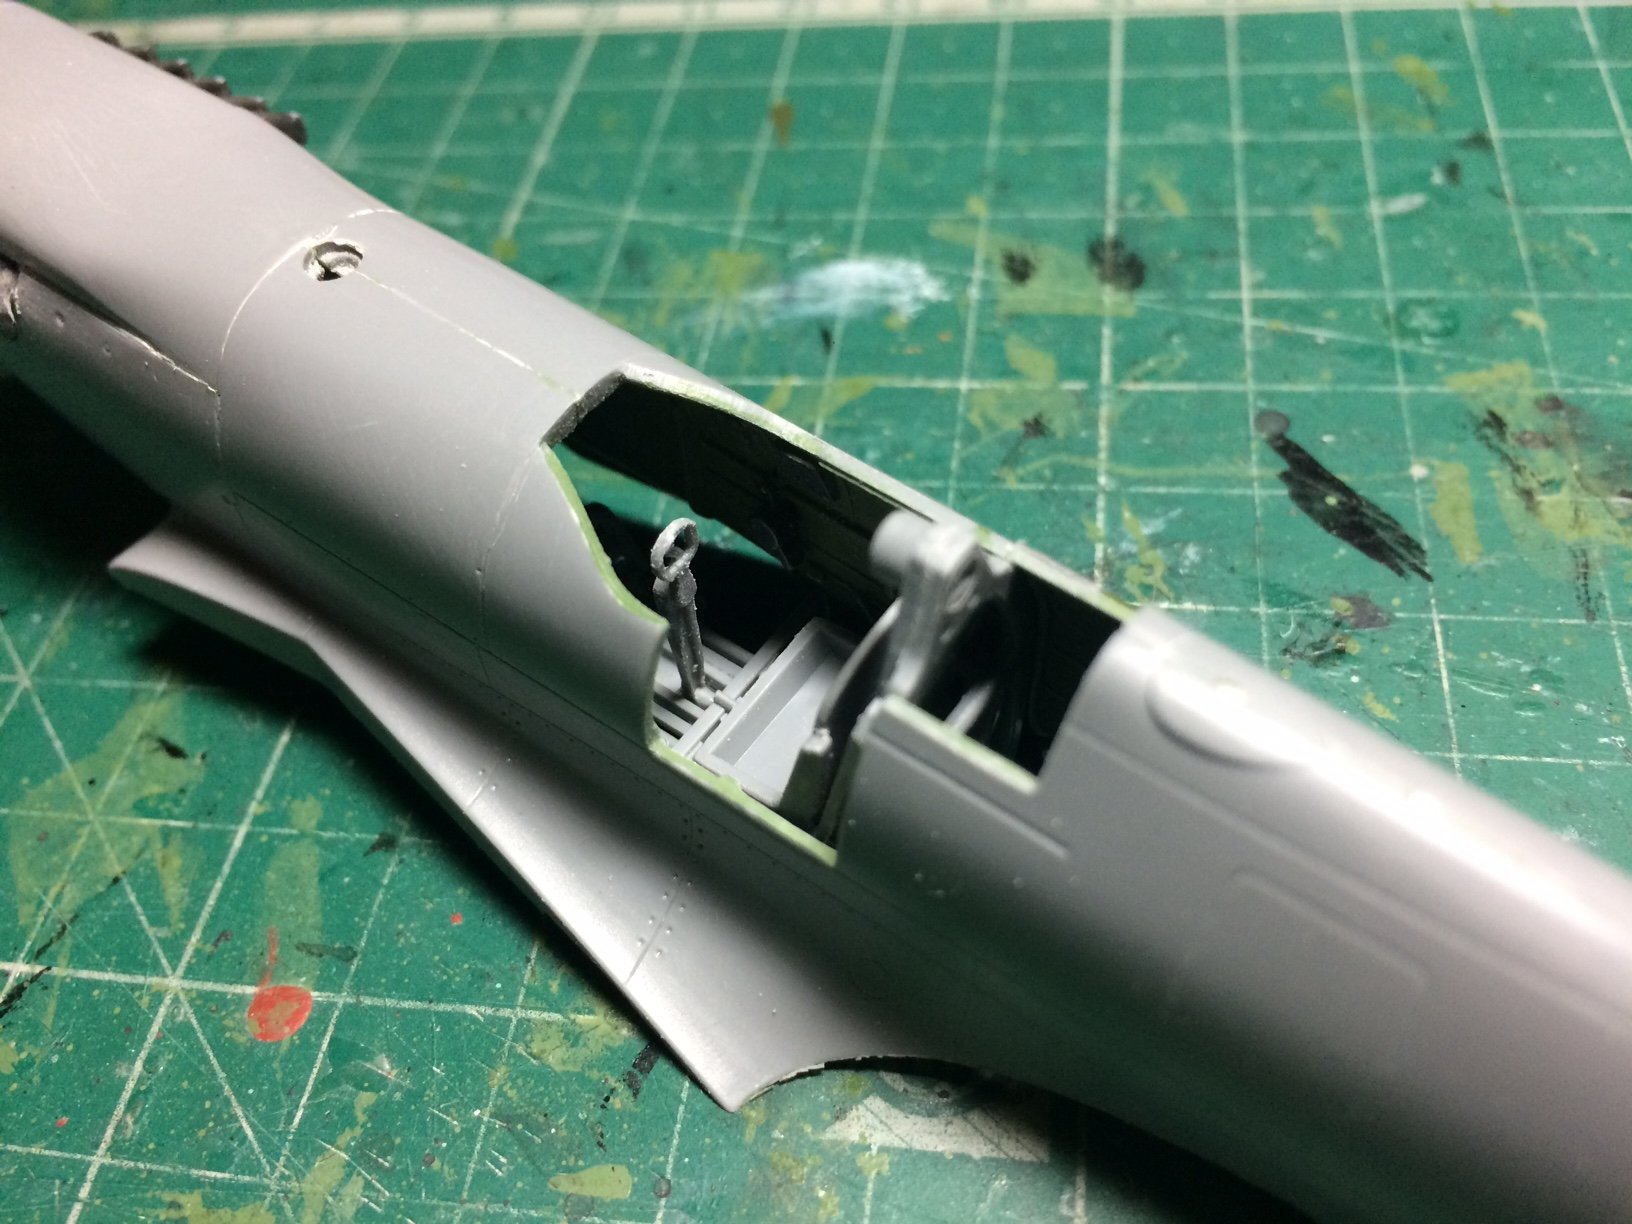
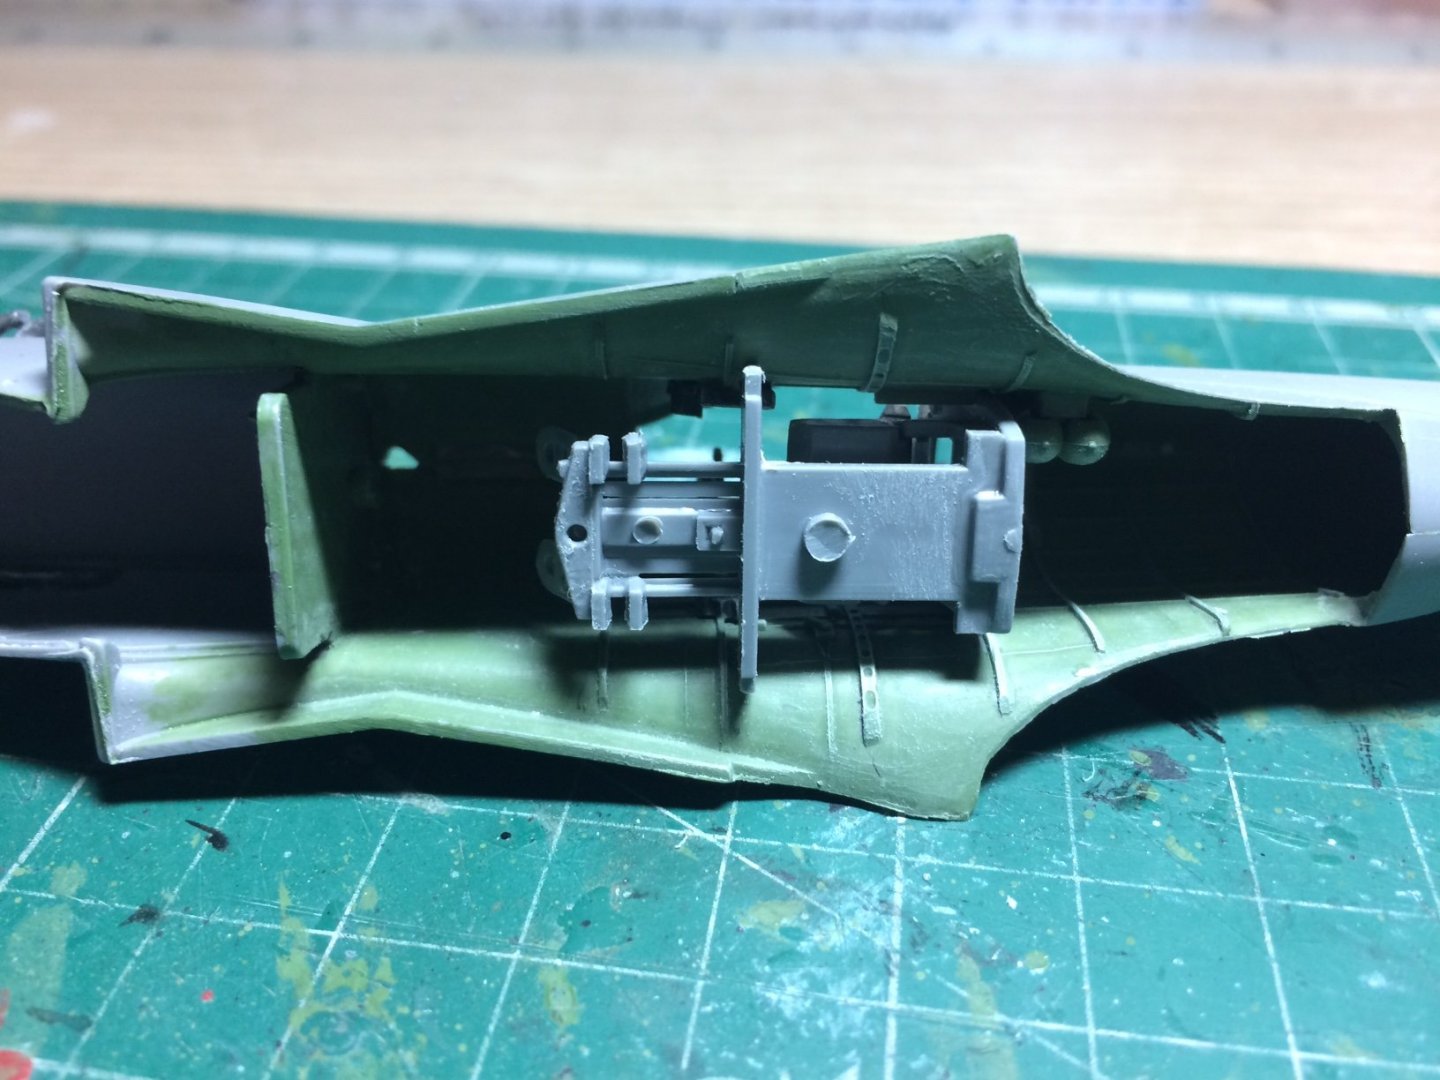
Evening all - hope everyone is ok, so it continues - next stage is the cockpit seat assembly, same build really as my other spit, rear bulkhead/armour plate/seat/base/pedals and columb, these were glued together then I did a bit of magic - dry fitted the assembly inside the fuselage. No secret it pops in from underneath. OC.
-
I will bring our garden bench with added sun. OC.
-
No problem at all Mark - truly glad to help.👍 OC.
-
Found a couple of links Mark - http://www.shipmodelsocietyofnewjersey.org/resources/Downloads_page/Lining Off your hull for planking.pdf https://www.syrenshipmodelcompany.com/resources/PartTwo.pdf And from our very own - OC.
-
Same as what everyone has said - a really nice build of an interesting subject, also great to here the discussion on it. OC.
-
1/48 Seafire Mk. III (Late)
Old Collingwood replied to Old Collingwood's topic in Non-ship/categorised builds
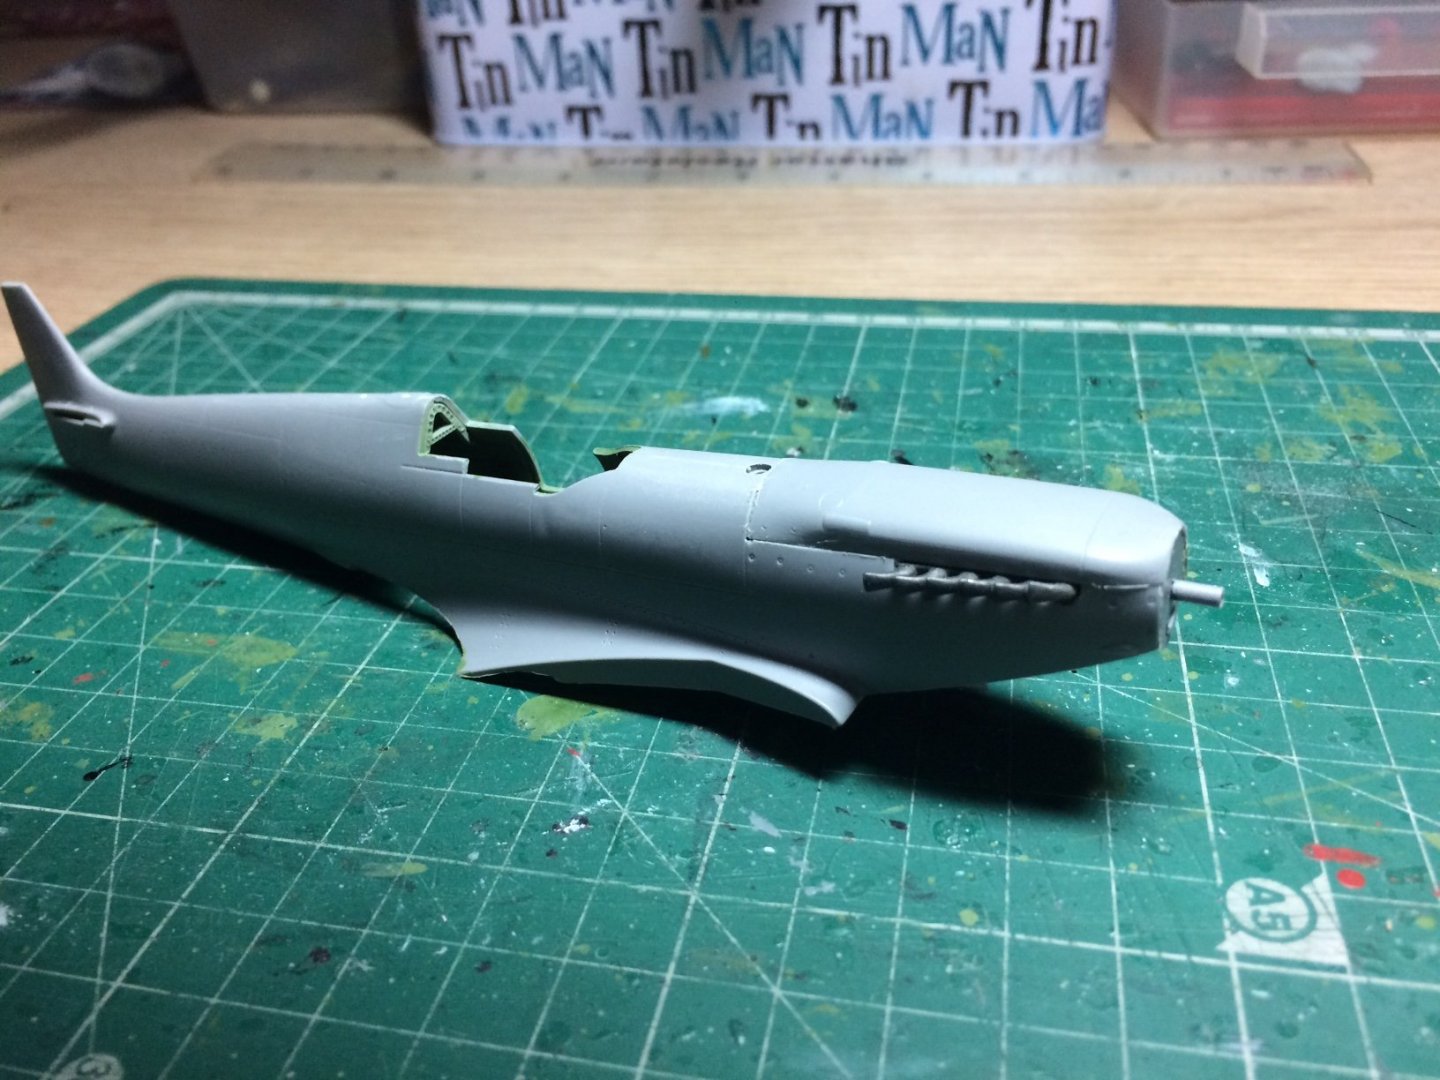
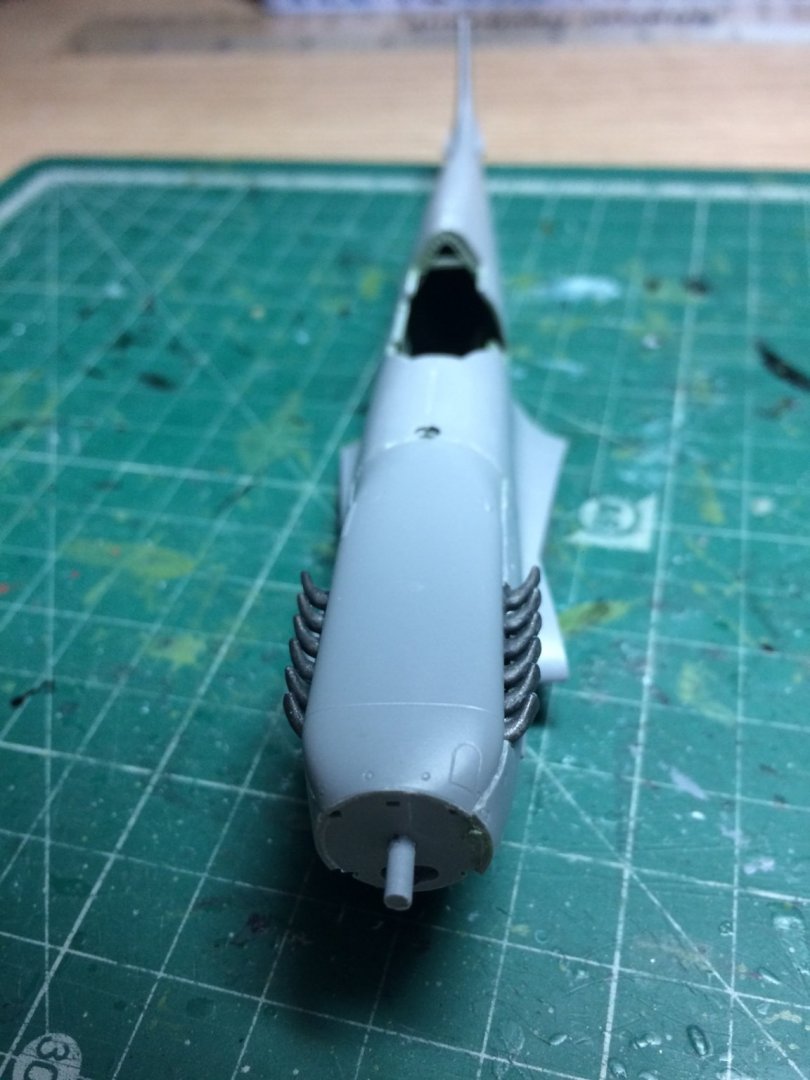
Hi all, a little more progress - just cleaning up the front engine cowl seams, also added the smallest amout of putty. OC.
- 122 replies
-
- 11
-
-
HMS GREYHOUND by fukui
Old Collingwood replied to fukui's topic in - Kit build logs for subjects built from 1501 - 1750
Hi and welcome, is this the Corel kit? I part built one in the forum. OC. -
Great seeing you back hope your in good health, in your absence I completed a build of The Black Pearl from Piarates of the Carribean. OC.
-
Thats good progress Mark - nice tidy work. OC.
-
Yep KP as Edward said despite the pit falls of the kit you are getting there, some kits certainly test of skills and patience. OC.
-
My first ever kit age about 7 (me not the kit) was a Red Arrows Gnat aircraft I only glued the wings on back to front and got the canopy glued to my finger - so I guess it happened to us all. OC.
-
1/48 Seafire Mk. III (Late)
Old Collingwood replied to Old Collingwood's topic in Non-ship/categorised builds
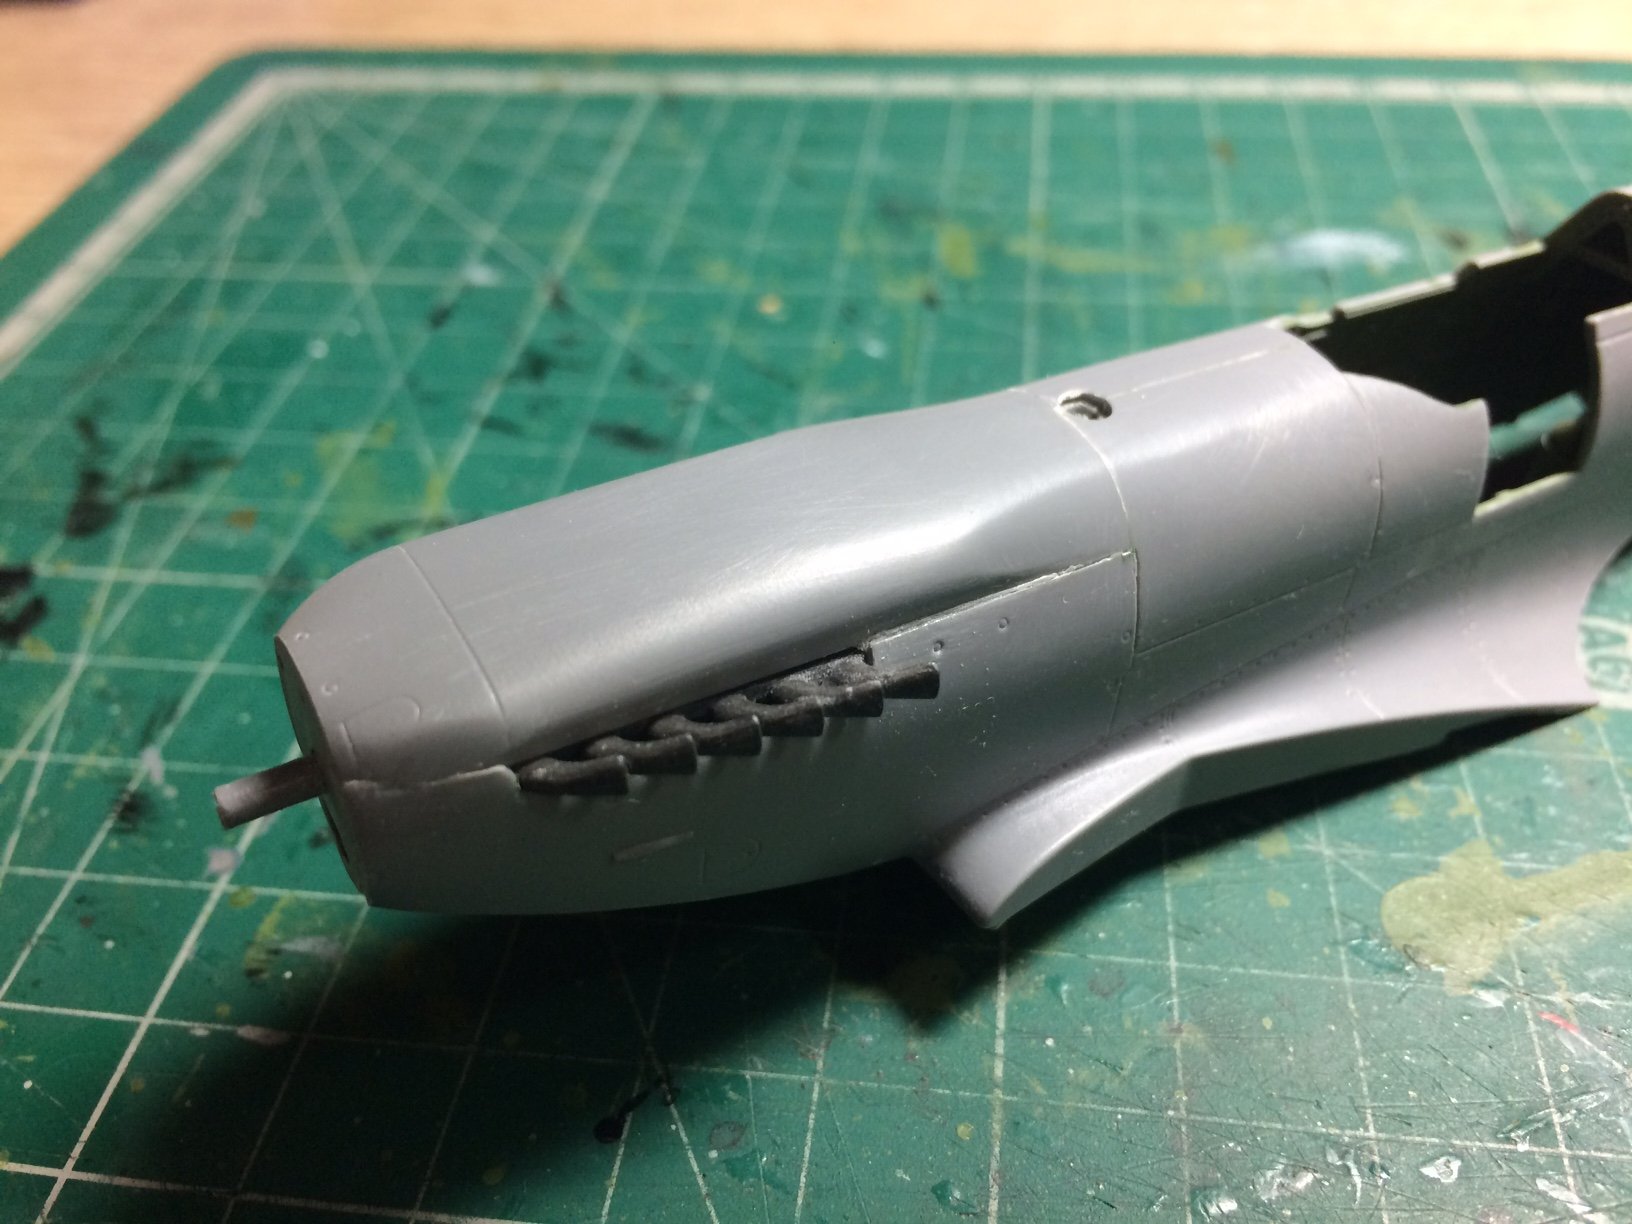
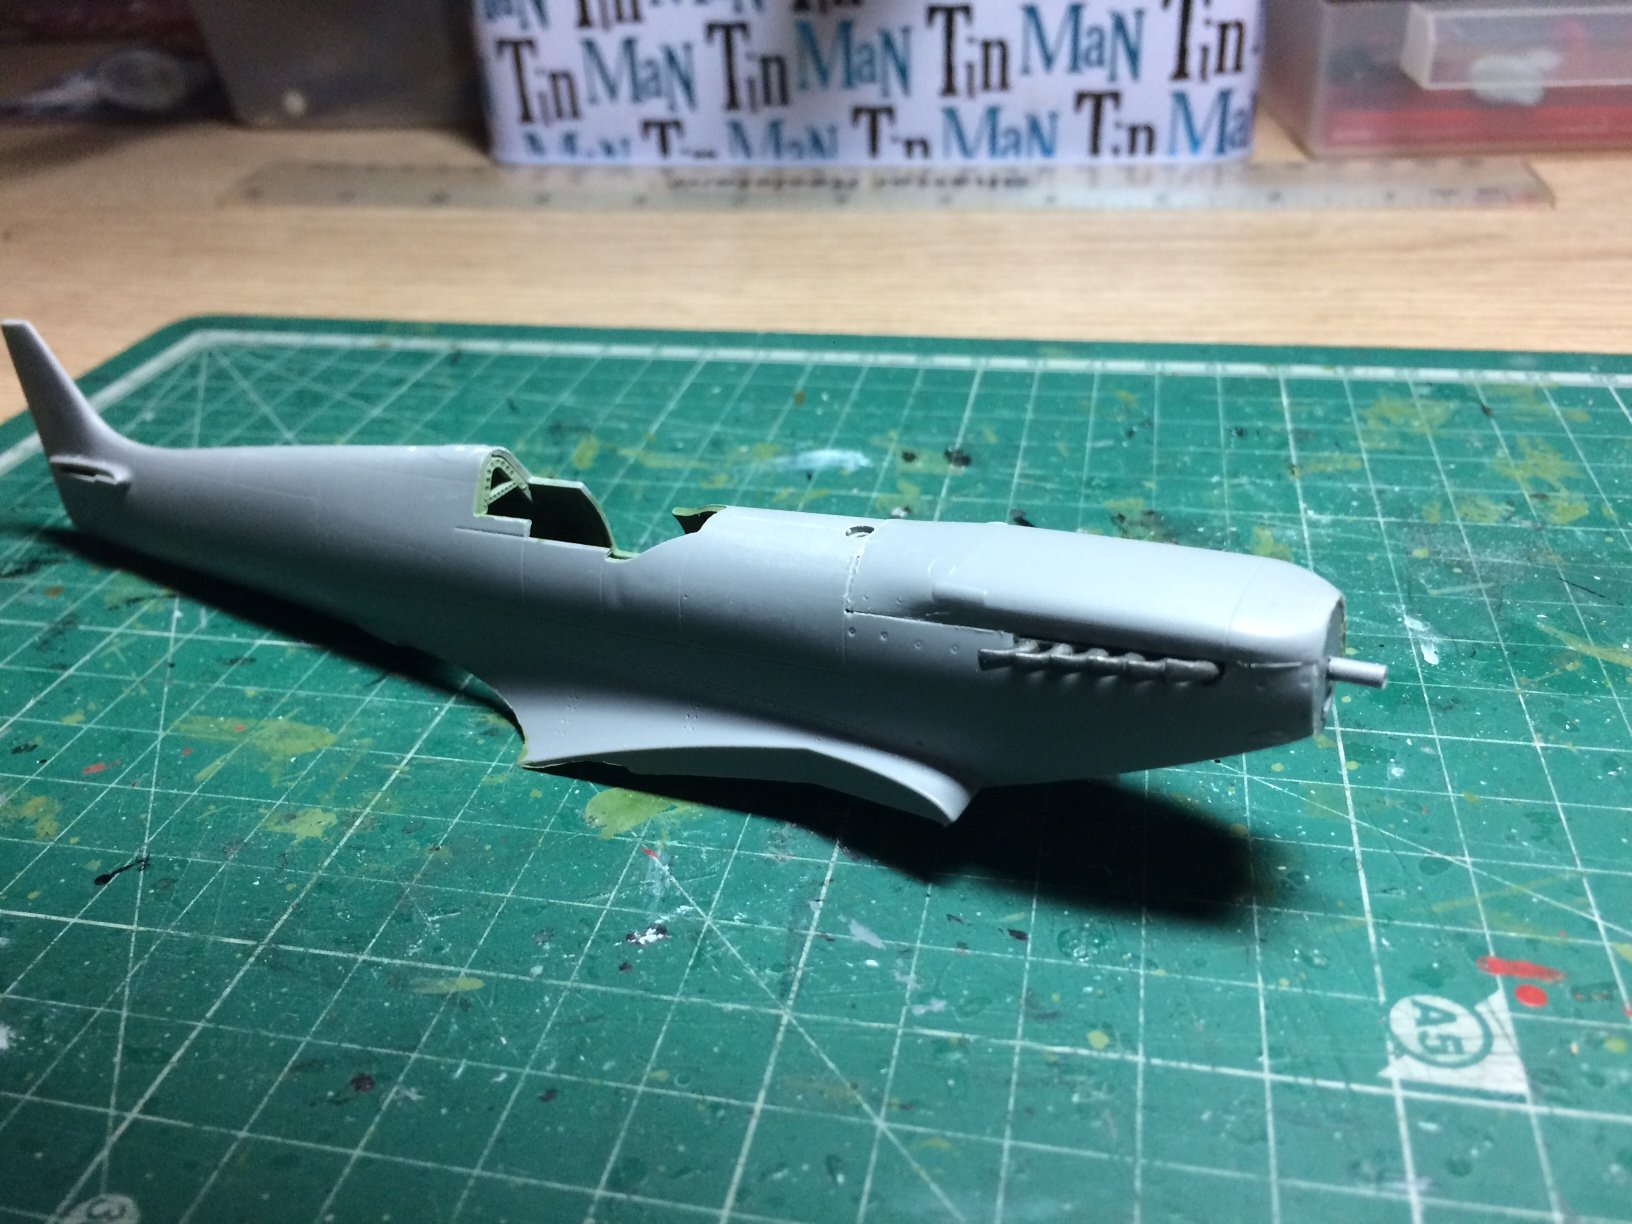
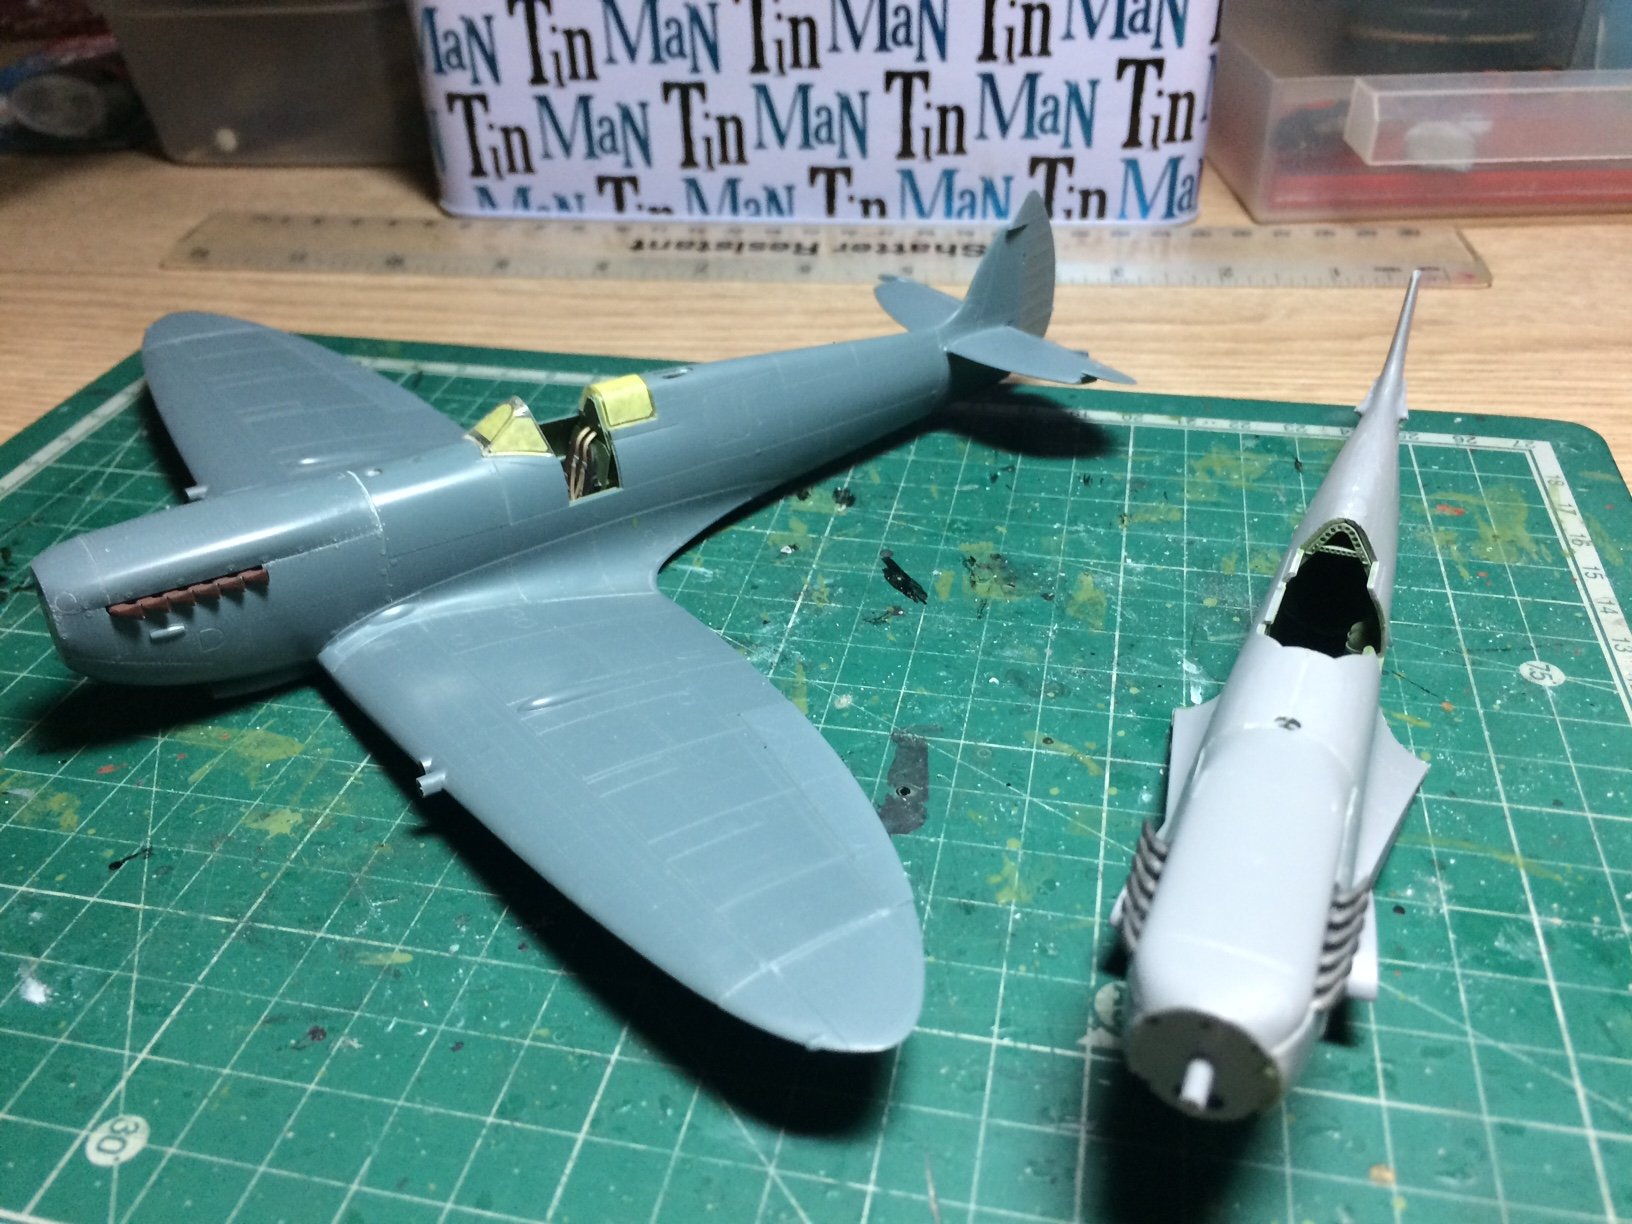
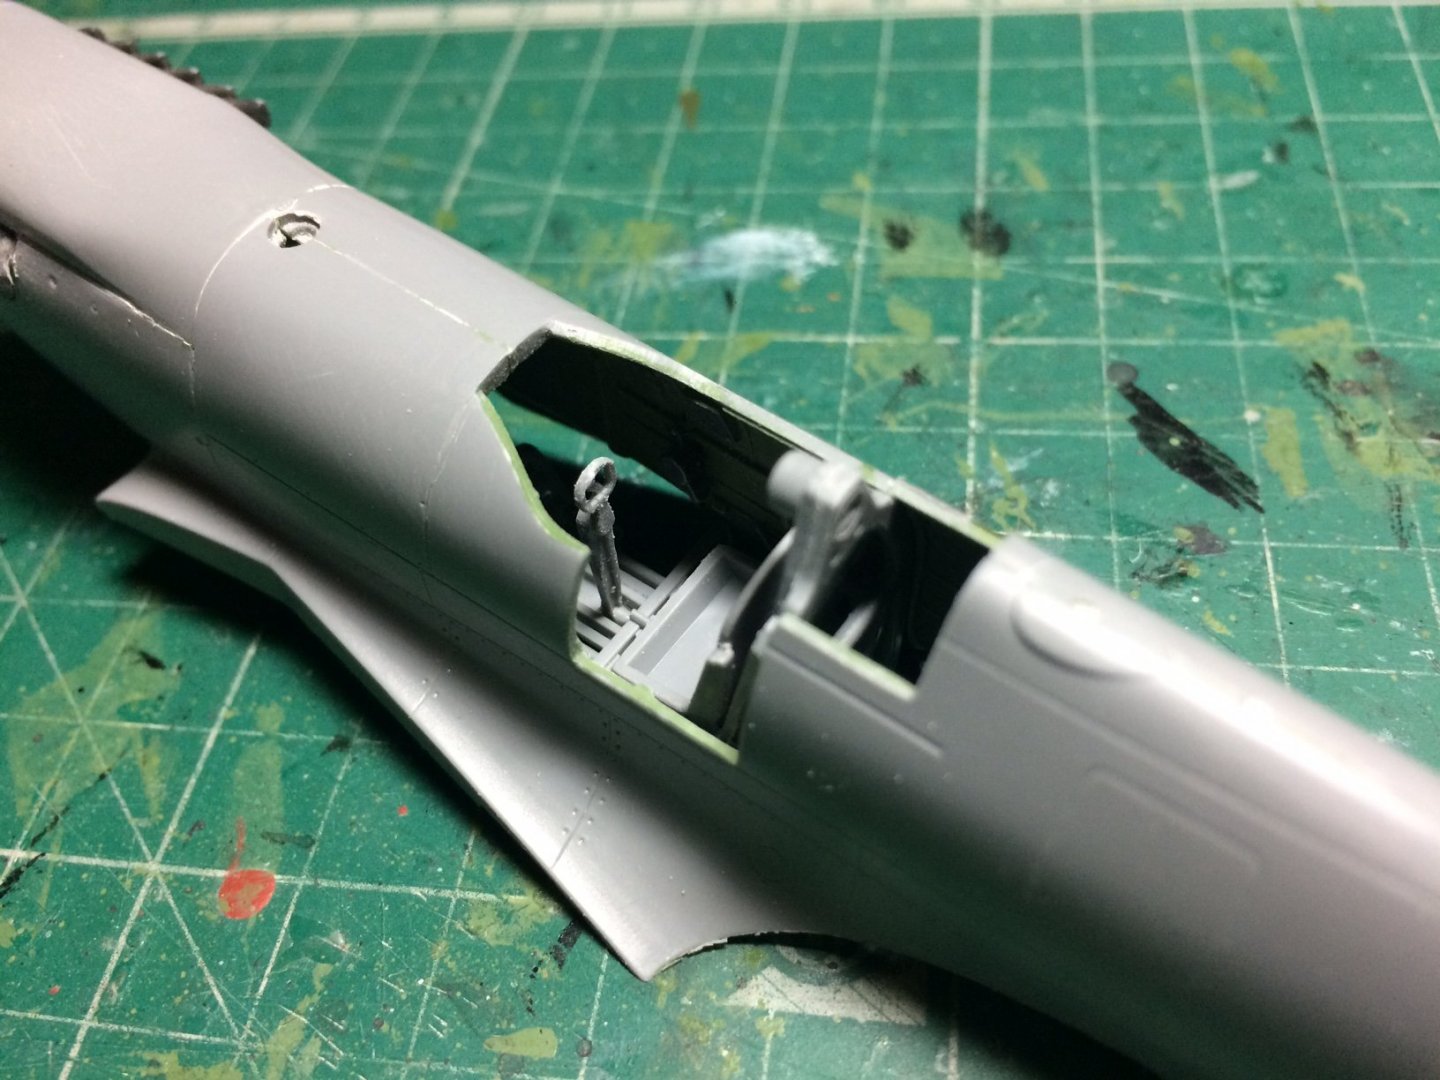
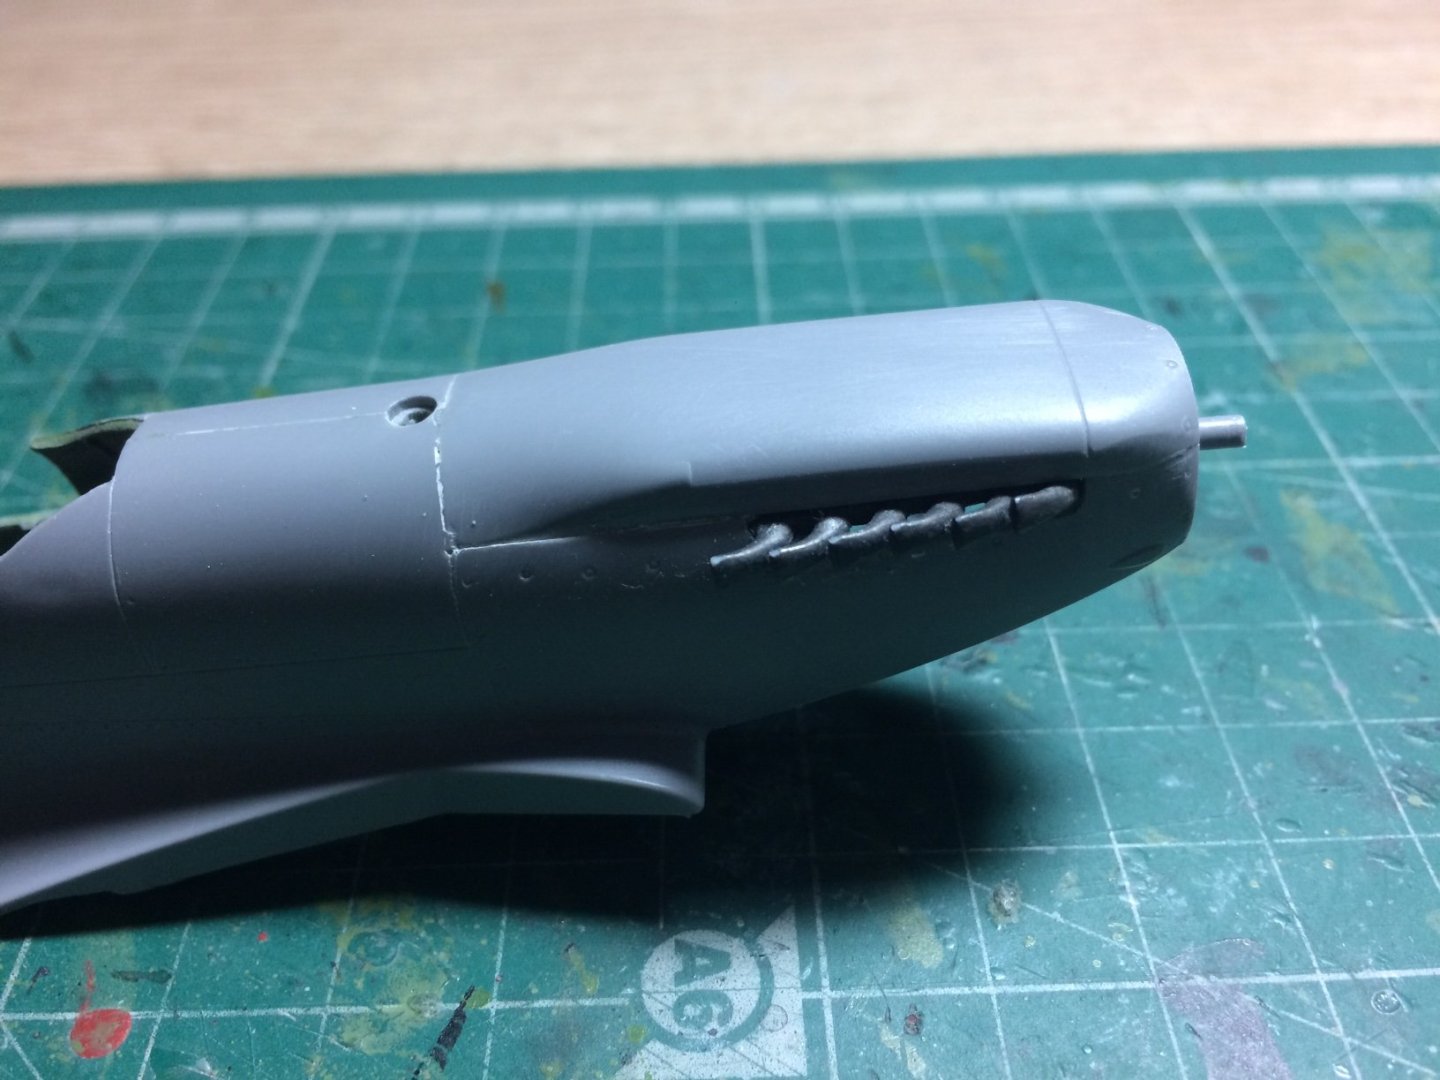
Evening all, I did a bit more work this evening - firstly I removed the tape and checked the seams, these needed just a bit of sanding (but no filler I dont think) this was a supprise to find two companies who manage to build kits with quite high build standards - it also makes my first observations what I first started to build this kist (in my earlier build log - Not Eduard one) as being incorect. Anyway next off was to fit the prop cone bulkhead, then when set I had to fix one of the exhausts stcks that had broken in two, this was fixed then glued in place in the recess - same the other side, then I got the engine cover and test fitted it, quite a bit of scraping and sanding was needed to get a good fit - then this was glued down. It needs sanding and cleaning up whne its set. So here are a couple of pics including one of my Supermarine prod line. OC.