


Old Collingwood
-
Posts
11,484 -
Joined
-
Last visited
Content Type
Profiles
Forums
Gallery
Events
Posts posted by Old Collingwood
-
-
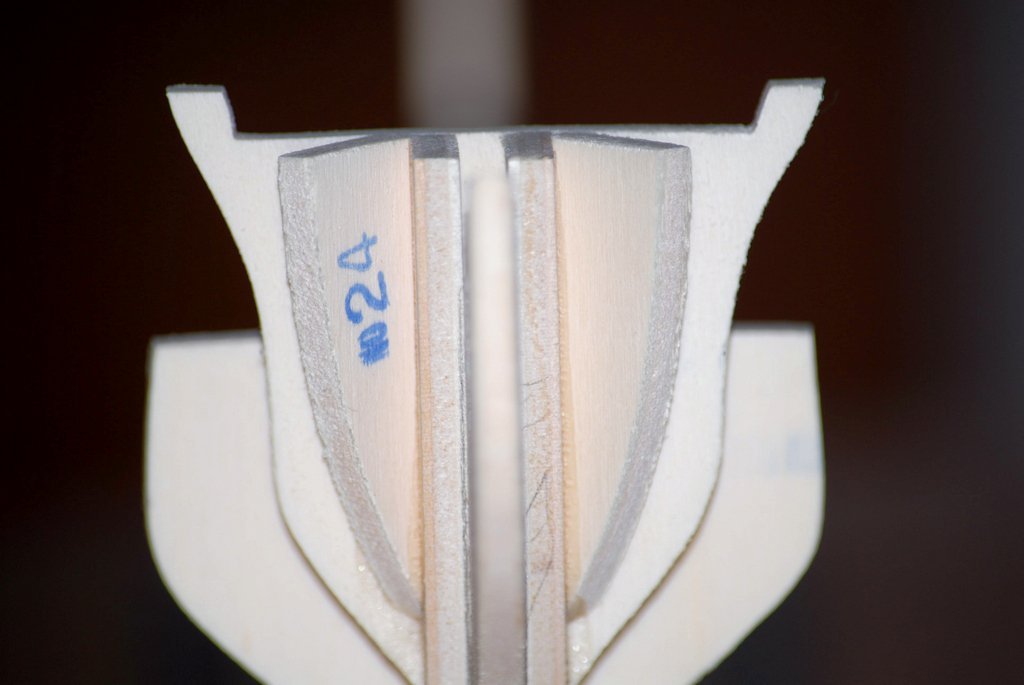
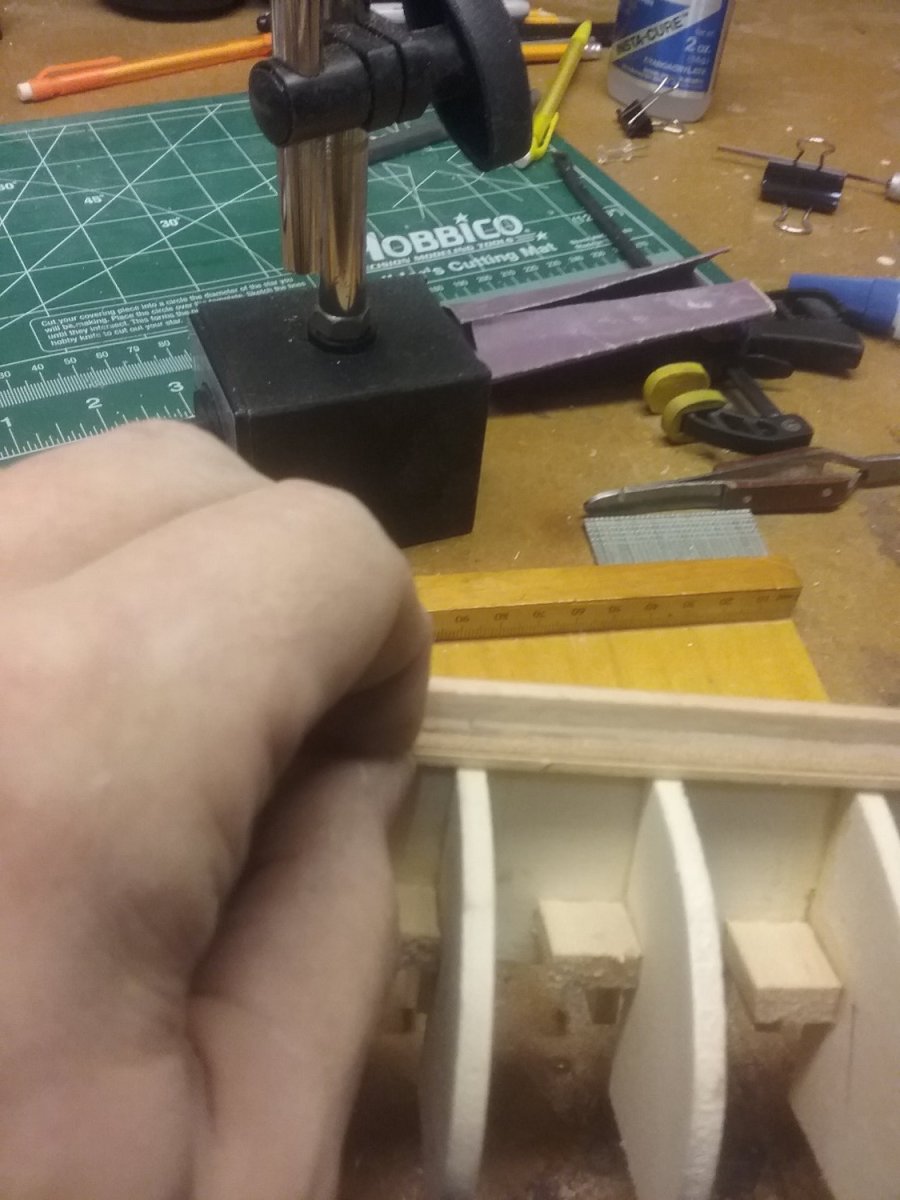
I see now - item num 24 at the front - this part - I think I just glued them than sanded till I got a smooth line and checked for hight etc.
OC.
-
54 minutes ago, tennfox said:
@Old Collingwood how much did you have to sand off of 24? Seems like they are a little too proud. Did you trim before or after you glued?
24? not sure I understand what you mean as there is only 12 frames.
OC.
-
I too remember these kits from way back - I built (threw together) as a kid Dracular and The Mummy.
OC.
- MisterMeester, Egilman, Jack12477 and 2 others
-
 5
5
-
5 hours ago, CDW said:
Thanks Dan.
I have no reference photos to use as a guide for the putty. Modern restored P-51’s show no evidence of the putty so I won’t try to model it now. Maybe on another build when I have reference to work from.
That guy owns some Stunning planes.
OC.
-
8 hours ago, Nipper said:
I love looking at your work OC, and I admire and agree with your pursuit of realism.
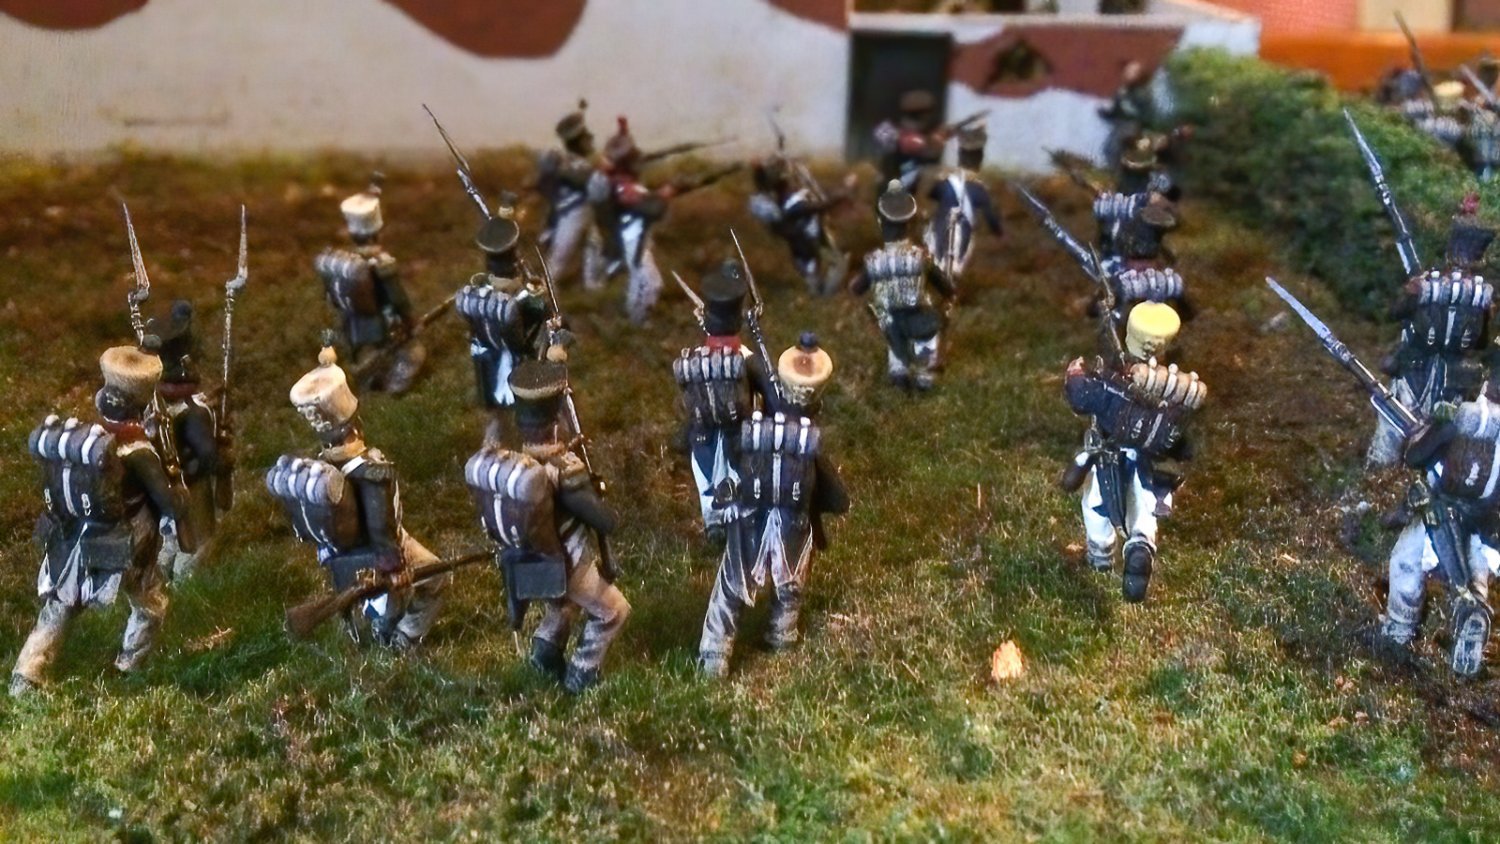
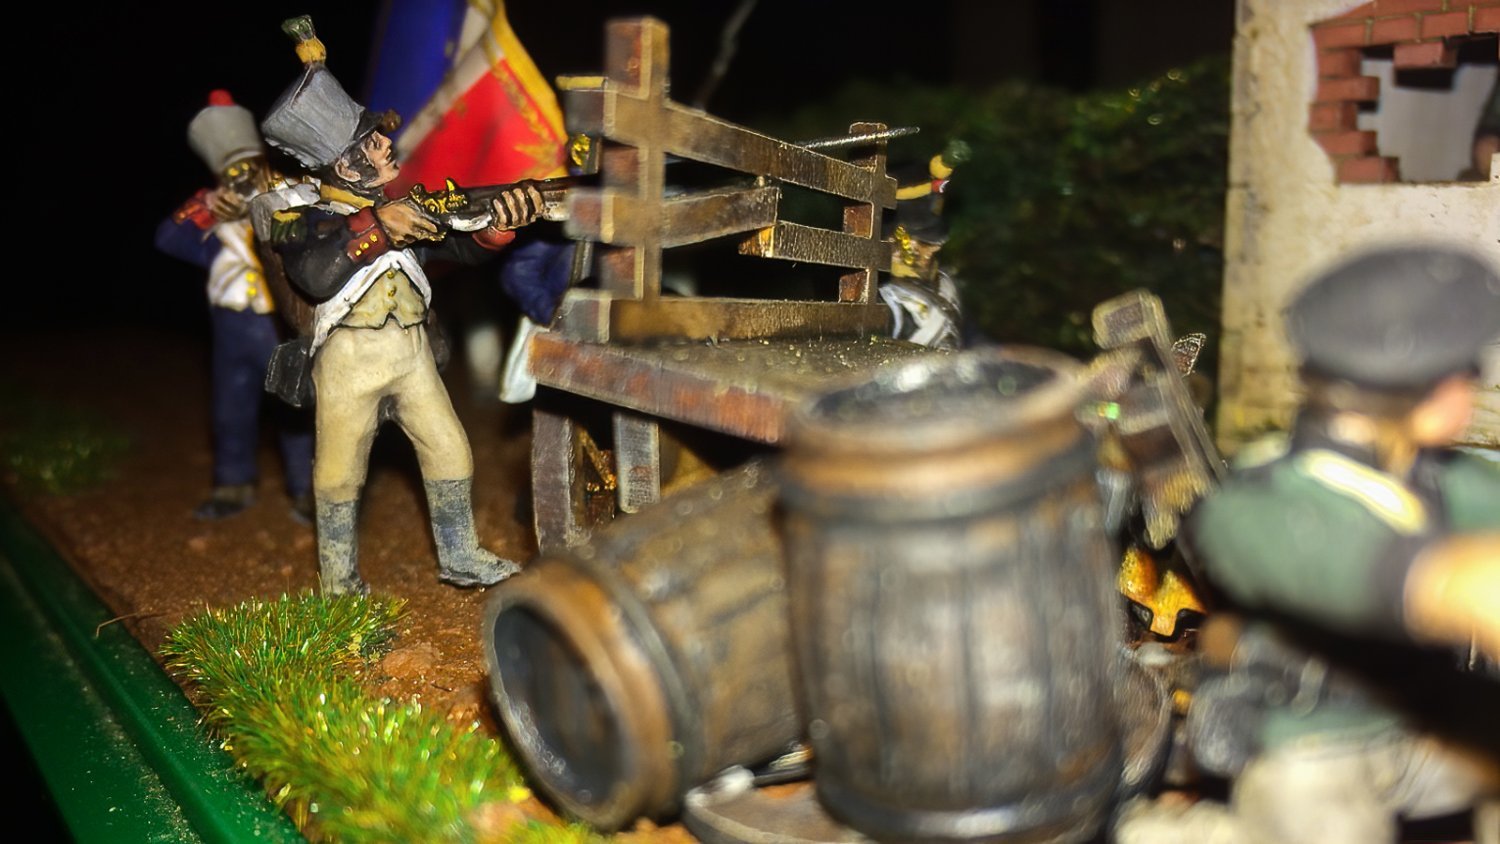
It looks like you have abandoned the idea of representing the smoke from the firearms. Certainly, it is very hard to create smoke that is convincing. Also, if one is going to take realism to its full extent, one would have to include more than the smoke from the muskets and rifles. How to create the pall of smoke that would have been blowing over the whole battlefield, obscuring your beautifuuly painted figures?!
Best to leave that to the paintings, like the one above of LHS.
Nipper
Thank you kindly. yes indeed I have seen a smokey over all scene in another forum builder using one of those disco smoke generators then taking the photos.
OC.
- Jack12477, king derelict, robert952 and 3 others
-
6
-
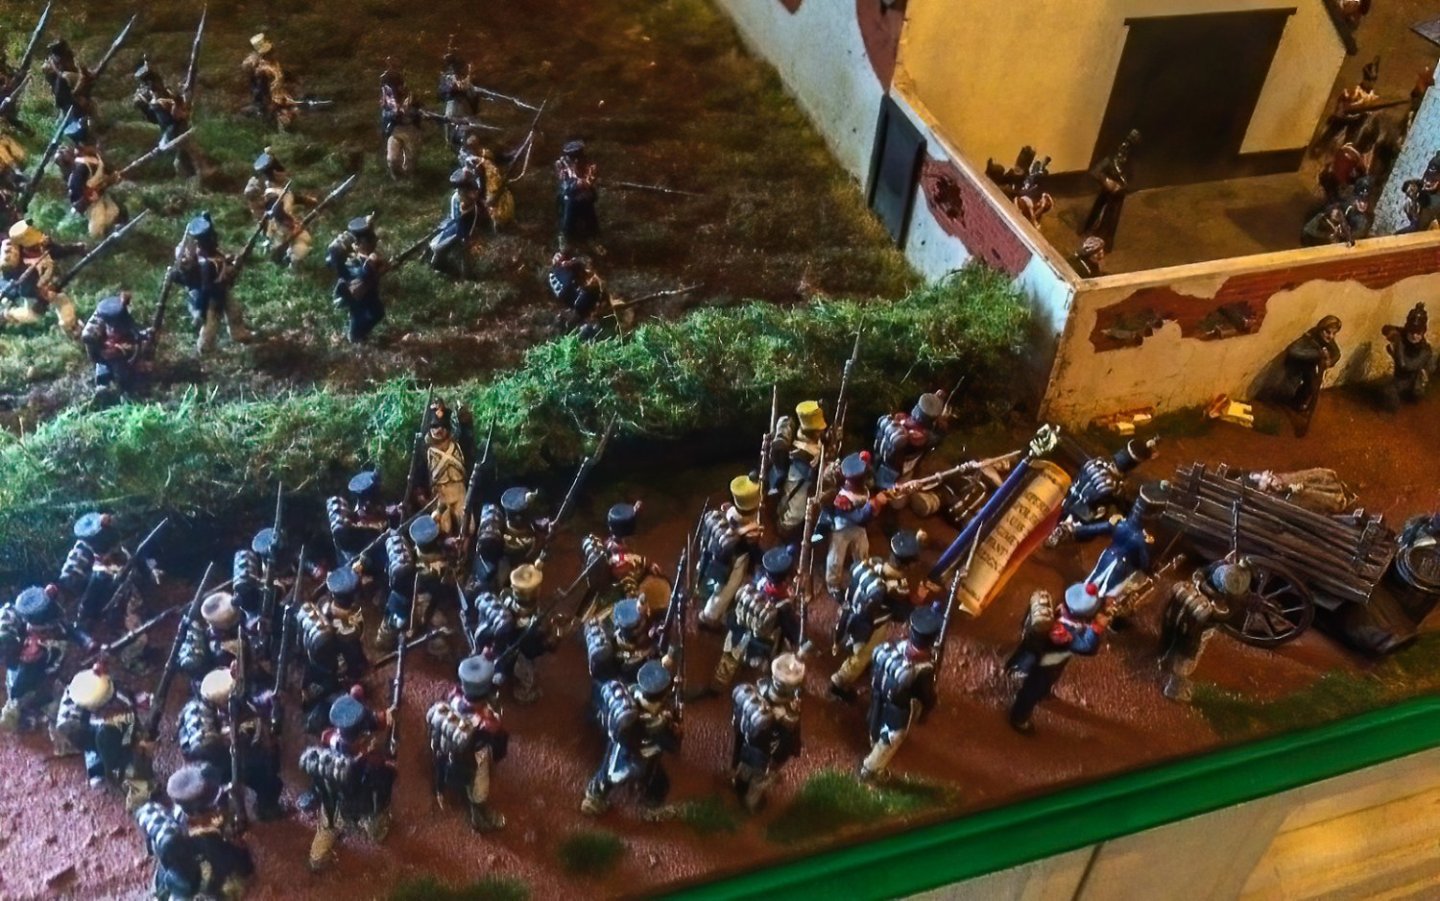
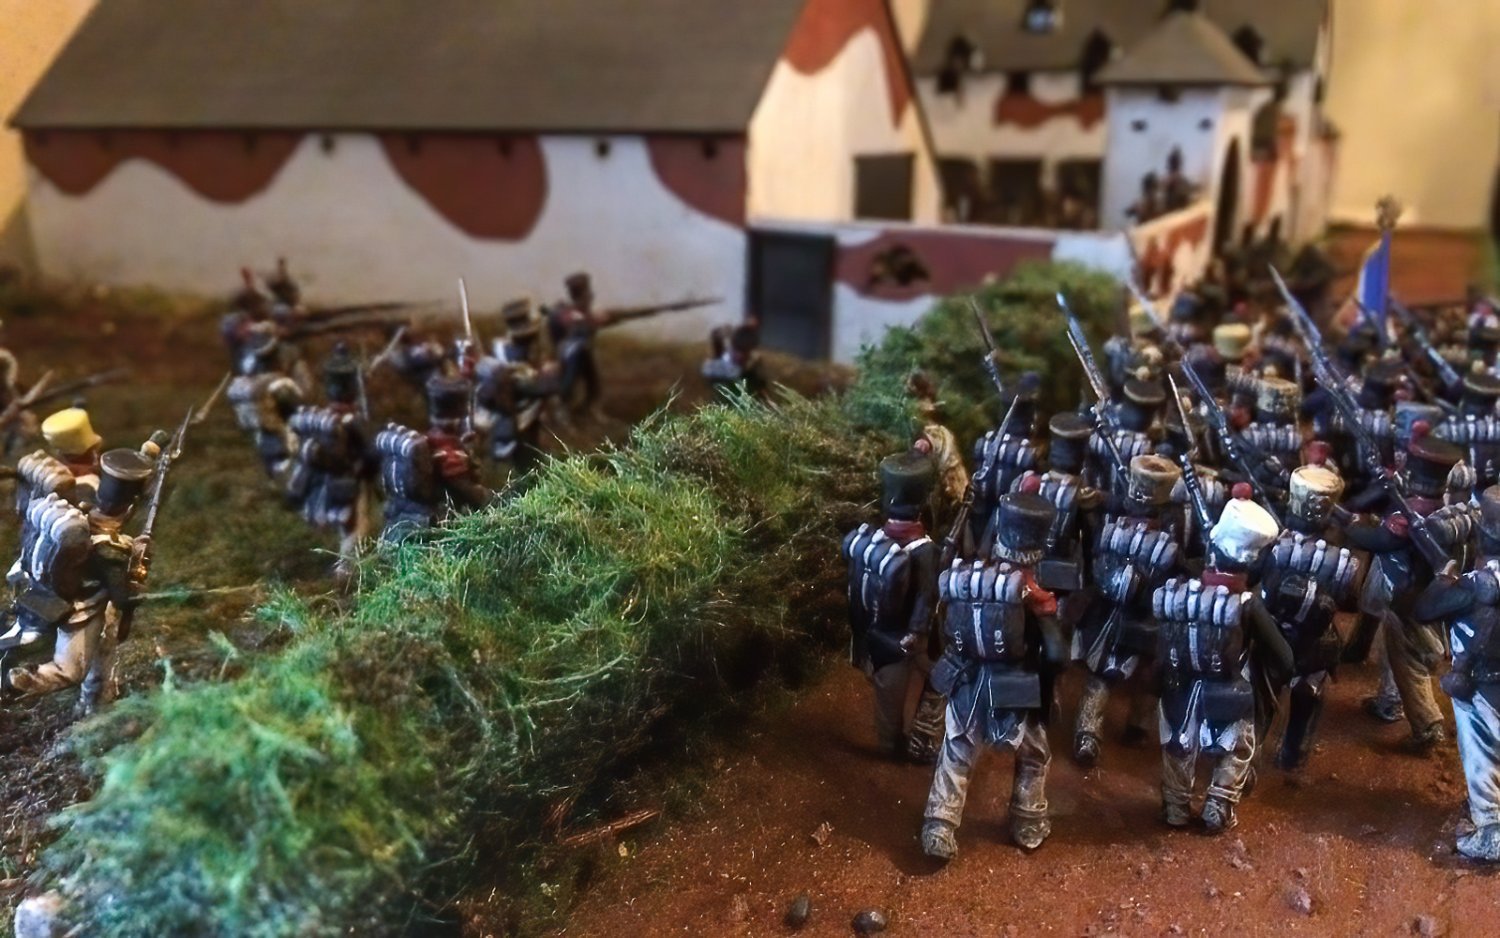
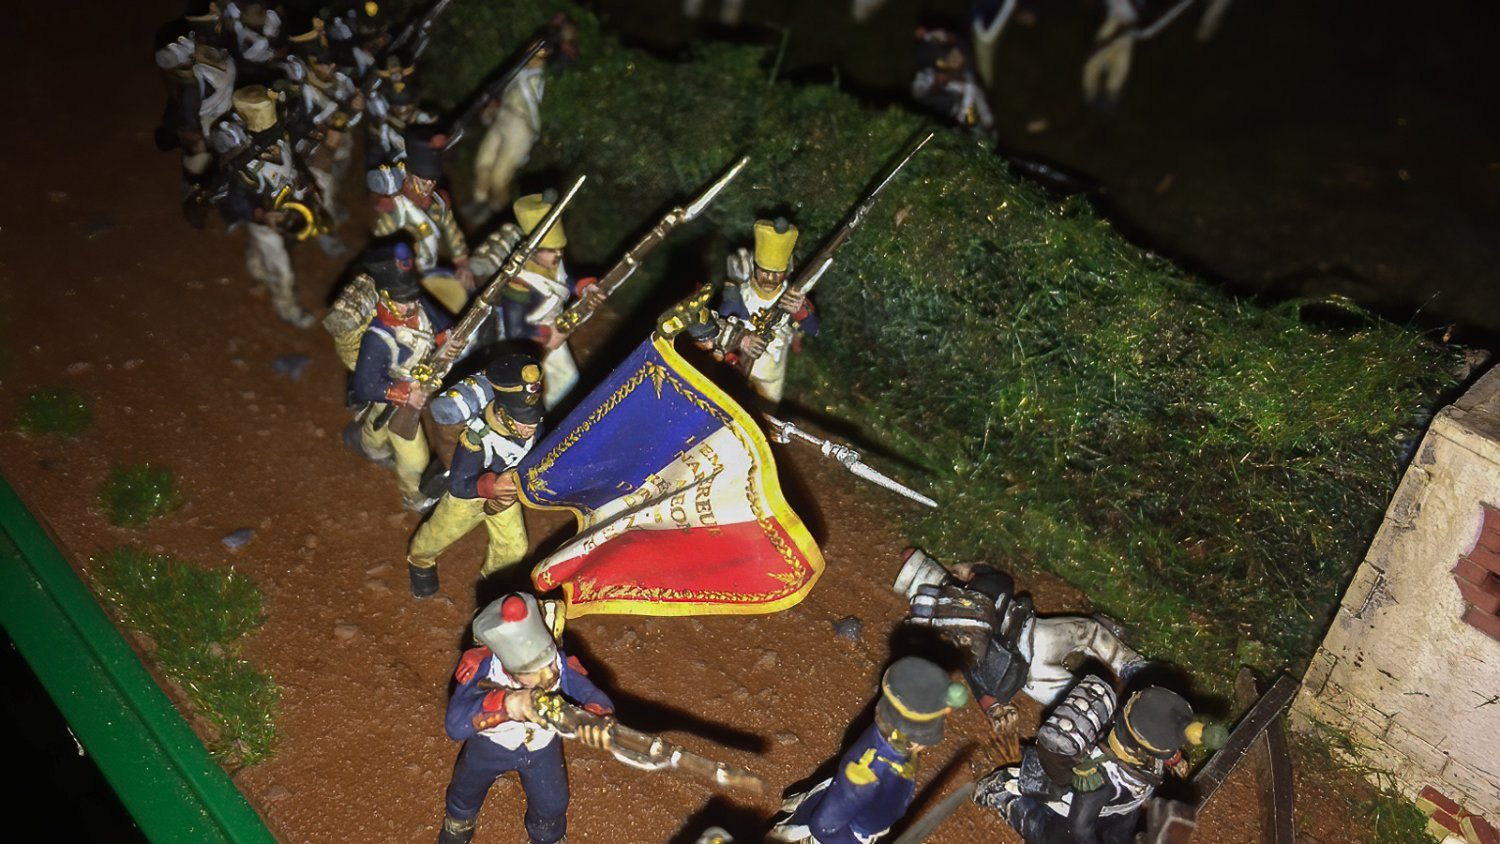
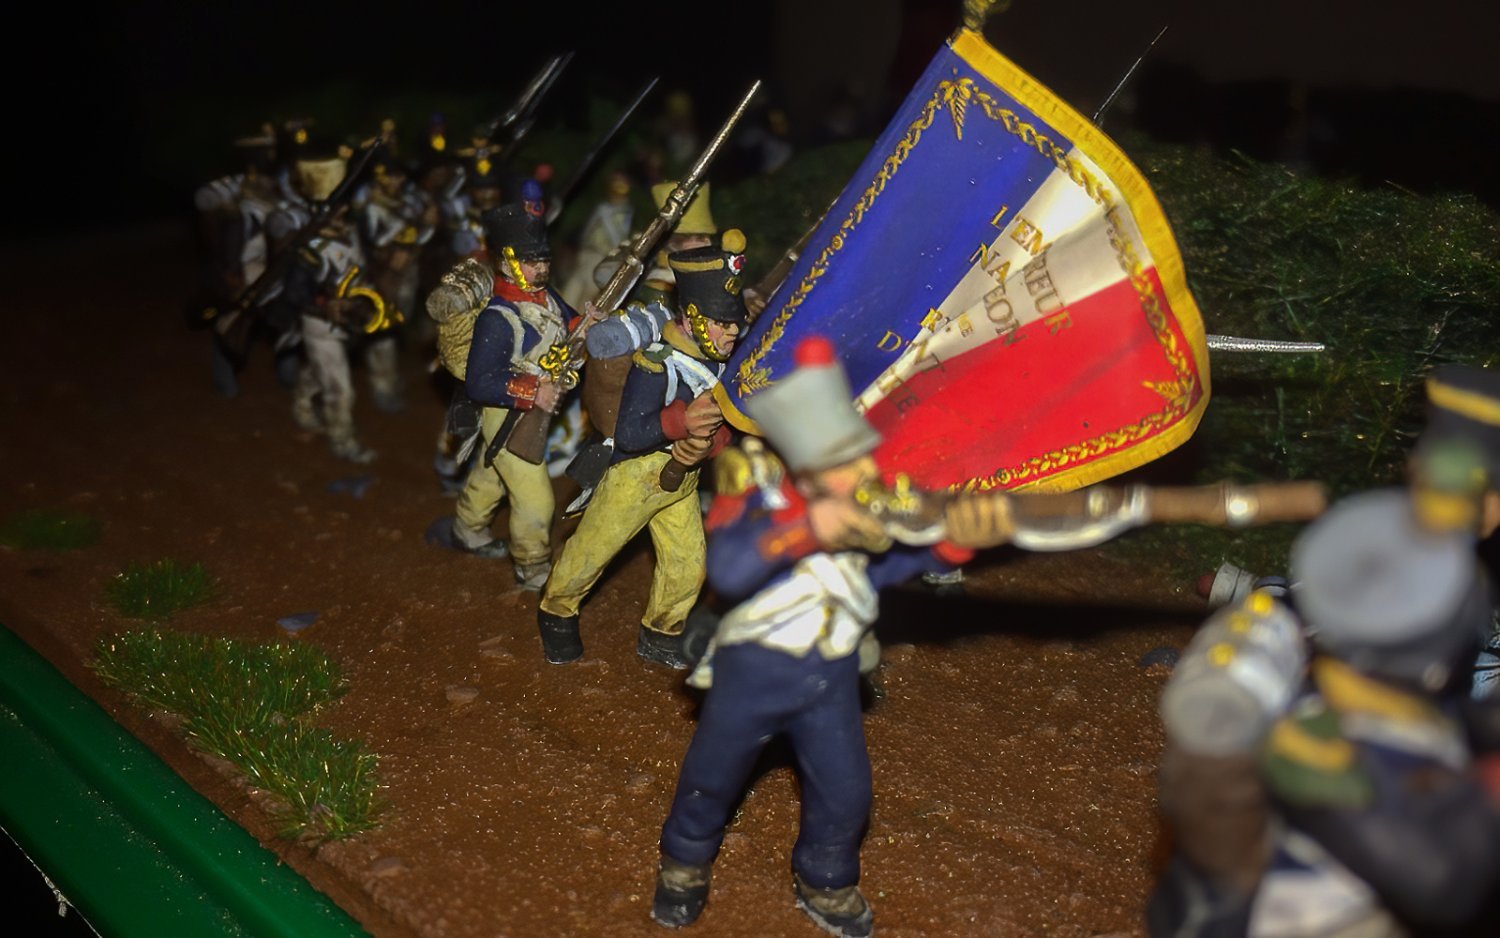
So today-tomorrow I will be carrying on with my flat - top coating as I still have a few more French to add, and possibly spme more French I could make up in my stash (will need to check) I aso have Colonel Claude Charlet to add after he has been flat coated.
Still lots more to do before the Big Finish.
OC.
- Jack12477, Canute, king derelict and 3 others
-
6
-
22 minutes ago, Egilman said:
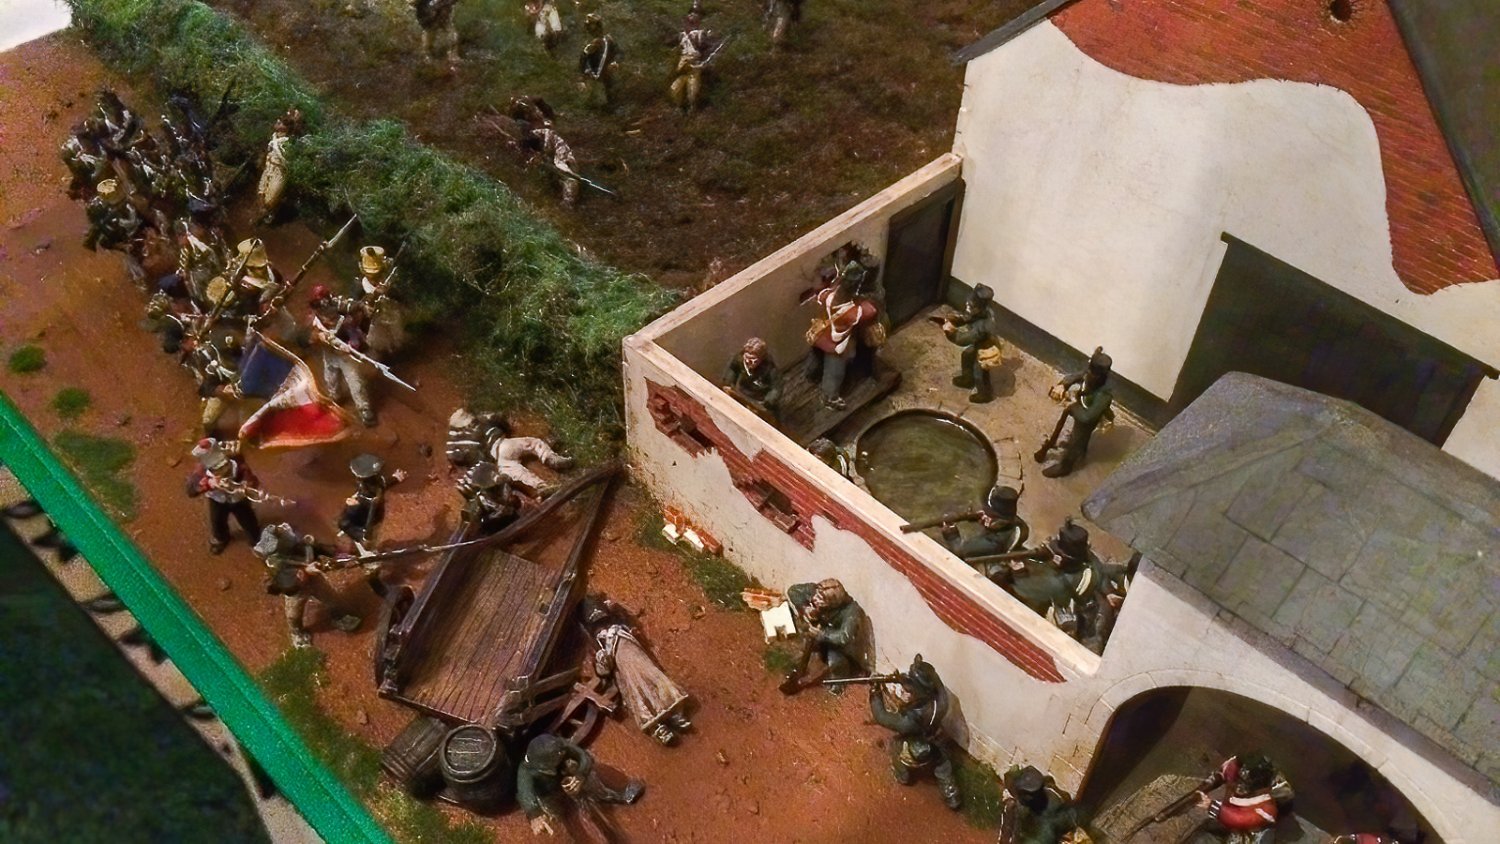
Yep the last assault before the KGL gave it up...
I always thought the French troops looked exhausted in that painting...
That's why they lost....
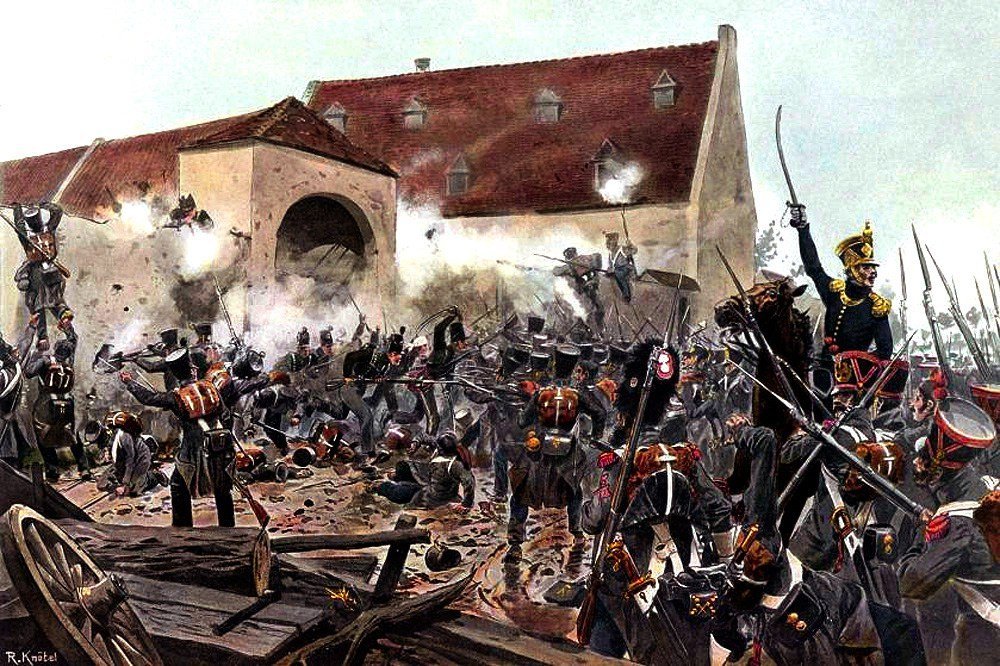
The reduction of Le Haye Sainte, is one of the dramatic visions of heroism ever seen on the battlefield, on both sides...
Indeed brother, I think Wellington was right in putting the KGL in there as they where battle hardened troops, who would not let up defending the farm.
OC.
- Jack12477, Egilman, FriedClams and 4 others
-
7
-
This is similar to what I am trying to achieve, take no notice of the roof colours they where Grey slates not Red tiles.
OC.
- CDW, king derelict, Jack12477 and 7 others
-
10
-
-
-
-
7 hours ago, tennfox said:
Thanks OC... ive been studying your build a lot since you have a lot of great pictures to go by.. I did notice that towards the end the pictures dont show, only dead links.
Im still sanding and building on the BHs im finding more spots that are flat, too round, and just bad.
Thanks for all the help, it is EXTREMELY appreciated.
Yes I think some of pics vanished.
OC.
-
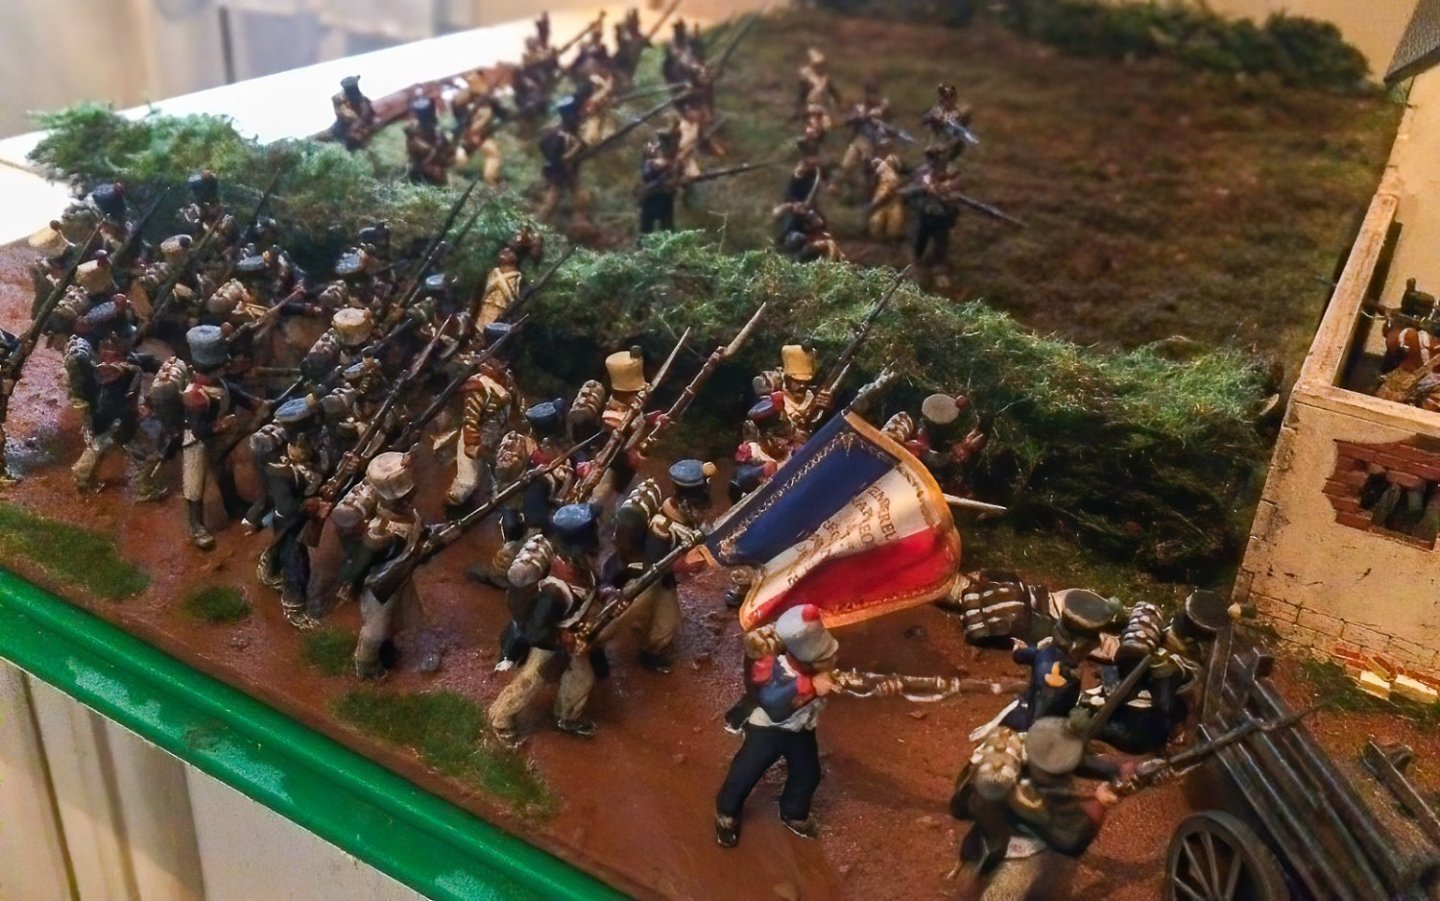
And still more added including my KGL mounted Captain - getting there.
OC.


-
-
-
8 hours ago, tennfox said:
Been working on building up the bulk heads. They are all kind of wonky. How are these looking.? I think I have the length/drop close.

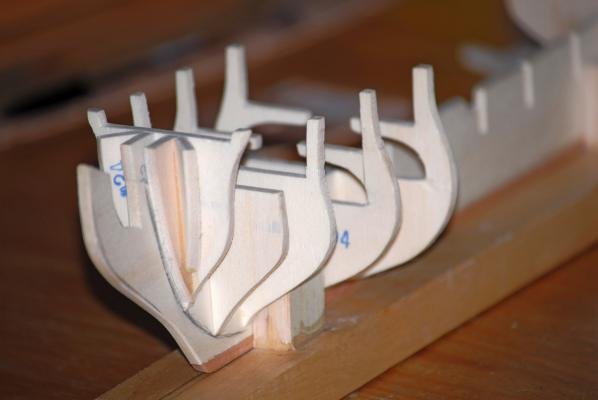
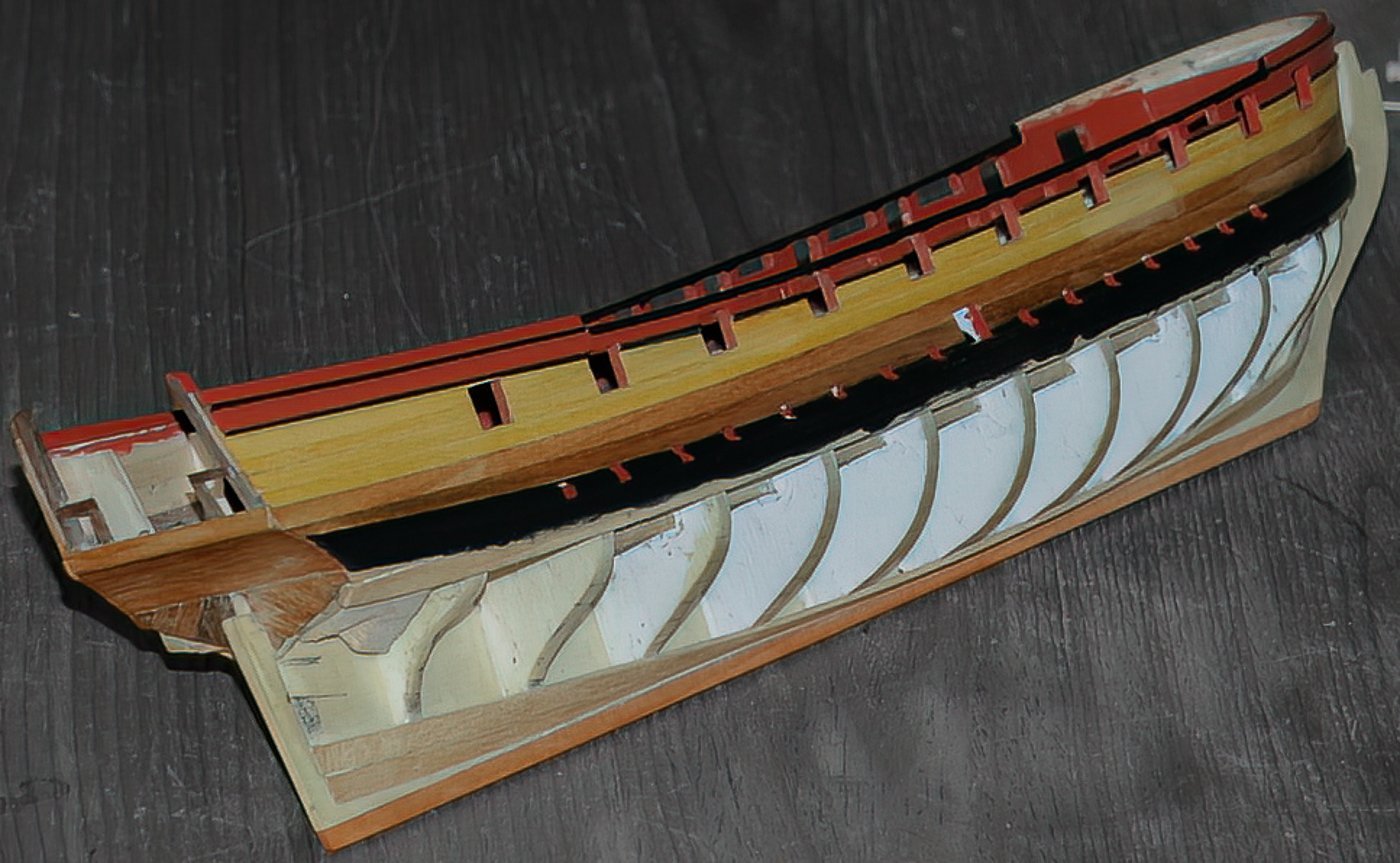
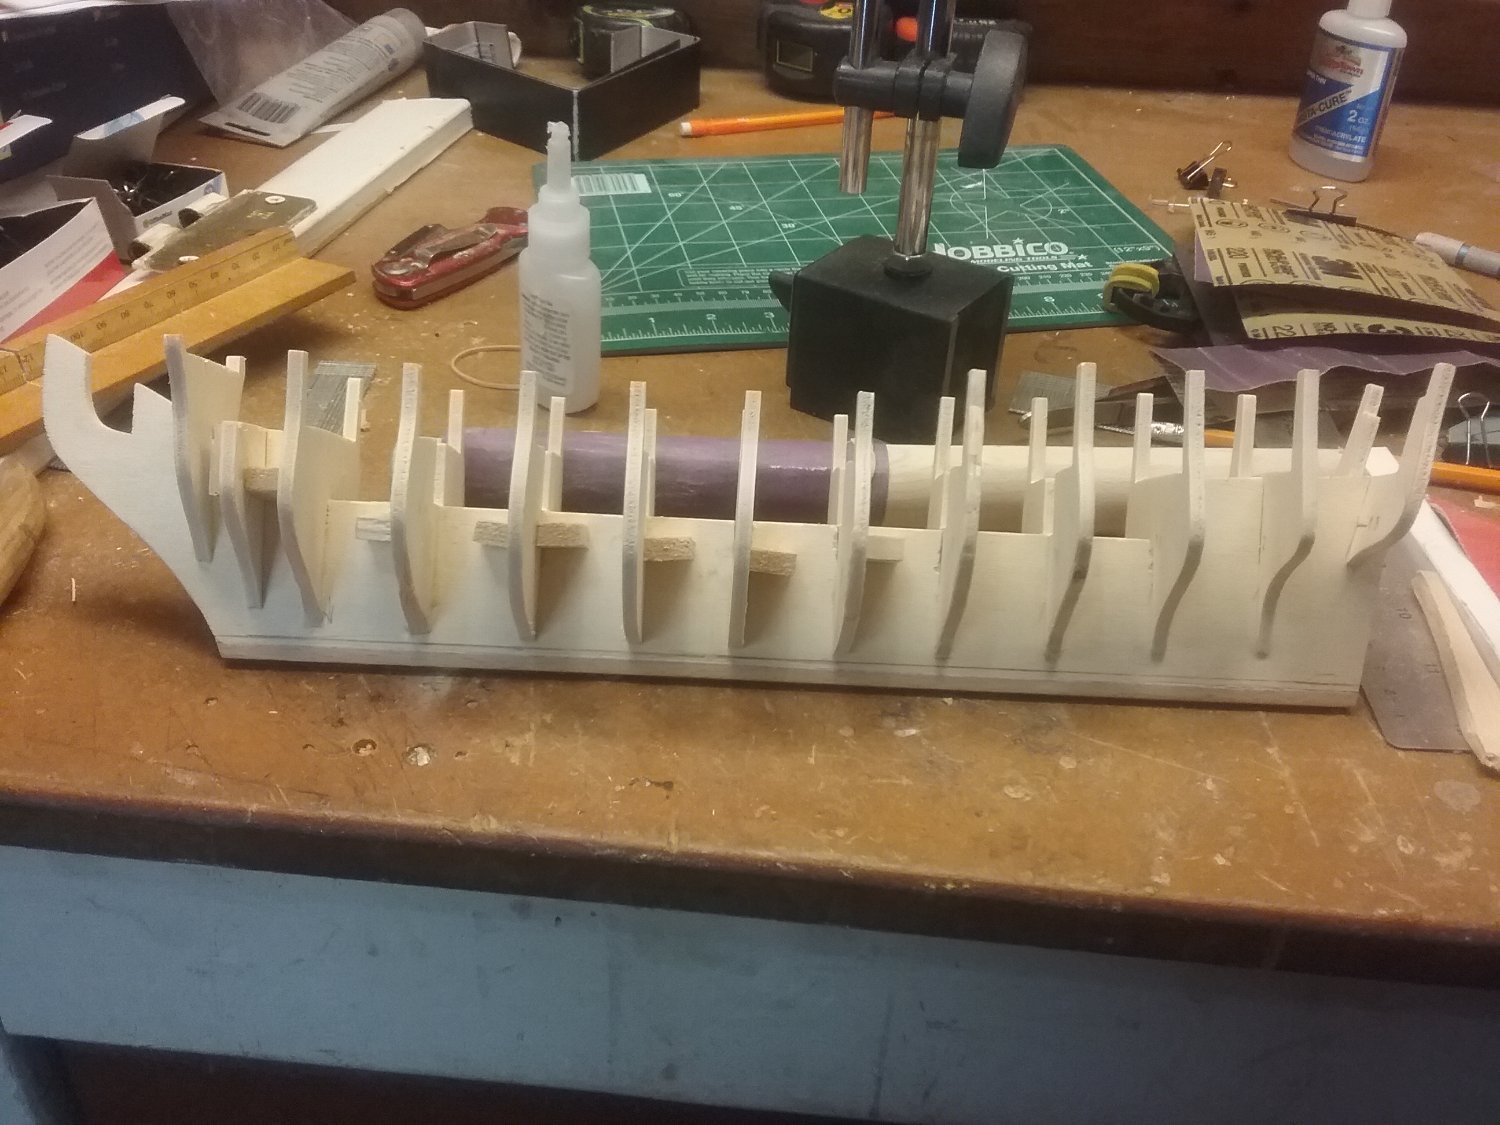
Like in my pic further up I added some strips of wood in between each frame - way to do that is to measure the gap both port and starboard and and after making sure the frames are true to the keel - cut and glue in place the wood strips working your way down each corresponding port and starboard frame, I used a block of wood that I knew was perfectly square and sat that where the frame met the main keel frame, that way you not only get a true frame to keel but also adds strength to the skeleton stage of the build.
OC.
-
11 hours ago, hamilton said:
Yes - OC has achieved a great result here - if you can get yours looking like this, you'll be ready to move on. You don't have to build them up to the keel. Just to fit along the bearding line - here is an MSW thread that talks about the bearding and rabbet lines - the ships uses as e.g.'s aren't exactly like Greyhound but you will get the principle and general idea from this.
hamilton
Thank you hamilton, I followed the Rabbet and Bearding line info also before doing it in my build - also the addition of extra fram fillers helped alot.
OC.
-
12 hours ago, hamilton said:
Don't cut the keel!!!! Shim the bulkheads instead - it is easier to take wood off that you've added than to add back wood you've removed, so it is much safer to correct the structural issue you're facing by shimming up the bulkhead edges.
When I look at your photos, here's what I see:
1. the mid-ships bulkheads look good - they seem to finish touching the top of the bearding line and they look reasonably even.
2. Bulkheads 9/10, which you've already modified, now also look good to me - they imply a nice gentle curve for the run aft of the planking
3. The last bulkhead forward of the transom looks like it needs trimming up - you'll see that the bottom intersects the bearding line, which it should not do - imagine a curve along the bottom of the bulkheads up to the aft edge of the slot for the transom bulkhead - you need to adjust your bulkheads to fit along that line.
4. The 4th bulkhead from the forwardmost one seems to rise too soon - and the 3rd one back is too high for sure and will need to be shimmed like B/H 9/10. There is also a gentle curving of the bearding line up the stem - b/h 1 & 2 in your photo look good, but 3 is way too high to allow for that nice curve you should see at the bows.
Finally - a word of encouragement. This is by far the most difficult and frustrating part of this build. It took me a long time to get through it and this was my 12th wooden ship kit, so I had some experience. Do not give up no matter how frustrating it may get. And do not hold yourself to results that the kit itself may make it really difficult to achieve.
hamilton
Like Hamilton said - this was the most difficult - confusing stage of the build for me - it took me days if not weeks of trial and error - testing adding wood fillers and asking lots of questions to try to correct the errors in the kit.
OC.
-
On 3/16/2024 at 8:56 PM, tennfox said:
It does appear I have to cut the keel off and plane the plywood down and reattach the keel. The first image is the first and second plank material on the bulk heads. I believe I need to plane down to the pencil line. Should that line go straight line the original or does it need to sweep up.?
Man this kit is a challenge. Lucky its wood, you can always glue sand and fill, then redo...
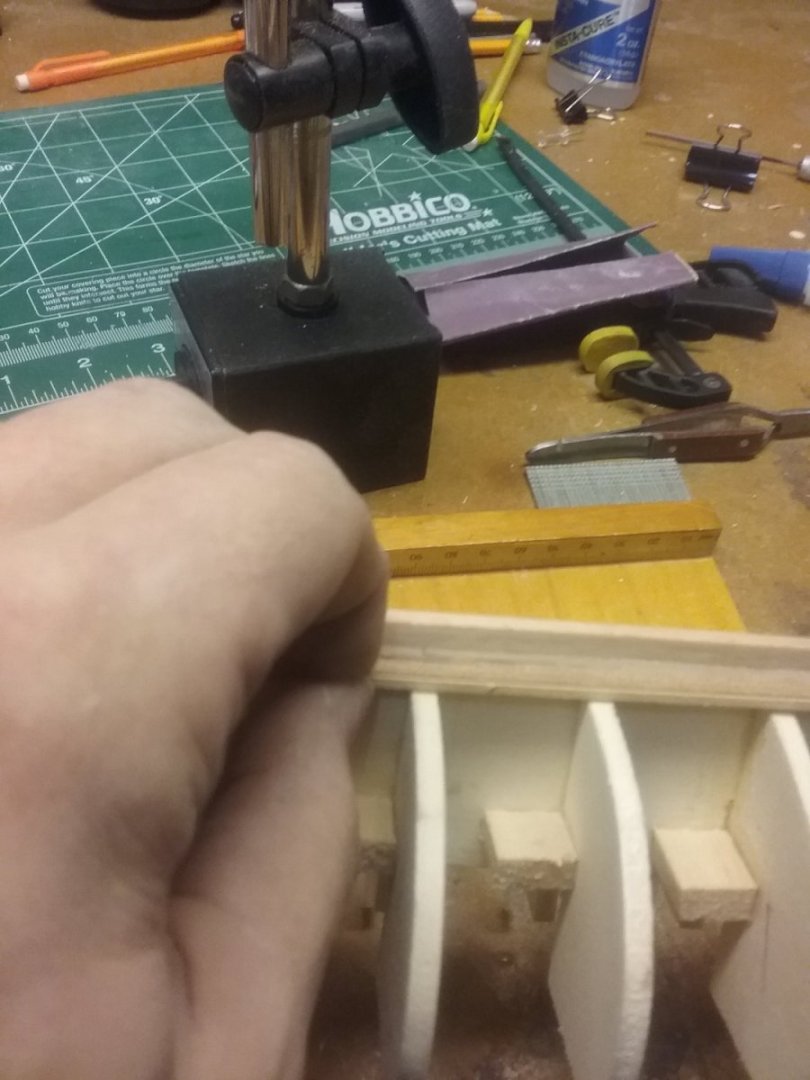

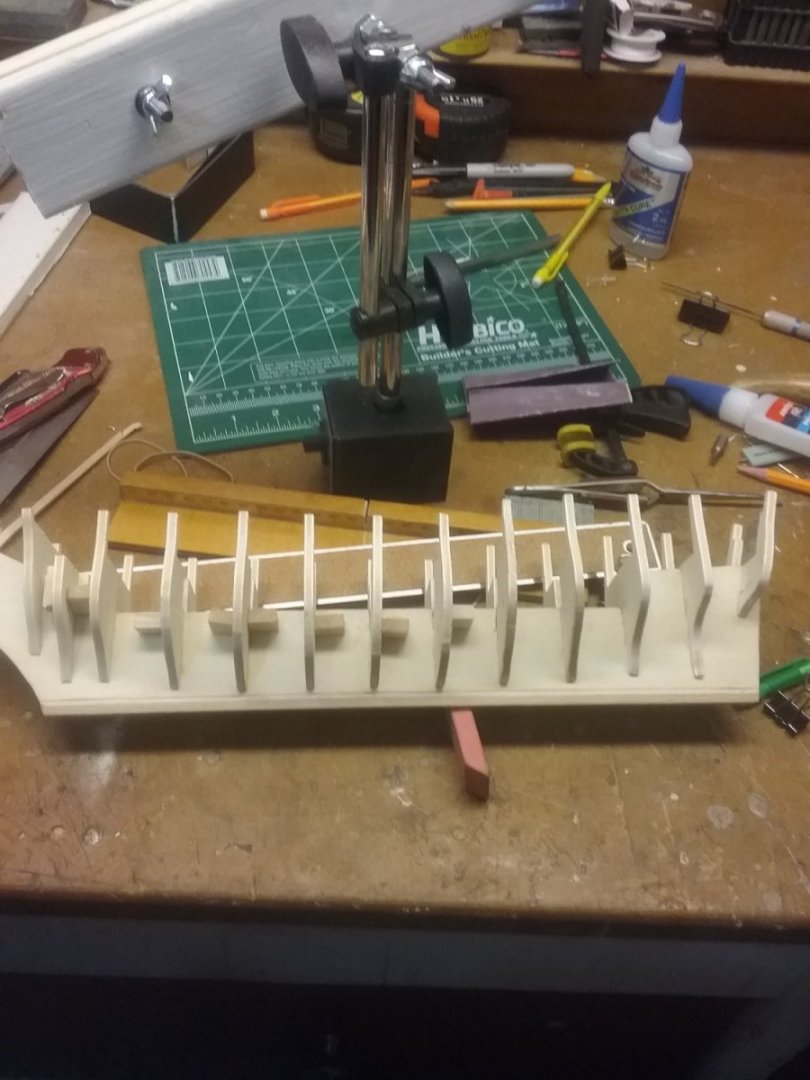
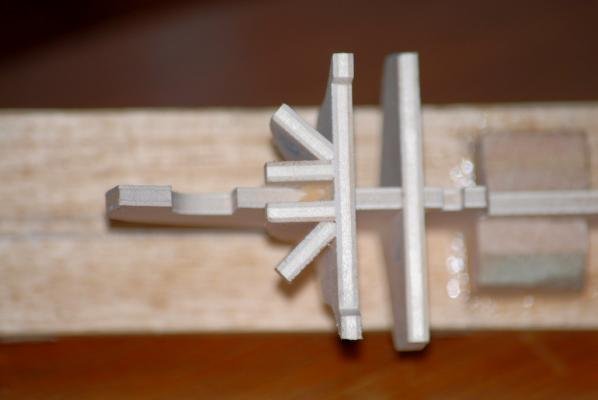
Frame no12 needs to be sanded flat where it meets the keel (keeping the natural curve but making its lower point level with the main fraim) this way the planks will follow a natural flow up to the rear when you start planking up from the keel. Hope that makes sense.
Check out my pic showing a natural smooth line -
OC.
-Edit-Edit.JPG.17716bd1b30f5d01591e0d24752952eb.JPG)
-
I picked up a little tip (I am yet to try) I was finding Vallejo Surface Primer (Black) dries with a slight sheen and not a nice flat surface like other primers, so an idea floating around was to add some matt acrylic flat coat to it, the idea is that any normal acrylic colours on top of it should adhere better and be a proper flat shade (as Blue acrylic on mine was not drying flat on top of my un altered vallejo primer.
OC.
-
-
-
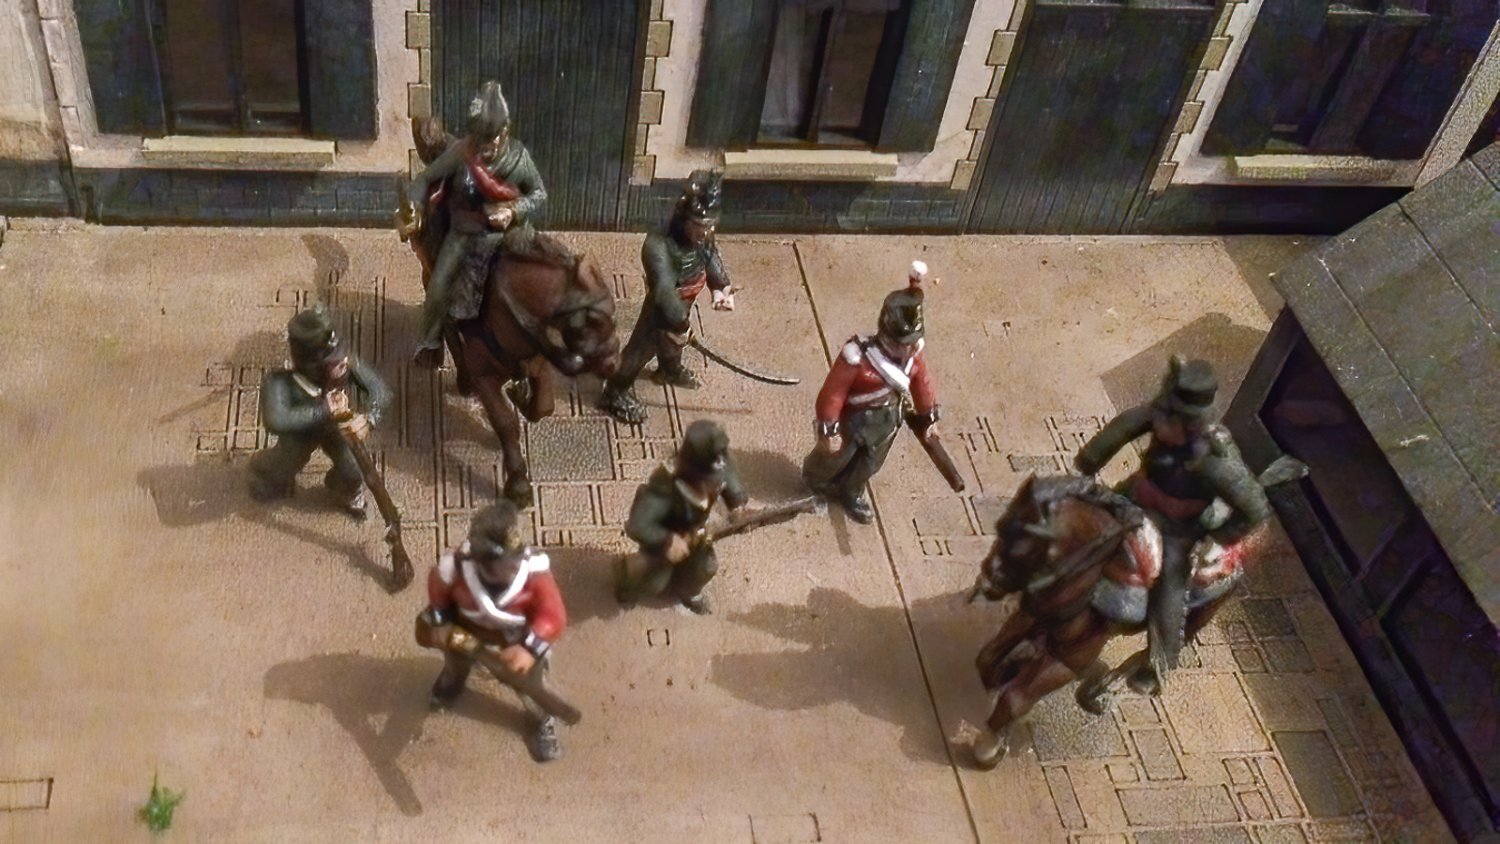
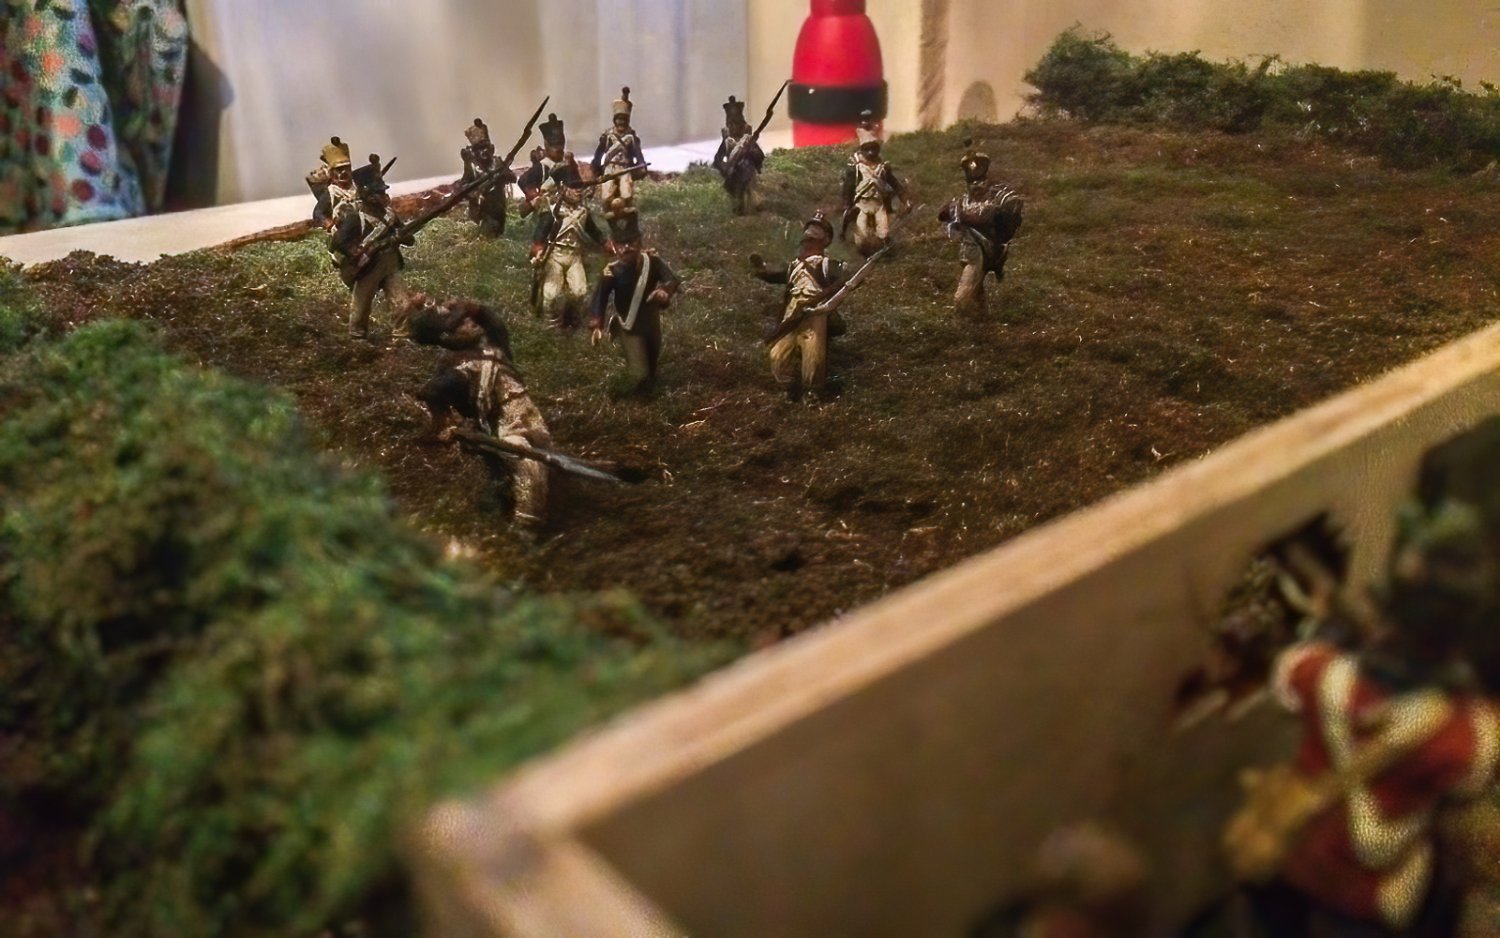
I have been thinking (steady boy) I will have some figures in my stash that will be left over from my build, I could do a couple of small dio's with what I have - possibly a Scots Grey (Union Brigade) running from a French Polish Lancer, and even a French Imperial Guard facing off aganst the Britsh Guards.
OC.
- Egilman, king derelict, Jack12477 and 3 others
-
6
-


HMS Greyhound by tennfox - Corel - 1:100 - building as USS Protector
in - Kit build logs for subjects built from 1501 - 1750
Posted
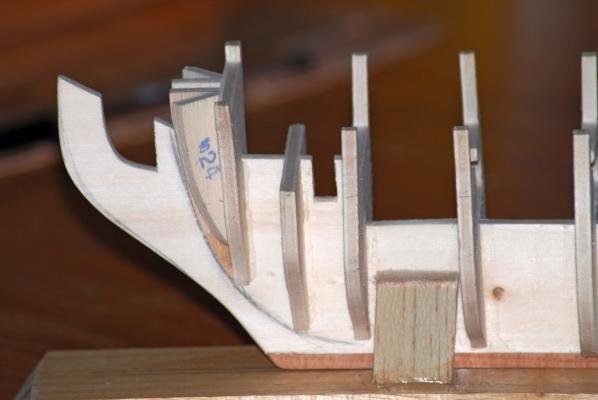
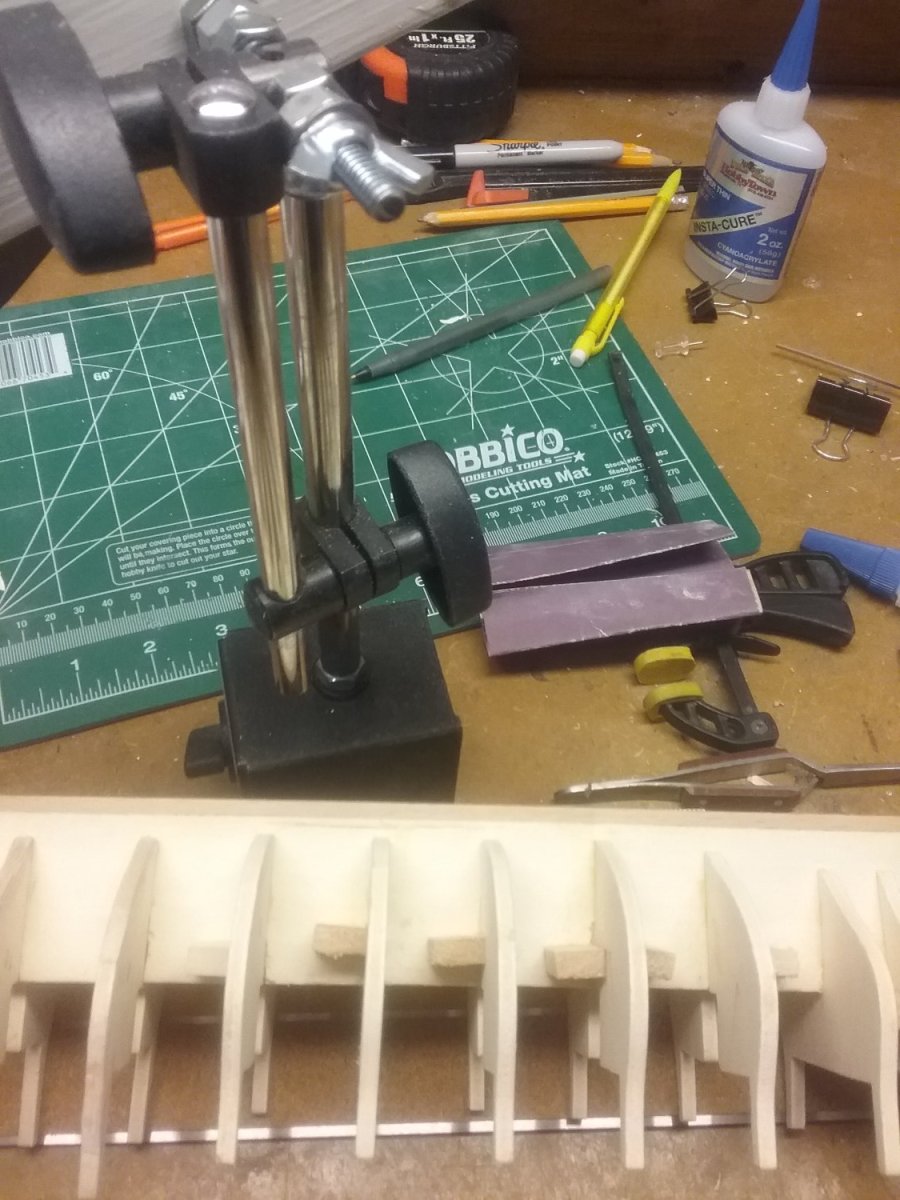
And I added some fillers that where then sanded to get the correct curve to the beak head, you can keep checking this with on of the planks by gently following the profile of the frames - (Both sides the same amount)
OC.