

woodrat
-
Posts
818 -
Joined
-
Last visited
Content Type
Profiles
Forums
Gallery
Events
Posts posted by woodrat
-
-
2 hours ago, druxey said:
Now that is a milestone of progress! Looks great, Dick. My only concern is lowering and raising the spar past the wooldings. One would need to loosen the parrel lines considerably, I would think.
Indeed so, which is the clever part of parrels. The wooden bearings ride over the ropes like an all-terrain vehicle.
Thanks for all the likes.
Carl you wont have to wait long.
Dick
- cog, CaptainSteve, mtaylor and 1 other
-
 4
4
-
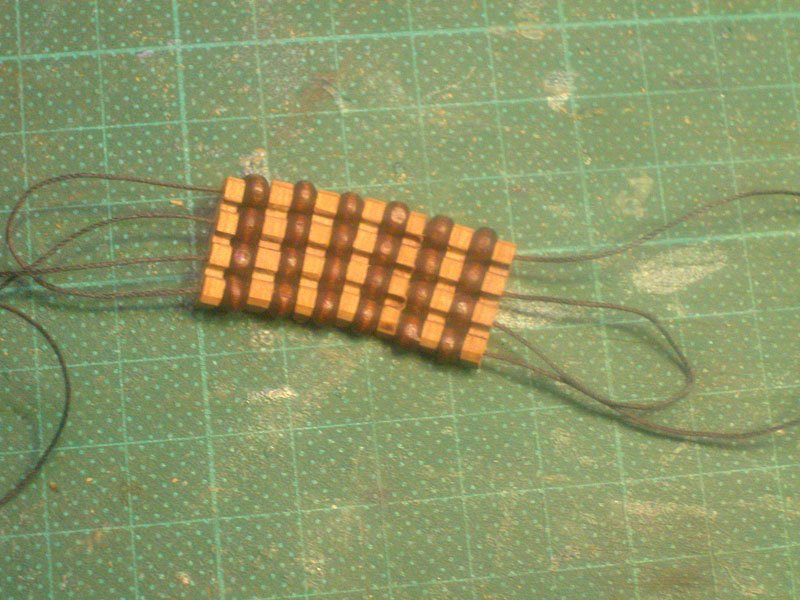
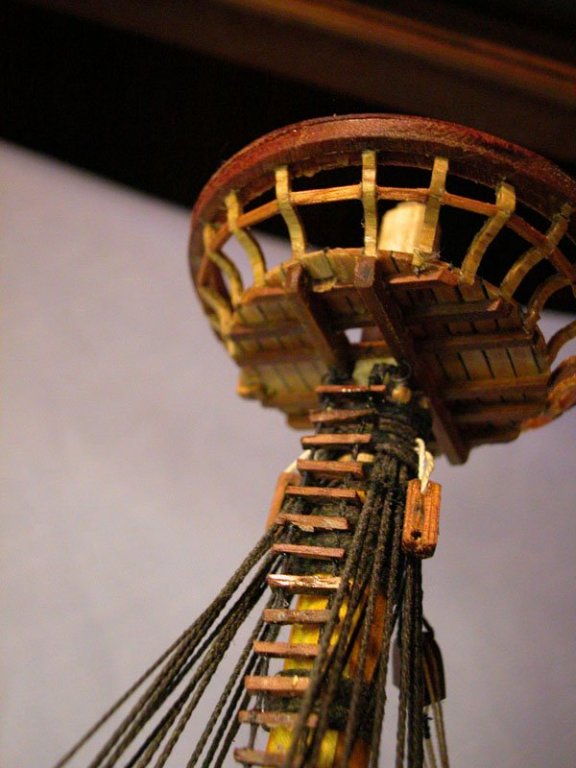
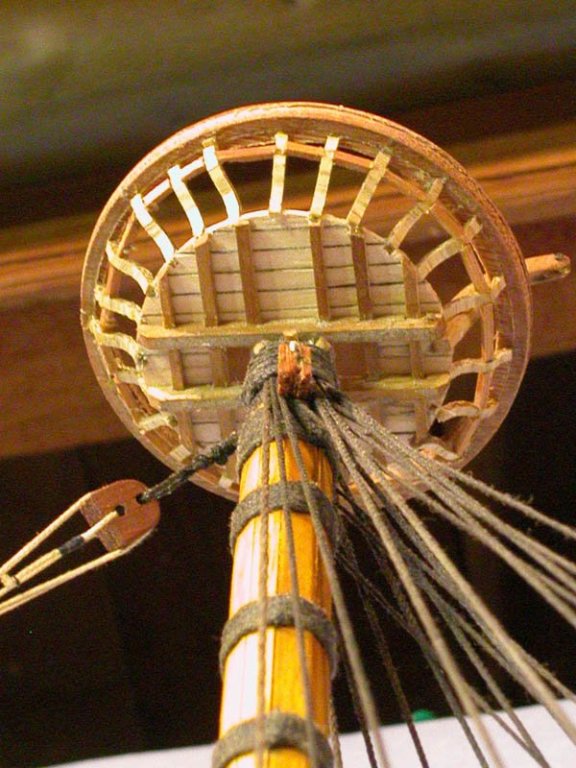
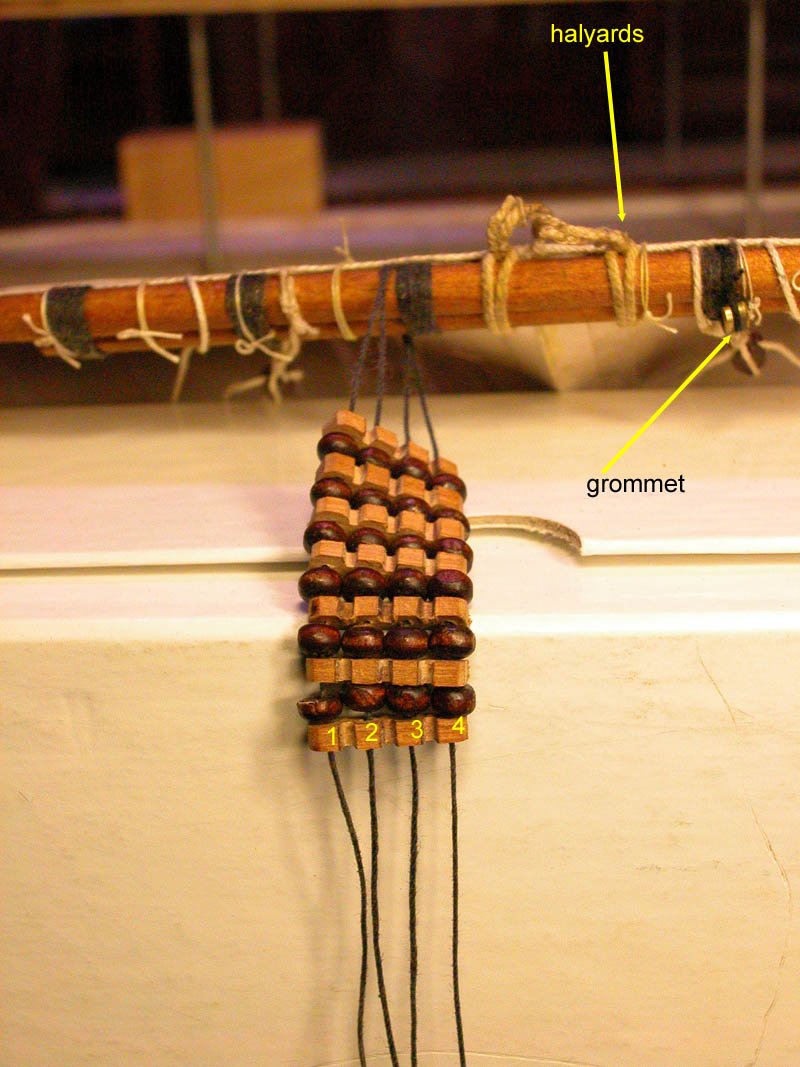
One of the more fiddly and interesting aspects of the rigging of this beast has been to work out how the parrels were applied to the mast. The excavated parrels from the Mary Rose were a great help in this regard. But I still had to work out a way of applying the parrels which I could understand and was consistent with the iconography. Firstly, in a large vessel such as this, three, four ar even more rows of parrels were needed. Secondly, any method of attaching them had to allow loosening and tightening of the parrels so that the position of the yard on the mast could be changed. In this regard, I recognise the wonderful work of Franco Gay ( The Ships of Christopher Columbus (Nuova Raccolta Colombiana, Vol. 7) by Franco Gay ) for his contributions . Thirdly, the parrel tightening needs to be done from deck level.
The concept is my own modification of Franco Gay's method and seems to work. Grommet is seized to the yard. Its purpose is to transmit the parrel ropes to the deck.
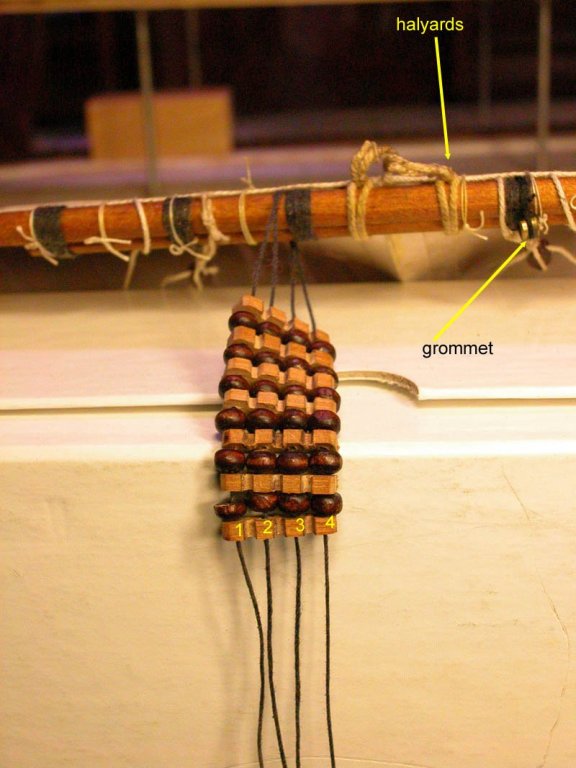
There are two ropes: one controls parrel rows 1 and 4 and the other rows 2 and 3
Please note that the slots end up AGAINST the mast
The yard is now ready to be attached to the mast.
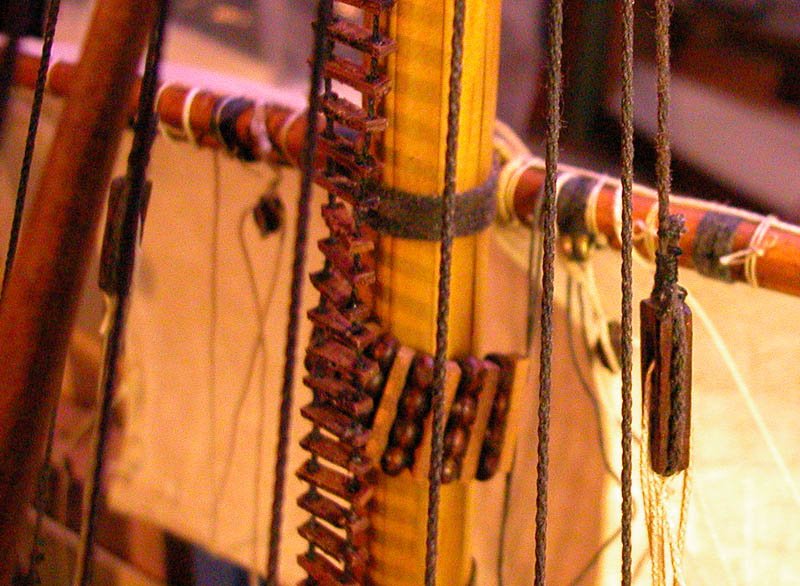
The starboard ropes are now passed around the yard. Note the parrels are loose.
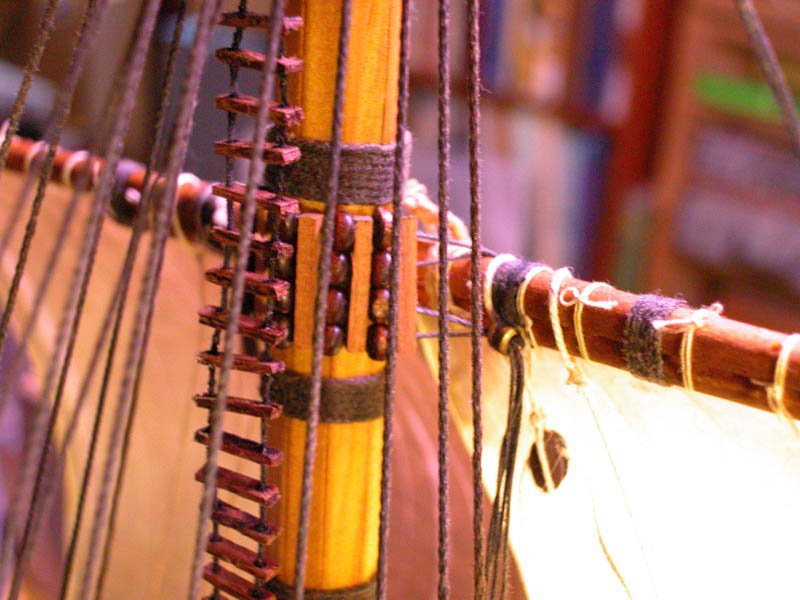
All ropes are passed through the grommet
The parrels are tightened.
The time has come to hoist the mainsail.
")
Dick
-
Thanks, Steven. The dromon is looking great!
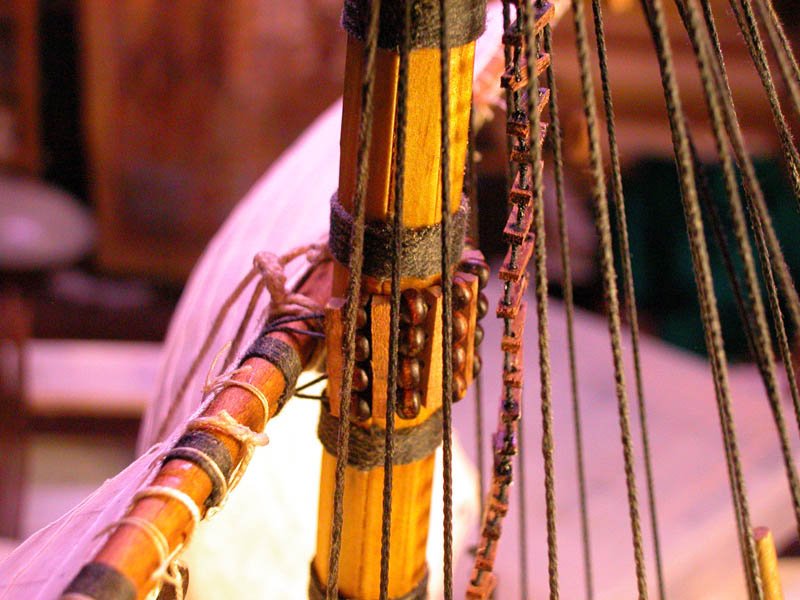
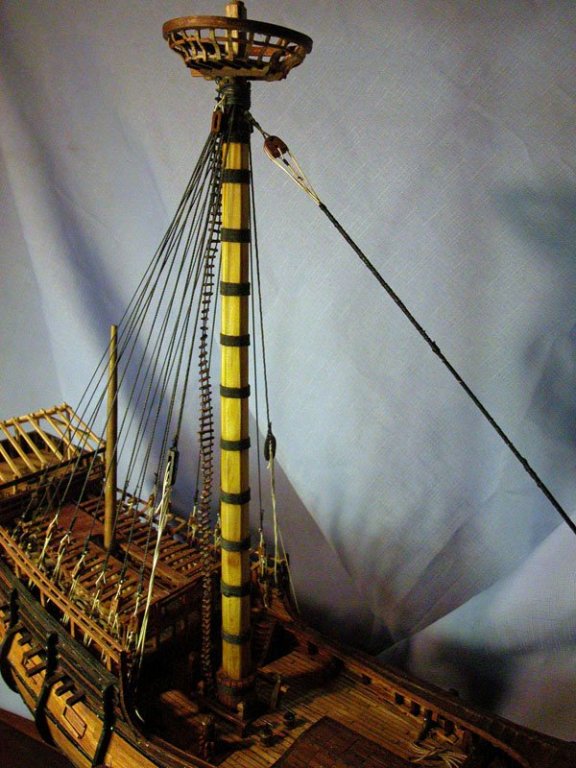
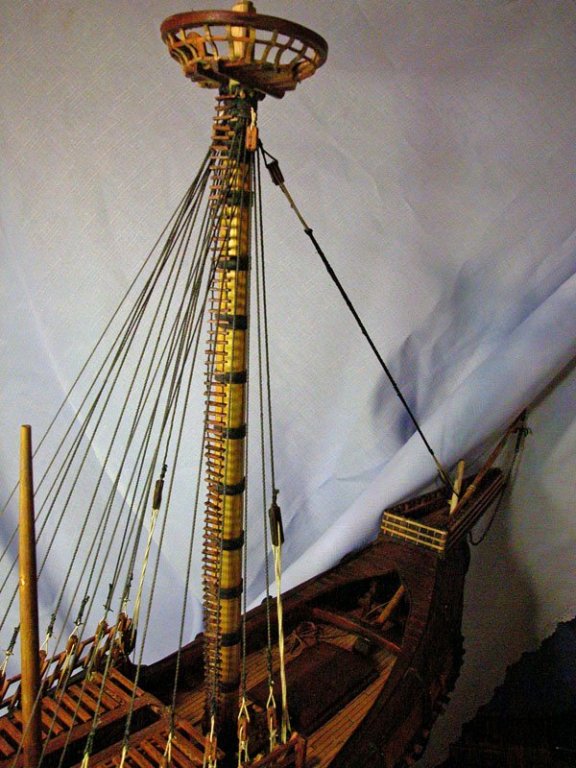
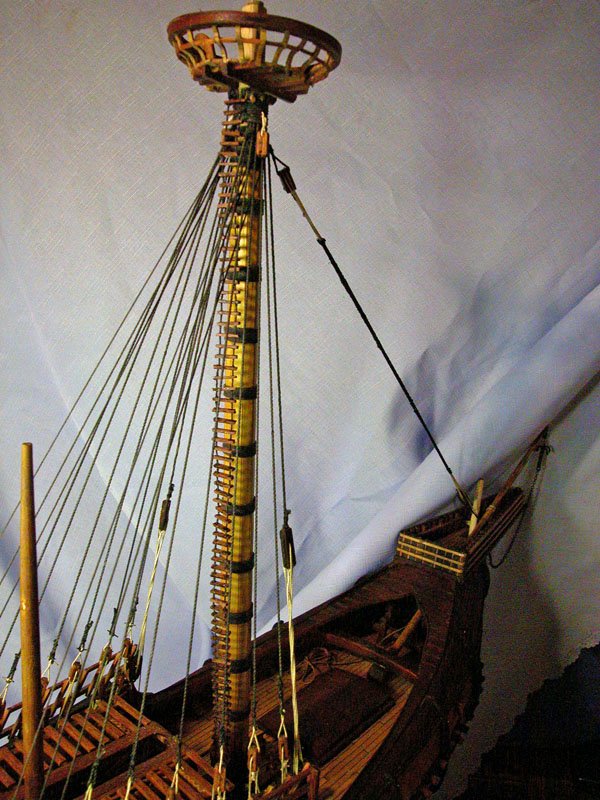
Here are some pics of the the parrels and the flagstaff. I have decided not to fit a topsail as they probably did not appear until about 1460. Also, no-one is sure how they were rigged.


 Cheers
Dick
- michael mott, cog, JesseLee and 10 others
-
13
-
19 hours ago, bearegalleon said:
Would this be something documentable or suitable to the nave?
I cant recall seeing illustrations of navi from that time with stern ladders, plenty with side ladders. But I suppose anything is possible. With the very tall sterncastle it would be a long climb to the poop!
Dick
-
thanks Carl and Druxey. Just wait till it's on the mast
.
- cog, CaptainSteve, JesseLee and 1 other
-
4
-
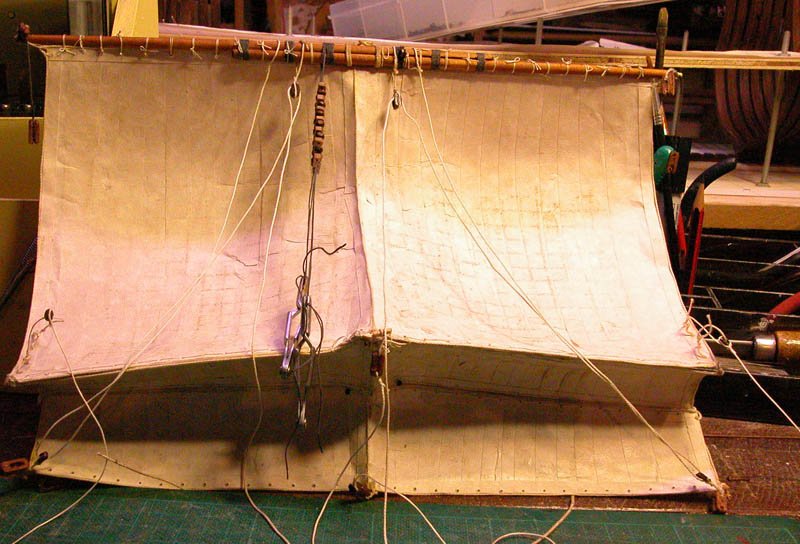
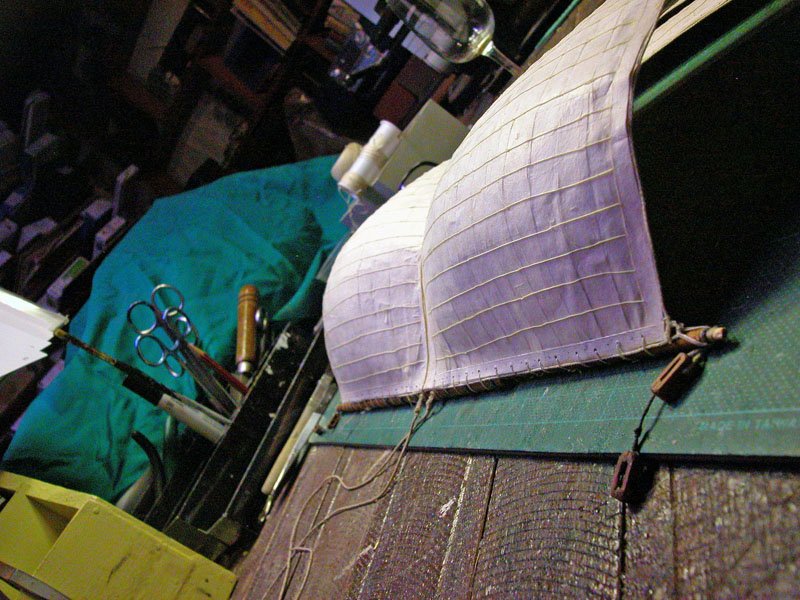
the aft view of the mainsail with rigging attached for furling the sail
Dick
-
On 14/07/2017 at 1:23 AM, goetzi73 said:
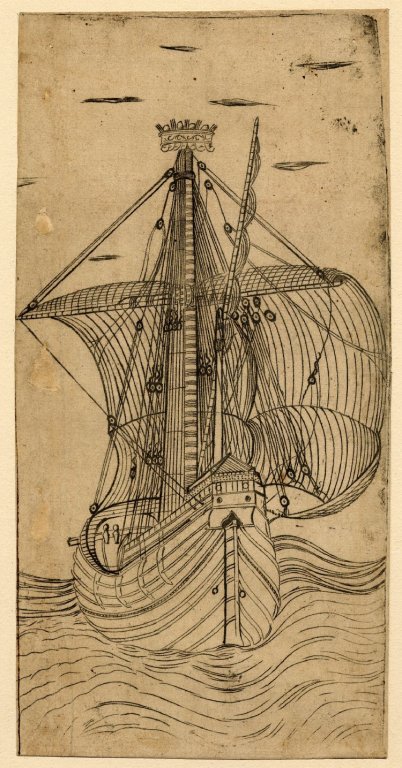
I found another picture of the jabob's ladder, which seems to be fixed on the deck and the maintop.
Götz
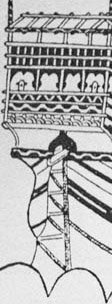
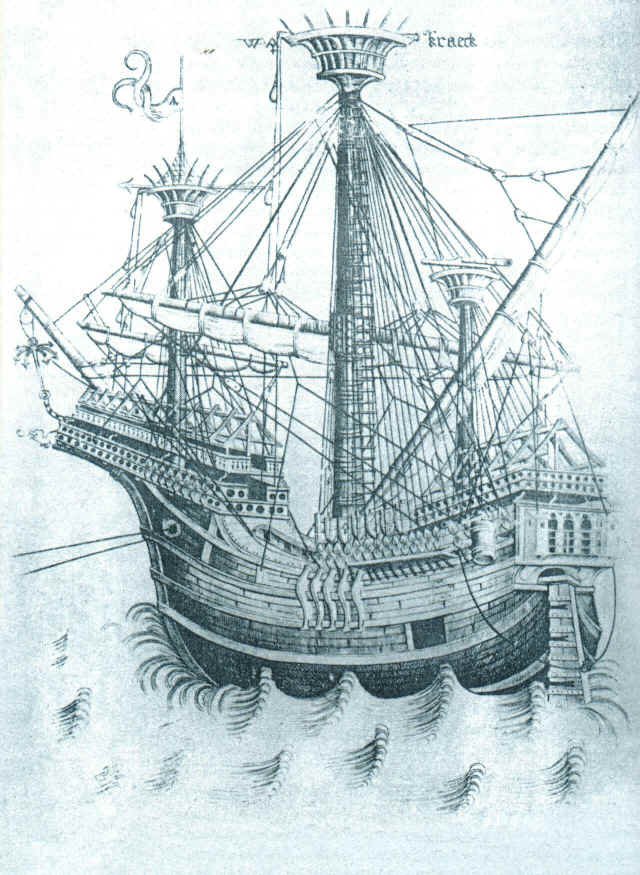
This seems to be a 19th century print of a small carrack. The ladder is well shown
On 14/07/2017 at 1:41 AM, bearegalleon said:Free hanging ladders show up in a number of 16th c illustrations and on a number of 18th c models, usually hanging off a ship's stern. Must have been interesting.
On 14/07/2017 at 9:15 AM, bearegalleon said:What were they doing back there? Odd way to access a ship.
I presume they had stern ladders to access boats.
- mtaylor, cog, CaptainSteve and 1 other
-
4
-
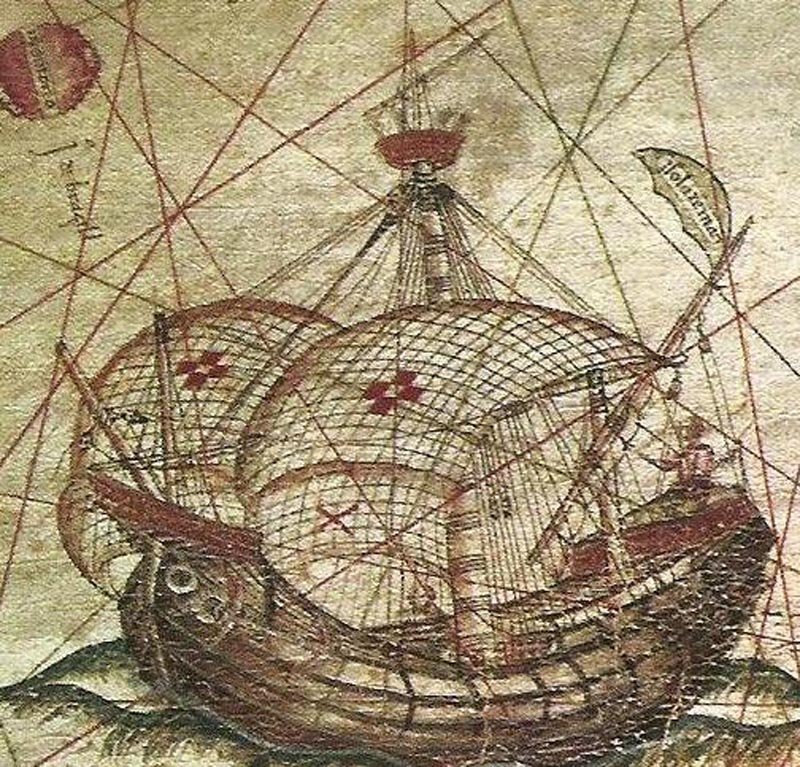
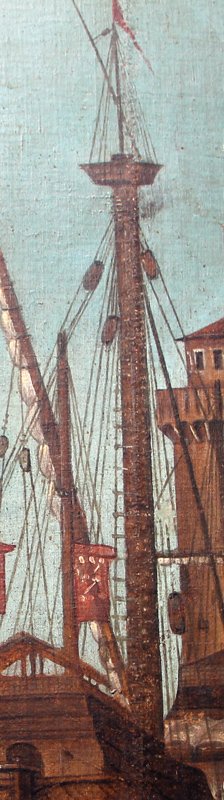
All the good contemporary illustrations, especially Carpaccio, agree that the ladder was fixed to the maintop and to the deck (presumably by eyebolts, Druxey). So, it must be concluded there was no other tethering


At least one illustration shows both Jacob's Ladder AND ratlines (or at least it looks like he's climbing ratlines, though you can't see them) Note the matelot perched on the mainyard.
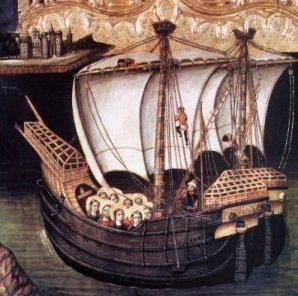
Confusing, isn't it?
Dick
-
-
This is the making of the Jacob's Ladder. I can understand why it became replaced by ratlines. They must have been a horror to climb on a pitching, rolling ship with the ladder twisting and slapping back and forth. question: were the ladders secured to the mast to make them more safe?
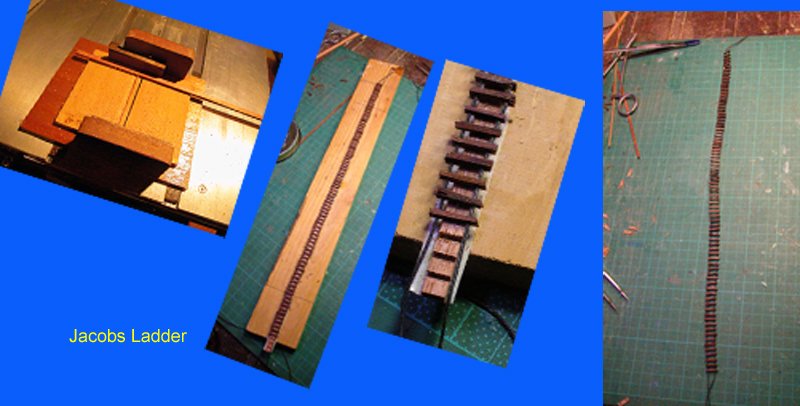
Dick
- BLACK VIKING, cog, Farbror Fartyg and 7 others
-
10
-
Thanks Jesse and Druxey. I have some deck level work to do first and also the Jacob's ladder before I can hoist the sail.
Dick
- JesseLee, mtaylor, CaptainSteve and 1 other
-
4
-
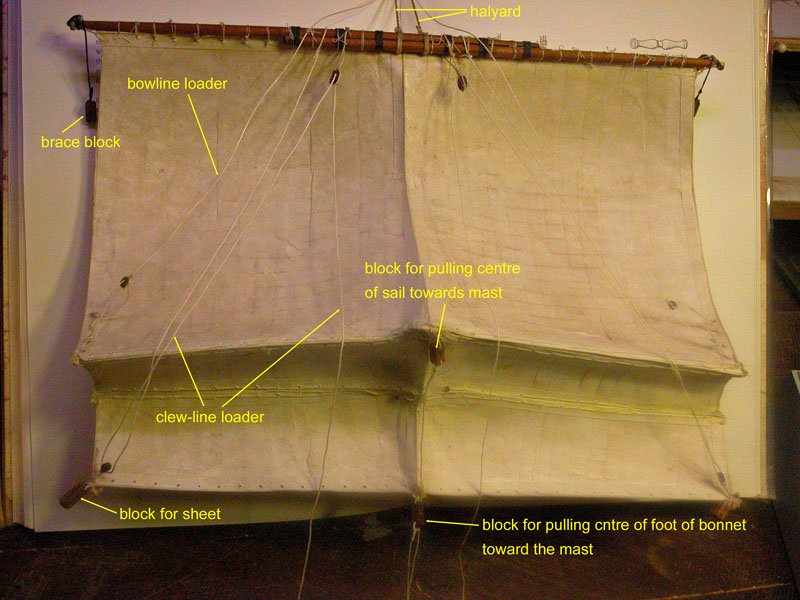
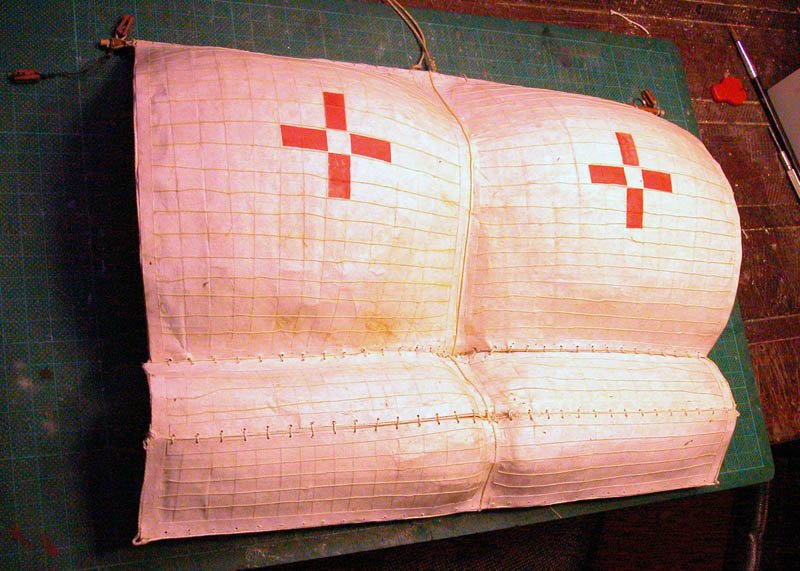
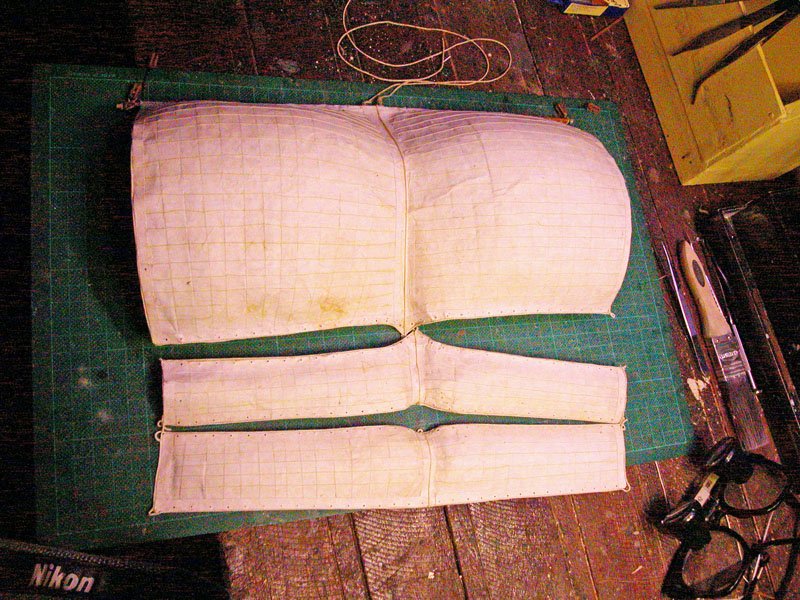
The bonnets were used to increase the area of the sail in this era They are unlaced from the mainsail as required. Reefing points are not seen in illustrations from this time although they are definitely seen in earlier mediaeval ships, particularly those from northern climes.The bonnets are now laced to the mainsail. I have applied a simple cross as in the Benincasa carrack shown previously. These need not be elaborate and, indeed, need not be depicted at all.
Dick
-
13 hours ago, Louie da fly said:
is there a chance of a tutorial in the future for those of us who want to follow your lead?
Steven
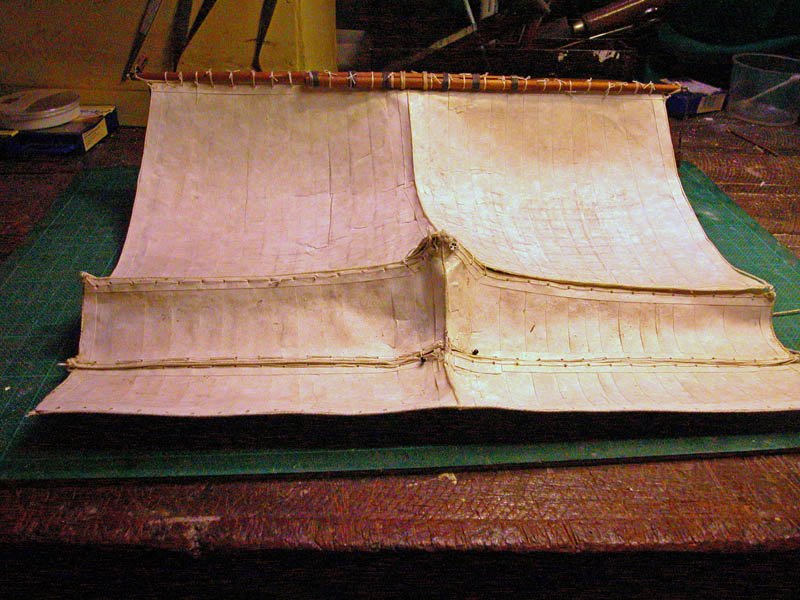
I would not be so presumptuous. Compared to other methods on this site my sail is a little primitive. But the shape is close to what the contemporary illustrations show.
It is basically papier-mache using strips of calligraphy paper over the plaster-of-Paris mold shown earlier. White glue is the stiffener. Bolt-ropes are glued on.
Dick
- druxey, Farbror Fartyg, cog and 2 others
-
5
-
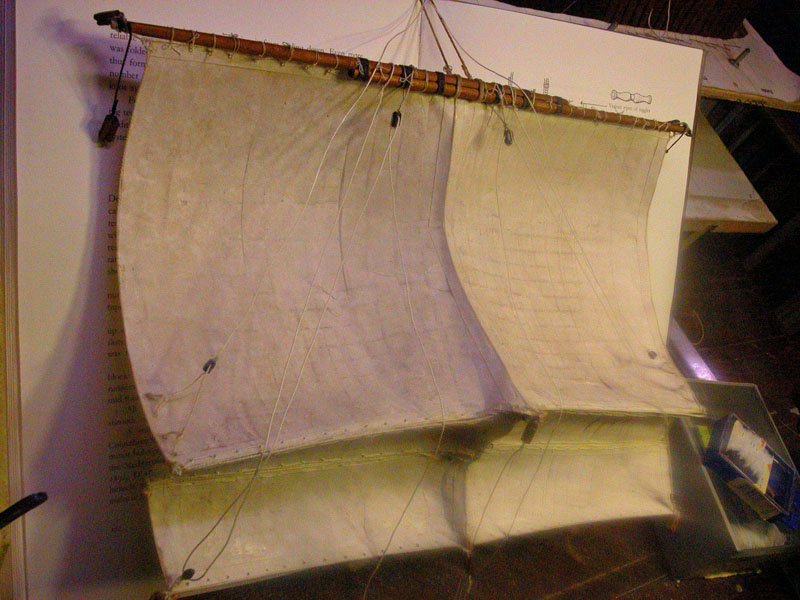
I have done the best I could on the mainsail. It is an approximation of the possible appearance of sail in that era. It only remains to hoist it.
- Archi, CaptainSteve, hexnut and 8 others
-
11
-
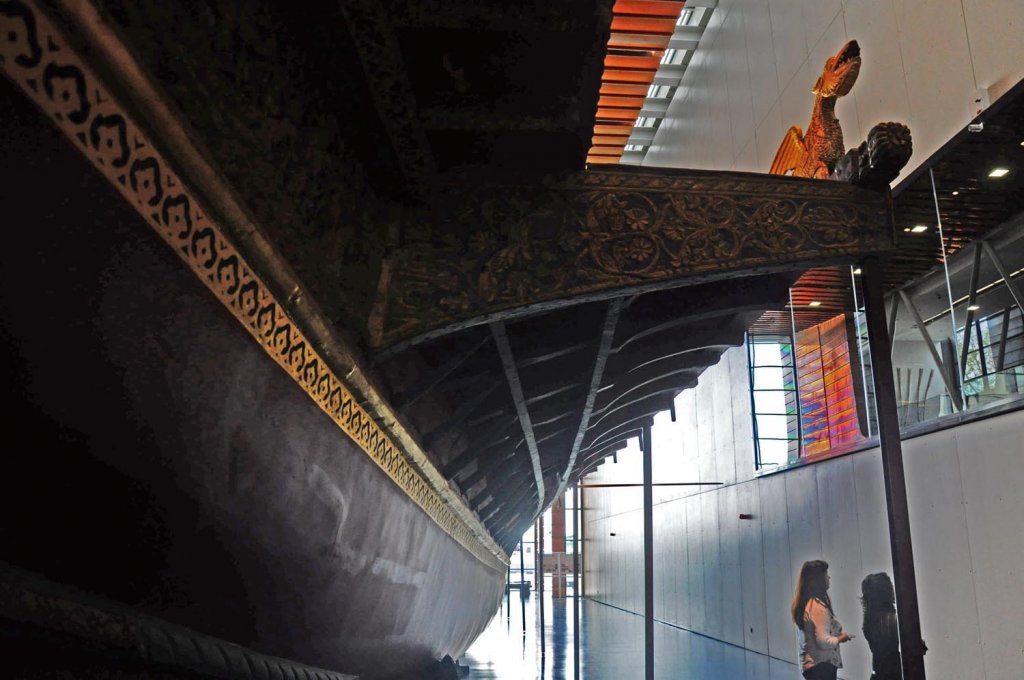
Don't be too concerned. I f you look at preserved galleys in the Istanbul Naval Museum, there are some imperfections in the run of planking. Models should never be "perfect" but they should be interesting and yours surely is.
Dick
- CaptainSteve, cog, BANYAN and 6 others
-
9
-
-
On 17/06/2017 at 2:46 PM, Louie da fly said:
How big are those lubber holes, Dick? Are they big enough for someone to squeeze through? They look rather small - but doubtless you've already worked that all out.
Steven
He fitted with inches to spare. Crows nest were very large fighting platforms in those days
Dick
-
The crane on the maintop is wrong. It should be projecting laterally not aft so that it will access the waist not the quarterdeck. Will fix as it will bug me!
Dick
- druxey, CaptainSteve, cog and 1 other
-
4
-
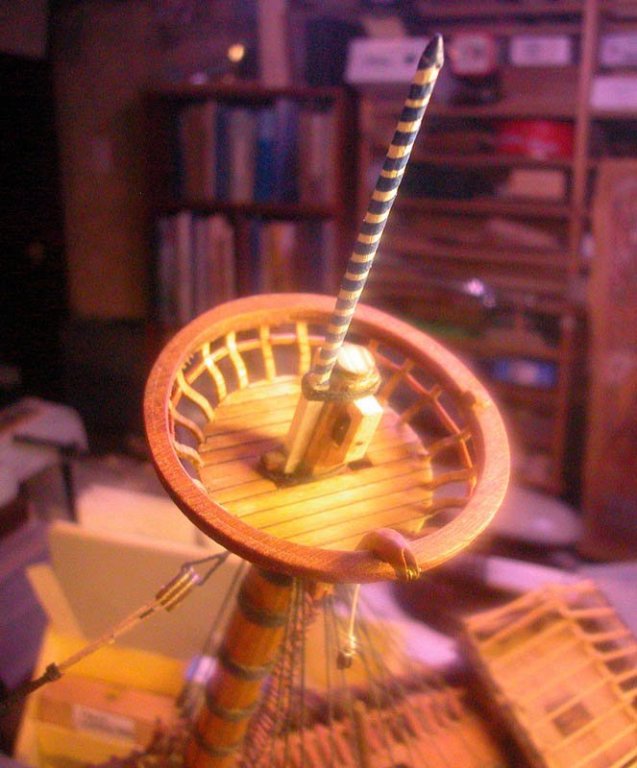
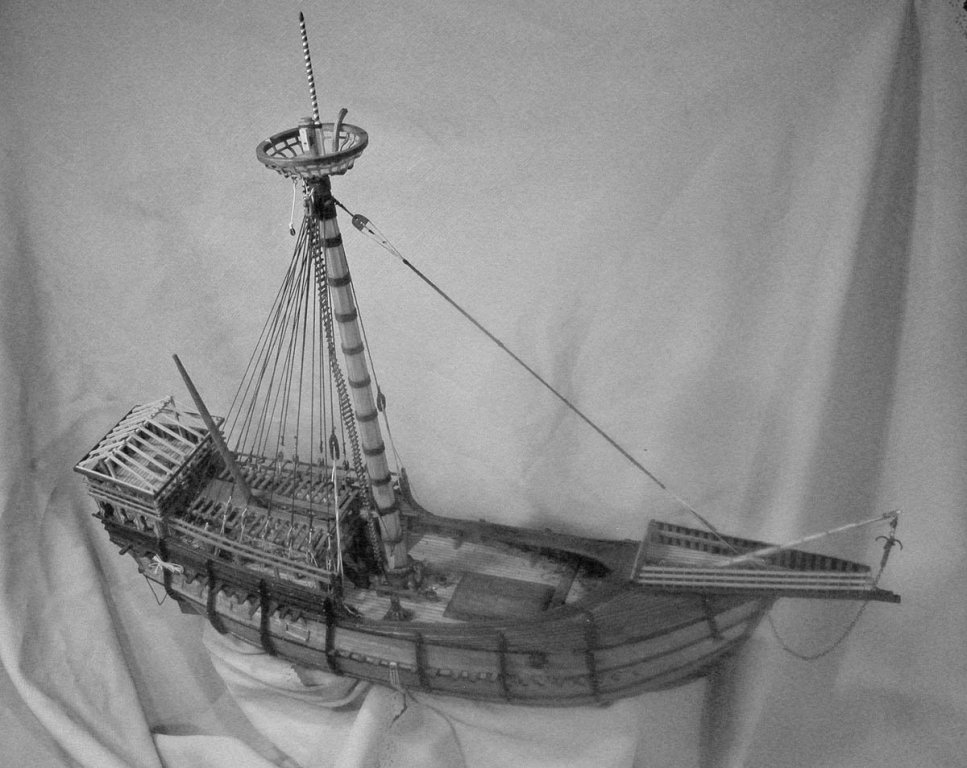
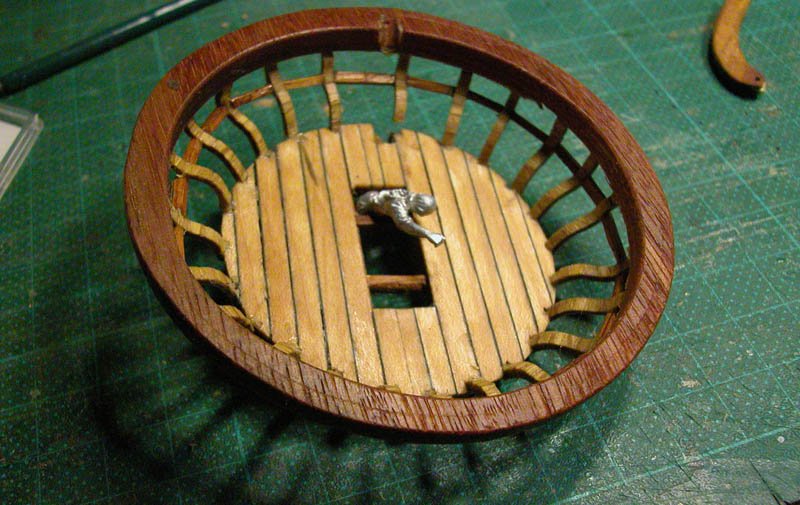
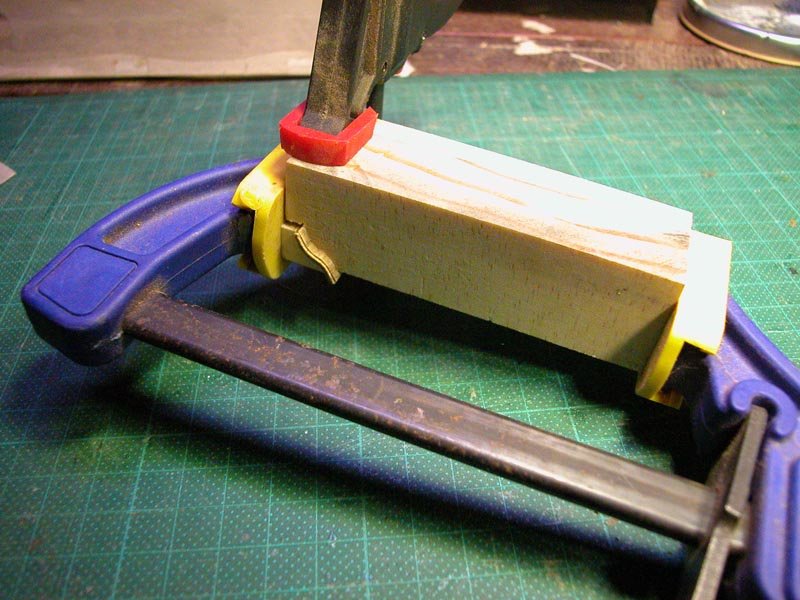
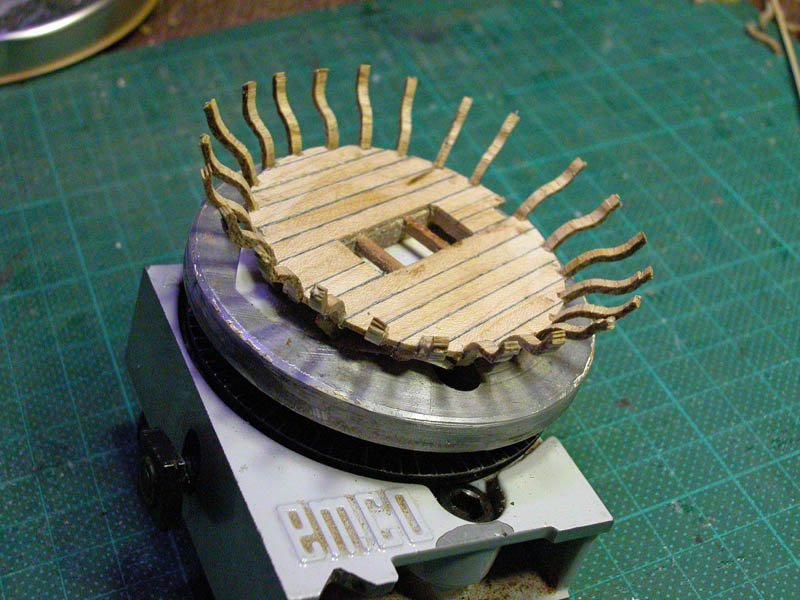
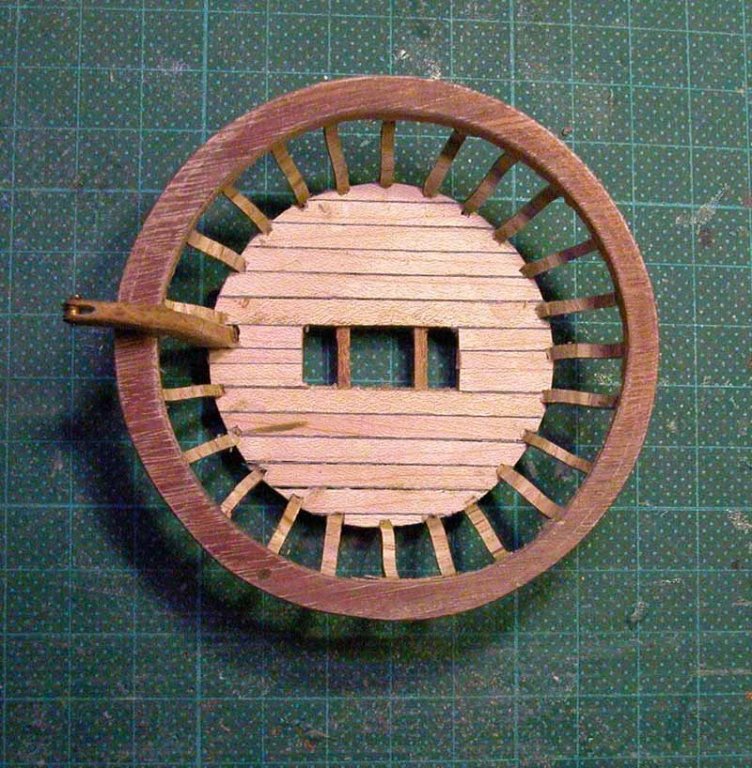
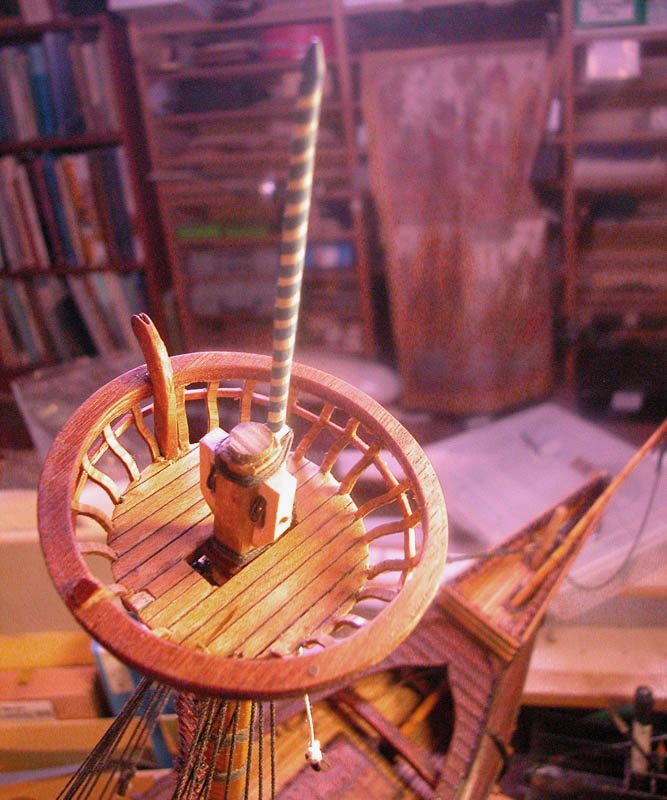
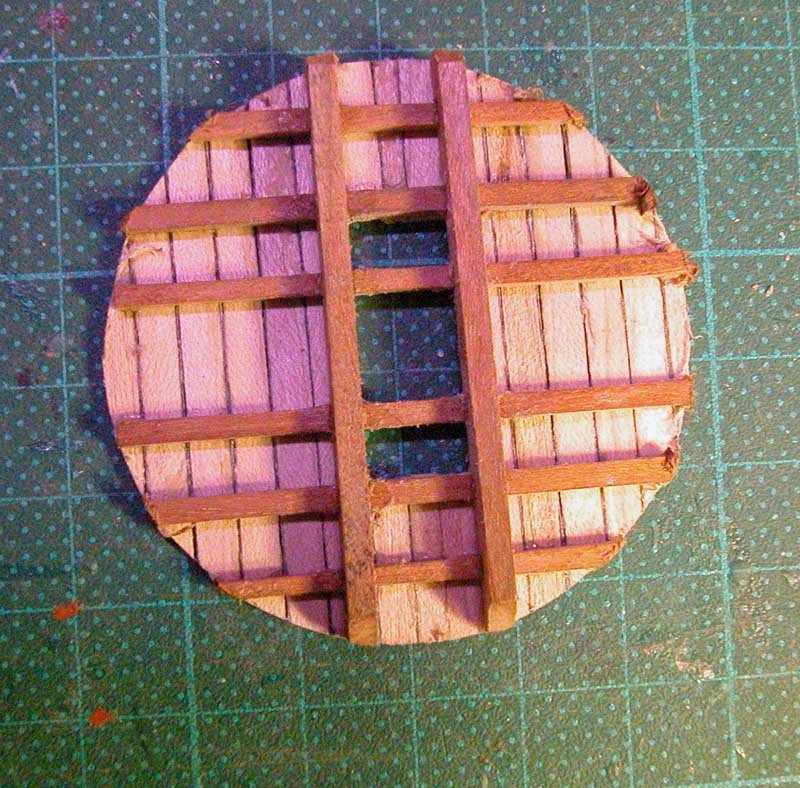
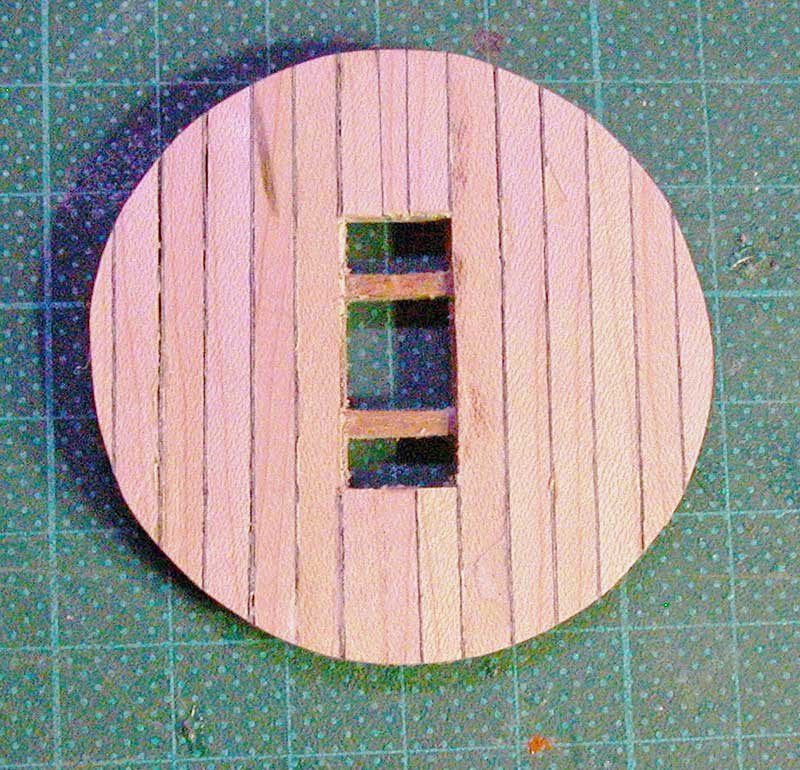
The following is the construction of the maintop (or crow's nest if you like)
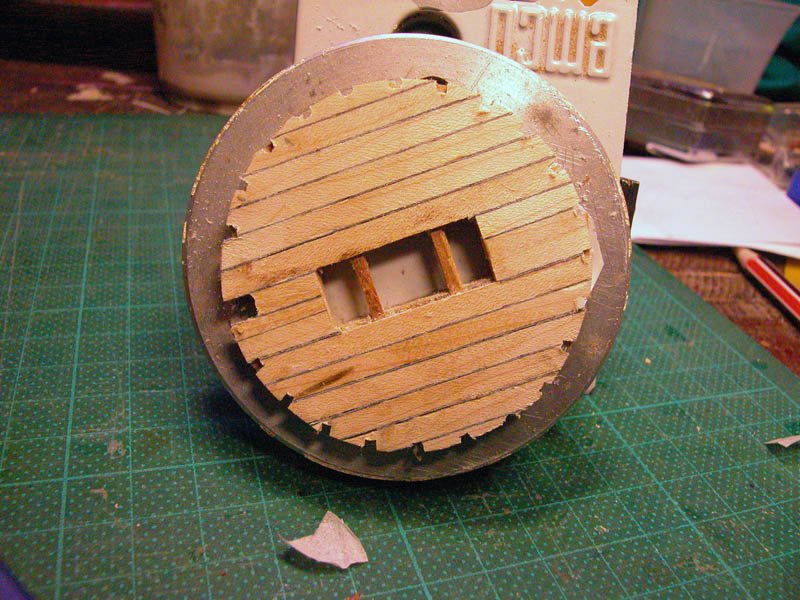
The construction of the base. Note the access aft for the jacob's ladder to allow ingress to the top and the entry of the halliards. for ward of the mast will be the exit of the halliards.
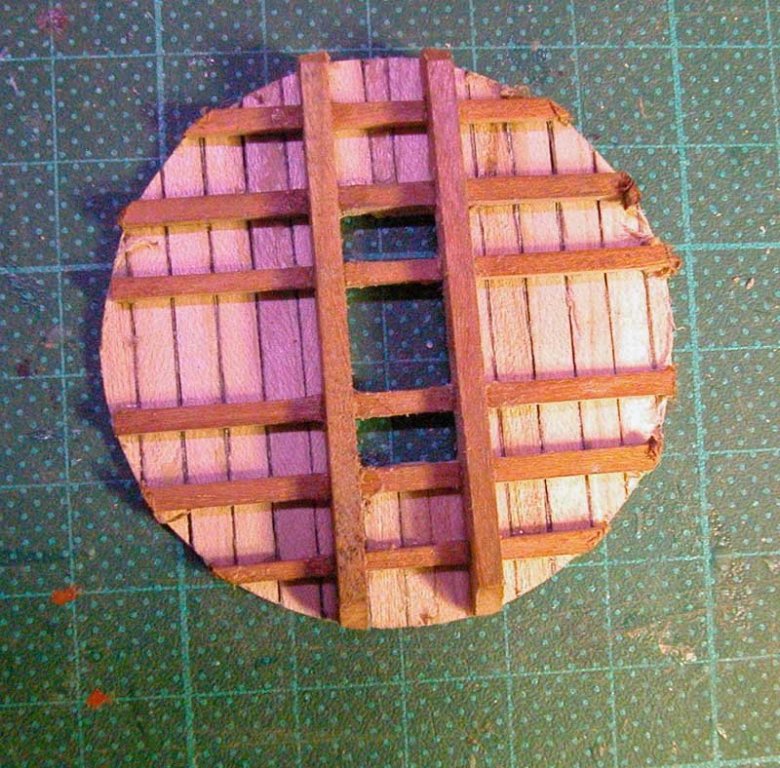
the position of the frames is located using my Emco dividing attachment (Unimat 3)
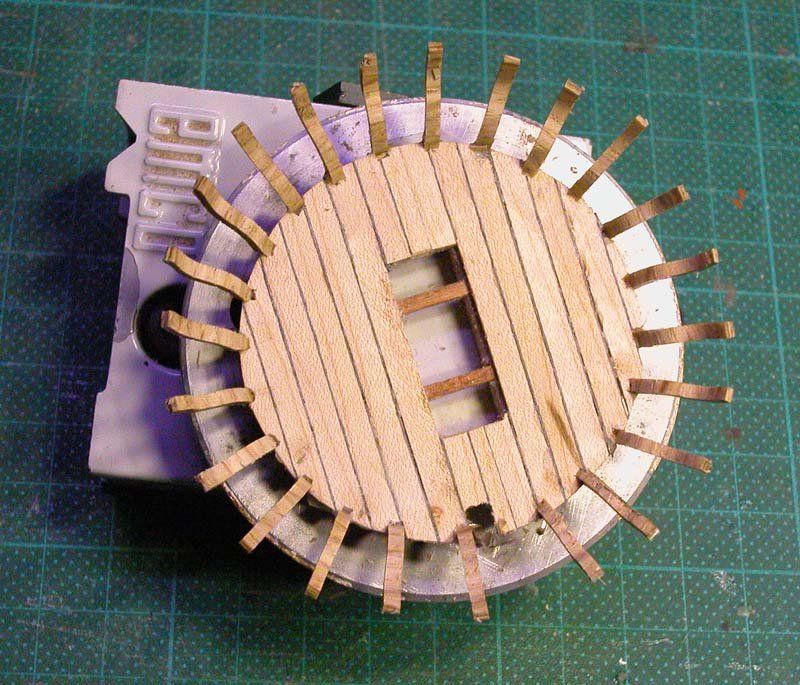
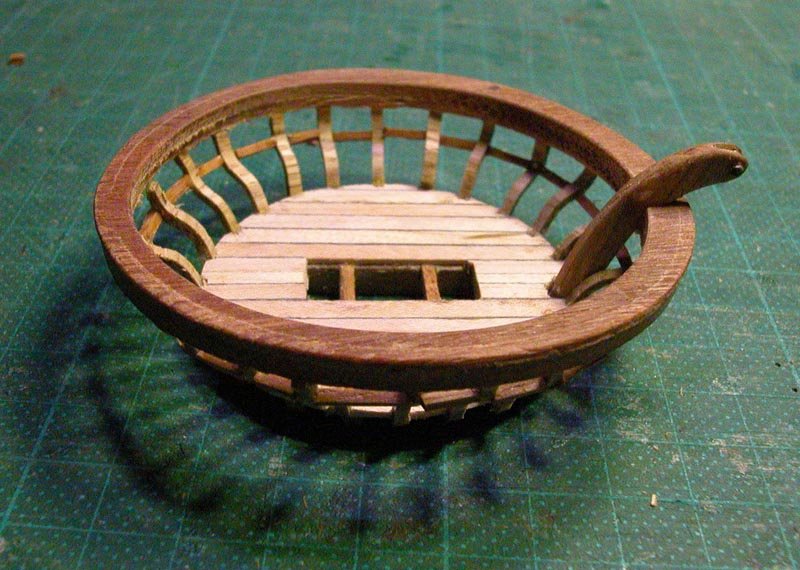
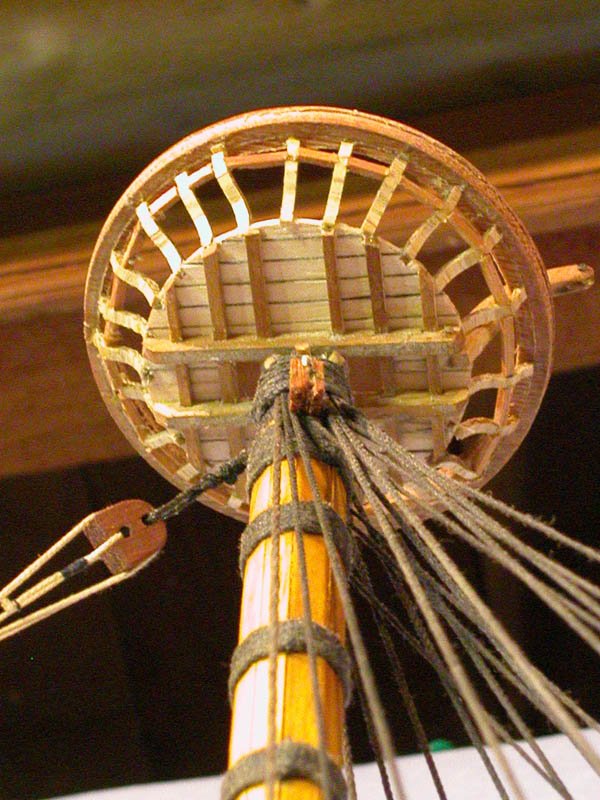
The circular rail for the top is turned on the lathe. Note the crane arching over the rail. This is for lifting objects such as ammunition etc from the deck to the maintop. It has a pulley.
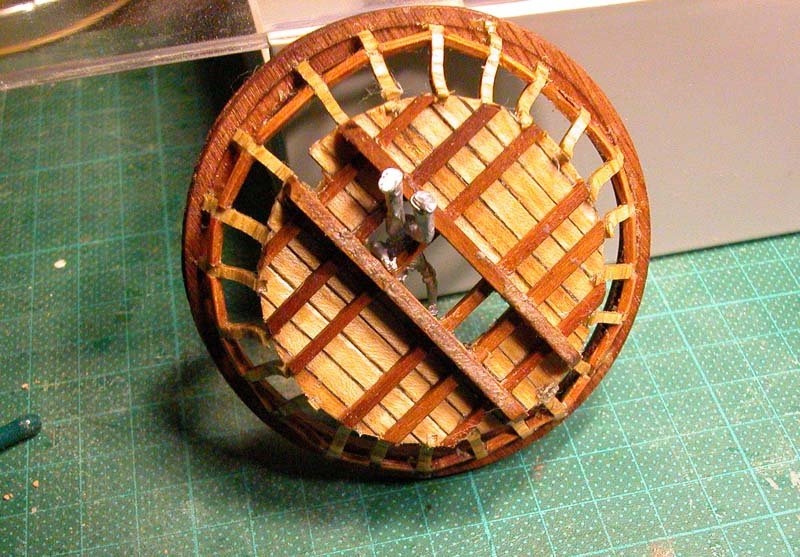
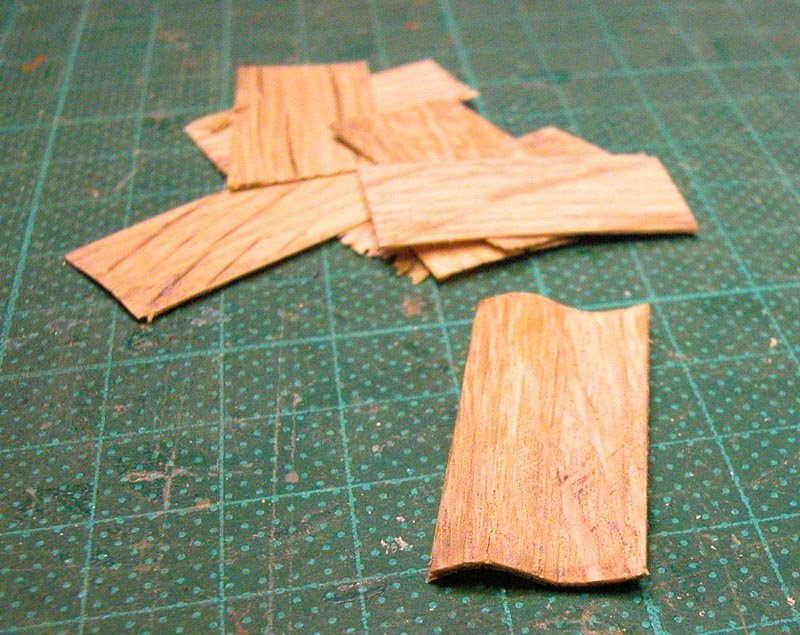
The frames are strengthened by bracing timbers
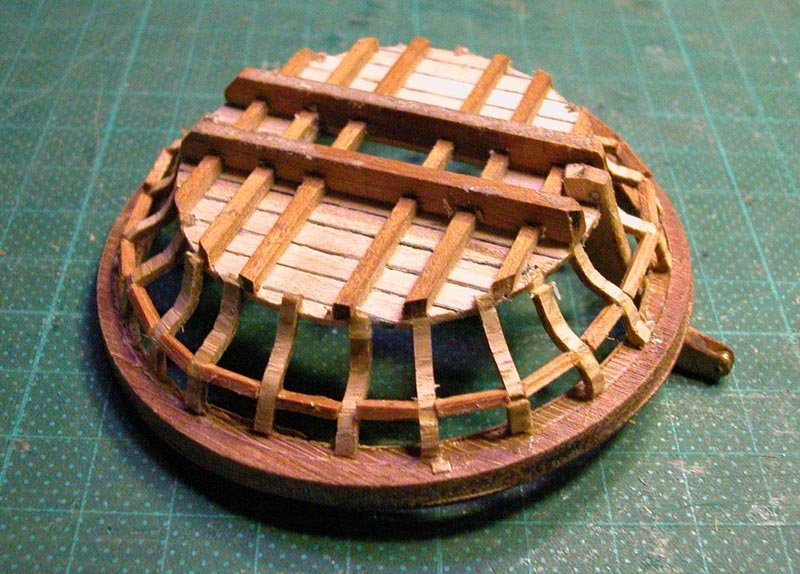
Temporary positioning of the maintop on the mast
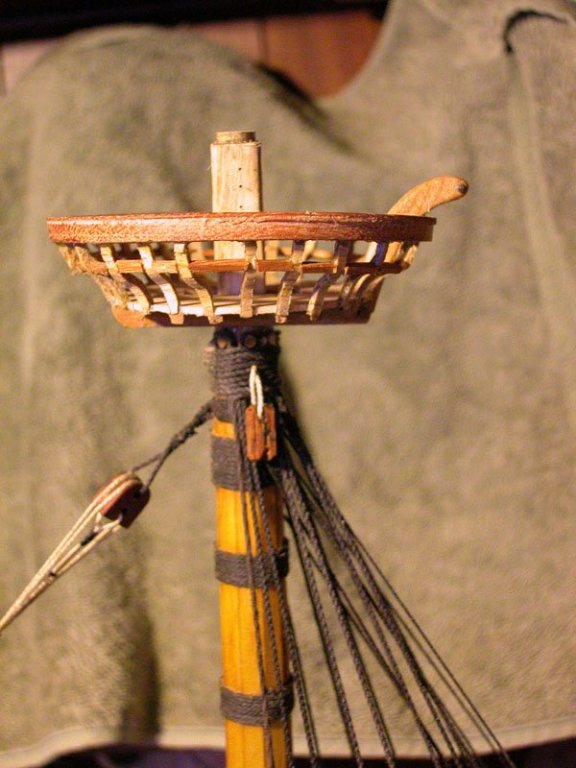

Almost ready for the mainsail and yard. Still have work to do at deck level.
Dick
- tlevine, russ, Vivian Galad and 13 others
-
16
-
-
Goetz, most of the vessels of this period have a rope ladder on the aft side of the "crows nest". The ladder entered beneath the crows nest. Remember that the halliards to hoist the mainyard also enter below the crows nest go over pulley(s) then exit down the front to attach to the yard. There were many designs for these structures. No set patterns. Ratlines did exist in some ships but at this period I doubt they were used to access the the crows nest even if they were fitted. I am in the process of building the same structure for my carrack
https://modelshipworld.com/index.php?/topic/4915-venetian-carrack-or-nave-rotonda-164-by-woodrat/&I will post the details soon.
Cheers
Dick (Woodrat)
-
12 hours ago, shipmodel said:
I was just agreeing with Druxey that acrylic matte medium is a good stiffener and has worked for me.
Dan
I could do with a good stiffener, right now

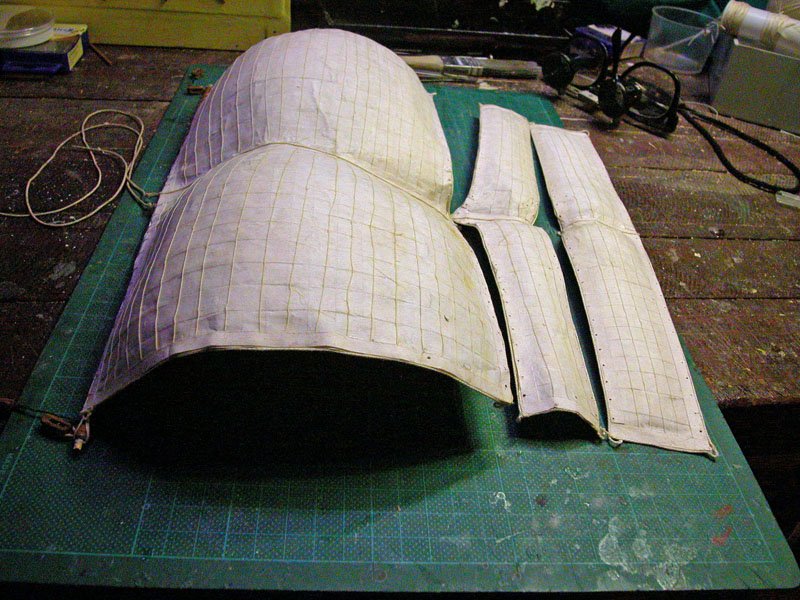
Seriously though, Dan your results on the Queen Anne's Revenge are superb. I wont be able to match that. What I hope to produce is something like the true shape of a carrack mainsail cracking on in a following wind
-
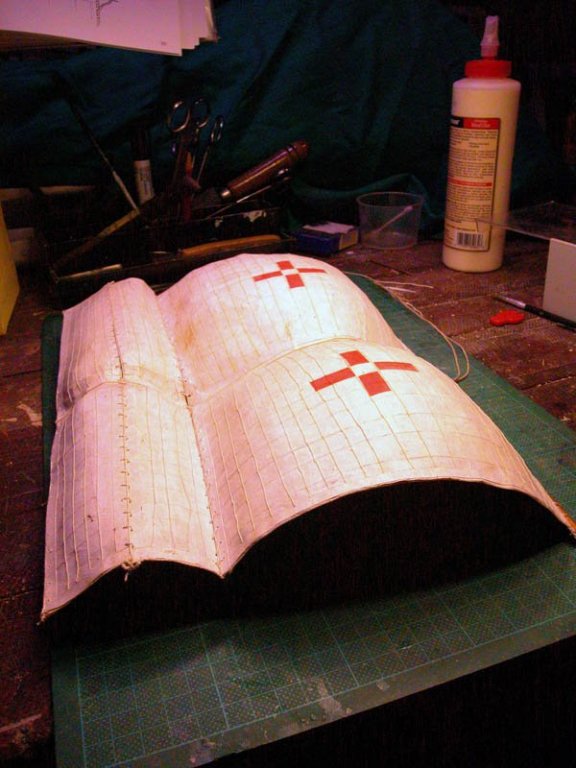
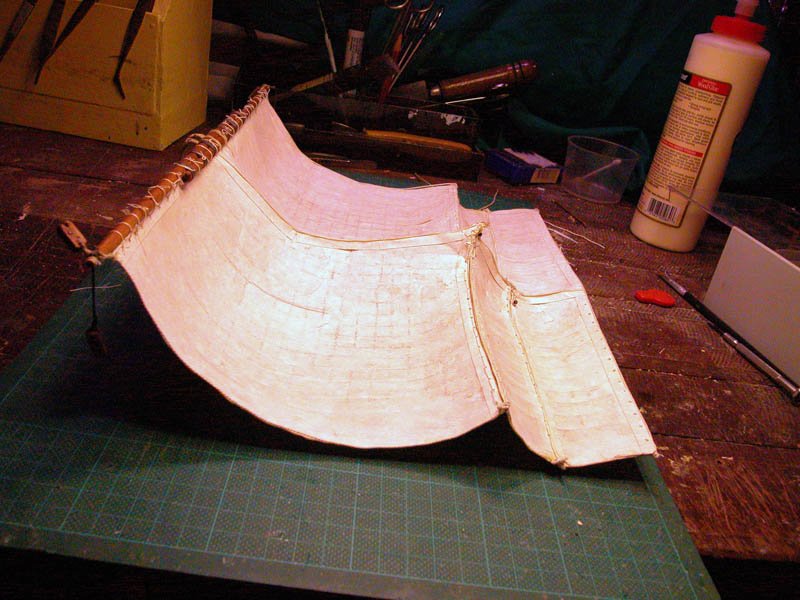
Thanks Dan. That would work for a simple billowing sail and that is not the problem. In this carrack sail, there is a reverse curve in the centre where the centre of the sail is being pulled back by a lanyard so the sail does not rub on the mainstay. Also, the carrack mainsail in contemporary illustrations does not hang off the yard. It billows upwards and forwards.
This is why I am having difficulty. But I think I have it licked.
even the excellent R C Anderson model does not attempt this. If I can reproduce this it will be a very gratifying effect. Cheers
Dick
- Farbror Fartyg, shipmodel, cog and 6 others
-
9
-


 and I would also like to thank everyone for the 'likes'. I can almost see the light at the end of the tunnel.


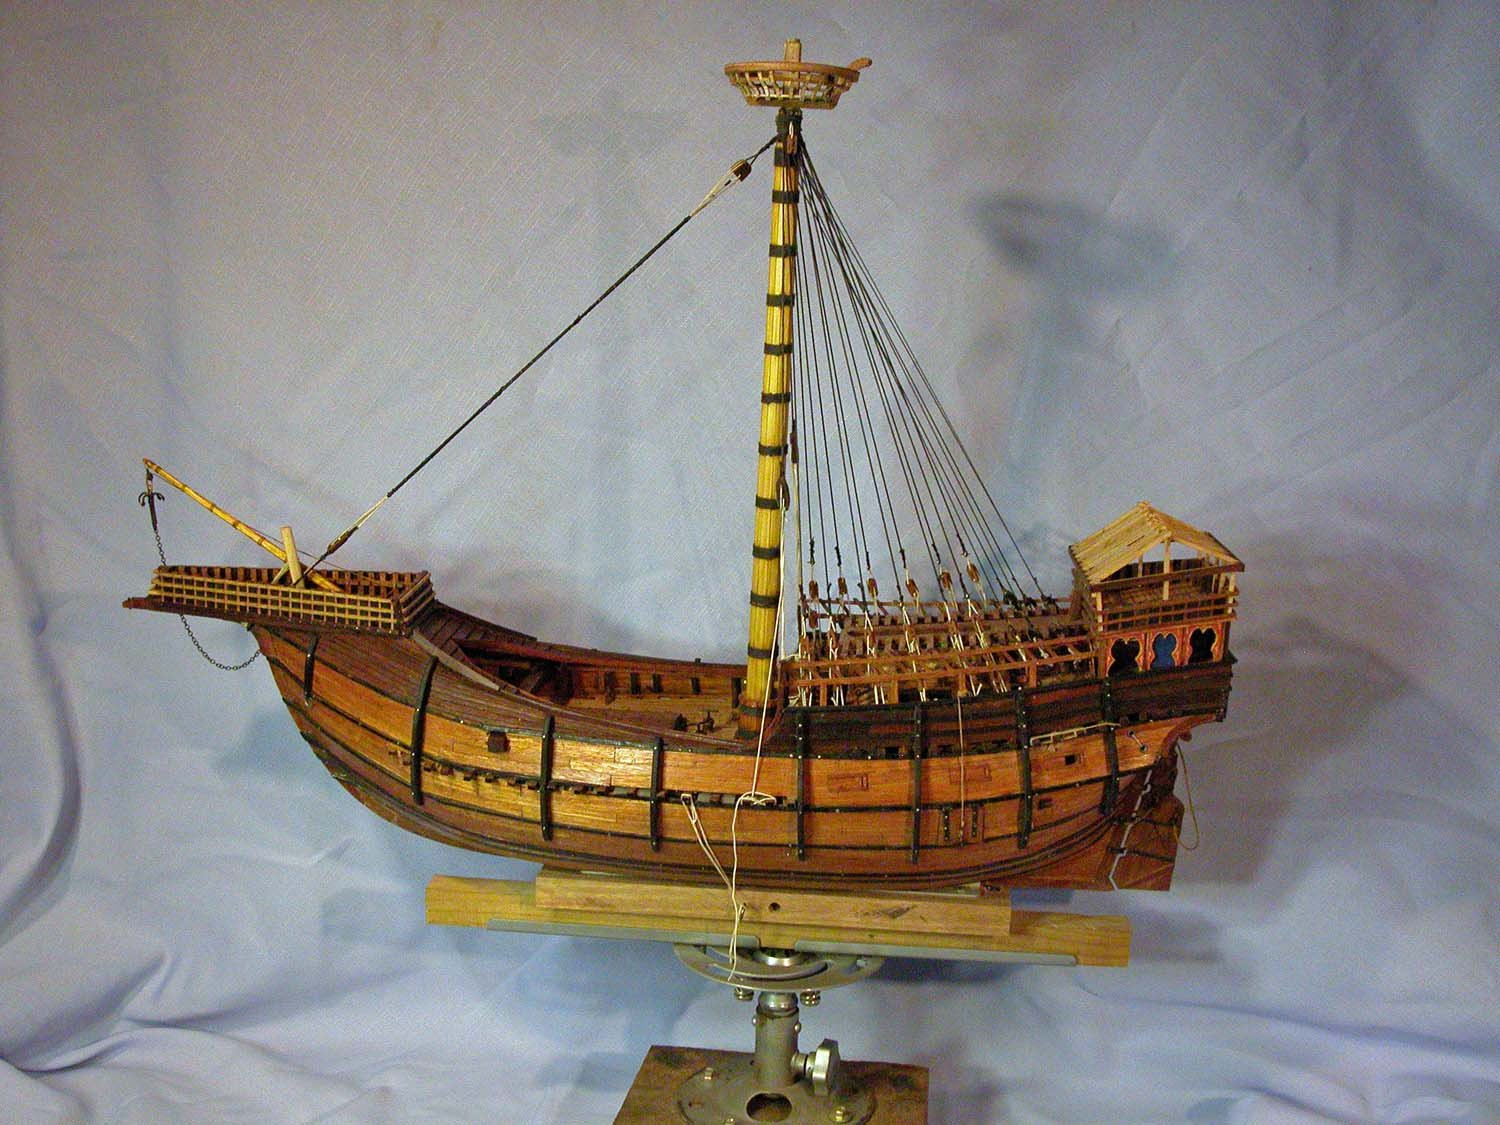
Venetian Carrack or Cocha by woodrat - FINISHED - 1/64
in - Subjects built Up to and including 1500 AD
Posted · Edited by woodrat
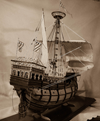
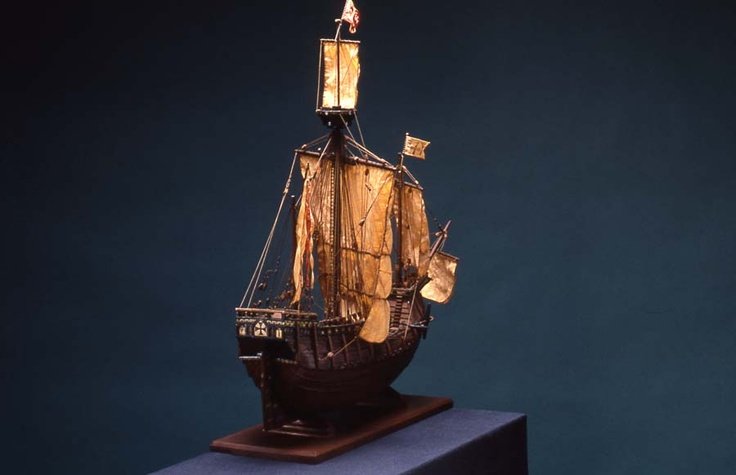
See how the mains'l sets...........
Dick