HOLIDAY DONATION DRIVE - SUPPORT MSW - DO YOUR PART TO KEEP THIS GREAT FORUM GOING! (Only 13 donations so far - C'mon guys!)
×


Beef Wellington
-
Posts
2,249 -
Joined
-
Last visited
Content Type
Profiles
Forums
Gallery
Events
Everything posted by Beef Wellington
-
 Kevin, I admire your willingness to share your journey - warts and all, building frames continues to intimidate me so seeing a less than perfect result is actually quite inspiring - and I do mean that in a positive way. We often only ever see the perfect results so I'm really enjoying seeing you through this process. Keep at it, you're doing great. All the best
 -
Siggi, your model is stunning, look forward to seeing you continue. The colours you have chosen look perfect - may I ask which colours you used? I see you carved some of the moldings, how did you do some of the finer ones? (e.g. the decoration on the red above the balcony) Your carving also has just the right proportions to my eye, wonderfully done sir.
-
Nicholas, you look to have done just fine as it is, no need to make it more complicated than it needs to be. Another option is to use clips on each of the bulkead extensions to force the camber of the deck, similarly low tech. You've got off to a nice solid start. Not familiar with this specific kit , but the CC instructions are not the most comprehensive, do they tell you to camber the bulkheads before starting planking? Thats probably the next major step for you. Looking great!
-
I will be following your progress Nicholas.
-
Hi John - Jim's right, have been a bit distracted . Just a very busy time of year with family sports activities. Any time that I have had in the shipyard I've been trying to get a head start on the new build (HMS Jason) so I could take advantage of good weather outside for sanding on the hull planking. That plan didn't work too well as I had a few issues with the kit which needed replacement and took longer to figure out what I wanted and how I was going to approach the build. I'll be back to hopefully finish up Snake over the winter.
- 800 replies
-
- 2
-

-
- snake
- caldercraft
- (and 1 more)
-
I started the CC HMS Snake kit (which is very similar construction) before I found this forum, it was also my first build. I didn't cut a rabbet not knowing any better. As long as you get the 'shaper' pieces installed and correctly shaped, they often need a lot taking off (assuming these are part of the kit) it is possible to simple shape the end of the planks to terminate flat against the wood. That being said, cutting a rabbet would be the recommended way if you feel up to it. Best of luck....and get a build log going
-
Great Joe - although not close to needing this, will definitely keep this in mind. Appreciate all the information.
- 302 replies
-
- 1
-
-
- granado
- caldercraft
- (and 1 more)
-
Joe - that looks fantastic, I would love to be able to use that technique int he future. For this those not initiated, and with no experience with weathering/decals (i.e. me), what are 'artists oils'?
- 302 replies
-
- 2
-
-
- granado
- caldercraft
- (and 1 more)
-
Can't wait to see this one grow Kevin, watching in anticipation....
-
Eamonn - I think its fair to say the original carronade is the wrong size. Just for comparison, the 32lb'er carronades on my Snake are approx 28mm end to end compared to the 22mm of yours, I suspect they gave you 24lb'ers by mistake. You could pack a serious punch with those on the Ballier!
- 1,039 replies
-
- 2
-
-
- ballahoo
- caldercraft
- (and 2 more)
-
Erin, first off, welcome to MSW! I'd suggest you start a build log as thats by far the best way to get help, advice and encouragement from builders who are familiar with this kit. I'd also suggest searching on the site for some similar logs, heres at least one. http://modelshipworld.com/index.php/topic/5024-hms-bounty-jolly-boat-by-cannon-fodder-artesania-latina-scale-125-first-wooden-ship-build-small/#entry144948 I'm not familiar with the kit, but it looks like you planking at the bow should have terminated in a nice smooth curve against a keel/stem similar to the piece you are holding. It sounds dramatic, and I hate to say it, but you may be better of removing the planking you've completed so far and redoing it. Using putty would be futile as the shape of the final hull would be very odd indeed. I'm sure you are eager to proceed, but I think you will get a much more satisfactory result that you will feel good about. Good luck!
-
Dave, some really nice progress on the planking. Your solution to improving to the quarter badges looks great, I'm not familiar with the kit pieces but I can only image how poor they are. Question on the mast positions, is that not also going to cause you problems because of precut slots in the false keel? I'm sure you've thought it through but am curious. Looking forward to seeing more progress.
-
Look here... http://www.amazon.com/s/?ie=UTF8&keywords=gs+hypo+cement&tag=mh0b-20&index=aps&hvadid=3527183049&ref=pd_sl_4rs1uh0435_e
- 1,144 replies
-
- 1
-
-
- snake
- caldercraft
- (and 1 more)
-
Regular sewing thread can work just fine. I went to a local store a just bought a bunch of different types (its very cheap), but I ended up using a 65% polyester 'glace finish' which seemed nice and smooth without any fuzz. I'd also recommend you buy some GS-Hypo glue, it works really well with rigging. Dries clear and slightly flexible, works well on false splices.
- 1,144 replies
-
- 1
-
-
- snake
- caldercraft
- (and 1 more)
-
Timmo - thats a really nice looking yard, you got some really sharp edges on the octagonal central profile. Did you use larger dowel, or build up using the recommended sizes? The taper looks spot on as well, very nicely done.
-
Mort - I did consider Jeff (and have bought some boxwood from him), but I was counting my pennies and thought I could make do with some lesser maple given the quantities needed Lou - it was a hard decision! I did like having the AOTS to reference but the HMS Bellona AOTS book could probably be used as a proxy for the Agamemnon. A frigate was also appealing because there is slightly less repetition (cannons, ports etc) but I also wanted to replace some of the wood for a more 'Admiralty' feel, I felt Diana kit was maybe more manageable based on my skill level - we'll see how that turns out. Size wise, the Diana is similar in size to the Agamemnon so its still big. The final thing that swayed me was that there are a couple of kits on the horizon but not available yet that have piqued my interest (Chris Watton's 1:64 Victory, and the 1:72 Bellona), so my next build (can't believe I'm even saying this because it will be years away) will likely be a ship of the line - I've given up hope on the Caldercraft 74, but you never know...there is always the CC Agamemnon or Amati Bellerophon. Hamilton - thanks for the kind comment - not perfect, but I'm happy how its turning out. Stergios - cheers mate, looking forward to more of your progress soon as well!
-
Stergios - I'd add my voice to the 'support for serving' club. In my view, it makes a big difference in the look of the rigging. The principle of serving is very simple, theres no manual, but I've seen people sharing individual ideas and I've tried to do that as I goalong, a lot of it comes down to what you find works for you. It does take more time, but I decided to commit as I would not have been happy with the non-served rigging and am glad I did. I use Alexey Domanoff's excellent machine as seen here on MSW and have been happy along with many others, he does provide a guide on his website to the basic techniques. Let us know what you decide!
- 1,144 replies
-
- 4
-
-
- snake
- caldercraft
- (and 1 more)
-
Lovely shots Ray, I'll be caught up to you in no time Looks like you replaced deadeye strops in the tops (?), what did you use?
- 536 replies
-
- 1
-
-
- diana
- caldercraft
- (and 1 more)
-
Frank, what is it that leads you to believe that it is an Artois class, there were a lot of similar contemporary designs (I'm certainly not disagreeing it isn't!). Would love to see more pictures as I've just started to a build of what I hope will one day be HMS Jason and this could be invaluable. I too though 'Jason' along with Druxey for the golden fleece.
-
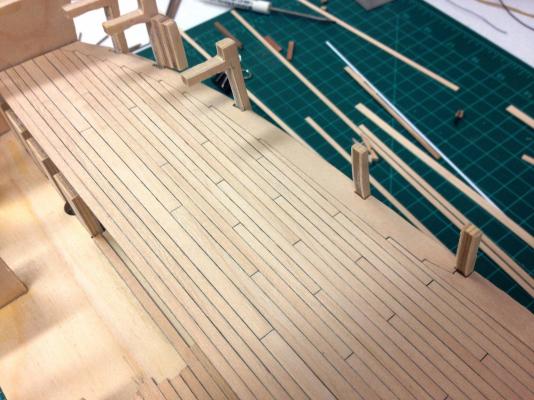
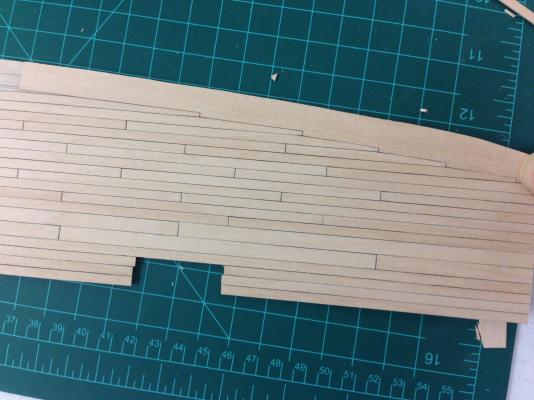
Thanks gents and for the kind words all the 'likes' Lou - Thanks for stopping by. I've been pretty lucky so far, taking it really slow. I did have one reject where I made the error of mistakenly assuming that the slots in the false deck should be fully replicated in the margin plank - this would result in the slot being visible once the bulkhead bulwarks were planked, but wont make that mistake again. B.E. - always appreciate your critical eye Jim - I am having a lot of fun doing it....once the initial fear was cast aside. Seeing you and Eamon tackle yours convinced me to try. Sjors - There will be no treenails! Personal preference only, I'd like to avoid the measles and don't think they would be visible at this scale; but I don't want to resurrect that whole debate again! ONE day, many years in the future, if I ever manage a POF then I would do treenails as I think these types of models demonstrate the physical structure and construction techniques. Joe - deck is maple, I ordered purchased from Caldercraft when they sent my replacement keel former. Thought I had ordered enough for the upper decks as well but I'm seeing a higher rate of wastage than I'd like because of splintering on the edge of the planking. I'll probably try CMB next time.
-
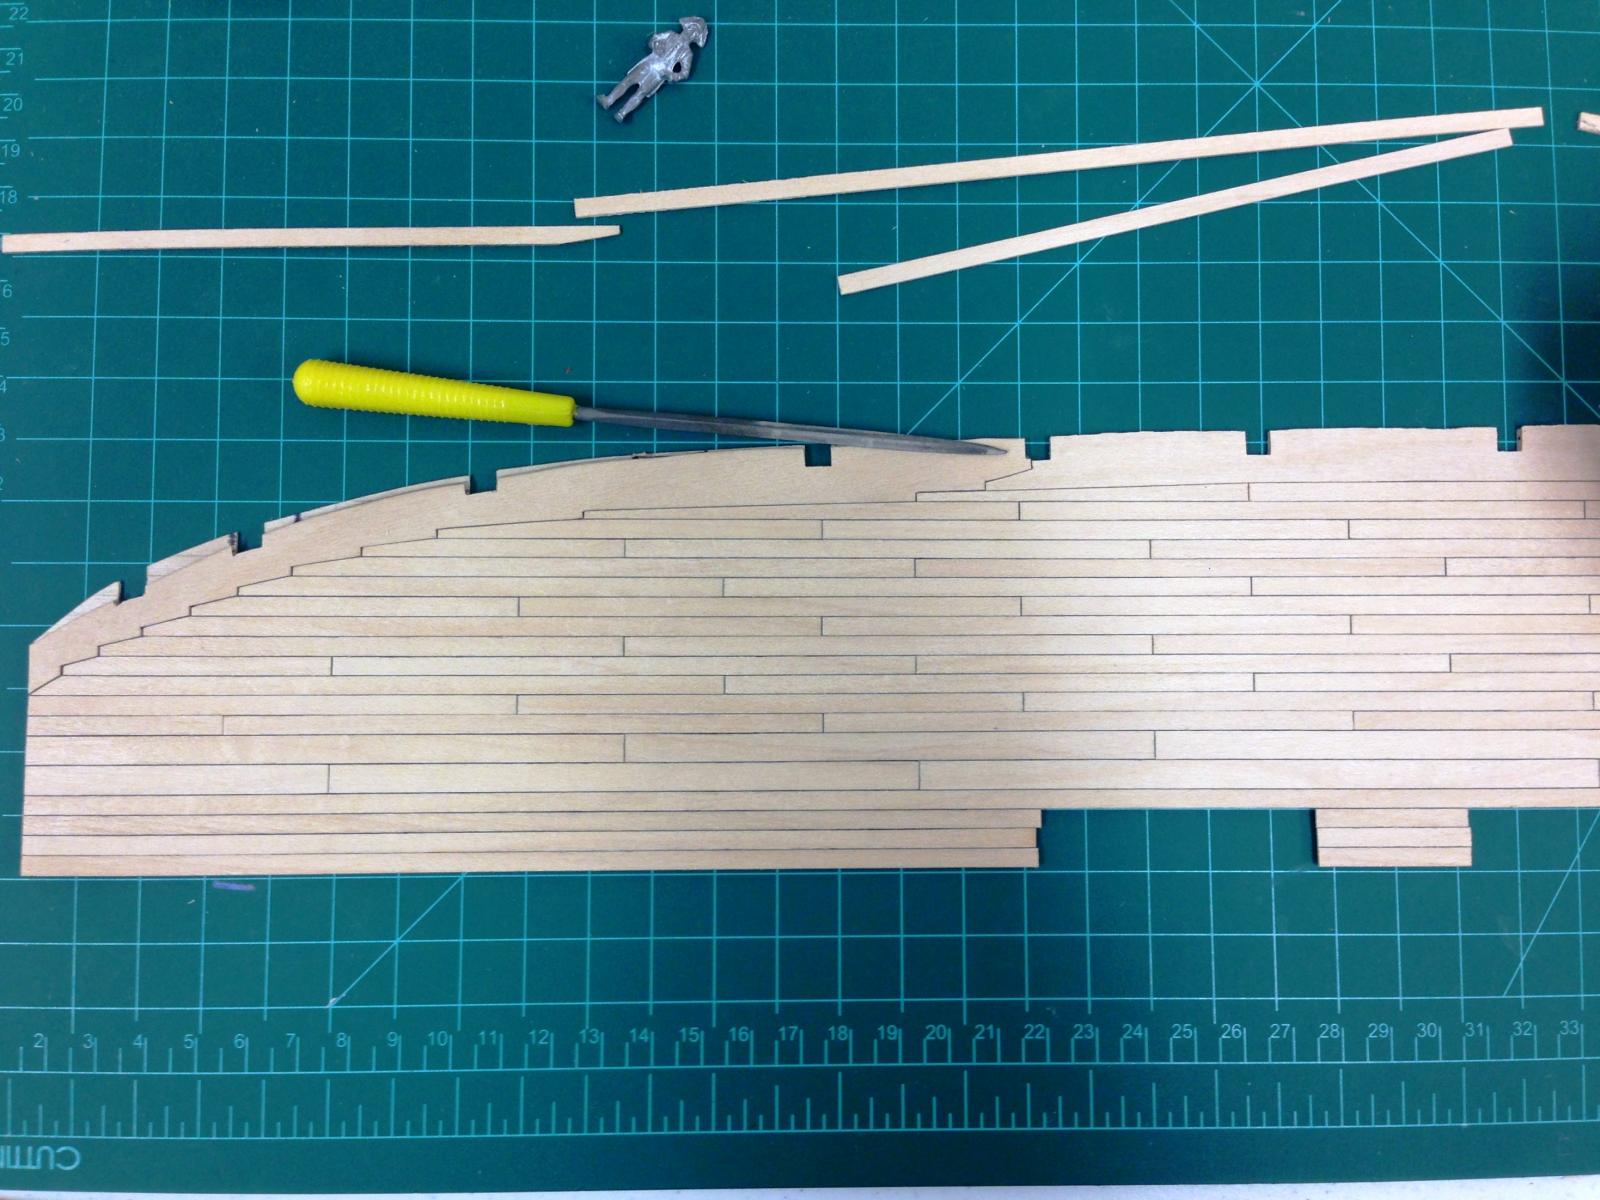
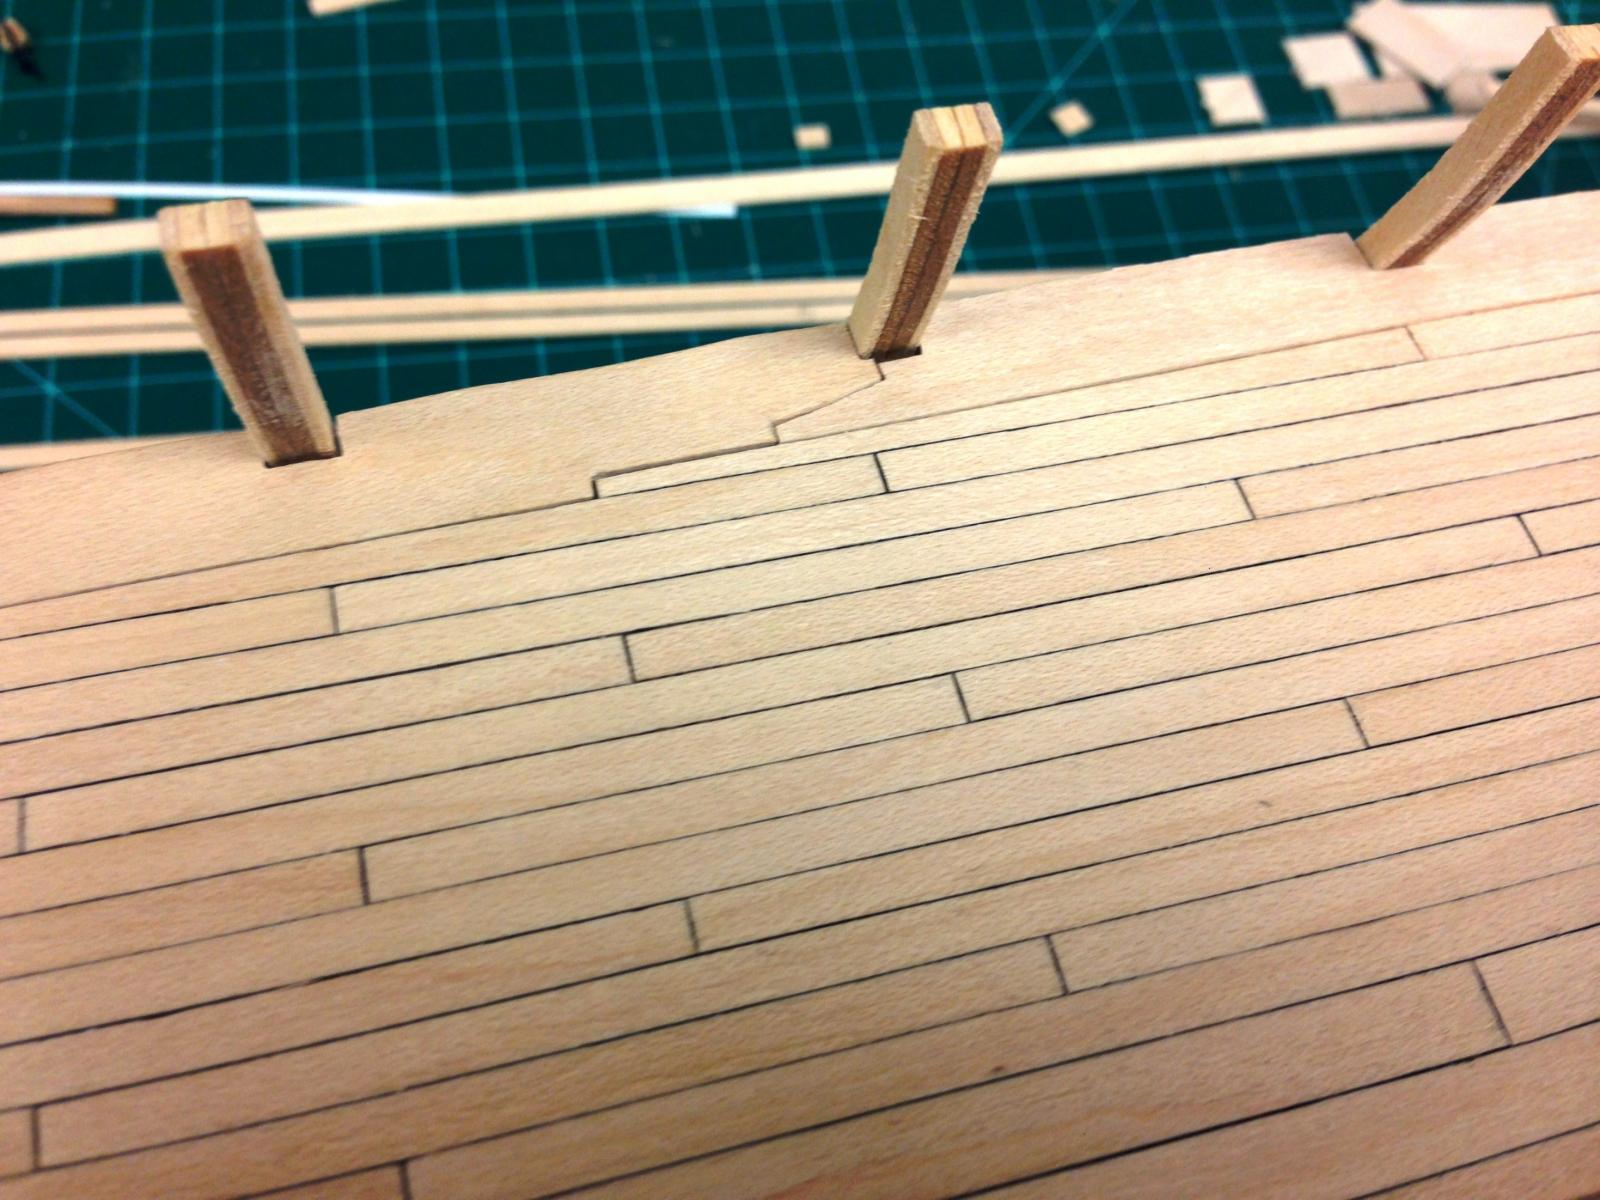
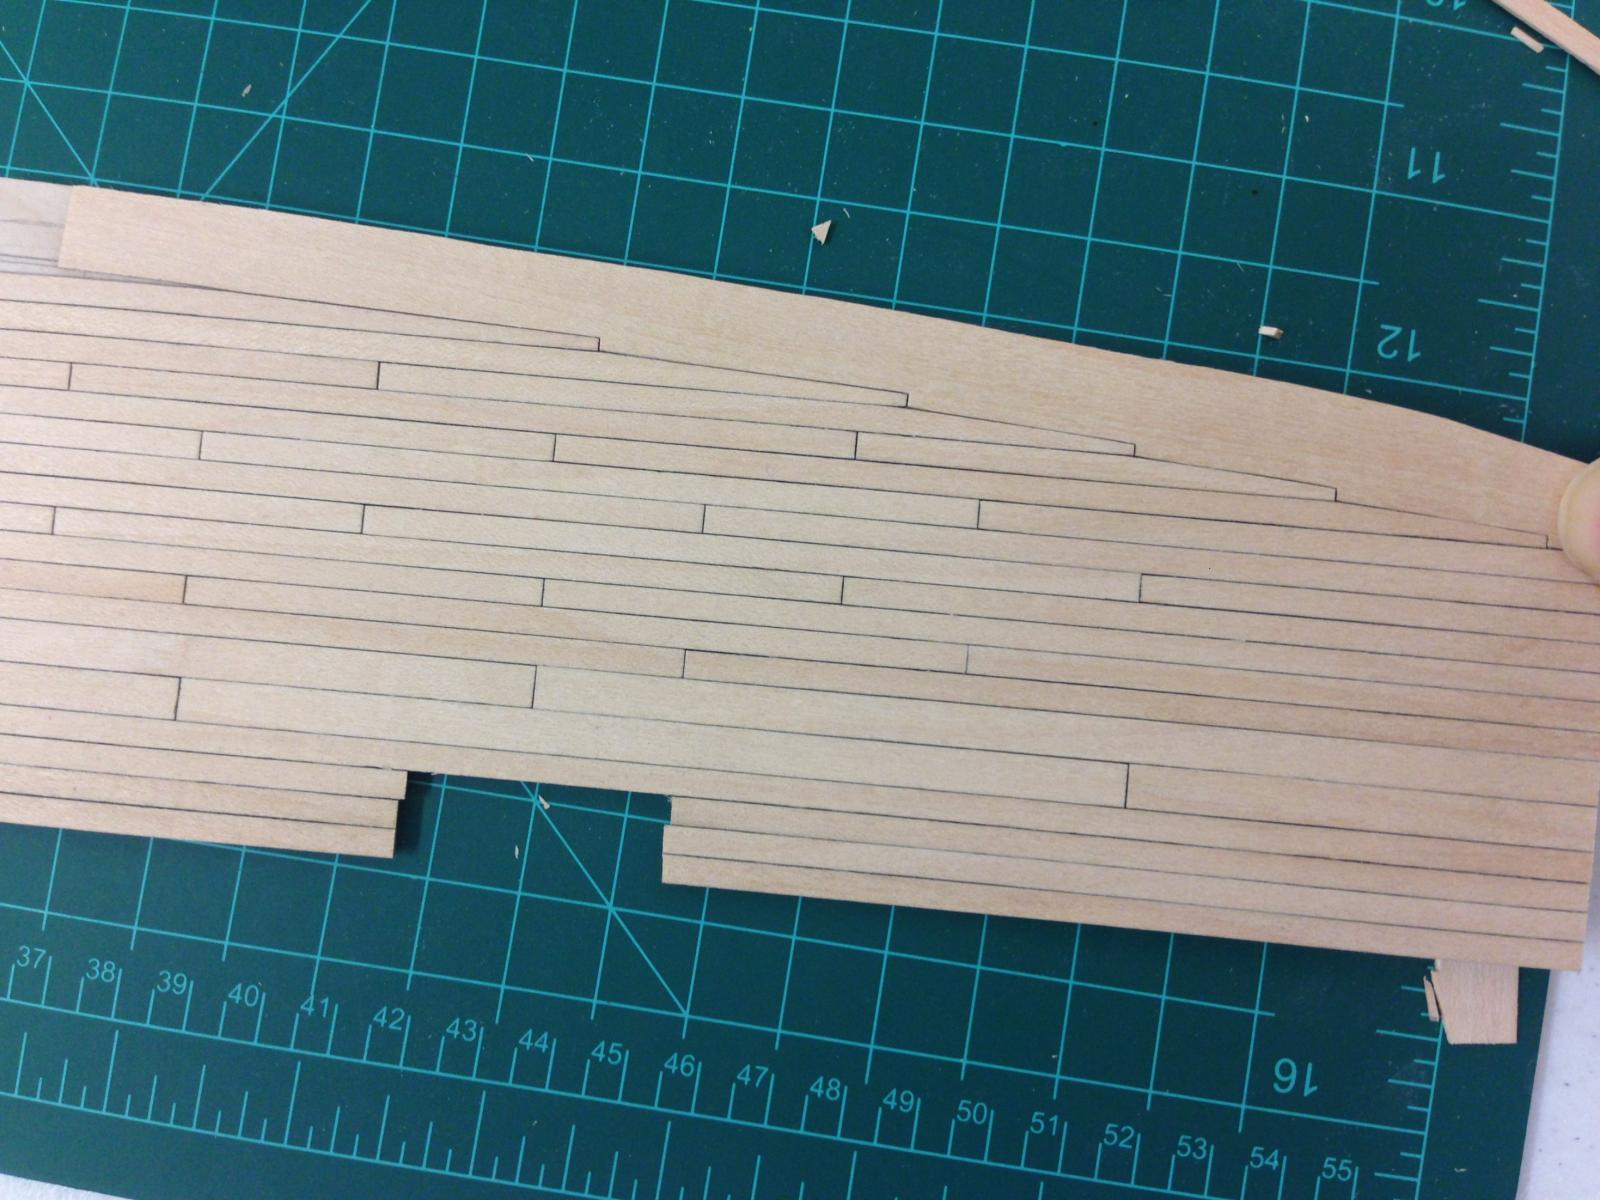
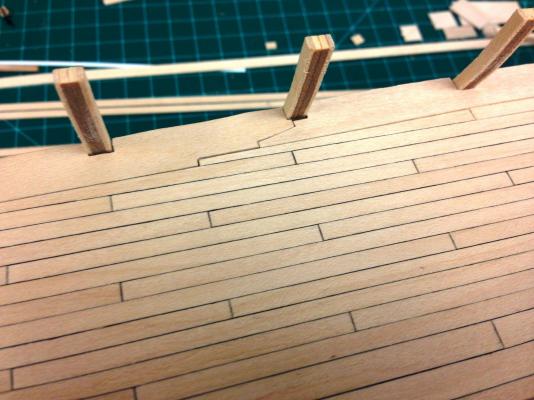
Decided I really needed to post few pics to show I'm still here. With the weather turning, and the end of the soccer/football season approaching (I coach my son and daughters teams) I can finally foresee more time in the shipyard in the evenings. I had spent a lot of time trying to figure out the deck arrangement, picture are pretty self explanatory and work obviously still in progress. Margin planks are not glued yet, but I did cut my first scarf joint. As mentioned previously, estimating the line of the margin plank required the future shape of the interior bulwark once planked to be estimated - I won't know that I've been successful until its too late. Unfortunately, at lot of this will not be seen once the quarter deck and forecastle are in place, but its good practice and building my confidence to tackle the more visible top decks.

-
Wow, very nice gratings Nigel! Envious
-
Those are pretty narrow Joe, and you're right that the CNC part is too thick. Think you can get away with using them on the wider ladders, but your scratched one looks much better.
- 302 replies
-
- 1
-
-
- granado
- caldercraft
- (and 1 more)