HOLIDAY DONATION DRIVE - SUPPORT MSW - DO YOUR PART TO KEEP THIS GREAT FORUM GOING! (Only 13 donations so far - C'mon guys!)
×


Beef Wellington
-
Posts
2,249 -
Joined
-
Last visited
Content Type
Profiles
Forums
Gallery
Events
Everything posted by Beef Wellington
-
 Stergios, I'd add the following. Like Jim, I didn't solder mine - I tried and failed! You can bend the metal strops so they close pretty well, but the chains can pop out if there is undue pressure. To alleviate this concern, I ended up putting some epoxy in the slots when all was complete to eliminate this risk. http://modelshipworld.com/index.php?/topic/509-hms-snake-by-beef-wellington-caldercraft-scale-1-64-first-wooden-ship-build/page-14#entry64038 I'd also suggest you consider the following points, I thought I'd documented what I did pretty well at the time, but going back and reading it afresh there is fair bit omitted. The chains want to be in line with the shrouds and stays. You can get the correct line by tying some thread to a dowel at the appropriate height and then trace where the various fixing points should be. Given than the two end fixing points are defined (most of the chains attach to the wale) and the deadeyes sit on the channels, the length of the chain is then defined. Using the kit supplied pieces will at best result in a gap. Making your own is an options using thick wire and bending manually - you can get a more authentic look as each chain is custom fit for its position. The kit supplied pieces are all the same size even though the lengths needed vary. Takes longer but for me had more satisfying result.
-
Didn't have a chance to post this earlier. Think I had ordered a some walnut dowel a while ago in shipment form CMB - because postage is so expensive to the states, its sadly cheaper to buy stuff with the risk that it doesn't get used. Anyway, I'd bought a variety of sizes, you can see that there is a significant colour variation, quite the smorgasbord! The beech dowel is at the bottom for reference.
-
Narrowing down the field for first ship model
Beef Wellington replied to Bill Hime's topic in Wood ship model kits
Bill, hope you start a build log, would love to see how you progress and people will always seek to help. Speaking also as a newcomer to the hobby a few years ago, I forced myself away from the larger more complex kits based on a lot of reading on this site. In the end I compromised and am building CCs HMS Snake, pretty similar I think the Syren. I'm glad I took that approach, one of the bigger barriers I found was the repetition found on the larger builds, but I'm not quite sure I would have been able to keep pushing through with a bigger kit without the knowledge I'm now building. Now I understand better (though of course not completely) how these things typically work, I'm much more confident I'd know how to tackle a larger more complex build (and actually finish it!) to a level I'd be satisfied with. -
Was I the only one worried that the sailor loading the charge and the shot was either going to fall out of the gunport or drop the shot? Would expect the gun to have been brought inboard by at least another couple of feet which would have made all the difference. Not sure it really accurately reflects the aiming process either, of course quoins would be moved, but the roll of the ship influenced that far more, the continual lateral training with the handspike because of unequal recoil and a likely moving target was probably much more critical (and harder work).
-
I think you're right, they should angle forward at 45%. I've read that the beech dowel is tricky to stain consistently - but that there are some products that apparently help with this - think there are some topics in the mast or paint forums. I had considered ordering some mahogany dowel and leave natural - there seems to be a lot of colour variation though so my need to buy more than needed if you're not able to find any at a local shop (which I haven't been able to).
- 412 replies
-
- 1
-

-
- snake
- caldercraft
- (and 1 more)
-
That's fantastic footage you've found there Dafi.
-
Nice Jim. Out of curiosity, will the catharpin situation causeany further problems, or is it just one of those things that probably only you would notice? Would not have noticed from the photos. Hope the rat lines are not getting you down!
-
Tsk tsk Sjors ....its derived from the latin 'puppis' meaning 'stern'.
- 2,250 replies
-
- 4
-
-
- model shipways
- Charles W Morgan
- (and 1 more)
-
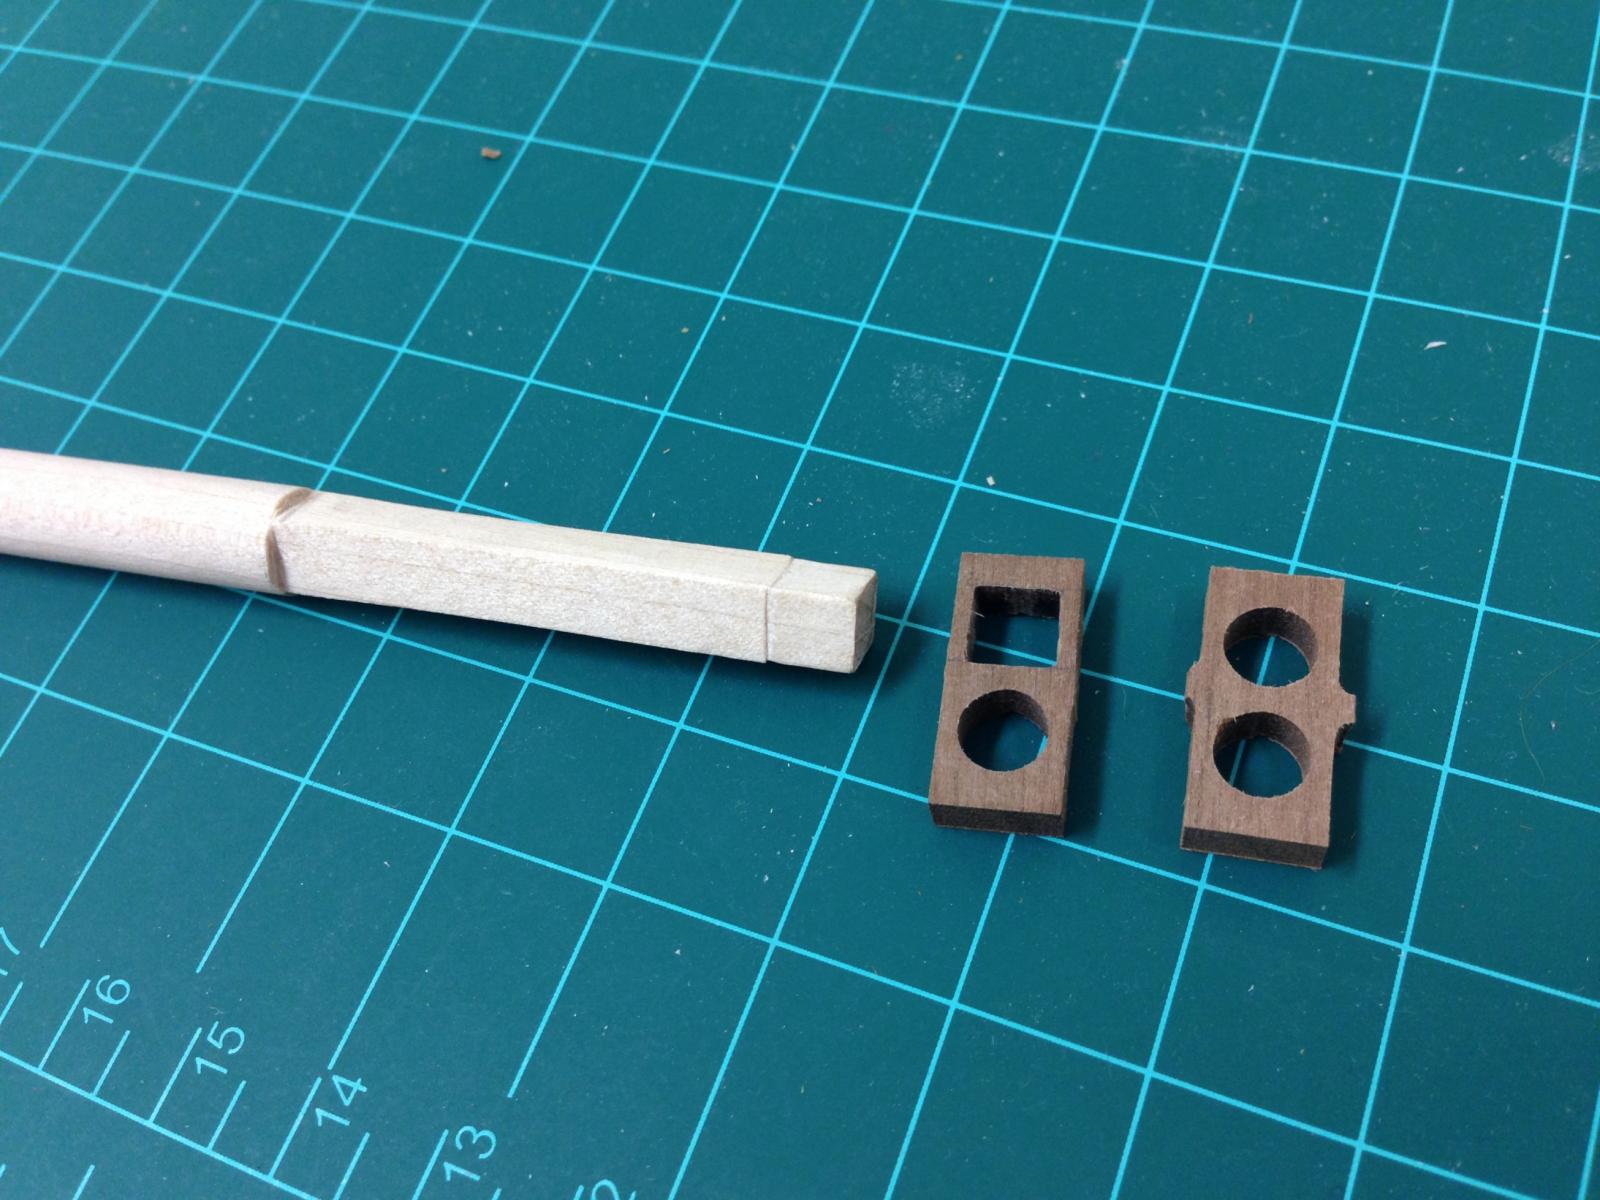
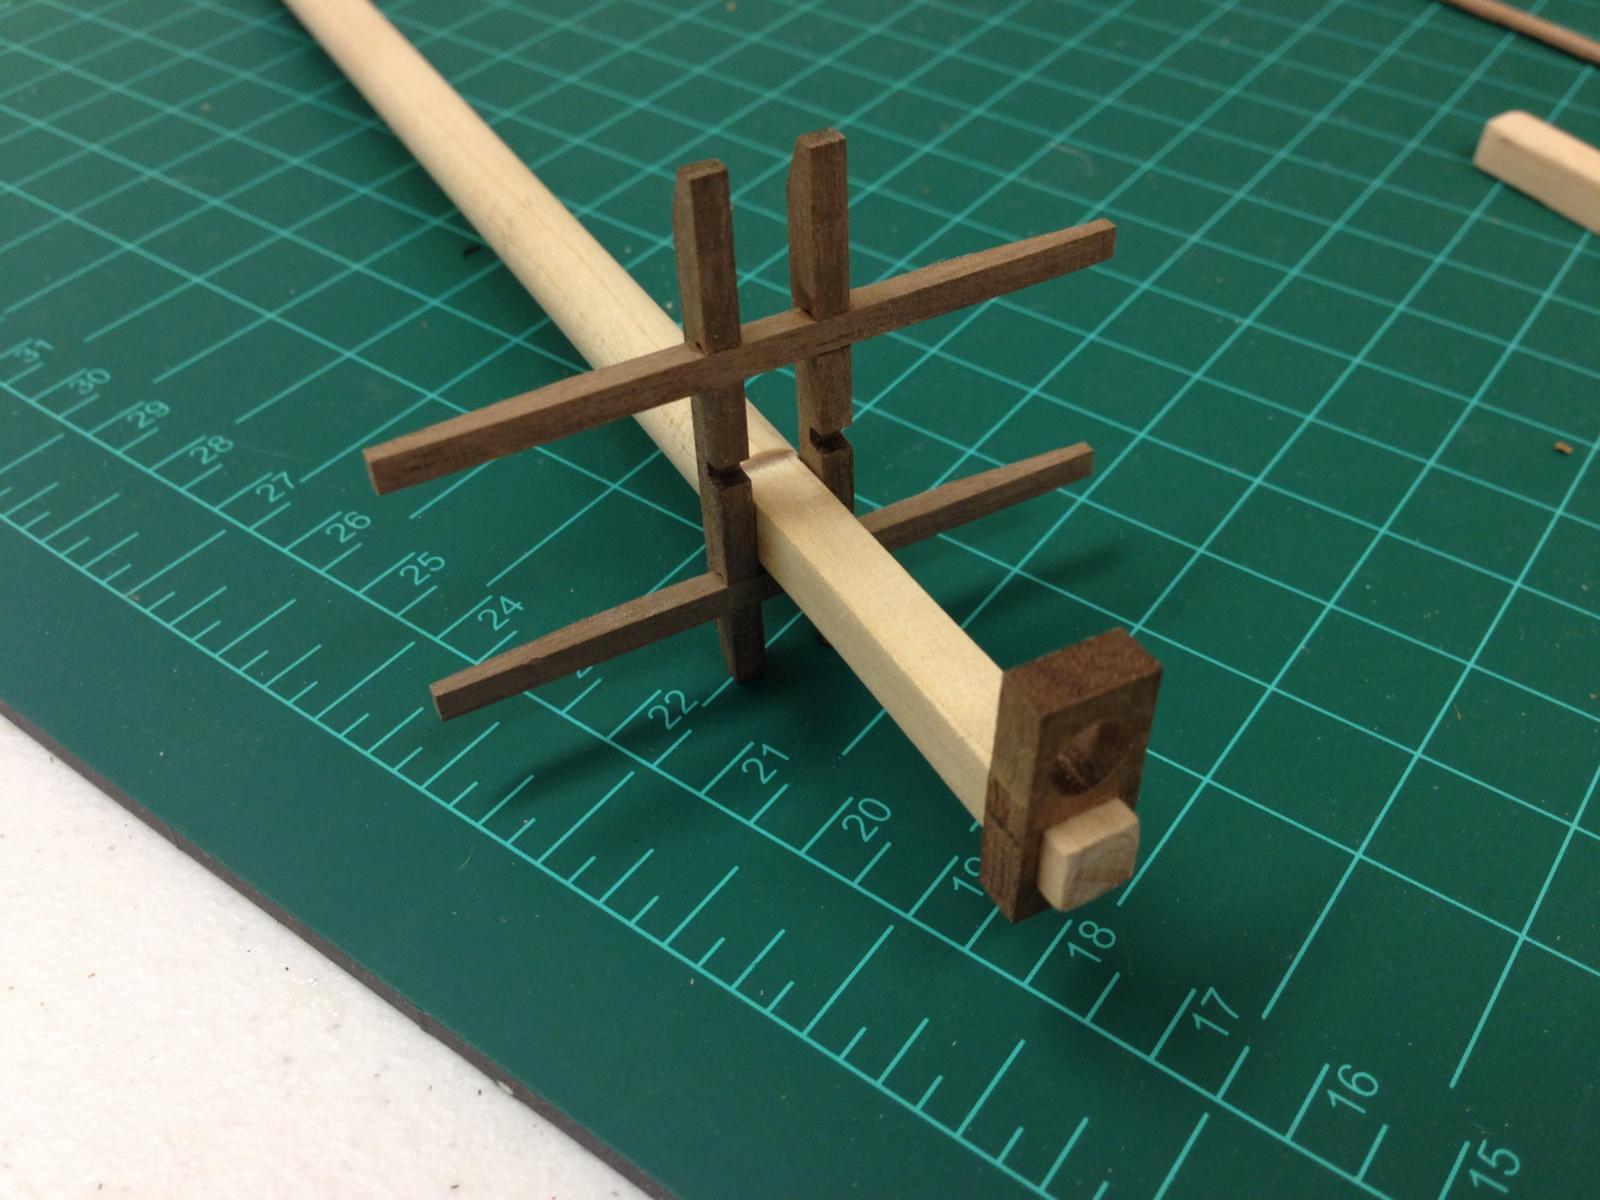
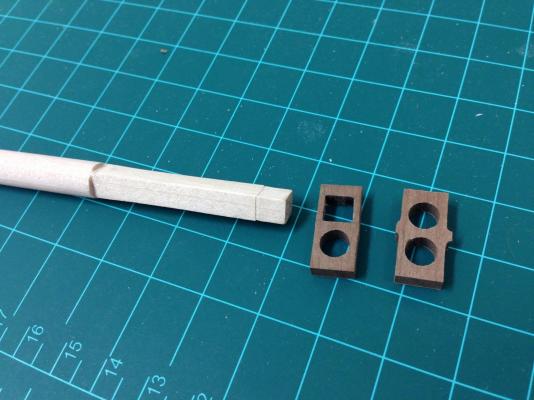
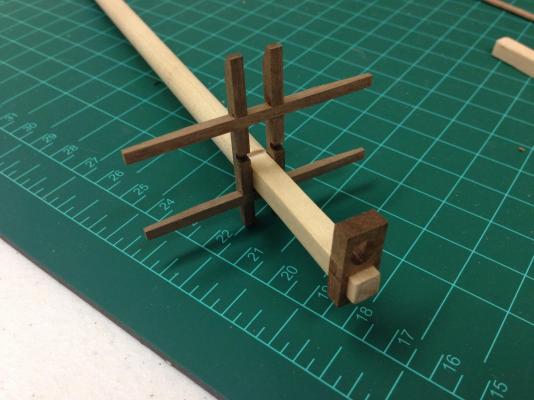
Stergios/Jim - glad you were able to figure that out in my absence! DFell - thanks for looking in and the kind words. Small update having started the masts...I'll probably be taking this slow and posting lots of pics hoping that people can stop me before I make any catastrophic errors. I also wanted to post plenty of pictures of the basic process as this always seems to be point in many logs where beautiful finished masts suddenly appear as if by magic out of nowhere... First off, cut the dowels to slightly longer than the required length as a contingency in the event of an error. This kit provides dowel that needs to be made square in a number of sections. First off the main mast, center located and appropriate sized square marked out. I'm using a simple hobby vise and hand files so took this slow and steady. Once roughly shaped, needed to decide how to fix the cap. Once again the precut caps don't seem to make any sense, it would have been nicer to have had the cap shape cut and do the any cutouts myself. As it is, needed to make a decision; make a round section in the top of the newly squared mast to fit the precut round hole as indicated in the plans, or as I ended up doing, square out one hole to smallest size possible and adjust the mast top to fit. Made this decision after similar situation with the bowsprit as the tenon should be square (I can live with it being very slightly the wrong size). Photo shows cap prior to adjustment and the square tenon made at the mast top. Having previously made up the crosstrees, dryfit seemed to indicate the right dimension. Everything will need some final finishing but its good to know it all fits together. The extra mast length will be trimmed later. To ensure that the cross trees are as parallel as possible to the waterline these will be finally positioned and glued with the masts dry fit in the hull and the angle on the bibbs adjusted accordingly. Next up, the cheeks and bibbs...

- 800 replies
-
- 8
-
-
- snake
- caldercraft
- (and 1 more)
-
Looking great though Jim, I'm still pondering the main masts...don't think you can go wrong with slow and steady.
-
Seems you are definitely working through your own 'learning experiences', shes really looking very nice though, love the effect you've created especially visible below the wale. Will the 'correction' of the wale step issue mean replacing the topmost plank?
-
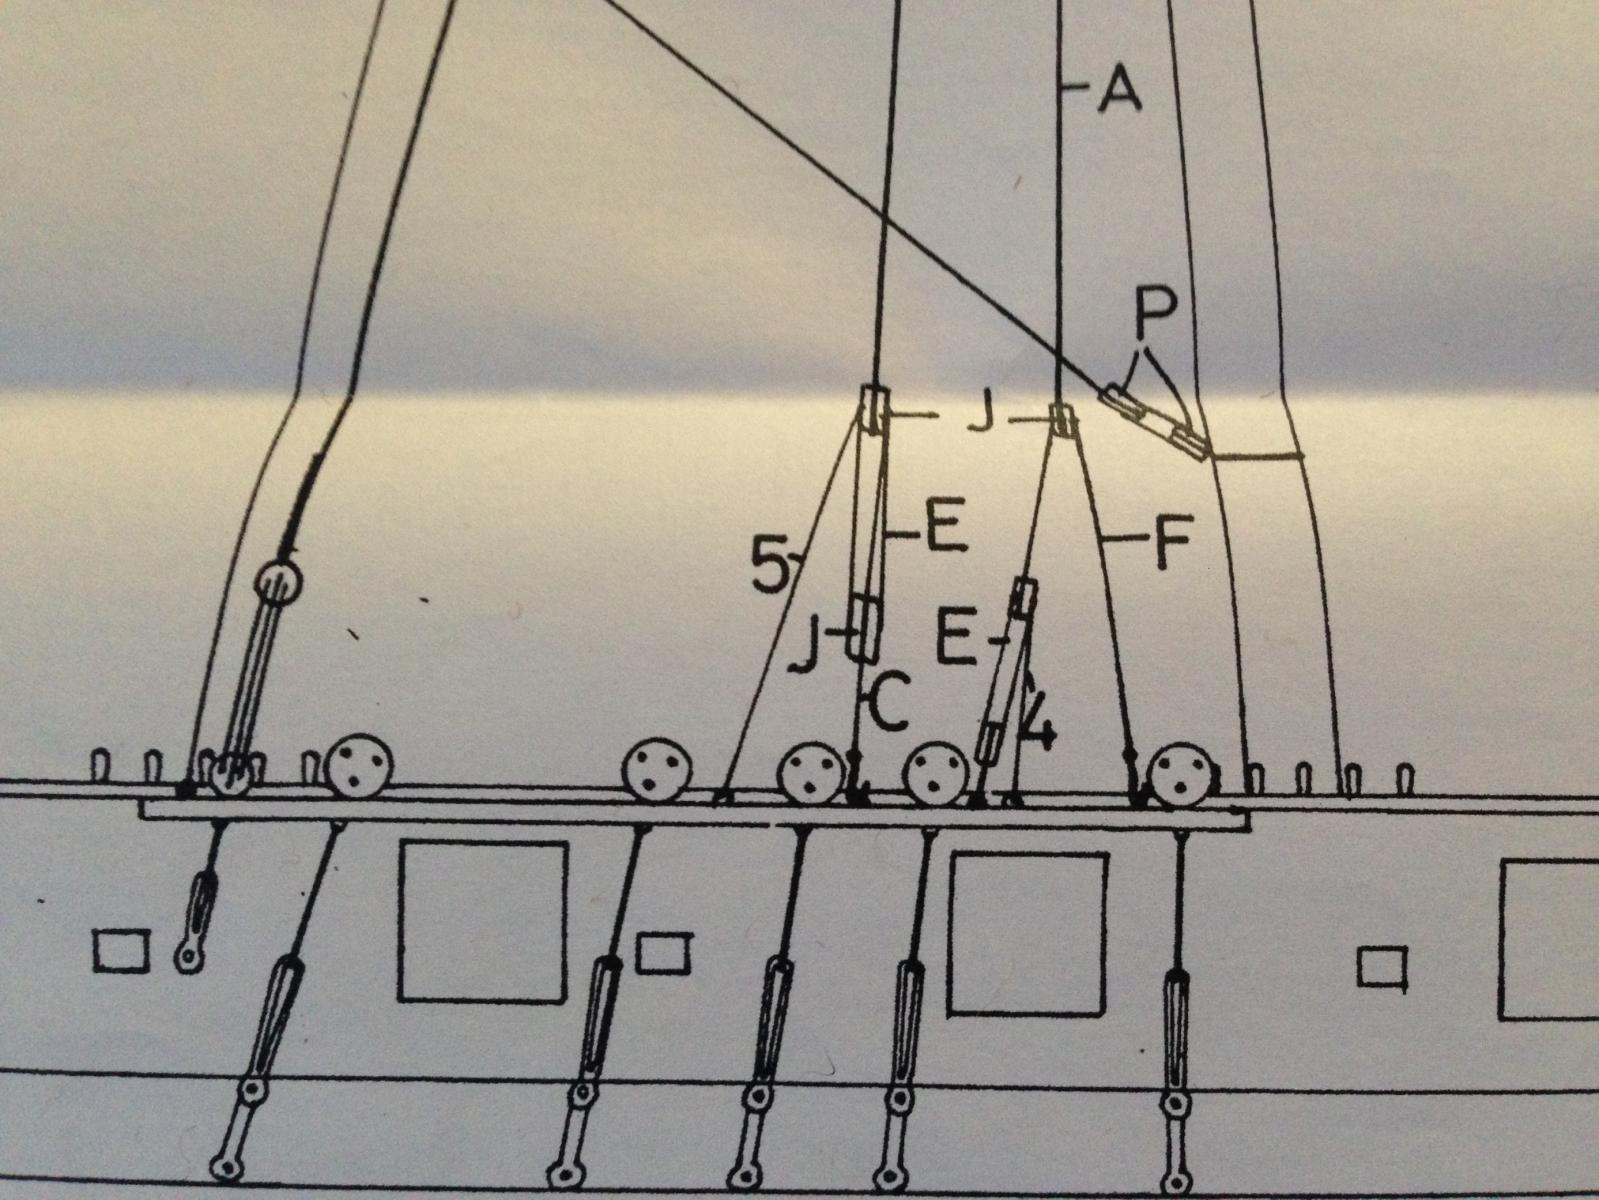
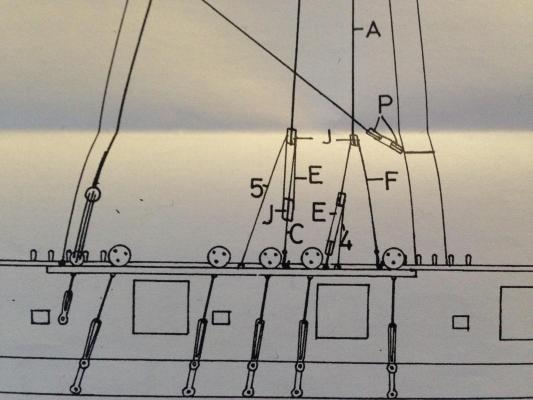
Jim, you probably took a safer, wiser course! This is the picture I was referring to below (from plan sheet 4) which shows how "line 5" terminates, some sort of arrangement tied or hooked onto eyebolts on the channels. If I'm misinterpreting this please let me know as I'm still not 100% confident I know how to read the plans.
-
Looks like a very nice kit Kevin, can't wait to see this one underway! The gun turret looks interesting, will it lift out so you can see the internal mechanism?
-
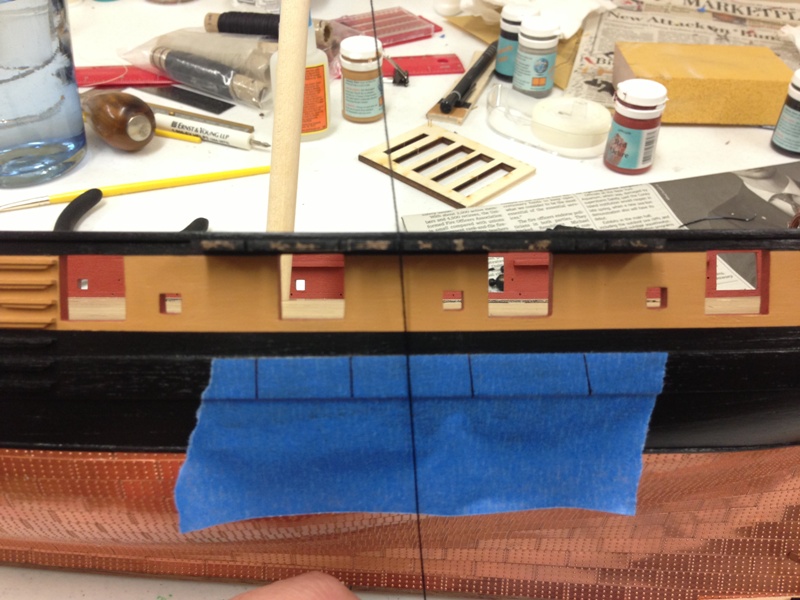
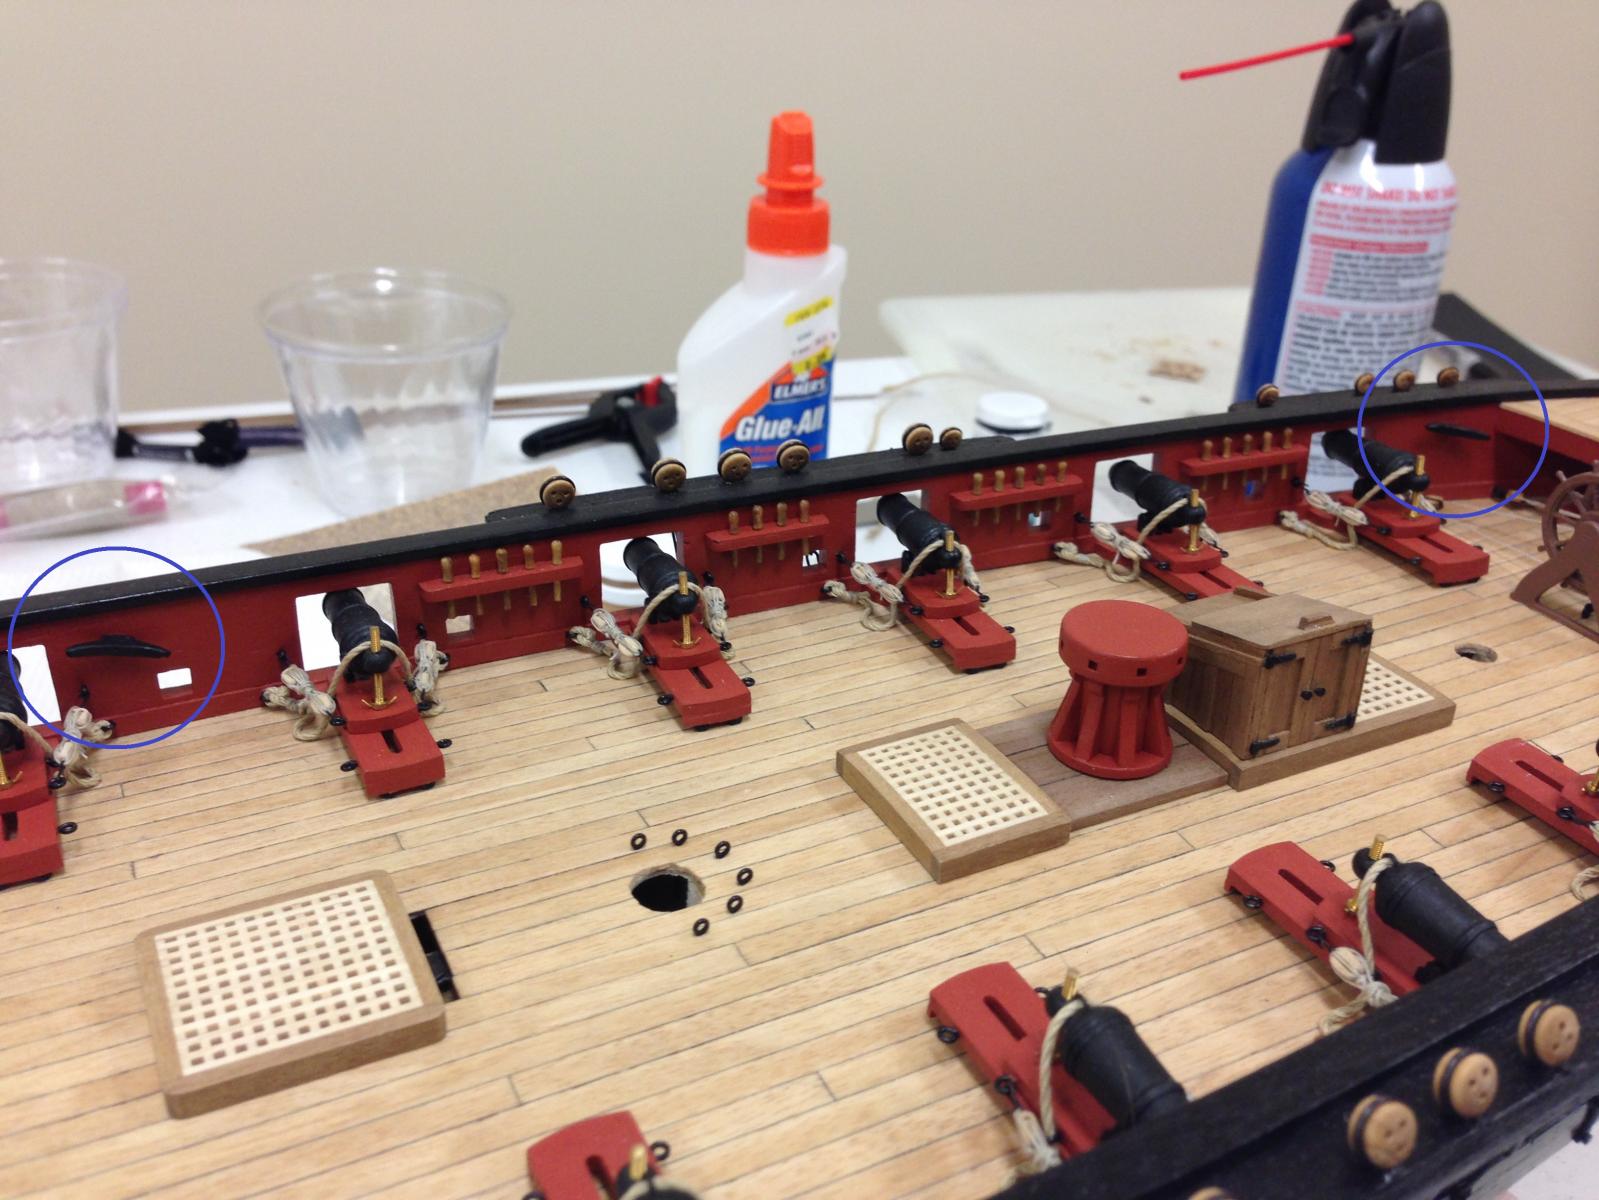
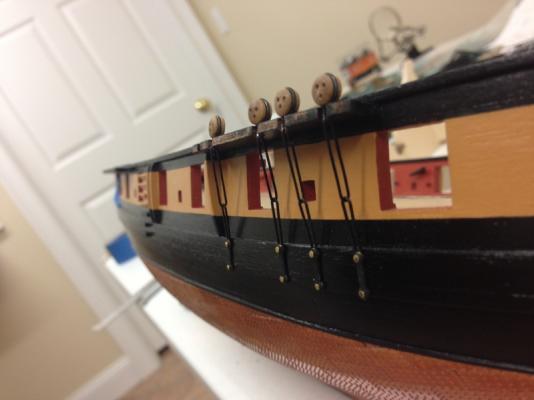
Sorry for another add on - just occurred to me. Don't believe you've installed the channels or chains yet, that is something to consider doing as well before mounting the cannons - especially as the barrels protrude slightly and could be easily knocked when installing the chains. The channels also give a bit of protection, I'm sure others would have advice here as well.
-
Anytime Stergios, I hope I'm actually helping and not leading you astray - this may be a case of the blind leading the blind!
- 1,144 replies
-
- 1
-
-
- snake
- caldercraft
- (and 1 more)
-
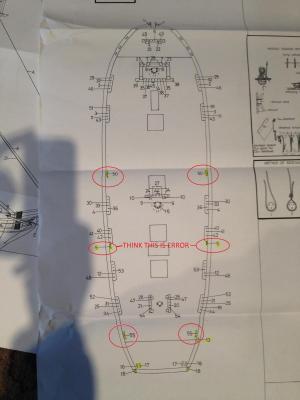
And the picture...

-
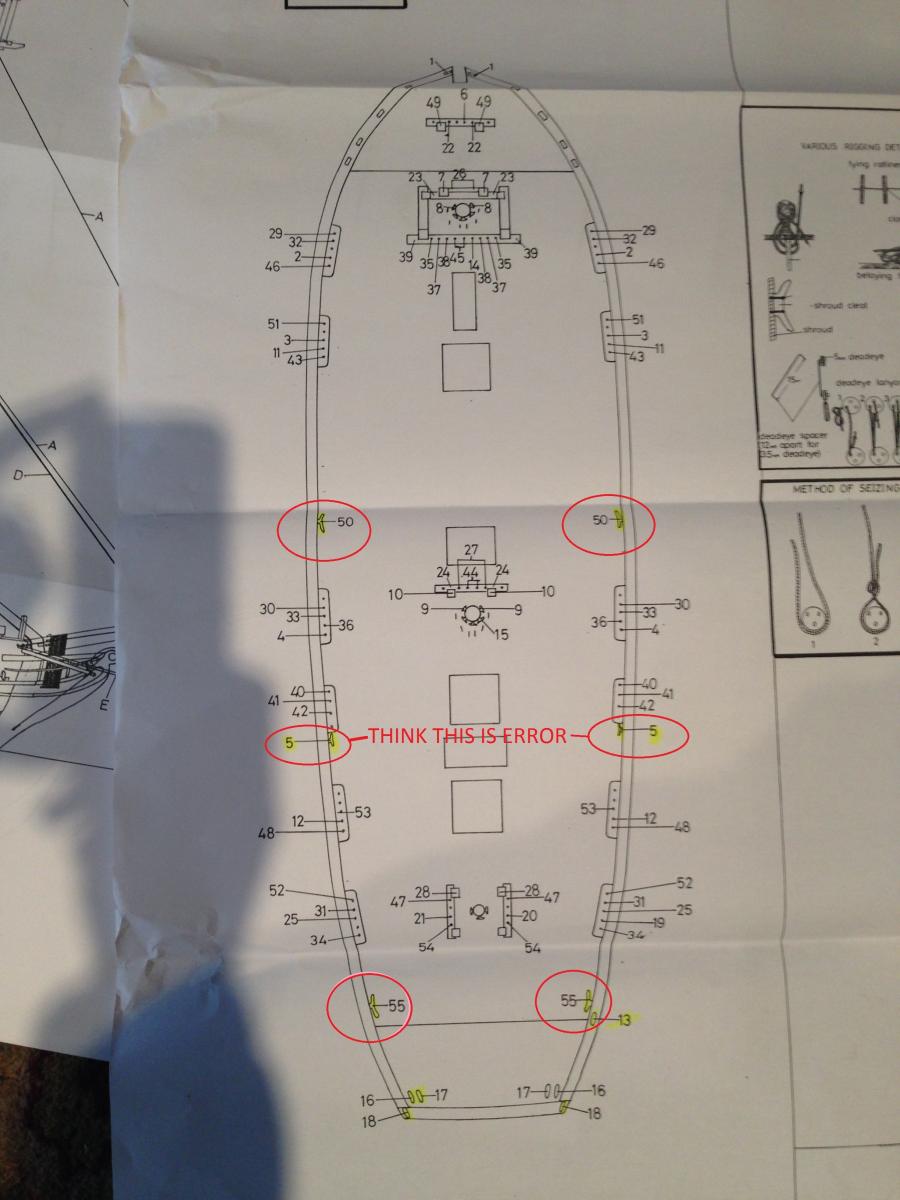
Vasileios, yes - parts sometimes appear multiple times on different plans. Stergios, hopefully picture below helps. Took a while for me to figure it out. - The hull plans typically show the part number (this should match the instruction book). - On the rigging plans, the numbers you see refer to the number assigned to the line/rope, and these are referenced on multiple sheets (sometimes just the start, the end or the whole) In this case, one of part identified as 165 appears on sheet 1. However, if you look at sheet 3, you can see the bulwark cleats identified (circled below). There are 6 identified (for lines 50, 5 and 55), but only 4 supplied. If you look closely on sheet 4 you can see that line 5 does not require a bulwark cleat, and this I believe is an error. I installed the bulwark cleats (part 165) in the positions indicated by lines 50 and 55 on sheet 3. I haven't completed the ship yet to know whether this is correct and others may have interpreted this differently, but I spent a lot of time thinking about this. If it would be helpful I could try to send a photo to illustrate what this looked like.
-
My personal opinion only - didn't find that the bulwark pinrails interfered at all in the cannon rigging, but do what you think you' be comfortable with. I'd definitely suggest fixing the bulwark cleats (part 165) before the cannons and this may also play into where you position the pinrails. This is one of those sneaky items that the instructions don't call out and you need to look at plan '3 of 7' to find them. Confusingly there are 6 bulwark cleats identified (for lines 55, 5, 50) but only 4 supplied. If you look at plan '4 of 7', you can see that line 5 does not in fact need to terminate at a bulwark cleat I ommitted that one, installing the bulwark cleats at locations indicated for lines 55 & 50 on plan '3 of 7'. This is less than clear, and fingers crossed it is correct...hope I haven't caused more confusion.
-
Continue to be amazed at what you attempt Robert, looking forward to seeing how these turn out, I'm sure they'll look fantastic.
-
You definitely want to do the pinrails on the bulkheads before doing the cannons. Leaving the ones in the center off the deck until cannons are complete is fine as you ill have more room and are less likely to accidentally knock and break something.
-
Any clues Dave?
-
Wonderful workmanship Alexendru, simply no words to express it! Love this build. What are you using to colour the wood, or is it a natural wood that is that colour red?
-
Ferit, Sjors, Alistair, Stergios - you are too kind. I'm a 'nervous' builder, its only a by product of taking a lot of time over the seamingly smallest of tasks...maybe the Caldercraft '74 will be ready by the time I'm finished! Spyglass - love that - "But if you ask the reason of this, many will be found who never though about it" (!!!) Never has a truer word been said. I may need to put that on my signature! Hamilton - thanks. The rope was simple Amati 2mm line purchased separately. There is a photo here that shows the comparison to the kit supplied stuff. http://modelshipworld.com/index.php?/topic/509-hms-snake-by-beef-wellington-caldercraft-scale-1-64-first-wooden-ship-build/page-10#entry44872 It was quite stiff, so it was necessary to try 'stretch it out' for a few days to remove larger kinks. I then found that soaking it in warm water gave it sufficient play to attempt to simulate a natural lay. A few spots of glue were still necessary otherwise it still tended to levitate above the deck! BE - appreciate the kind comment, means a lot from you but doubt there is much you could learn from me, quite the reverse. As always, its the builder who lives with his flaws and mistakes :-)
- 800 replies
-
- 1
-
-
- snake
- caldercraft
- (and 1 more)
-
This is a fascinating topic! I'm wondering, if the breach ropes were stretched, would that have also meant that the guns's would have similarly kicked in the next action (starting with cold barrel again)? It sort of raises another question, assuming that the breach ropes 'stretched' then wouldn't their structural integrity fail as well. How often would breach ropes have been replaced, and how would that have been done at sea (apart from very carefully)?