


Ulises Victoria
-
Posts
1,790 -
Joined
-
Last visited
Content Type
Profiles
Forums
Gallery
Events
Posts posted by Ulises Victoria
-
-
In spite of the bad quality of the kit, you are doing a very good job. Keep on it!!!
Best wishes, my friend.
-
A warm welcome from Monterrey, Mexico. You will find a nice and helpful group of fellow modelers here.
-
1 hour ago, Snow said:
Hi mate nice build
I was thinking of doing the vanguard by amati or the sanitisma Trinidad by occre but this ship could be next
You said the timber wasnt great
Could you tell me if the plans are good or great and are they're sails to go on her
I mean are they supplied in fabric or pre made
Sorry mate just answering lots of questions cause i live in Darwin and we have not got a model shop
Thanks. She looks great
Hello Snow.
Thanks for your interest.
Some of the wood is awful , but is fair to say that most is OK. Some thin stripes of (I think) walnut came with the edges really bad cut. I would recommend buying this wood from external sources.
Plans and instructions so far have been OK but not very detailed. You have to look at drawings and written instructions which come in the drawing sheets themselves. There is no "Instructions booklet" per se.
I can not say much about rigging instructions and plans, because I am just starting that process, but a few things I have looked at, looks like the rigging instructions and drawings are somewhat confusing and you have to carefully study each step to fully understand it. Also some things are not very clear. I am using books like Lennarth's, Lee's and Longridge's to understand how ships of the era were rigged, and I may base my ship's rigging in these books, rather than following the kits instructions completely. I am not sure how this will work out, but only time will tell.
There are no sails in the kit. In fact the rigging instructions are for a ship without sails. I bought a (very expensive) set of already made sails for my ship (sorry, don't remember where, but I do remember it was the last set) before starting the build. So my idea is to build it with some fully and some partially furled sails. This also may change in time.
I live in Mexico. All my purchases for my beloved hobby come from other countries. I am lucky though because I live 2 hours drive South from Texas, and we have a P.O.Box company that brings our stuff from a USA address to an office very near from my home, so I can order from all over the world to my address in Texas as if I lived in the USA.
Best regards
-
-
1 hour ago, chris watton said:
The problem with later period ships of the Nineteenth Century is the fact that most are just plain dull by comparison to their earlier relatives (more functional). Plus there is still a rich vein of subjects to tap into from the 17th and 18th Centuries. I think there is a lack of steam ship/transition model kits for a reason, they do not sell, not attractive enough to most, I guess.
Cheers,
Chris
Couldn't agree more!!!
- mtaylor, hollowneck, Canute and 1 other
-
 4
4
-
Good news, Chris. Rest assured I and many of us will keep an eye on your project. Best of lucks, since that will benefit us all!!!
- Canute, chris watton, Murphy and 3 others
-
6
-
-
-
Thanks Nick. Your comment made me more sure about my decision!
")
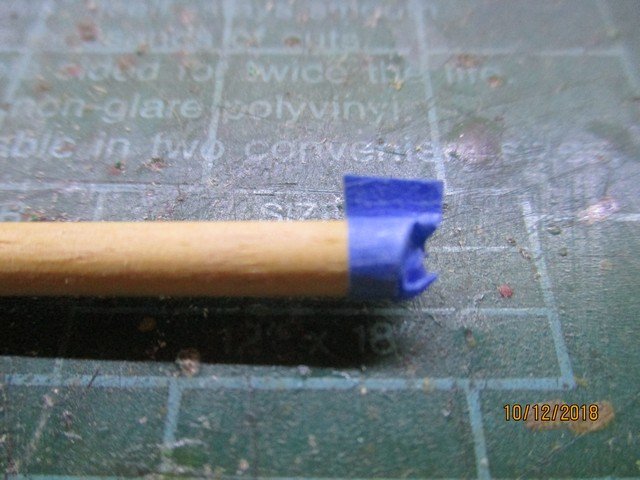
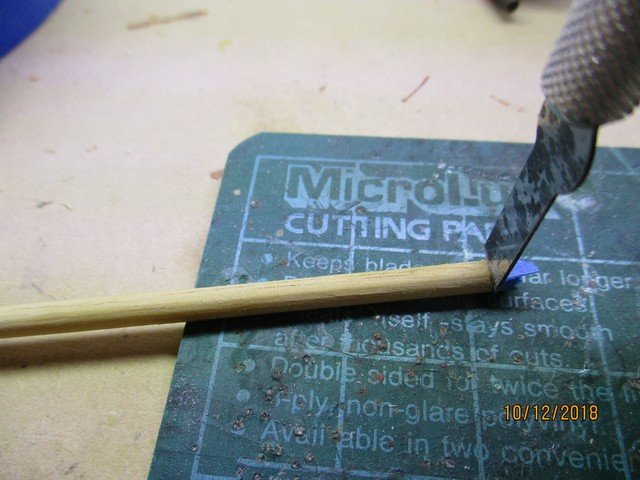
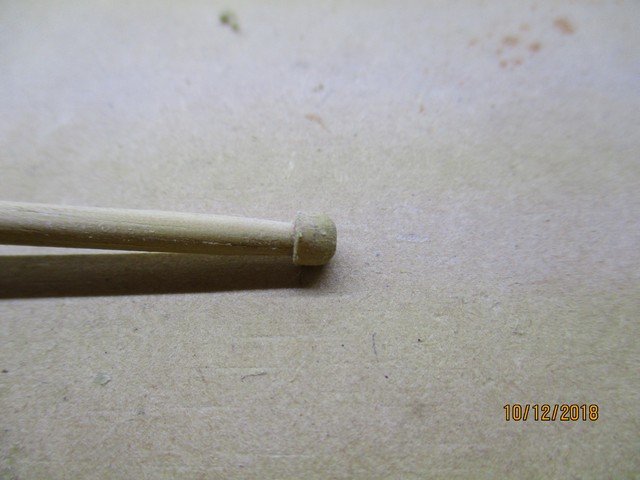
Another small update.
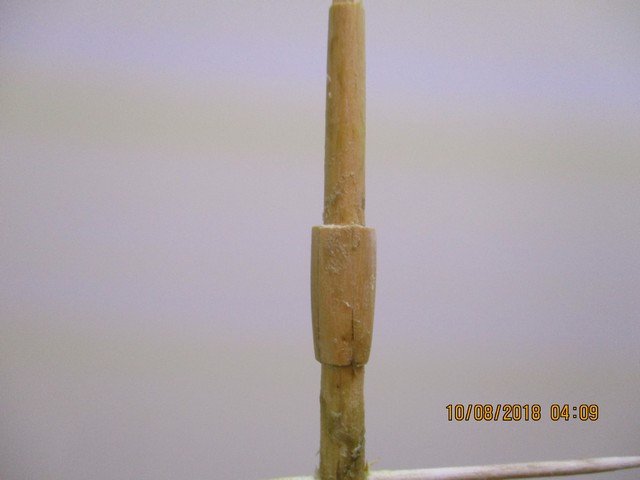
This is how I cut the small round thing in the top of the masts.
First, delimited the area with tape
Next with a chisel carved to an approximated diameter
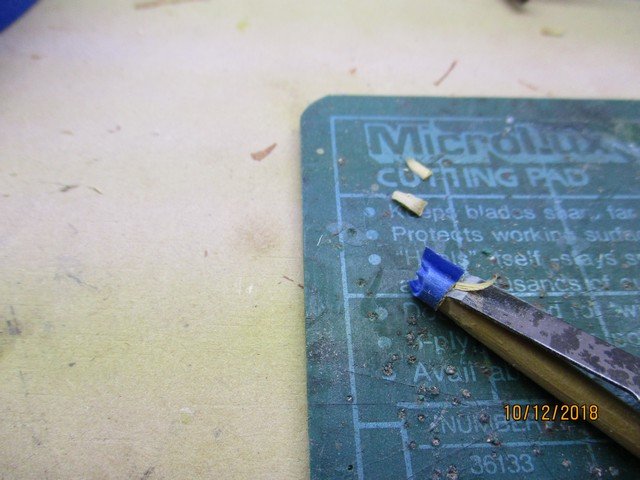
Finish and final shape/taper in my drill fixed with clamps to my worktable
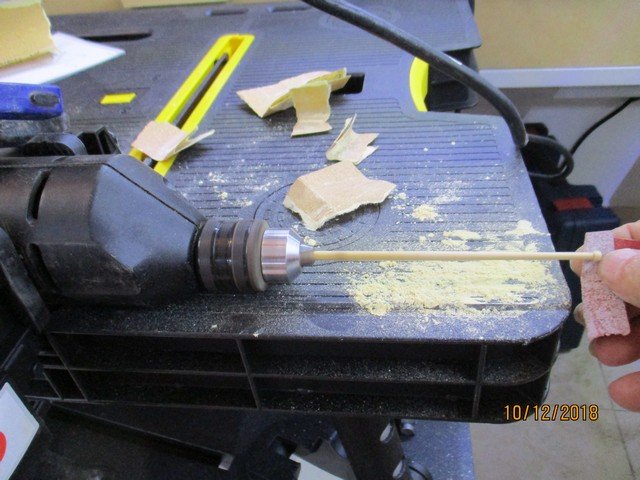
End result
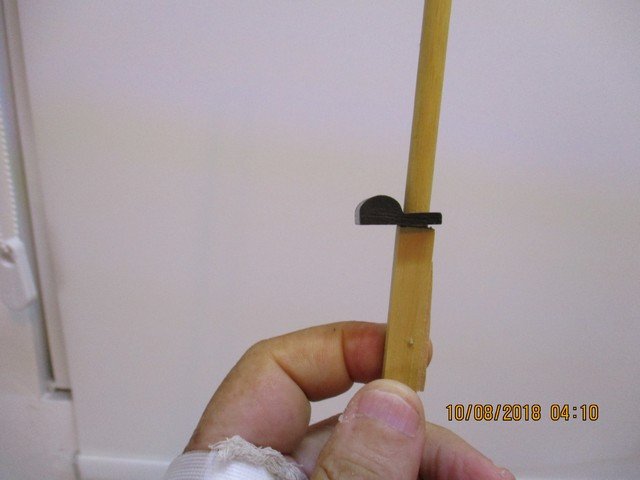
To make this "blob" of wood...

I used toothpicks all around...
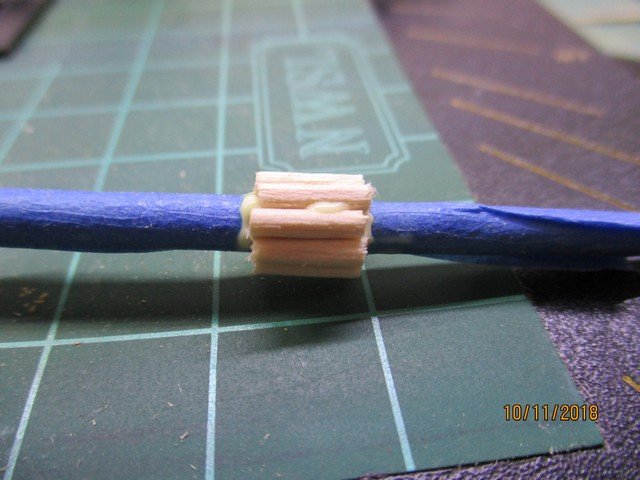
Let it dry overnight...
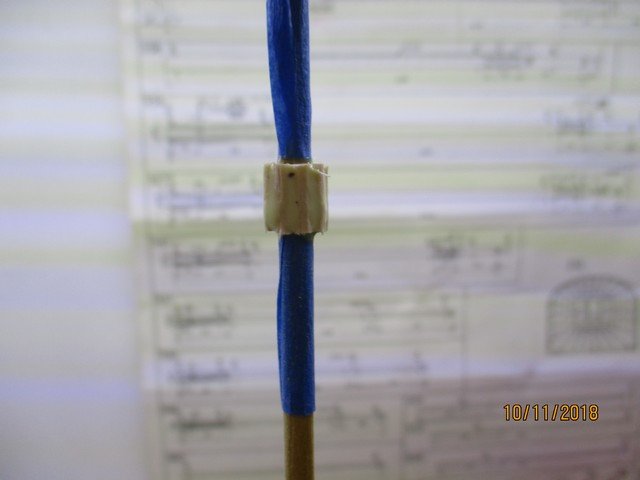
Dry overnight.... yeah right... three hours later I came back and finished by sanding...
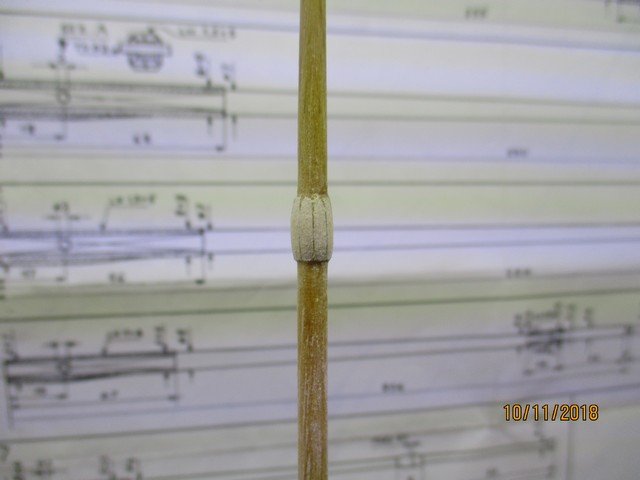
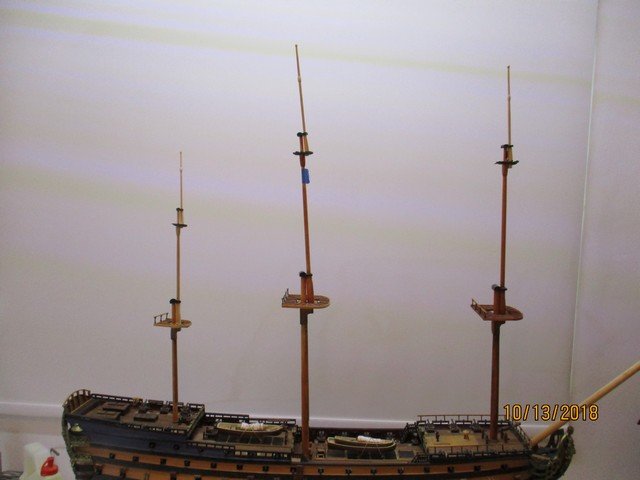
This is the progress in the masts.
Painting is next, and then fixing of all the blocks and stuff needed here like tying some lengths of rope around the masts before definitive mounting.
Remember that misalignment is due because there is nothing fixed yet!
Thanks all for watching and as always your comments are greatly appreciated and encouraging!!!
- marktiedens, BLACK VIKING, zappto and 6 others
-
9
-
Hello all.
Small update and heads-up to those future RL builders!
Mistake in photos 2, 3, 4. Fixed, but time consuming. I told you you will have something to learn from my mistakes ")
This is a small update on my RL build.
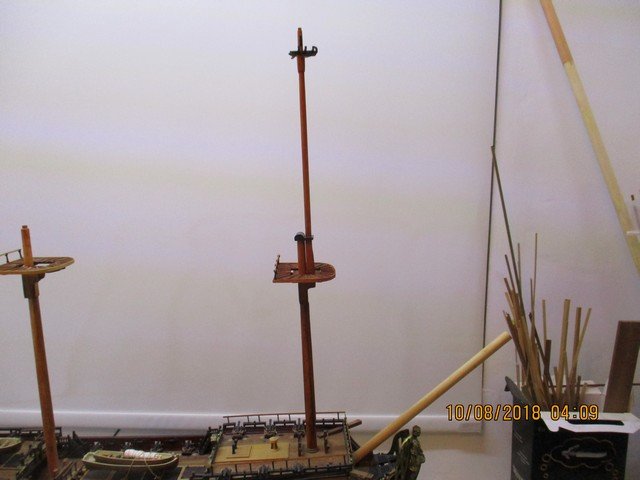
I finished the middle section of the three masts. Well... the wooden parts, anyway.
If you see some misalignment and twisted parts, its because nothing is fixed yet.
Fore mast:
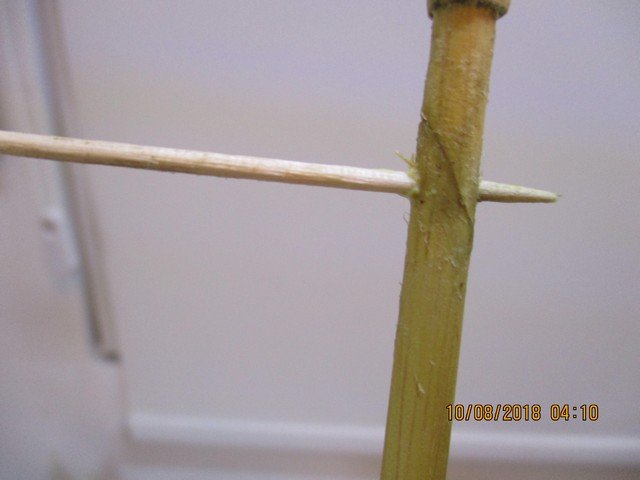
Mistake: I forgot, before making up this part...
... that I had to insert this other part first. Otherwise it will not fit...
I had two options: rebuild the wooden part, or cut the mast, insert the piece, and glue again.
I went for the second choice, thinking that it would be easier and quicker... well... it turned out not being so easy or quick
I made a diagonal cut, drilled a hole and inserted a toothpick for strength. In the end it came out fine. Forgot to take a photo of the finished fix. This is in the main mast.
Subsequent steps. As I said, nothing is fixed yet.
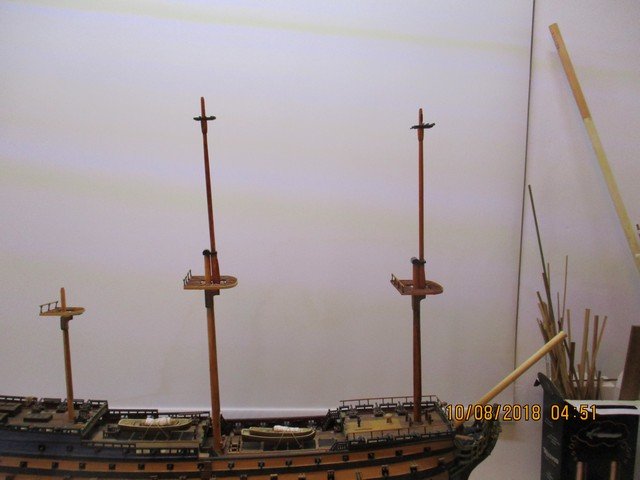
Also, I decided I am going to paint the masts the same color as the Yellow Ochre of the hull. I am not too happy with how the stain job came up.
Thanks for watching. This is going to be a very tall ship.
-
Hello. I use this stuff on all metal parts that are going to be painted. Works great. Leaves a very hard surface and paint will stick to it totally. The highest the number, the thinner the coat. I wasn't aware of the 1200 or 1500 version. Will surely try it next time.
Looks like it comes in white, gray and black colors.
- thibaultron, mtaylor, RussR and 1 other
-
4
-
-
-
Hello Sargon. Yes 550 is a good deal. I got mine for about 450 in one of those outrageous discounts model expo used to have from time to time.
Best of lucks with it.
I remember going to Model Expo from time to time to see the advertising of this magnificent ship, but at a price nearly 1200 dlls, it was out of my budget. When they offered it for a limited time for around 450 I just couldn't miss the opportunity. I haven't regretted my decision a bit.
I love this ship soooo much. By far my all time favorite, being close followed by the Victory.
-
Good morning, friends.
Small update now, because my work will have to slow down a bit for some days. I had surgery in both my hands. I developed "trigger finger" in both my right ring and left index fingers. I can do some work but I need to slow down.
Anyway, here is a small update.
Lower part of masts and mast-tops is finished. Still need to apply maybe a stain and finish, but the wood work is done. I will continue with the next sections now, but at a slower pace.
Greetings to all of you.
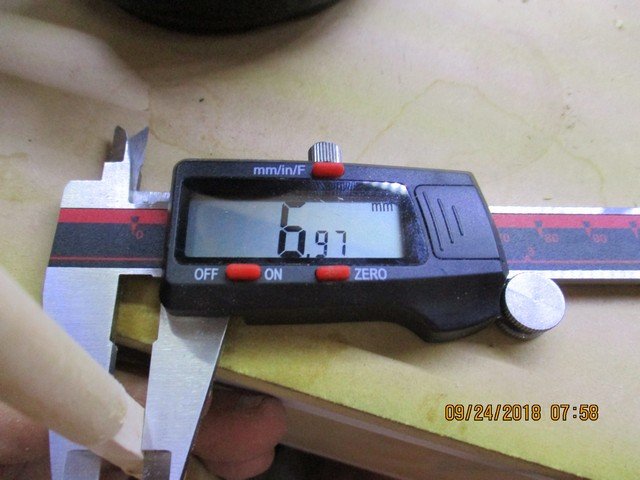
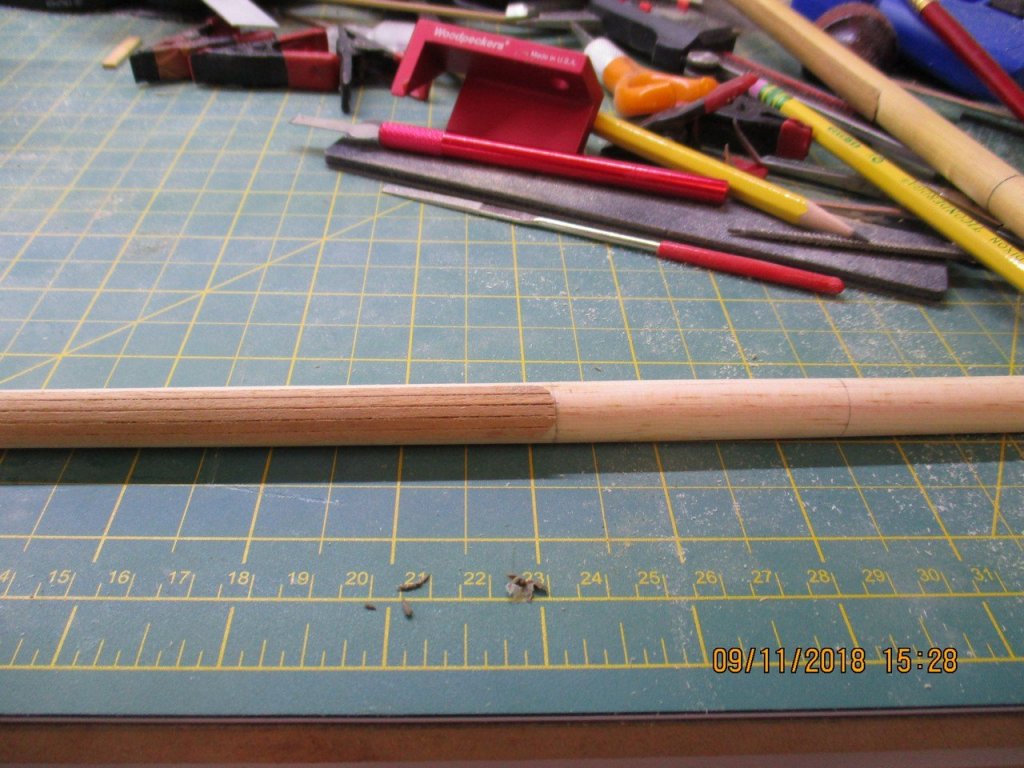
Tappering in my lathe.
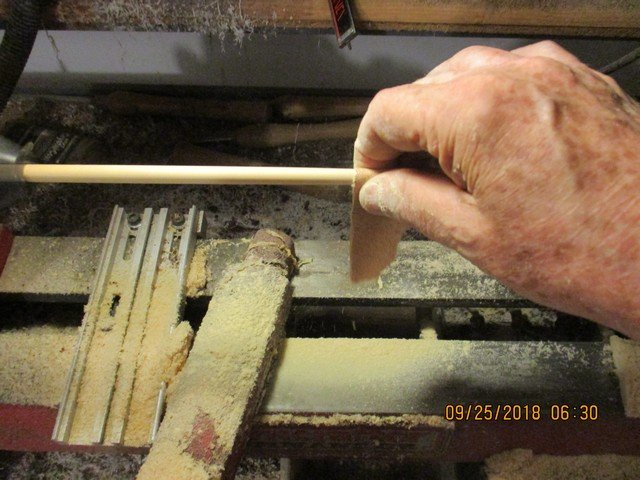
I did a much better job at squaring this section now, and did it by hand. I can see my skills improving!
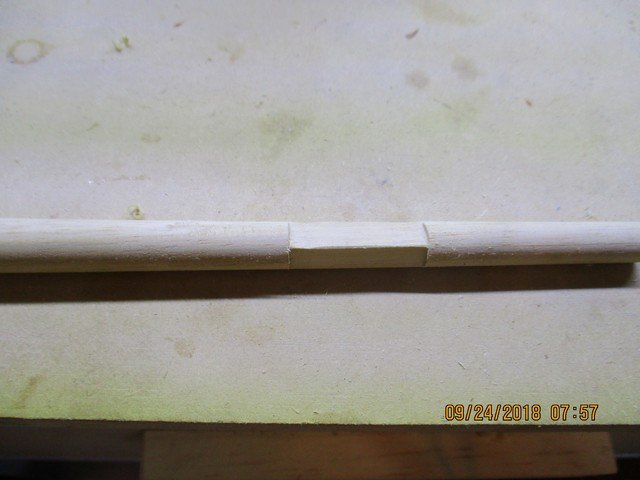
They are supposed to be 7 mm squares
(Dang!!! Missed it )
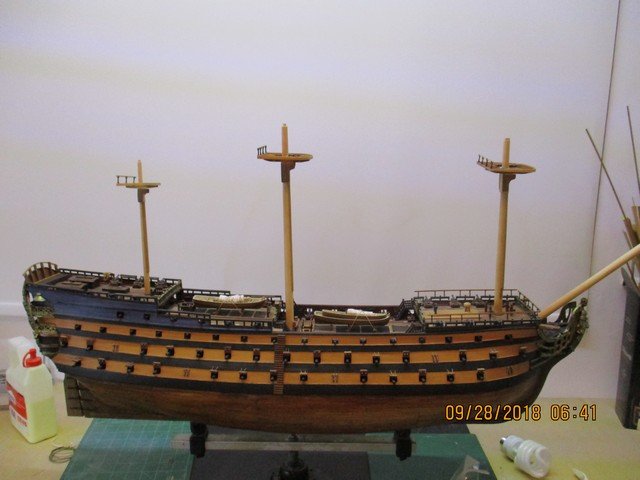
General views of work done

-
-
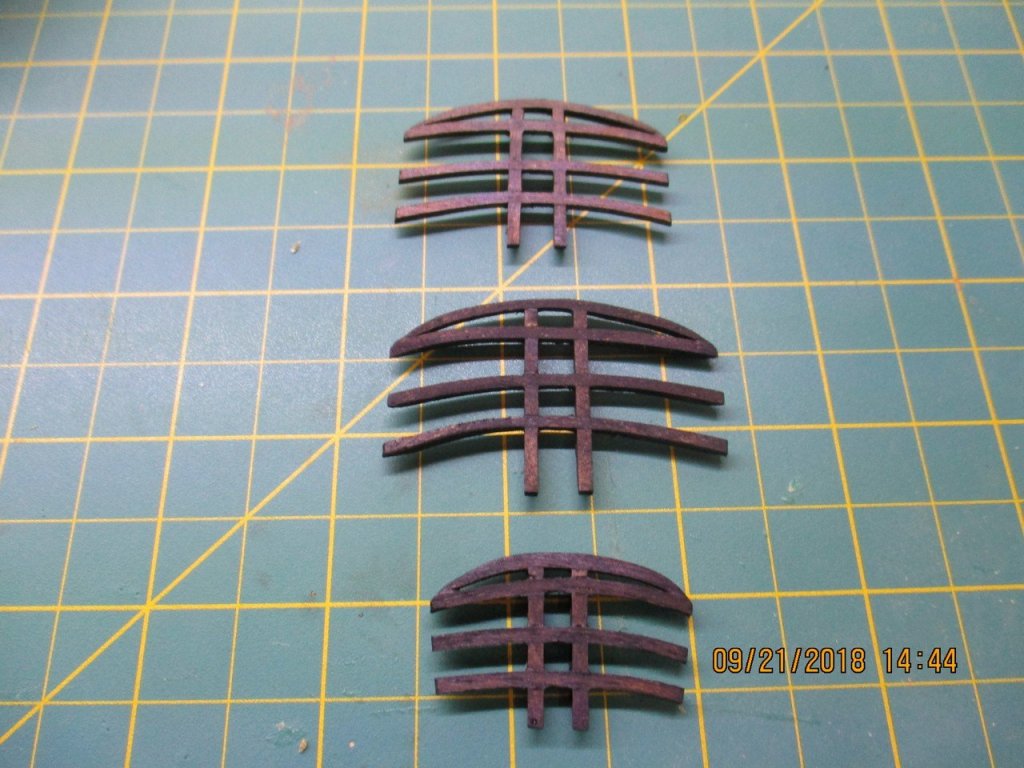
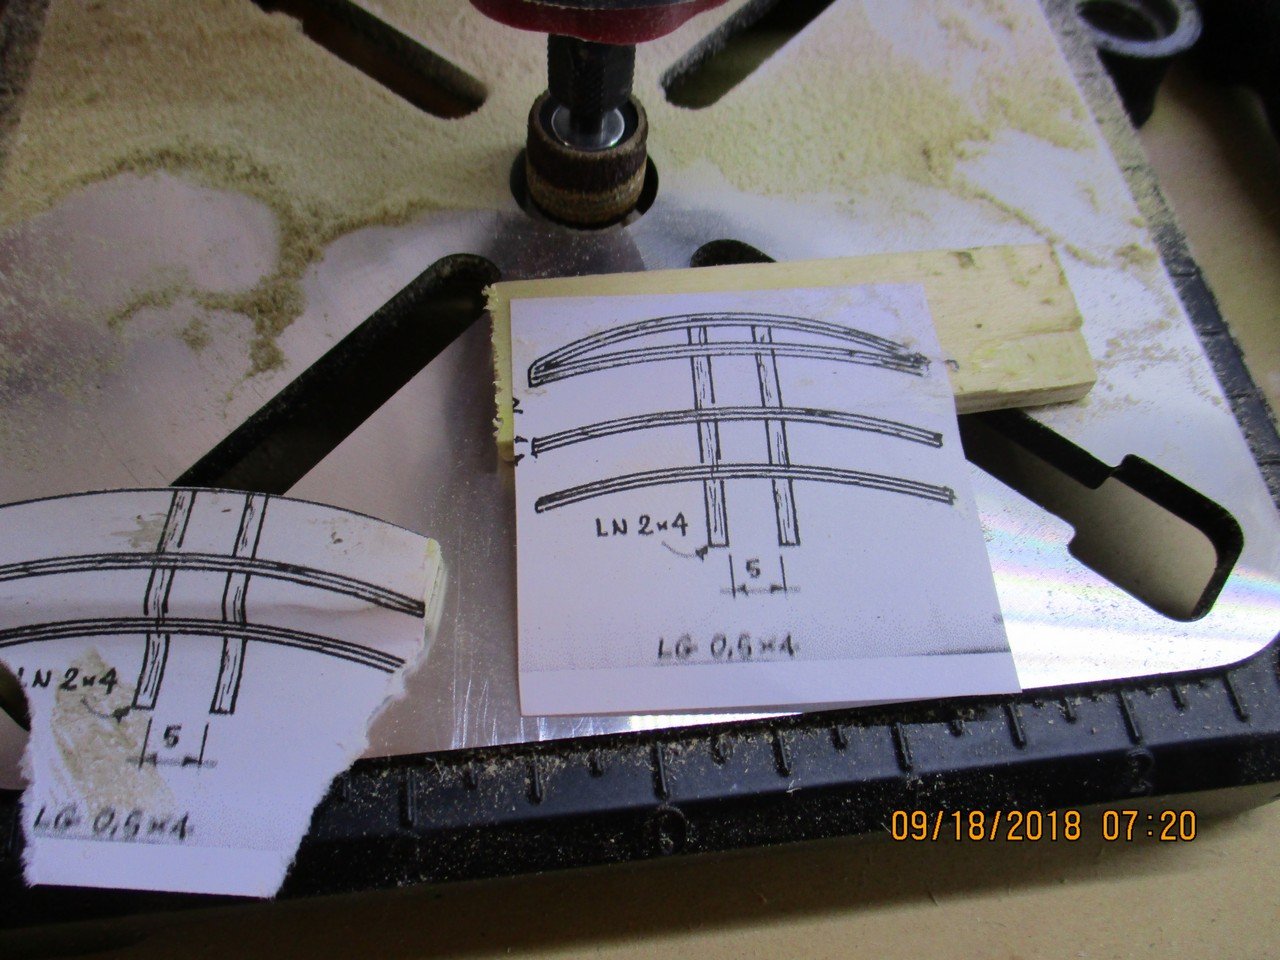
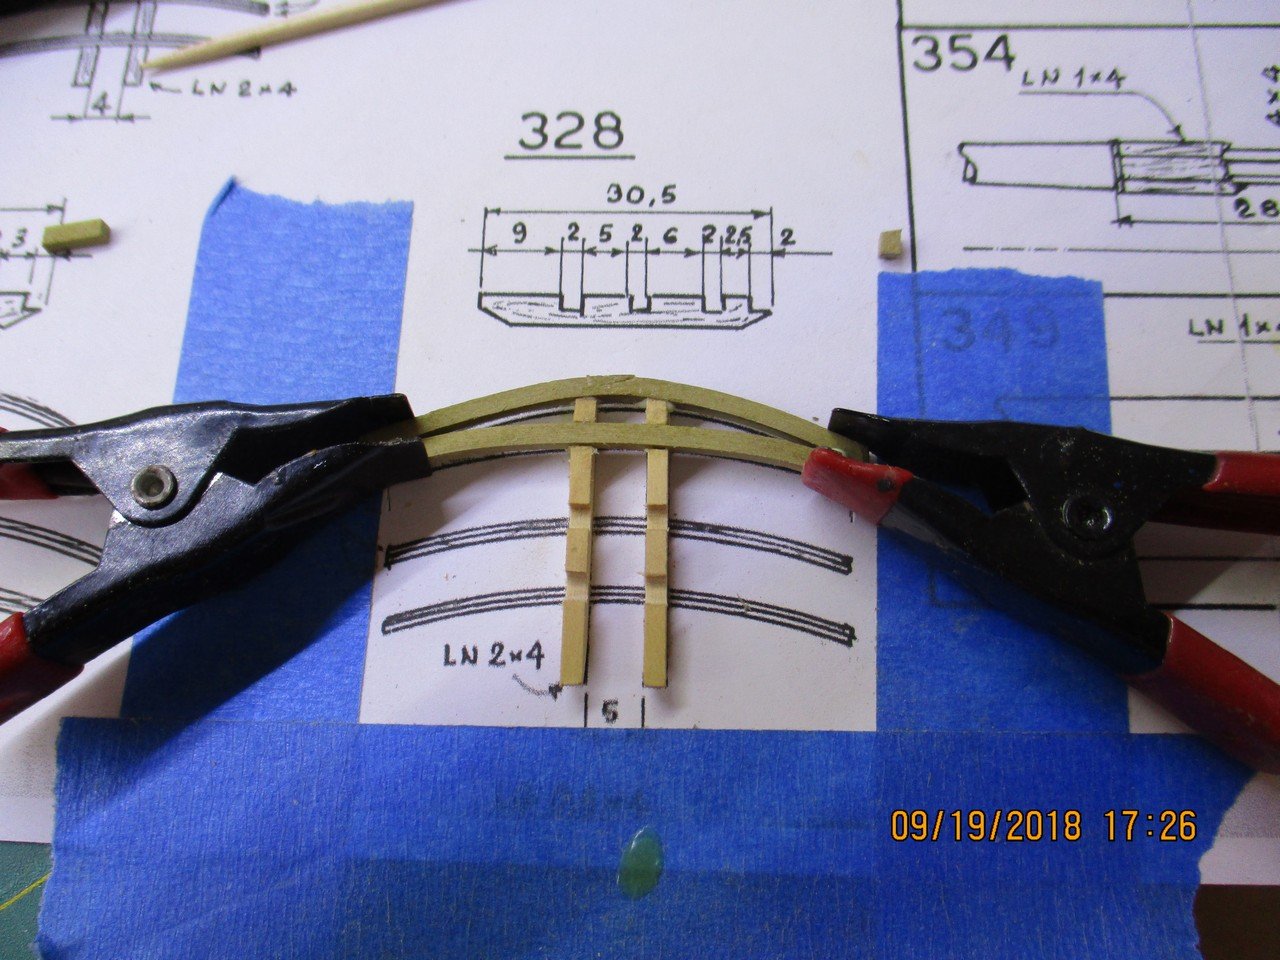
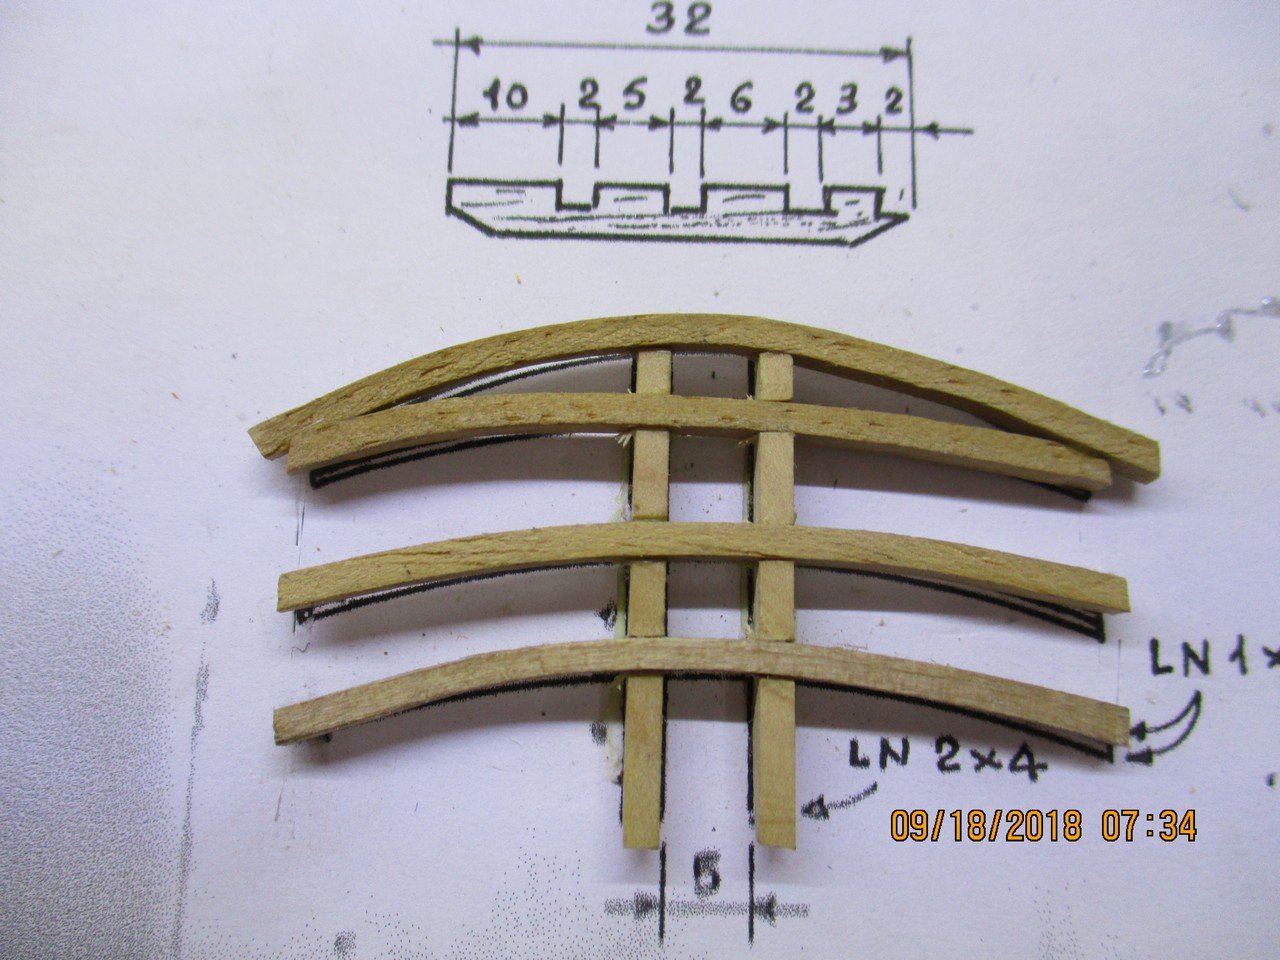
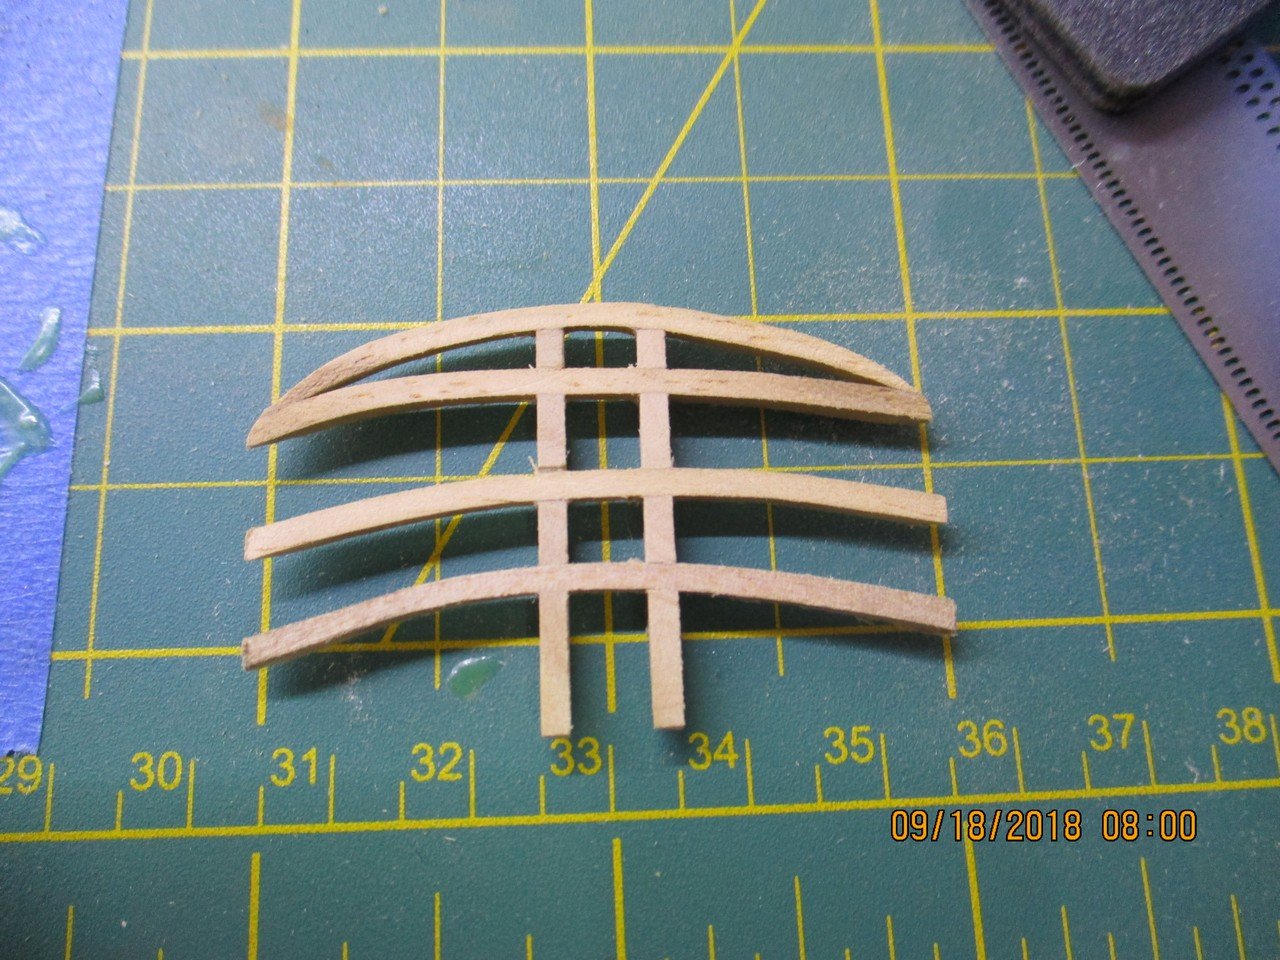
Finally done with these crosstrees . Making those curves was very troublesome.
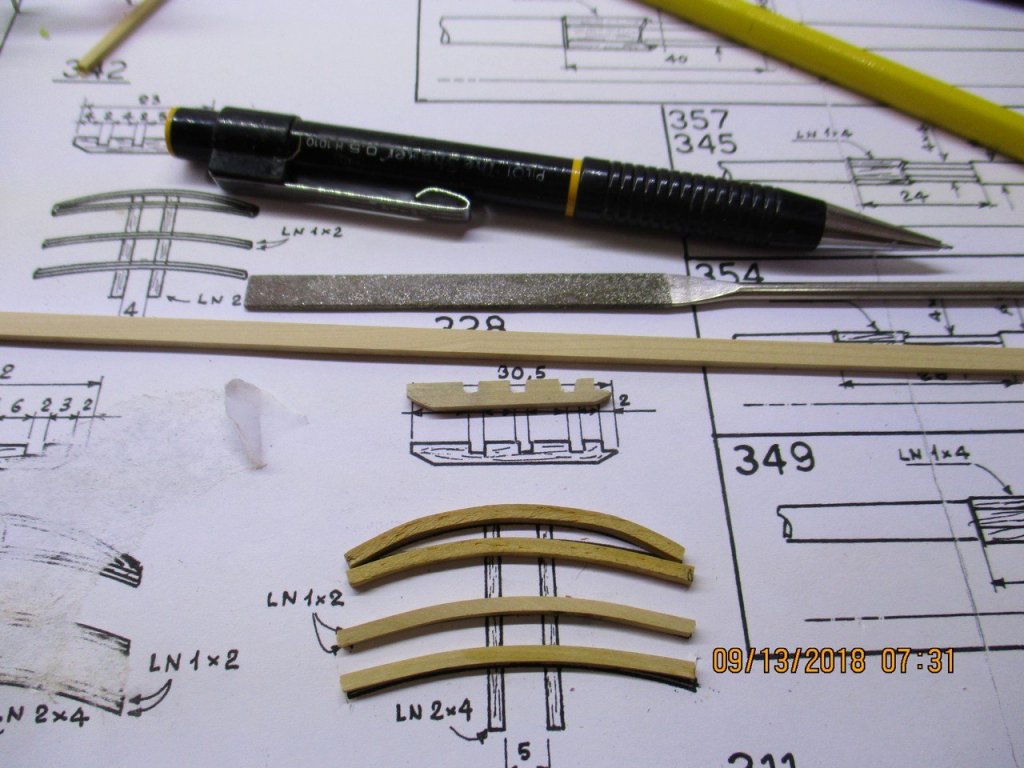
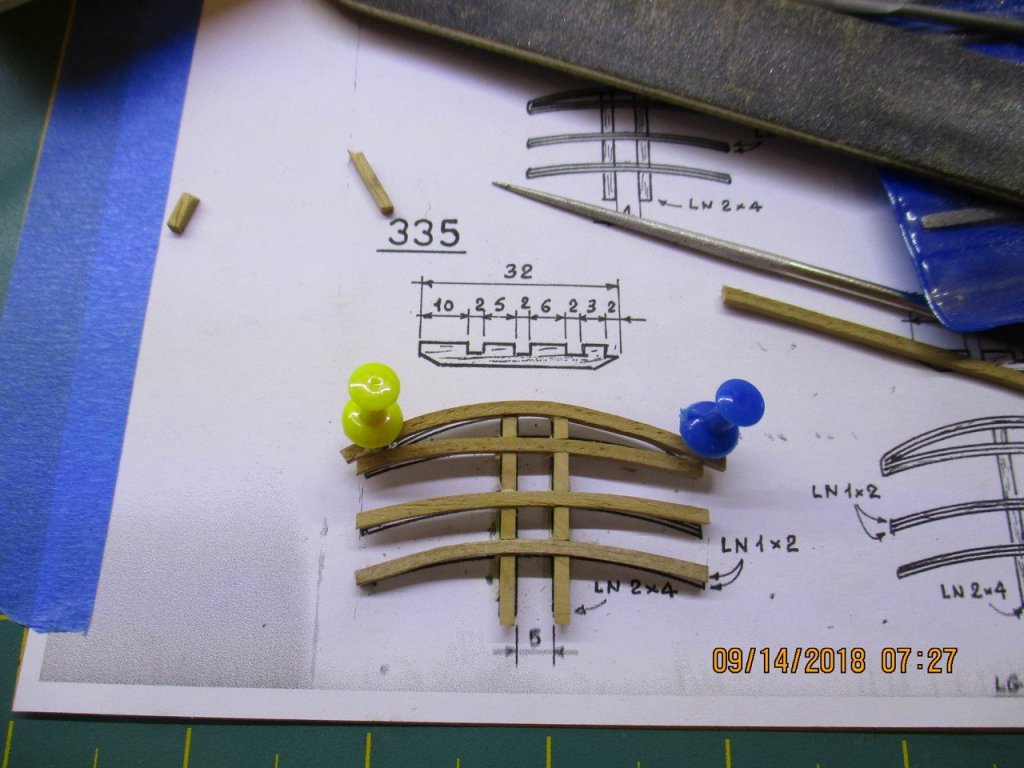
I decided to cut some temp[lates from the drawings to have a better shape.
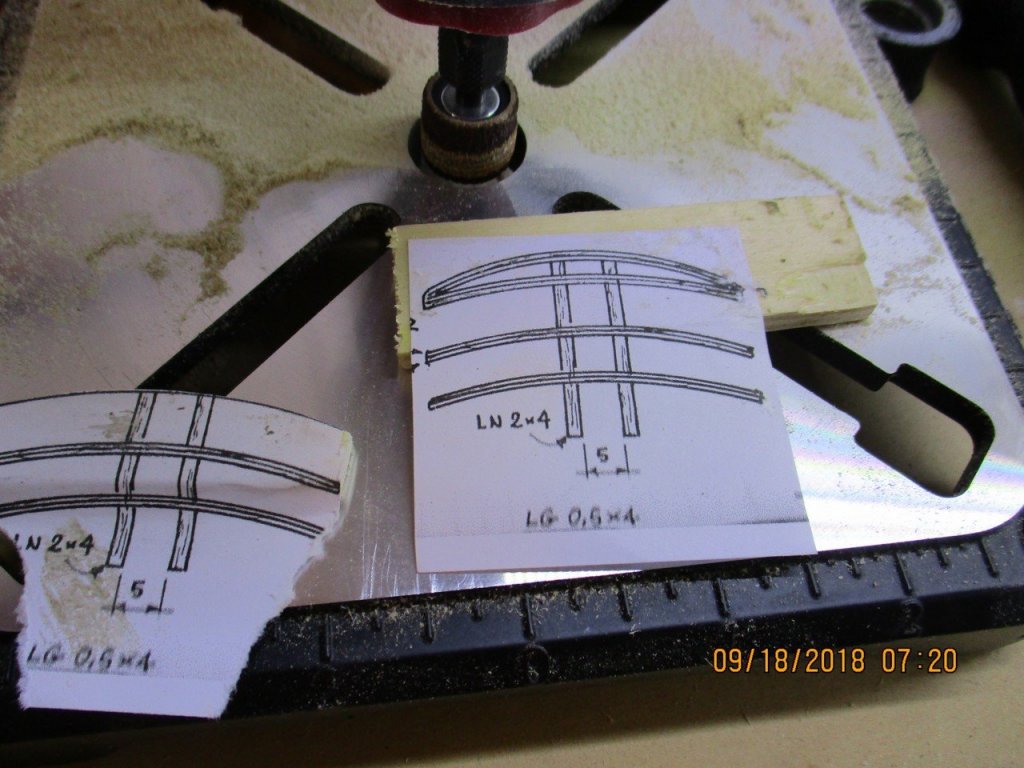
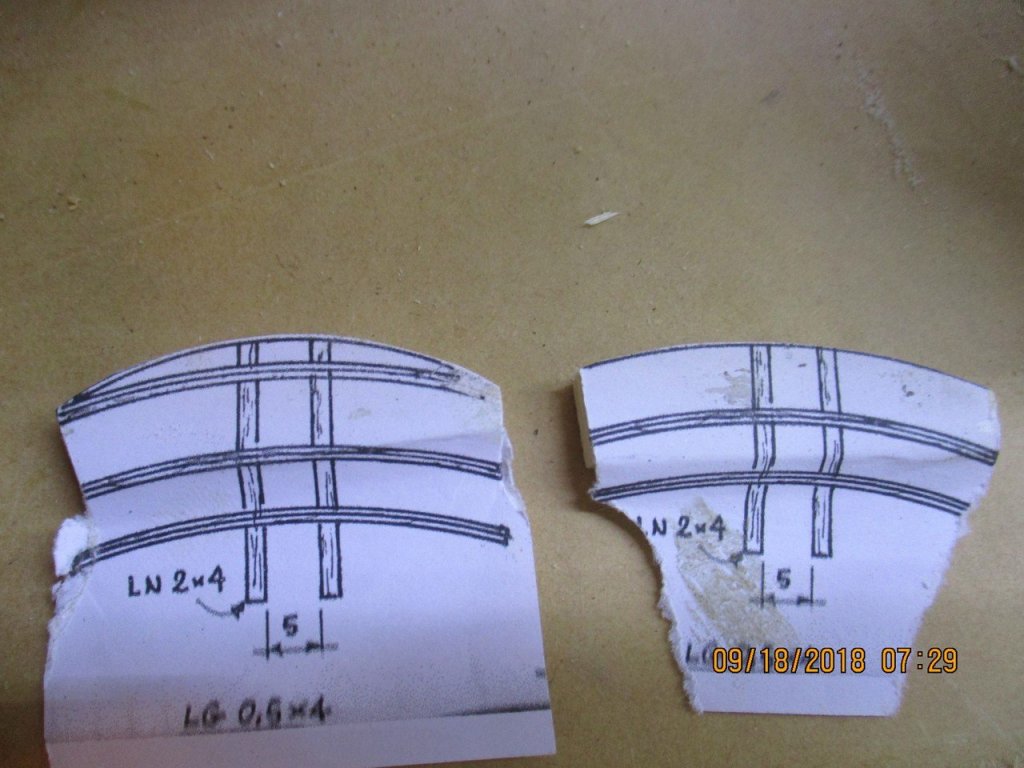
Work in progress
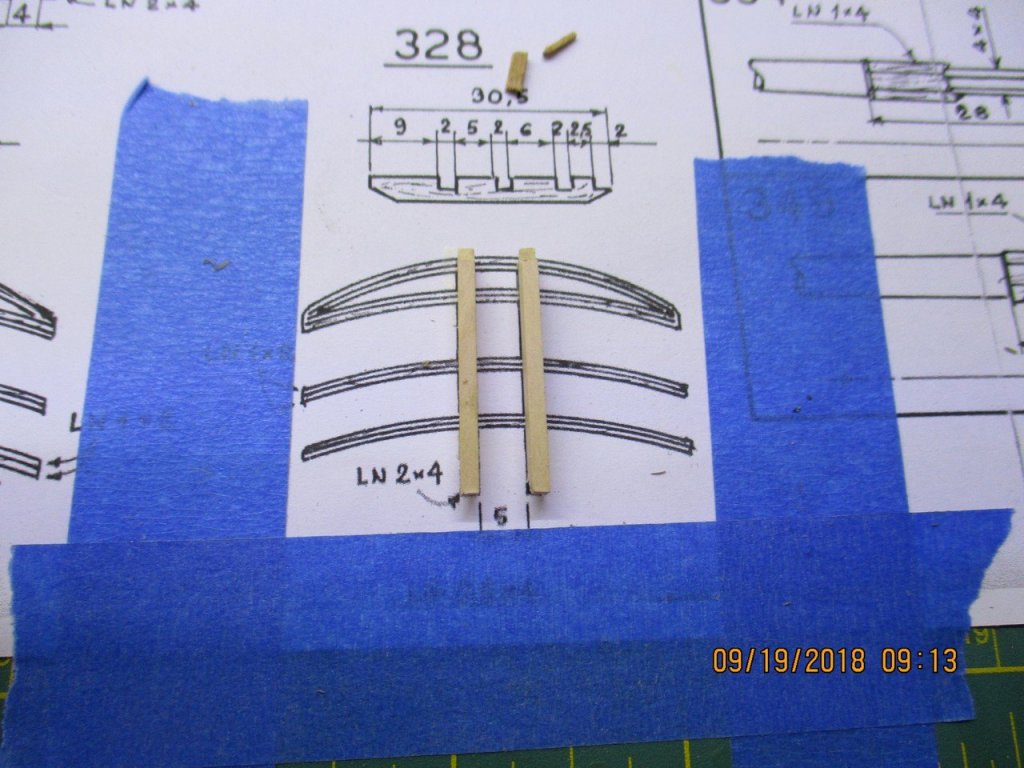


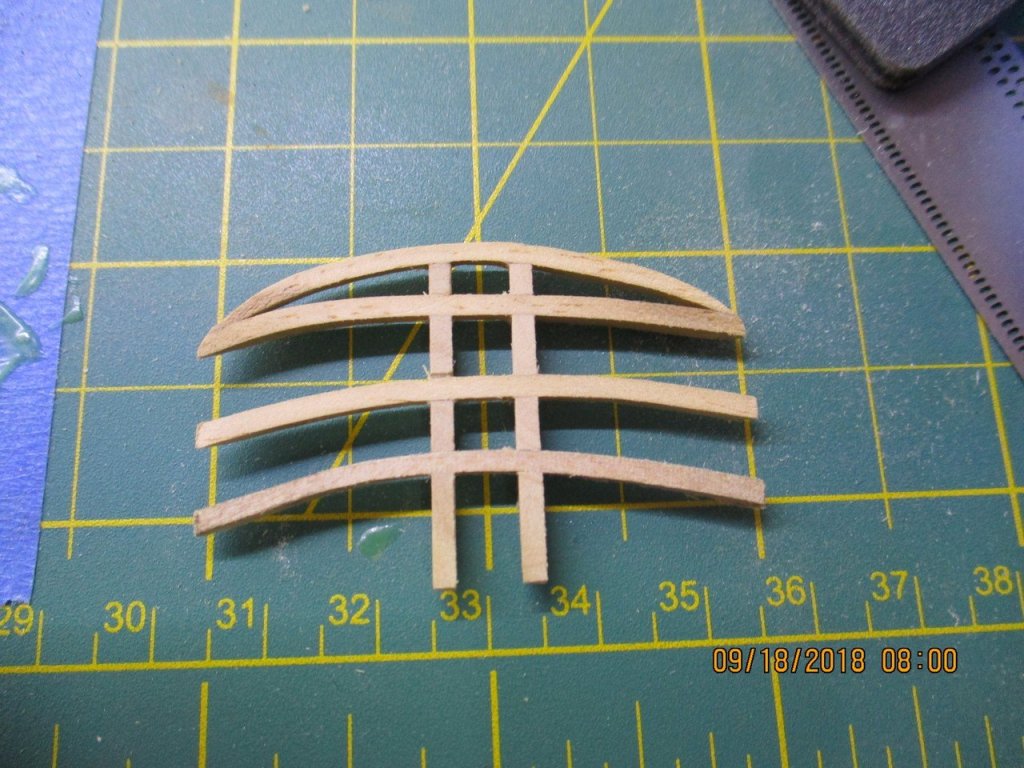
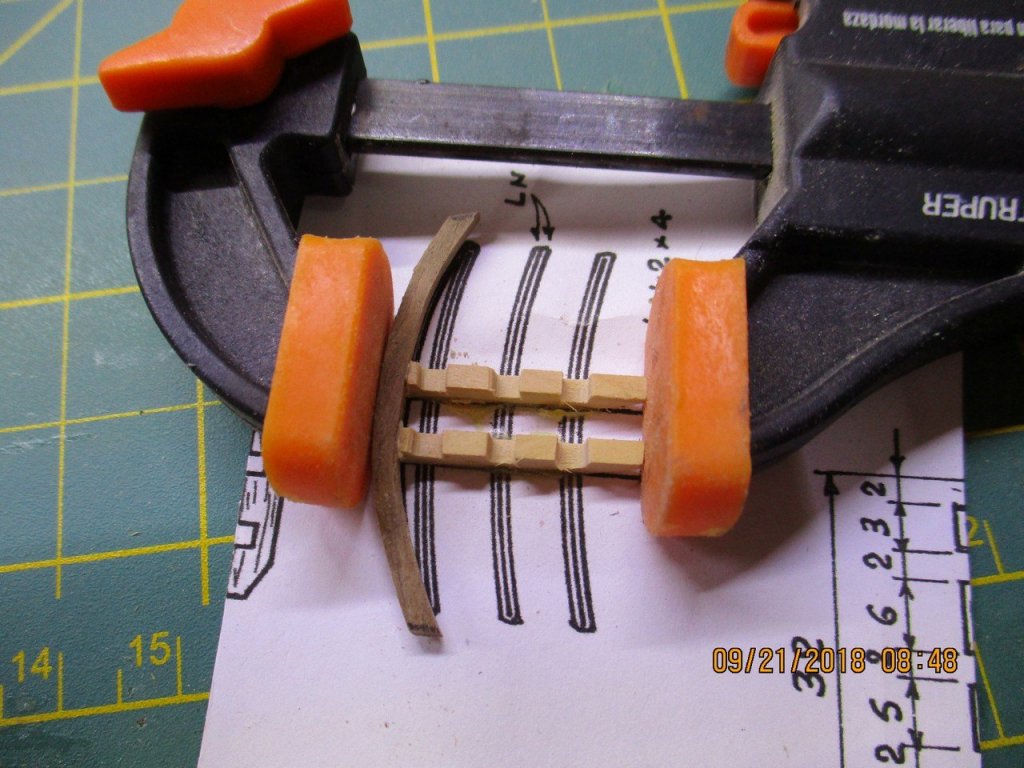
Finally done!
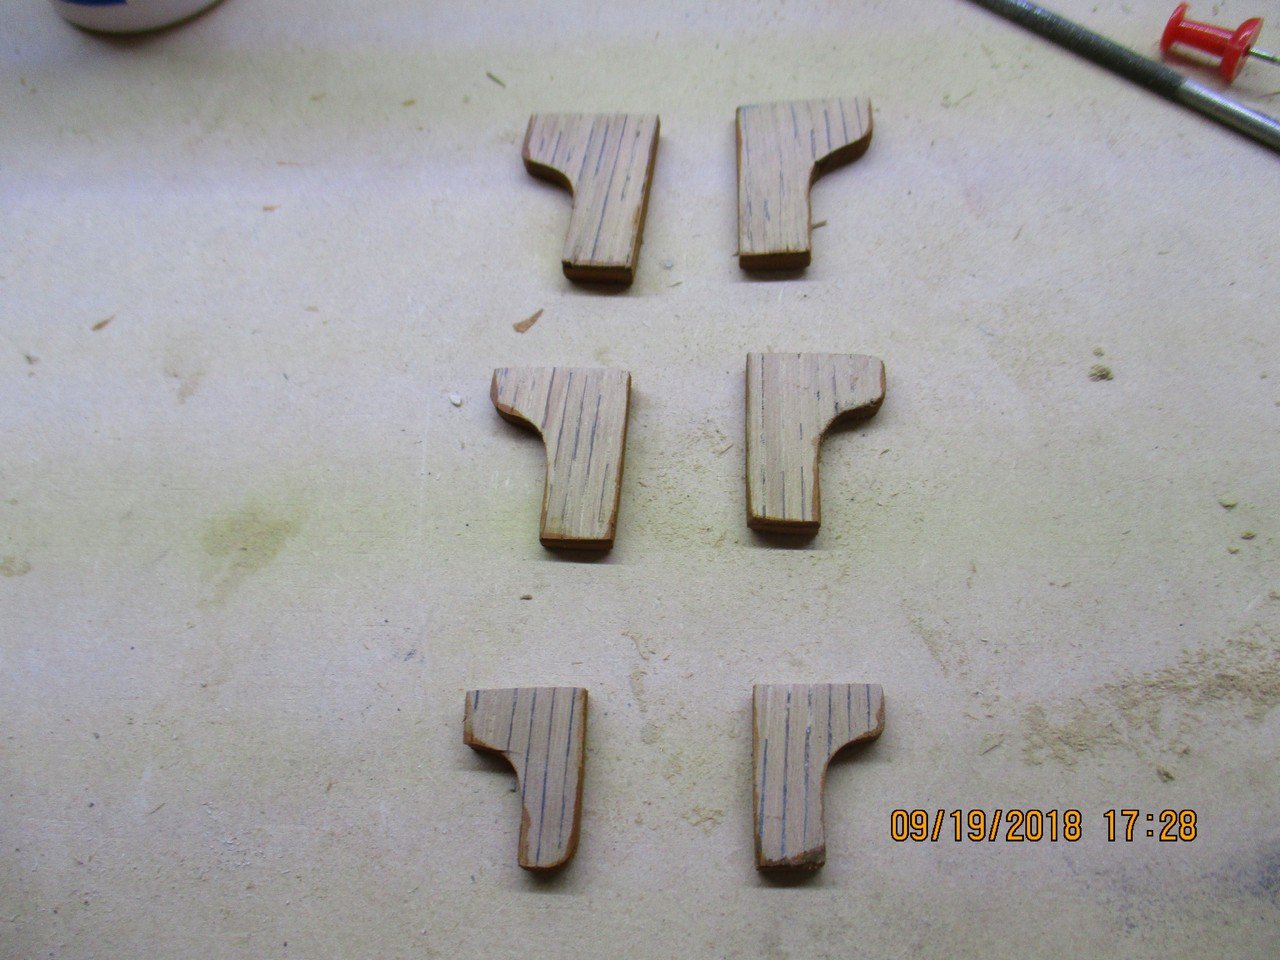
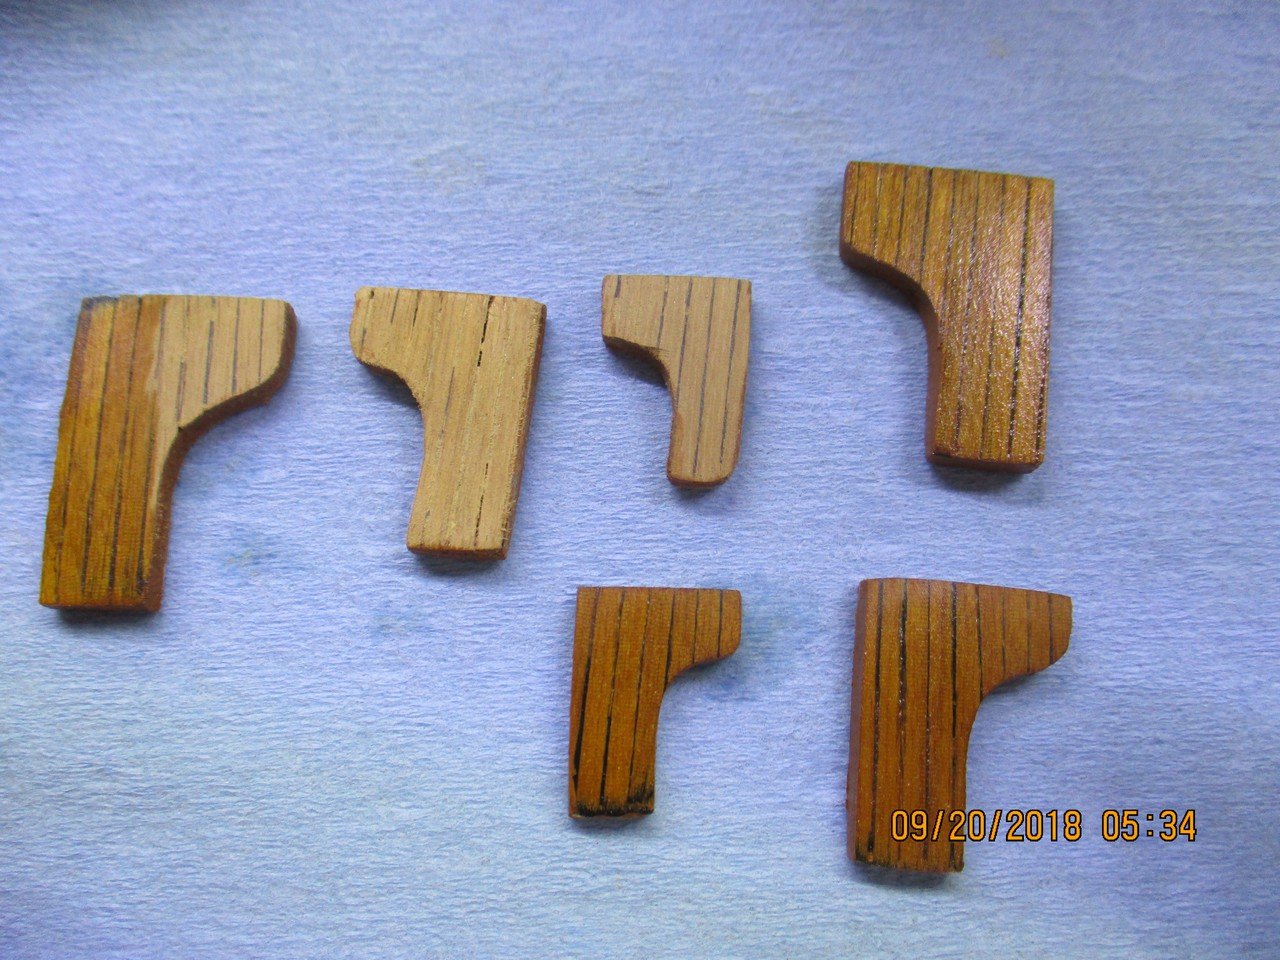
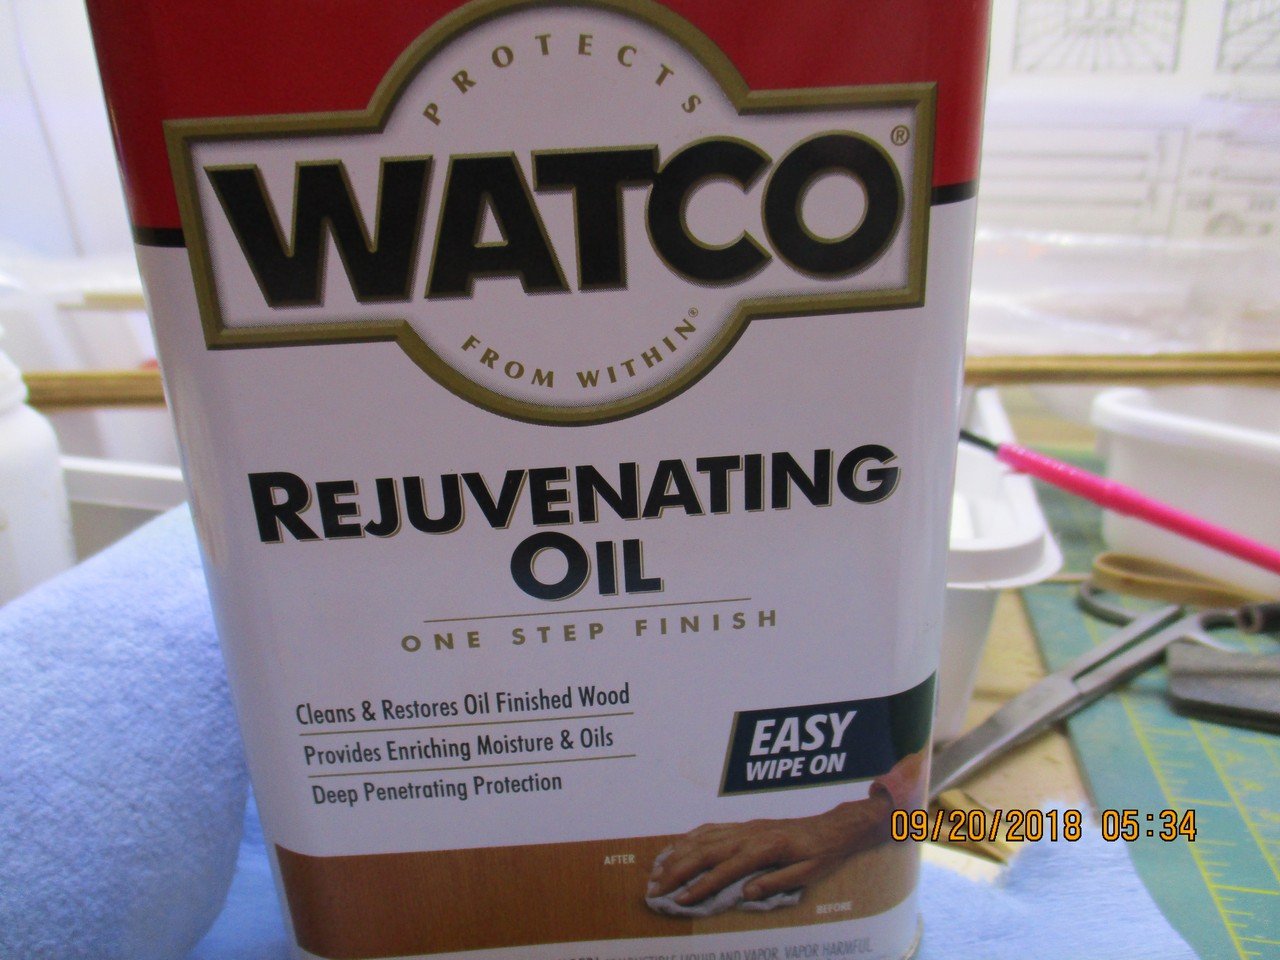
I also worked on these cheeks.
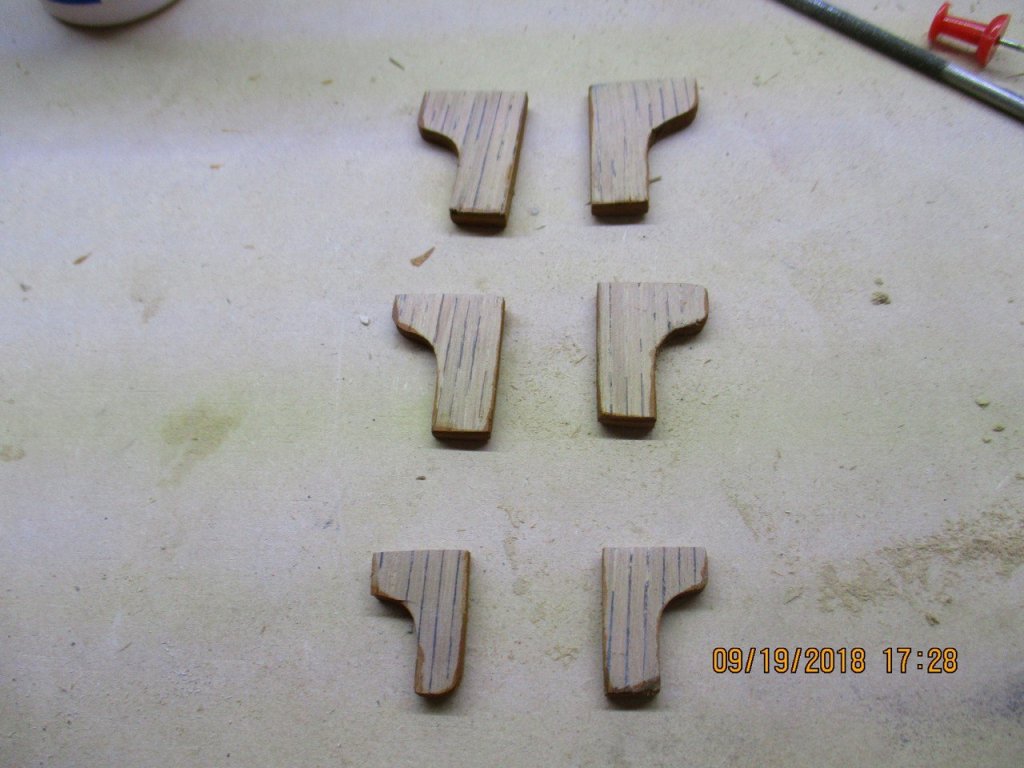
You can see the before and after ...

...by using this product.

- Barbossa, CaptainSteve, Zapto and 3 others
-
6
-
-
-
I sincerely thank all of you for your nice words and comments. This is encouraging to continue building and trying to make a better job. I really apreciatte it.
@Sargon. I'm surprised you found a Royal Louis kit. I hope you got a good price. Since Mamoli factory burned down these kits are being harder and harder to get.
Best regards to all.
-
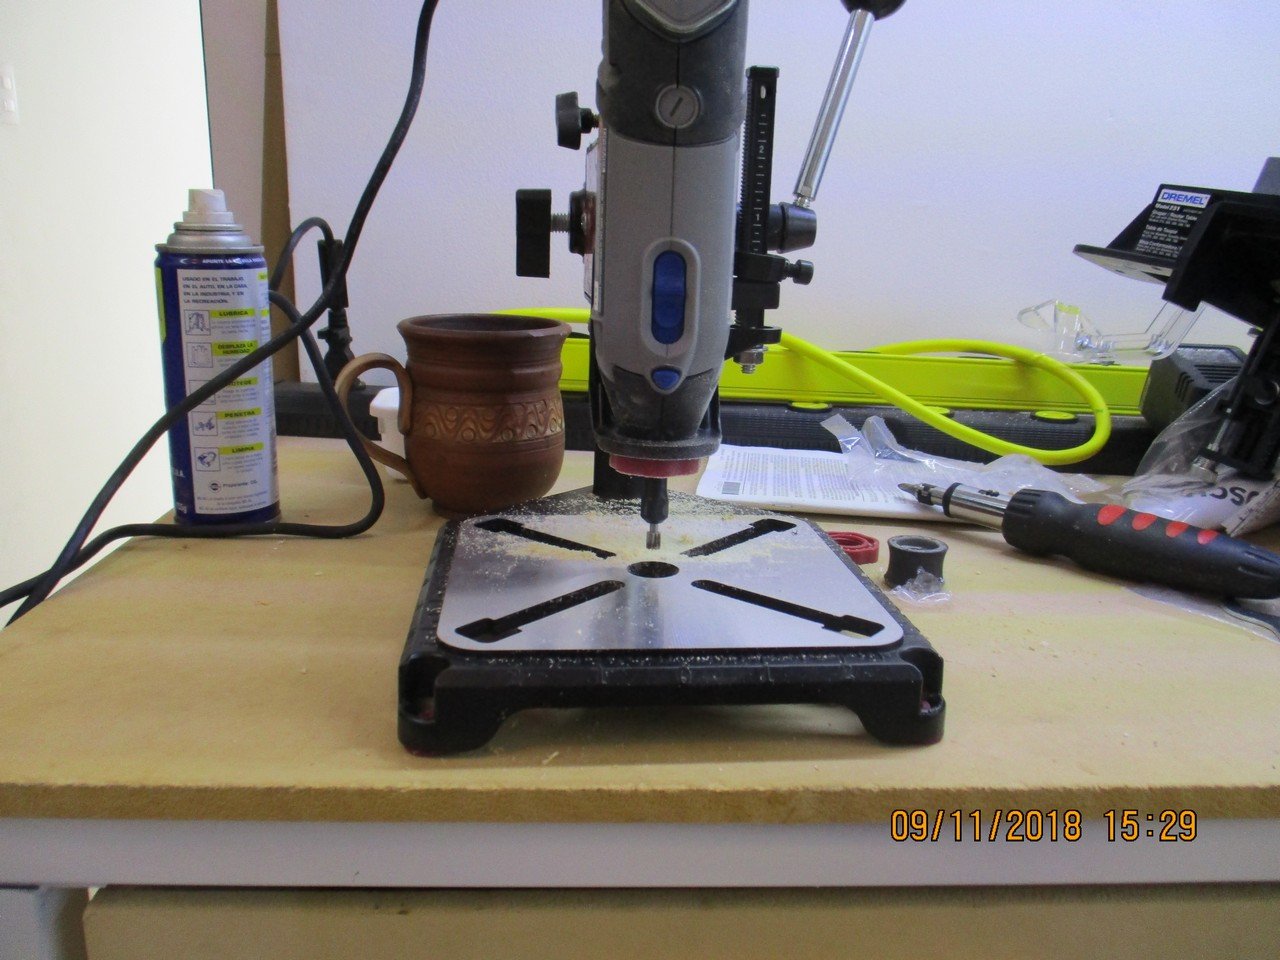
Small update. I just got a Dremel router table and a mototool stand.
I used the stand to cut the square sections of my main mast, using my Dremel as a router. I had to re-do the whole mast because the first attempt at cutting those squares by hand was a total disaster. In fact I had to turn in my lathe a new dowel to make a whole new mast.
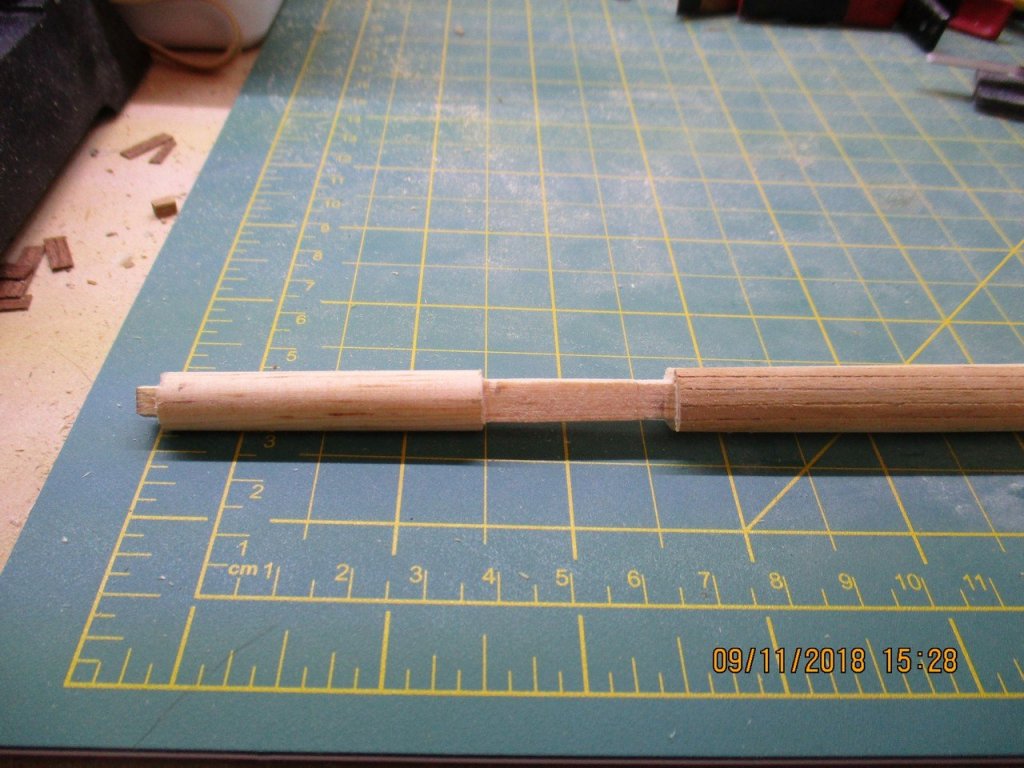

Also the mast tops are finished.
- Sargon, marktiedens, BANYAN and 4 others
-
7
-
-
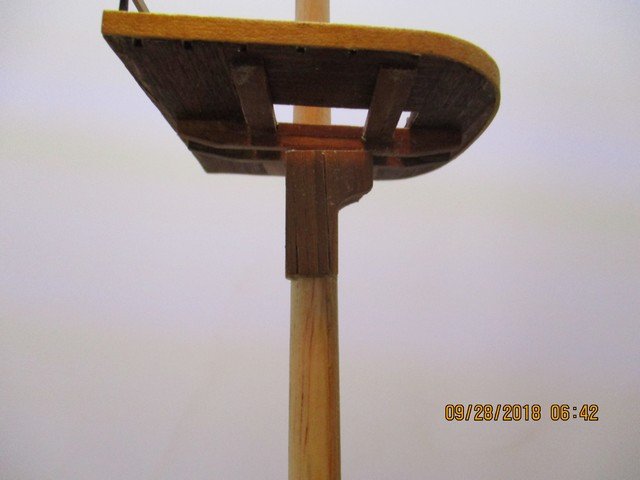
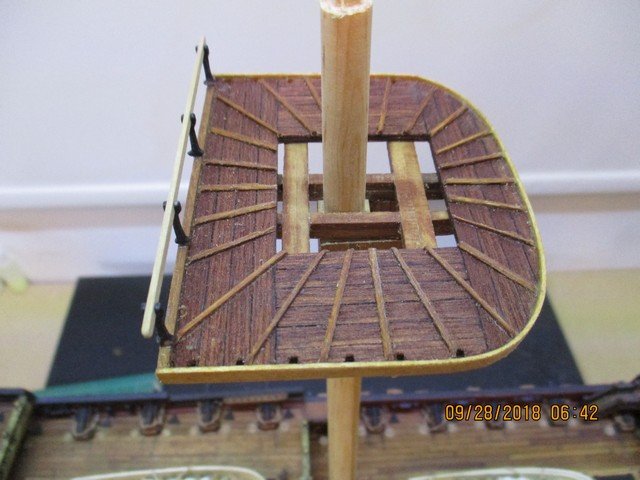
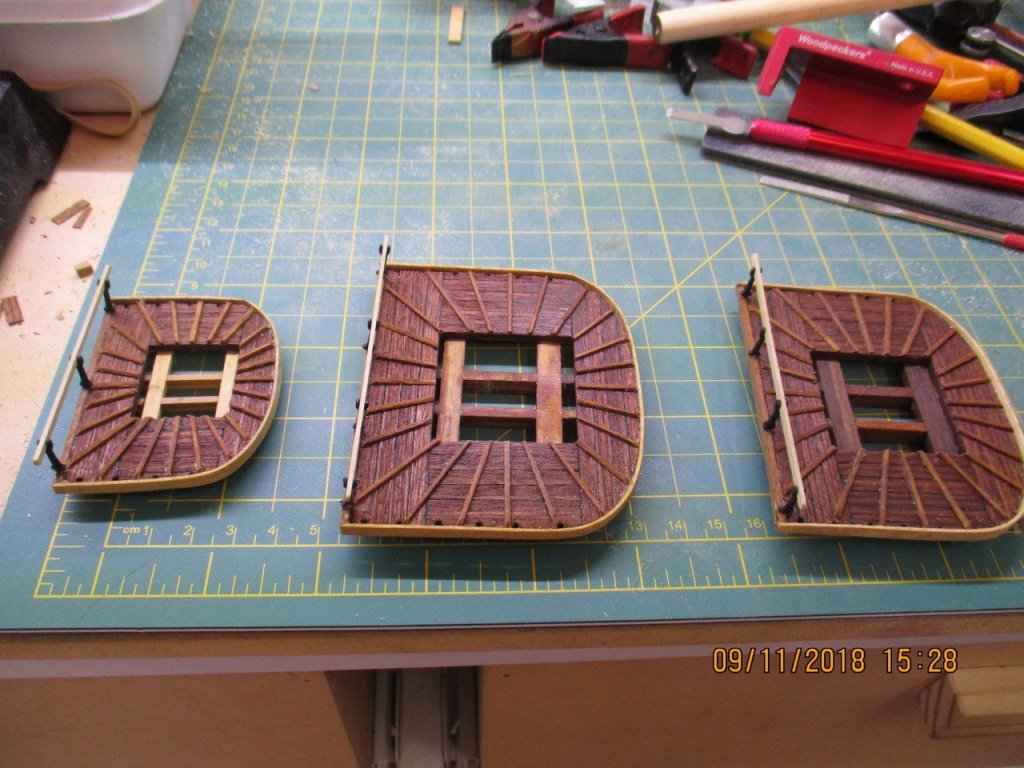
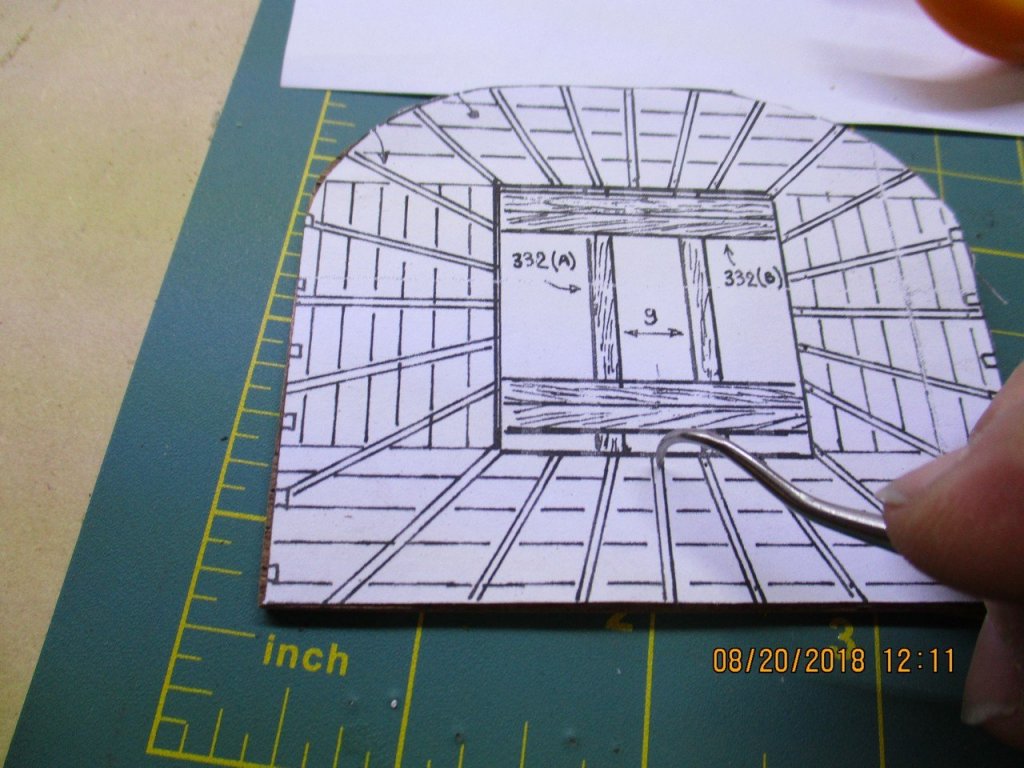
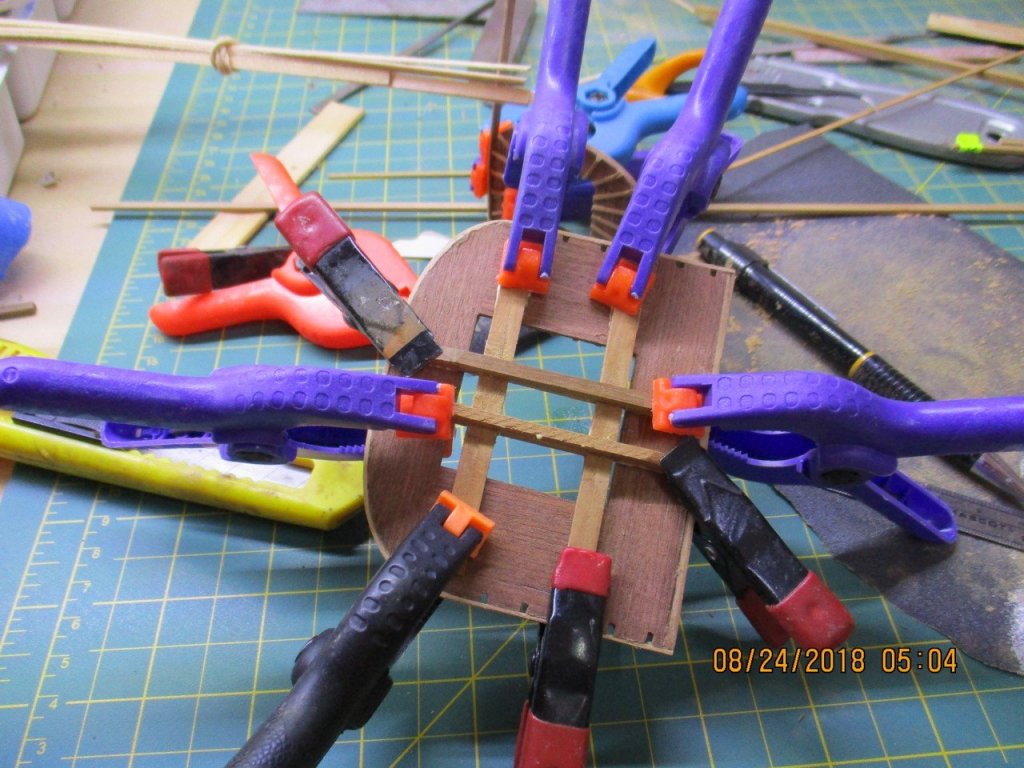
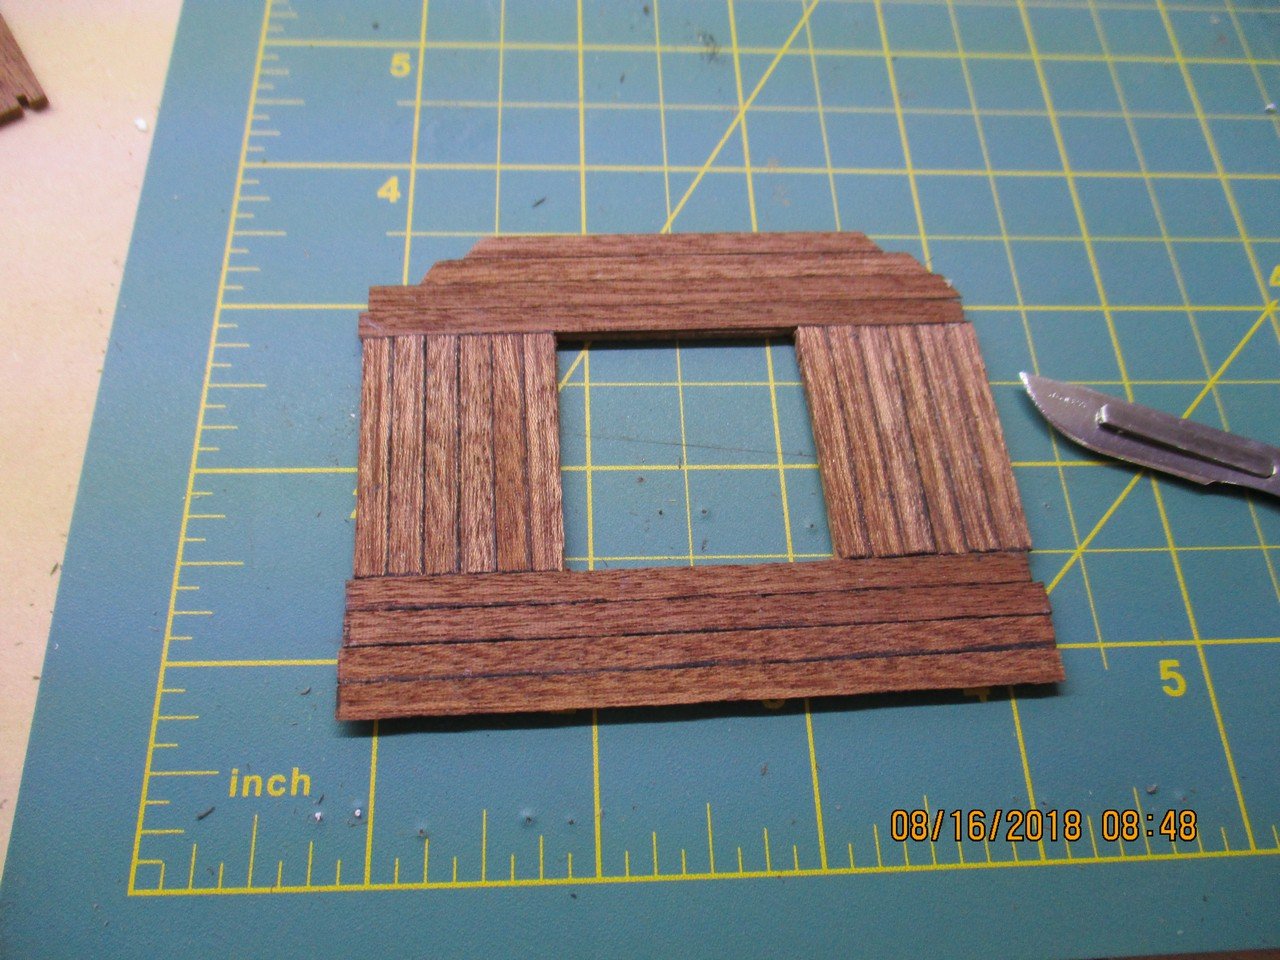
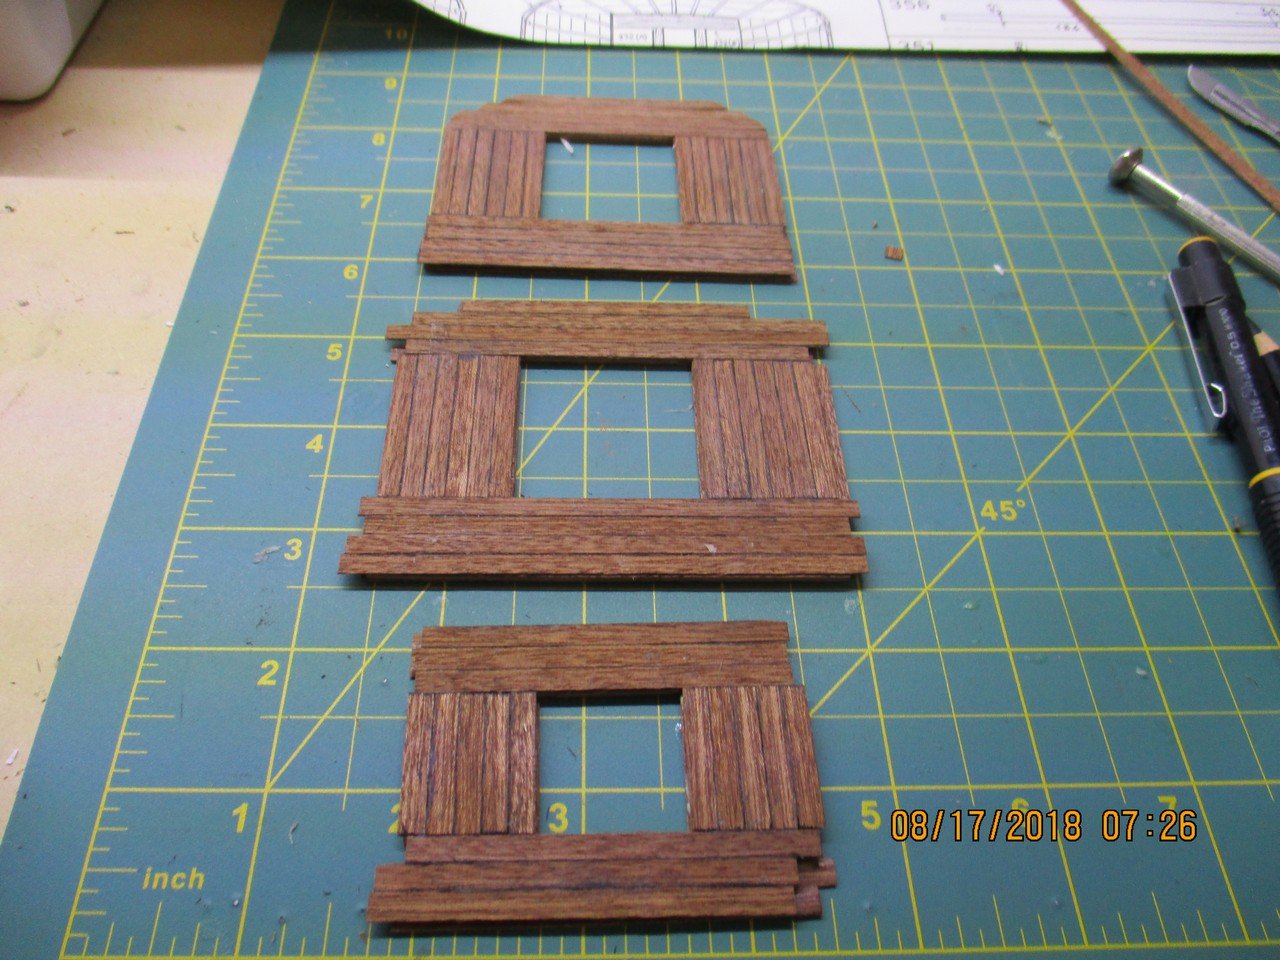
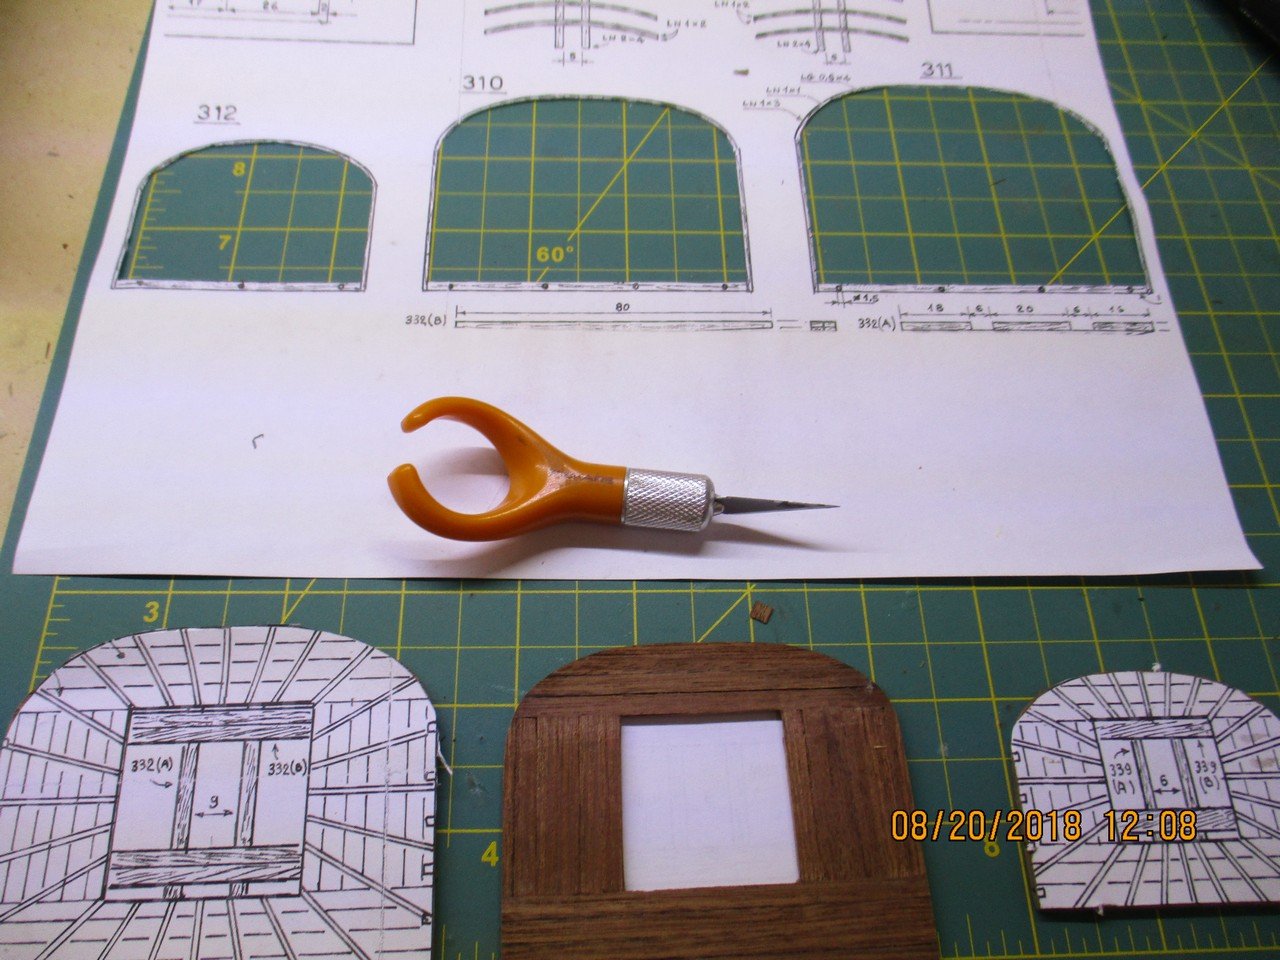
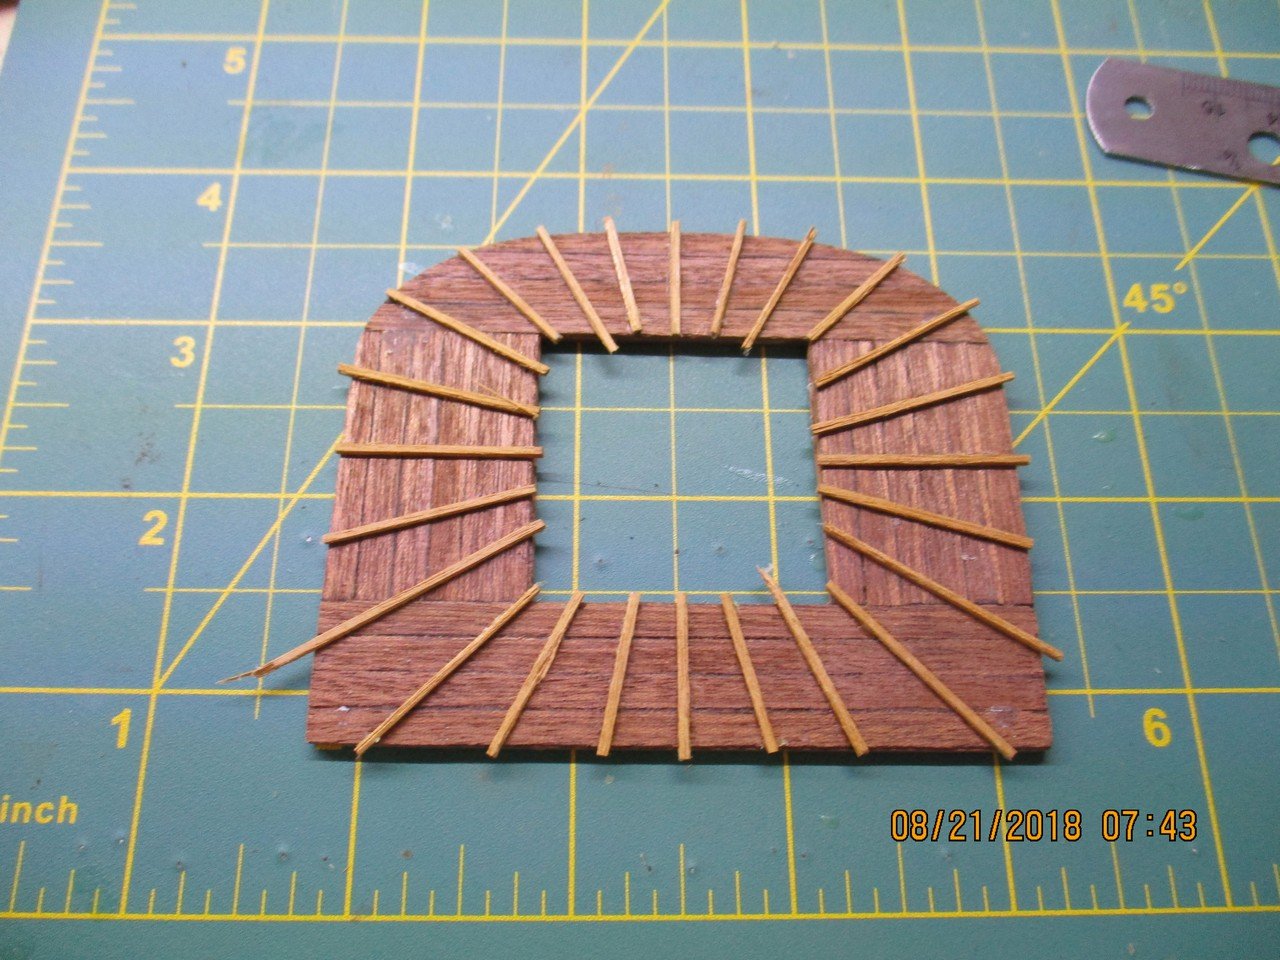
Update on the build. Making of the crownests. Photos are self explanatory, I think
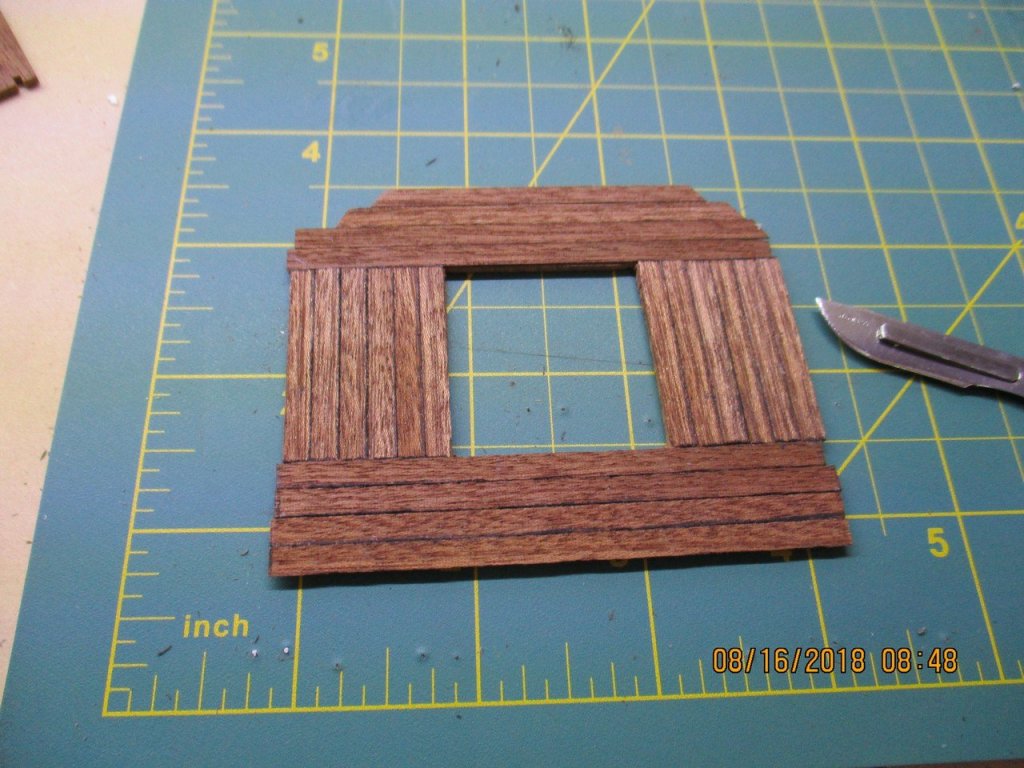

By using a copy from the plans, I placed a small dent on the platfor with an awl, which allowed me to place the thin pieces of wood at the correct distance.

Terrible wood here, by the way.


Using magnets to press the sides.
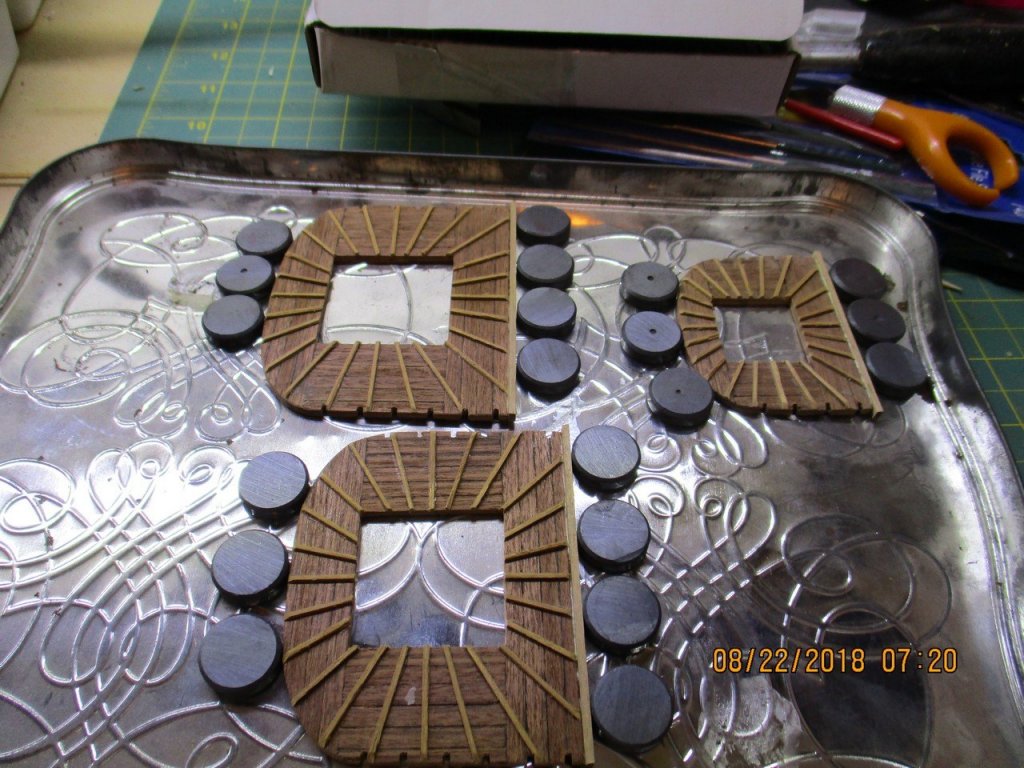
And a rubber band
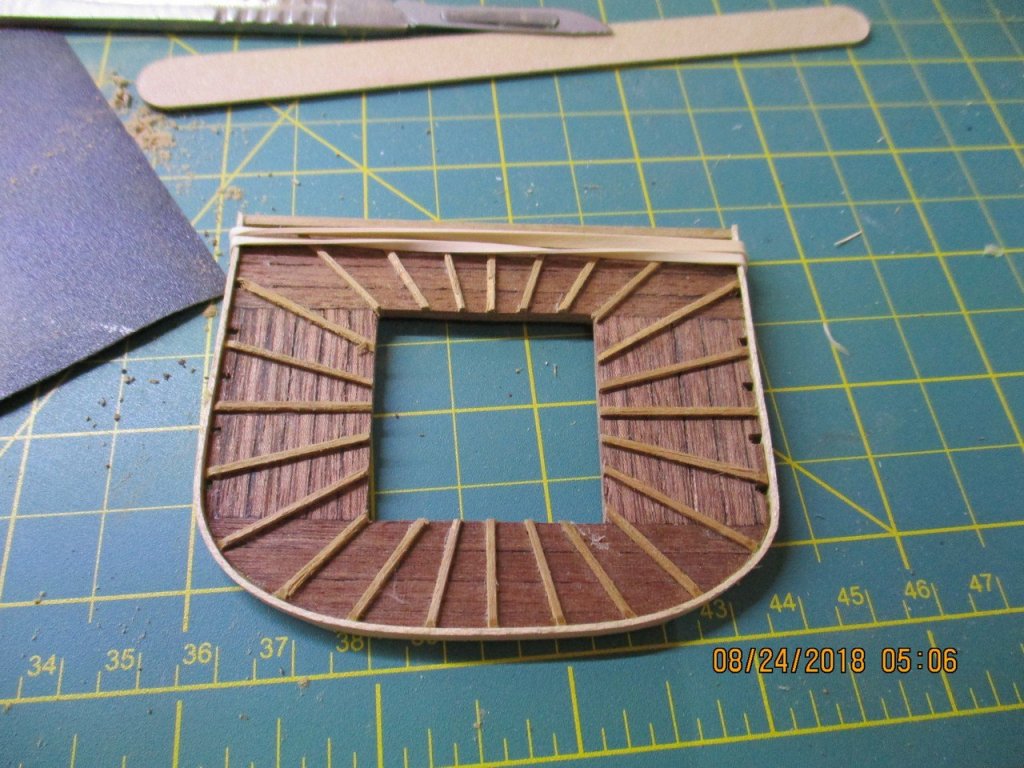
It's been said: you can never have too many clamps
-
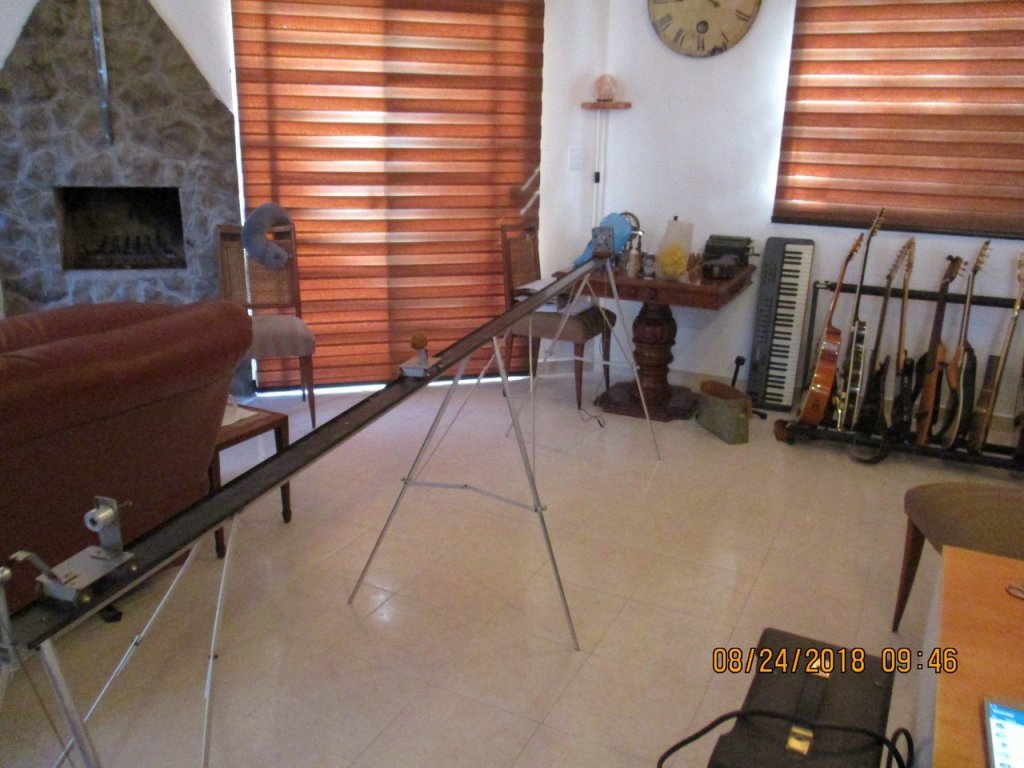
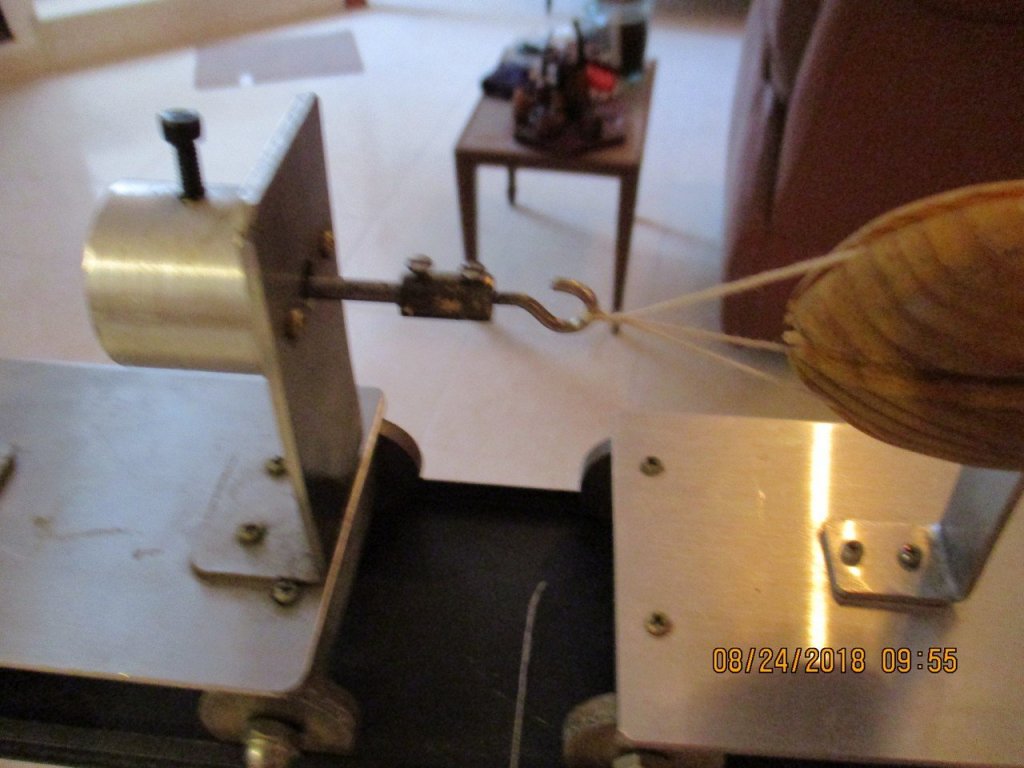
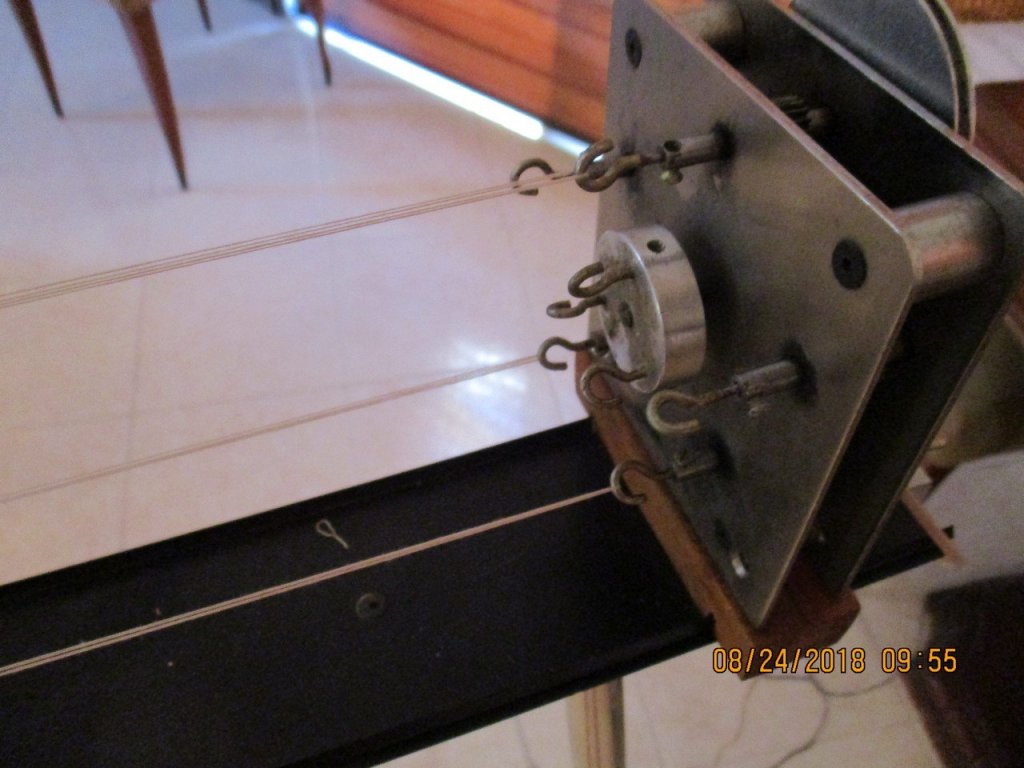
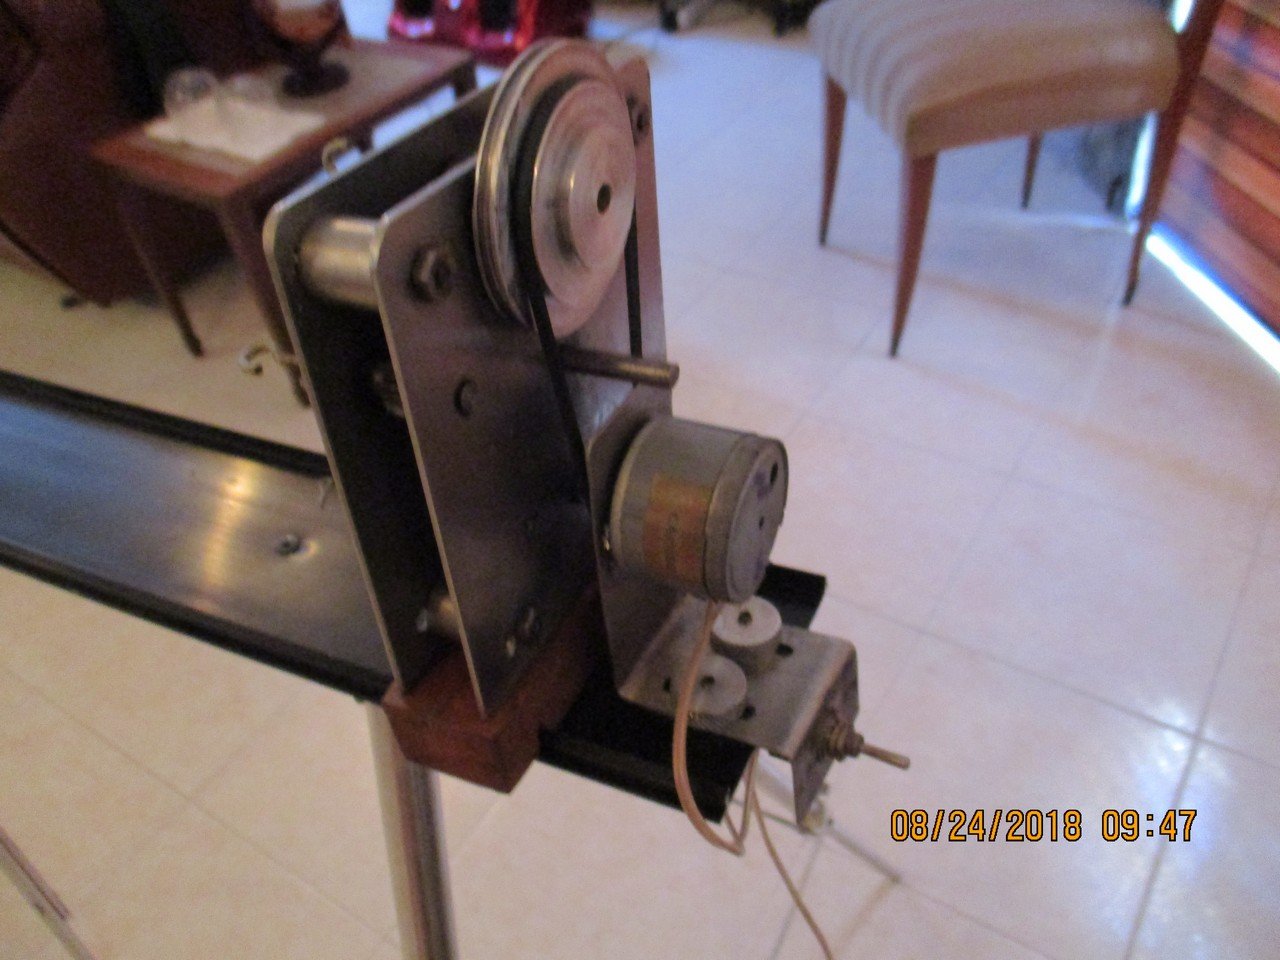
Small update and my ropewalk machine
Hello all. Here is a small update on my RL build. I will show you also the machine I use for making ropes, its pros and cons.
I'll start with the machine:
This is a wide view of the machine. It was made by a friend of mine who owns a metal-mechanic workshop.
I purchased the Byrnes and the Domanoff's. I spent a fortune on those, and to me, they don't make better rope than this one.
Con: It makes a fixed length of rope, so every time you make a rope you need to start all the threading process again.
Pro: The winding process starts by itself when the twisting of the threads is strong enough. This makes for a very tight rope.
Since you use a single piece of thread for the whole process, the tension in all the threads or strands is the same, which makes a very even rope.
Photos hopefully will clarify this.
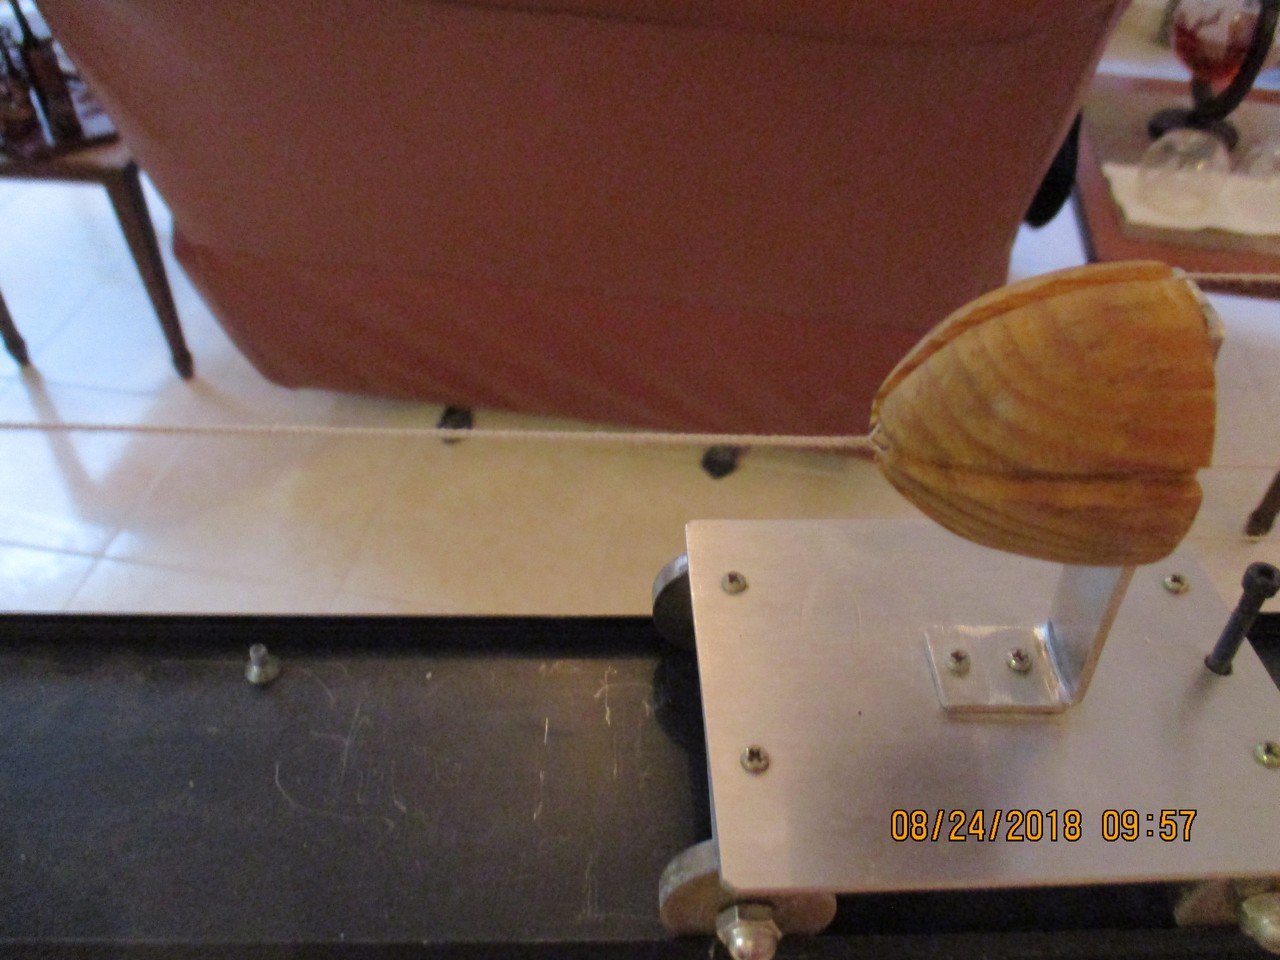
This hook is free to turn. You start the threading here.
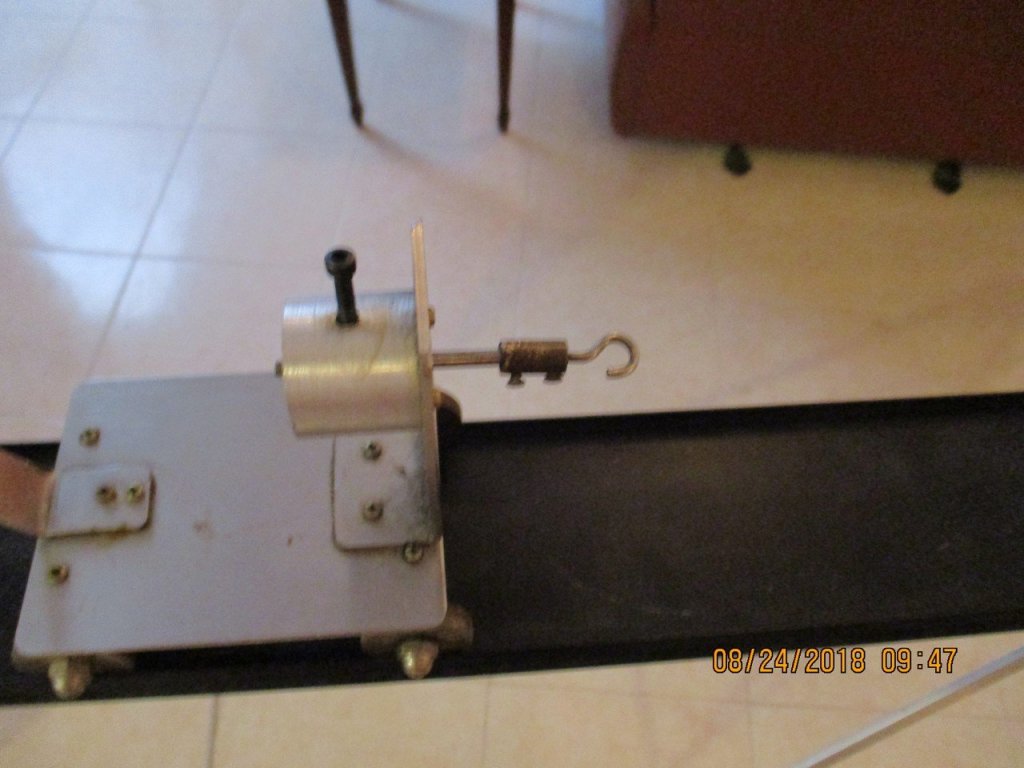
This is the planetary set of gears and hooks.. You start at the first (above photo) hook, bring the thread to one of these hooks, return to the first hook, back to the second planetary hook and so on. One single thread used.= even tension.
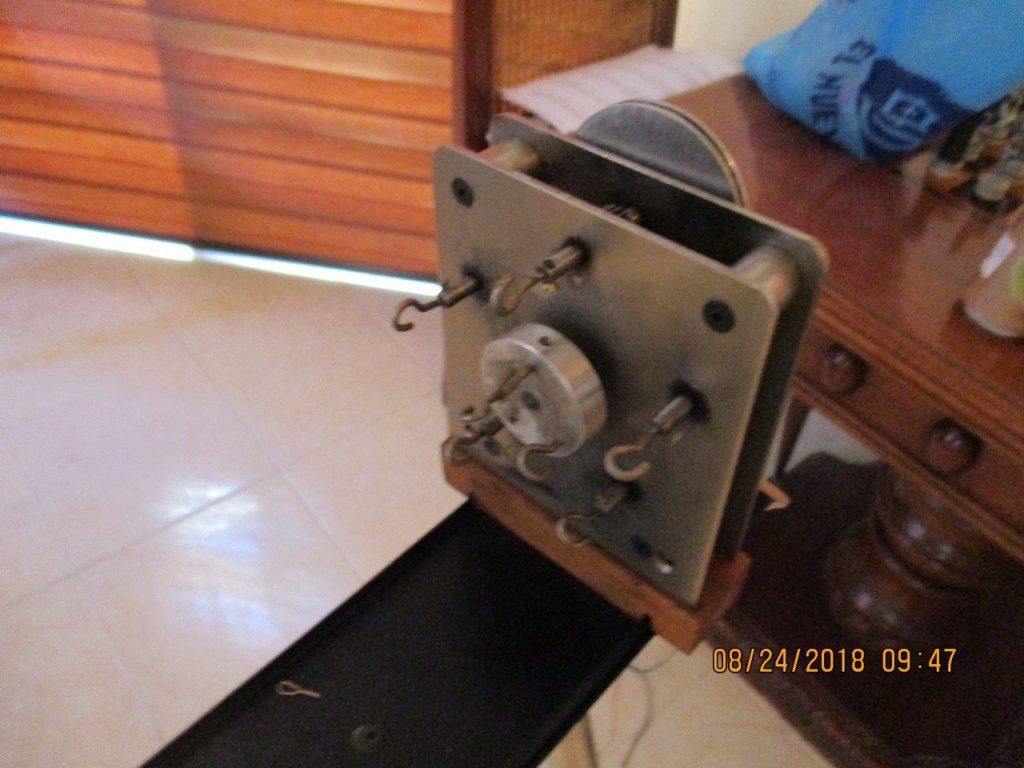
This is the motor and band assembly. The switch allows for forward or backward turning to make left or right handed rope.
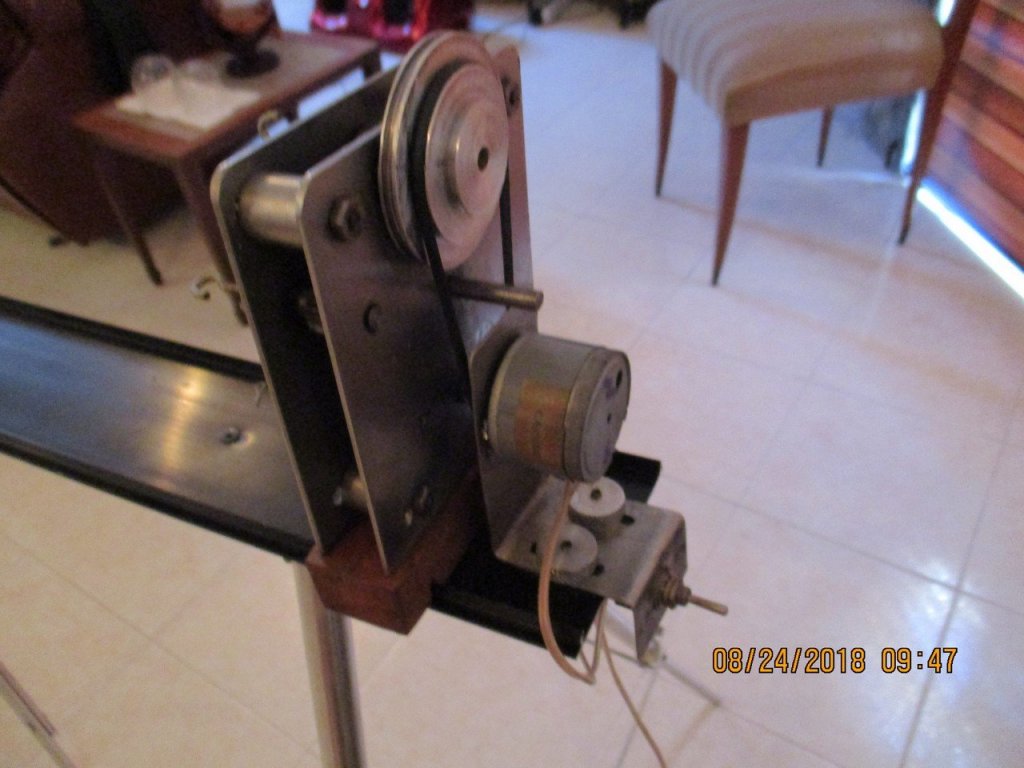
Here I am starting a 4 x 3 rope. This means that there are 3 lines of thread of 4 strands each. (Am I making any sense? ) (And sorry fuzzy photos)
What you see here is four threads in each hook, which makes for the 4 x 3 rope.
Here the rope starts to be made by itself, due to the tension generated by the twisting of the hooks. Since this process starts by itself when the tension is enough, this makes for a very tight rope.
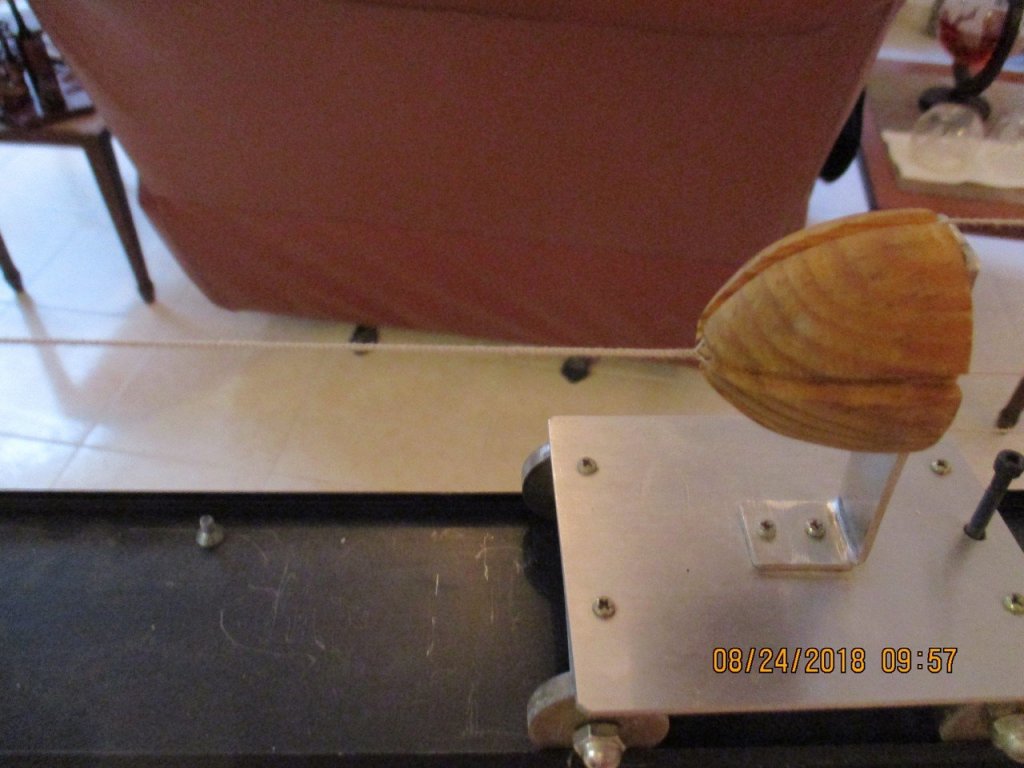
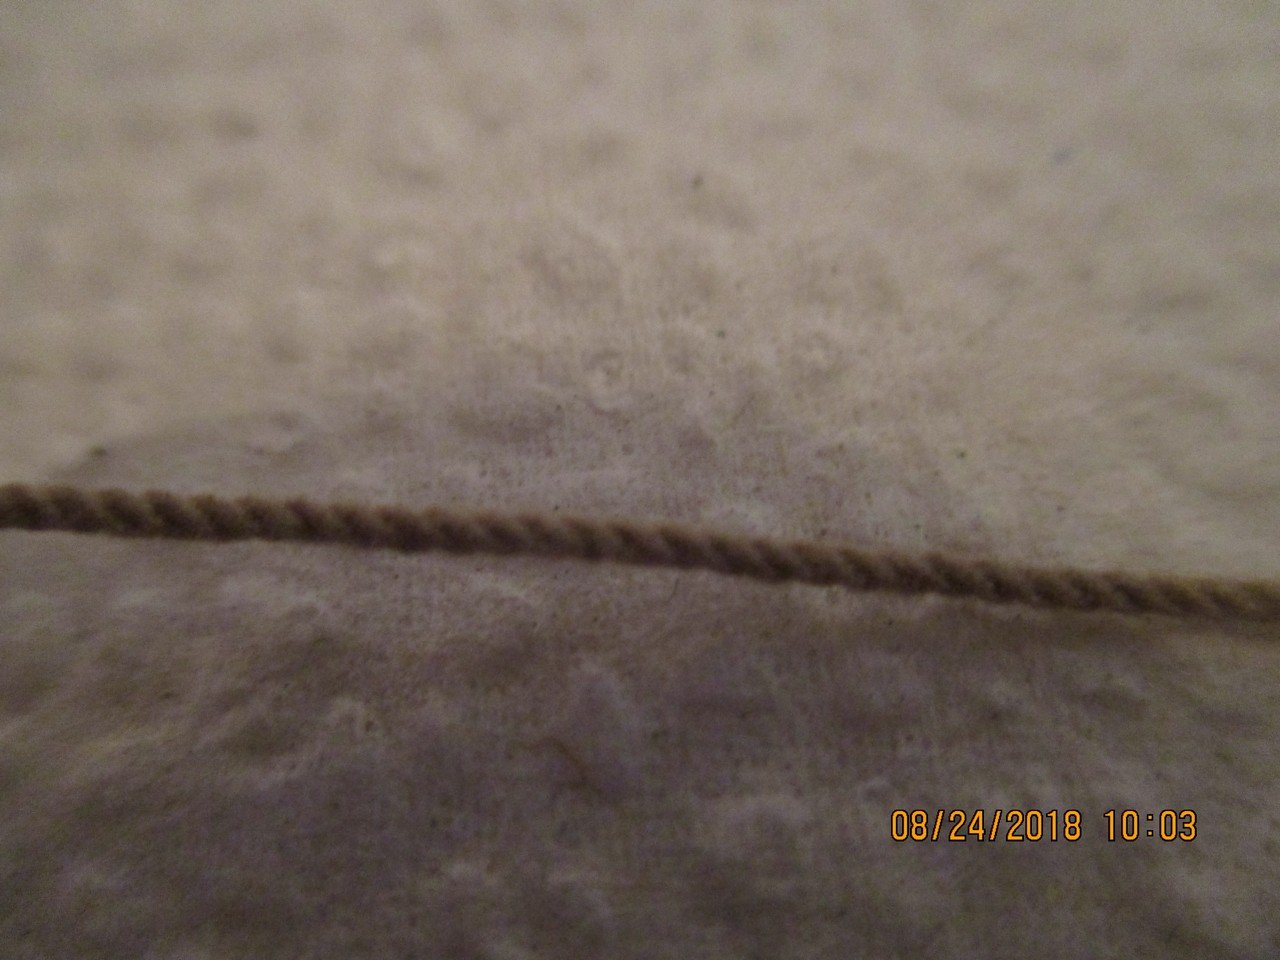
Here is the result. This rope is actually made by 12 strands of thread. And you can put 4, 6, 8, strands per hook, making rope of very different sizes.

- BANYAN, russ, marktiedens and 2 others
-
5


Royal Louis 1780 by Ulises Victoria - FINISHED - Mamoli - Scale 1/90 - French 126-gun ship
in - Kit build logs for subjects built from 1751 - 1800
Posted
Small update as of Nov 26 18
Working with Chuck's serving machine. Definitely a lot faster.
All my tropes receive the "lighter flame treatment" Some people use wax to eliminate fuzz. In my opinion this method only "disguise" the fuzz, but it's still there. With the fire the fuzz is gone... period... forever.
Here is approx 1.30 mts of served rope.
Progress on the bowsprit. This is the most complicated part of masting.
Thanks for watching. Will add more photos soon!!!!