Search the Community
Showing results for tags 'Victory'.
-
 So my first build log. This model was actually a present to my father. He started the model and got as far as completing the frames and orlop deck. But he passes away a few year ago. I recently found his started model. So I will complete it for him. I've been following JeffE build of the same model and will "borrow" some of his ideas. As his build is turning out beautiful. As I model on and off as time and life permits. I'm counting on the knowledge and encouragement of this group to keep me progressing 🙂 So away we go.
 -
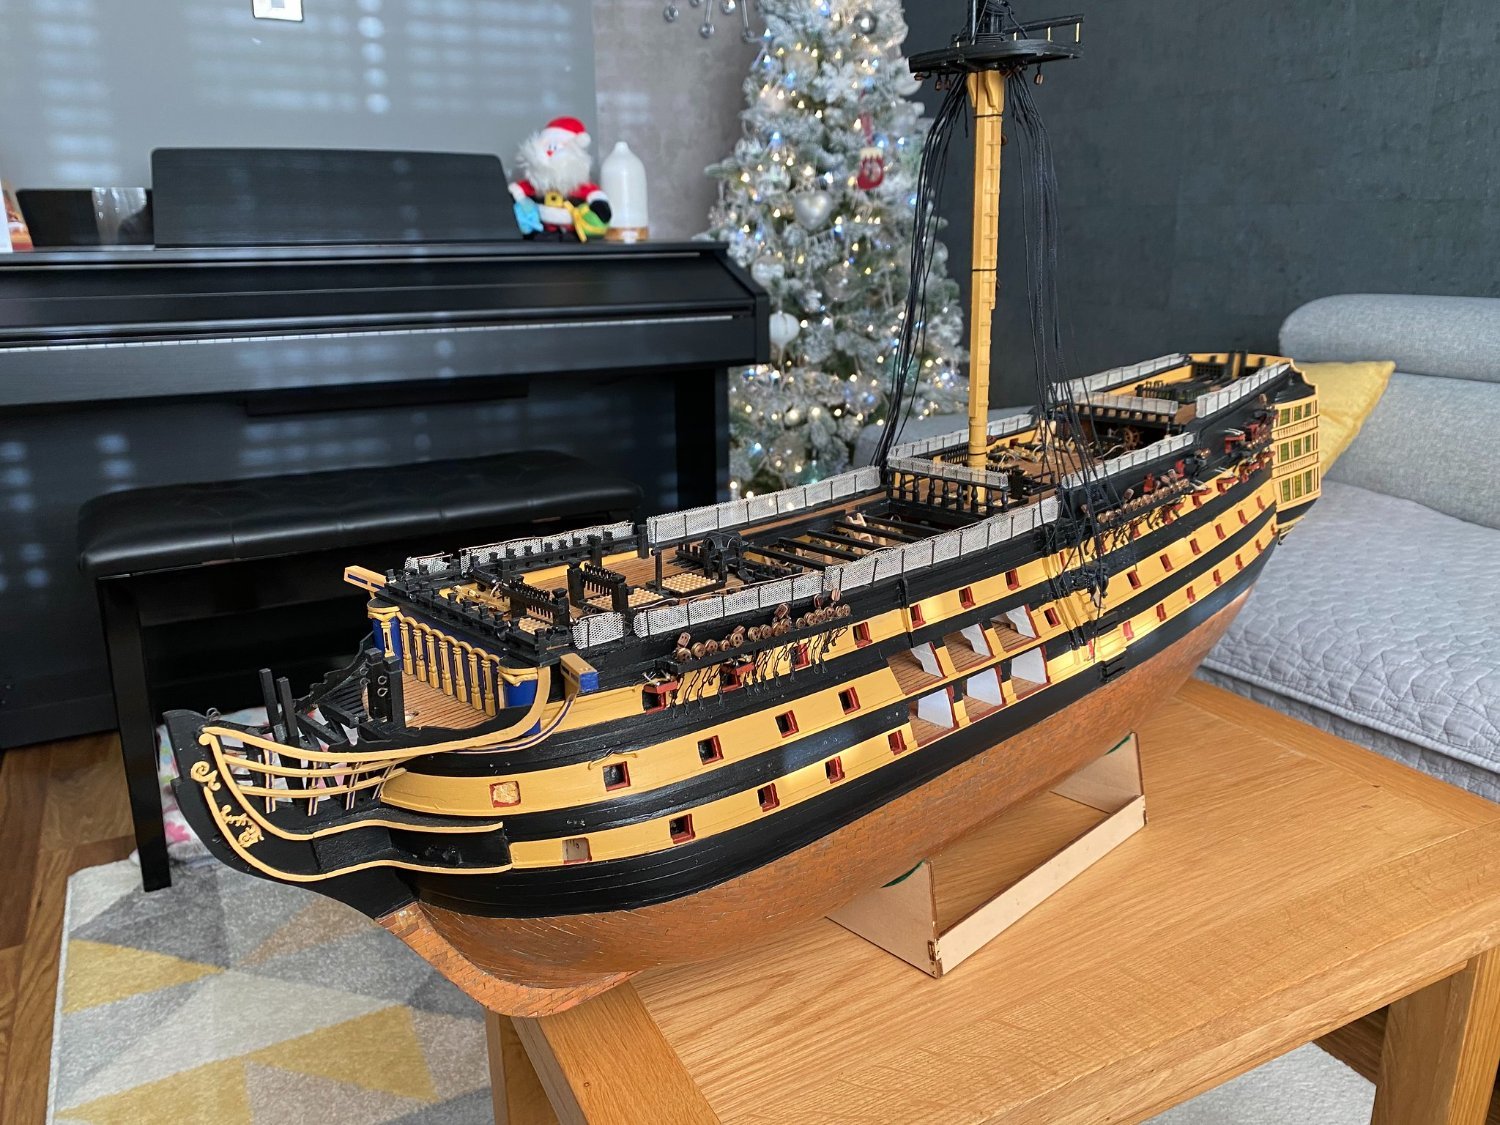
 As I move into retirement (and the peasants rejoiced) I had wanted to spend some time focusing on rigging. Well, I was given this Heller Victory with the hull pretty much done. The backstory was the gentleman had passed away and this was picked up in an estate sale for next to nothing. His work was superior and once I saw the hull I decided this was a good subject for my goal. There was the inevitable broken components but that was largely confined to the royal masts and (of course) the jibboom. The accompanying box of parts was incomplete but I have another 1.5 of these in the stash (bit of a story there). I would have done some things differently (like the deck isn't painted) but for what I was going to use if for and for actual looks that was fine. I have a friend that already has asked to have it upon completion for his library at home, which is perfect. I have dissected the plans and have defined each and every line so am over that hump. I did notice some differences to actual practice. I have a set of the plans that Longridge uses in his book (thank you Uncle Leo) and have defaulted to that presentation where practical. For example the foremast stays did not include the Breast Backstay so I am adding that. Not going crazy or over the top but where it makes sense will make those changes (for example, will use the supplied plastic blocks). I looked through my stash of 'rigging' line and have chosen to use 6 types. The Heller supplied line is white and didn't want to dye. So this morning after getting the remnants of the broken pieces removed and things prepped, went ahead and primed the necessary replacements. I am using Vallejo acrylics. It will be interesting to see how close I can get to the existing yellow shade. I should be working on this at least 2 days a week at a minimum. My first task is to scratch some open and closed hearts for the fore and main mast stays. These seem pretty iconic and need to be there but aren't included in the kit. Stay Building My Friends, Mark
.JPG.79990ac9a03ccb5863611932cf047da2.JPG)
.JPG.d202681a6ef3aee1ec9fa793cfe4a452.JPG)
.JPG.082ebe4de74ac127de97aca00a15e0c5.JPG)
.JPG.1935c3259708a5afe50dd95635322ff2.JPG)
.JPG.569333ad8409a308ff435f633ba2b67a.JPG)
.JPG.5c6fb467d3cc582a9de7ef92c1c78d54.JPG)
-
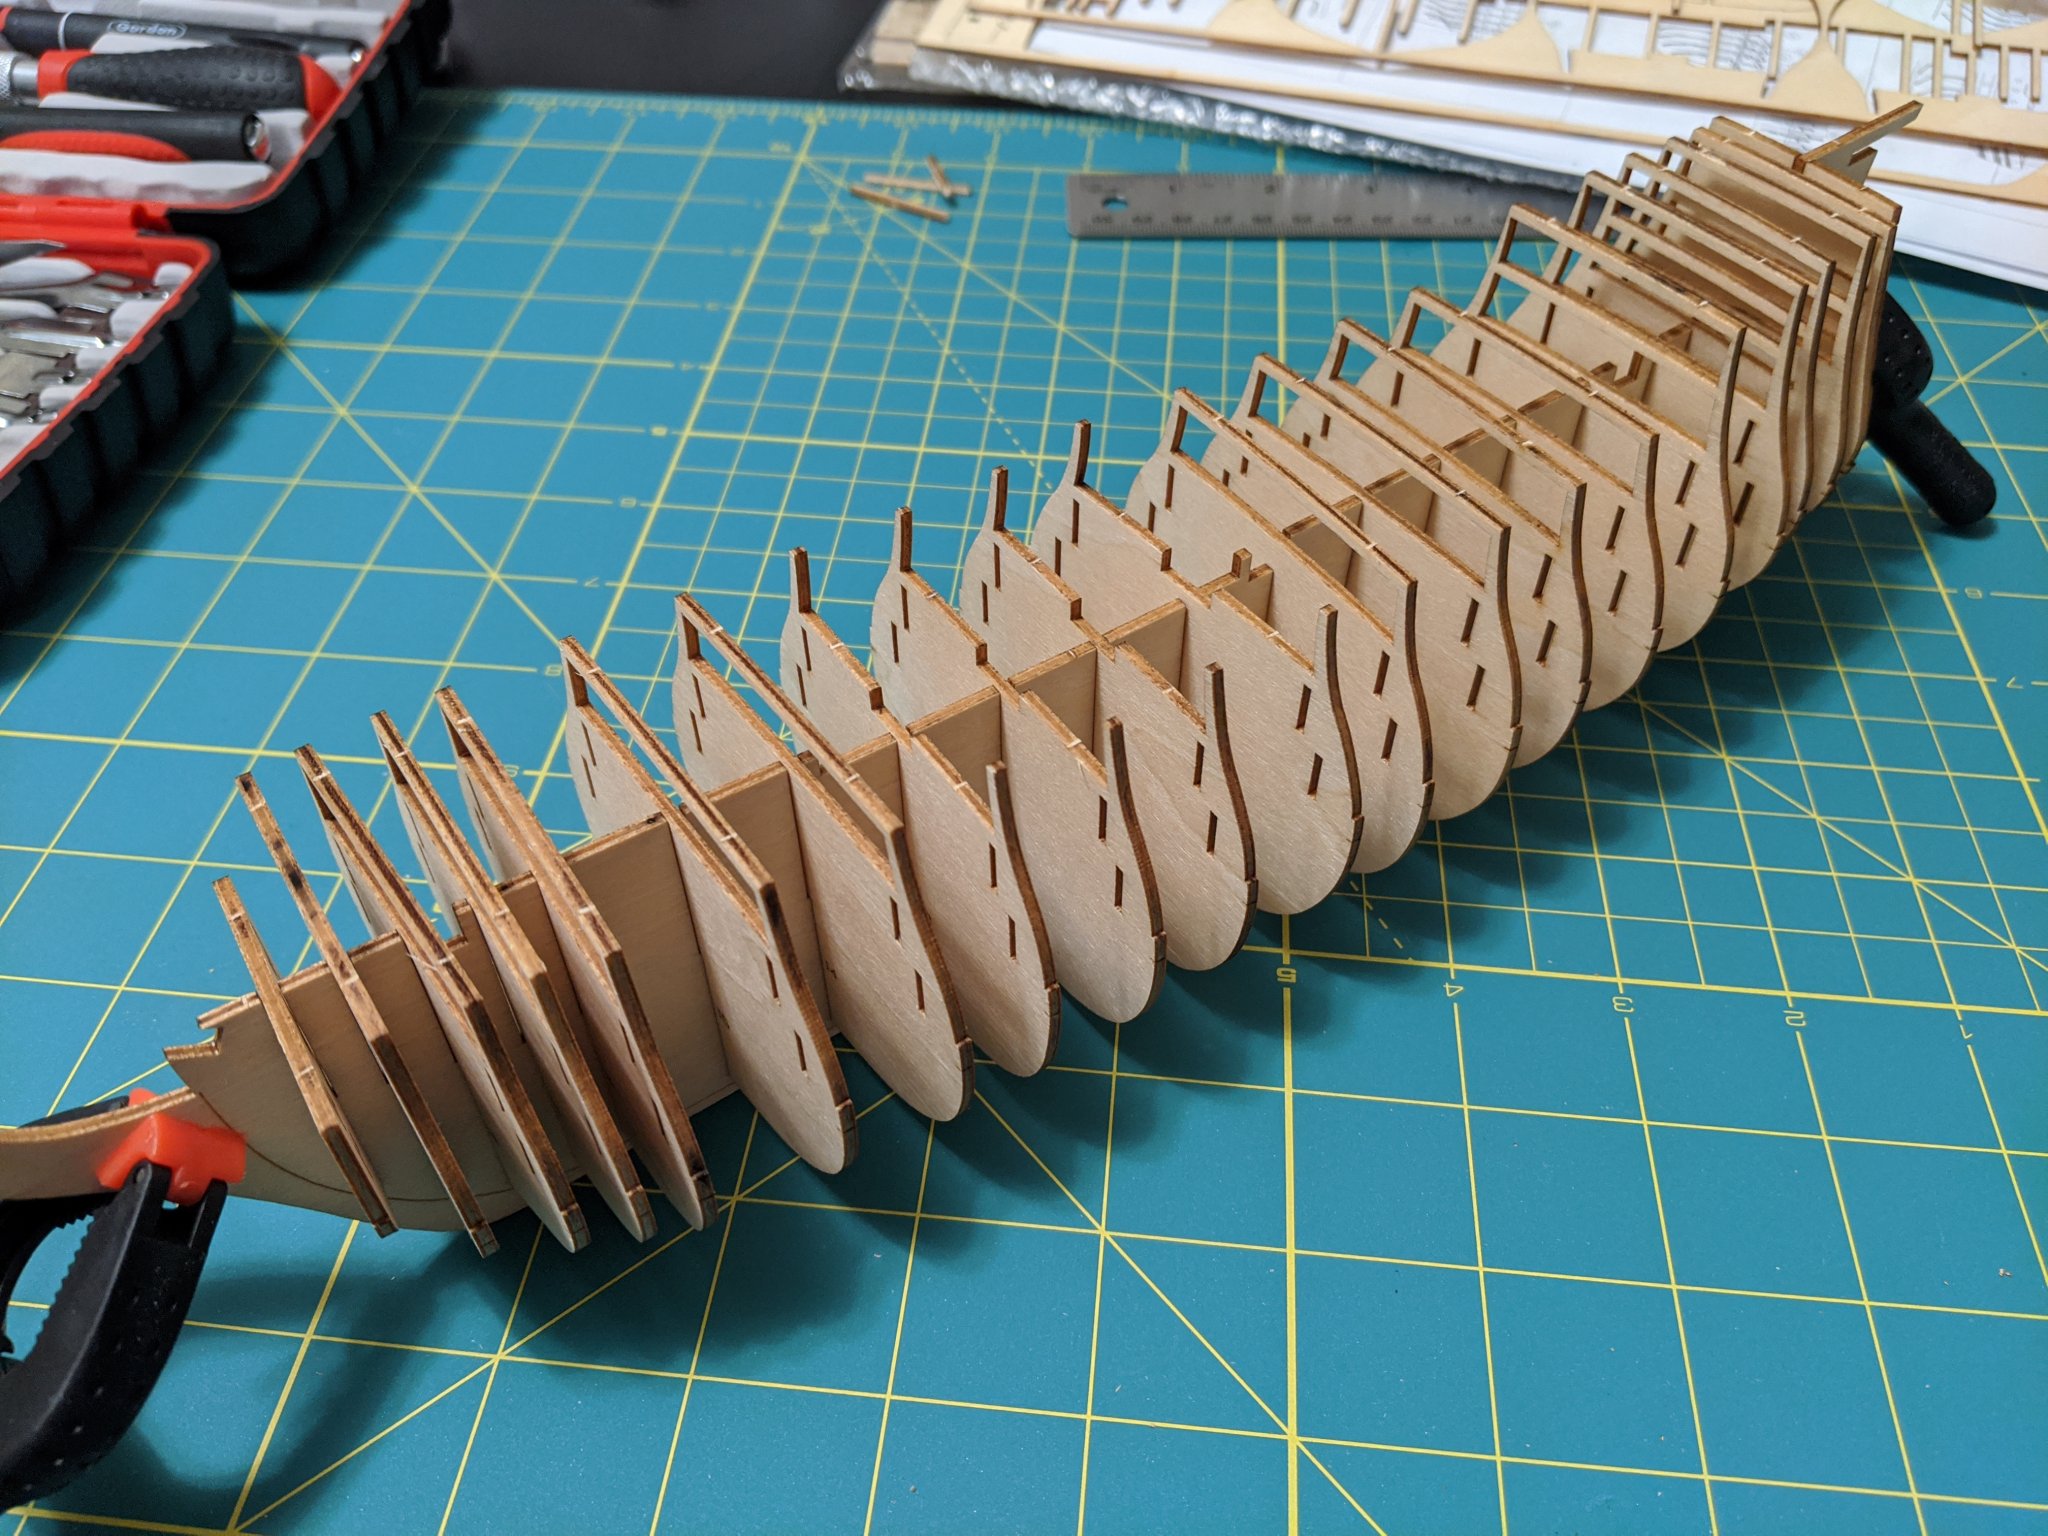
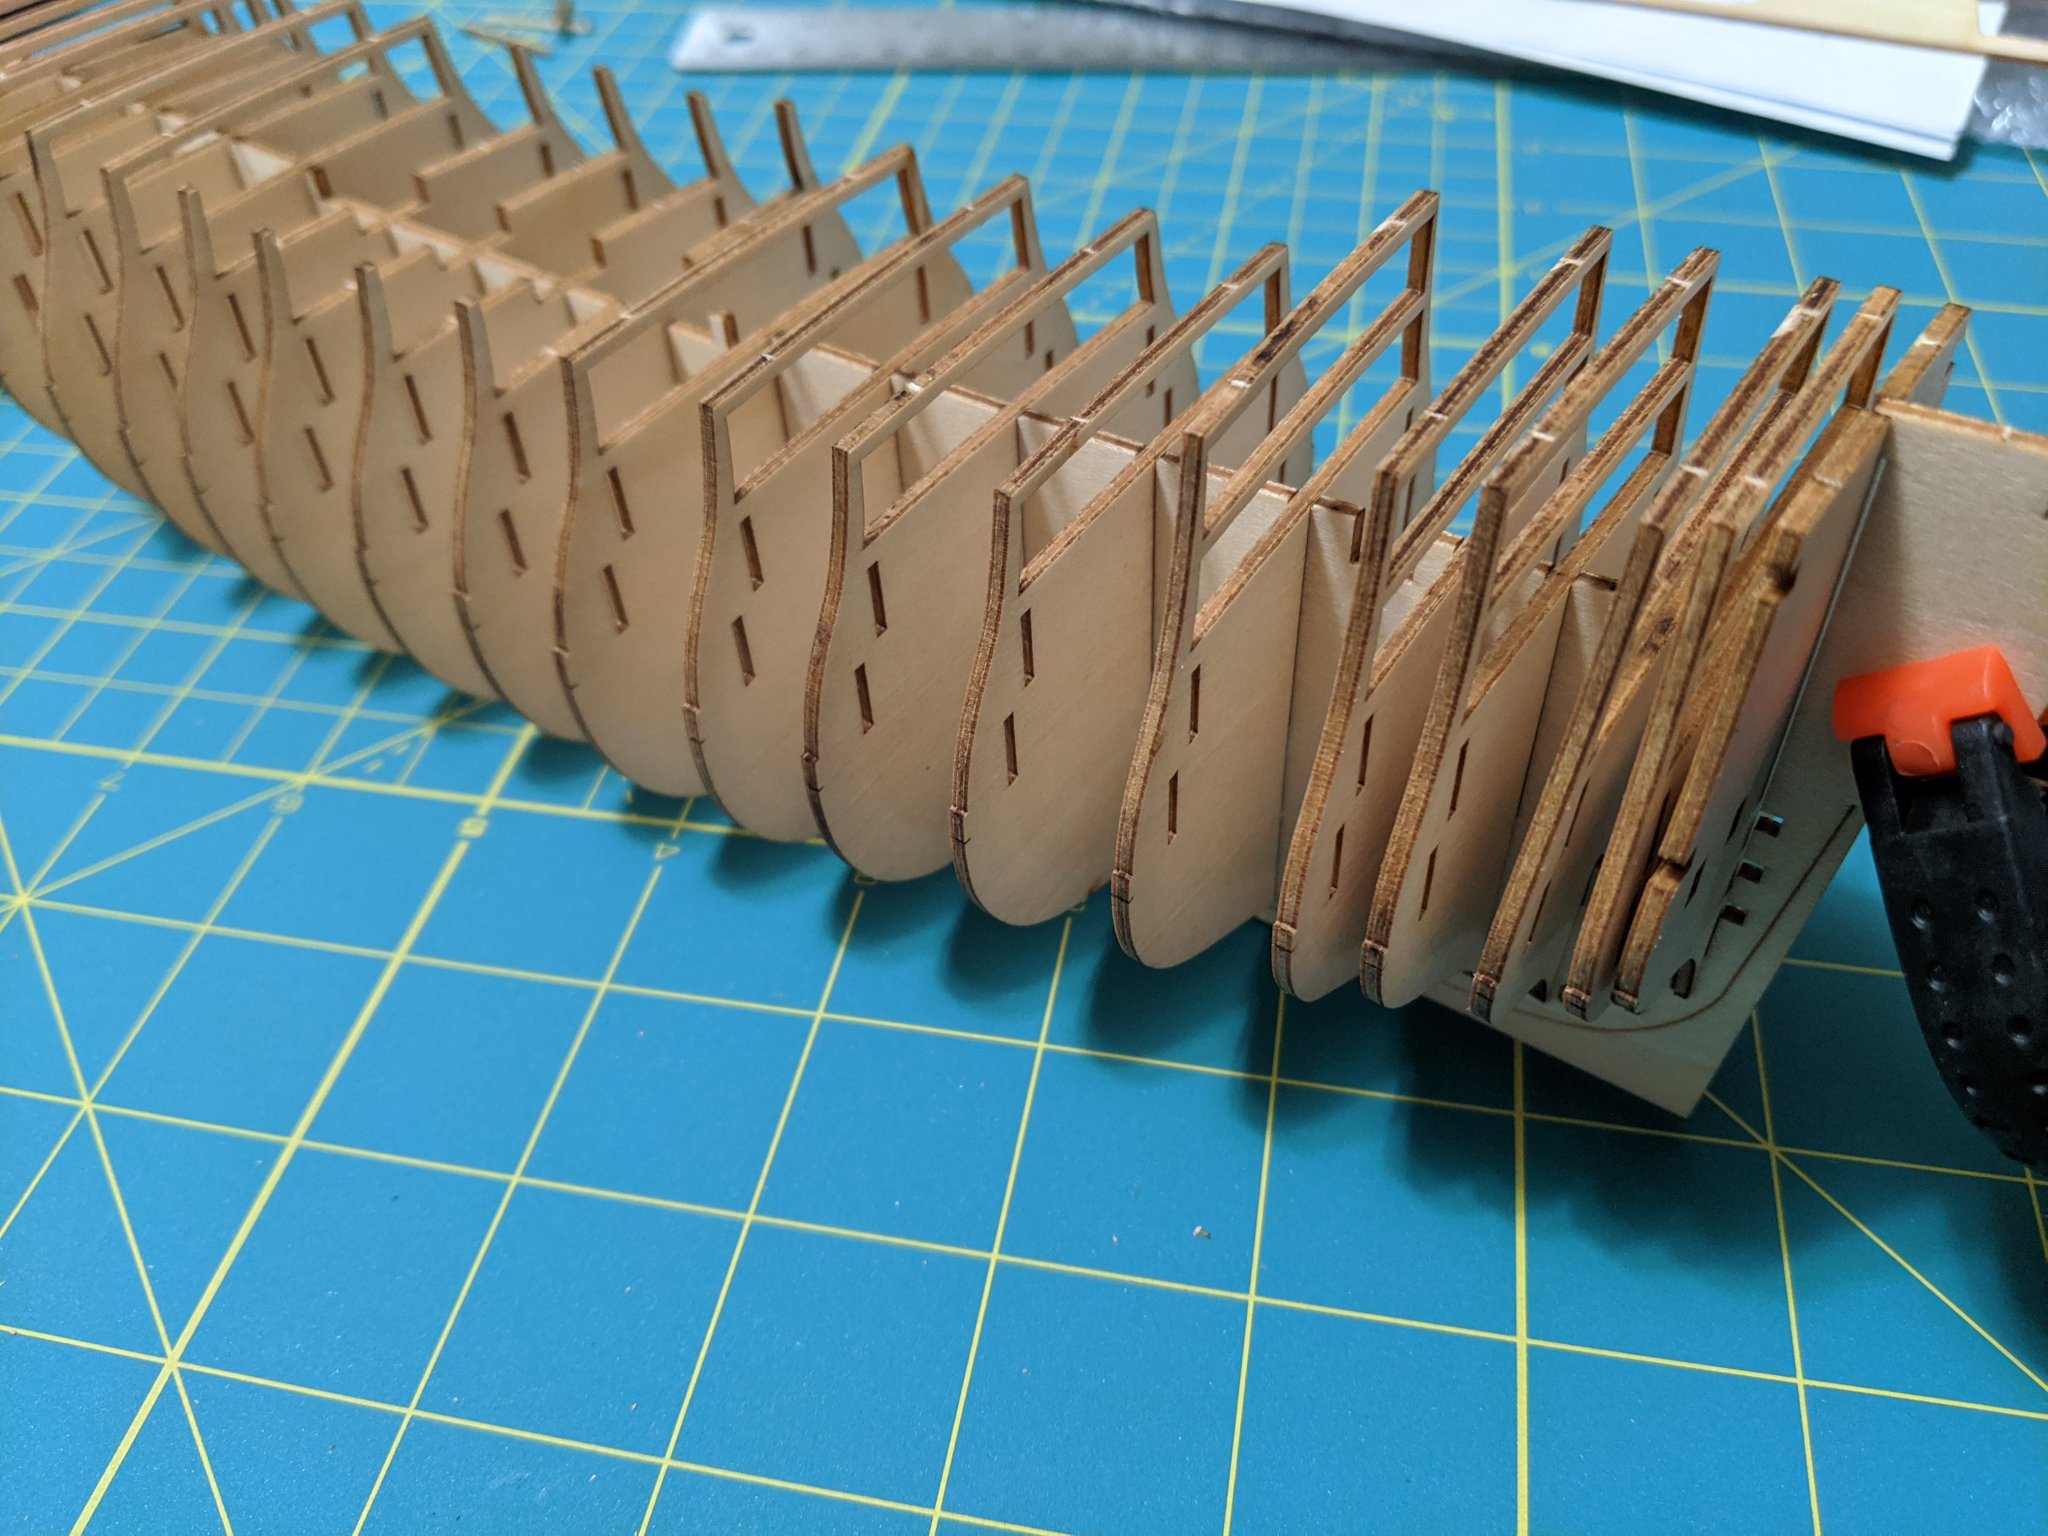
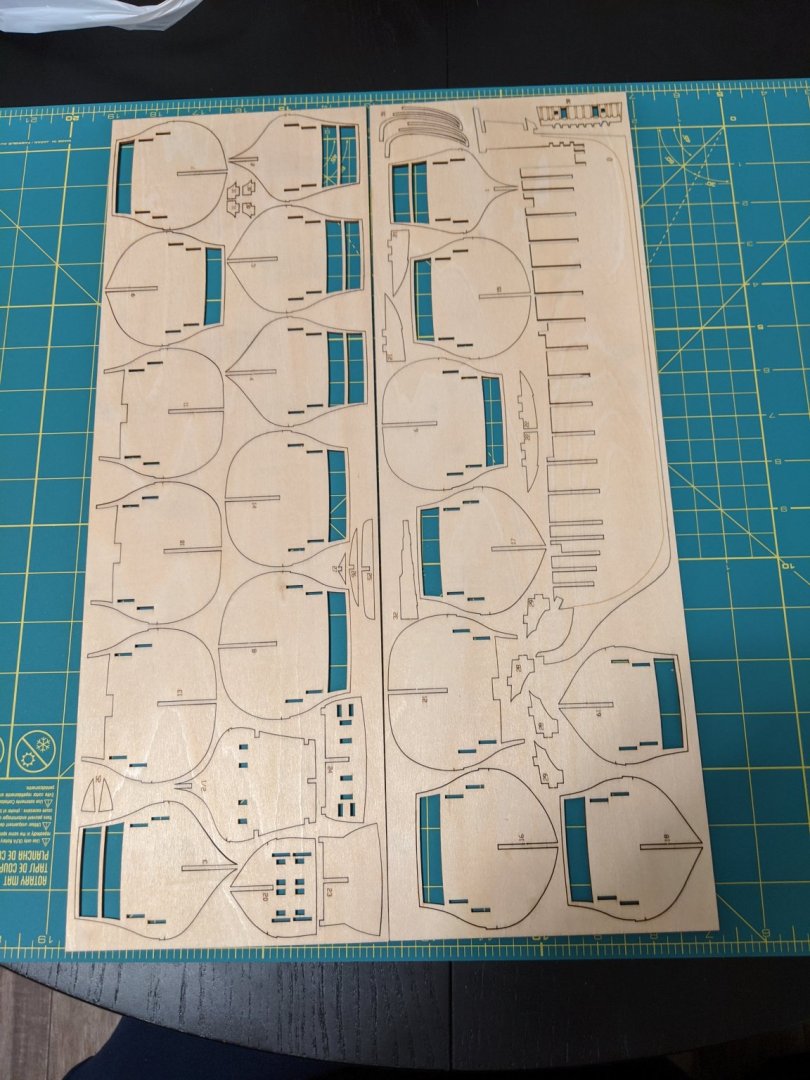
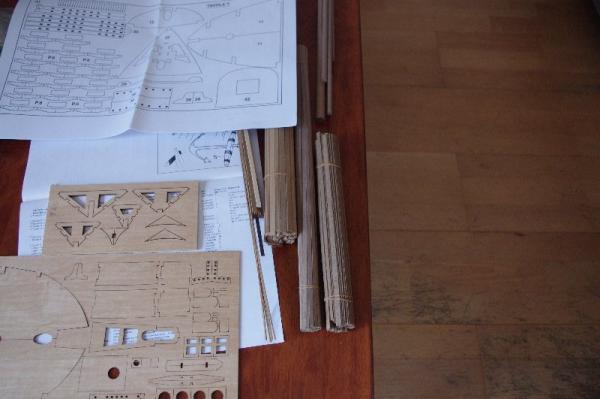
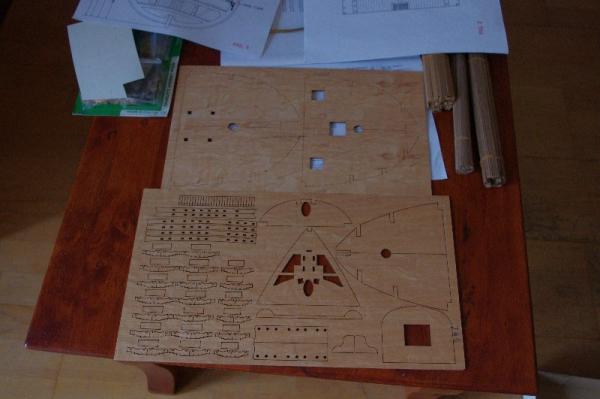
 This is my seventh build. I do believe it's above my skill level but for better or worse I'm going to give it a try. I've never done a second planking so this will be interesting. Also, the sheet plans are all in Italian. I've been using the Google translator which works really good. I started using a soldering iron with a jig that I made for the bending of the planks. I've found that water soaking the planks before I heat them to bend work quite well. More photos to follow as I progress.


- 5 replies
-
- 1
-

-
- Panart
- bow section
- (and 1 more)
-
 Hello all, I Just want to announce that I started my HMS Victory build last January, but have only just gotten around to starting this build log, I'll add a few posts over the next few days to bring the log up to speed of where I am currently (78 hours in) with accompanying pictures. Opening the Box, numbering the parts, building the Slip and assembling the keel and the Hull Bulkheads took me to about 21 hours
- 11 replies
-
- 4
-
-
- victory
- billing boats
- (and 1 more)
-
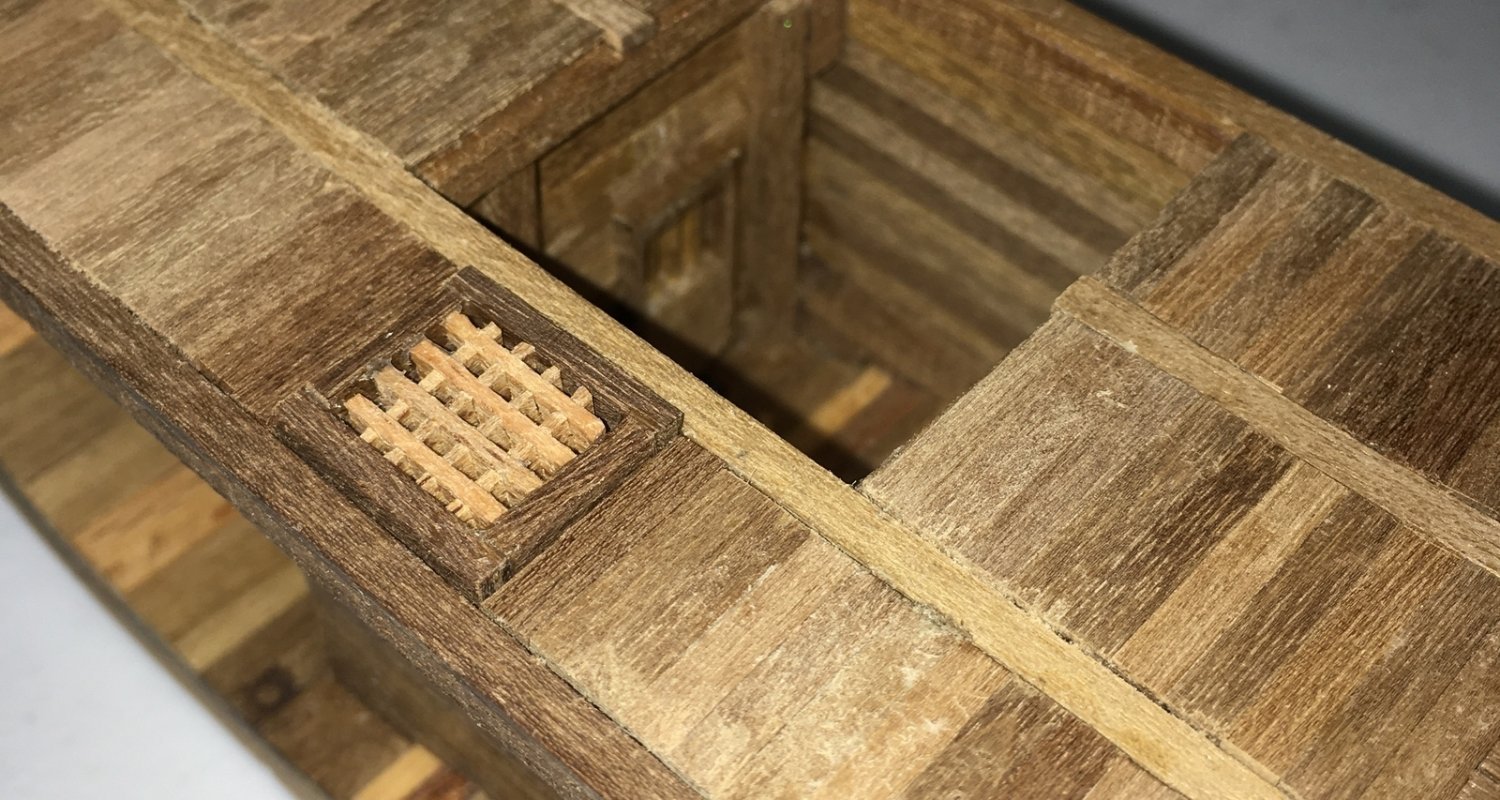
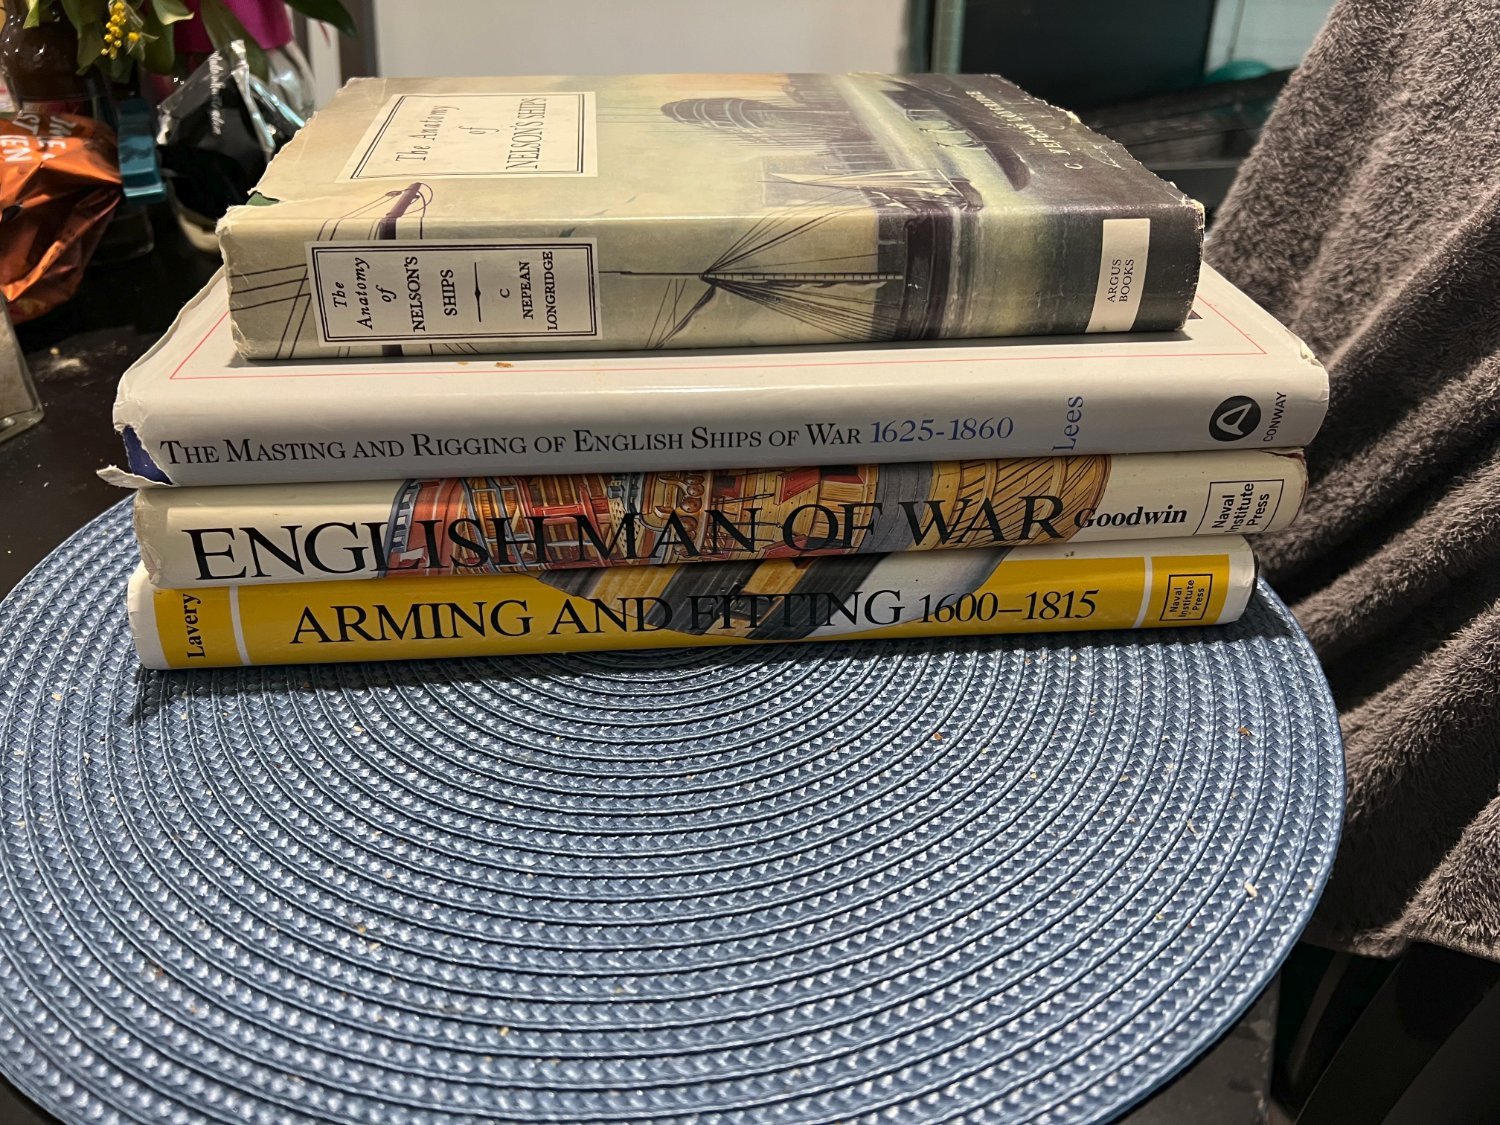
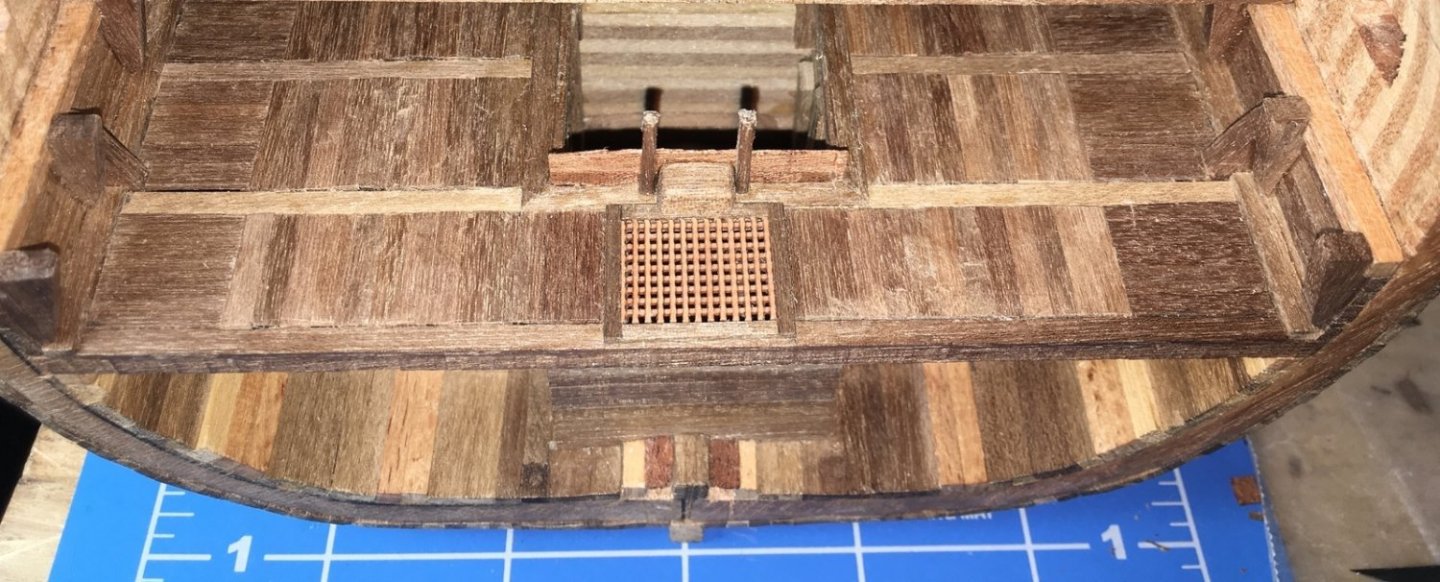
 Hi. David here. I thought I could start a build log in mid progress it that’s okay. I don’t have any photos of my previous work on this, but I’ll start now. I probably should say that this might be more of a “how to avoid mistakes that I made” rather than a “see how good a job I did.” This is going to be a skill building project for me. I know that Victory changed over time so I’m not trying to be perfect but to follow the sources and use my judgement when they disagree or are missing details. I want to make it… well if not completely accurate then at least plausible. And something nice to go on the wall! I also didn’t want to spend a fortune on upgrading it. I grabbed up this kit back in 2007 and set it aside for a while. Eventually I got around to working on it. I followed the instructions in the beginning. I joined the two half frame units, attached the keel and keelson, planked the hold, and added the orlop deck. I then decided it was not very accurate. I put it aside for a time. Around 2019, as I was heading towards retirement, I started getting serious about redoing it and I started my research. Main print sources used so far: · McGowan, Alan P. HMS Victory: Her Construction, Career, and Restoration. Naval Institute Press, 1999. · Bugler, Arthur R. H.M.S. Victory: Building, Restoration & Repair. Her Majesty's Stationary Office, 1966. · McKay, John. The 100-Gun Ship Victory (Anatomy of the Ship). Naval Institute Press, 2000. · Longridge, C. Nepean. The Anatomy of Nelson’s Ships. Percival Marshal & Co., Ltd, 1955. · Goodwin, Peter. The Construction and Fitting of the English Man of War: 1650 – 1850. Naval Institute Press, 1987. · Lavery, Brian. The Arming and Fitting of English Ships of War, 1600 – 1815. Naval Institute Press, 1987 · Peter G. Goodwin (2013) The Application and Scheme of Paintworks in British Men-of-War in the Late Eighteenth and Early Nineteenth Centuries, The Mariner's Mirror, 99:3, 287-300, DOI: 10.1080/00253359.2013.815993 I also did a lot of searching on the web for photographs and YouTube has several good video tours that helped with a few areas that don’t show well in the plans or in any photographs I had seen. I decided to have the forward edge of the model end with the forward wall of the pump room. I didn’t want to try to open the room to show the pumps. The other edge would end at the orlop deck beam aft of the shot locker. On the McKay plans this would be from about station 1? to about station 8? I will say that the McKay plans scale easily to 1:96 but this model is listed as 1:98. I felt the difference was small enough to work around. I bought some additional walnut wood strips and sheets to supplement what came with the kit since I needed different sizes. Sizes I mention in this are how they were listed by the seller in my order, but the actual materials vary a little bit. I don’t have any power tools other than a Dremel tool with a shaper/router table and a Rockwell Bladerunner for home repairs. They are okay for rough cutting and shaping but not for the fine stuff. The hold. The first thing that I did was remove my previous orlop deck entirely. Next, I removed one plank on either side of the keelson to create the limber passages and covered them with thin limber boards. I traced out templates and used the Bladerunner to rough cut some riders from a 1/8” walnut sheet and shaped them with the Dremel. They are not as tight a fit as I would like. If I had something thicker, I probably would have used it. I built the pump house from 1mm x 3mm strips. I put in a door on the port side even though I couldn't get a good view anywhere to see what it looked like. The platforms are 2mm x 2mm with 2mm wide strips. I’ll detail later with hinges for the shot locker lids along with iron and shingle ballast. I planked the exterior up to the level of the orlop using the kit supplied strips. Orlop Deck I used 4mm x 4mm walnut strips for the orlop deck beams, 2.5mm x 2.5mm for the fore and aft carlings and 1.5mm x 1mm for the athwartship carlings. I tried adding the carlings with the beams in place and leaving room for the deck boards to recess. I used 2mm x 5mm strips for the waterways. It ended up uneven in places. I should have built the deck as one unit before installing it. I didn’t paint the underside of the deck but I probably should have. Probably too late now. I cut knees from the 1/8” sheet. For the pump house on the orlop I used 2mm x 2mm uprights with 0.6mm x 3mm strips. I arranged the strips in a louvered pattern. I wasn’t able to leave a gap between each strip for ventilation so just pretend that they are there. I felt the kit grate was too bulky, so I purchased a grate with 0.6mm holes and cut a piece to size. If my math is right the openings scale to 2.35 inches at 1:98. I framed it with 1mm x2mm strips. Kit grate. Pearwood grate. I painted the sides of this deck and the pump house white.
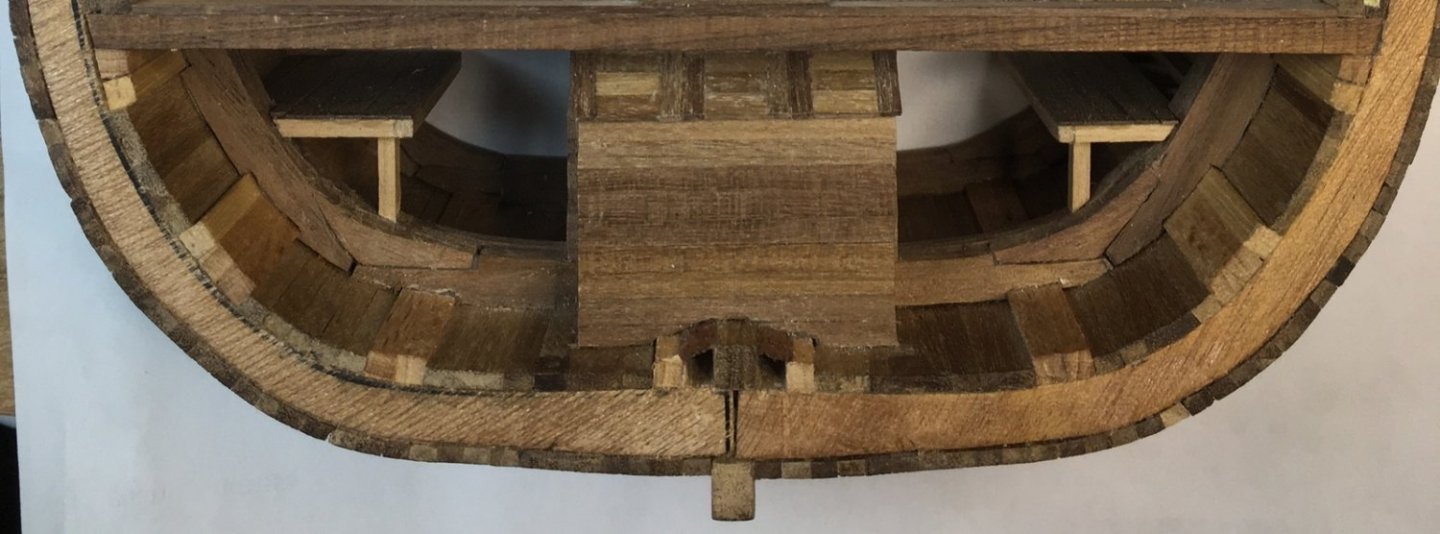


-
 Hi I joined this forum a few months ago and after reading other ship builds I decided to do one myself. This is my first time doing this and would like any help from other members will be appreciated. I've already stated and I know it is going to take along time.
 -
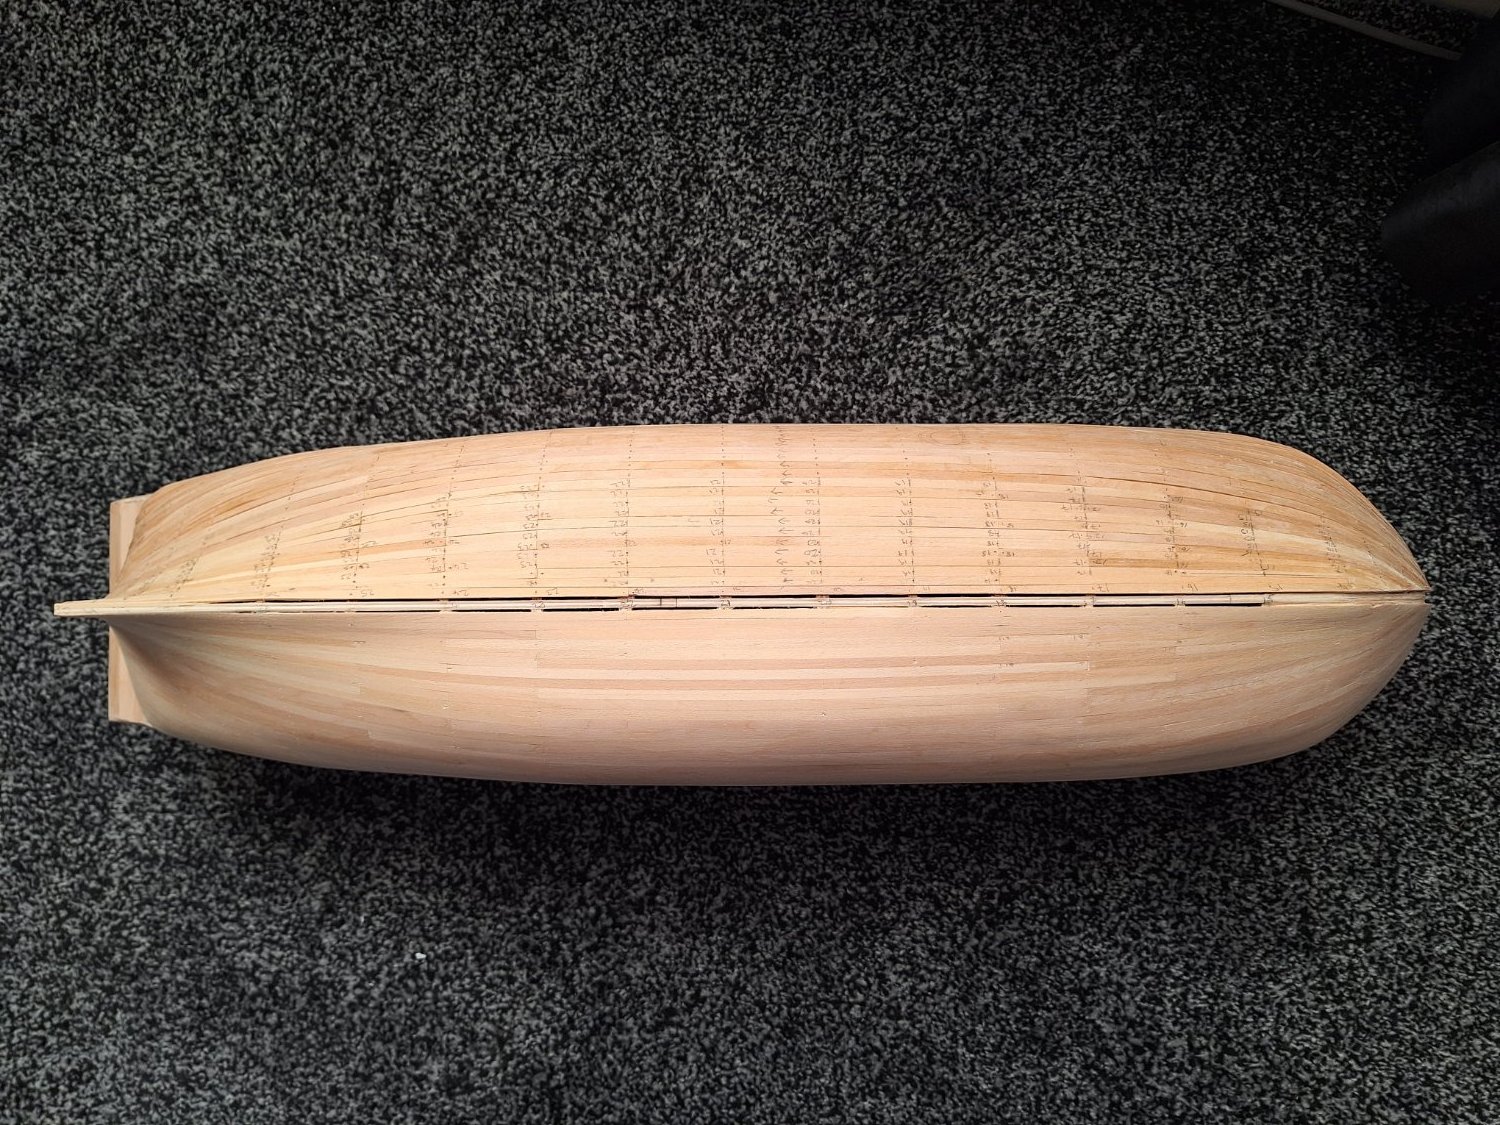
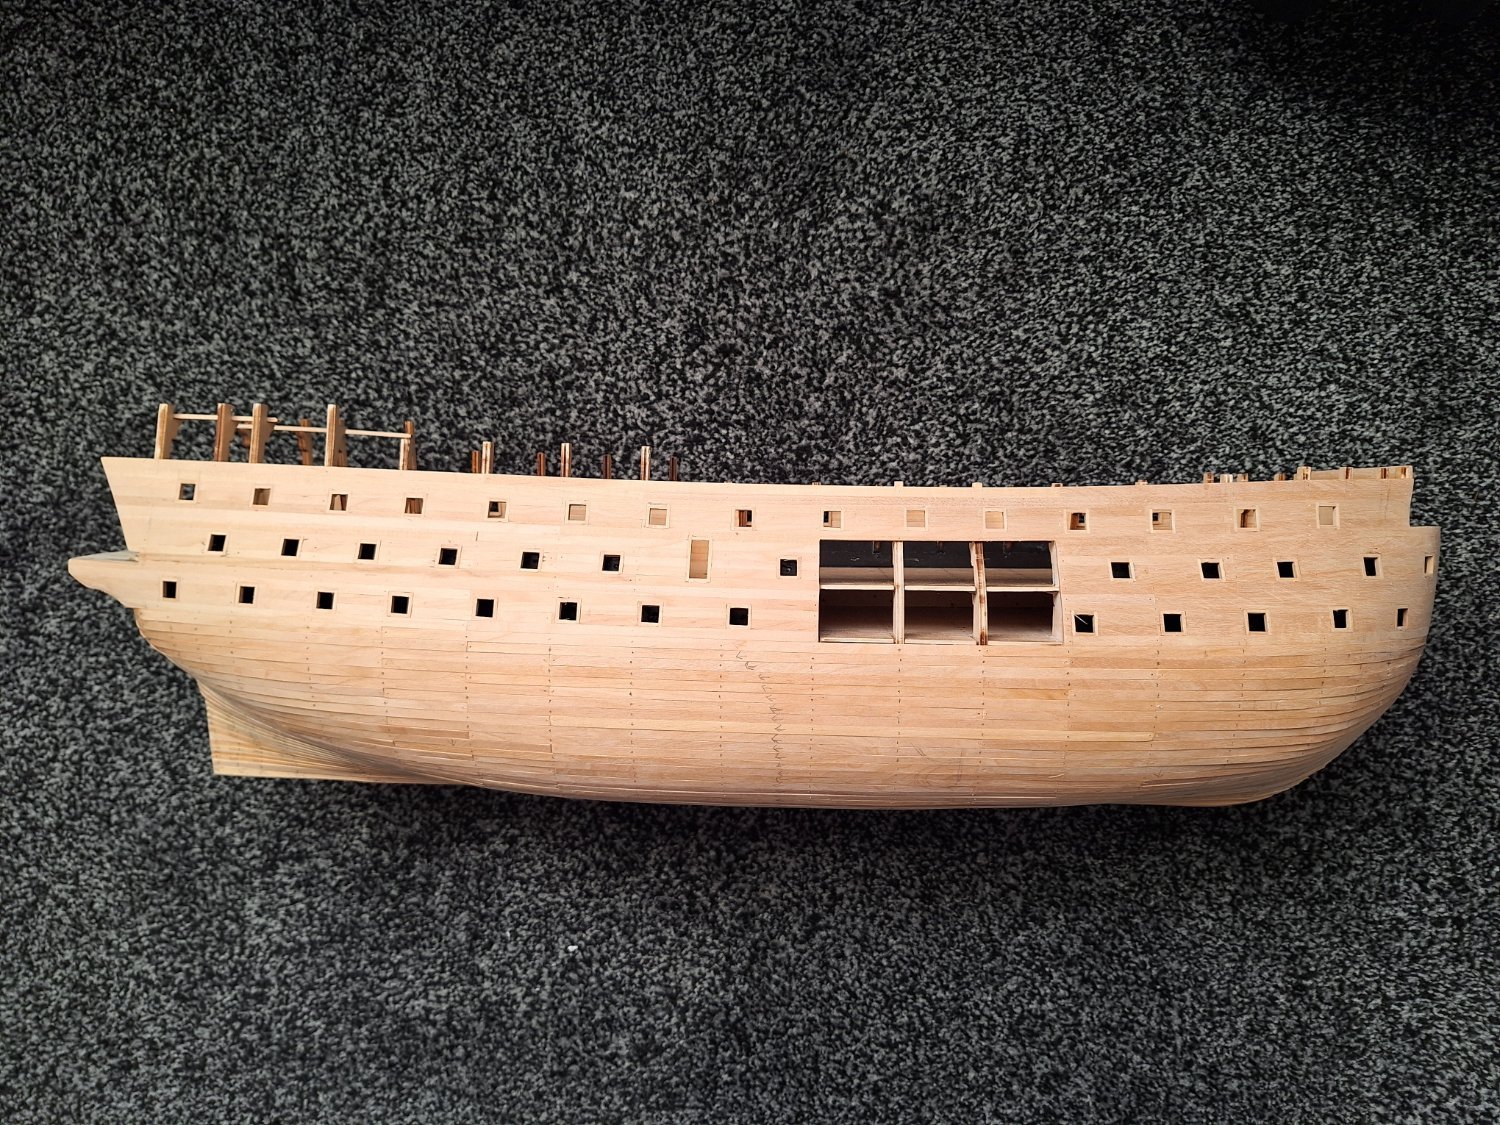
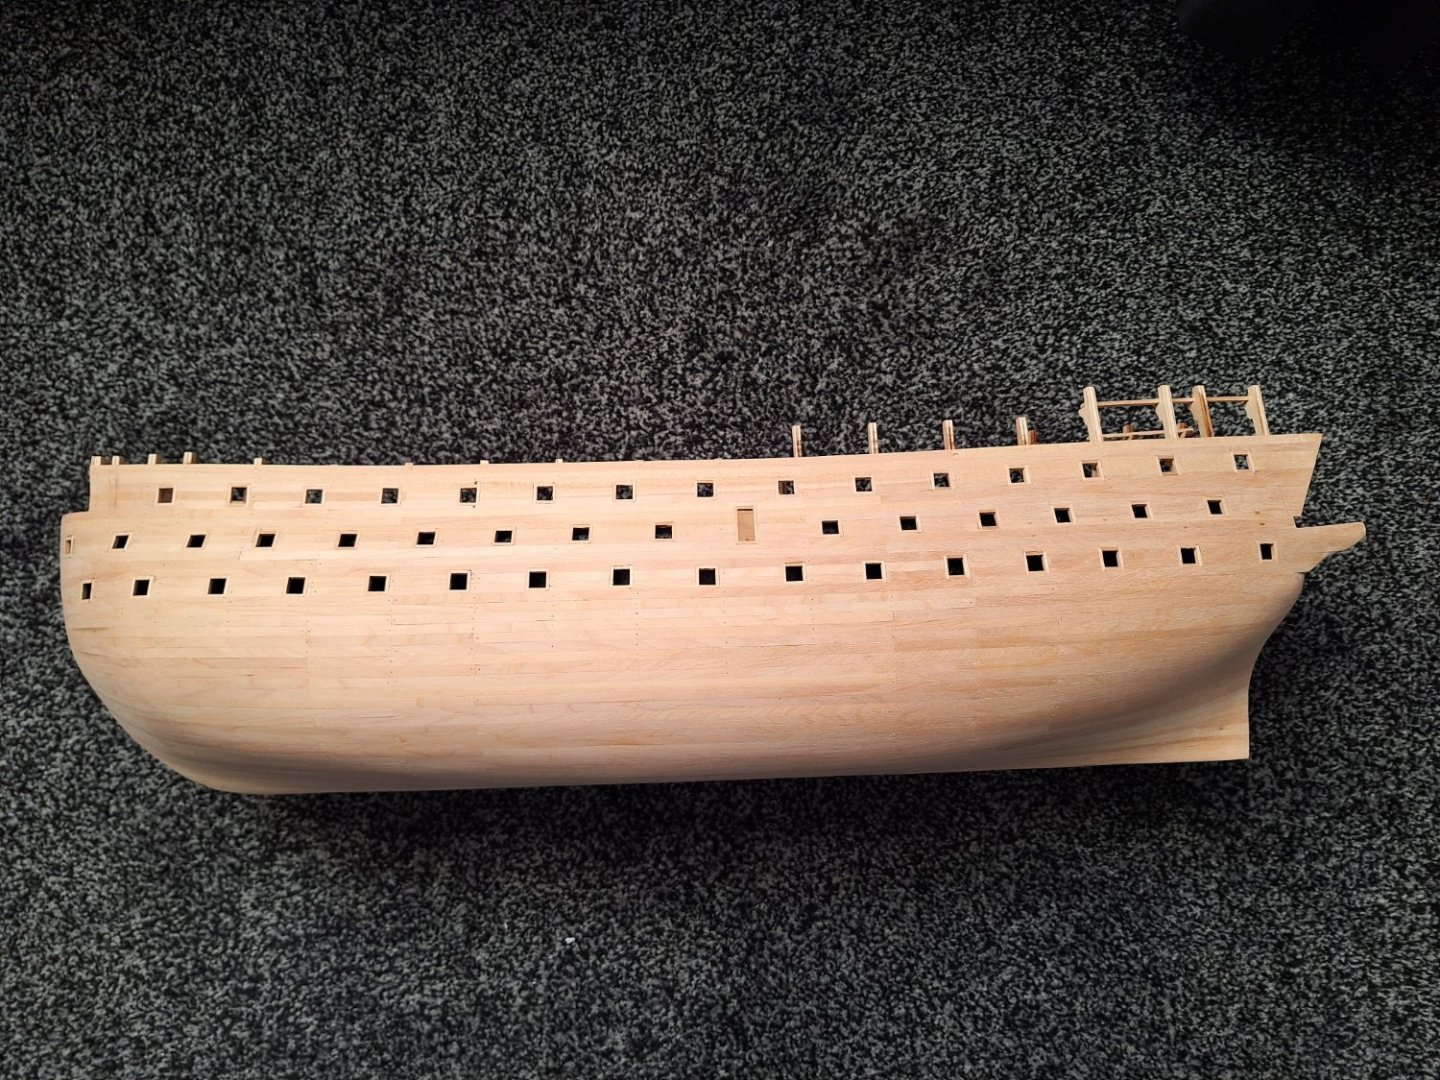
 Hi All, This is my first build, I started it in April 2023. This is the stage it is at. Port side which has had its first sand 24/12/23. Not had any wood fillers applied yet so will need a touch up Starboard side that still needs its first sanding. Hull as you can see Port side has had its first sanding. Top View of middle deck which I stencilled all the floor rather than just a section.
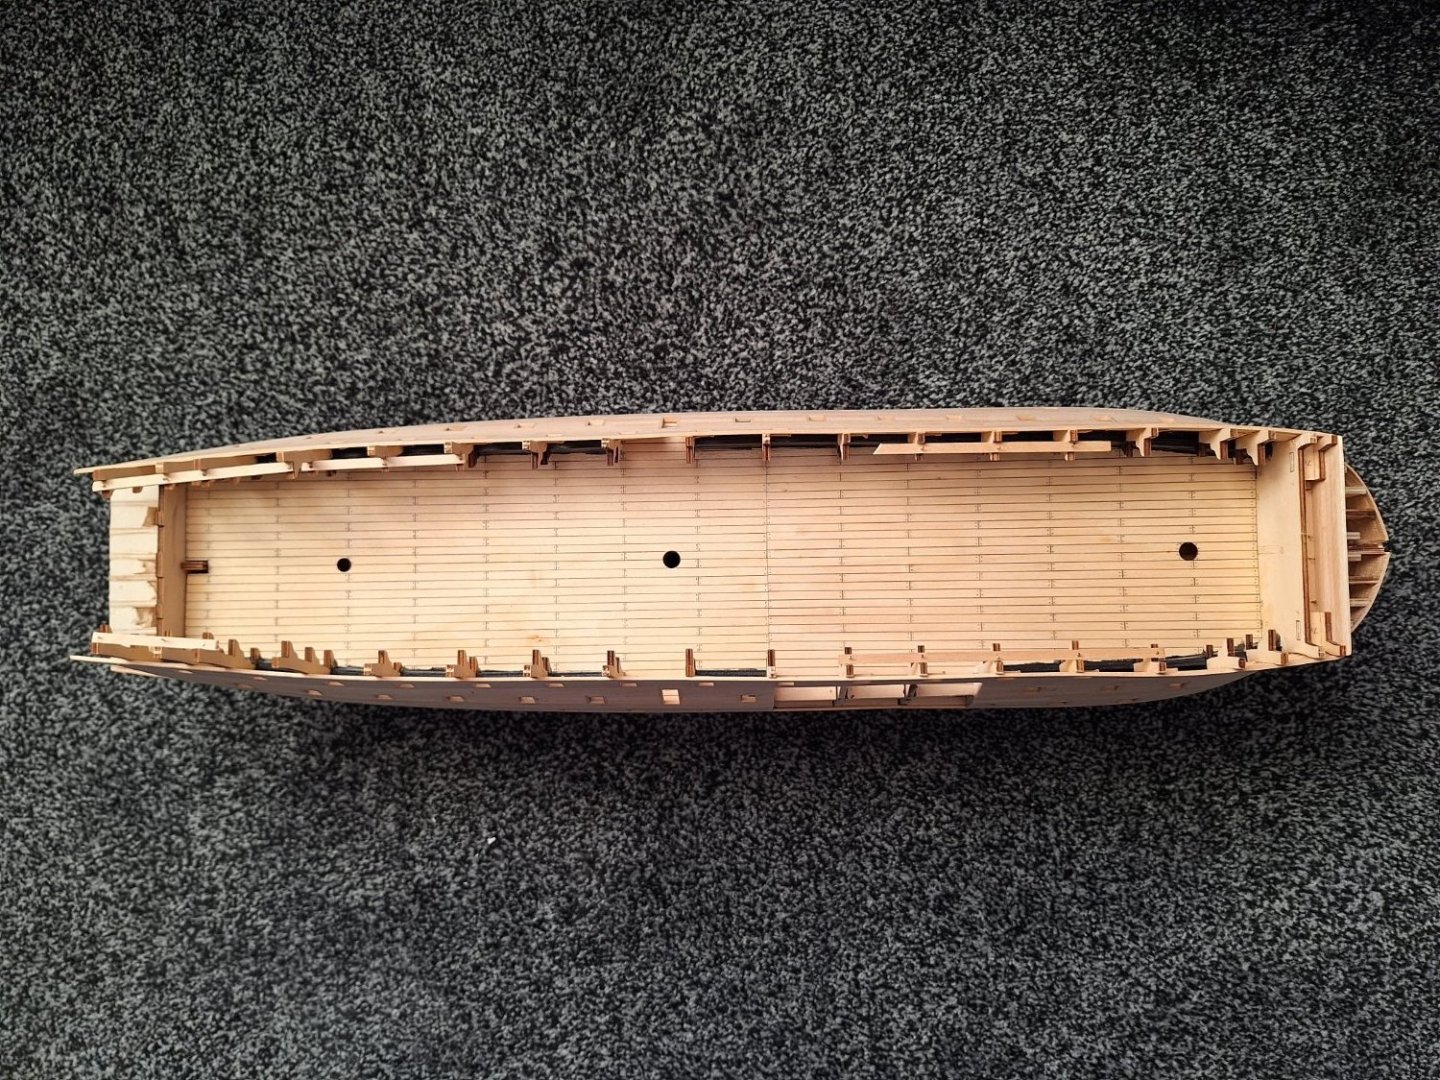


- 33 replies
-
- 12
-
-
- Victory
- DeAgostini
- (and 1 more)
-
 Hallo liebe Community, nachdem ich dieses Forum schon eine ganze Zeit beobachte, habe ich mich entschlossen, nun auch meine Victory vorzustellen. Ich bin noch ziemlich neu in diesem Hobby und habe mir mit der Victory von Caldercraft einen ziemlichen Brocken vorgenommen. Ich habe zwar bereits an einem kleineren Modell geübt, allerdings waren meine Gedanken immer bei dem Caldercraft-Bausatz. Im Dezember 2013 habe ich ihn mir nun gekauft, damit die liebe Seele Ruhe hat. Warum die Victory - ein Schiff, dass bereits 1000 x gebaut wurde? Und das von Menschen, die mehr davon verstehen, als ich. Ganz einfach: ich finde sie schön. Und es gibt jede Menge Fotos - teils vom Original, teils von anderen Modellbauern. Ich habe weder den Anspruch, sie in Museumsqualität zu bauen, noch dem Original in allen Details historisch einwandfrei zu entsprechen. Hierzu fehlen mir die handwerklichen Fähigkeiten, die professionellen Werkzeuge und das Wissen. Ich will sie so gut wie möglich bauen. Und wenn ich auf Fotos und/oder im Internet auf Details stoße, die ich mir handwerklich zutraue, dann werde ich versuchen, es im Rahmen meiner Möglichkeiten umzuseten. Ich freue mich auf eure Anregungen und Tipps. Und los gehts mit dem Rumpf... Moderator translation via Google Translator Hello dear community, after I been watching this forum for quite some time, I decided, now imagine my Victory. I'm still pretty new to this hobby and have made up my mind with the Victory by Caldercraft quite a chunk. Although I have already practiced on a smaller model, but my thoughts were always with the Caldercraft kit. In December 2013 I have now bought it to me so dear soul rest. Why the Victory - a ship that already 1000 x built? And this from people who know more about it than I do. It's simple: I find them beautiful. And there are lots of photos - some from the original, partly from other modelers. I have neither the claim, they build in museum quality, yet the original suit historically accurate in every detail. To this end, I lack the technical skills, professional tools and knowledge. I want as much as possible build. And if I come across photographs and / or the Internet to details that I trust my craft, I will try it umzuseten within my means. I look forward to your suggestions and tips. And there you go with the hull ...
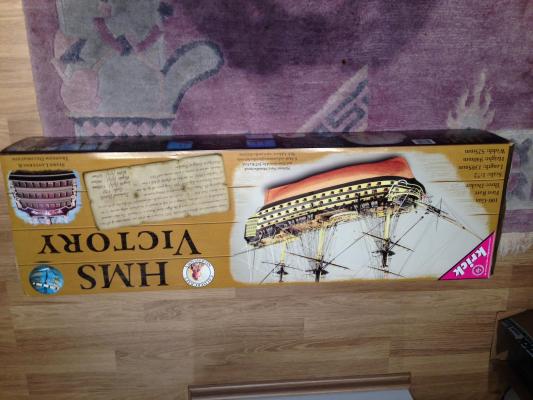


-
 Hello, I am a new member and started to build the HMS Victory. Visited this site very often in the last month for building info and found a lot of great building logs. I had problems finding the right location for the top gunport pattern (270).
-
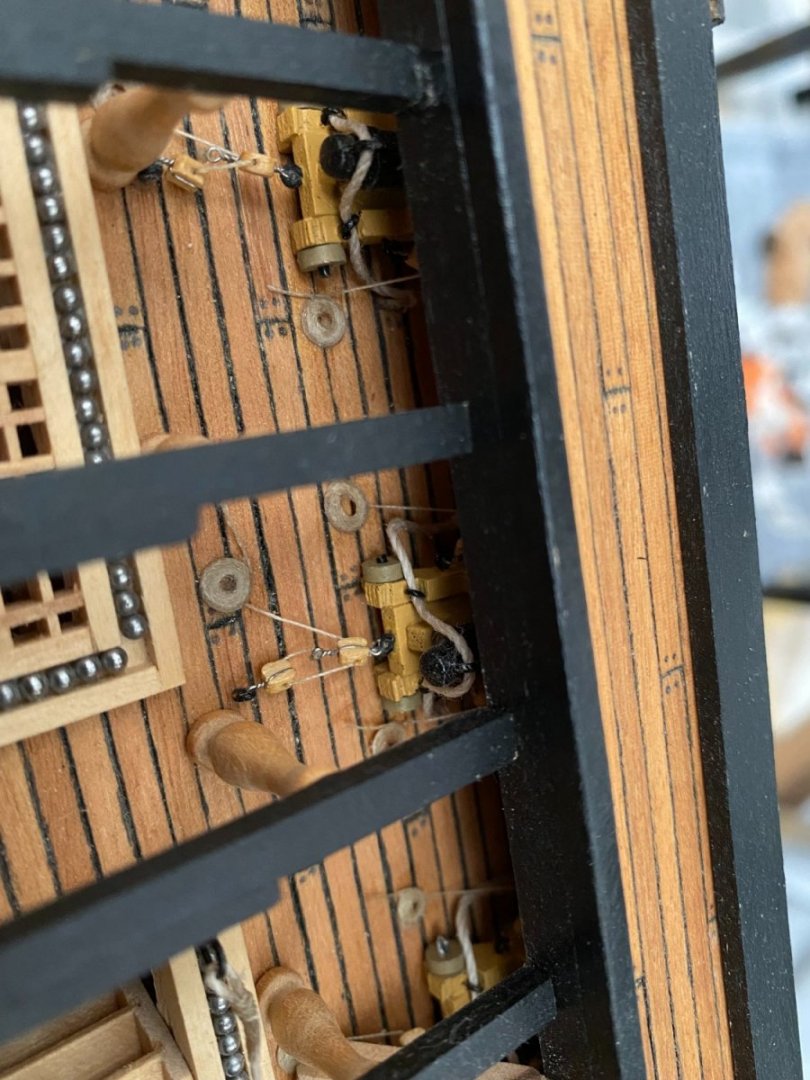
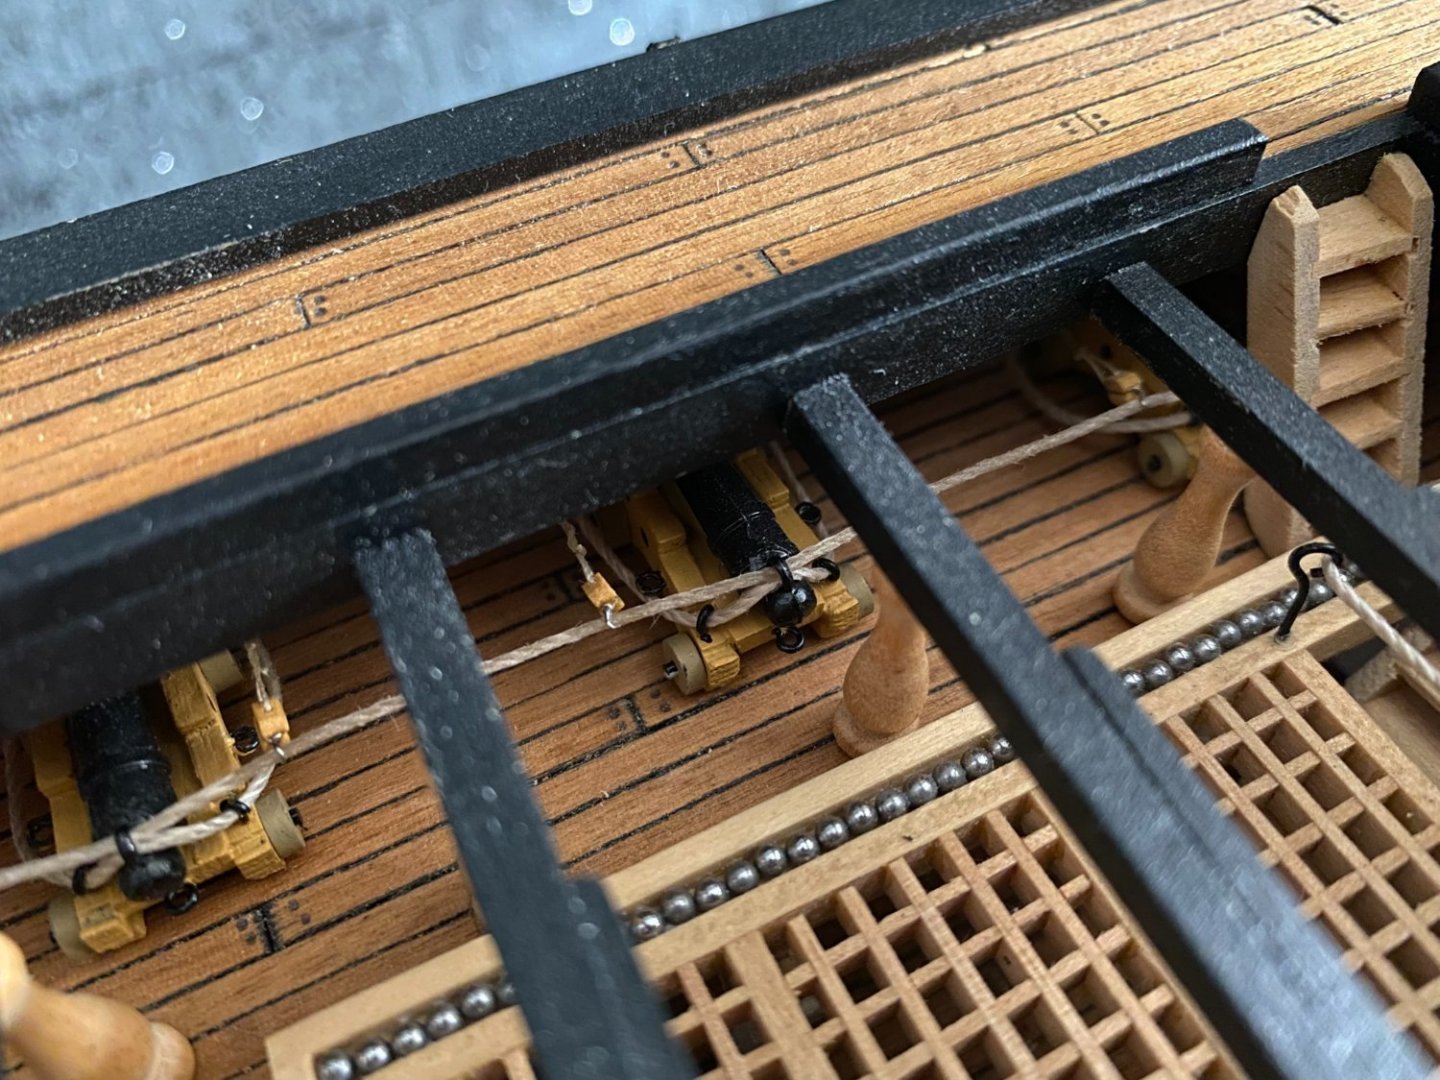
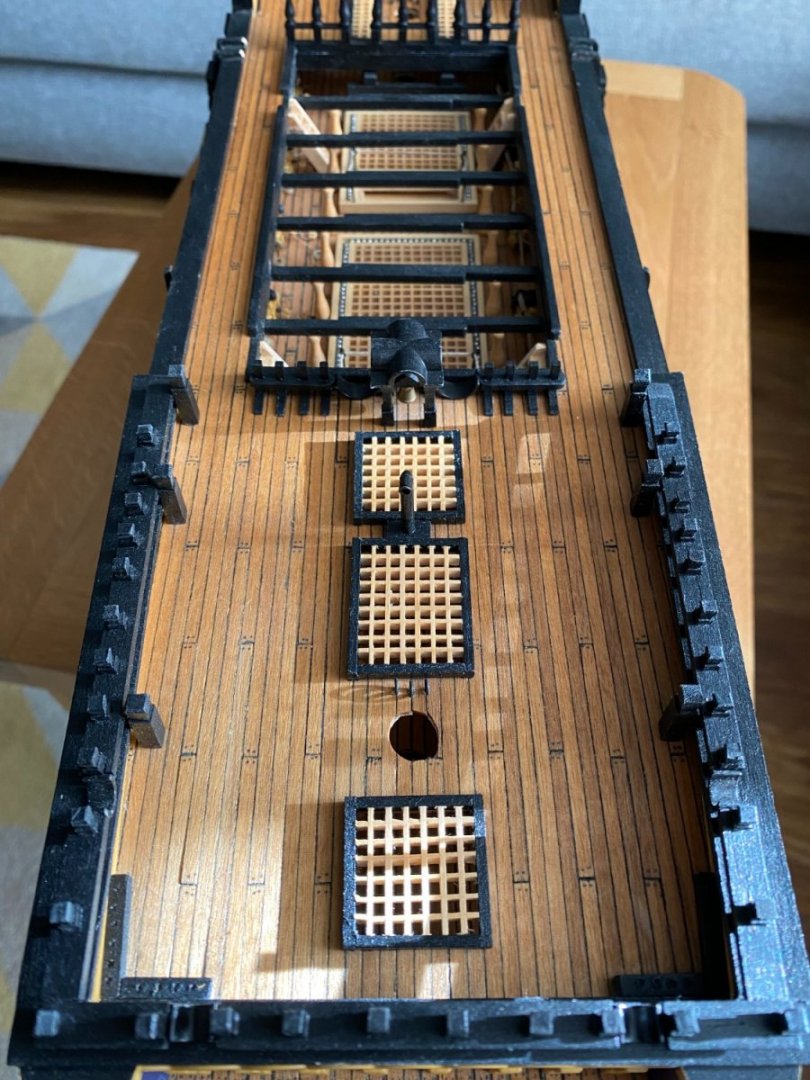
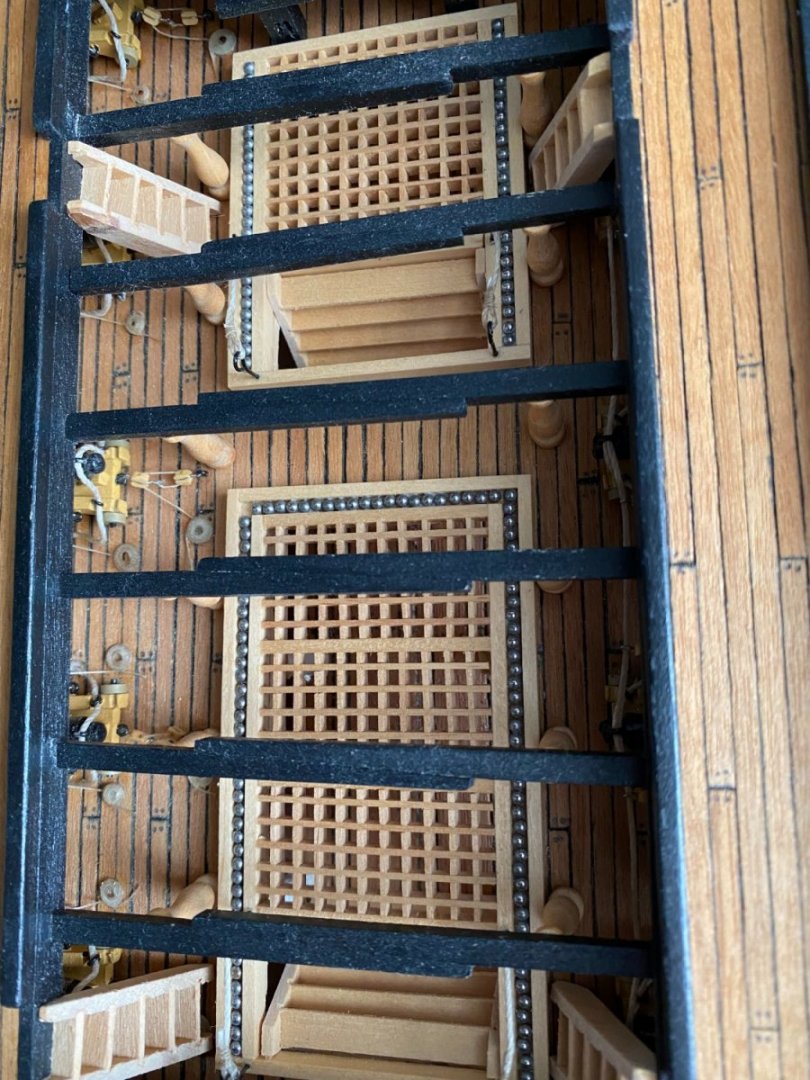
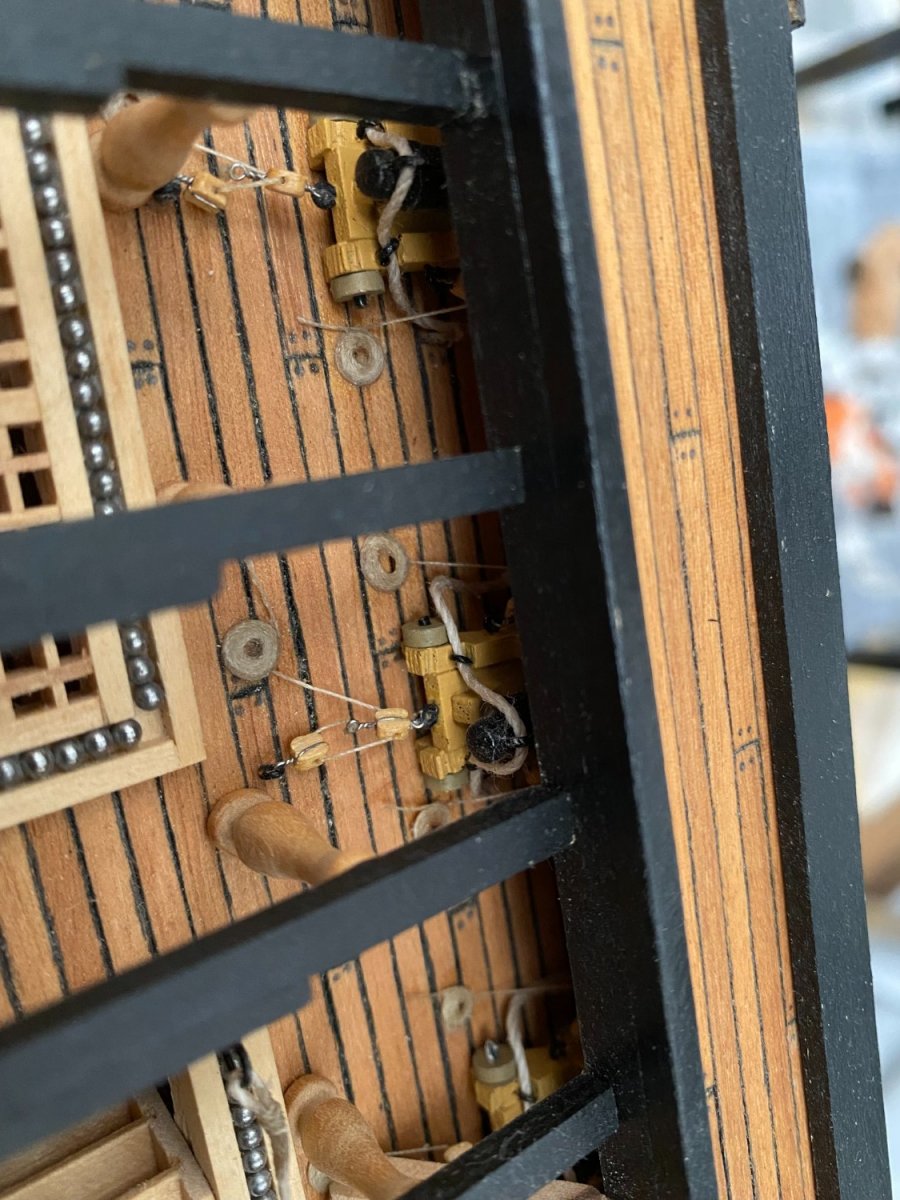
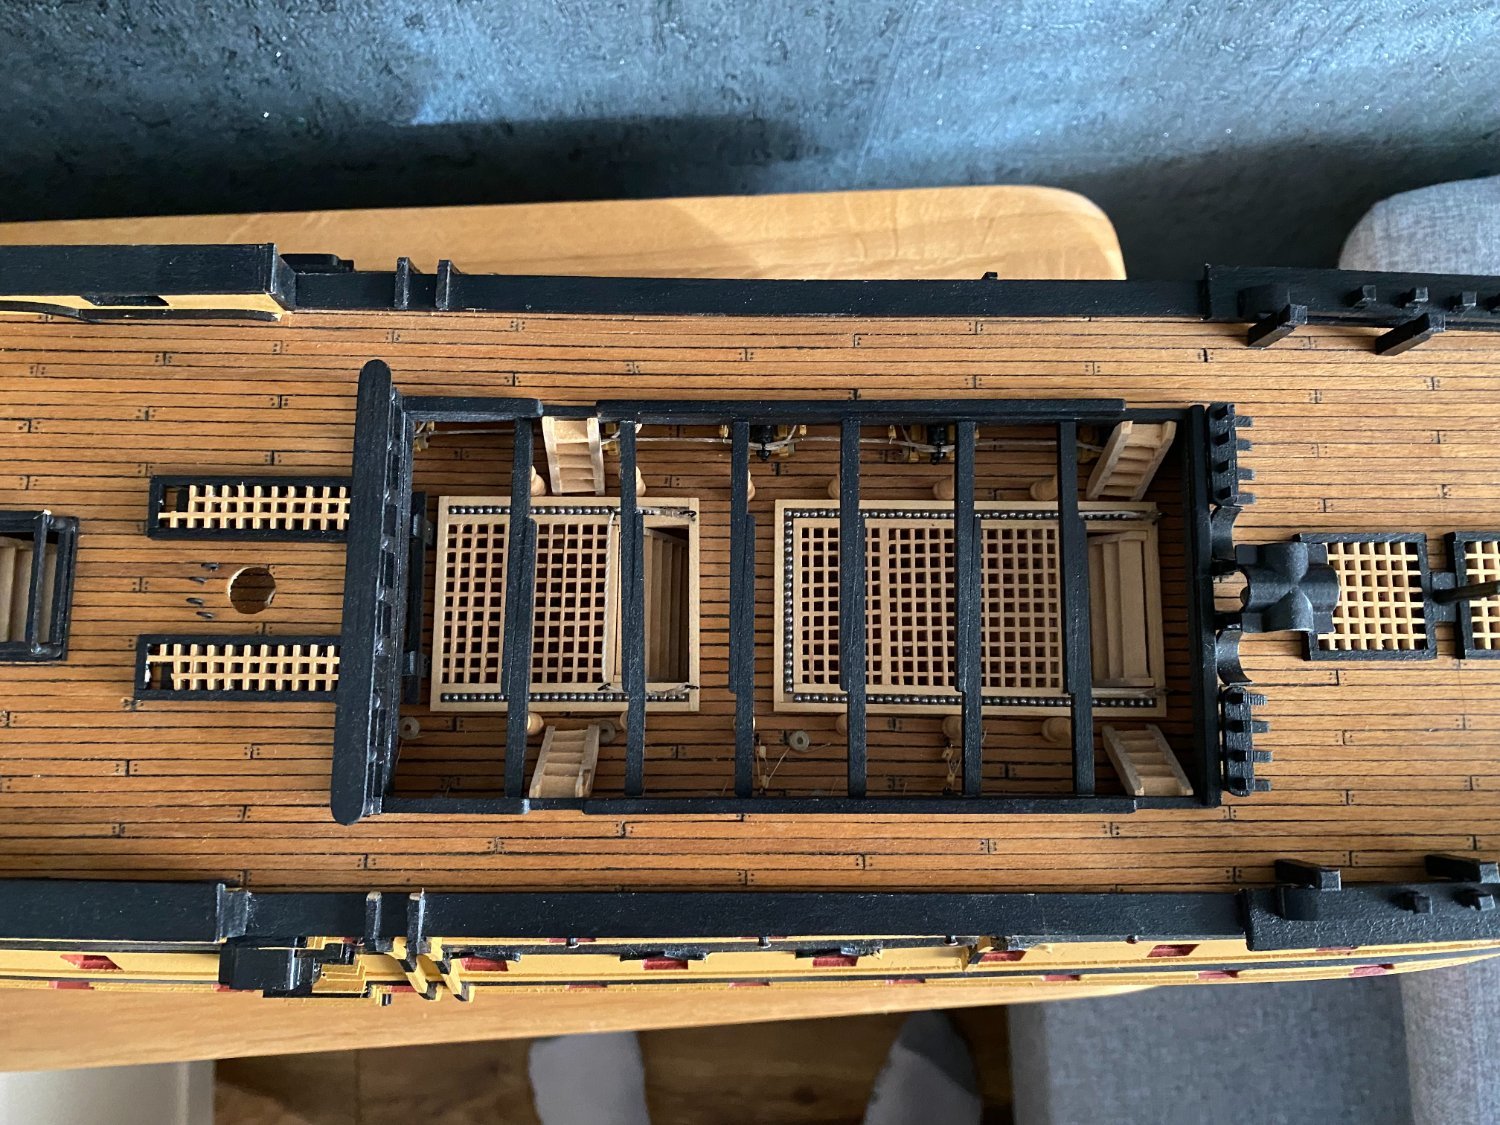
 Some background: I started this build a year and two months ago. I did some modeling when I was a kid, but discovered other joys of life when I reached puberty 🙂 In the meantime I settled down and decided to take it up again (I'm 30 years old). I decided to go for a challenge and went for the Heller Victory. I wanted to try all the new and exciting tools & techniques I did not have the money for when I was a kid. I started out using acrylics by brush, but invested in a good compressor and airbrush a couple of months ago. Too bad I did not have this at the start of my build! The finish is so much nicer! The goal is not to make a true to life representation of the actual ship, but a nice looking model in warm colours with lot's of detail that looks good under glass in the living room. Enough background, here are the pictures: You can clearly see half of the hull bee lines haven't received the sepia wash yet I use to give it more depth and a warmer tone. I also need to rework the figurehead a little bit. The white crown is a bit to big and the white horse needs some TLC as well. Otherwise, I'm very happy with the look of the ship! I used some styrene sheet to make the gun port thicker. I like that look even though it's out of scale. After a lot of trial and error, I finally settled on a style of gun carriage lashing. I used 2mm single blocks and Morope rigging chords. The most difficult part was making the two holes in the top blocks. I ruined quite a lot of blocks just to get these guns finished 🙂 Will need to order lot's more! I was not completely happy with my decks. The colour was a bit to pale, it missed some 'life', and some parts were damaged a bit. So, in a moment of temporary insanity, I went out and got a second Heller Victory kit. Maybe a bit drastic, but now I have spare parts for everything and this allows me to experiment a bit more. I tore out the old deck. This meant I also had to take out the four guns I tackled already, unfortunately. I redid the decks using the same technique, but this time I added two coats of MIG brown filter. This added a nice weathered wood tone. I'm very happy with the result, but judge for yourselves (the foto does not do it justice, though): The stanchions were made using 2mm eyelets and 0.1mm Morope rigging chord.
- 27 replies
-
- 12
-
-
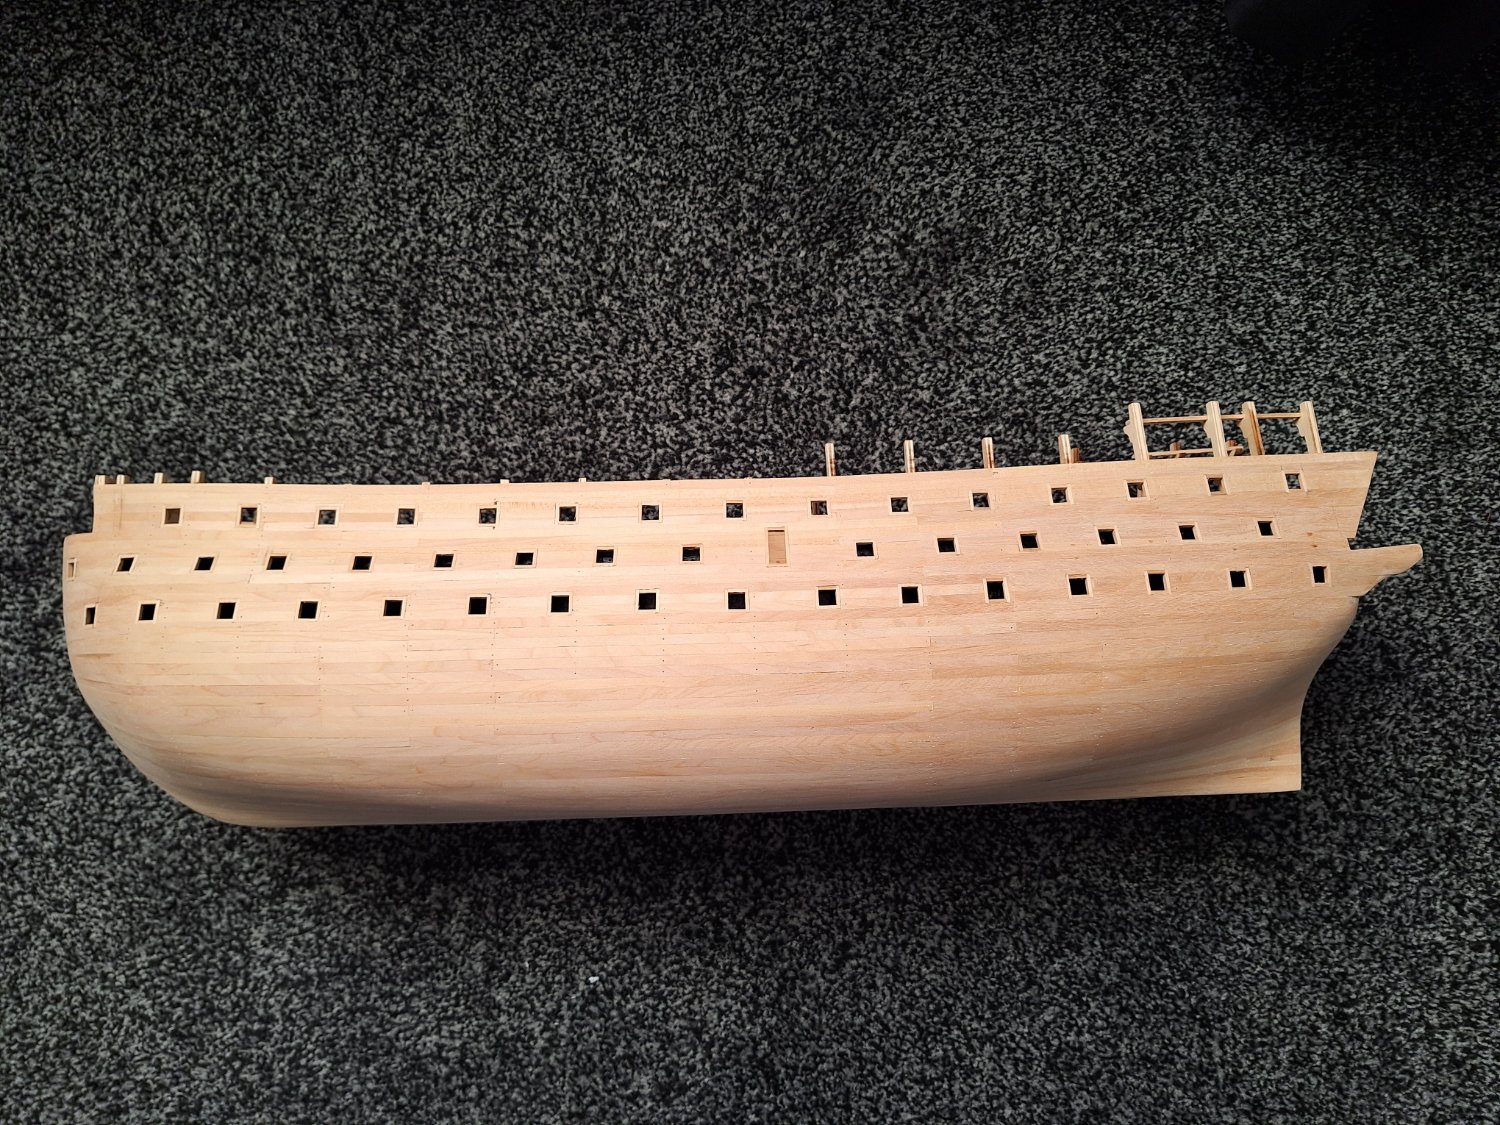
 Hi fellow builders, After 2 years of trying to build the HMS Victory, using the Caldercraft kit I think it's time to show some of my efforts on this forum. I live in Utrecht, The Netherlands, and I regard this as a 10-year project. Building is the fun part, time is of no essence as the fun is much less when the model is finished (speaking for myself). I chose the HMS Victory for several reasons: - The Caldergraft kit is essentially historically correct, although some research is still necessary. - The kit is technically very good, most parts fit without much adjustment - The "original" 1805 Travalgar version of the ship can still be visited in Portmouth and plenty of photo's circulate on the internet, therefore building a historically "correct" model is easier than of many other ships. - Many books can be found on the subject like Longridge, McKay and others. over time I collected a (very) small library on the subject. - There are some build logs of the Victory on the internet of excellent builders, notably Gil Middleton. In some instances my choices differ from theirs, but I will explain my choices as much as possible. In the weeks to follow I wil show the progress so far, which is as far as the 30 cannons on the Upper Gun Deck. Some basic facts about the HMS Victory: The HMS Victory was (and is) the flagship of the English Navy which defeated the combined French-Spanish fleet during the Battle of Trafalgar. Admiral Lord Nelson was mortally wounded during battle by a French sniper, but England won the battle. The HMS Victory is the 5th ship with this name and the largest by far. The ship was ordered in 1758. It is a First Rate Ship with more than 100 cannons. The design of the ship was completely devoted to firepower In 1805 (Trafalgar) ther were: - on the Lower Gun Deck: 30 cannons for 32-pound balls - on the Middle Gun Deck: 28 cannons for 24-pound balls - on the Upper Gun Deck: 30 cannons for 12-pound balls - on the Quarterdeck: 12 cannons for 12-pound balls - on the Forecastle: 2 cannons voor 12-pound balls and 2 carronades for 68-ponds balls(!!) The total length of the ship is about 70 meter, water displacement more than 2000 tons and almost 5500 square meter of sail can be carried. Some other numbers: 40km rope in the rigging, 1400 blocks, 300 tons of "potable" water, 50 tons of coals, 20 tons of wood, 50 tons of beer, etc. Index First and second planking Wales Gunports Coppering Upper gun deck, cannons and fittings Quarter Deck Forecastle Bow Poop Deck Stern Fascia Quarter Galleries Hull details First an impression of the progress so far. I will try not to bore you with every individual bulkhead and plank. Details will be provided on request (of course).
 -
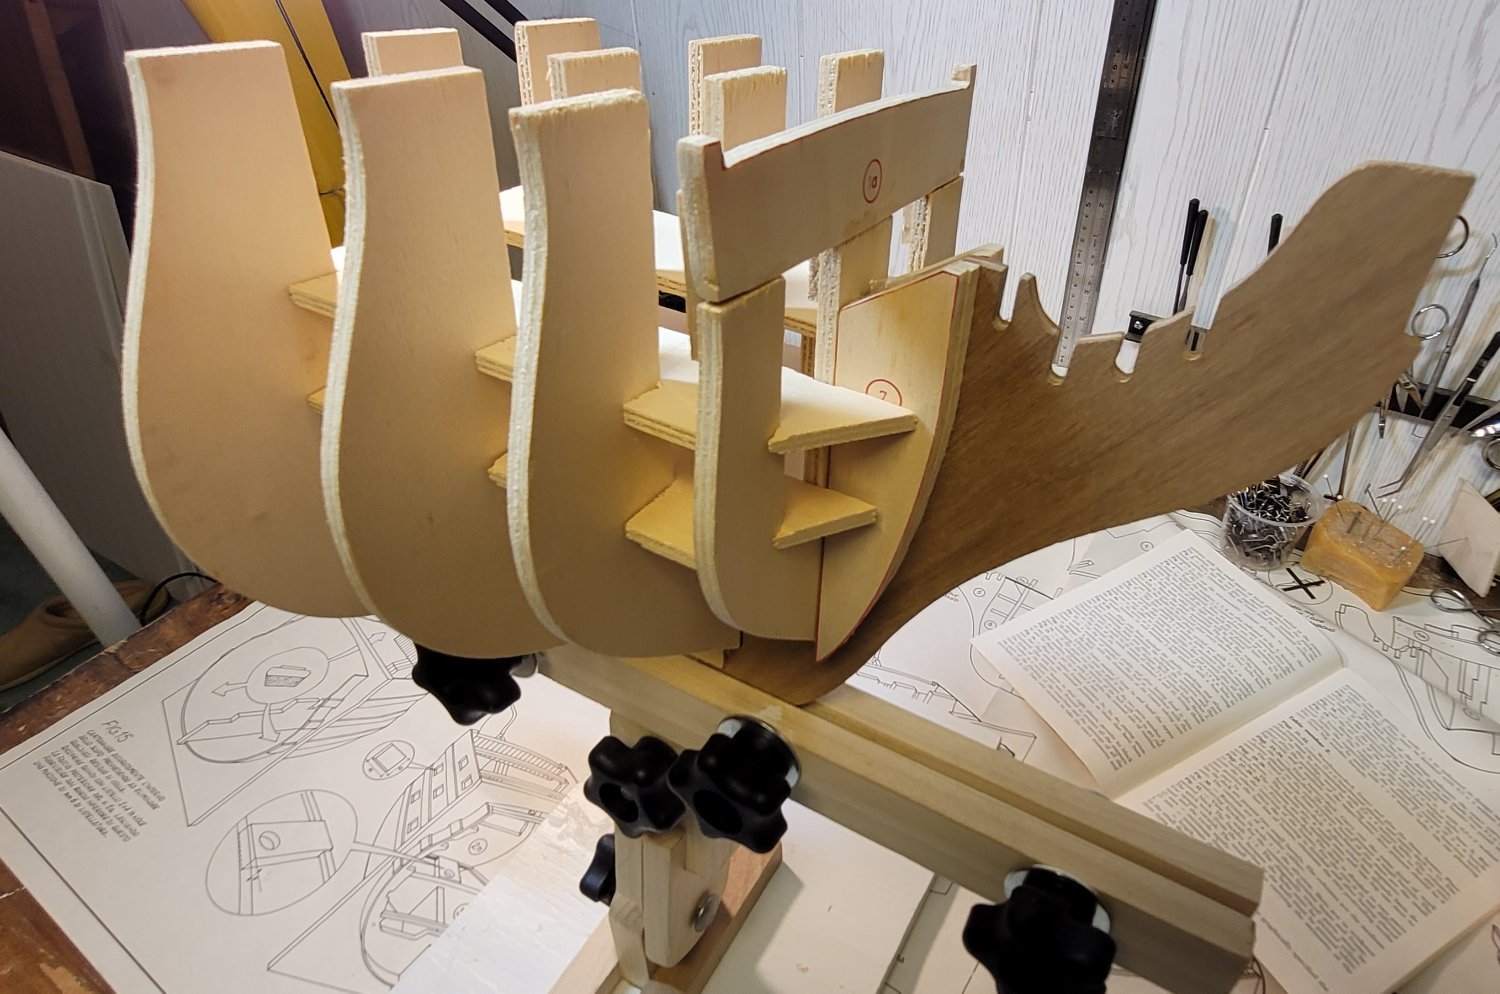
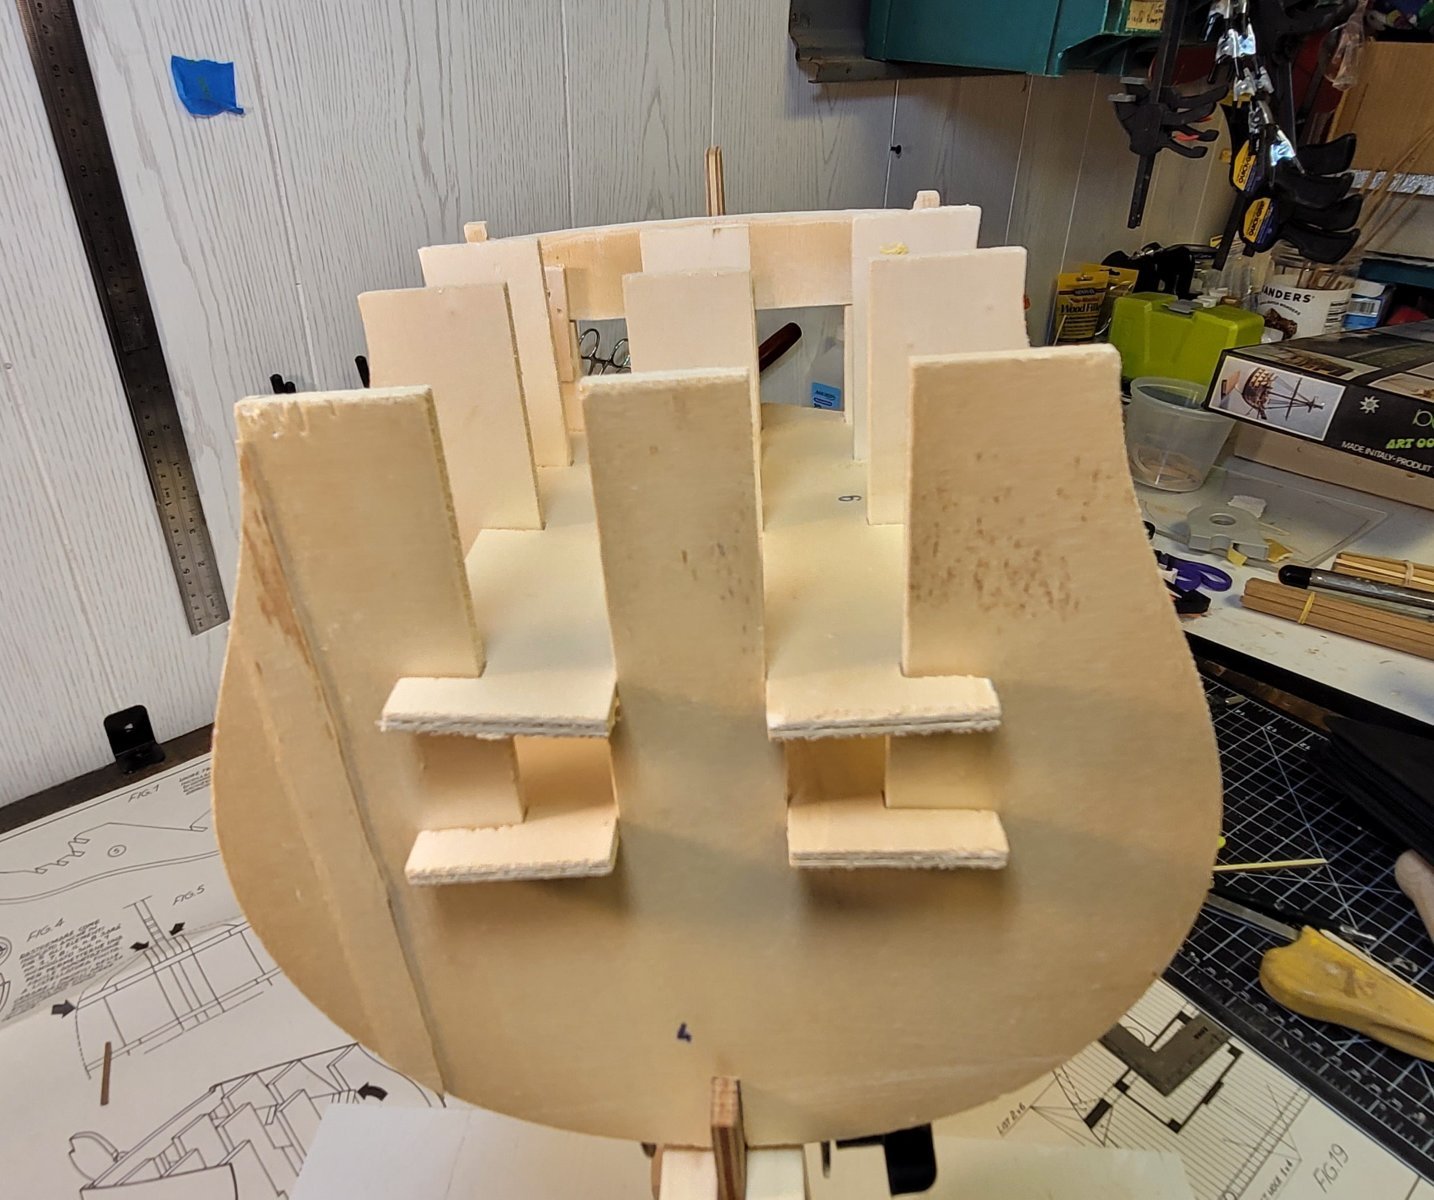
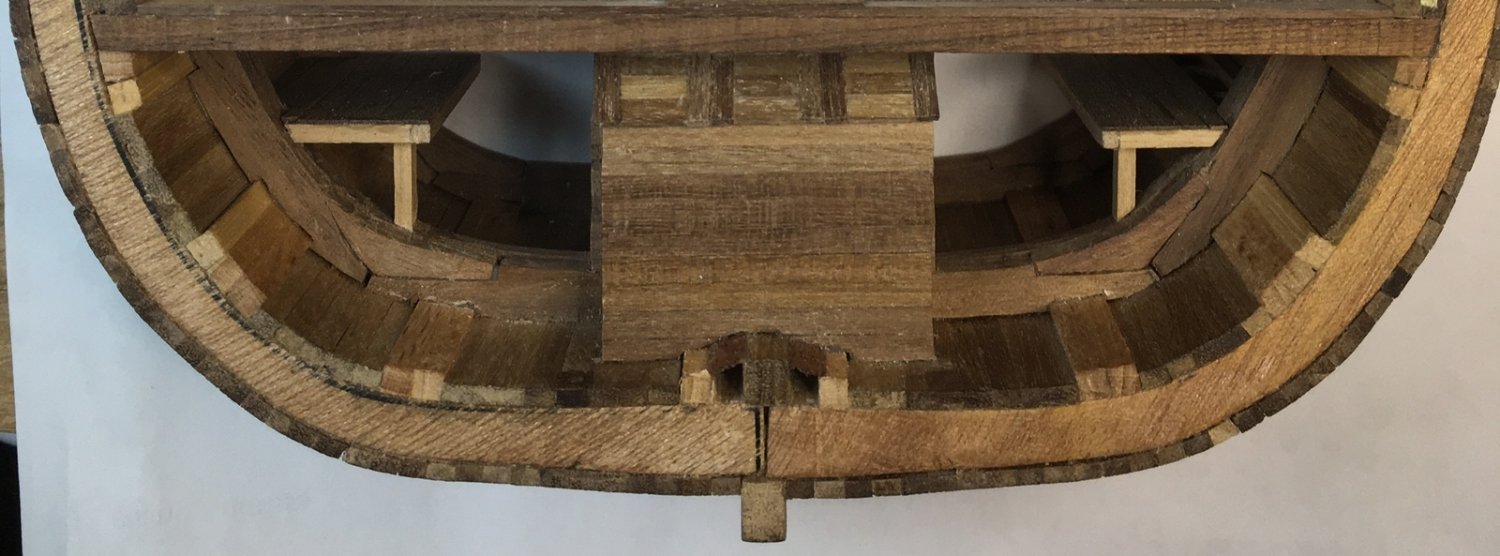
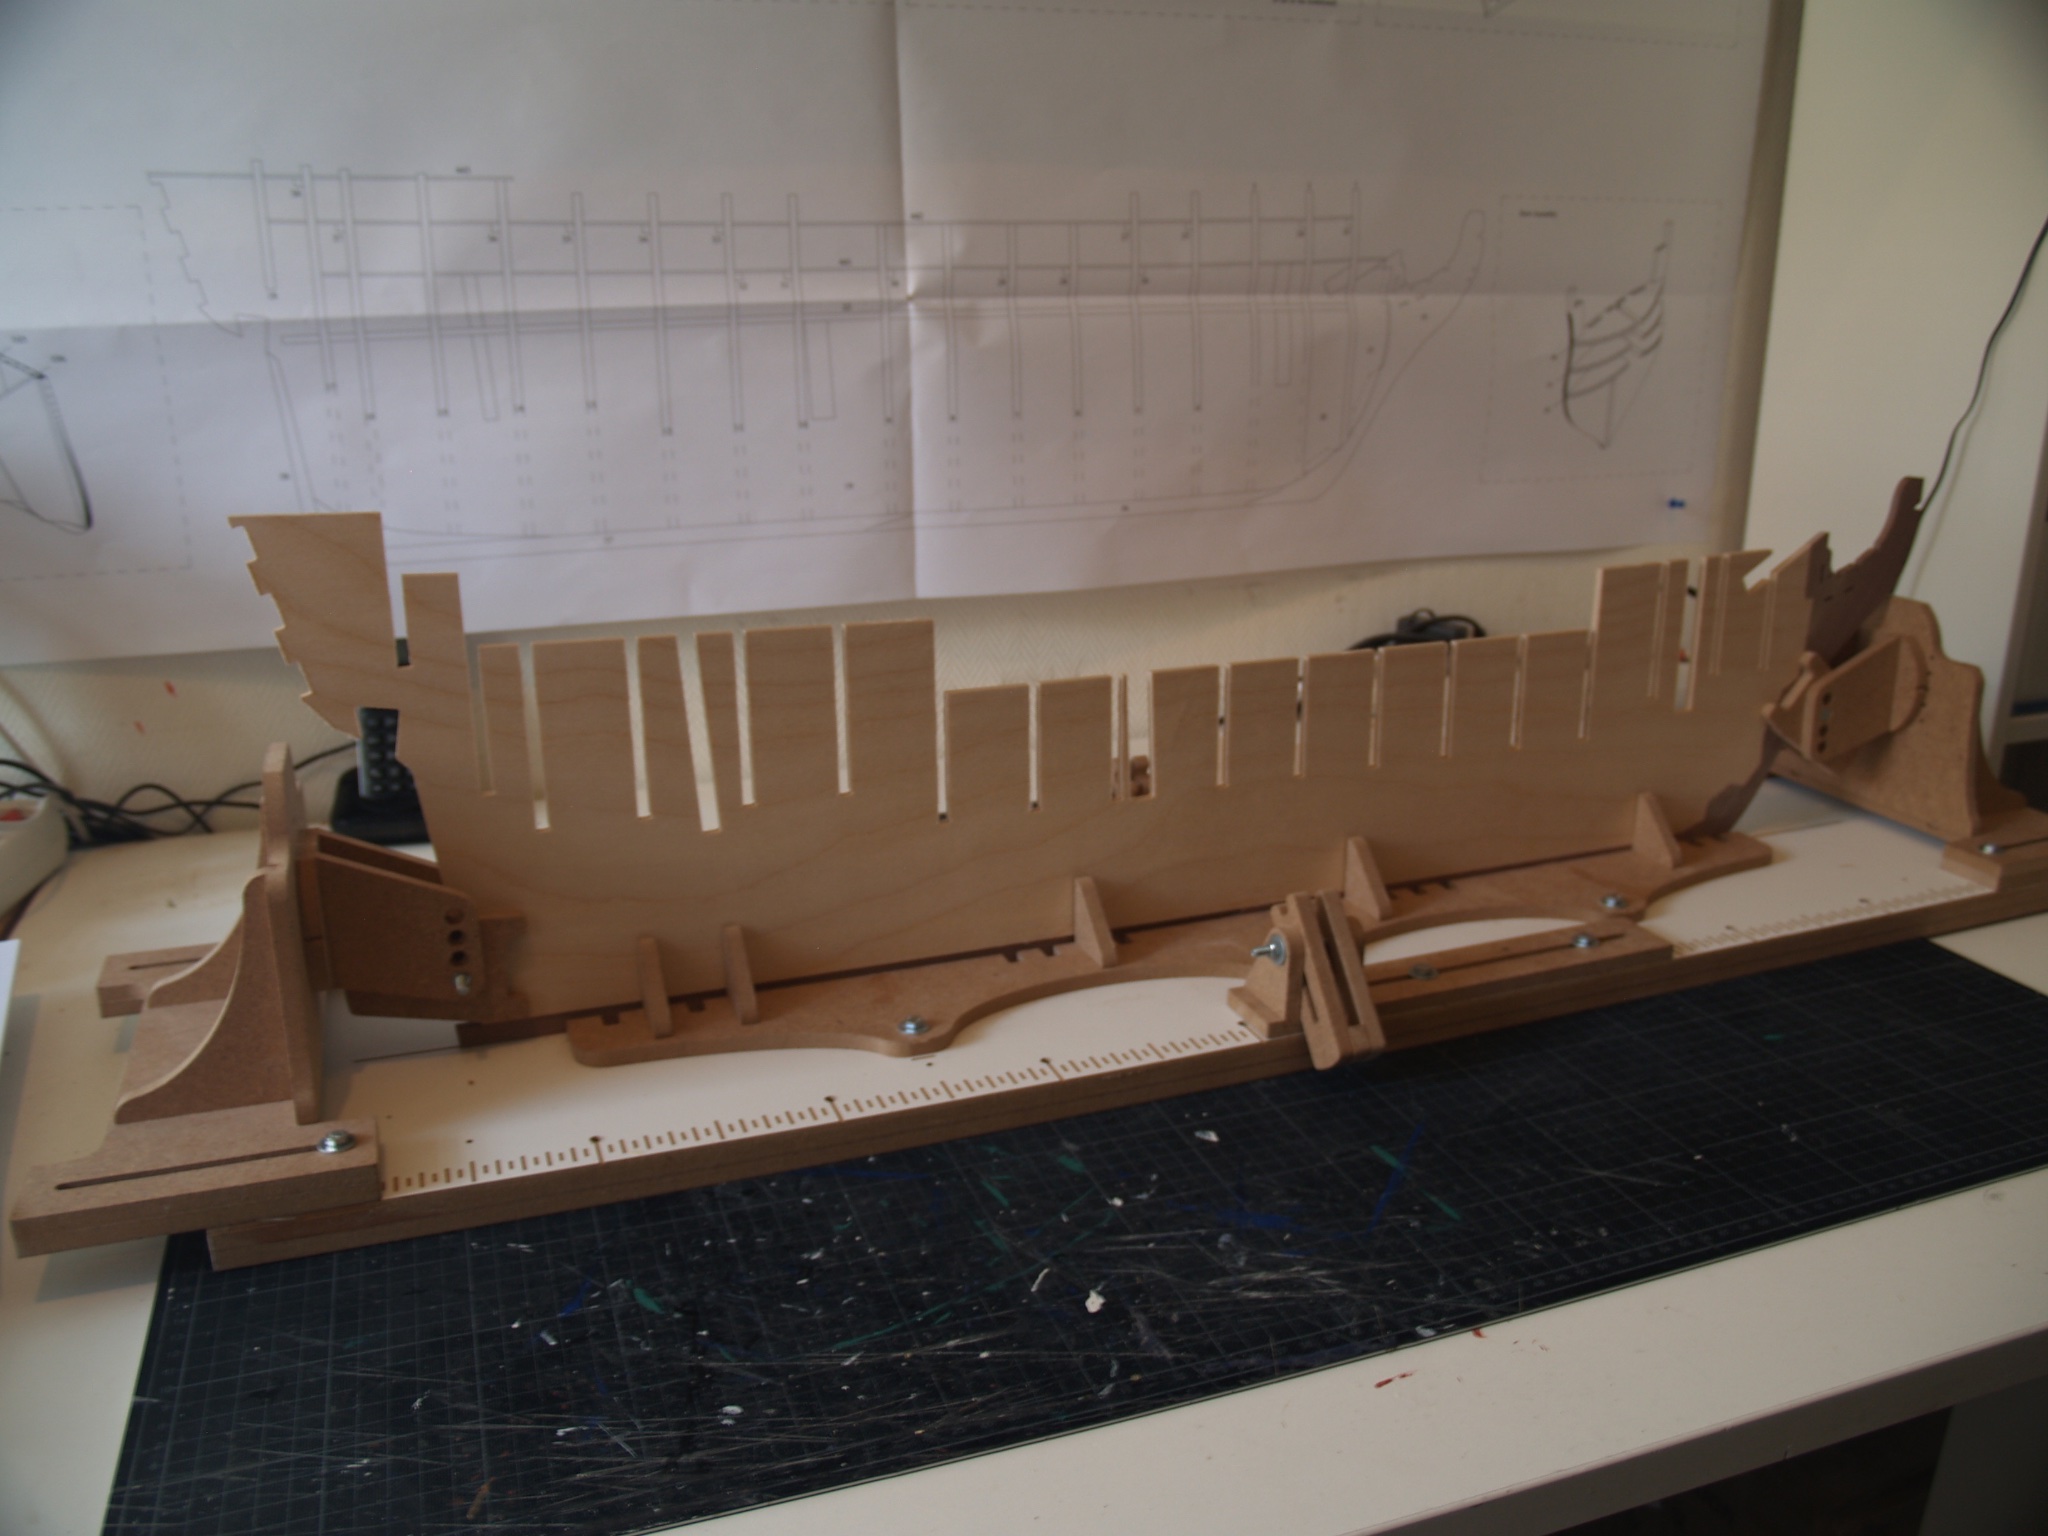
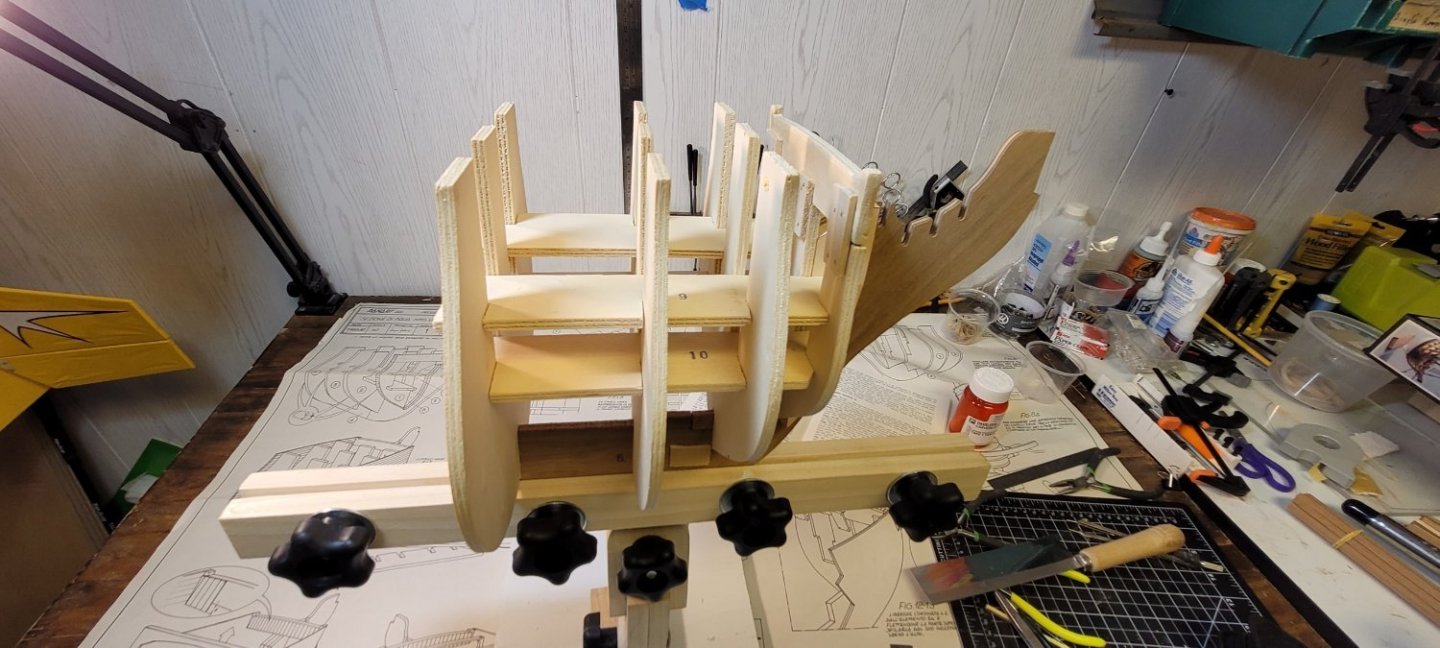
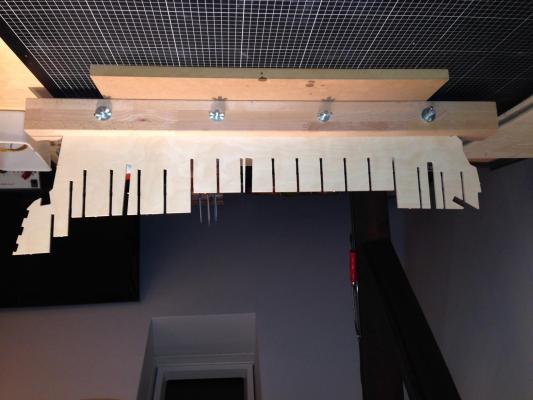
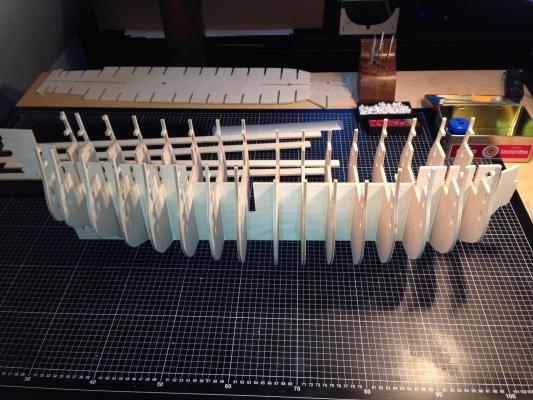
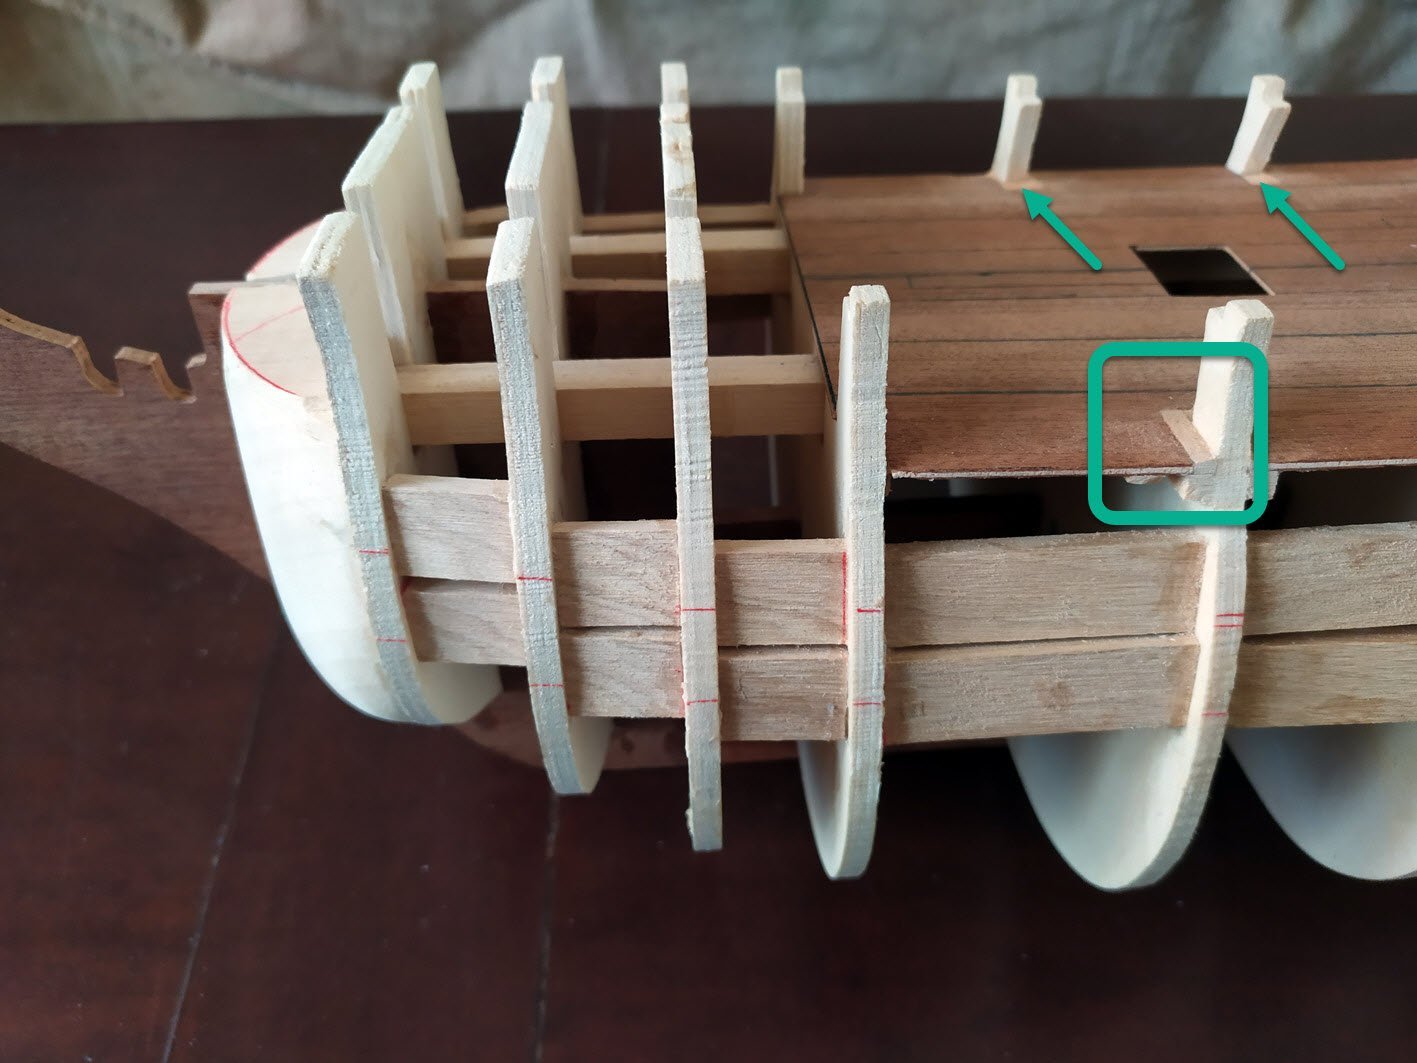
 I started bashing a Corel 1:98 Victory cross section a while back, but took a break. I'm now back to work on it and wondering about the historical accuracy of a couple of 'pseudo' decks/shelves located below the Orlop deck. The original model is quite lacking, as sold by Corel, and the Diagostini Model Space verson looks quite sexy (that's the visual reference that I followed), however. After purchasing a copy of Longridge's 'Anatomy of Nelson's Ships', and getting back to the build, I'm not seeing those two 'pseudo' decks depicted on either the side elevation, plan #1, nor the cross section on page 63. Did Victory actually have these two platforms, or are they just 'eye-candy', created by a model manufacturer, for 'looks' and to promote sales? I wish I was more into actual historical accuracy when I started this model, but I wasn't. Now it 'Is' what it is and I need to make the best of what I started... 🤔 *NOTE*: The Orlop deck, nor the lower pump house/shot locker are glued in place, yet. This is why the Orlop deck does not appear to be sitting proper at the hull. I have a lot of detail work to go before securing that deck in place....
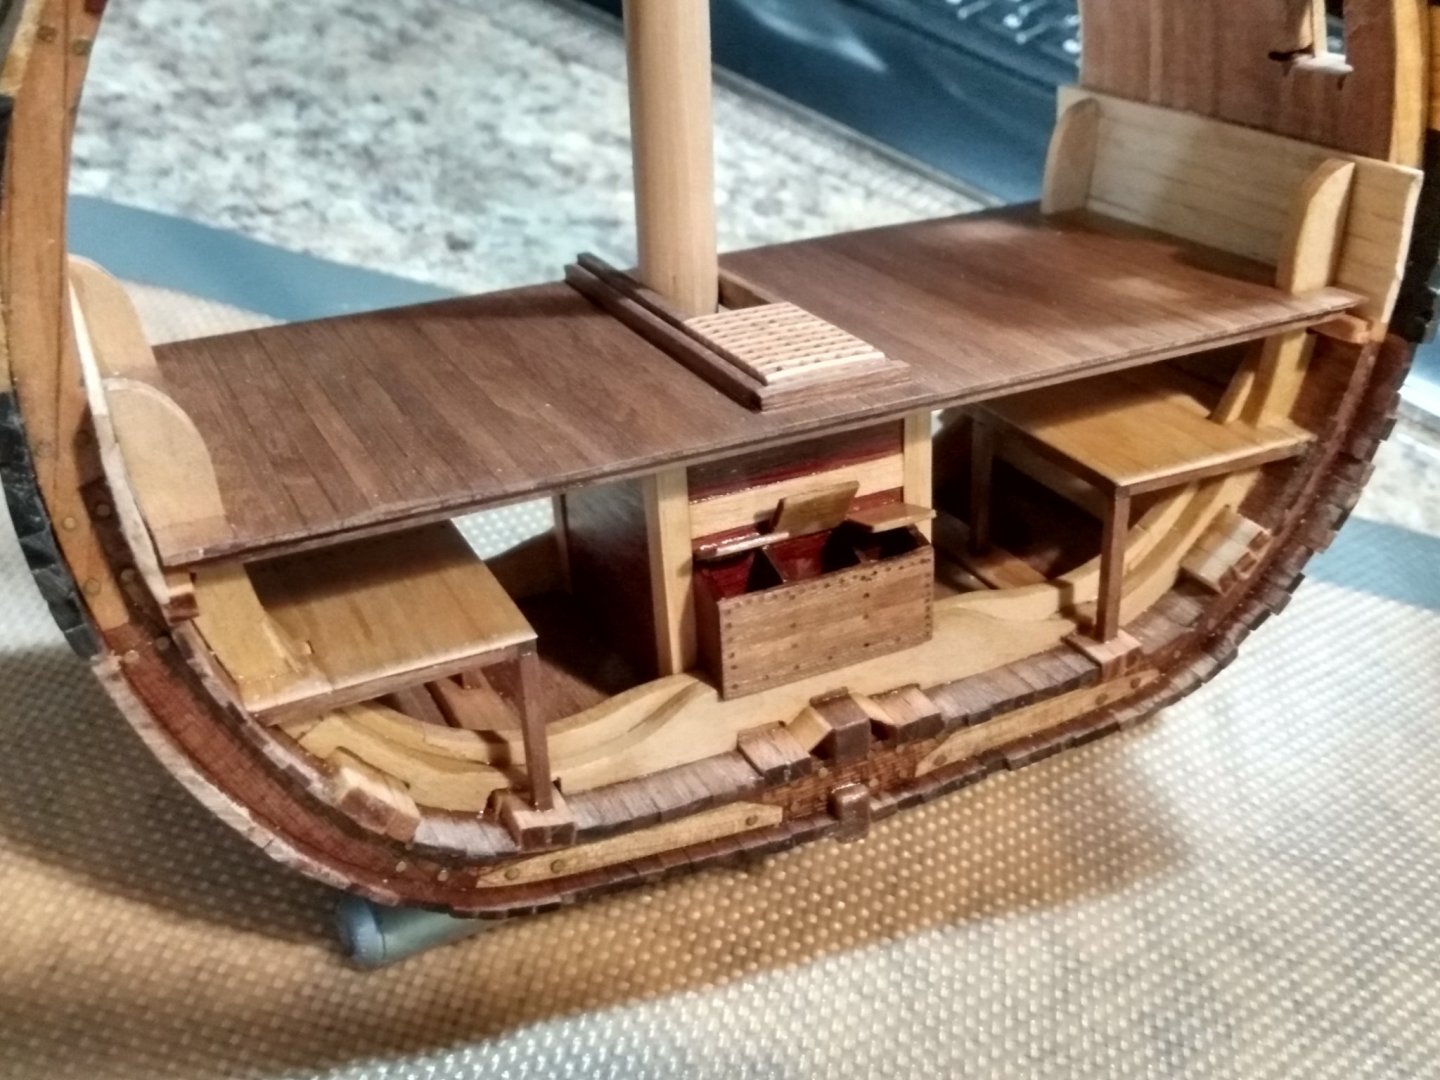
-
Hi all, I was just wondering, is Caldrcraft (1:72 version) the go to kit for Victory freaks? Is it the most detailed/accurate on the market? Indeed, is it the largest? Anyone know of any others to rival Caldercraft's version or any planned by other manufacturers in the pipeline? Cheers Chris
-
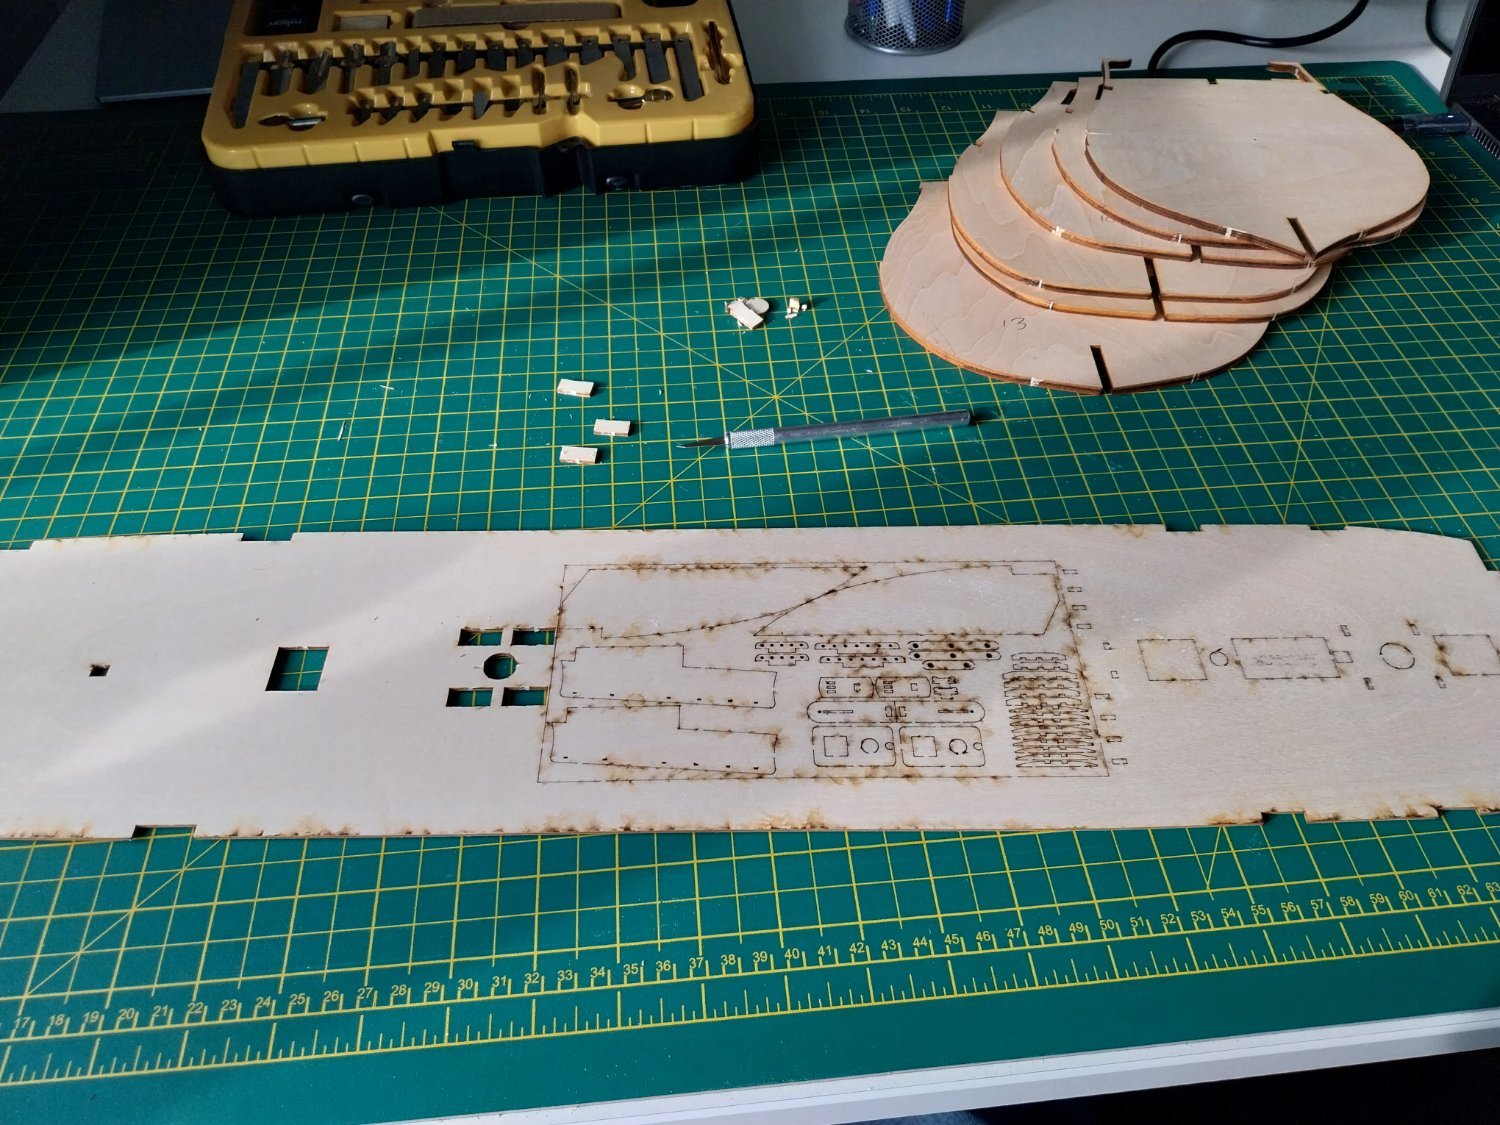
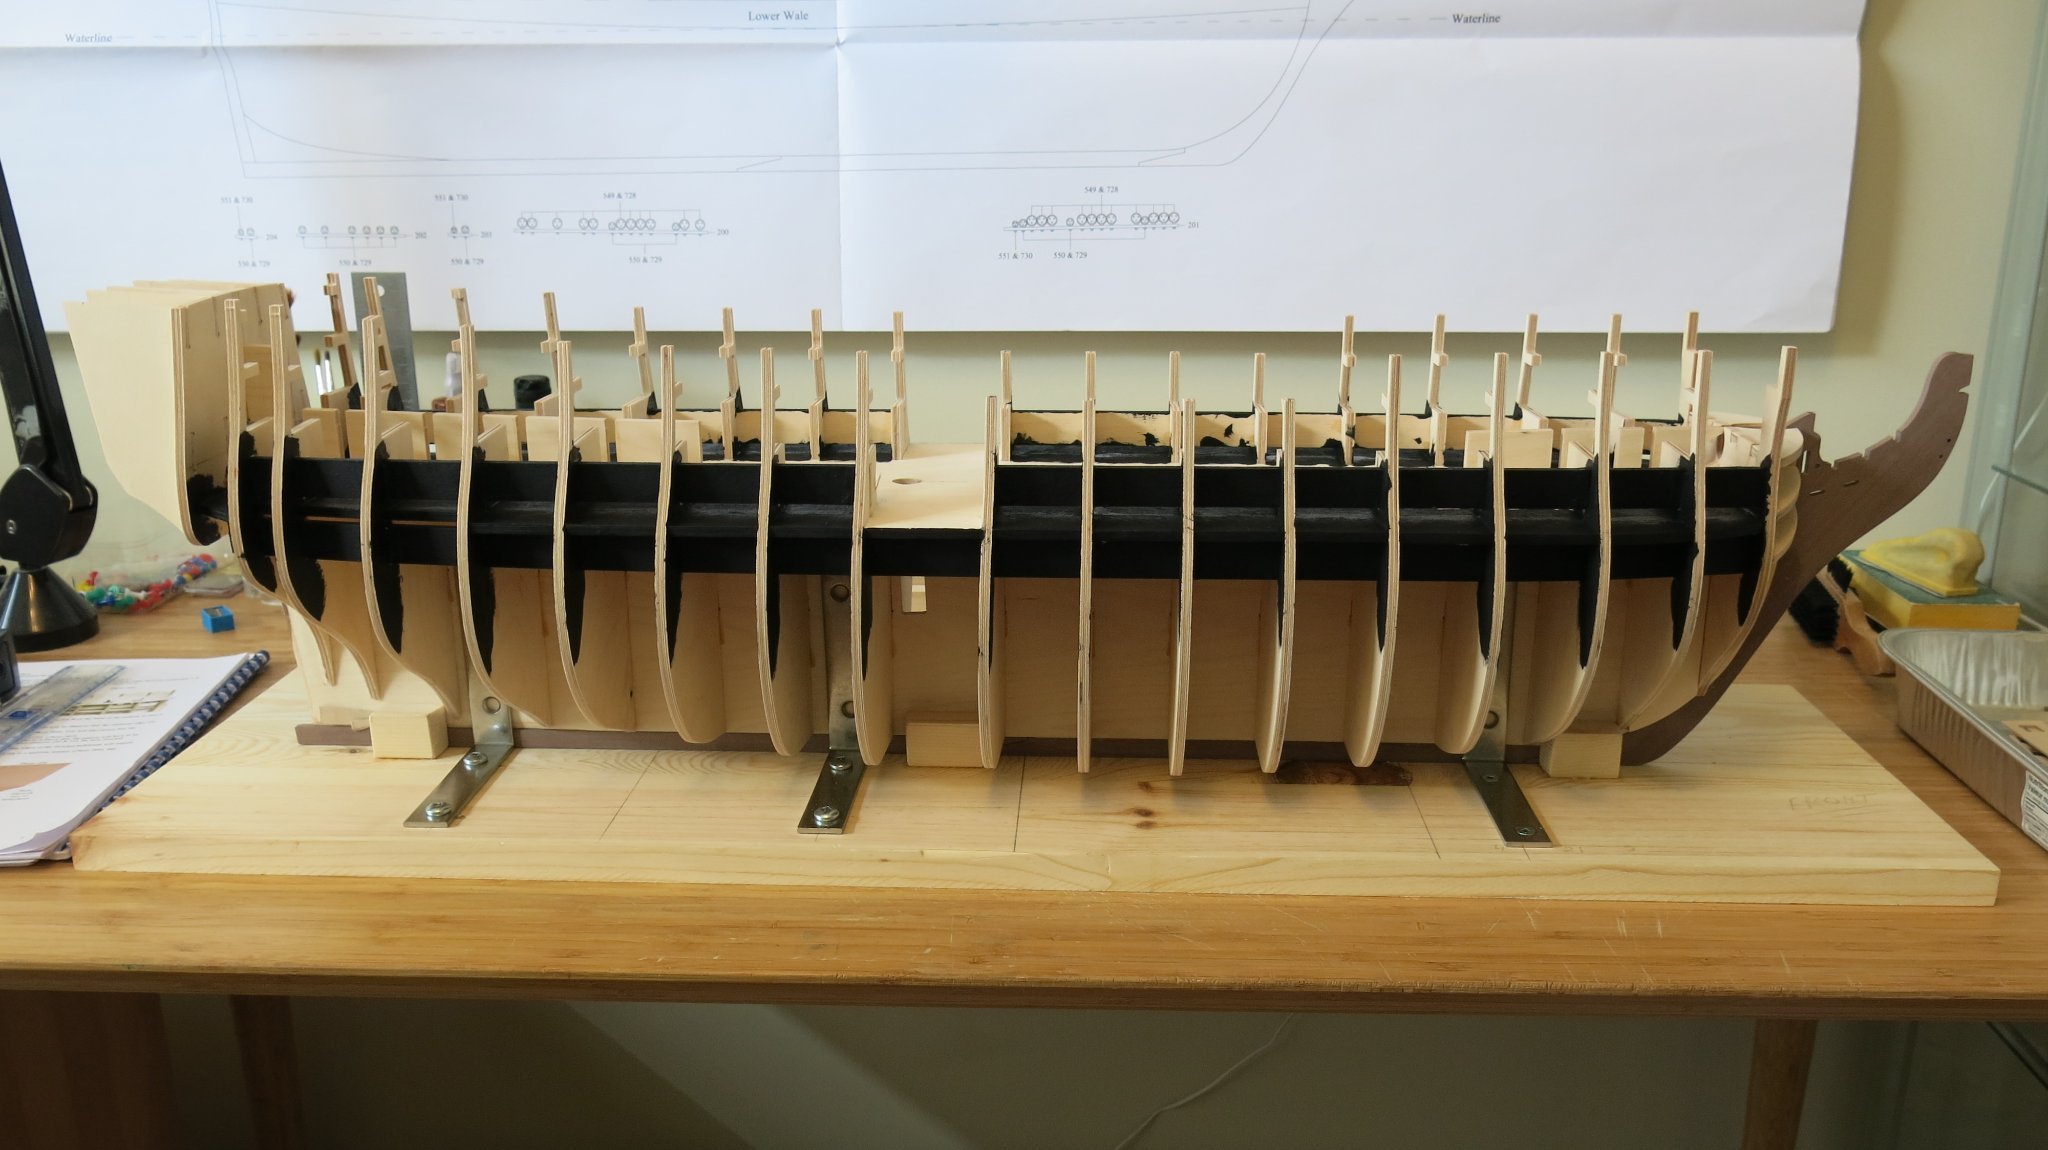
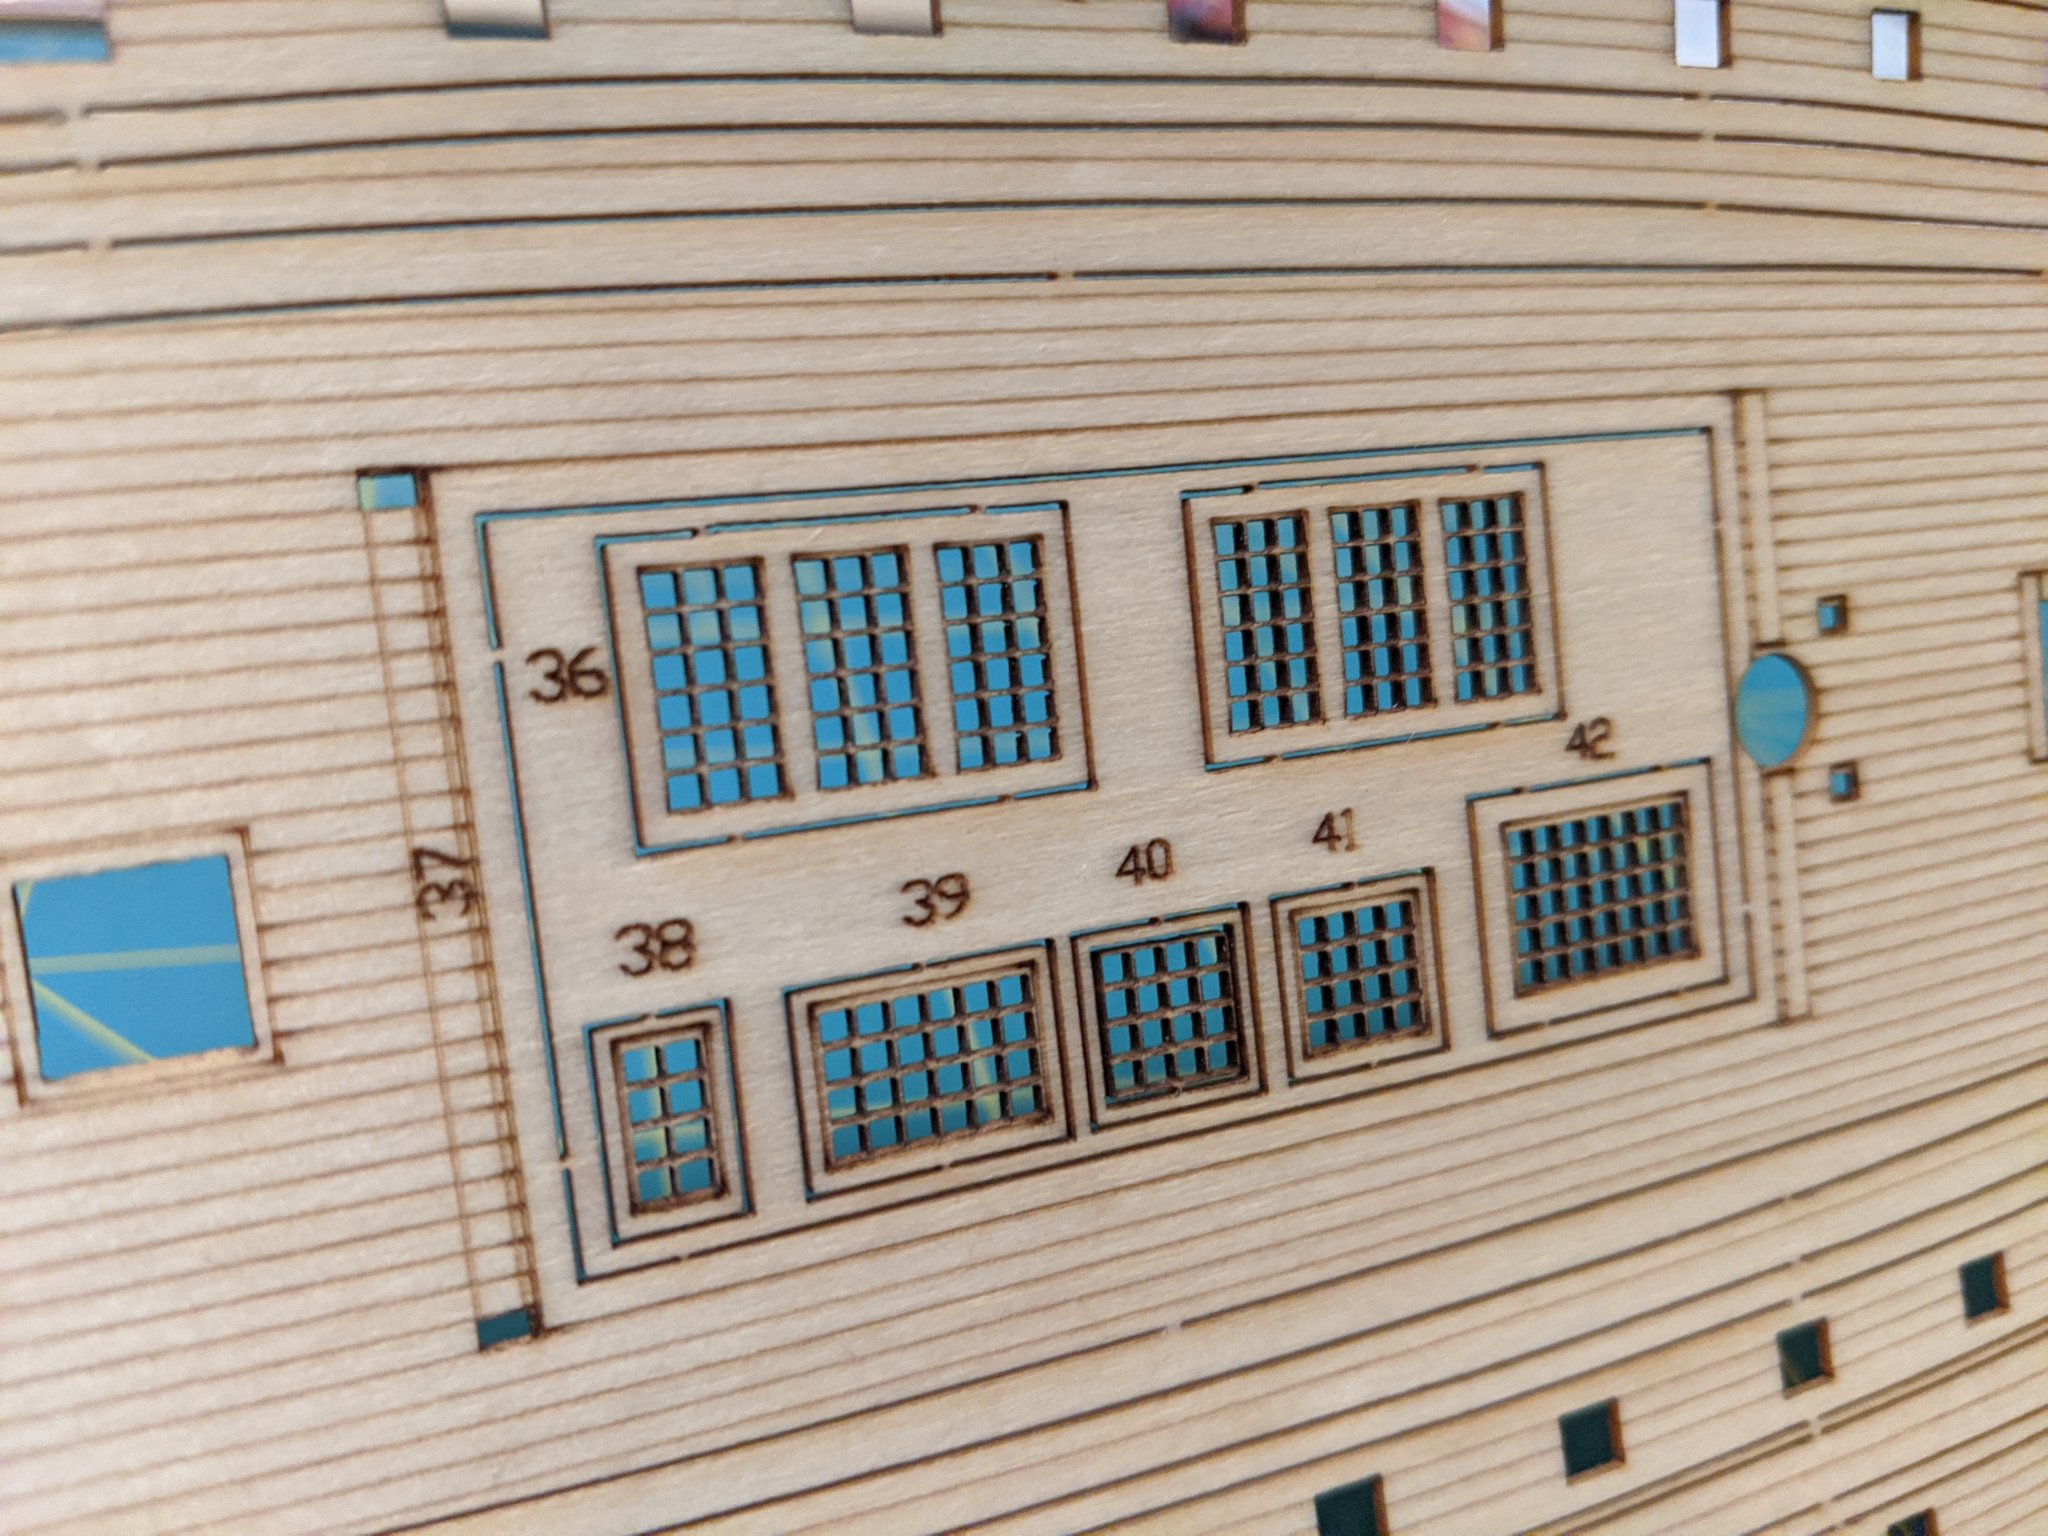
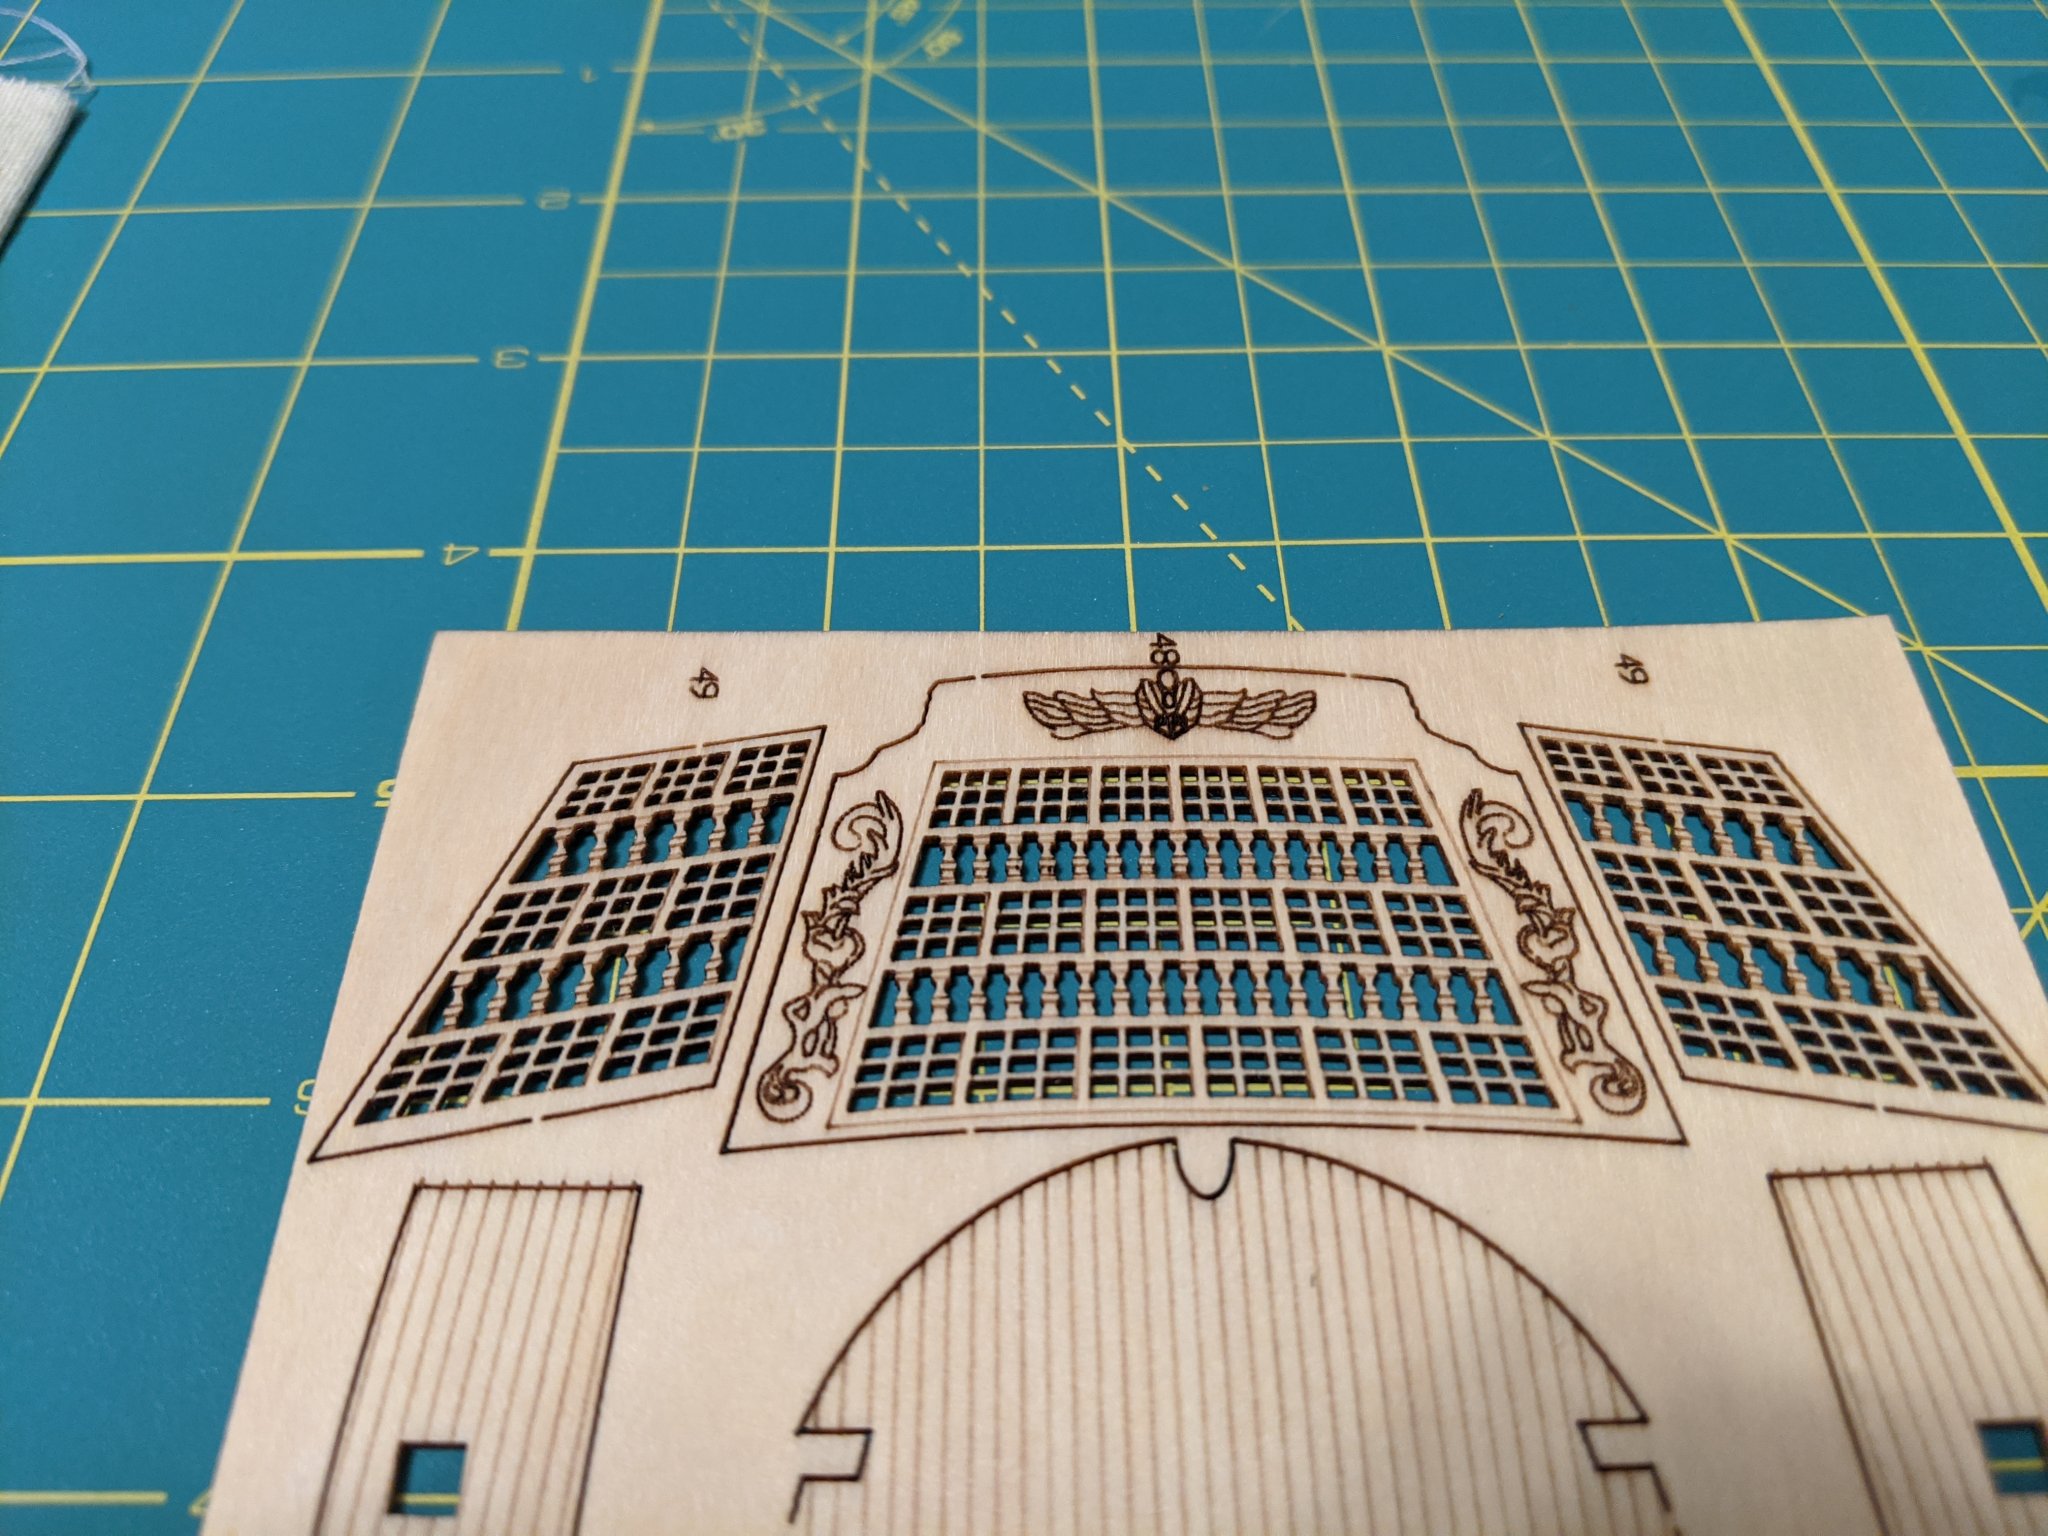
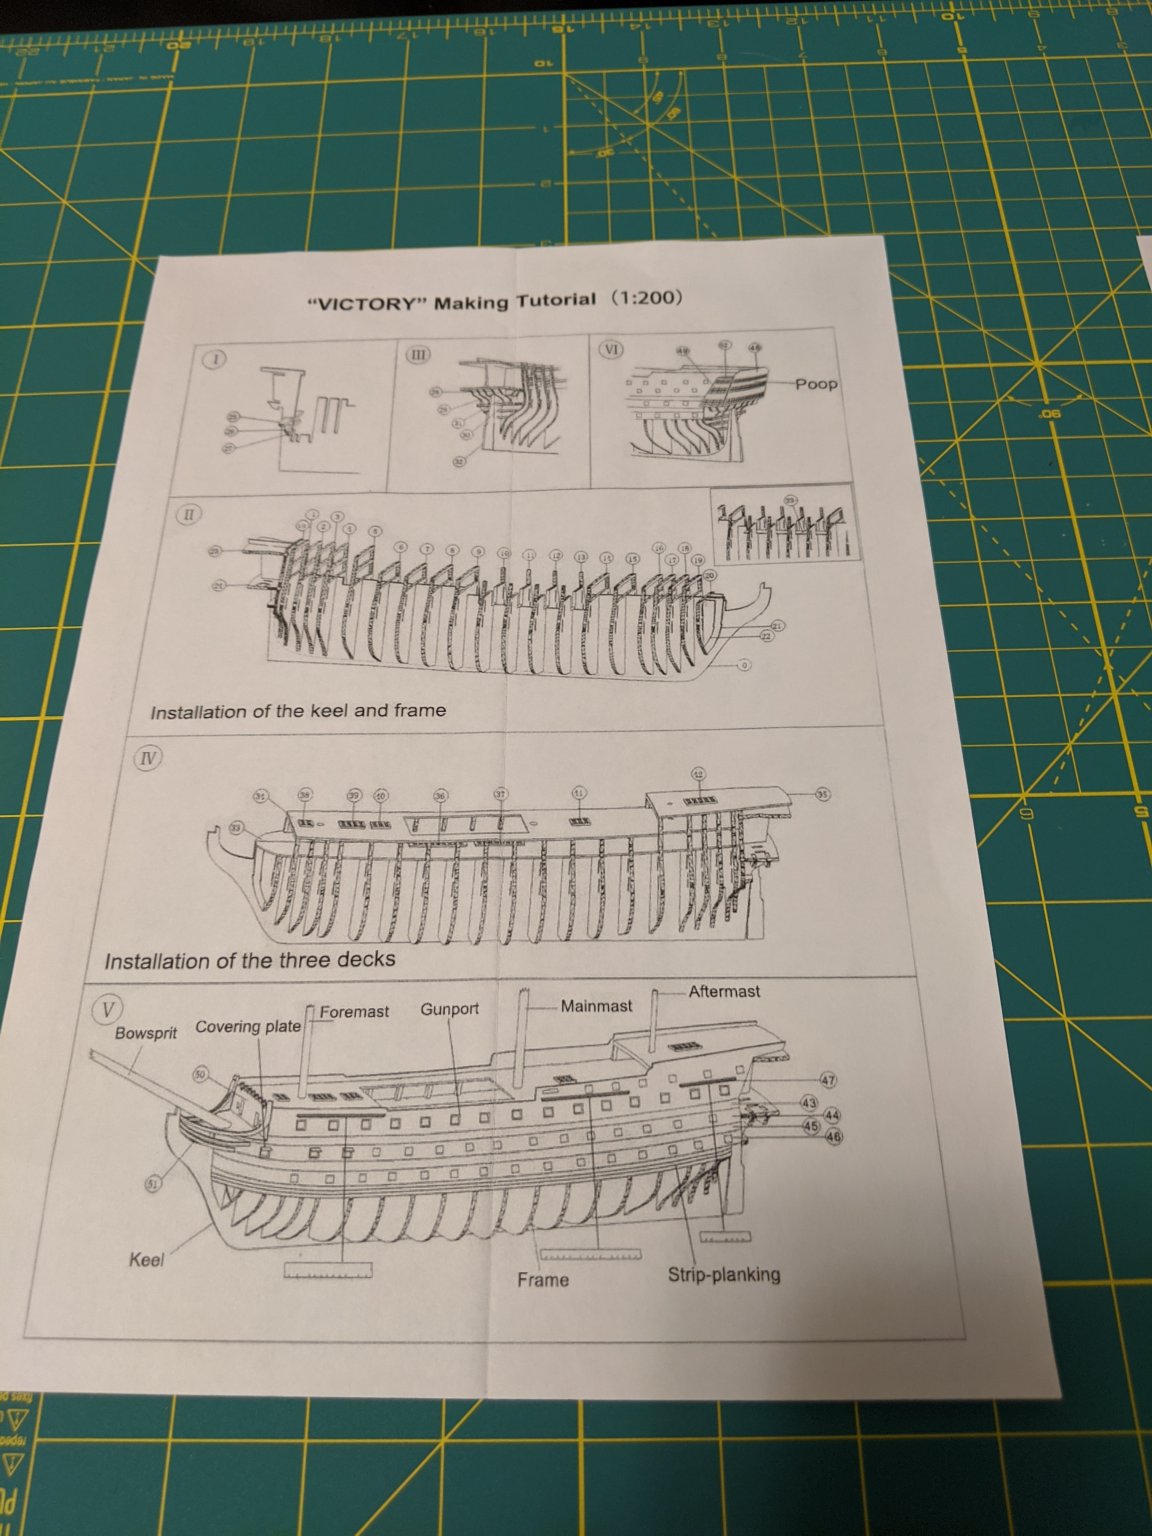
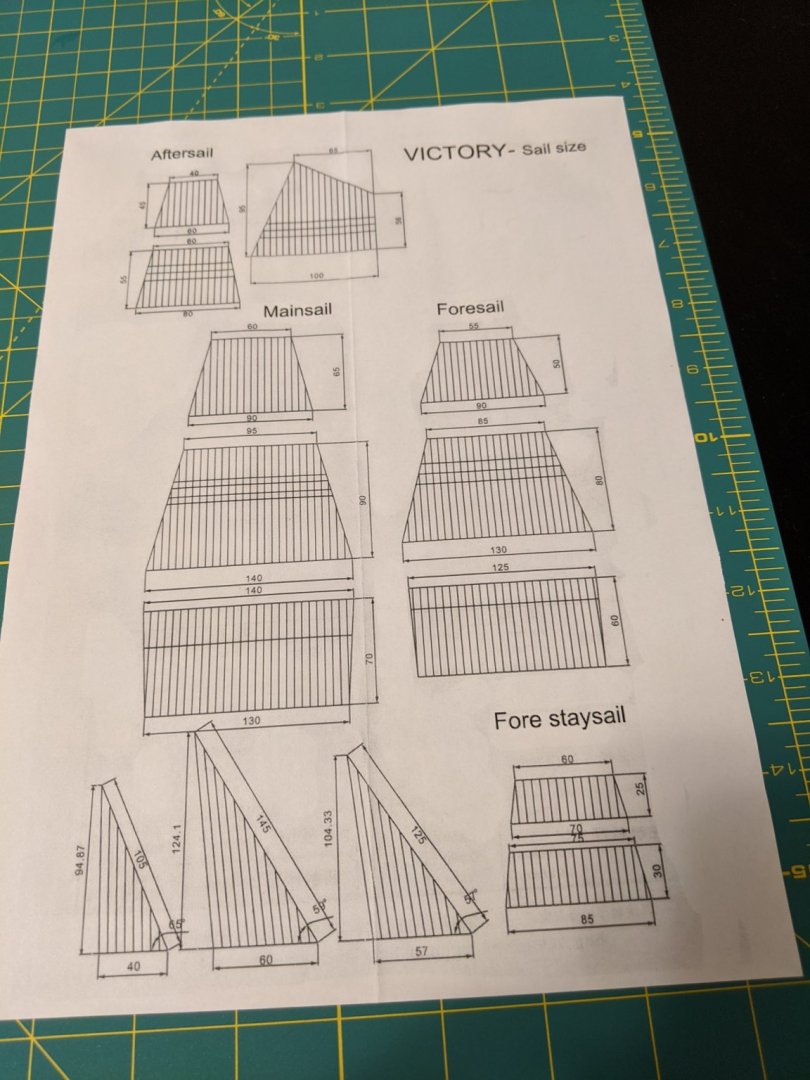
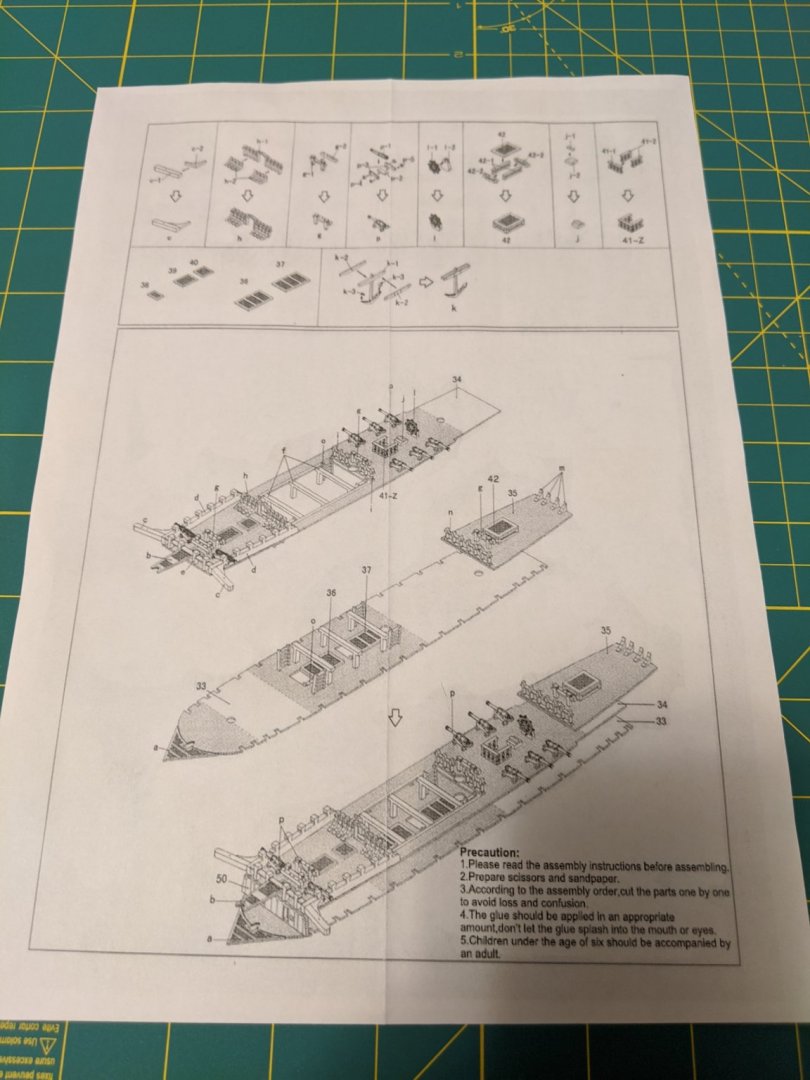
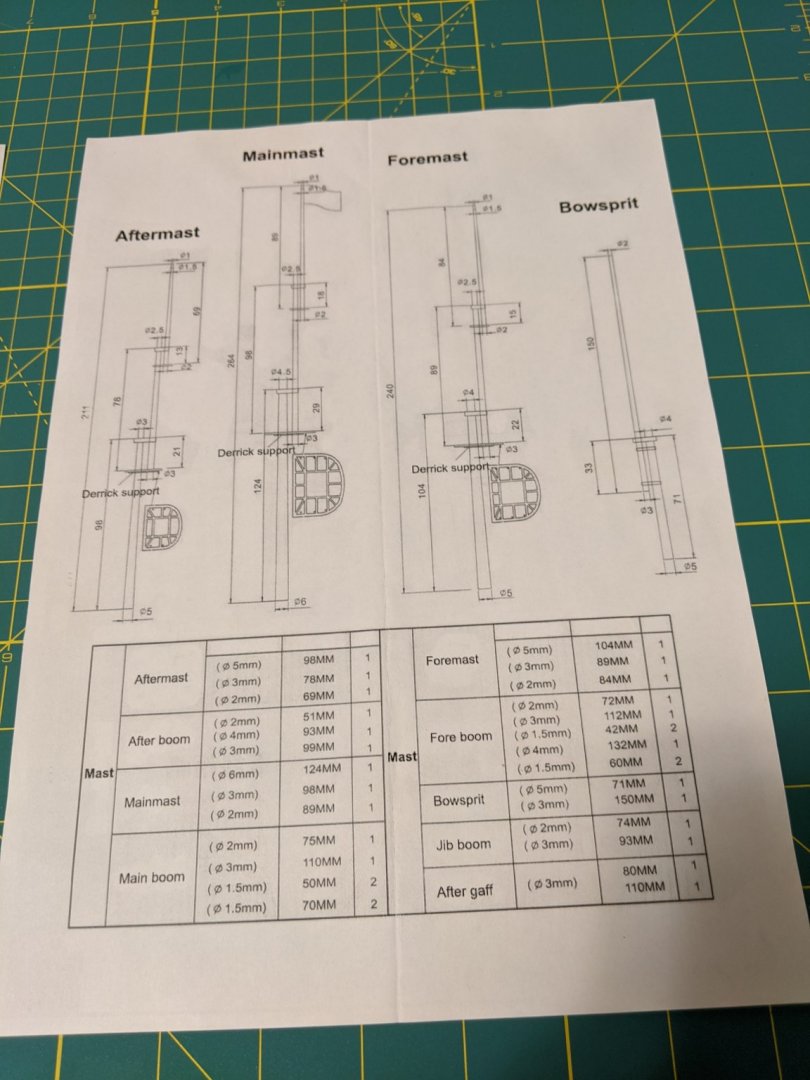
 Hello all, it's time to begin my first build log, of HMS Victory in 1:200 scale. This will be the 3rd sailing vessel I have built, though my previous 2 were Revel Plastic kits of the Cutty Sark and the CSS Alabama, and both were several decades ago while I was in high school. I've been lurking here in MSW for a couple months now once I decided I wanted to pick up the hobby again and wanted to build in wood this time, and have been dropping hints to the Admiral that all along. So last week for Christmas she presented me with this kit, proud as can be. I just wish she had taken a closer look to my wish list on Amazon instead! But as a fist time kit to learn new skills and techniques on, I can't complain. To start off, I am not sure who makes this kit, it came from Amazon from a seller called TWOBOYS and as far as I can tell the manufacturer is Western Wooden Sailboat. The parts sheets are die cut, I thought, as I don't see much char on the cut edges, but as you can see in some of the pics below, of the stern windows and deck grates, the detail is pretty good at this scale. Sadly, the plans and instructions are seriously lacking. I have basically 4 8.5x11 pages of very basic plans and directions to work from. I have tried searching online for the MFG, but have had no luck locating anything with greater detail. Luckily I have numerous online resources that were not available 30 years ago for a few tips and tricks when I run into a road block, and a number of Victory build logs that I can review also. What I do not have at all is a rigging and sail plan, but I think I can work this out, at least well enough for this first attempt. So, after checking each parts sheet for missing parts or damage, I popped the false keel out, and starting to dry fit the bulkheads. The fit and finish it pretty good with most of the bulkheads fitting snugly, but not to tight that I have to sand anything to make it fit. Special thanks to Lazy Saint for his encouragement to start this build log. As mentioned I have been lurking for a little while now and following his build closely as it is very similar to what I am trying to build here. Wish me luck as I dive in and see what I can make of this kit. Hoser
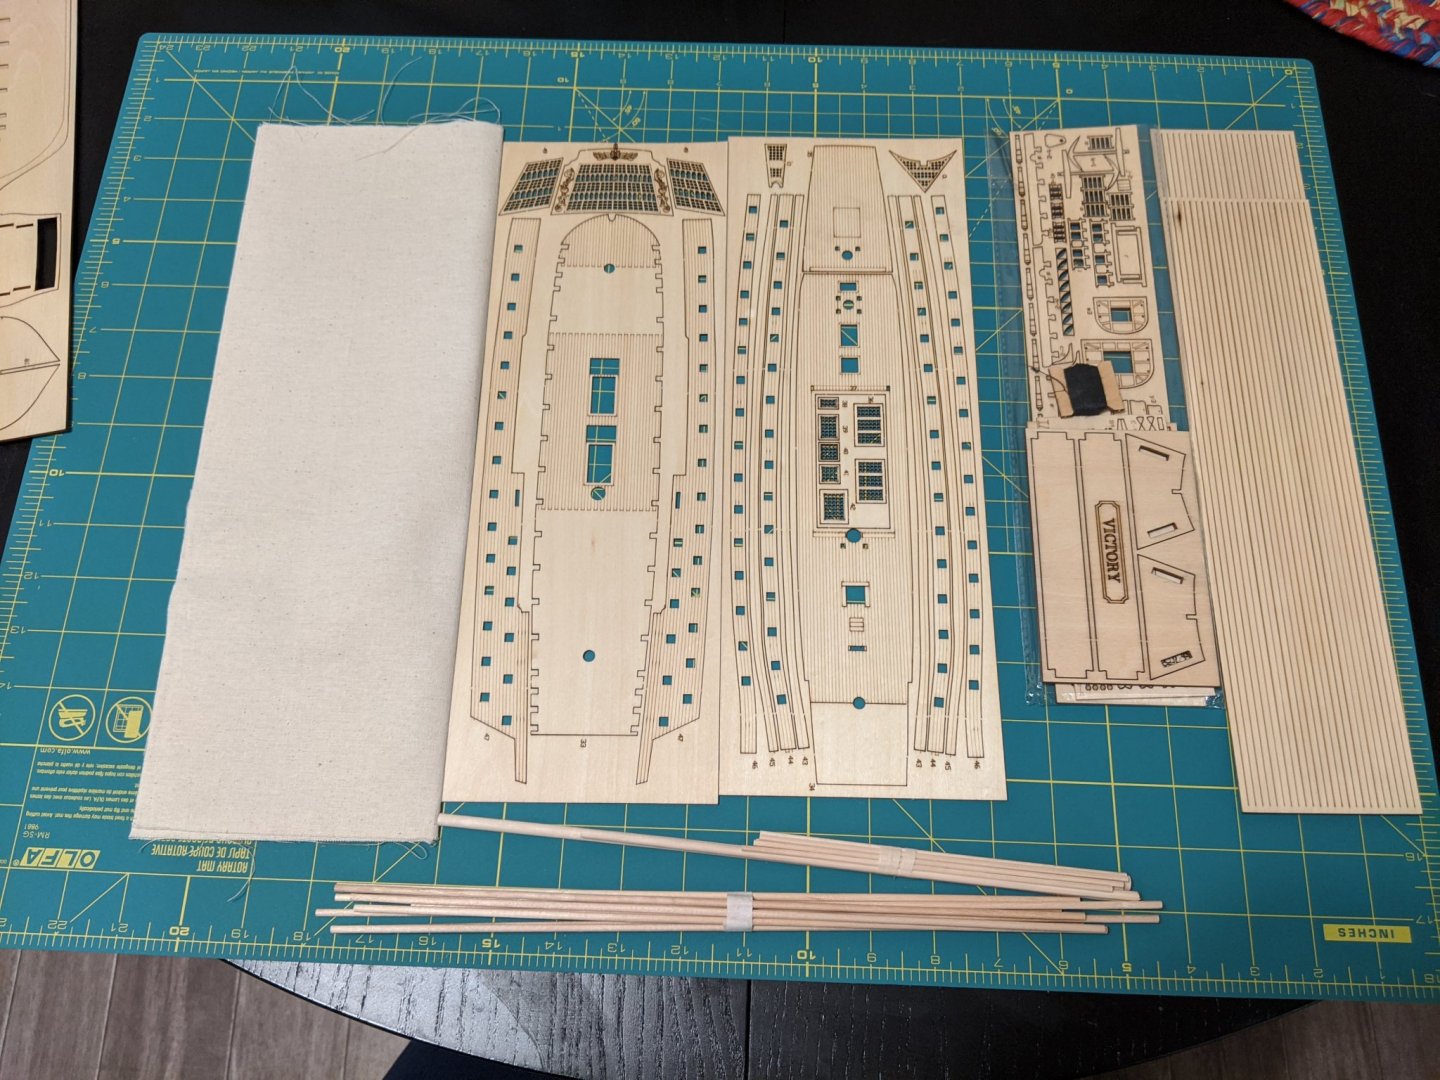


-
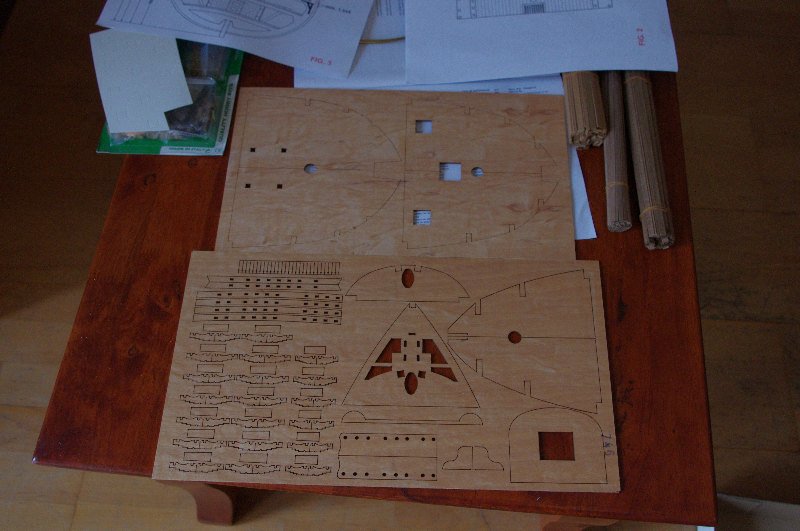
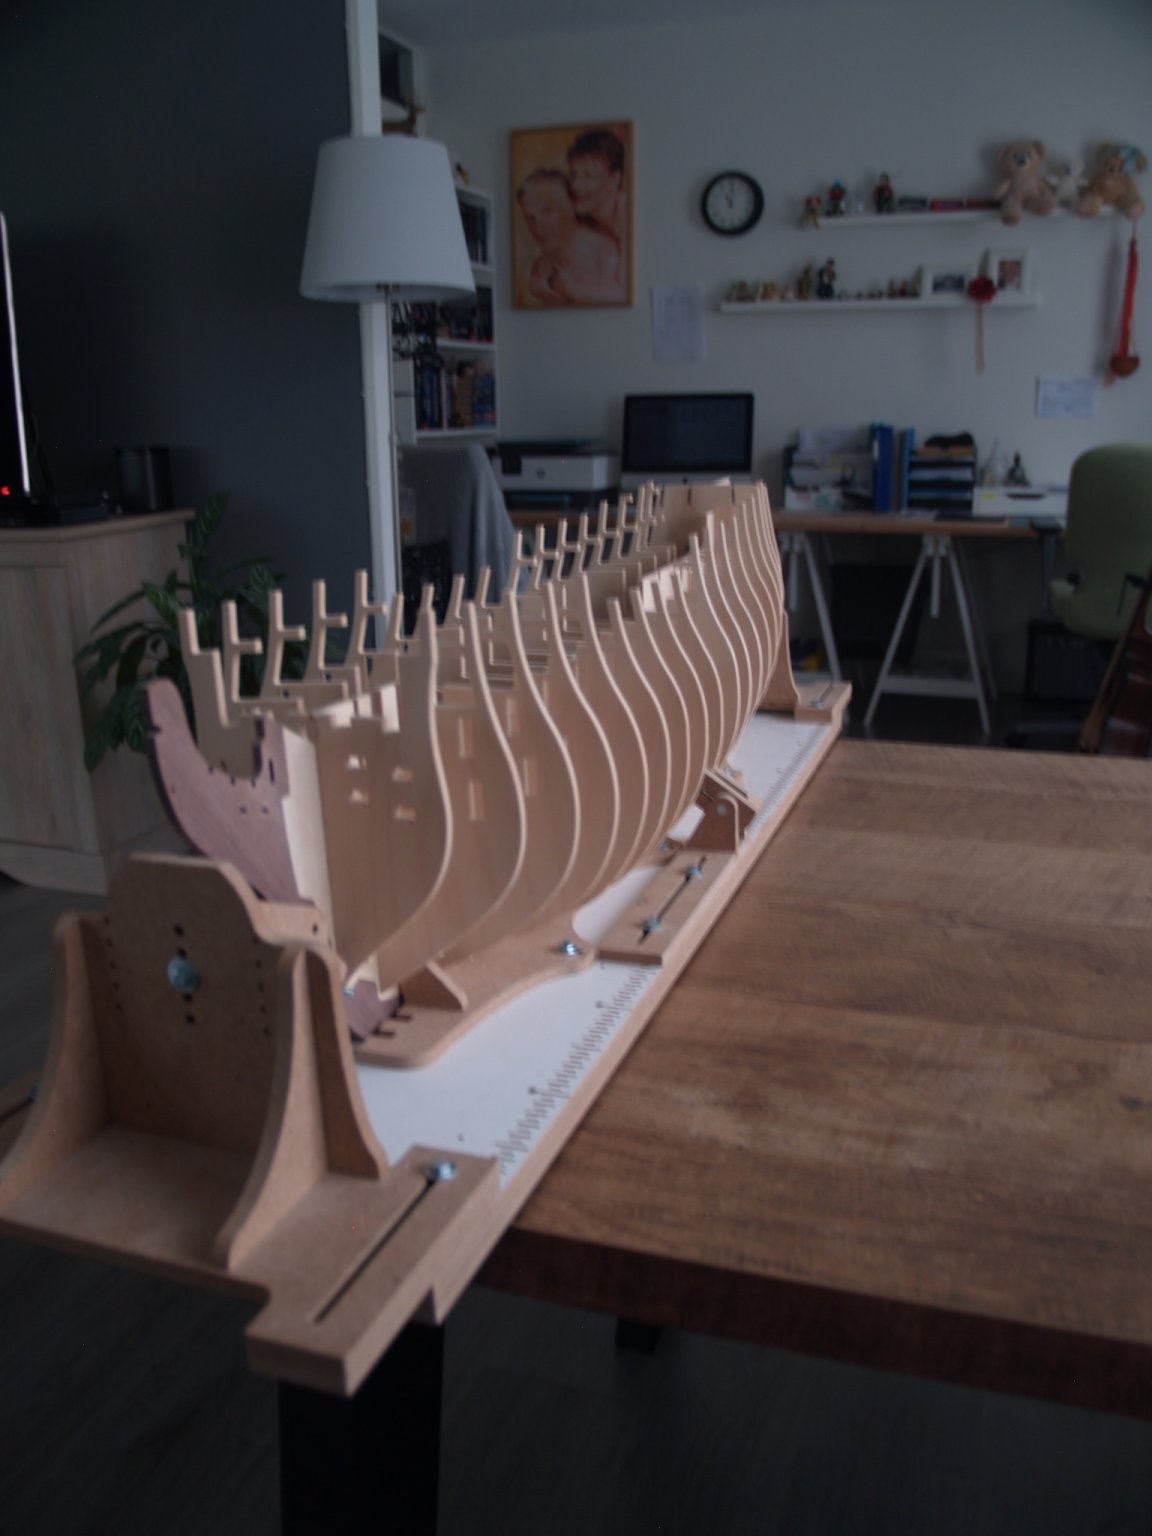
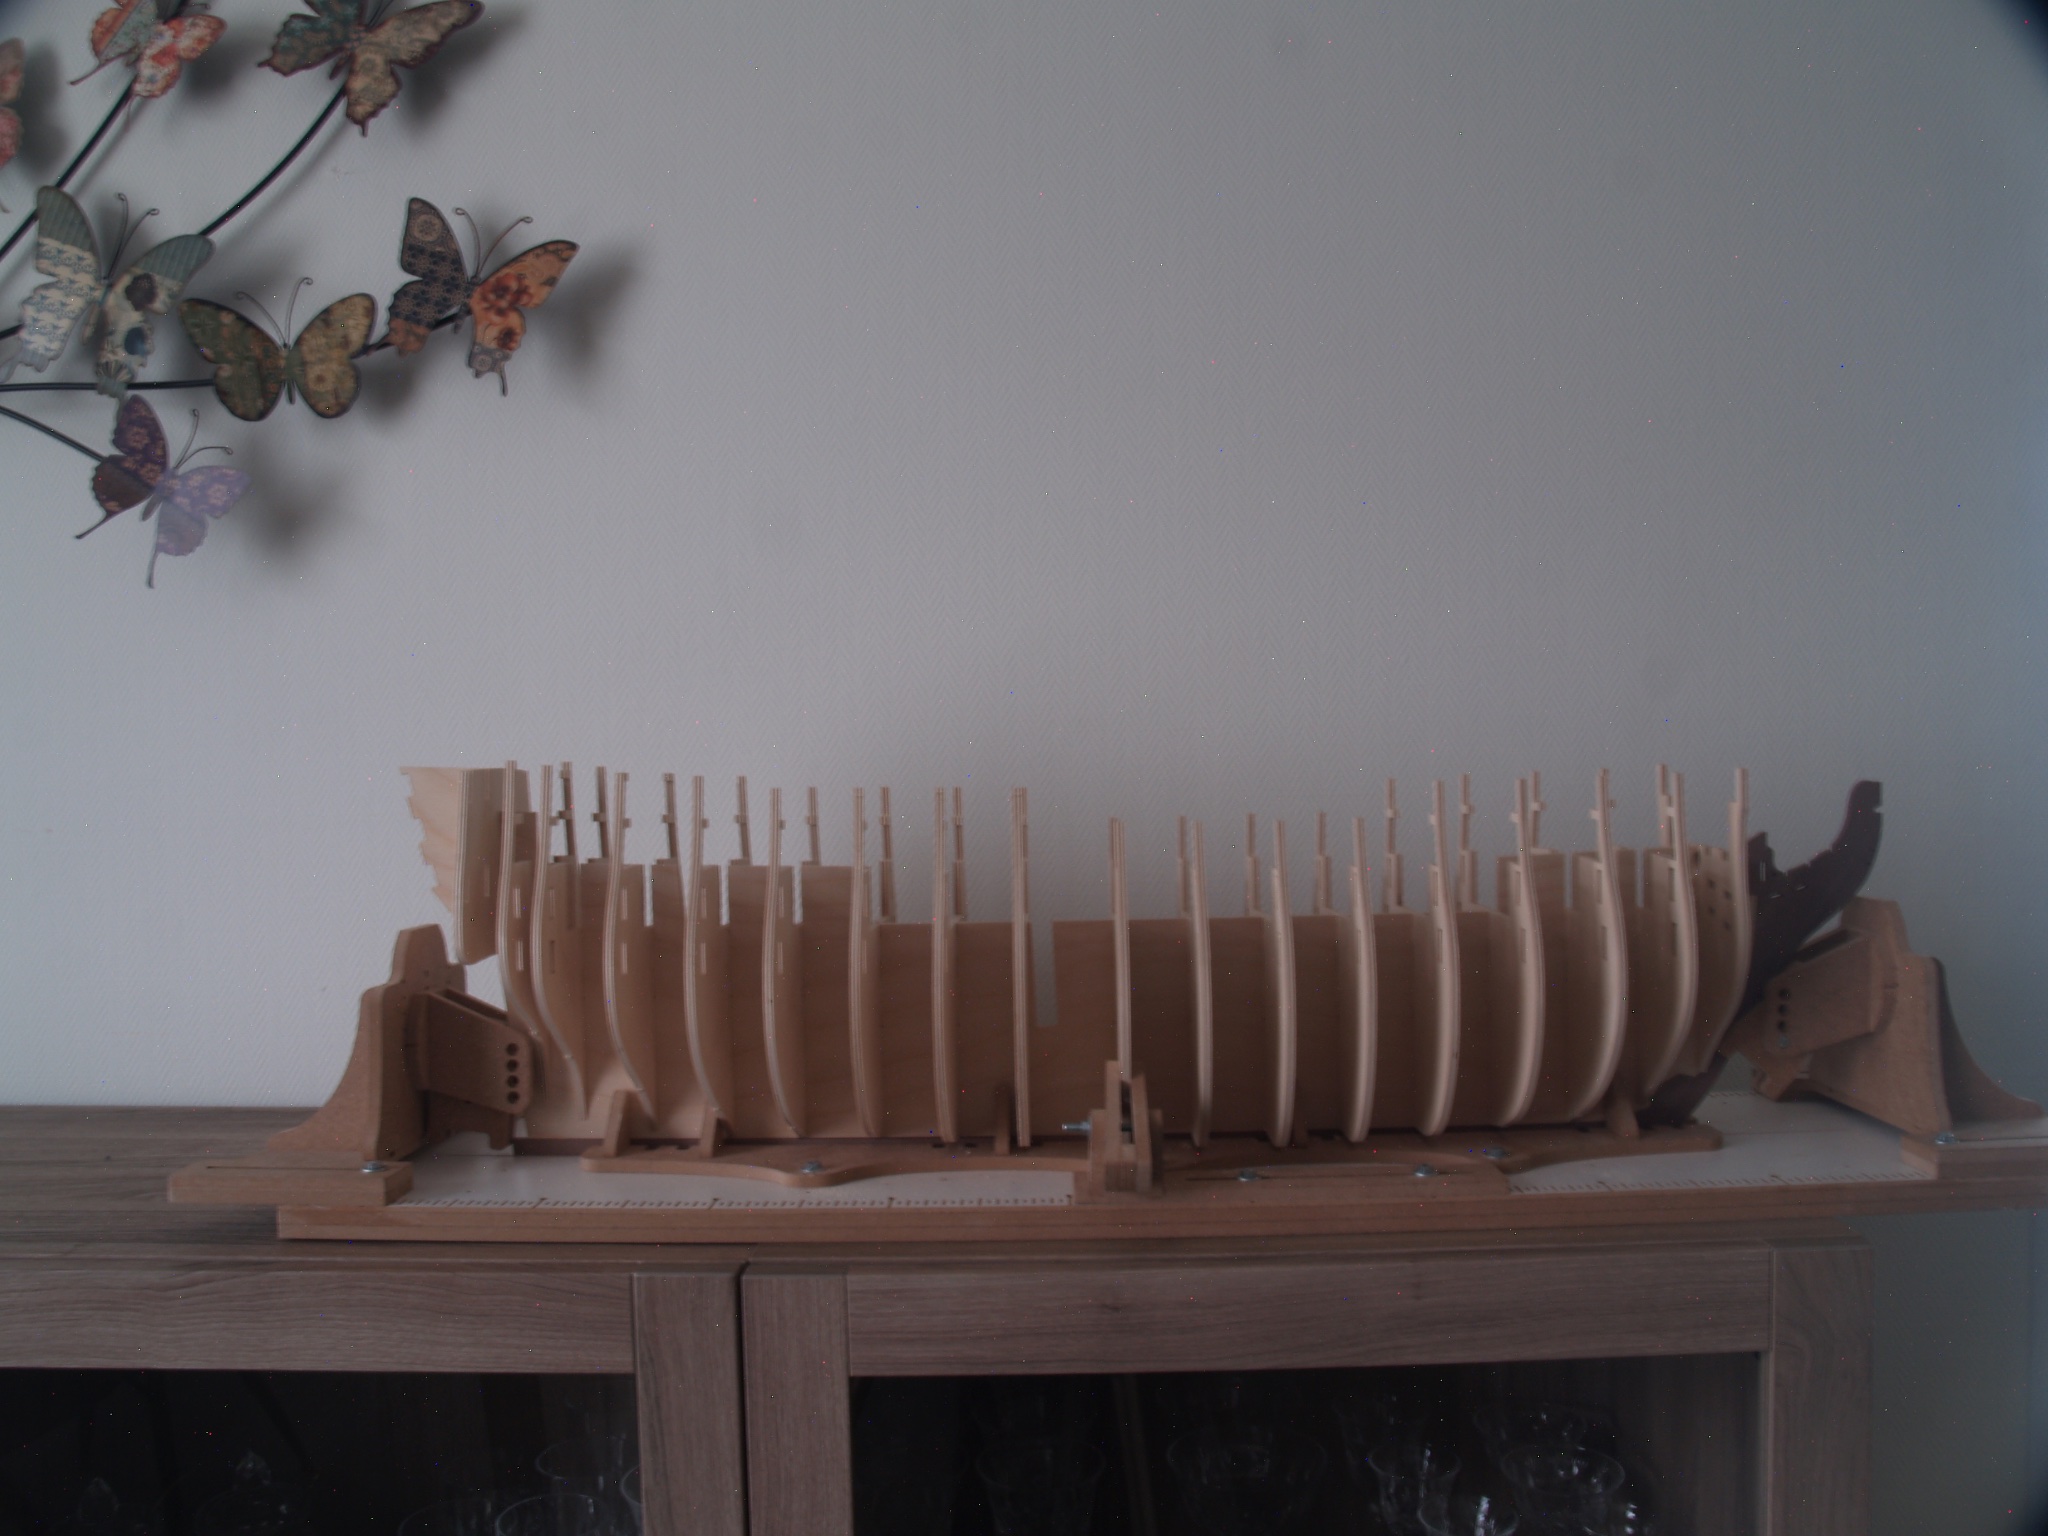
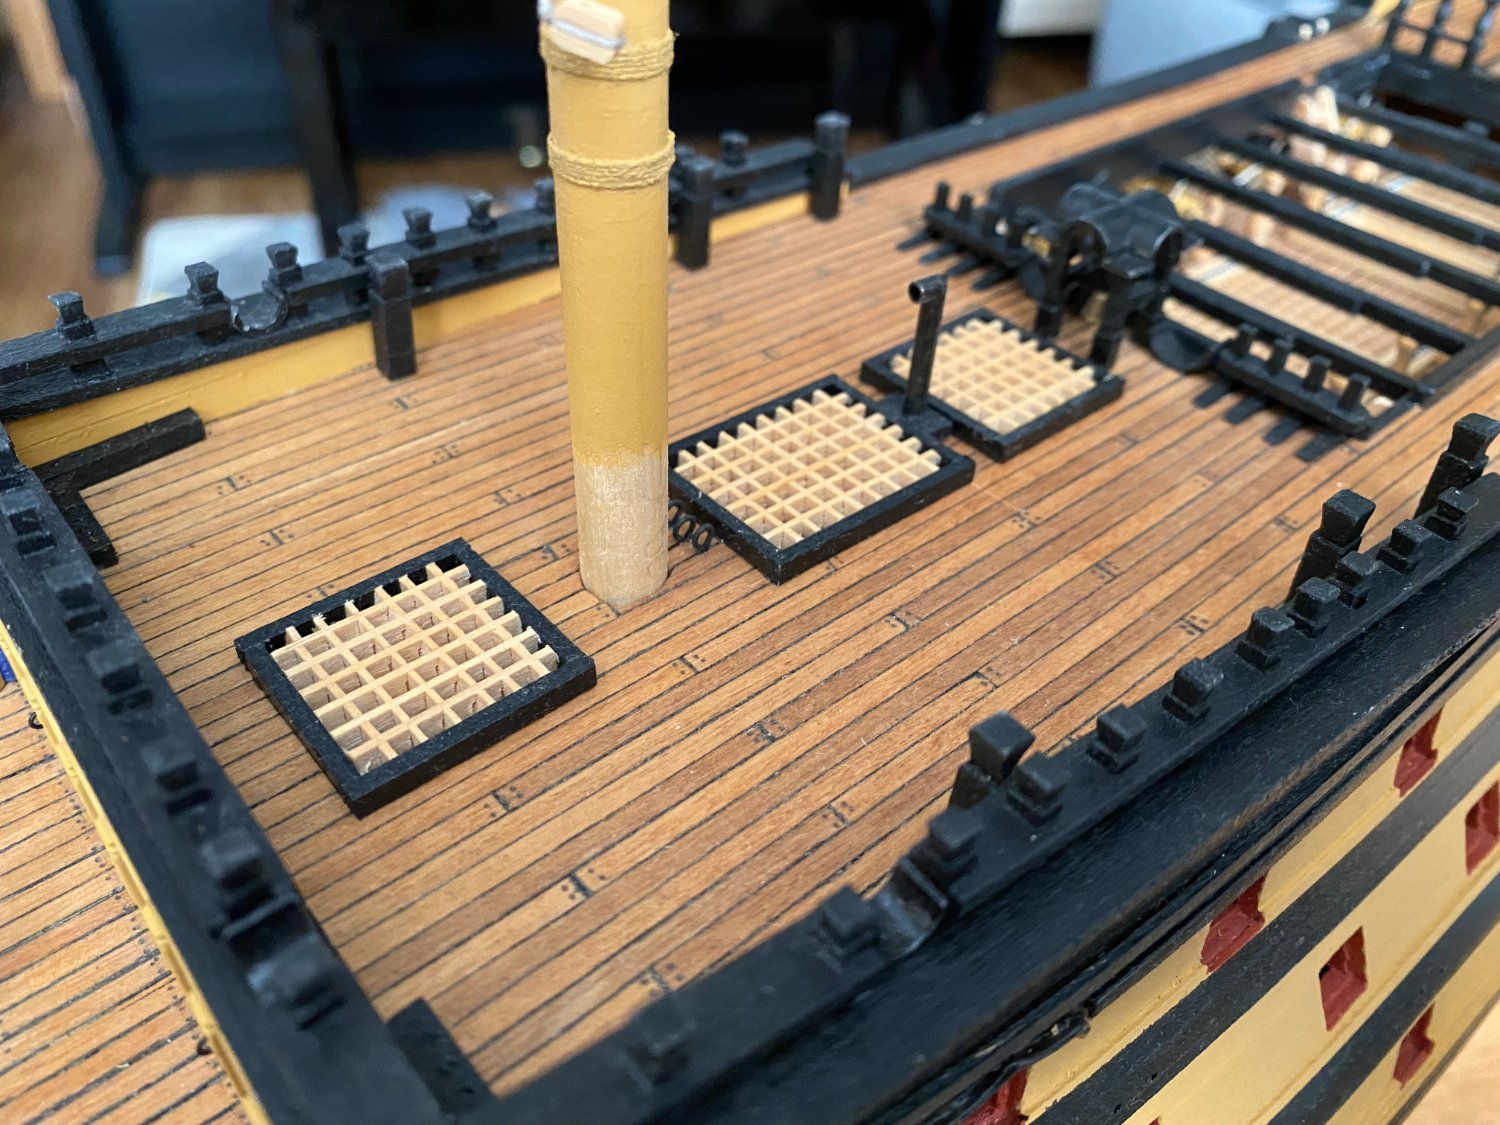
 Hello, I ve recently started with this kit. It is my first scalemodel sail ship (actually second model after more than 26 years pause) , so I am not sure what is reasonably possible in this scale (and what I will be able to do), but this is what is fun on such project. I have no ambitions to finish fast, just have fun by trying various approaches, inventing new ones, remaking things to achieve better results, etc...I have not much free time in my life (small daughter), so it will probably take lot of time. But it does not matter, goal is to have a fun and create something nice. Currently I started working on the hull and I am studying various resources (huge thanks to Shipman) including this forum (there are indeed some inspiring builds). I also bought veneer deck, some rigging accesories (https://www.hismodel.com/articles-category-38), some small resin parts (https://scalewarship.com/index.php?route=product/product&product_id=1303&search=victory&description=true) and photo-etch (https://scalewarship.com/index.php?route=product/product&product_id=1292 and https://www.britmodeller.com/forums/index.php?/topic/234932536-scalewarships-hms-victory-etch-set/). I am not sure I will use everything from these photo etches, for example hammocks looks unnatural (everything too straight), wooden gratings have mostly higher number of holes than real ship, so they dont look well, etc...Well, I will see, I have already some ideas. First I have to do some small POCs, what is feasible and what not.
 -
 Hi All, I started this model last Christmas, sorry I have been so long in starting a log , but I was alsostill building the 'Norfolk'. Then the kit went back on the shelf while I finished the 'Norfolk' and I contemplated a problem I was having with the planking, that lasted for about 5 months!! I finally got her out of storage a couple of weeks ago and have been slowly building again in between house renovations. I have taken heaps of photos so please be patient while I upload them to catch up to where I am currently with the build. I would like to make a few comments about the kit. The timber and laser cut parts are all of good quality, however all of the planks including the deck planks are walnut this makes for a very dark interior on an open model. I think they should have supplied a lighter timber for the deck planks as a contrast. all of the fittings are of high quality material although the bow figuere head does seem a bit large and akward. There were a few parts missing which I have replaced. I also have brought some extra blocks and eye pins so I can fully rig the guns and some heart blocks to replace the 3 hole blocks they supplied for the forestay. I intend to fully rig the guns on the middle and upper gun deck and to rig at least the breeching ropes on the lower gun deck. My plan is to fit the middle and upper gun deck after the hull has been completed so I can rig the cannons on each deck before fitting the deck above. We will see how that plan works out Here are some pic's of the kit I will post some more pics later Enjoy
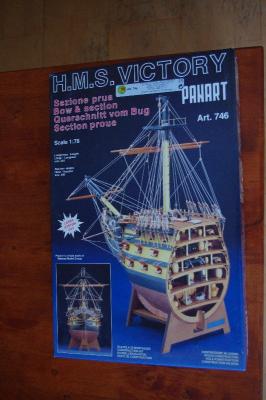


-
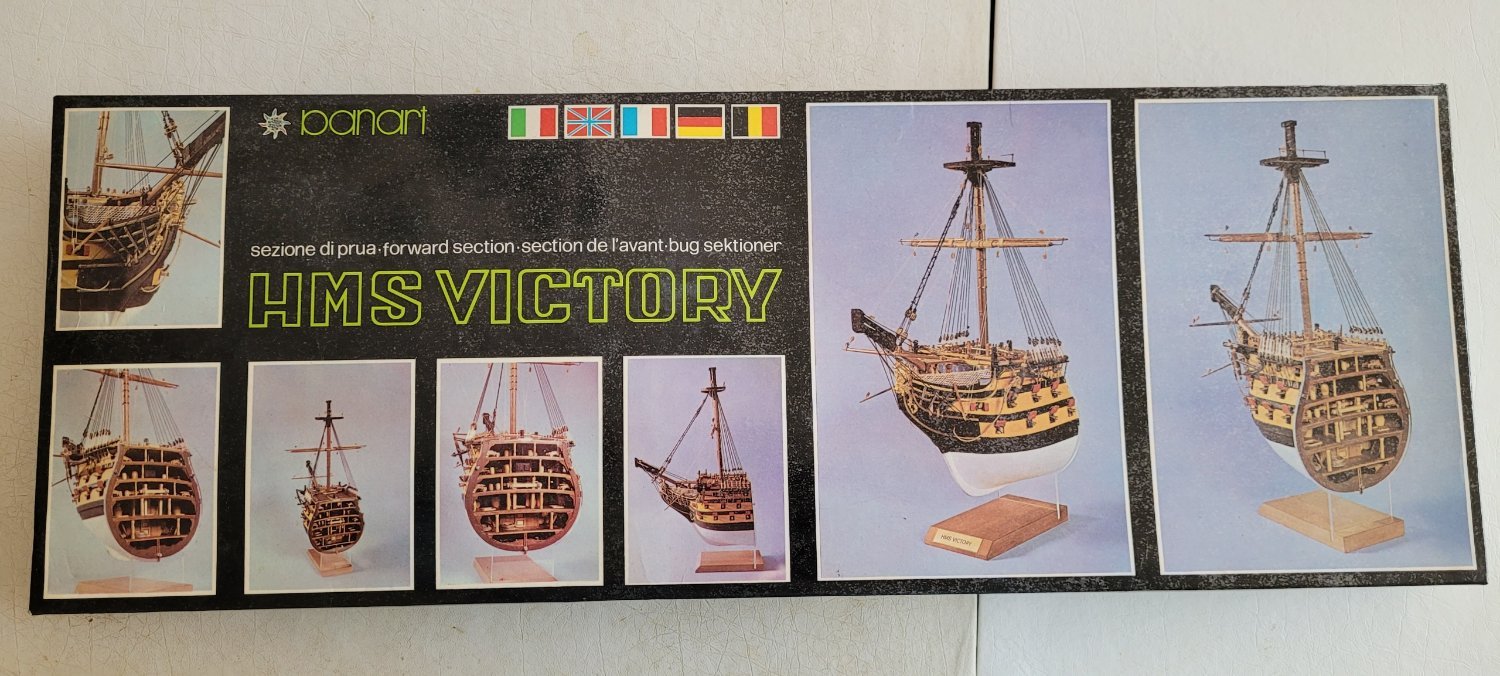
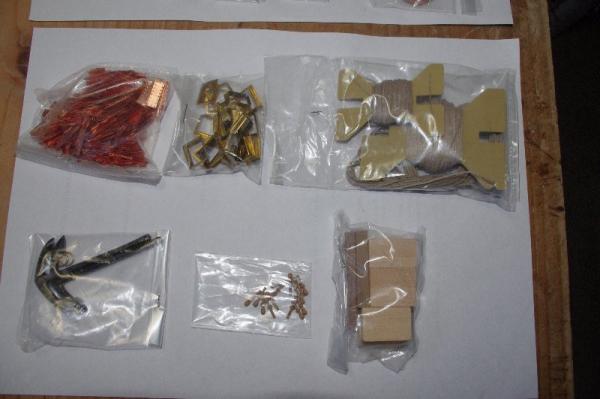
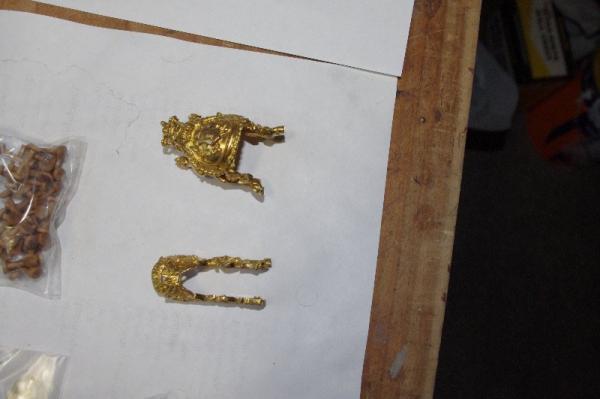
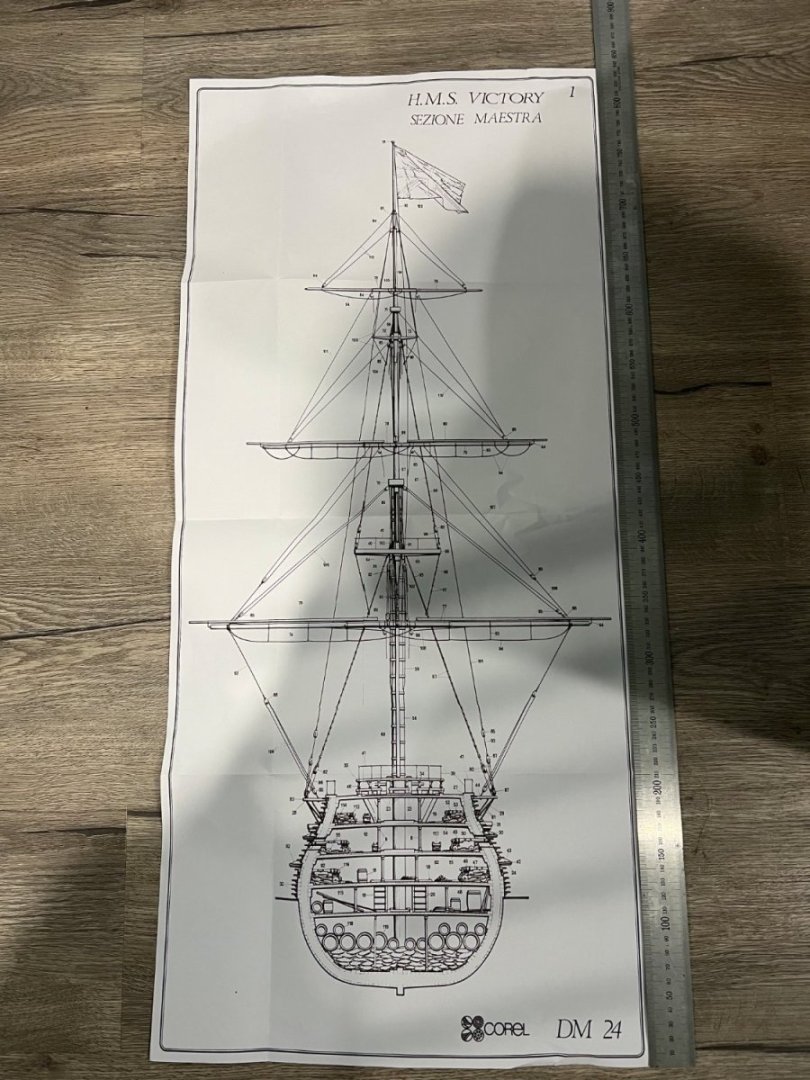
 After a longtime out of the hobby I thought I'd ease myself back in by doing something simple so I picked the Corel Victory cross section 😎🤣 So obligatory pictures of the box , full sized plan and references.
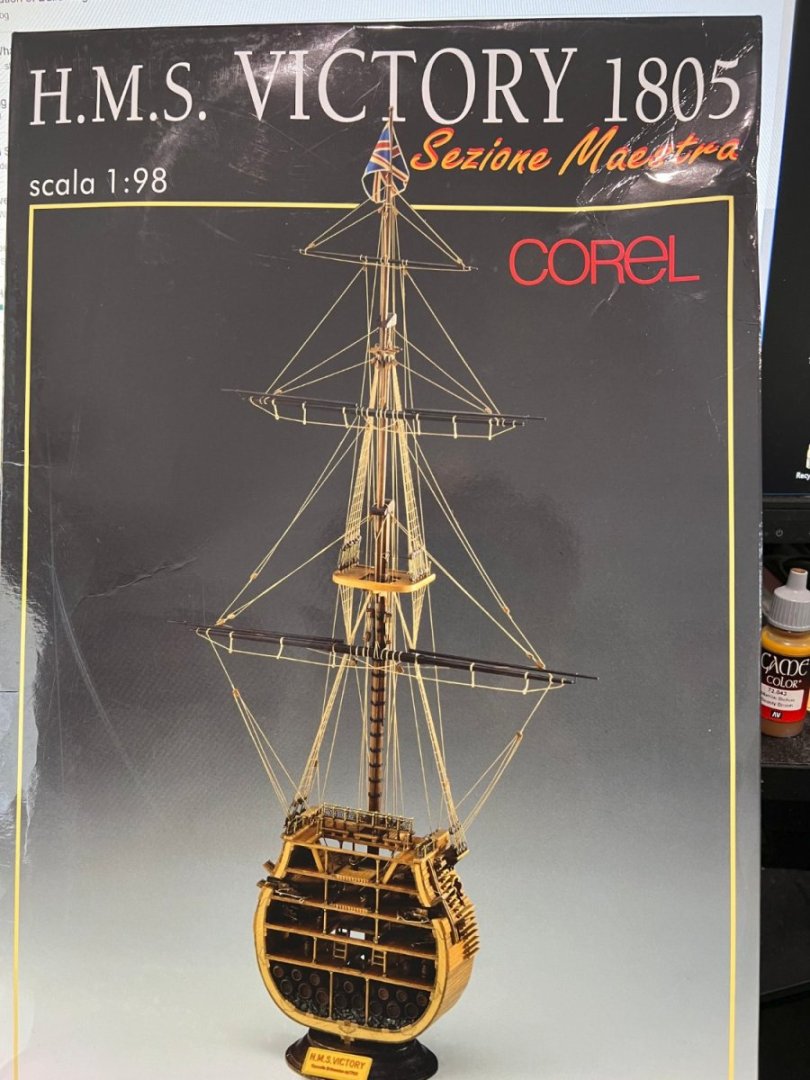

- 25 replies
-
- 4
-
-
- Victory
- Cross-Section
- (and 1 more)
-
 Along with victory cross section, that is almost done, the time has come to start HMS Victory. Corel's kit is a bit old (at least the one I have) and probably I will have to make a lot of improvements/modifications while building the hull, I have noticed that many parts did not fit very well, hull beams are looking quite old and dry I had to fill the gaps almost in every hull beam
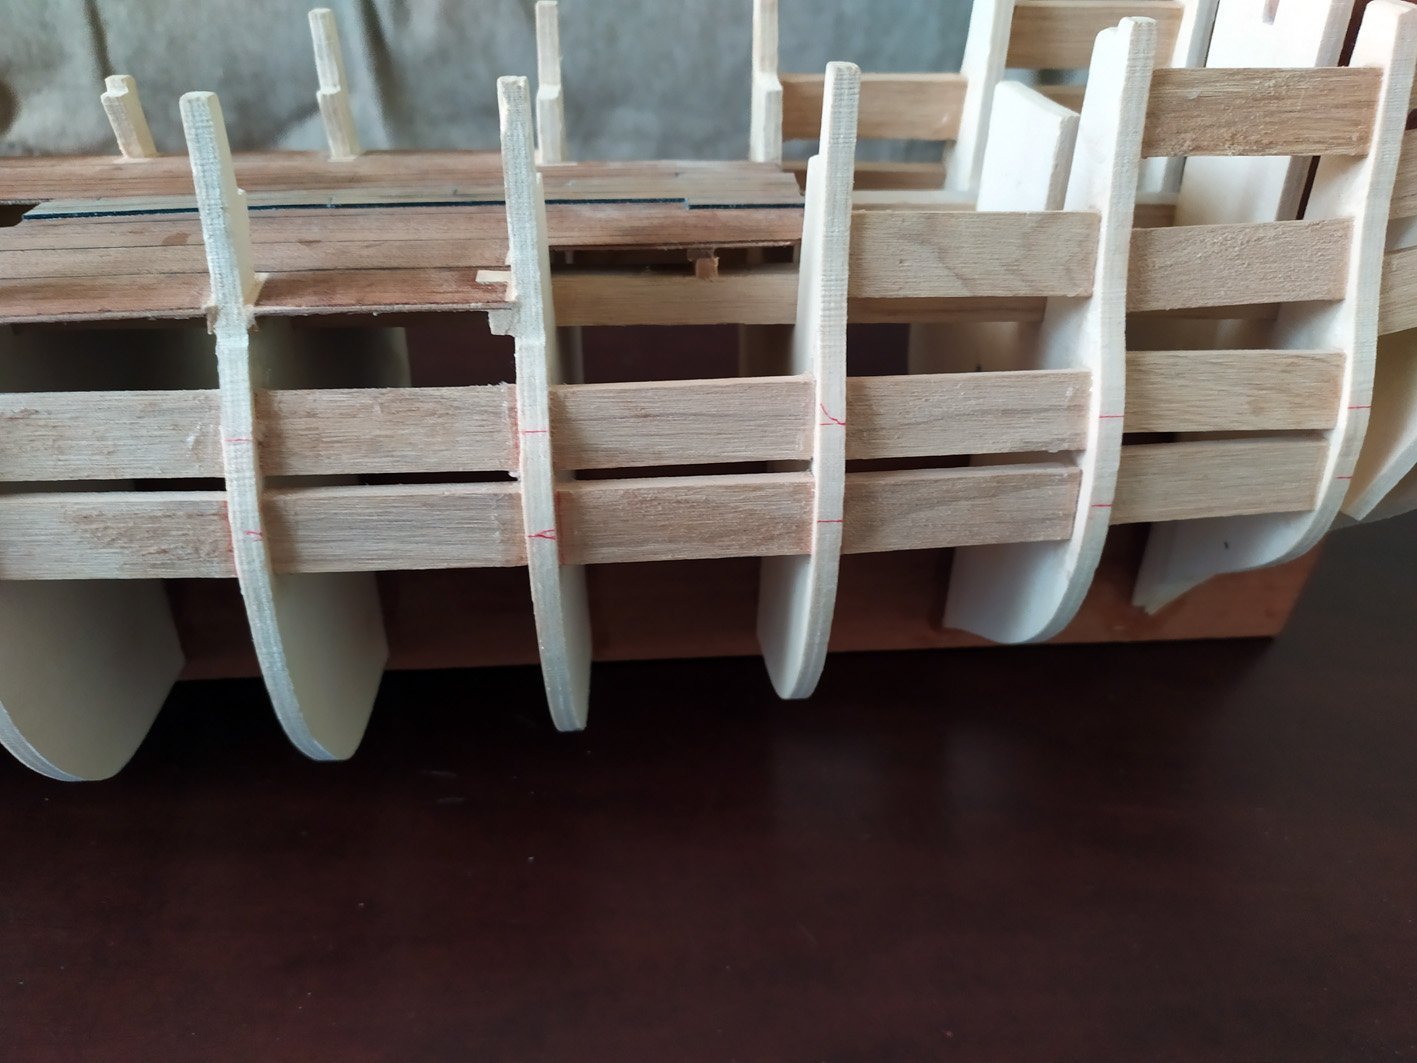
-
 Hello all, Finally I found a bit of time to restart my log of HMS Victory. For now, here's the link to my personal web site where I have a summary of the build process so far: http://www.alexshipmodels.com/category/hms-victory/ and maybe other stuff that might be interesting for someone. Last update in it was January 23rd, so quite recent. My plan was to continue with the build log from where I left but I've seen so many people reposting all the old progress pictures that made me think if I shouldn't do the same. The problem with that is that I have so many it is nearly impossible to post them all (though almost all were on the old site) so probably this coming weekend I'll try to do a selection and post a few. Regards, Alexandru
 -
 hi guys and gals, after many many to many years of following i have decided to post a build log. i bought this kit in 2006 along with the snake and diana. i finished the diana last fall and started the victory in march after completing the duke william. to date i have lower gundeck, dummy barrel strips, stem, keelson and frames attached to the keel. i am working on beveling bow and stern frames. as soon as i figure out how to post some pictures i will and once i do please feel free to comment on any and everything you wish. thanks, mort
- 60 replies
-
- 7
-
-
- victory
- caldercraft
- (and 1 more)
-
 Hello all, And yes, another Victory build! Welcome all. My apologies to Amati, but I couldn't wait any longer for their Victory. So I ordered the Caldercraft / Jotika instead as a present to myself on the occasion on my upcoming 40th work anniversary in August. And boy, she is big and heavy. A box filled with 15 kilo's (33 lb) of all kinds of goodies.
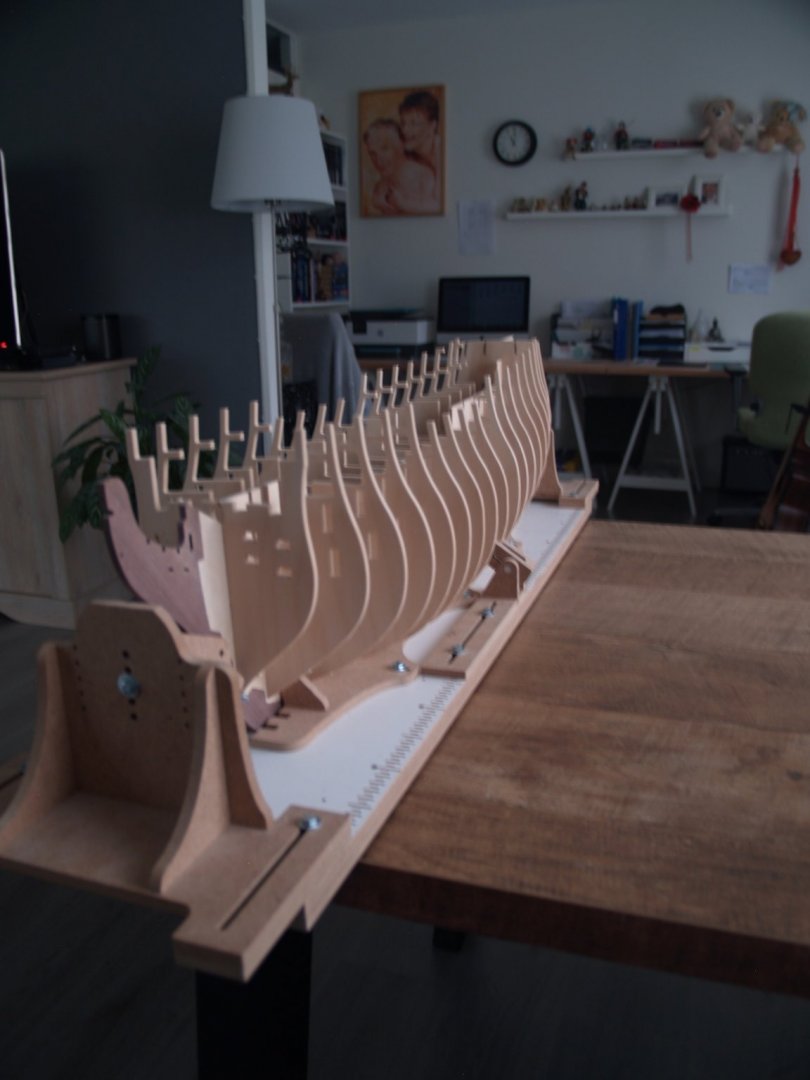


-
 Born in Plymouth and brought up in Pompey. 6 generations of Royal Navy on both sides of my family (all mainly Chief POs, ranging from stores to engineers) but I let the side down when I broke the traditions and didn't become a matelot (mainly because I wanted to fly harriers but got diagnosed as colour blind at 11, so that was out, and lost the heart to do anything else RN related!). So.....I became an accountant, via a trip to Uni to get a Marine Engineering degree....what else! Live in "Admiralty House" (now I'm 40 and have my own nice enough to merit the name), prints of HMS Victory and HMS Royal Sovereign adorn the entrance hallway, stairs and my office, so doing all the "right" things. However, I've always wanted to build a big, wooden, model of "Vicky" as a nod to my Naval heritage and all those family members who have served before. Call it my "apology", if you like. So, my Grandad (stoker/engineer, turned Seawolf programme leader post-Navy), then 81, bought me the Billings Boats kit in a "get on with it then cos I want to see it finished" prompt. This was 2 years ago and I'd made some good progress but it stalled what with the general time-constraints of life (work, kids, divorce, re-marriage etc etc) but I want to kick-start it again and get going. Partly prompted by the fact that same Grandad, now 83, went through a tough time recently and I've now taken him in to live with me and my family (as a thank you for looking after me all those years my Dad was away when I was younger). Wish I'd found this site sooner as have been reading with interest some of the other build logs and some of the hints, tips and problems I've faced so far may have been a bit easier to overcome! Anyway, I will start to post photos of the work to date and some of the above issues and then carry on from where I left off. First ever build, so it's not perfect (so please be gentle all you pros) but I've tried to show (mainly Grandad) that despite being a number-cruncher by profession now, there's a real marine engineer (not just the right letters after my name) in there somewhere! Anyway, I hope you enjoy. Cheers, Chris
- 117 replies
-
- 7
-
-
- victory
- billing boats
- (and 1 more)
-
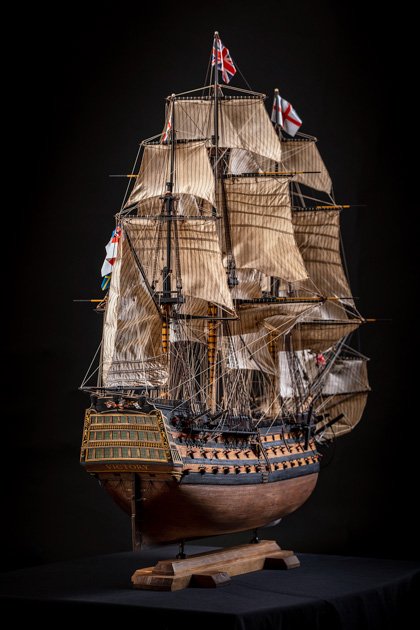
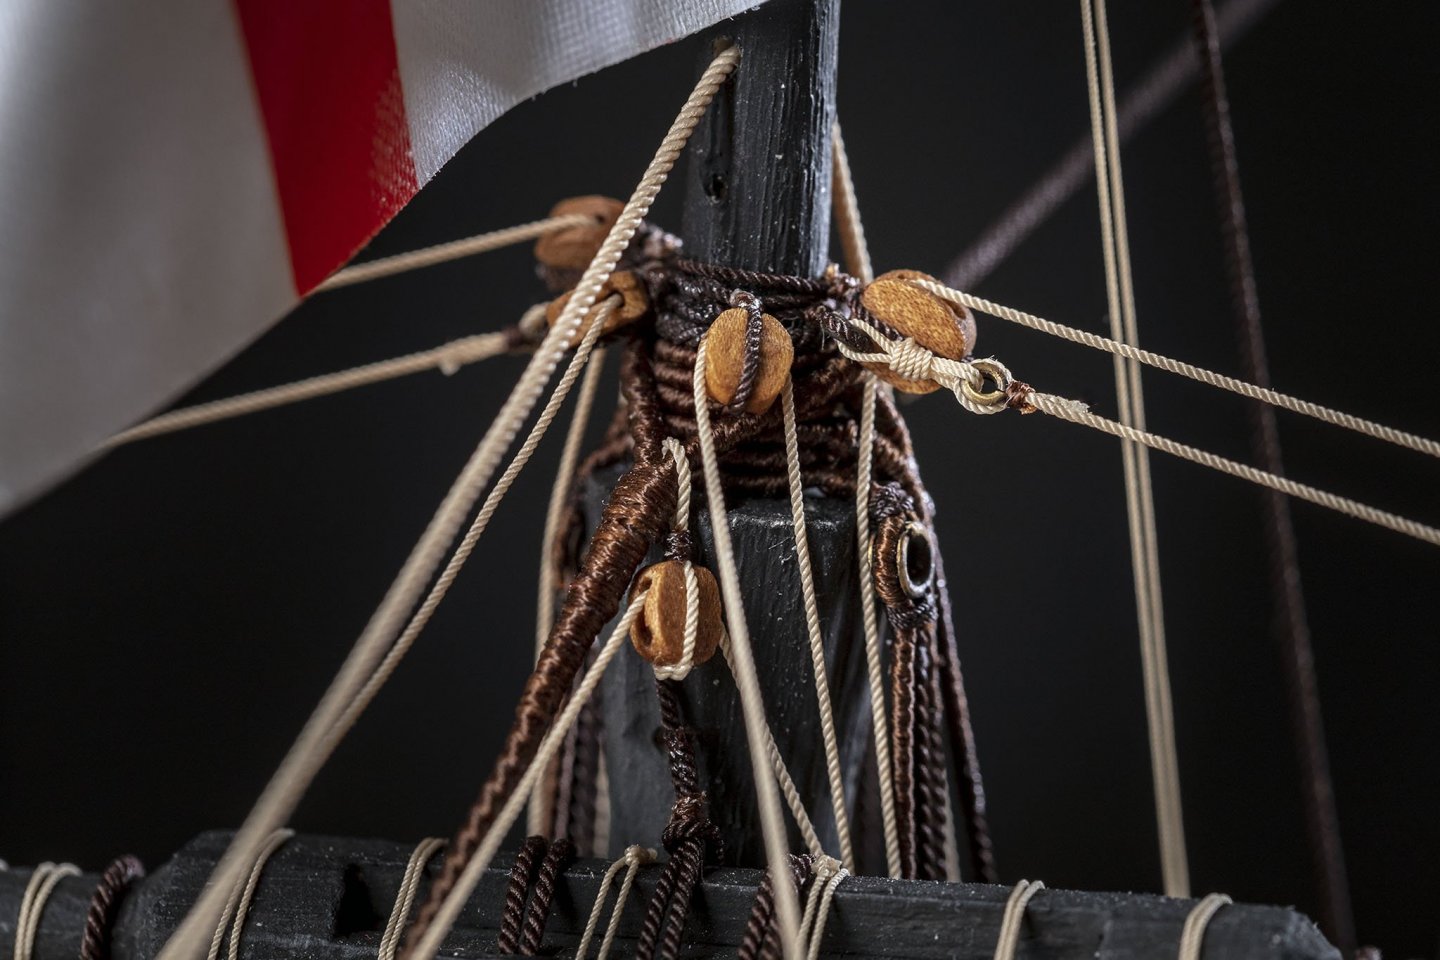
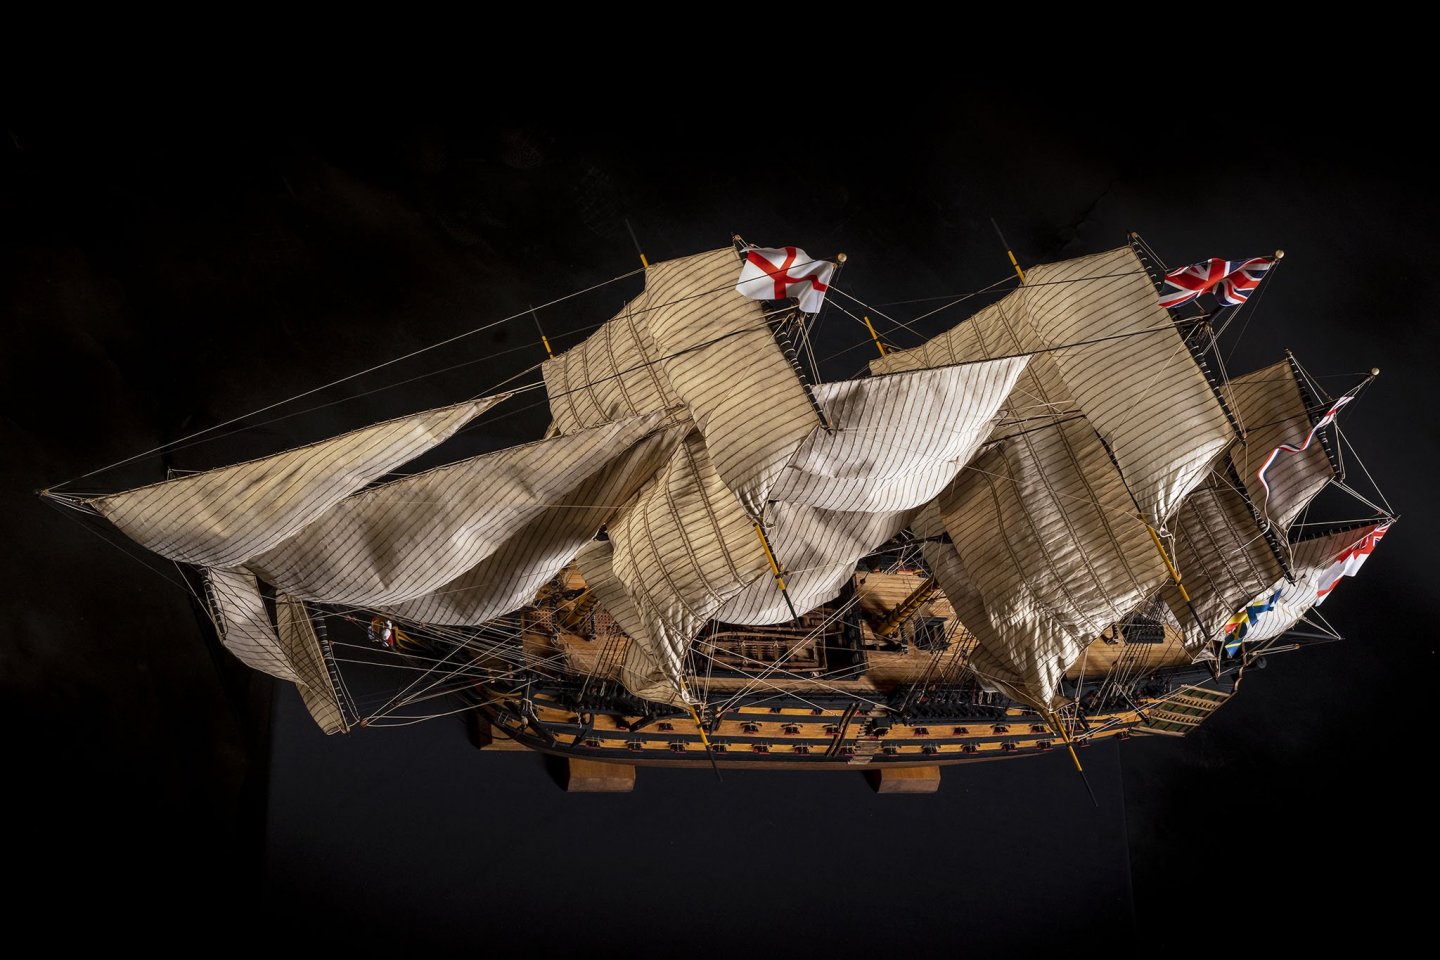
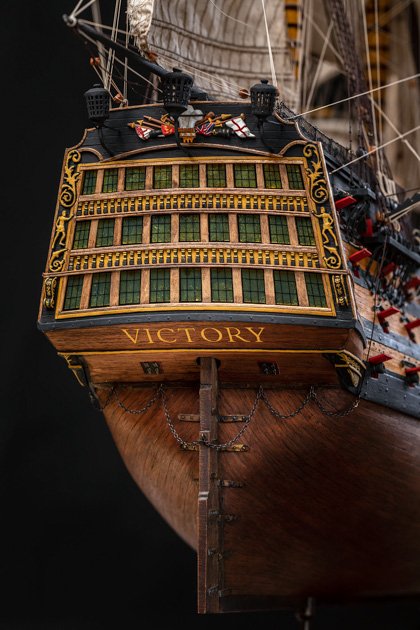
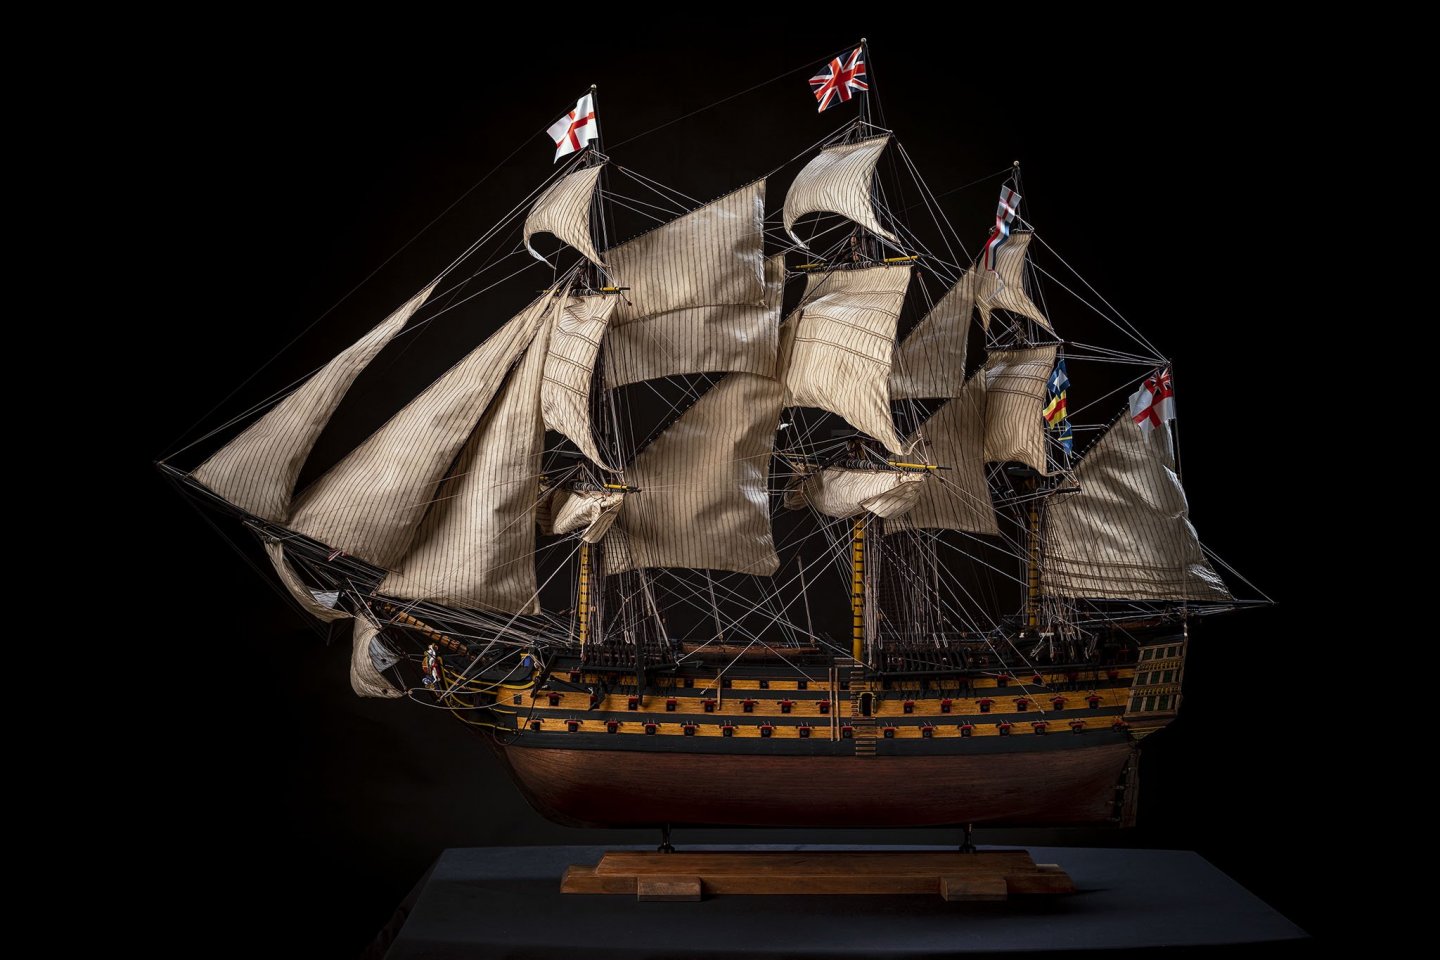
 The VICTORY’s keel was laid down in my shipyard at the end of 2011. This is the third ship released in installments by the magazine. That is why I started building without knowing what I was setting myself in for. Having already assembled the hull, it was evident that the ship would be large and heavy and complicated to build. About the time I completed the first layer of planking to the gunports - I put it aside to complete first simpler models. This interruption lasted 3.5 years until January of 2017. I began work on it again and this time took it firmly in hand, without distractions until completion in June of 2017, the last steps being the flags and glass cover. It took me 4.5 full years to complete the model.
-
 I had much less of a break after finishing the Alert than I had thought -- got the itch to start this kit, which I have been looking forward to. It's my first Caldercraft kit and I'm interested in the comparison with Amati and Vanguard -- my gold standards up to now. There are a number of build logs on this kit by builders with much better skills than mine, so I don't know how much added value I can provide, but I find these logs fun to share, and what I'll try to focus on (as in this post) are construction details and issues, and how I addressed them. So I've skipped the "what's in the box" opener, because what's in the box is what you'd expect. There are three manuals: one for the hull -- with pictures, one for rigging, and a third for parts -- which is great, as you don't have to wrestle multiple plan sheets up on the wall to figure out the wood panel and other cut sheet parts. I also bought some white posterboard to provide a better backdrop on my workbench for my pictures. I have finished the first phase of the frame: keel, bulkheads and lowest deck. This kit uses 5mm plywood for all of that -- in all of my other kits these parts have been MDF, and based on my experience with MDF where all the parts slide together easily without sanding, I found working with the plywood a challenge. NONE of the slots in the keel, bulkheads, or deck fit without some more-than-trivial widening. Regular sanding would take forever, and I tried a couple of times to use rotary tool sanding disks, but they get chewed up fast. So I found some 3mm rotary burrs on Amazon, and that did the trick. But with 18 bulkheads and 16 double-sided deck slots, it comes out to 68 slots to widen. Got it done, and everything fit together as you can see. This is a heavy ship because of the plywood and its size. I'm looking forward to digging into it. Regards, David
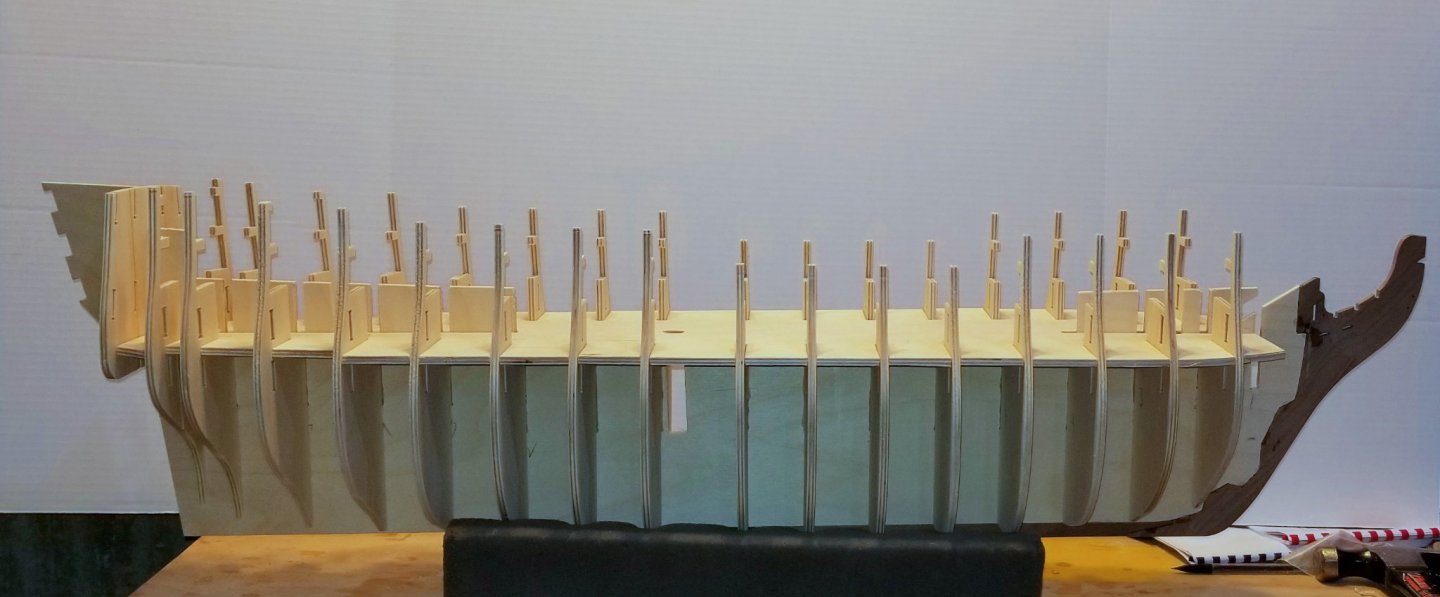
- 218 replies
-
- 11
-
-
- Victory
- Caldercraft
- (and 1 more)
-
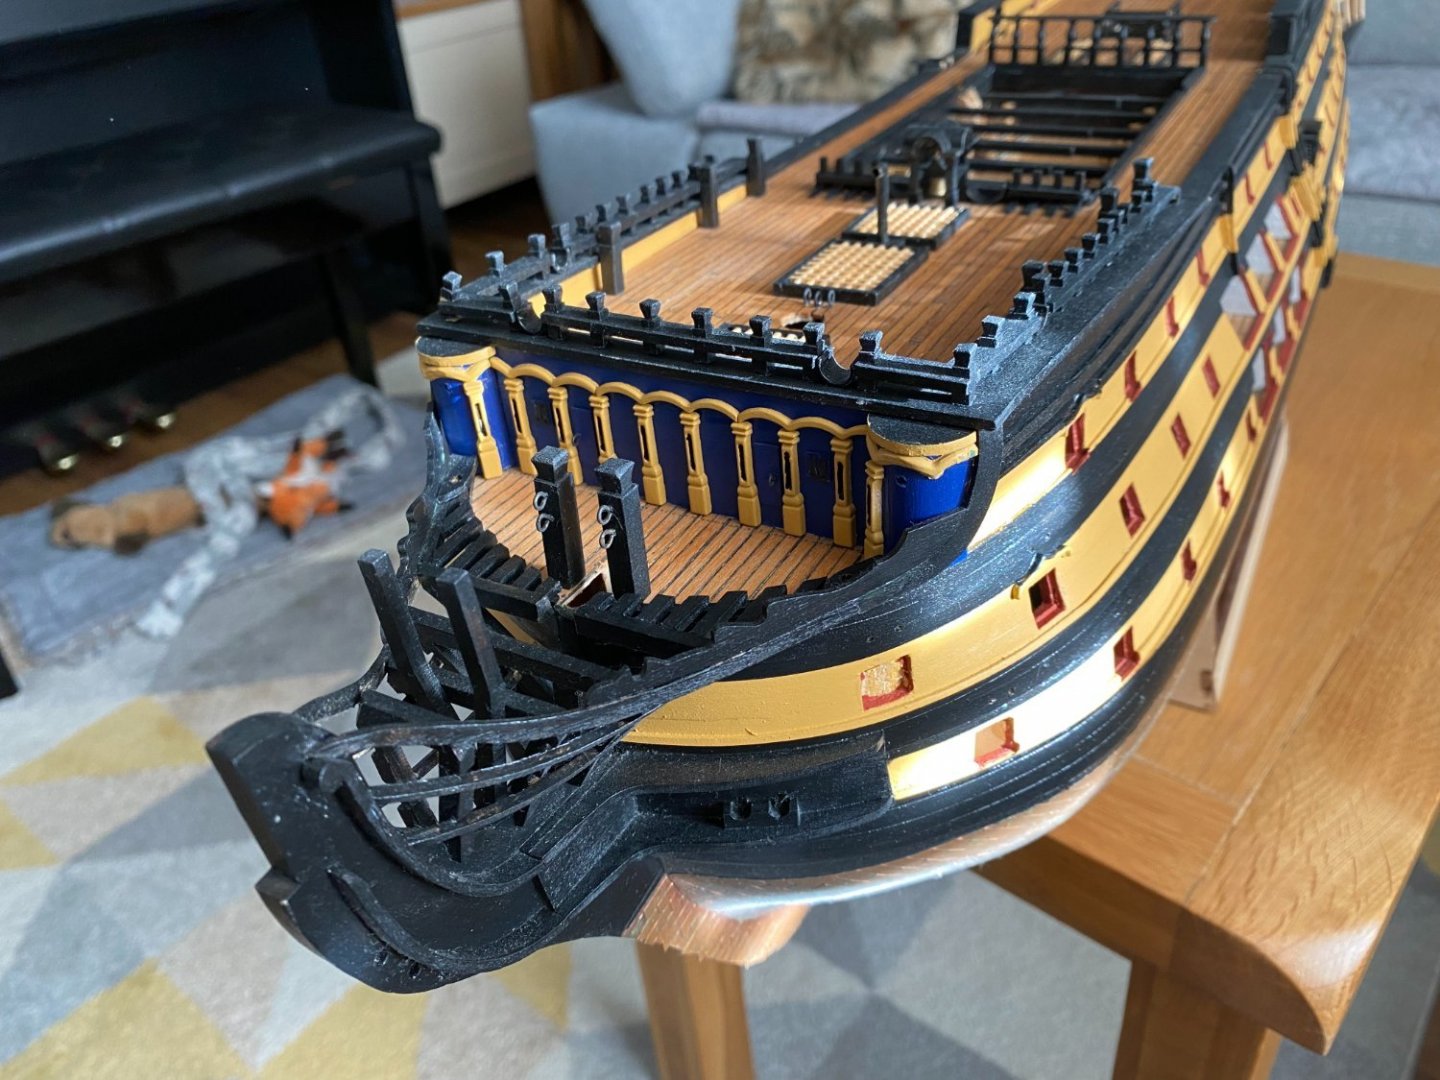
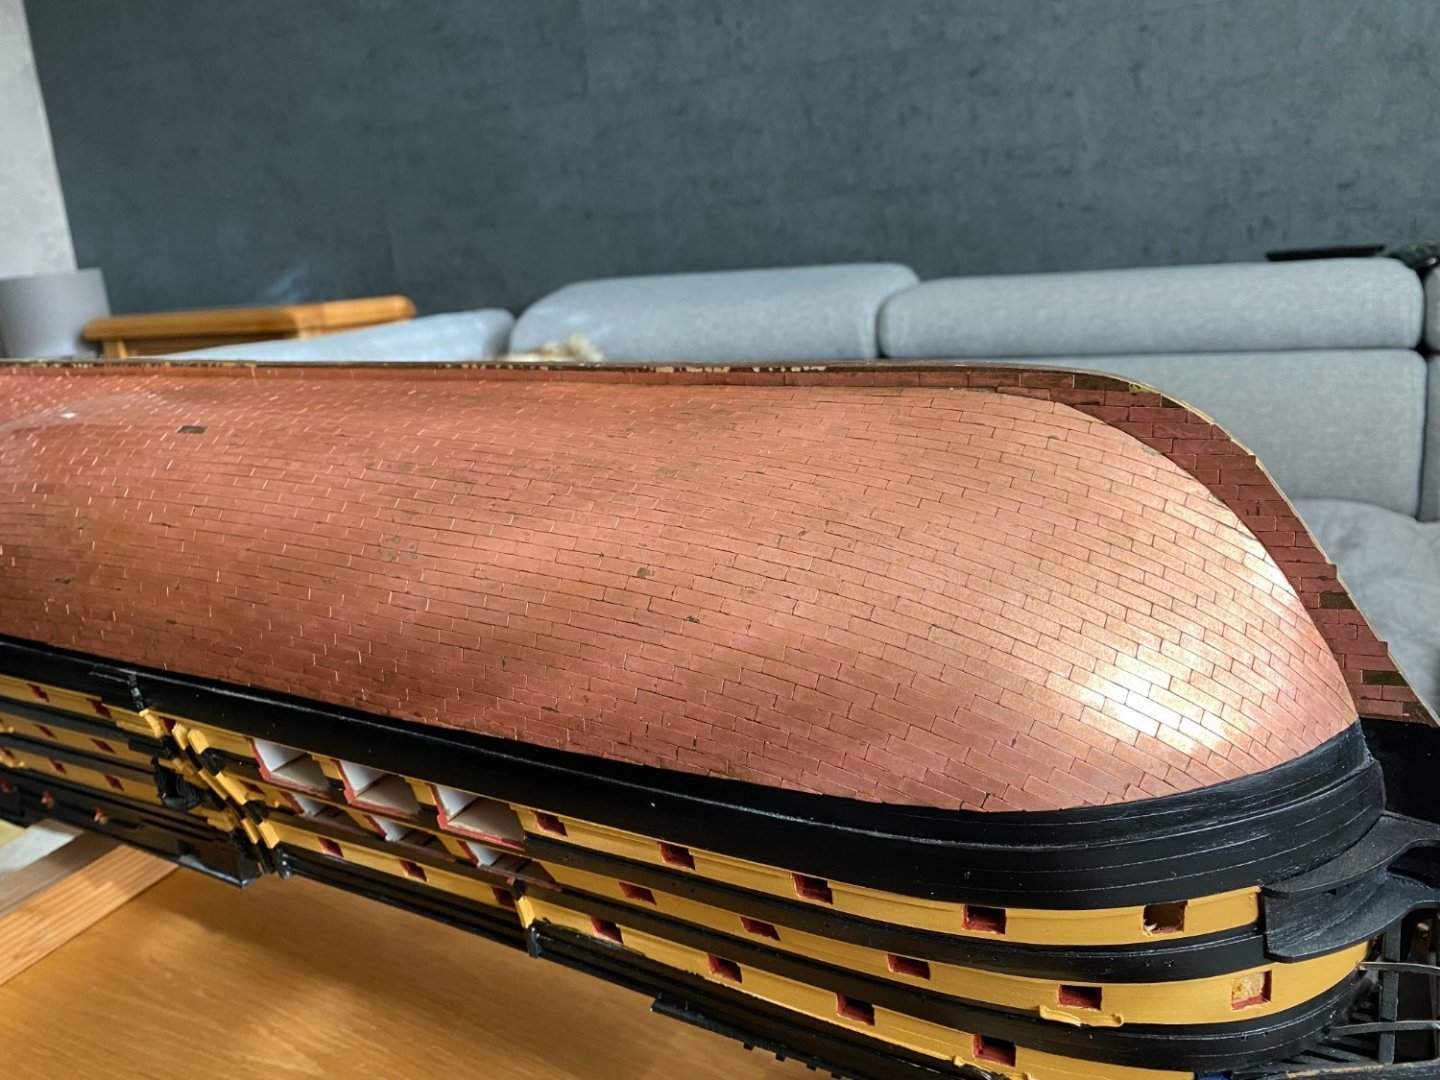
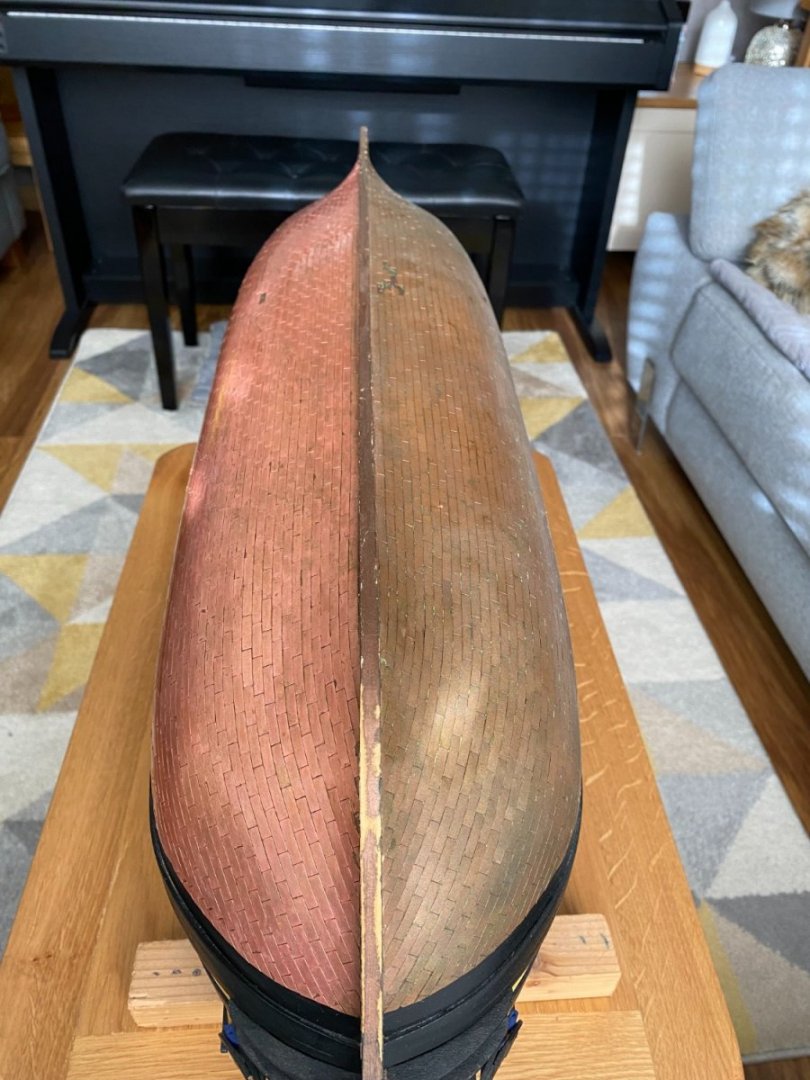
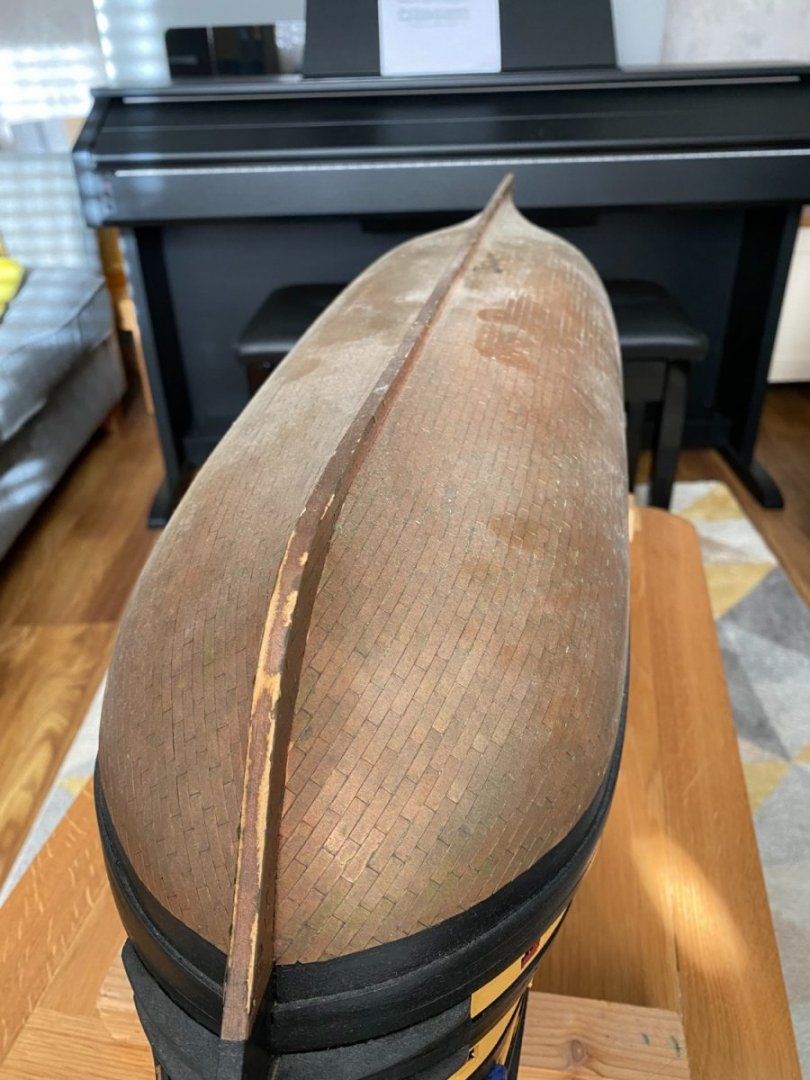
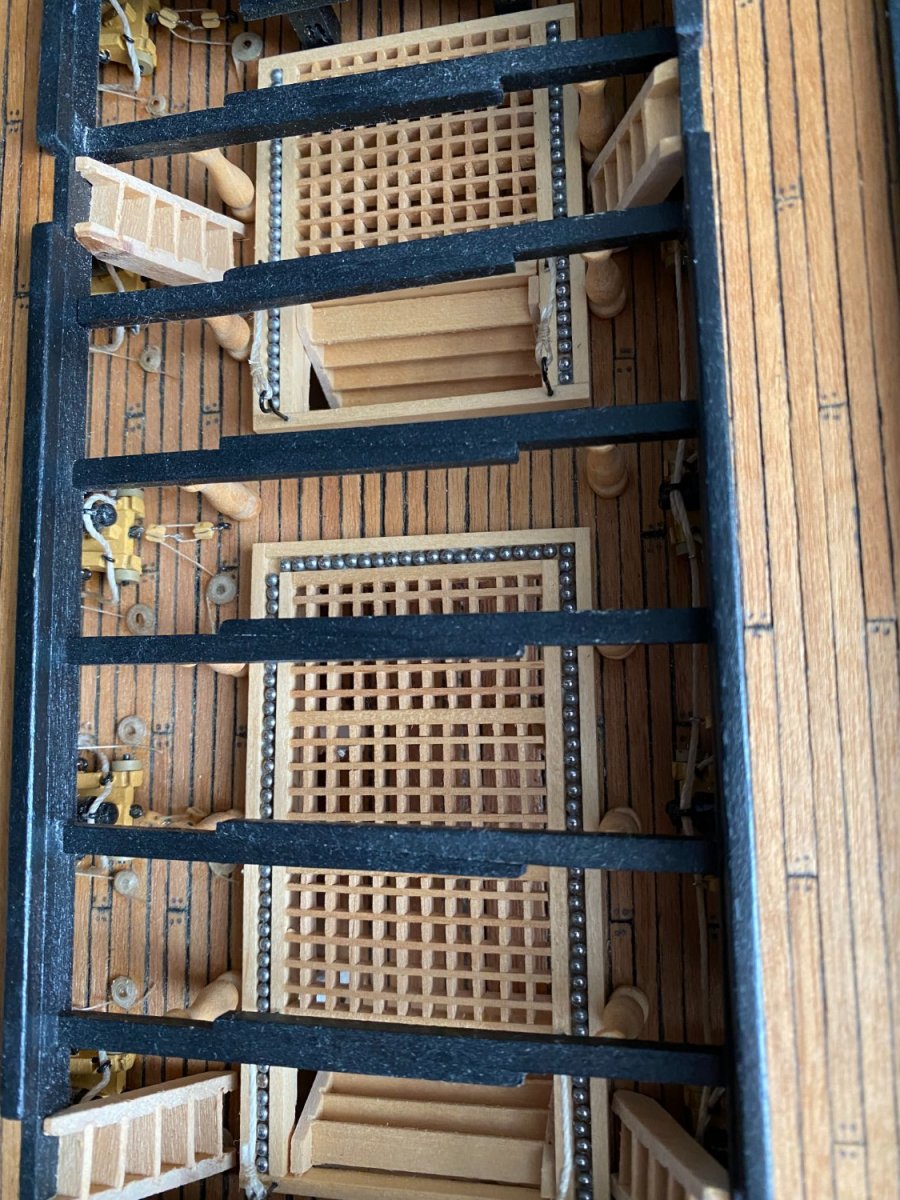
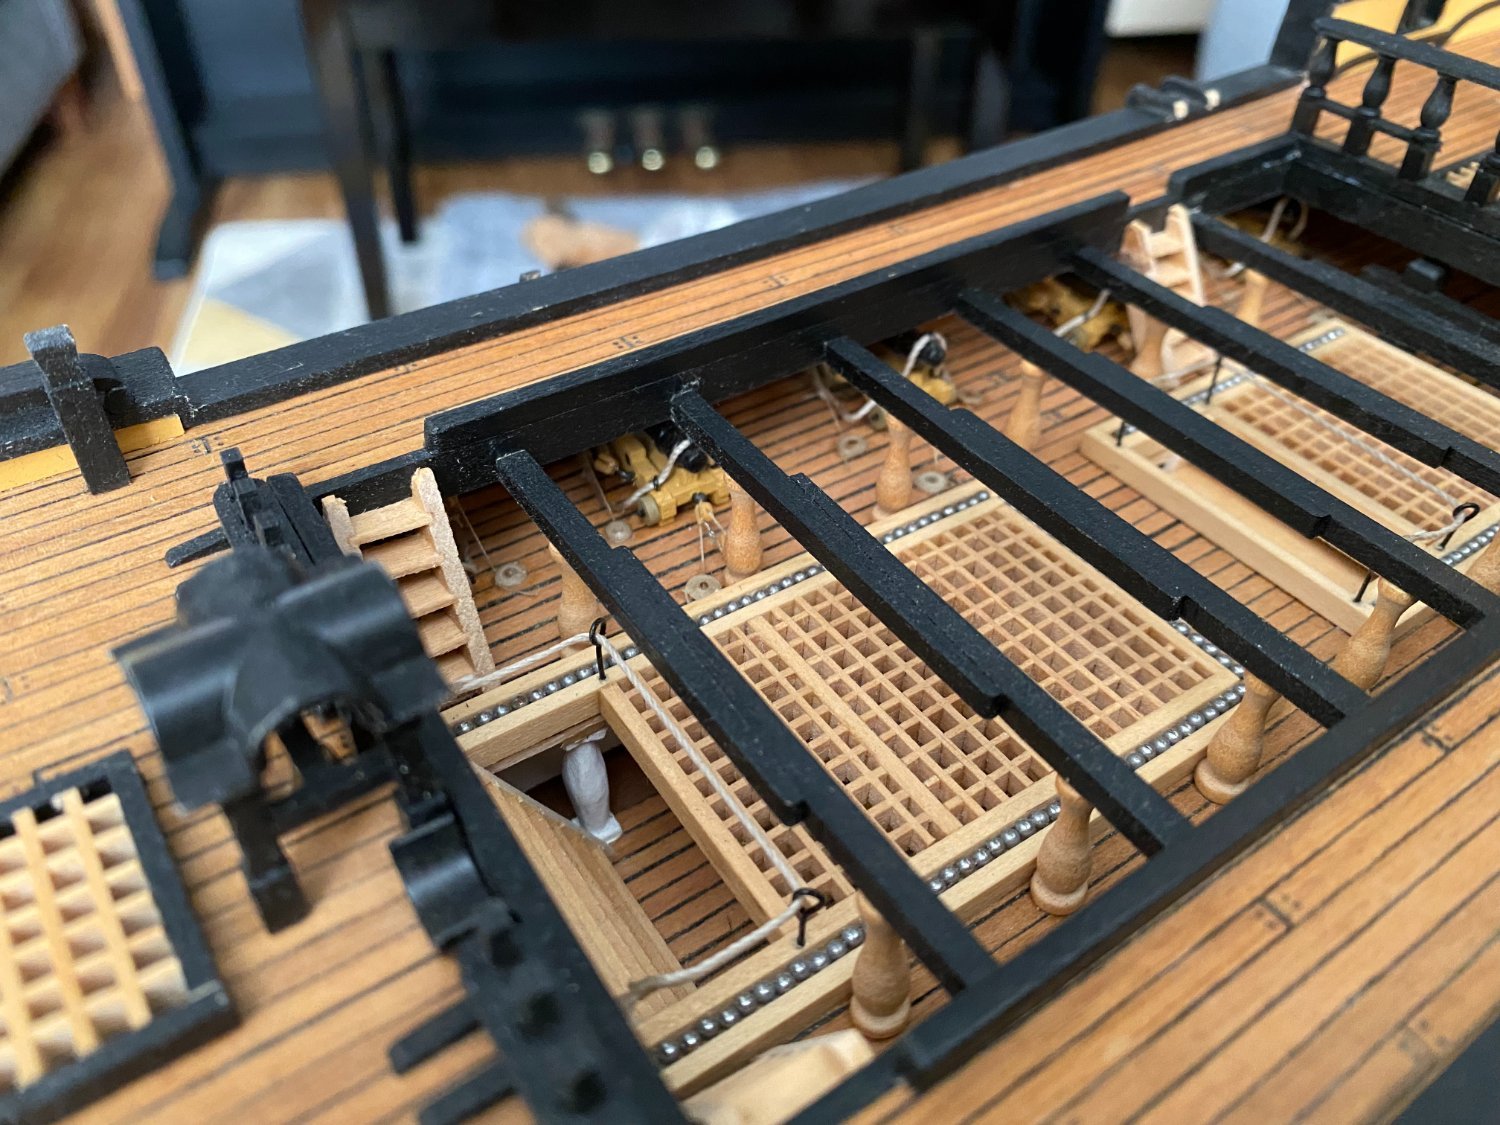
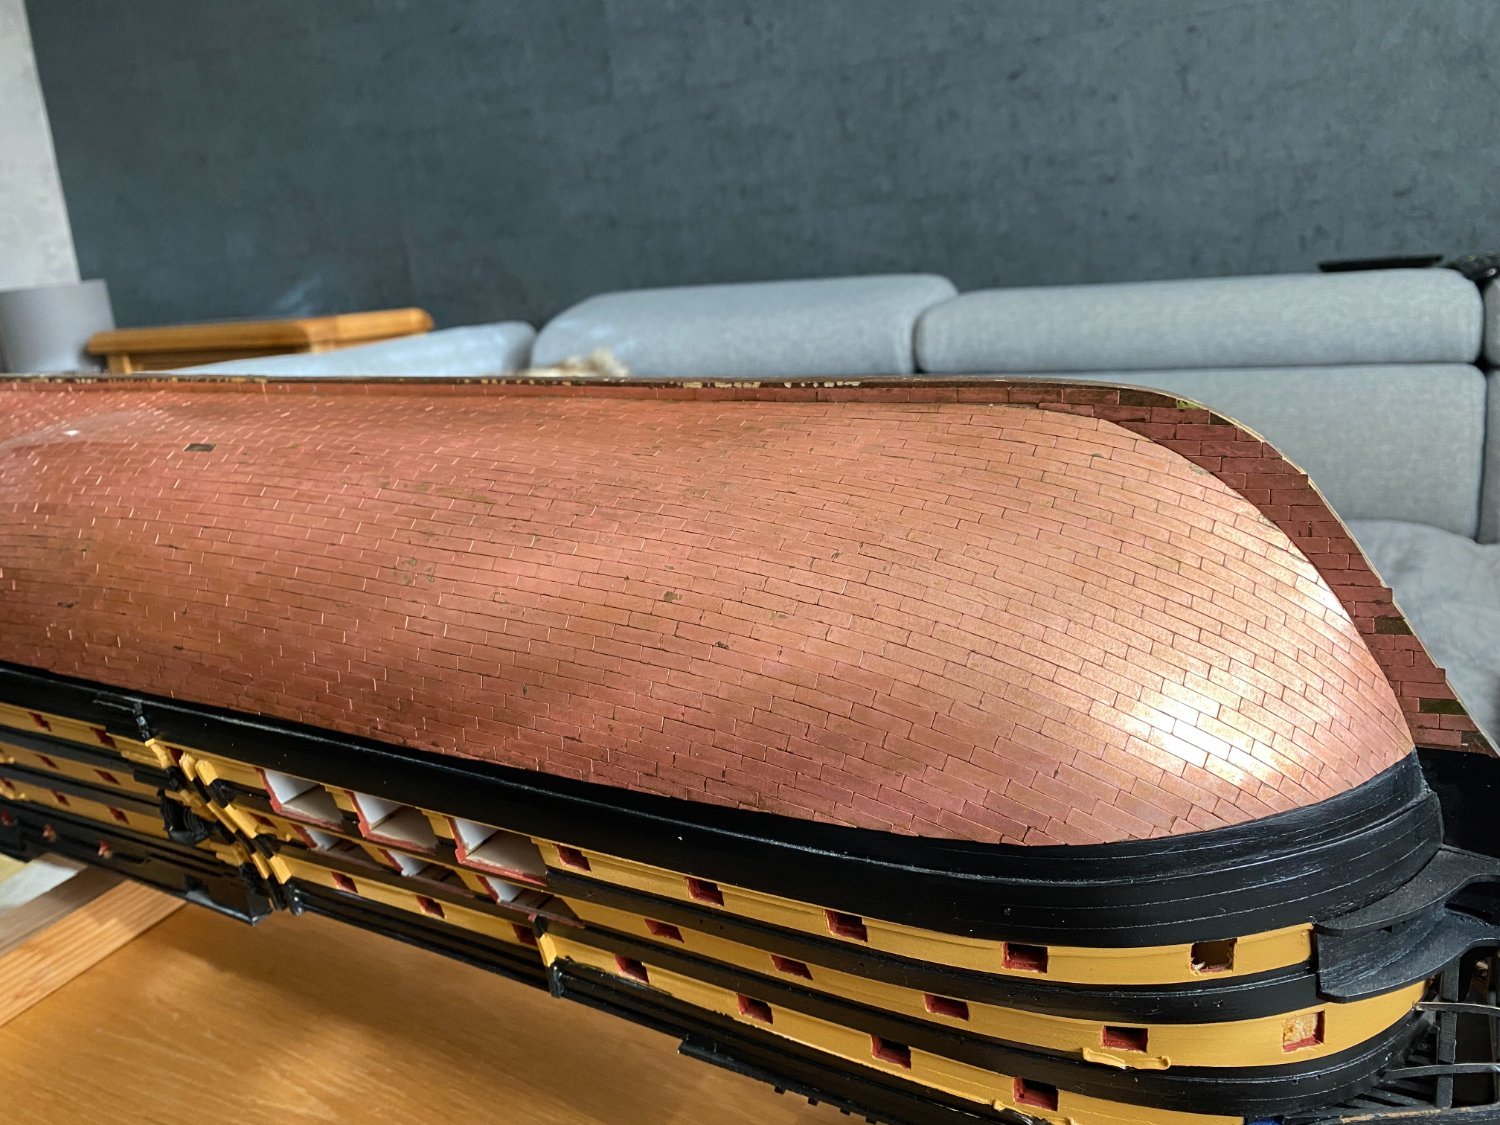
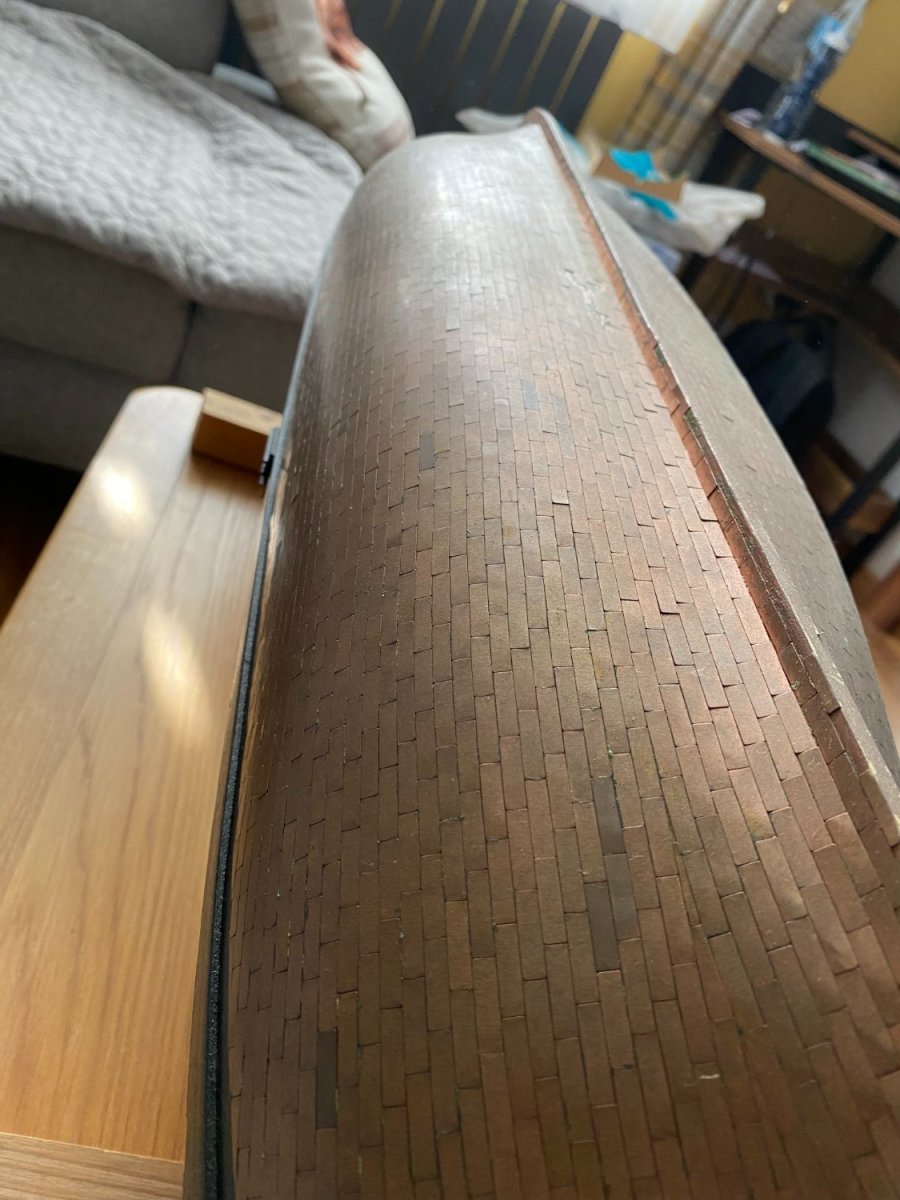
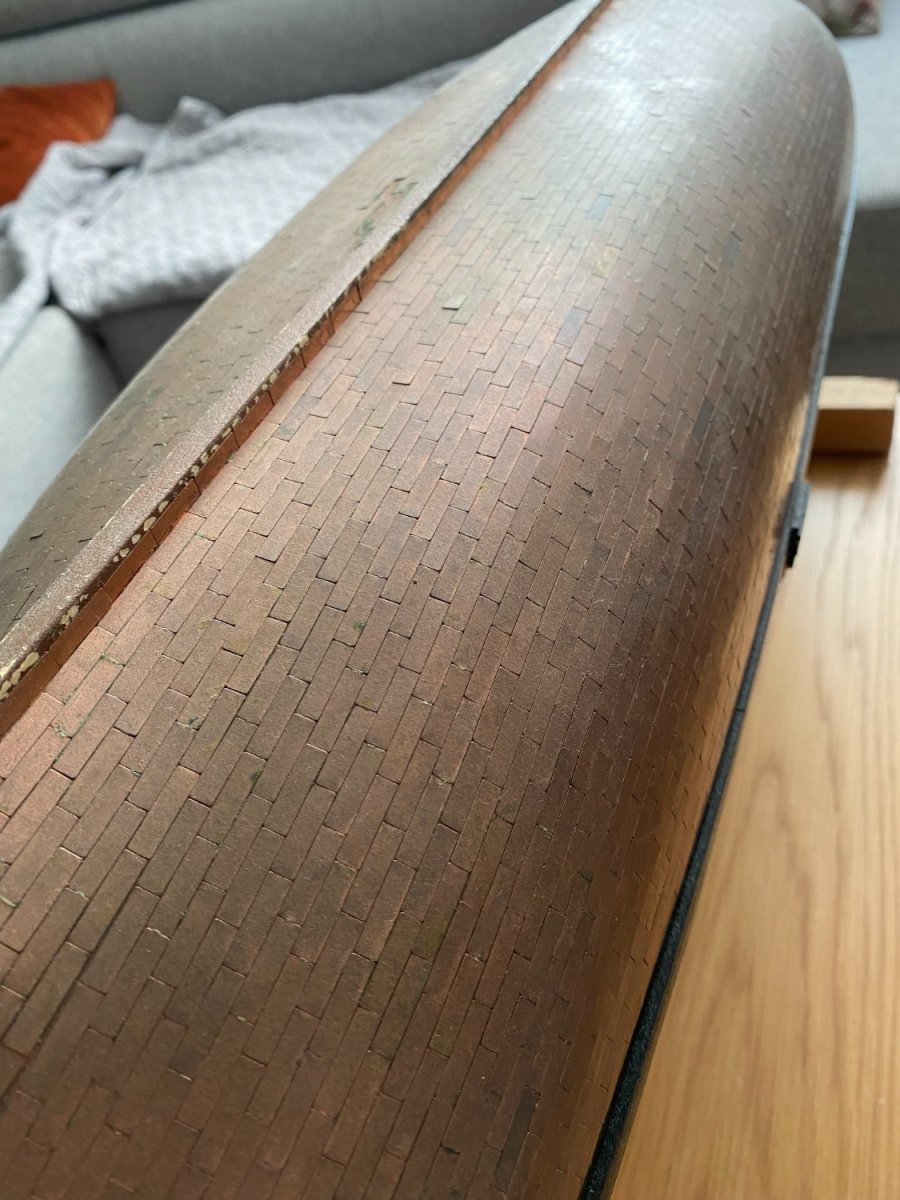
 Hello everyone! Happy New Year from brand new member I'm so happy I have joined this community as I saw some fantastic builds here and I can't wait to share some of my stuff I've started my build when it was released as a partwork about 8 years ago. It was going great and I had to put it on hold for some time. Luckily I've collected all the magazines and completed all the parts. She went into the loft and survived two house moves. Few months ago I decided to get cracking and finish the build. This was the best decision ever as since I reinstated build I had so much fun with it. To recap what I've done before restart - have a look at some pics... There is some additional stuff I purchased - mainly copper planking. It is I think around 4000 individual plates so it took absolute ages to get it done. I still had rudder left to do and few bits that came loose needed replacing... Have a look The first job after this quite few years was cleaning the copper hull... I used water with vinegar and salt. There is a massive difference after this treatment... There is more but I need to sort out the pics That's the sneak peek from current stage... Thanks Tom